RogueGeek
-
Posts
45 -
Joined
-
Last visited
Content Type
Profiles
Forums
Articles
Gallery
Downloads
Events
Everything posted by RogueGeek
-
Resin for making Micarta question
RogueGeek replied to HP500's topic in Finish and Polish for Knives
I have used Alumilite resins in the past and had excellent luck with them. They have a water clear version. -
Unfortunately I didn't. I will try to do a quick write up or video soon and post it.
-
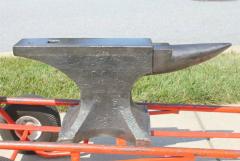
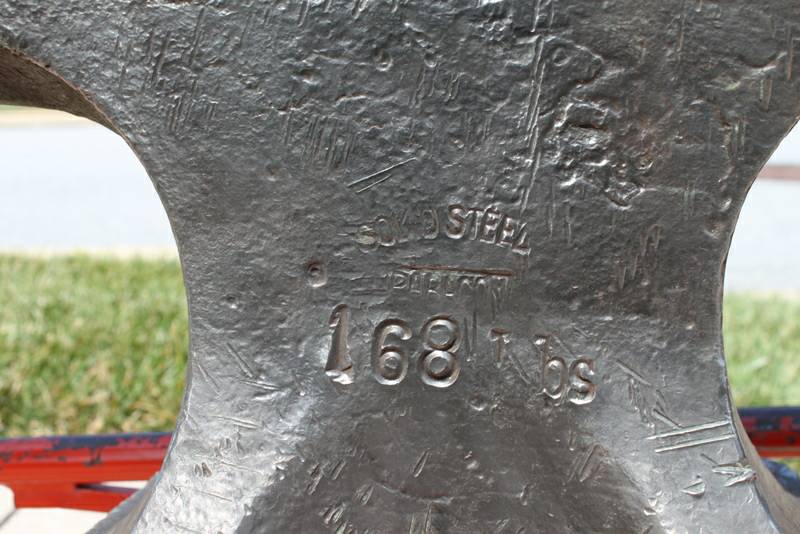
That is a very nice looking anvil. My 1928 168lb Soderfors has amazing rebound. I filmed it in slow motion and I would say it is at least 95% rebound if not more.
-
A breaker is rated to protect the wiring from the breaker to the outlet. The wire between the outlet and breaker should be sized/rated for the full load load plus a safety margin. Wiring from the plug/outlet to the device (motor/tv/etc) is typically sized for the amount of current the device will use. I would guess your biggest problem using the 50A outlet will likely be finding a plug that will safely accommodate the small diameter wire you use for your grinder. If the 50A plug is designed for large wire you don't want to improvise something to make it work with the smaller wire. The screw terminals may not grab onto and hold the small wire properly. Your grinder motor should be similar to my 2HP table saw. It is rated at 240v 7.5A and uses 14AWG from the motor to the plug/outlet (from the factory). Unless you are going to have an excessively long power cord (over 8ft), 14AWG should be ok from the grinder to the outlet. Personally, I would use 12AWG just to give a bit more safety margin. I had a similar situation with my table saw. I wasn't comfortable improvising a 50A plug to work with the 240V 50A RV outlet I had in my workshop. I installed a dedicated 20A 240v circuit using a NEMA 6-20 outlet. The NEMA 6-20 plugs are designed for the smaller wire in the 10-14AWG range. Installing a new circuit will give you the added benefit of being able to have the welder and grinder both plugged in at the same time. If you will be using them both on a project, swapping plugs gets old very fast. If you do install a new circuit, please make sure to size the wire (breaker to outlet) appropriately for the amperage load and the length of the wire run. If you aren't comfortable working with electricity, please hire a licensed electrician. It is cheaper than a funeral bill or a new house.
-
Consider the how often you will need/want to change belts. With most of the existing grinder designs you can change a belt in just a few seconds. Adjusting belt tension via the motor mount will probably get old very fast.
-
I have built a wooden belt grinder and it works. It isn't perfect but it does work. https://www.iforgeiron.com/topic/49875-diy-2x72-belt-grinder-plywood/ My biggest issue is the size and weight. It takes a lot of wood to make it sturdy. What could easily be accomplished with a couple of 2" pieces of heavy wall box tube requires several layers of 3/4" plywood to get similar rigidity. If I had it to do again, I wouldn't go the wood route. Also consider 80/20 aluminum extrusion. A quick google search (search for '8020 belt grinder') shows several DIY grinders built using the 80/20 extrusion. I've worked with 80/20 and it is almost as easy to build with as wood and in the end the materials cost is probably quite similar. 80/20 surplus is also available on eBay for reasonable prices. There are a variety of wheels (glass reinforced nylon and steel) available at reasonable prices on eBay. I used the glass filled nylon ones and haven't had any problems. I considered making my own wheels. After pricing bearings, other materials, and the time and effort required, it was cheaper to just buy them. Ultimately the wheels I purchased were better than anything I could have made for the same cost. For belt tension I am using a gas spring/strut like the ones on the trunk of a car. I started off with a 20lb one and it was too weak and my belt slipped a fair amount. I recently upgraded to a 40lb gas spring and it eliminated the belt slippage. I'm using a 1-1/2 hp motor. It does a decent job but I can bog it down if I really try to. I don't think a 1/2hp motor will be useful for anything other than just watching the belt go around. Edit to add: Check and see if you have a welding school near you. The one my daughter is going to will take on projects for people at very reasonable costs.
-
Yes it is possible to get it working and I have seen some on youtube that appeared to work fairly well. I was going to use a similar motor to build a 2x72 and ultimately gave up on the treadmill motor. My primary reasons were: 1. treadmill motor is open to the outside air and the metal from grinding can get into the motor and will can problems. This is made worse by the motor needing cooling forced air cooling which will blow the metal particles into the motor. You will need to add a filter of some sort to keep the motor clean. 2. Non-standard shaft sizes. You will most likely have to use one or more belts and pulleys to get the RPM/belt speed you desire. Also some DC treadmill motors are biased to running in one direction. So you may have to account for that. The fan is part of the flywheel on most treadmills. If you take off the flywheel you will have to rig up some kind of fan to cool the motor. 3. The electronics from the treadmill control panel just didn't make for a nice looking machine. My grinder didn't need a hill climb mode. I thought about designing a new controller but it was too much work for not enough return on my investment. I also looked at commercial DC motor controllers and for the price, I could by a buy a 3 phase speed controller and 3 phase motor. Ultimately I opted to go with the commercial 3 phase speed controller and 3 phase TEFC 1.5HP motor. It cost me more than my scrounged treadmill motor, but my belt grinder is nice and compact, no wiring hacks, and everything is sealed to keep out dust and metal particles. I should also note, that while nearly infinite speed control is nice, many people get by perfectly well with a single speed motor and use stepped pulleys to change between a couple of speeds. With a bit of engineering you should be able to get a few very usable speeds with just a couple of stepped pulleys. This is MUCH less expensive than the 3ph speed controller and 3ph motor I used. -Brian
-
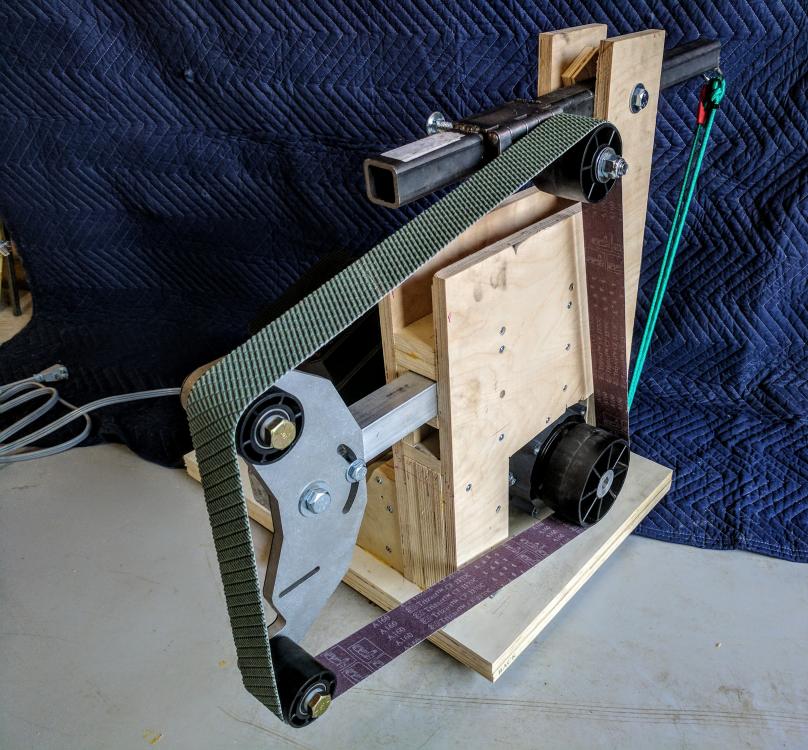
The wheels are from the eBay guy 'Oregon Blade Maker'. They are the glass filled nylon material. I haven't really read anything good or bad regarding their durability, I guess time will tell. I plan to put it through some heavy use this summer. Hopefully I can report back on their durability. It seems to be very rigid, but I haven't really run it very hard since finishing it. It is built from multiple layers of 3/4" plywood and each layer is glued and screwed to the adjacent layers. It has almost no vibration and runs fairly quietly. If time permits later this week, I plan to give it a proper workout. -Brian
-
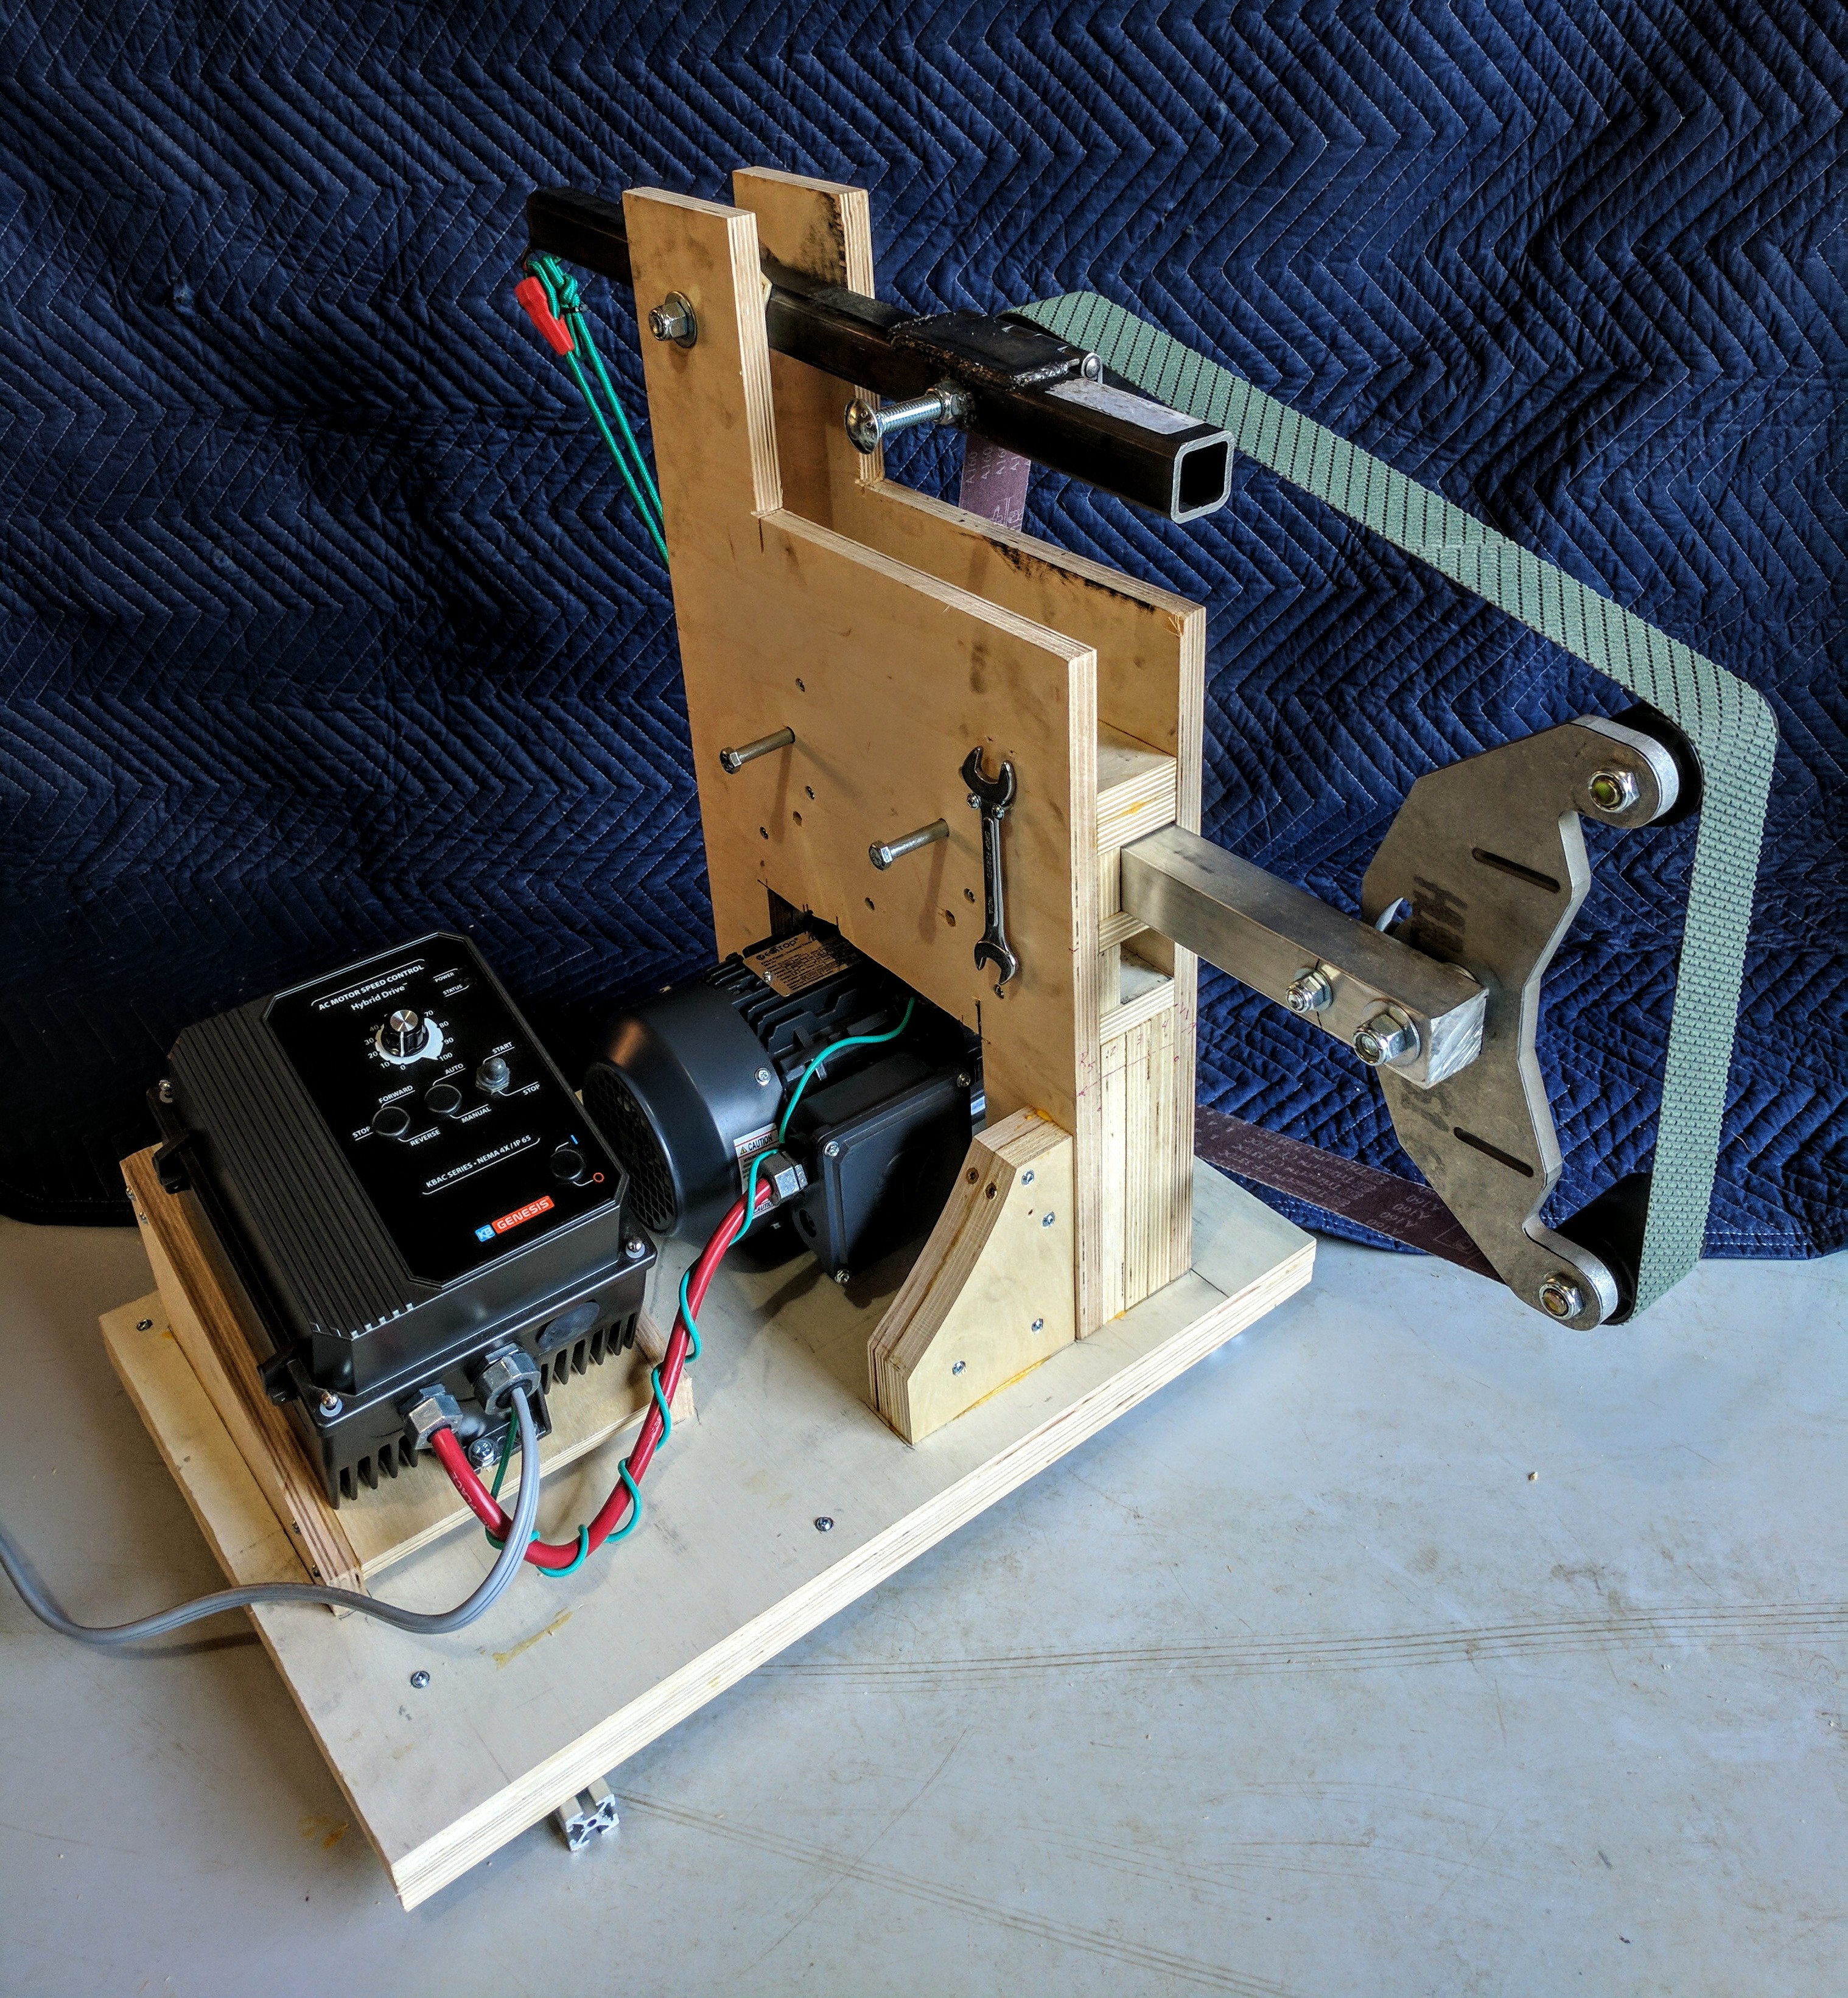
The platen isn't shown...I still need to make it.
-
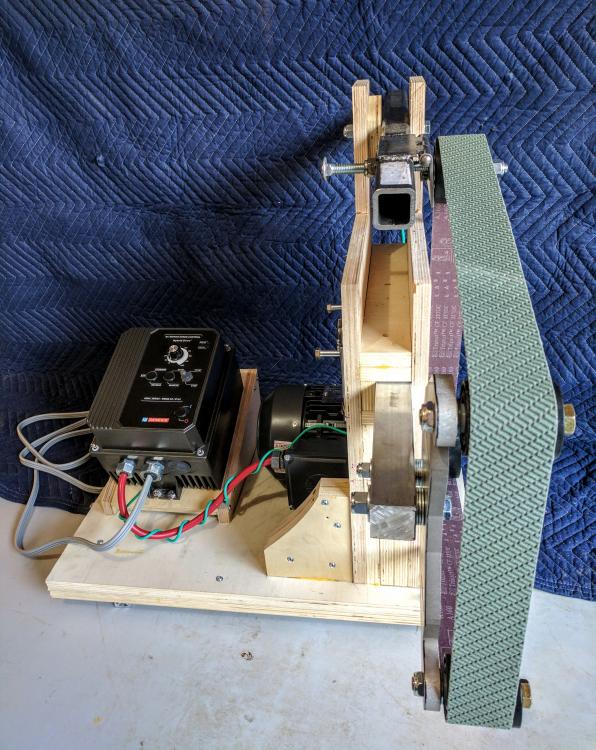
I've been collecting parts for a little over a year and I was finally able to get a weekend all to myself to build my belt grinder. Since I mostly have wood working tools I made the majority of the grinder body from plywood. The idler arm and working arm are both metal. I'm using a 1.5HP motor with a full variable speed control. The motors max speed is 3500 RPM which gives me around 4500 sfpm. The bungee cord is only temporary until I can locate the spring I purchased. It somehow managed to get lost in my workshop. The motor, wheels, AL bar, Steel box tube, and D-plate are from eBay. Motor controller from Amazon. Plywood and miscellaneous hardware from Lowes. All total, I think I'm in for around $600-700. Most of that was the 3 phase motor and the speed controller. Here are a couple of pictures.

-
Wood pellets for forge fuel
RogueGeek replied to ronwend523's topic in Solid Fuels: Coal, Coke, Charcoal, Wood, etc
I have a wood pellet stove so naturally I had to try it. It only took me about a minute to decide it wasn't such a great idea. Pellets are great for heating in stoves designed for their use, they are terrible for fueling a forge. I recommend sticking to chunks of wood, lump charcoal, or regular coal. -
Soderfors Paragon 168lb anvil and stand
RogueGeek replied to RogueGeek's topic in Anvils, Swage Blocks, and Mandrels
So true! My daughter is starting welding classes at the local college and she will need a project to practice on. So I figured if I don't get around to building it, I'll have her do it. -
Soderfors Paragon 168lb anvil and stand
RogueGeek replied to RogueGeek's topic in Anvils, Swage Blocks, and Mandrels
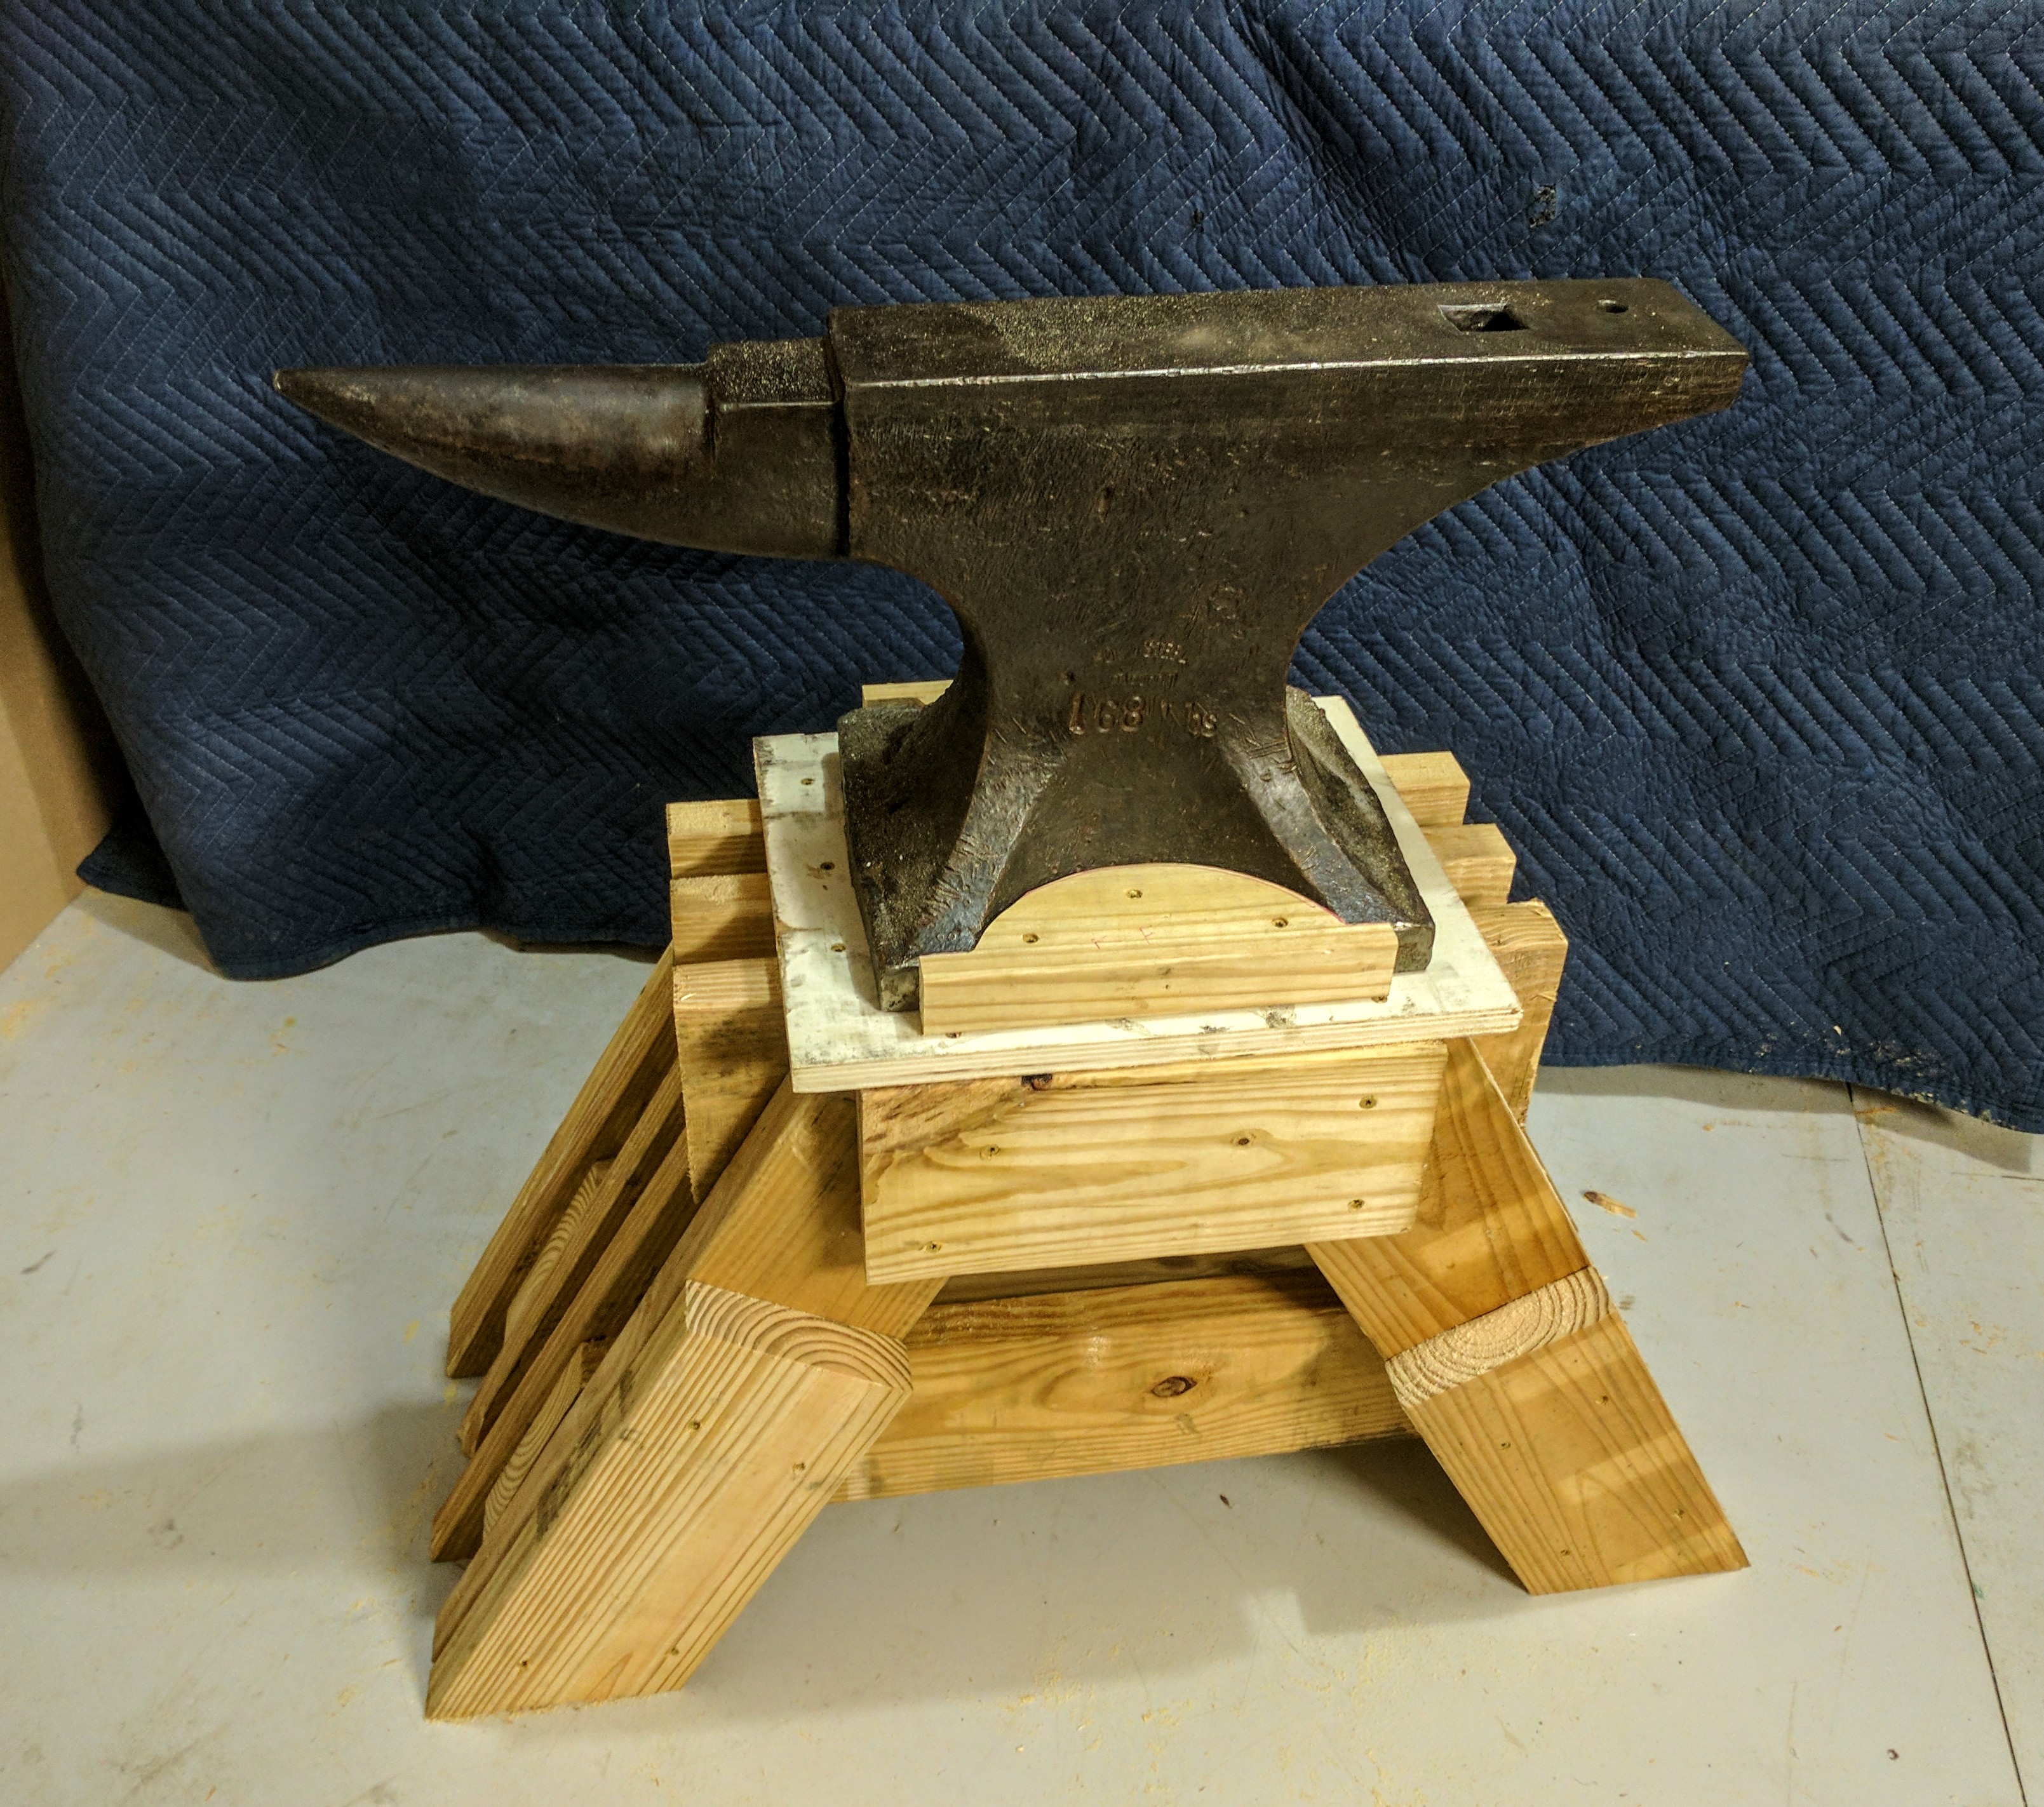
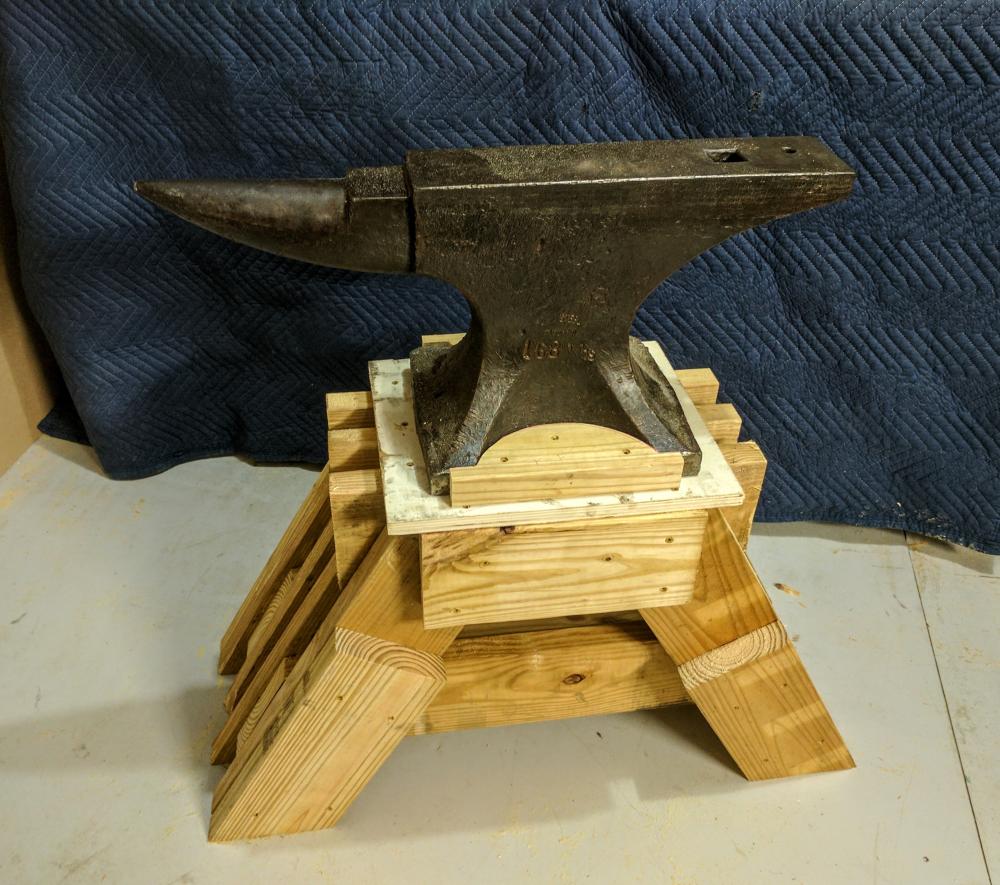
Thanks Frosty. A steel tripod is definitely going to be a future project. This wood one is just to get me through until I have time and materials to build the steel one. -Brian -
Soderfors Paragon 168lb anvil and stand
RogueGeek replied to RogueGeek's topic in Anvils, Swage Blocks, and Mandrels
I took the video with my phone (Google Pixel XL). It has a feature to shoot slow motion video. It records the video at 240 frames per second then when you play it back at 30fps it appears to be in slow motion. Many of the newer phones have similar slow motion features. -
Soderfors Paragon 168lb anvil and stand
RogueGeek replied to RogueGeek's topic in Anvils, Swage Blocks, and Mandrels
I promise it is a ball bearing. I was quite surprised as well, when I watched the video. -
Soderfors Paragon 168lb anvil and stand
RogueGeek replied to RogueGeek's topic in Anvils, Swage Blocks, and Mandrels
Thanks. Hopefully this weekend I will get to fire up the forge and give it a proper welcome to my workshop. -
Soderfors Paragon 168lb anvil and stand
RogueGeek replied to RogueGeek's topic in Anvils, Swage Blocks, and Mandrels
Here is a video of a couple of rebound tests I did on it. -
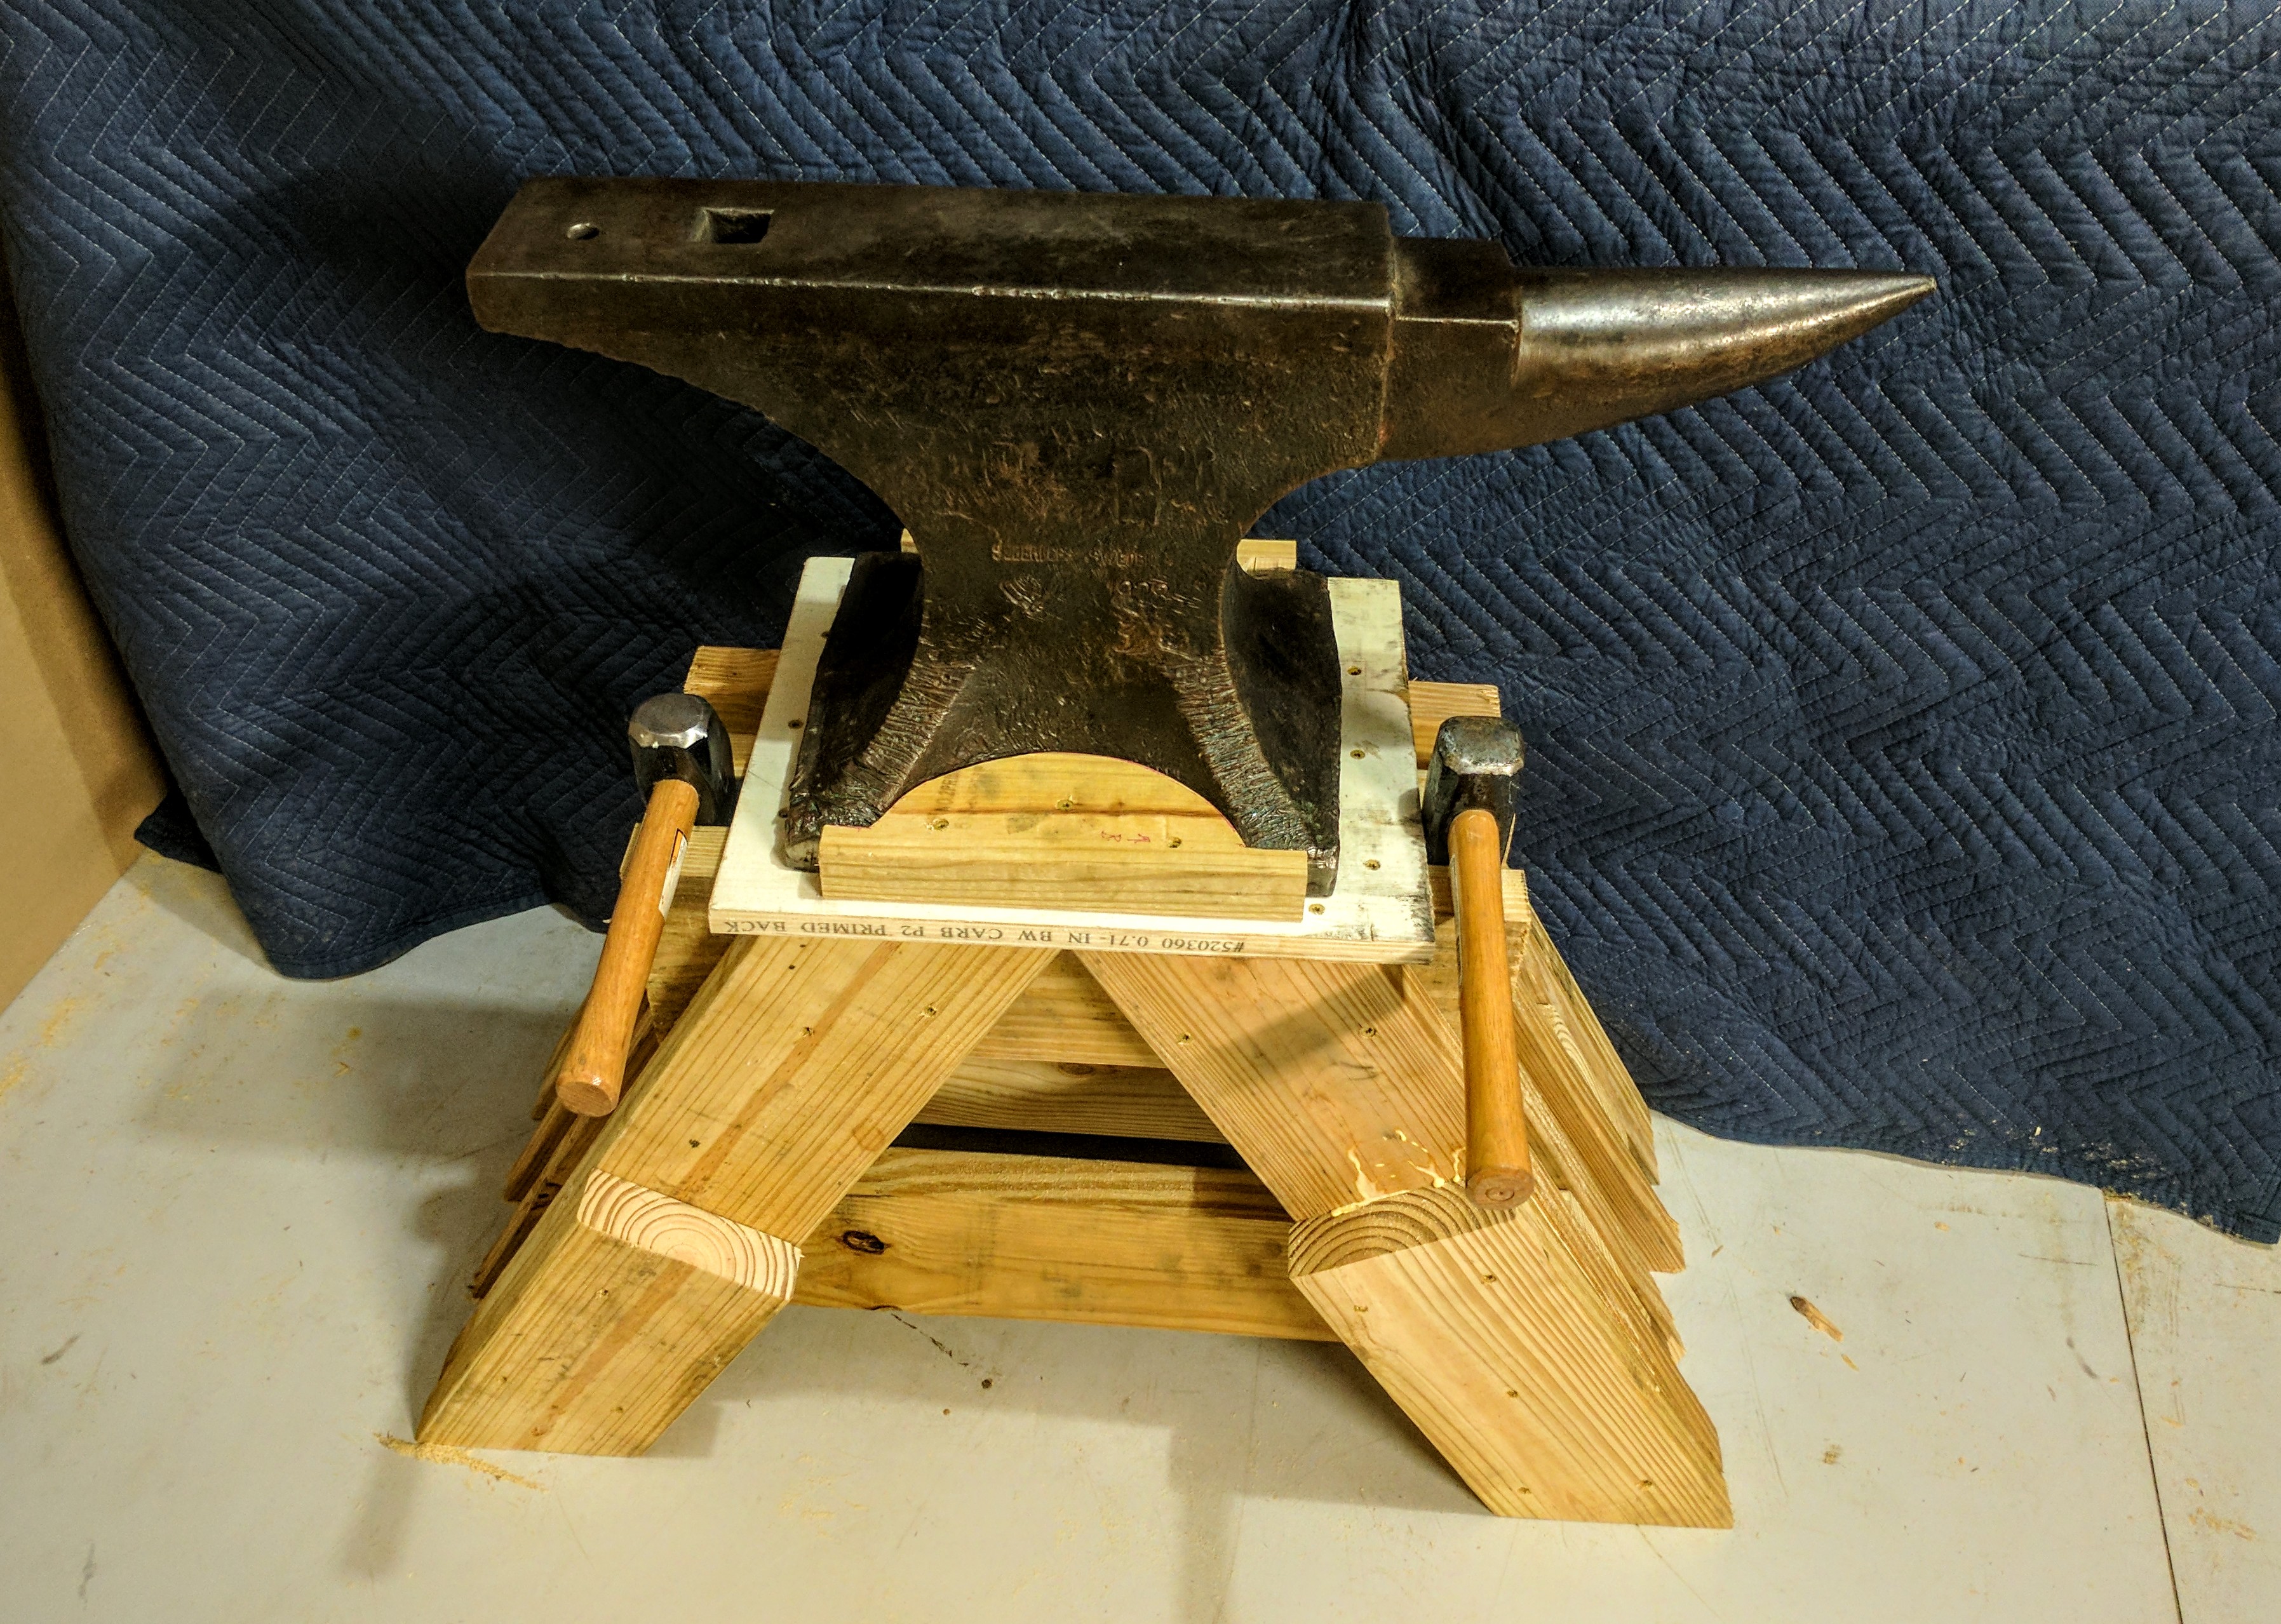
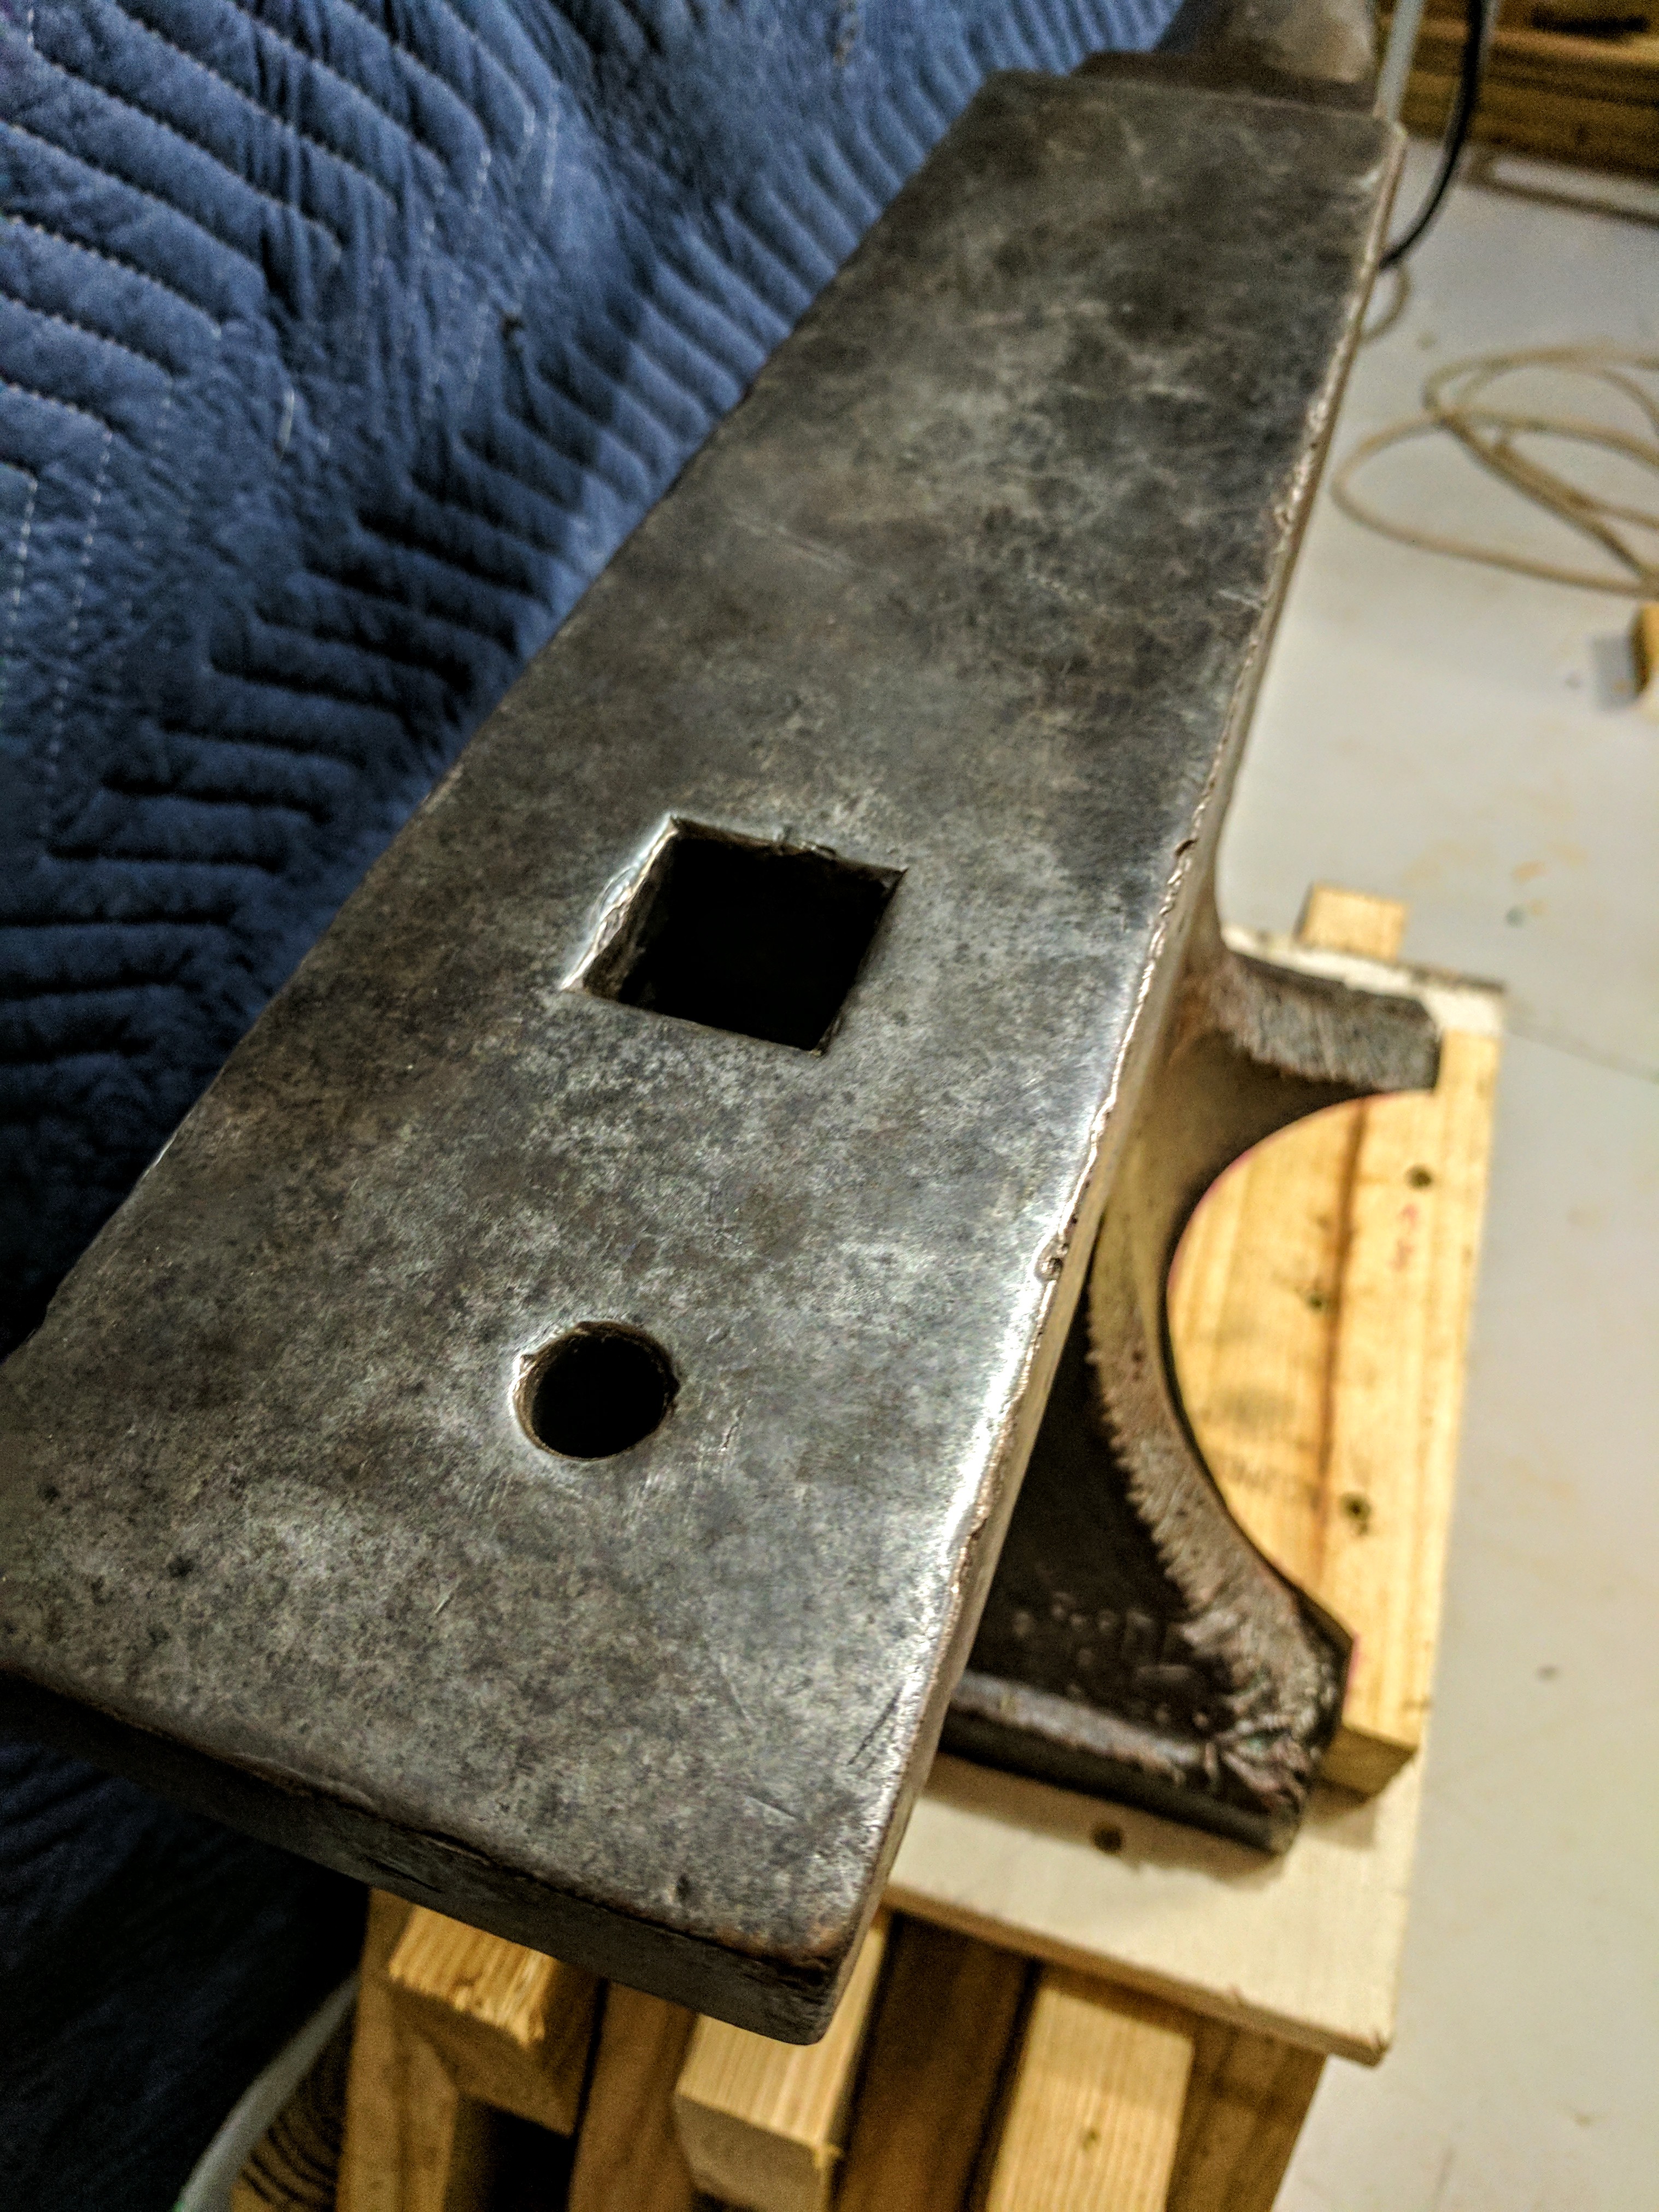
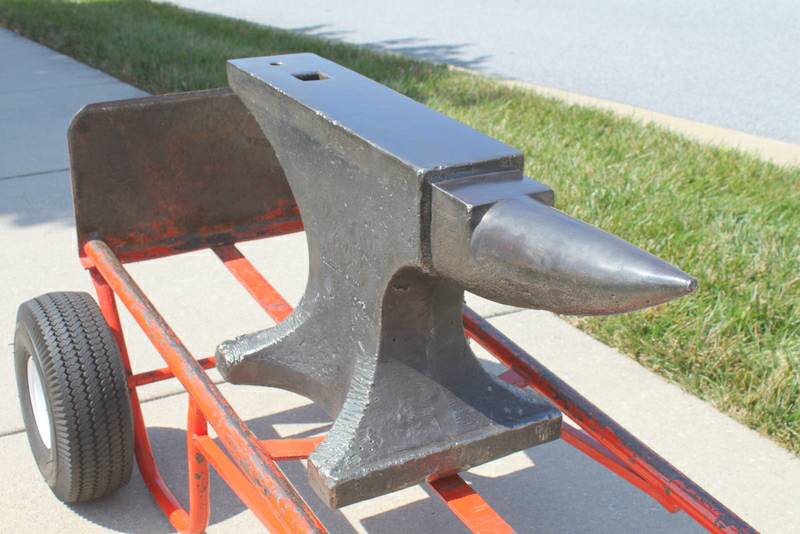
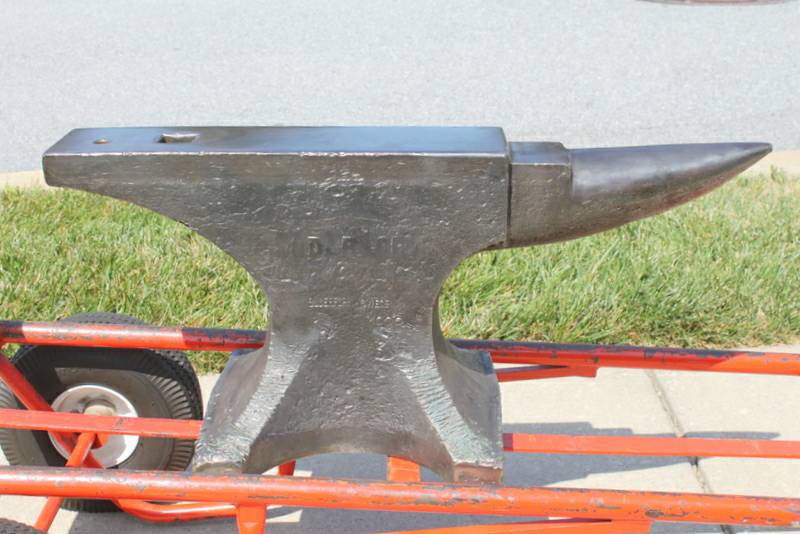
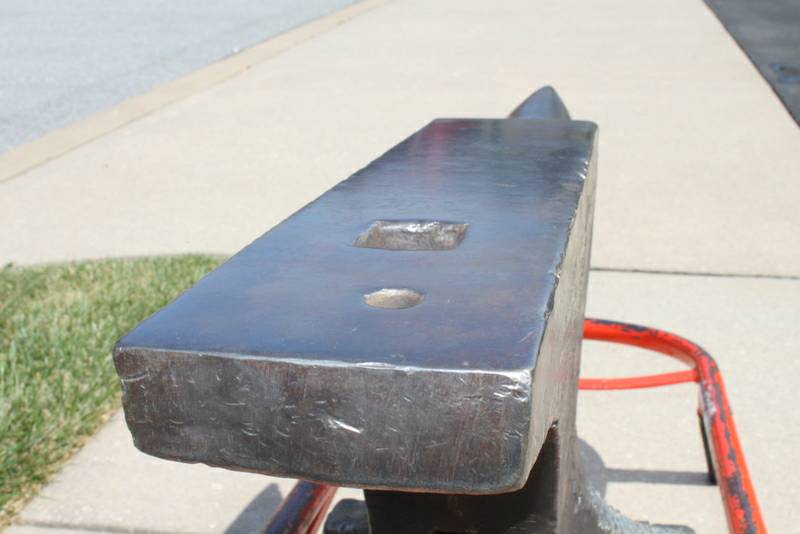
So back in September of last year I came across a 1928 Soderfors Paragon 168lb anvil in excellent condition. This thing rings like a church bell and the ball bearing test probably has 90% or better rebound. Unfortunately due to moving twice in 2 months (long story) I never got the chance to put this fine anvil to work. So a few days ago, I decided that since I have my workshop just about setup (cleaned out of moving boxes) I would build a proper stand and get my anvil ready to do some work. The stand is built out of treated 2x6 lumber that I had left over after a deck project. The finished stand probably weights in at 50-60lbs. The stand was assembled with construction adhesive and deck screws. Here is the almost finished setup. I'll be adding about 10' of chain later today to dampen the ringing. Only other thing I have to do is fabricate some way to roll this around when it isn't in use. -Brian Here are a few pics of the anvil and its new stand.


-
I've been very slowly assembling a grinder using a treadmill motor. One thing to look out for is the large flywheel/pulley from the treadmill usually has fins molded in the motor side of it to act as a cooling fan. If you remove it, you will likely need to find an alternate way to cool your motor. I am going to try making a ducted fan similar to this http://bbs.homeshopmachinist.net/threads/47611-Cooling-off-a-hot-treadmill-motor I'm going to add a small air filter to reduce the junk sucked into the motor. -Brian
-
I used a blower from an old heat gun that the heating elements had burned out. I disassemble the heat gun and took out the blower assembly. The heat gun was 120V AC but oddly enough the blower was low voltage DC. I ended up powering it from a cheap 12V wall-wart but you could use a car battery or other 12-18V source. It was nearly silent and provided plenty of air.
-
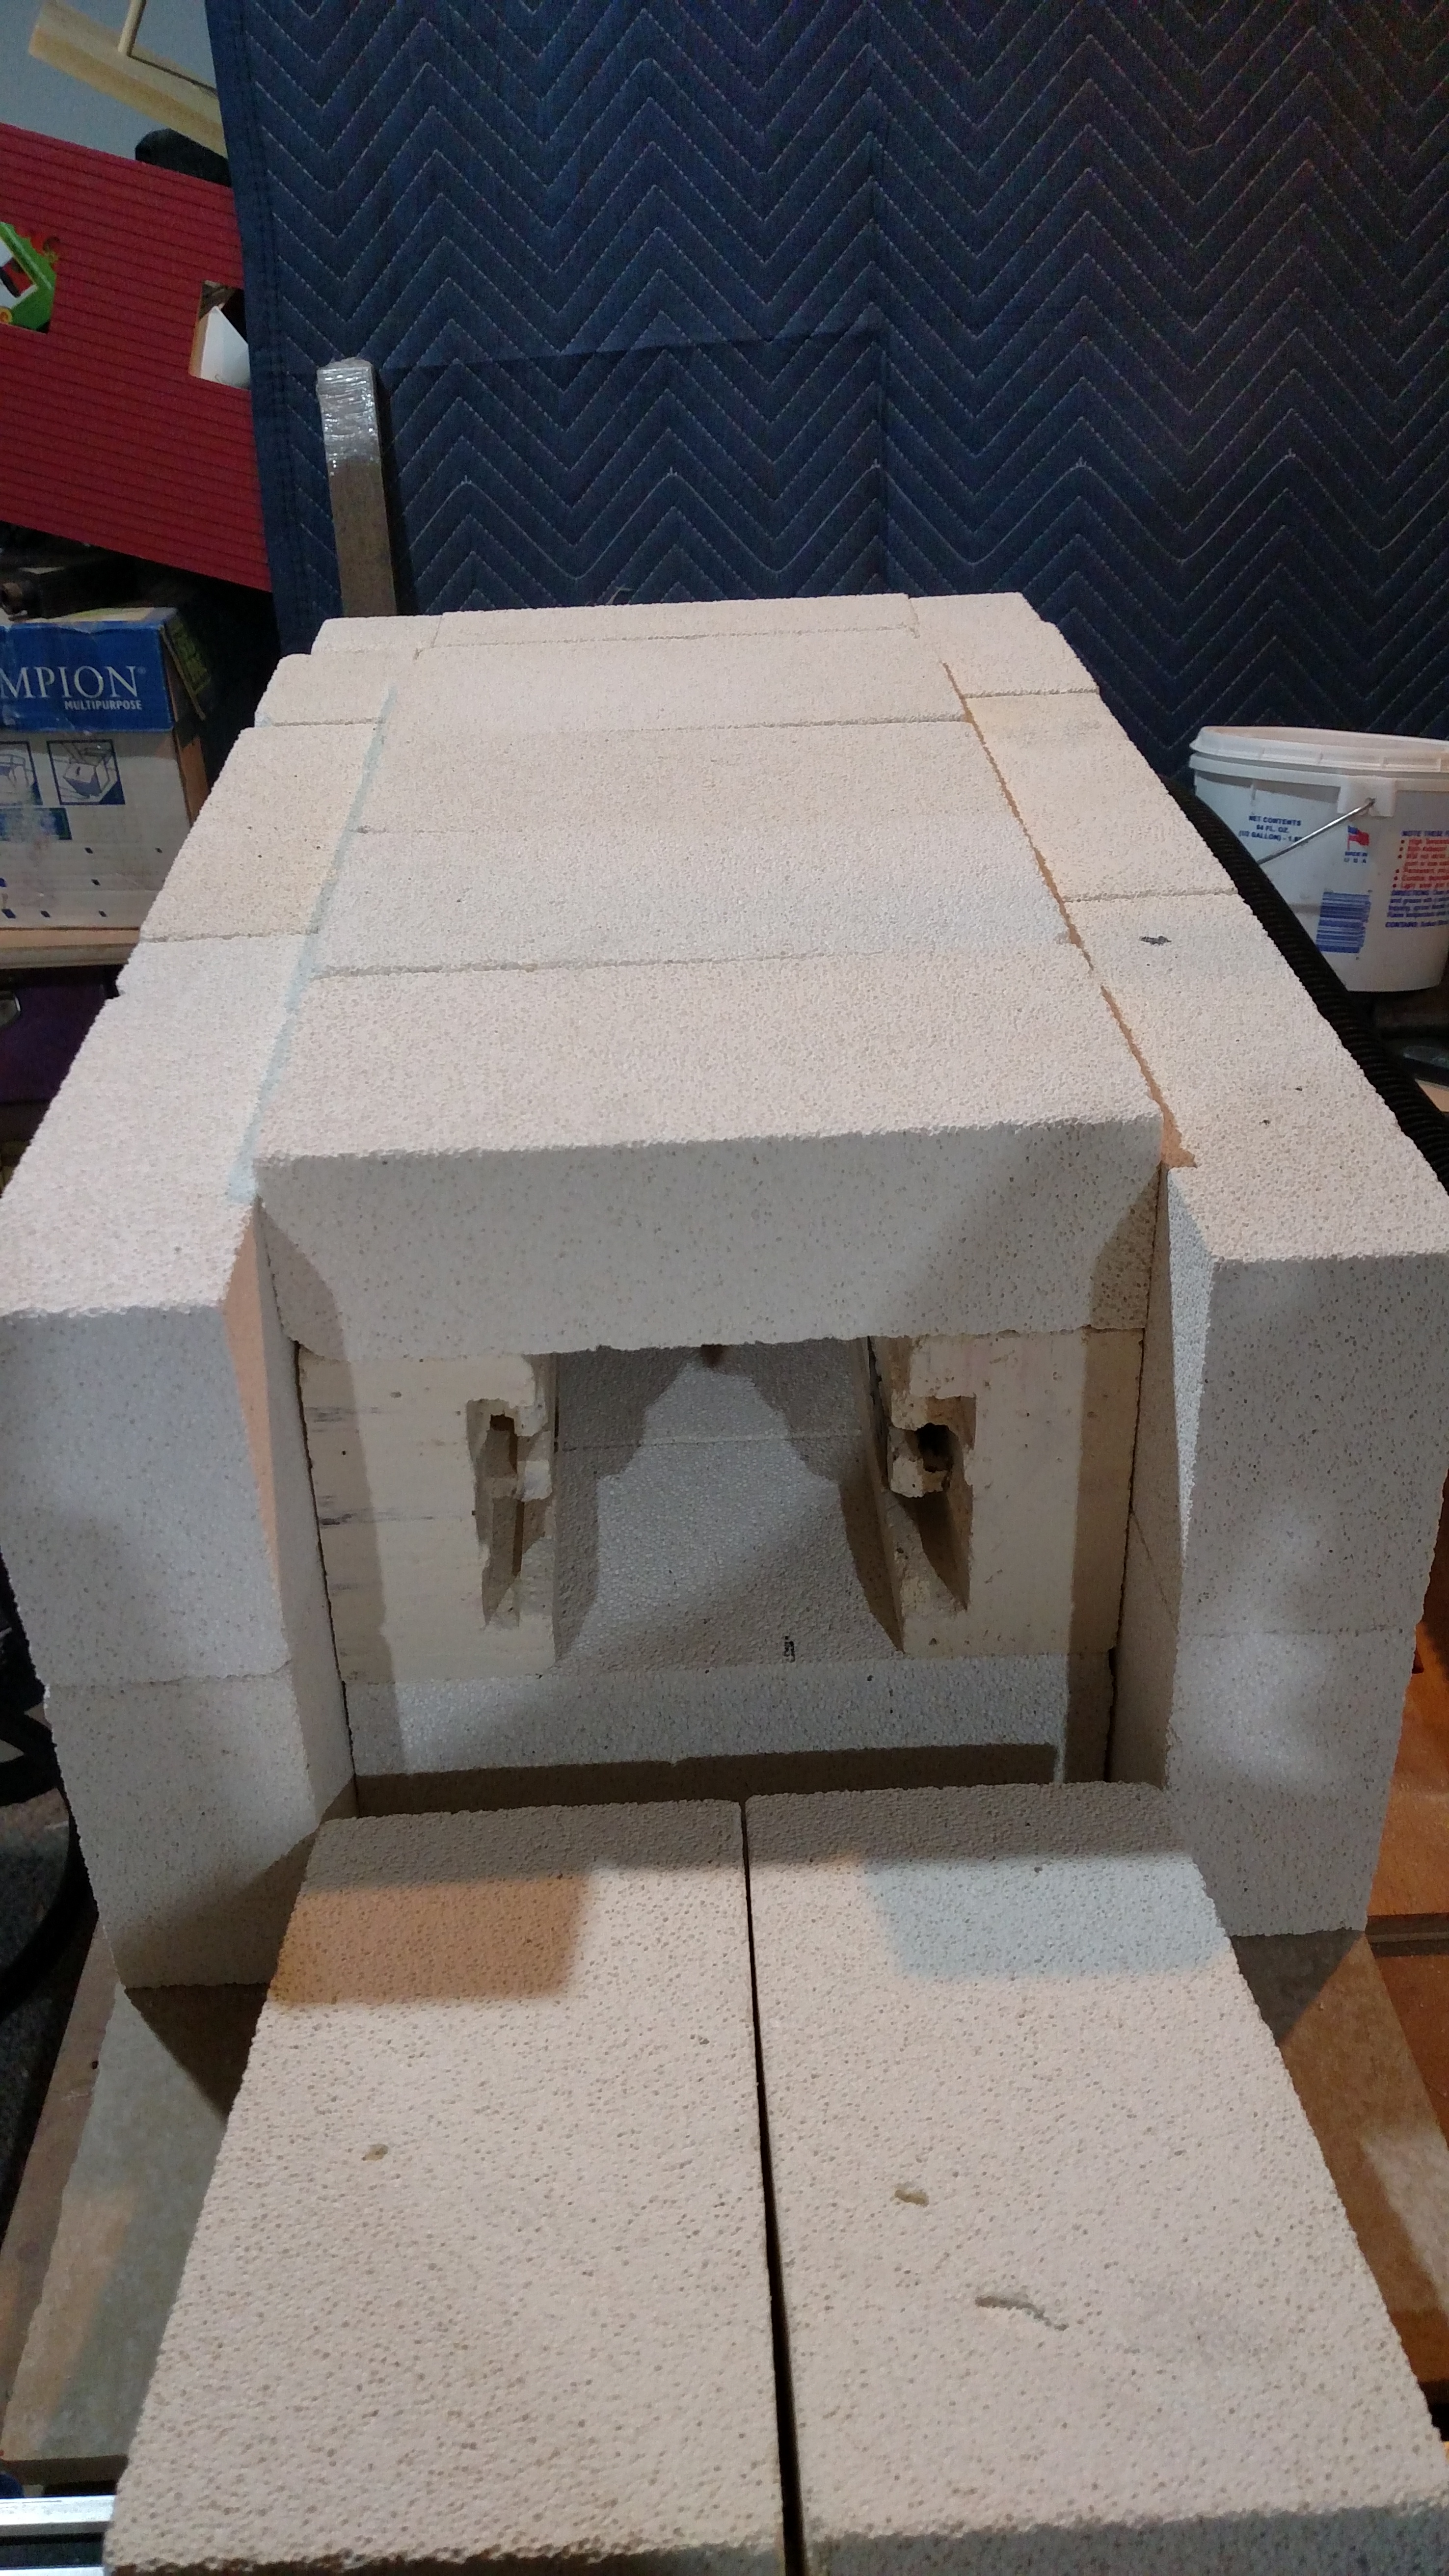
I can't speak for non-US costs or availability but the PID controller I used included the thermocouple and solid state relay. I think it was under $50 USD on Amazon. I also wound my own heating element coils. The resistance wire was also purchased from Amazon for around $25 USD. I think the bricks were the most expensive part they cost me around $80 for a case of 25. Misc switches and lights were probably another $25 or $30. The hardest part was winding the element. The wire is very stiff and I had several rats nests to untangle before I managed to finally get it.
-
Goro, Heat treating ovens are not too difficult to build and can be done for far less that $2000. I built one for around $300 using all new parts. It is powered by standard 120V AC and has a digital temperature controller. I can provide construction details (separate thread) if anyone is interested.

-
With some advice from Frosty, I acquired my first true anvil today. It is a beautiful 168lb Soderfors Paragon. I purchased it from a gentleman in the Philadelphia area off of Craigslist. Rebound is excellent 90% or better and she rings like a bell. Here are a few pics

-
-