Augus7us
-
Posts
34 -
Joined
-
Last visited
Content Type
Profiles
Forums
Articles
Gallery
Downloads
Events
Everything posted by Augus7us
-

Dies and Dovetails, need some opinions
Augus7us replied to Augus7us's topic in Power Hammers, Treadle Hammers, Olivers
Thanks Tim, I didn't realize there was a difference. I always thought they were the same thing... -
It was a motorcycle technically and had an engine. It was pretty cool zipping up and down, though I wouldn't want to be in the side car or what he was appropriately calling a "hot seat" Nice photos Jacob, I heard they poured an anvil the first day and I was disappointed I didn't get to see that. Looks like they did a fantastic job. I was actually at SOFA for two weeks for an ABS bladesmithing class right before Quadstate and got to meet and spend some time with Butch. He is a great guy and really knows his stuff. There was also an ABS knife show the weekend I was there and Butch had some of his tomahawks on display. Highend stuff!

-
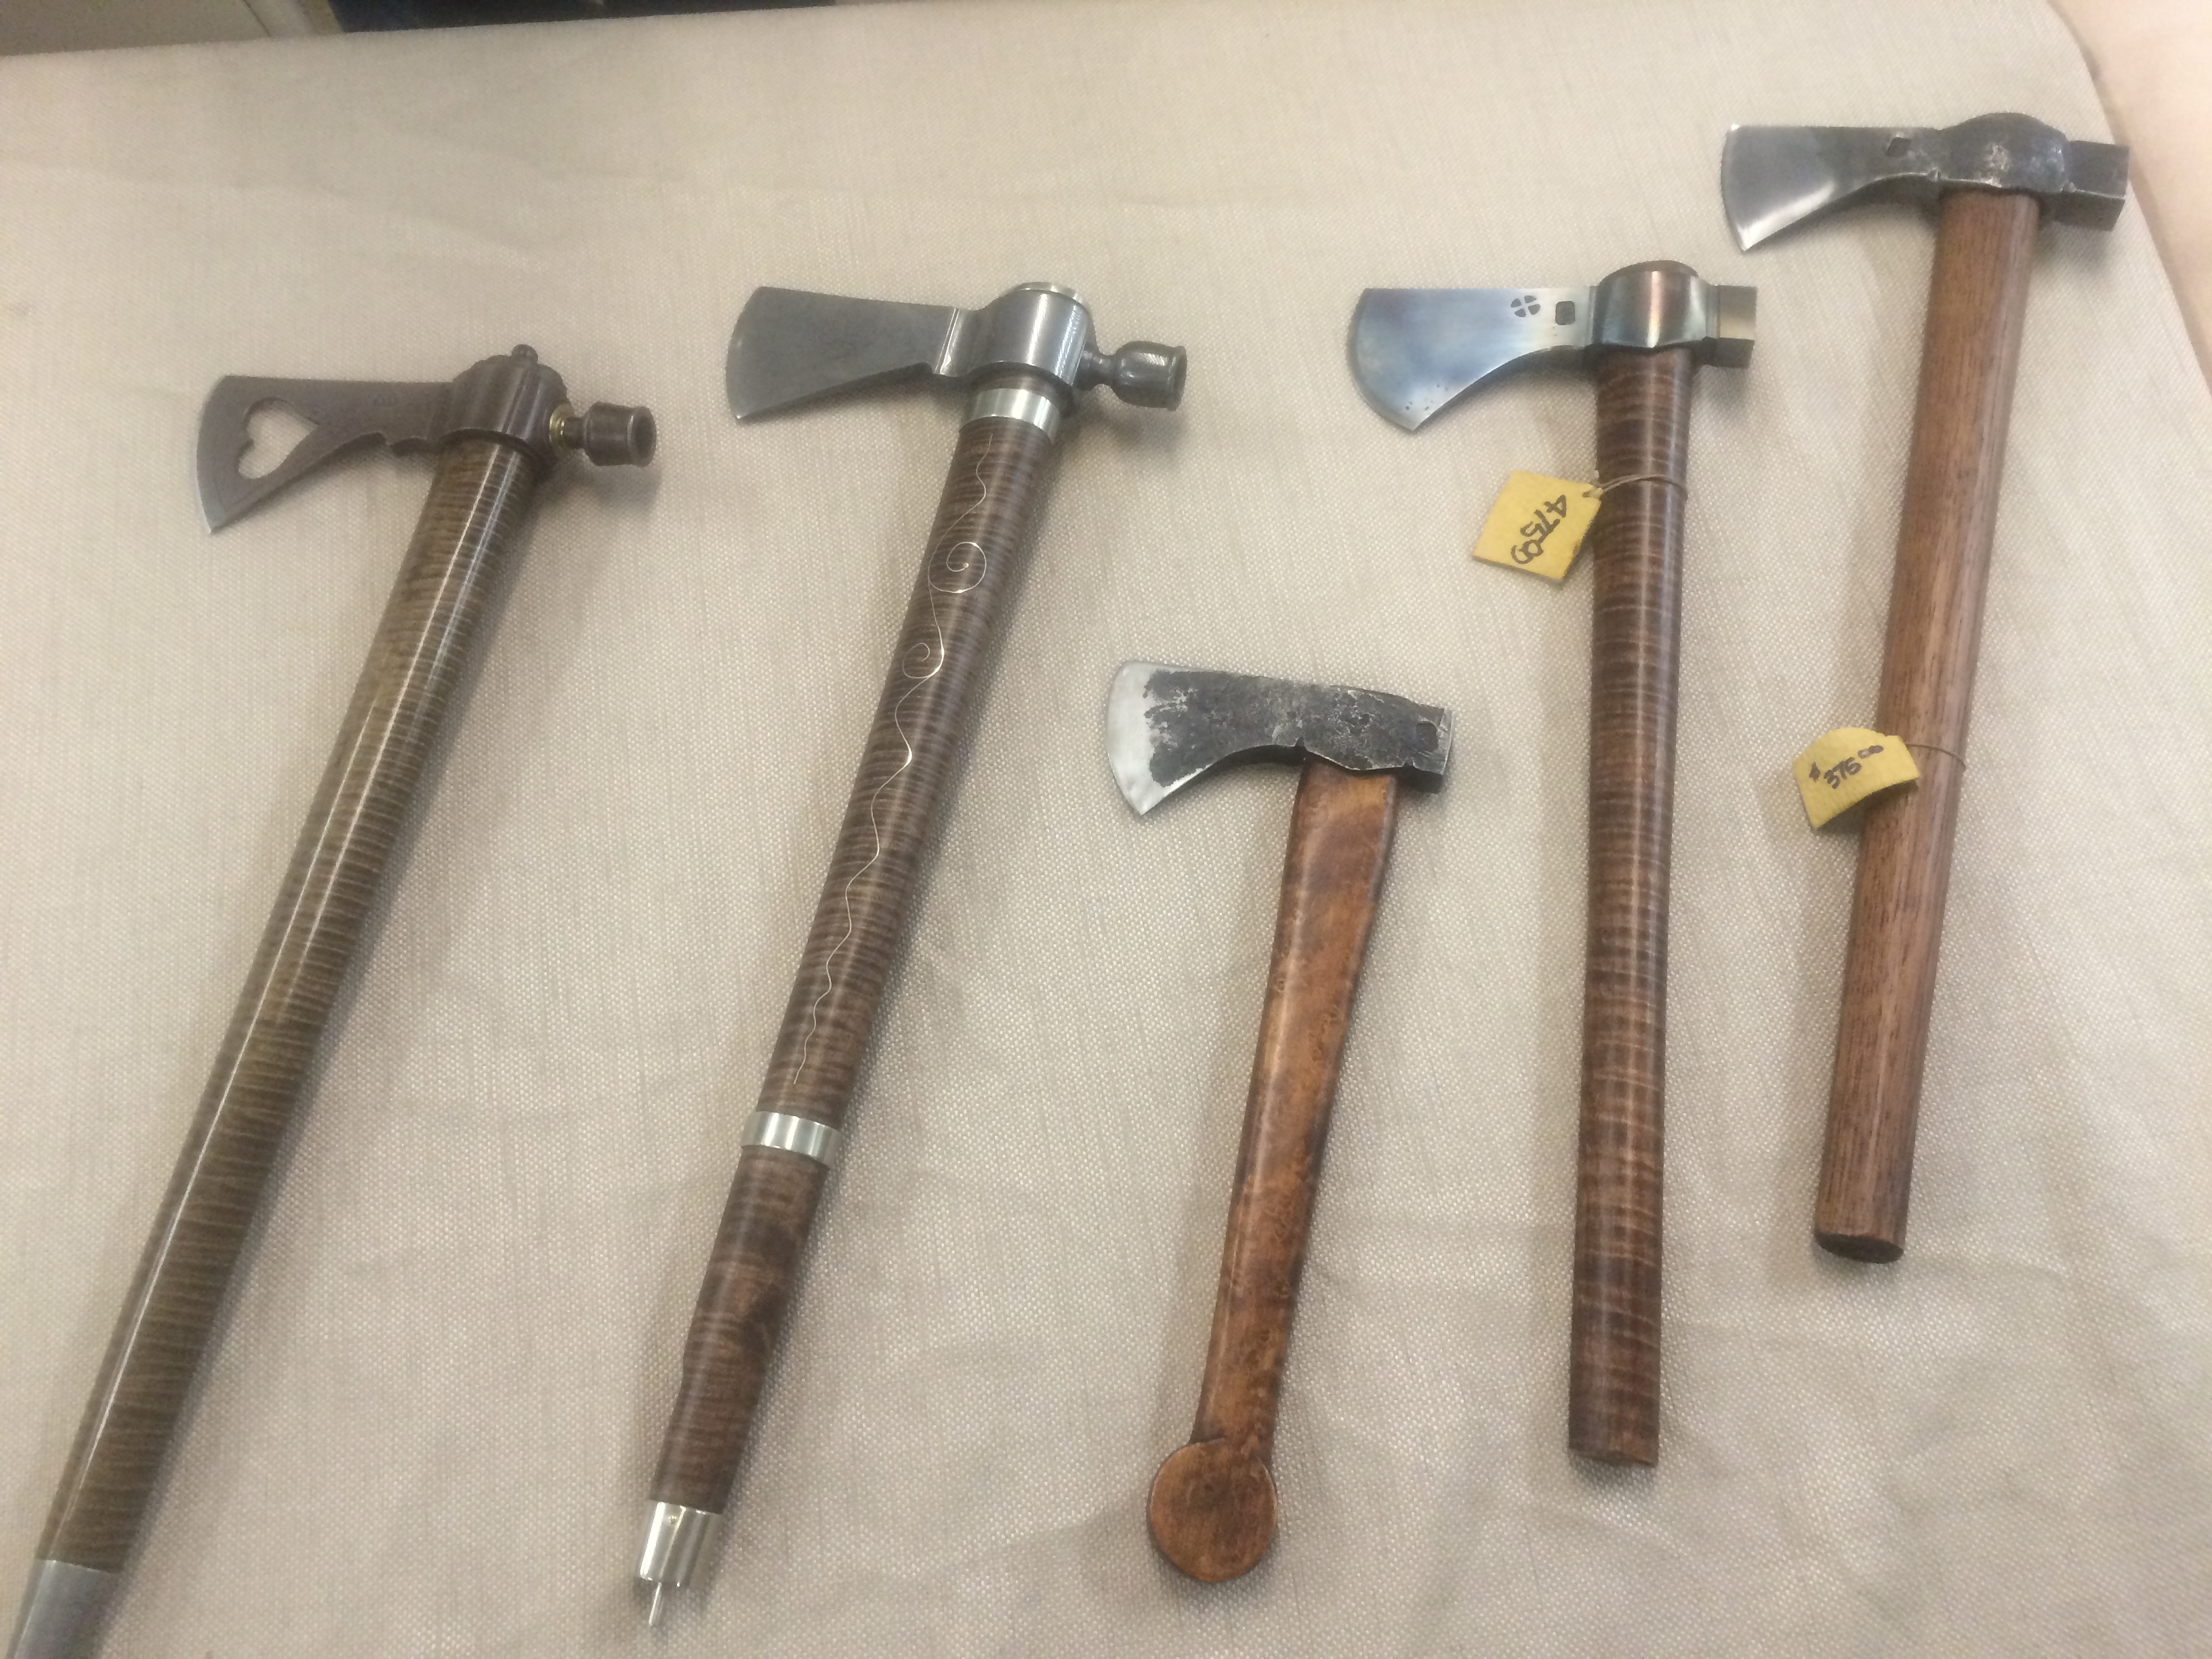
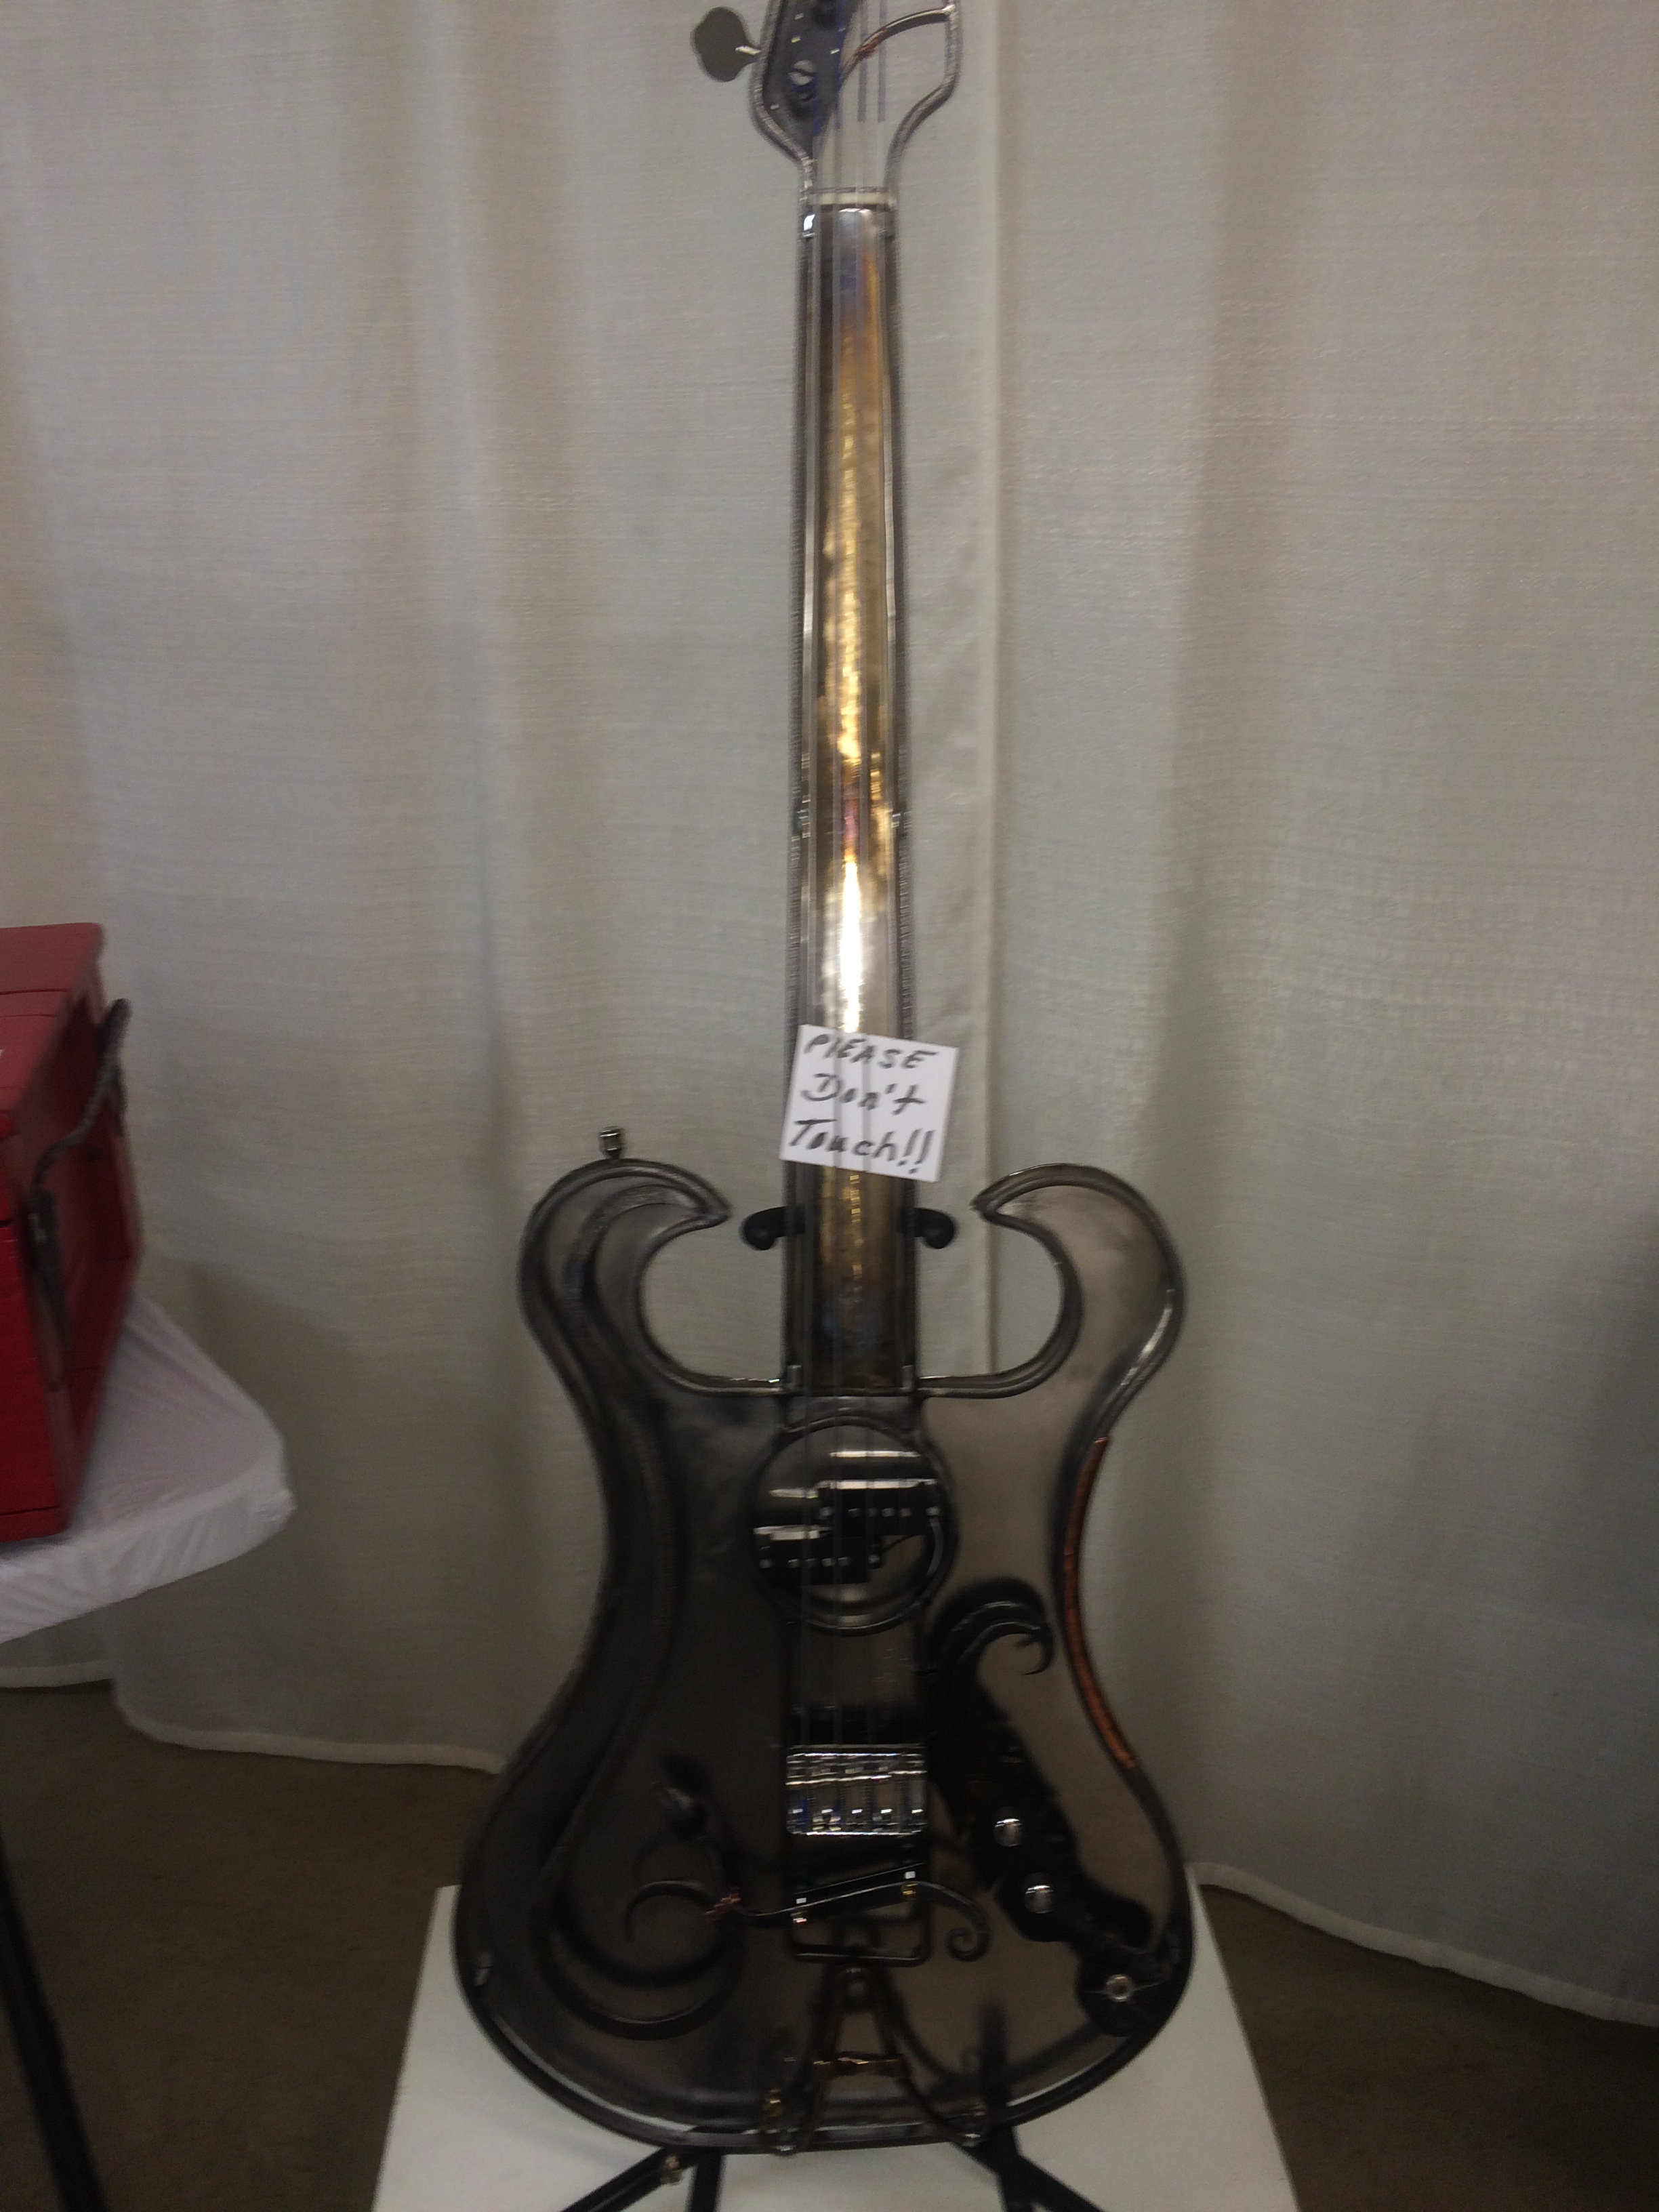
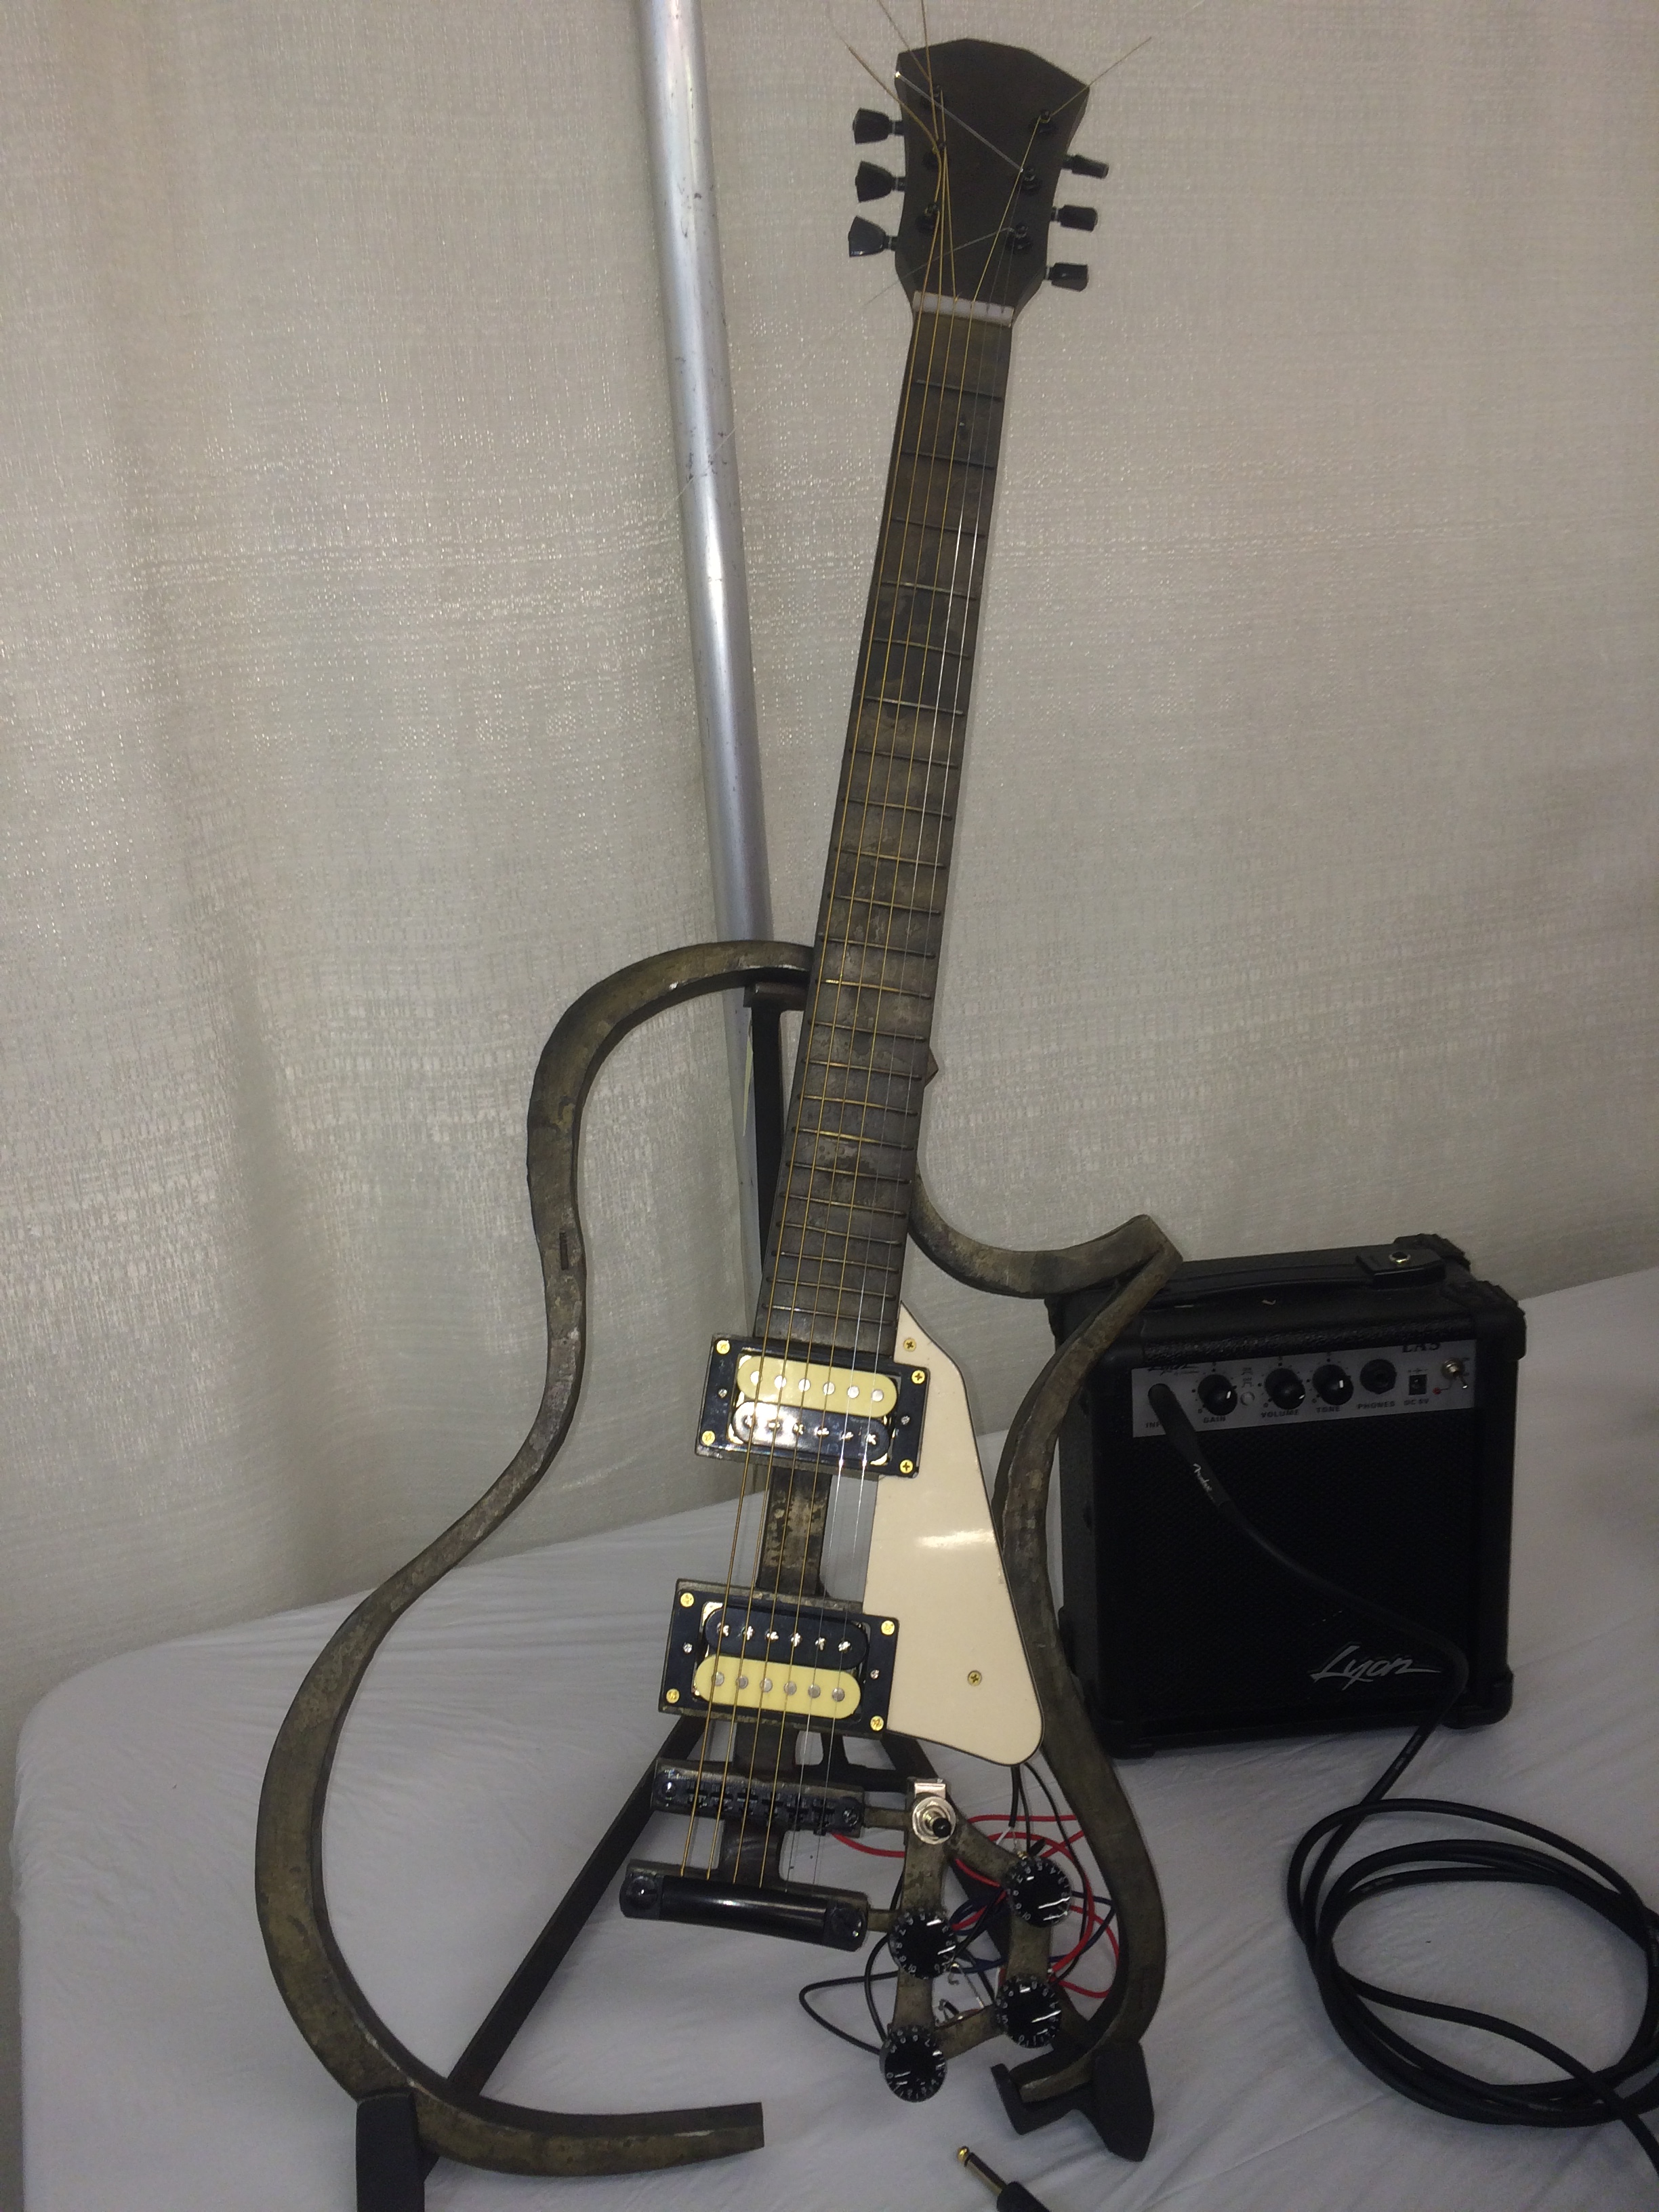
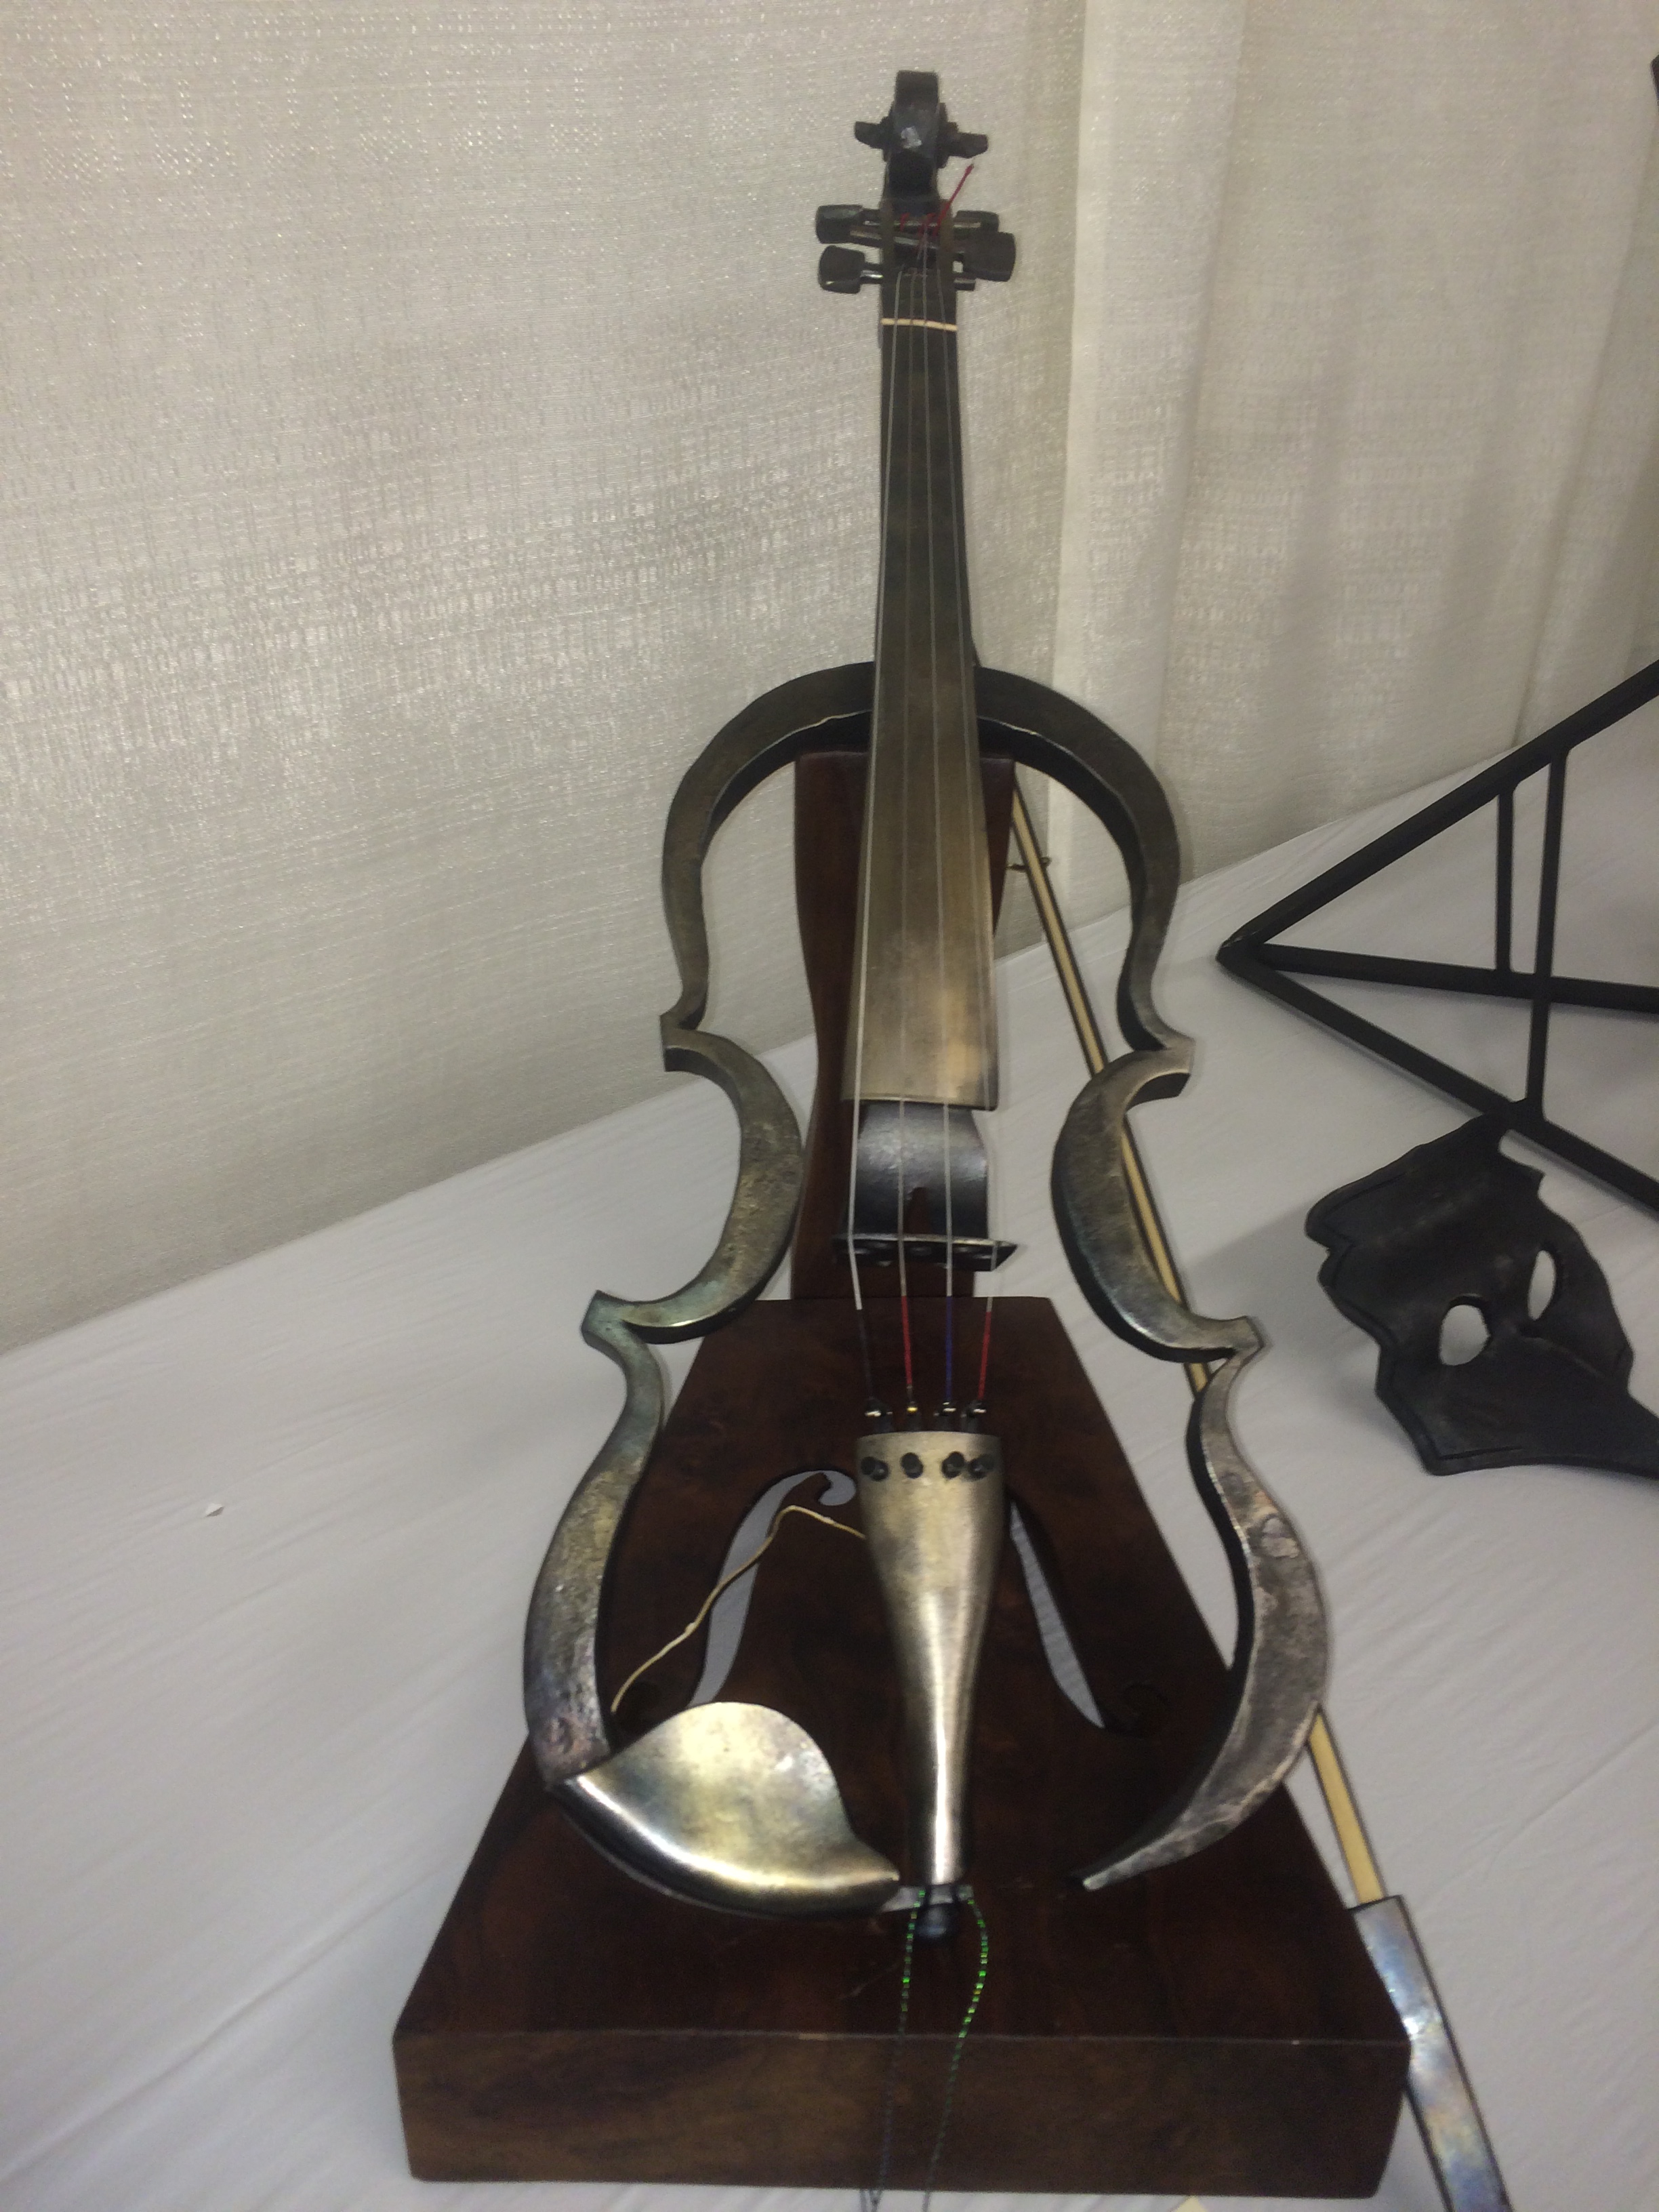
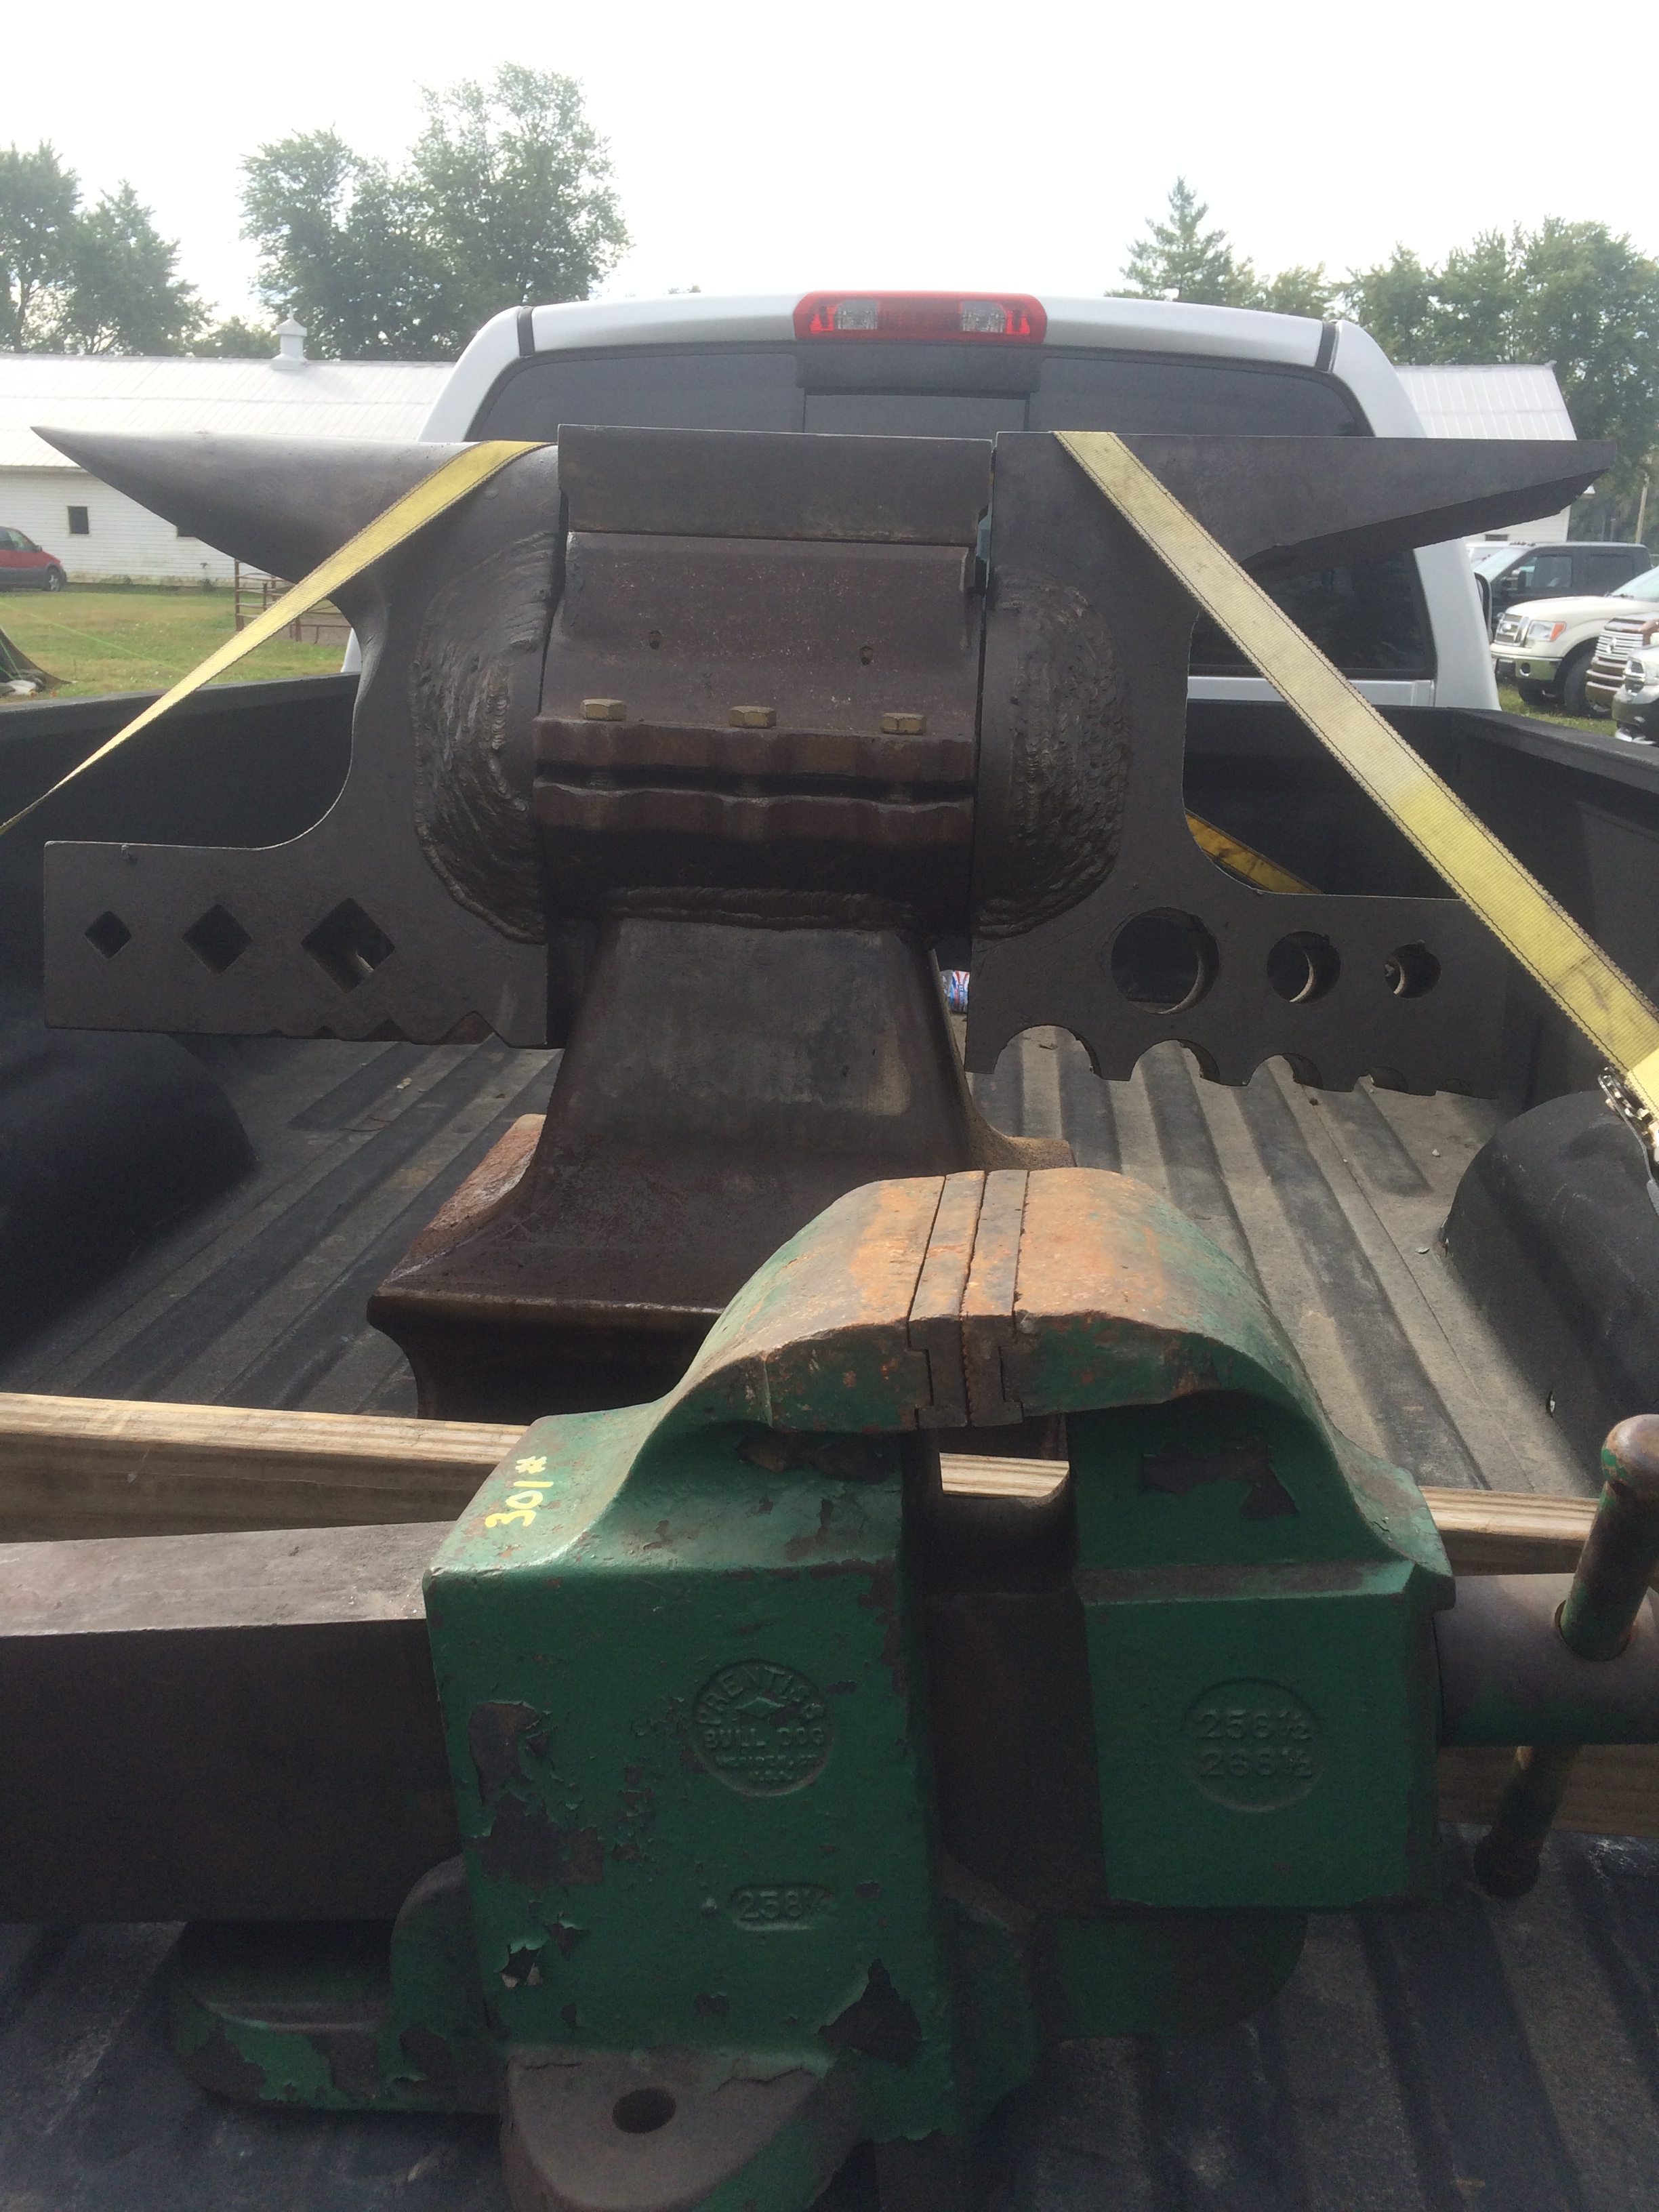
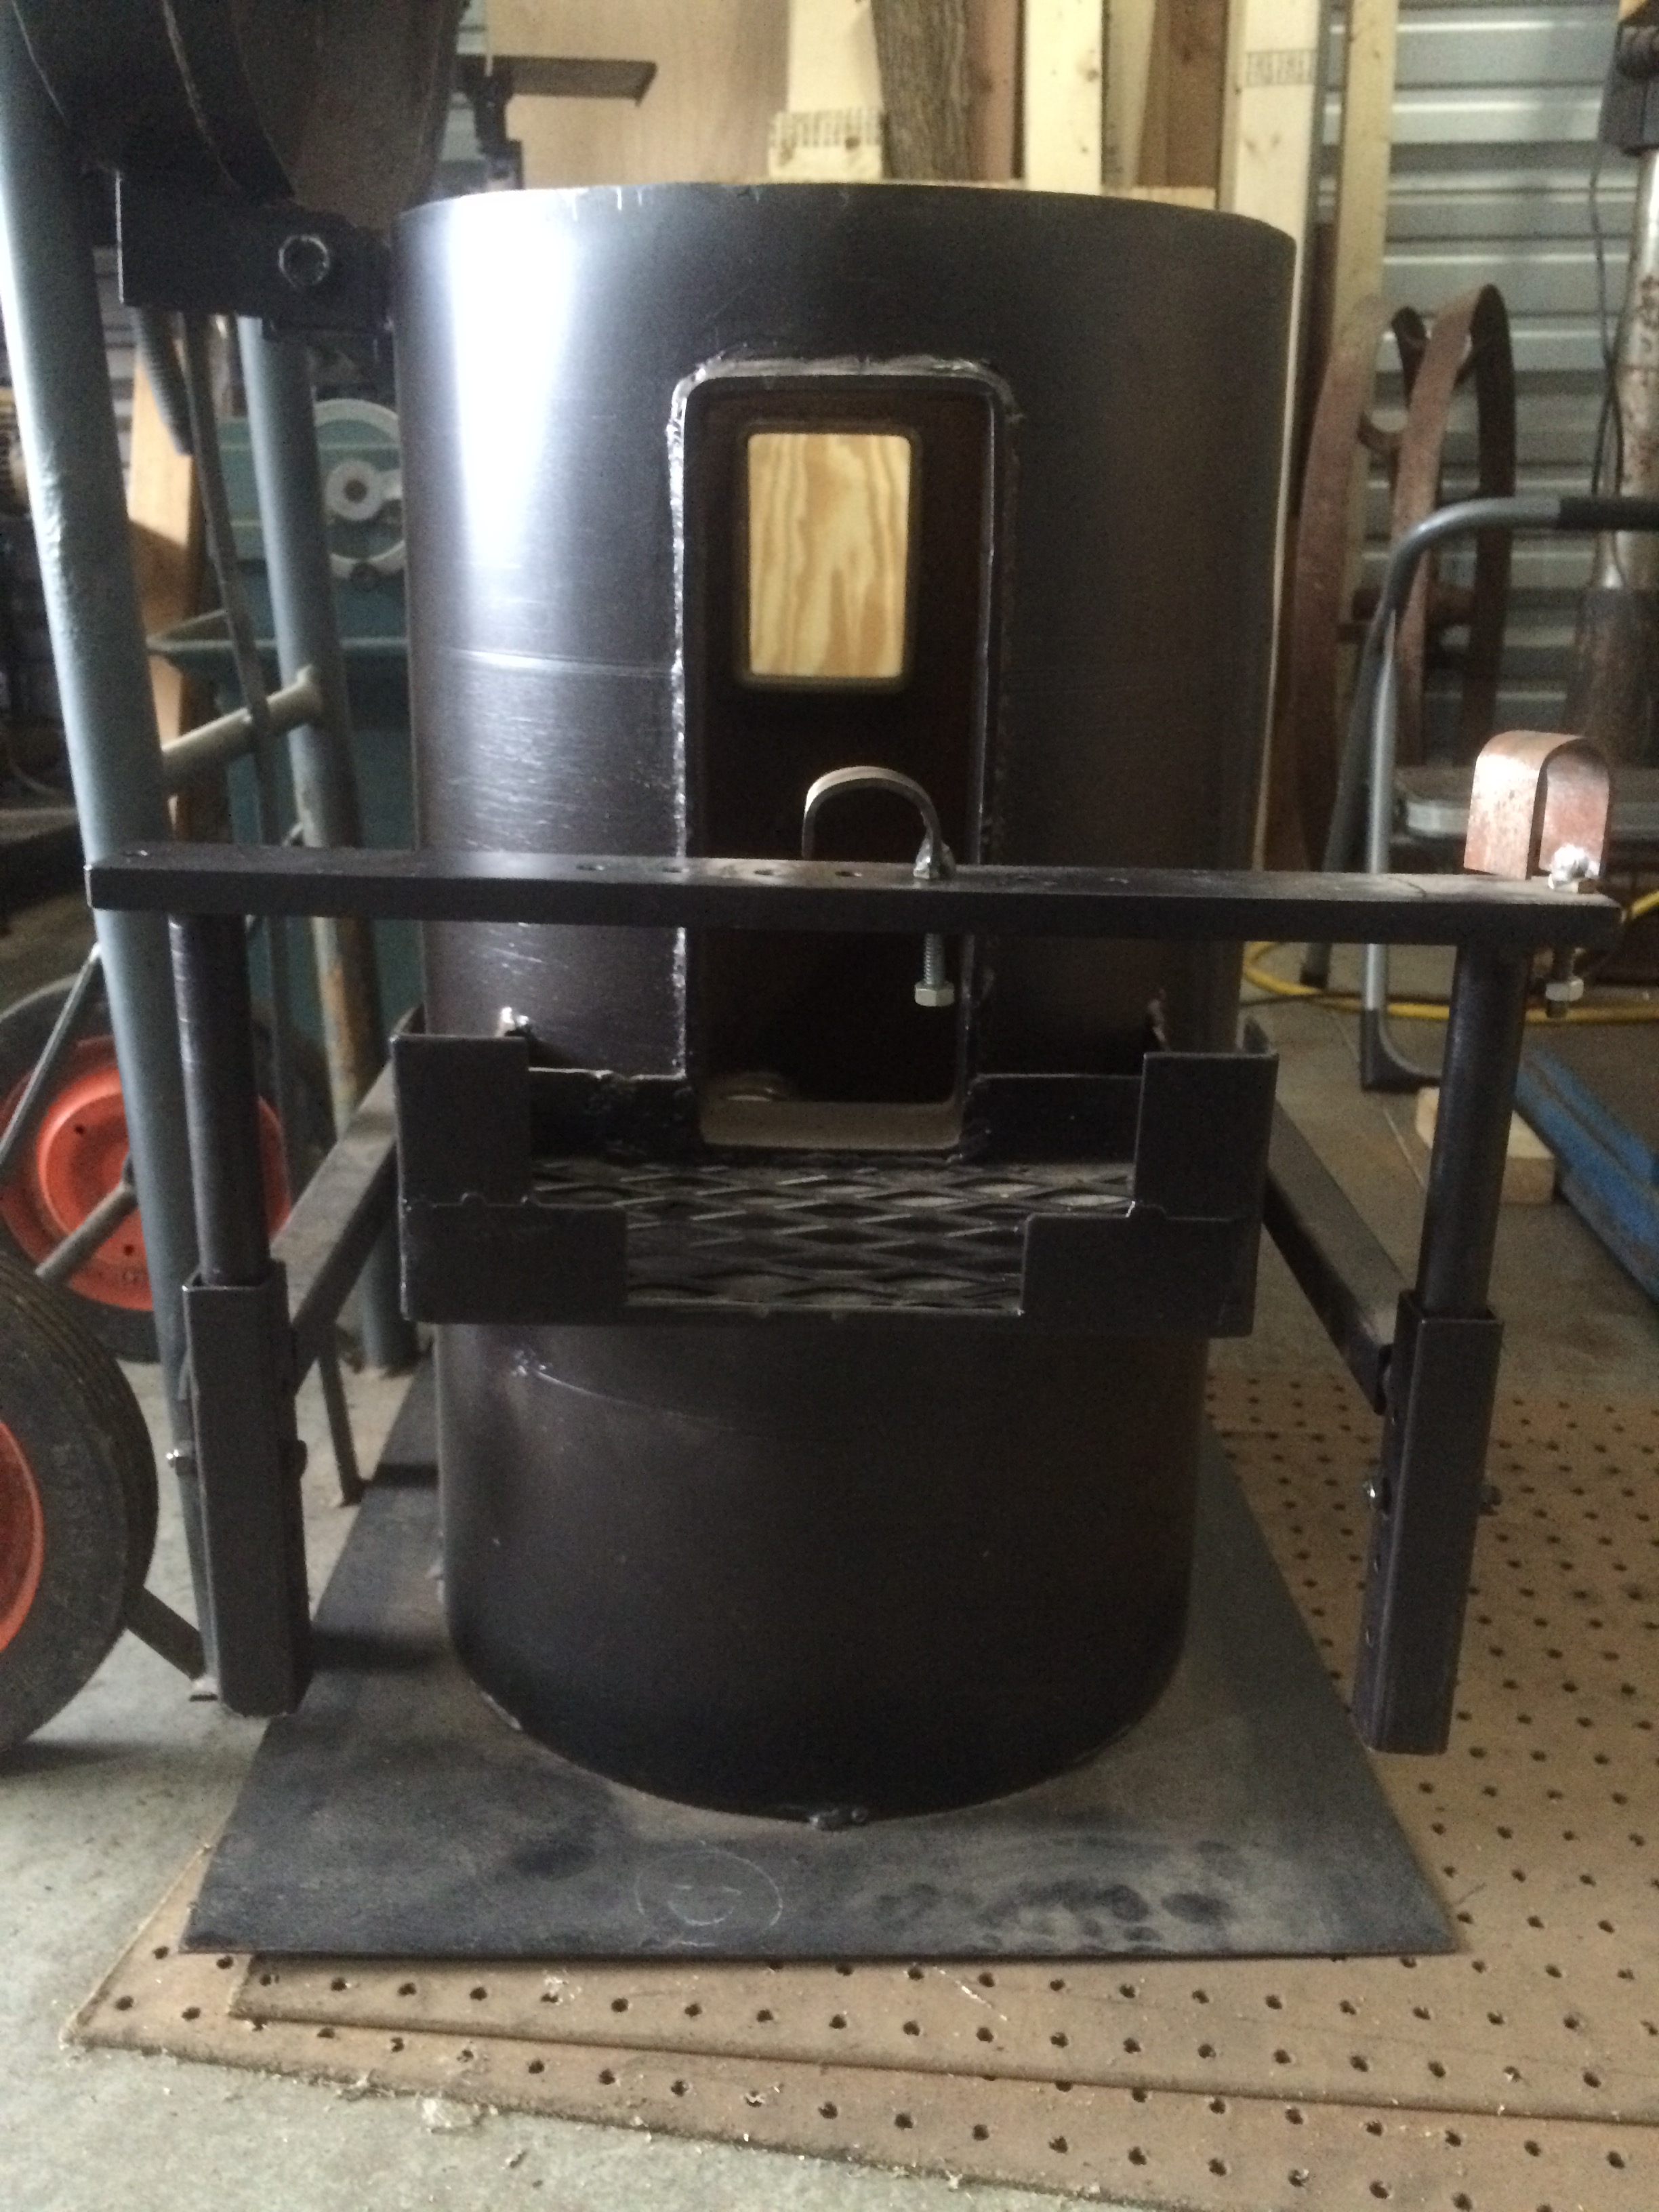
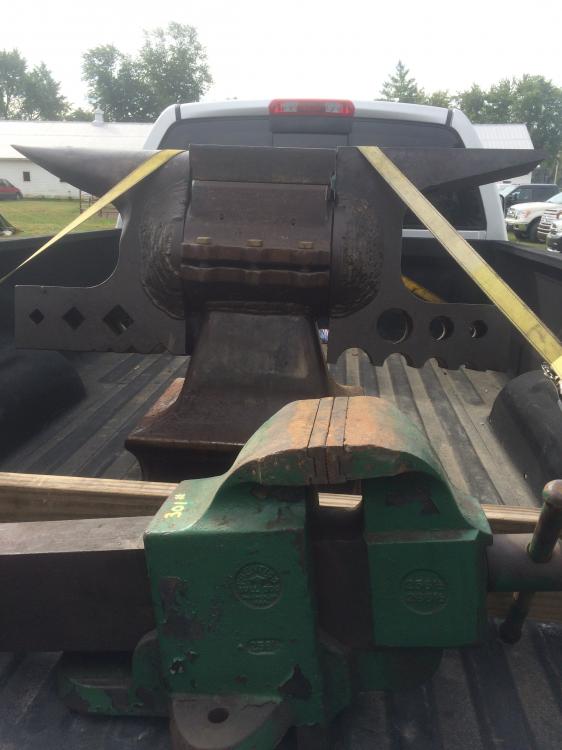
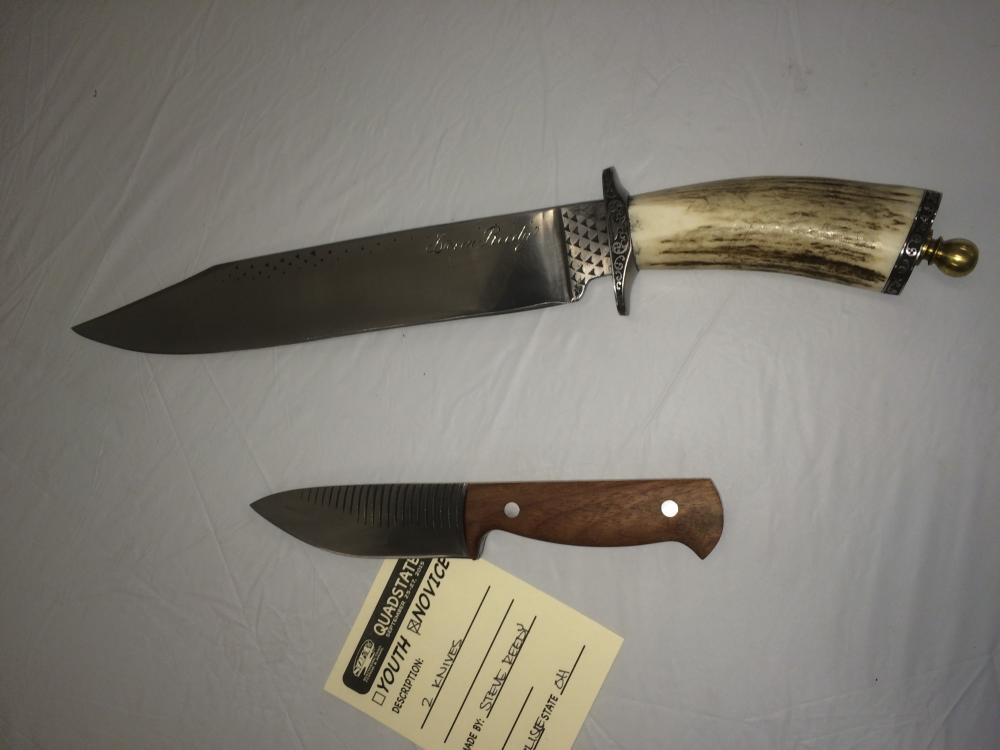
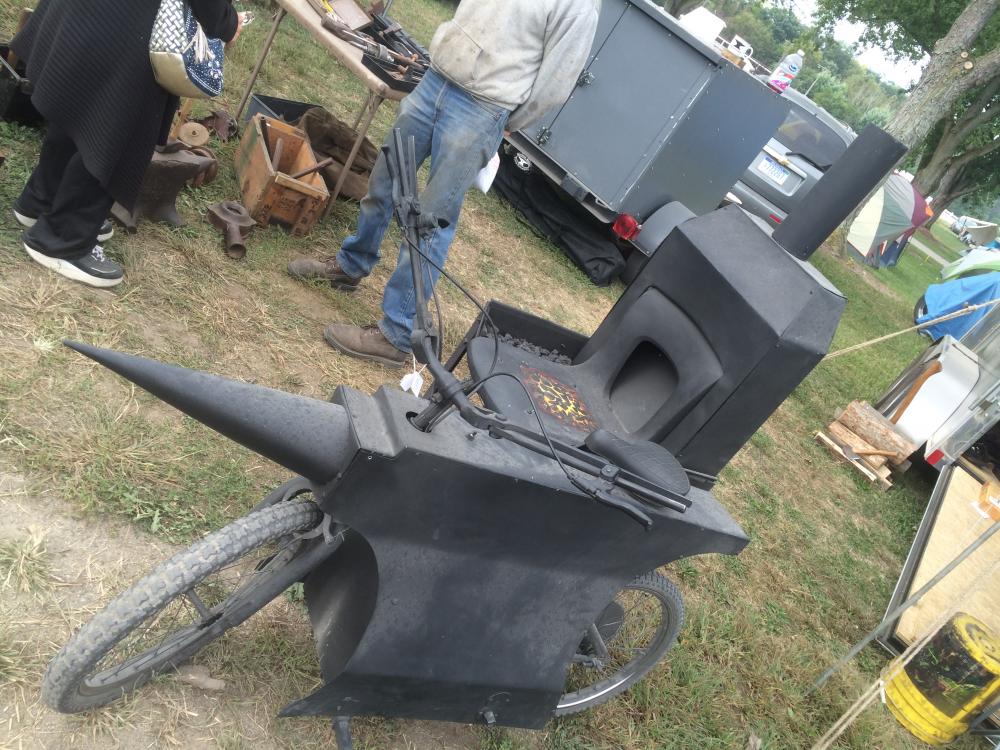
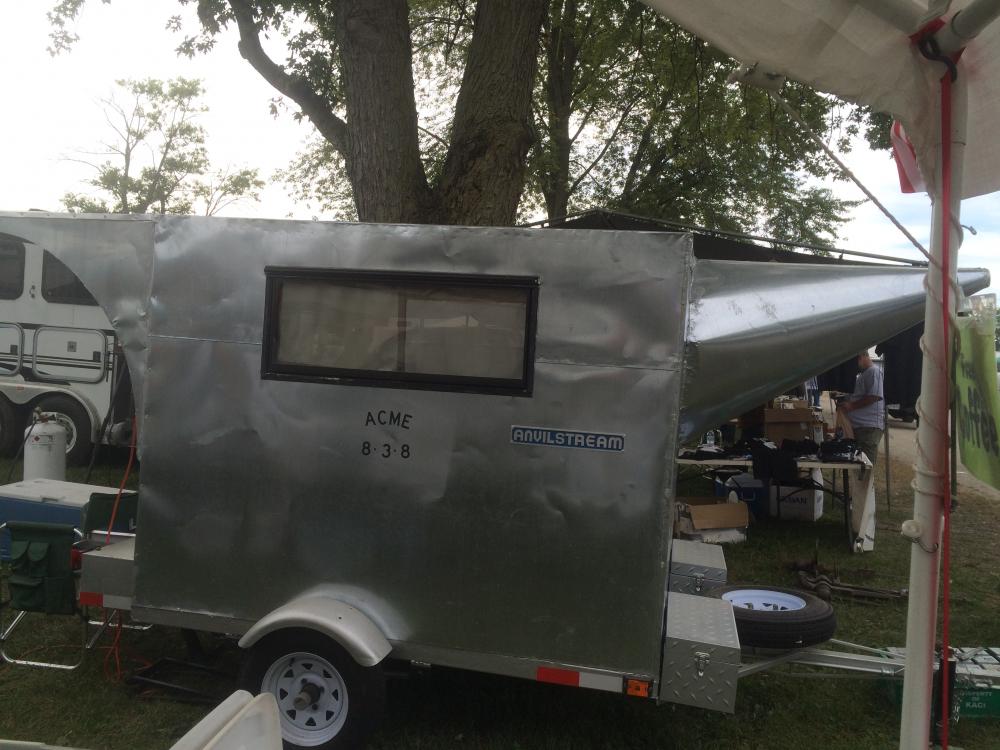
Hey guys I thought you all would enjoy some of the photos I took at the quadstate here in Ohio this year. I figure if anyone is going to appreciate them it would be you guys. I'm sure a lot of you have heard of it but if you haven't the Quadstate Blacksmithing Conference here in Ohio is a fairly large gathering of blacksmiths, bladesmiths and various vendors along with quite a few demonstrations of all sorts put on by Souther Ohio Forge and Anvil, or SOFA. I believe there were 12 or 14 demos this year and I spoke with the president of SOFA who was telling me they had their biggest showing to date. The demos were fantastic, I watched Matthew Parkinson forge a kitchen knife, there was a fella who made some fantastic medieval looking lights that were amazing I wish I could have got a picture but the place was packed. Sadly I didn't get to see Ric Furer's demo as it was Sunday I wasn't able to make it then. For blacksmiths its a paradise. Anvils, post vises, steel, and pretty much everything you could want as far as the eyes can see. I bought a nice giant vertical forge for a song and if I wasn't looking for a house I may have picked up a 100lb little giant as the prices were pretty good. So enough rambling on to the photos! These were just awesome and the last two actually played! Not sure how to insert photos on the new code so I'll make a couple posts so my descriptions match. This anvil / swage transformer was pretty cool and massive Looks like the board will format it for me, posts are getting merged These were some youth knives in the display area This bike was really cool. The attention to detail was incredible. Note the handle bars are tongs, I missed that the first couple times I looked at it. It ran too he was driving it up and down the rows of vendors. I saw this guy last year and thought it was pretty cool. And finally my new vertical forge. It needs lined, a burner and a blower but I paid a hundred dollars for it so I'm pretty happy with the deal. It will take up to about an 8" stack of damascus if I so desire Far more than I need now or in the near future but eventually that 100 pound hammer will land in my shop... Well I hope you guys enjoy them. If anyone else was there and has some pictures please post them I'd love to see them. So much there I no doubt missed stuff. In addition to the forge I picked up about 4' of 1" cable, a couple of hammers for cheap and a few small things I'm forgetting. Didn't buy a whole lot, but I went there for some tom tongs and the guy that usually sells them wasn't there this year due to illness. I got to see some new and old friends and I met and had a chat with IFI's own Steve Sells All in all it was another fantastic time and I'm looking forward to next years. -Clint

-
Dies and Dovetails, need some opinions
Augus7us replied to Augus7us's topic in Power Hammers, Treadle Hammers, Olivers
Thanks Alan that is fantastic advice. And I'm glad you mentioned working on the dove tails first because in my haste I would have kept going on the dies and realized that afterwards which would likely have lead to loud cursing. I'm calling engineers blue dykem and plan to go that route. Fortunately the last tool I brought back to life was my surface grinder and it may see some action when I'm making the wedges. I'm going to try to get this as squared up and true as I can. Thanks again -Clint -
Dies and Dovetails, need some opinions
Augus7us replied to Augus7us's topic in Power Hammers, Treadle Hammers, Olivers
No worries Alan, I appreciate the opinions. If I was doing mostly blacksmithing stuff I wouldn't have messed with the shape of the dies at all. But with the way I come across the dies length-wise I had to even them out some. I'm not really doing any major drawing as I'm starting with bar stock and drawing the blade out from spine to edge along the length of the dies. The dies are definitely hardened but I have plenty of grinders and belts so I made some good progress last trip out to the shop. A little more hogging to do then I will even them both up and move on to the dove tails. Looks like I'm going to go with the files and arm power and true them up a bit then check for fit with dykem as mentioned above. I just don't want the dovetails to crack or break off. I got a good deal on this hammer and its in fantastic shape and I want it to last another 80 or so years. But I won't deny it gets harder and harder to look at it sitting idle each time I make it out to the shop! I'll post updates as I work on it. -Clint -
Dies and Dovetails, need some opinions
Augus7us replied to Augus7us's topic in Power Hammers, Treadle Hammers, Olivers
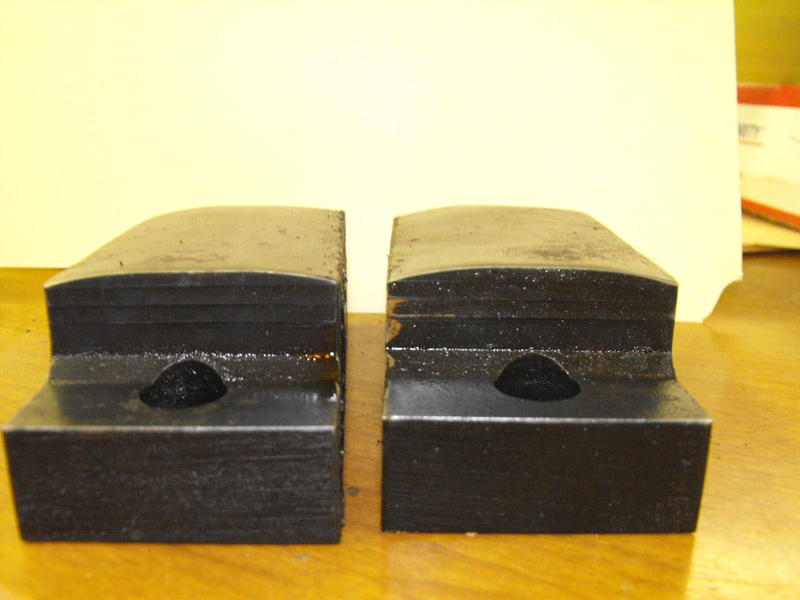
Alan its primary purpose will be for bladesmithing. How I've been trained and what I have been told the best dies by far are what were referred to as "Euro" dies (the last photo). And now that I have practiced on several small and large hammers I'm not sure how I would use two different sized dies with any success. -Clint -
Dies and Dovetails, need some opinions
Augus7us replied to Augus7us's topic in Power Hammers, Treadle Hammers, Olivers
I started grinding the top die down after a little fighting to get it out. I want it to be flatter like the lower die is. Once I finish that I will clean up the dove tails. Not sure I am brave enough to try a router, 78 did you slow yours down with a reostat or something? Mine runs at some ludicrously high rpm. I may get tired of hand filing and try it. Either way its going to start hammering metal. Tired of looking at it idle and I just picked up a massive vertical ford for damascus! I'll keep you guys posted. -Clint -
Interesting stuff Frosty, good to know! I've been forging for a little over a year and here's what I've found so far. Coke definitely creates less smoke while working the fire. When burning only coke I can pretty much keep the smoke to practically non existent aside from getting it started. It burns very clean for me. The downsides are getting it started is a real pain. I can't get it started without using charcoal or wood. Keeping it lit is also difficult compared to coal. It doesn't clump like coal. With coal I can make a "cave" out of the coal so its hot on the sides, top and bottom. Coke pieces won't stick to each other. It also burns very hot for me and find it much easier to over heat my steel with it. I get more clinkers with coke also which I've found odd. I love coal. I like the smell, I like how easy it is to maintain a fire, I like how easy it starts... I don't like the smoke when I'm coking coal though. By comparison I can start a coal fire with one sheet of newspaper. I get less clinkers and find my temperatures are easier to manage with coal. Over time I'll probably have different experiences with each and right now I may have to go back to coke to limit the smoke. But so far I'll take coal over coke. As Frosty said get a bag of each and find out which one you like better. Once you've decide you can mix them to use up the one you don't like as much.
-
Dies and Dovetails, need some opinions
Augus7us replied to Augus7us's topic in Power Hammers, Treadle Hammers, Olivers
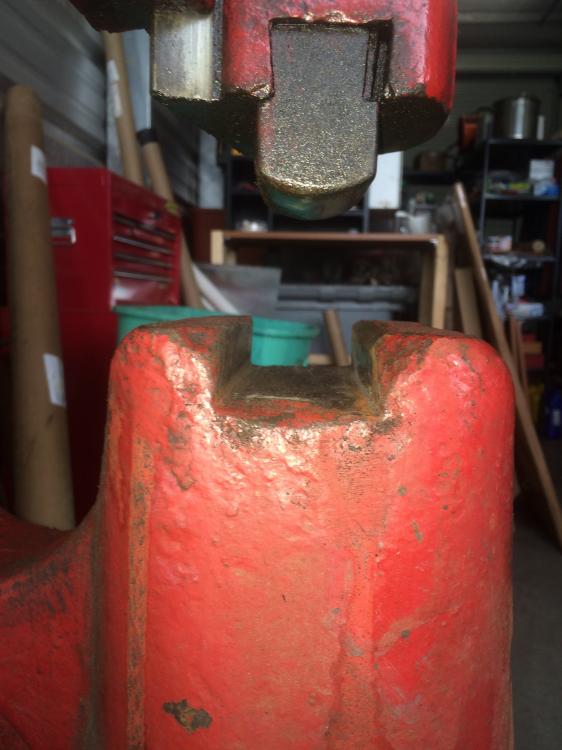
The hammer runs fine and was in use when I bought it. Aside from the dies and motor it appears to be completely original and well cared for. I couldn't find any evidence of cracks or welding but I may remove the paint and double check before repainting it. Not sure if I'm going to go through all that yet. Just want to get this sorted first and go from there.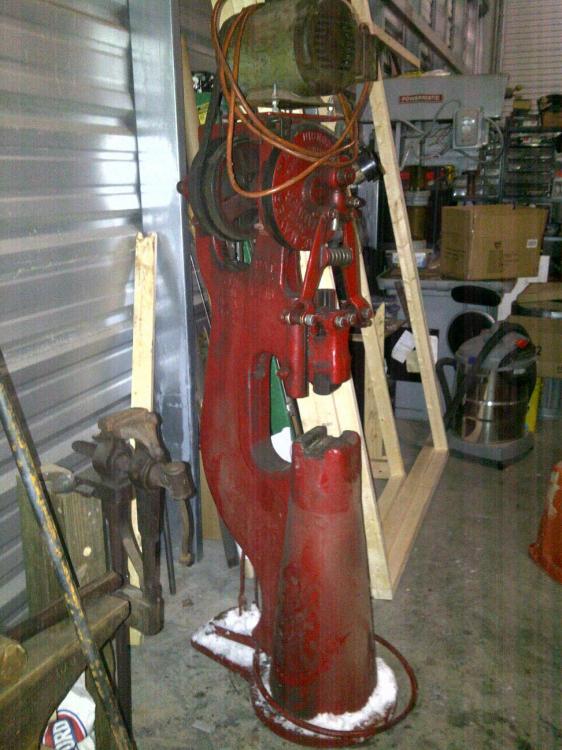
-
Dies and Dovetails, need some opinions
Augus7us replied to Augus7us's topic in Power Hammers, Treadle Hammers, Olivers
I thought it looked like a weld bead also. I figured if so they were filling a dip or something. What would be your concerns? -
Dies and Dovetails, need some opinions
Augus7us replied to Augus7us's topic in Power Hammers, Treadle Hammers, Olivers
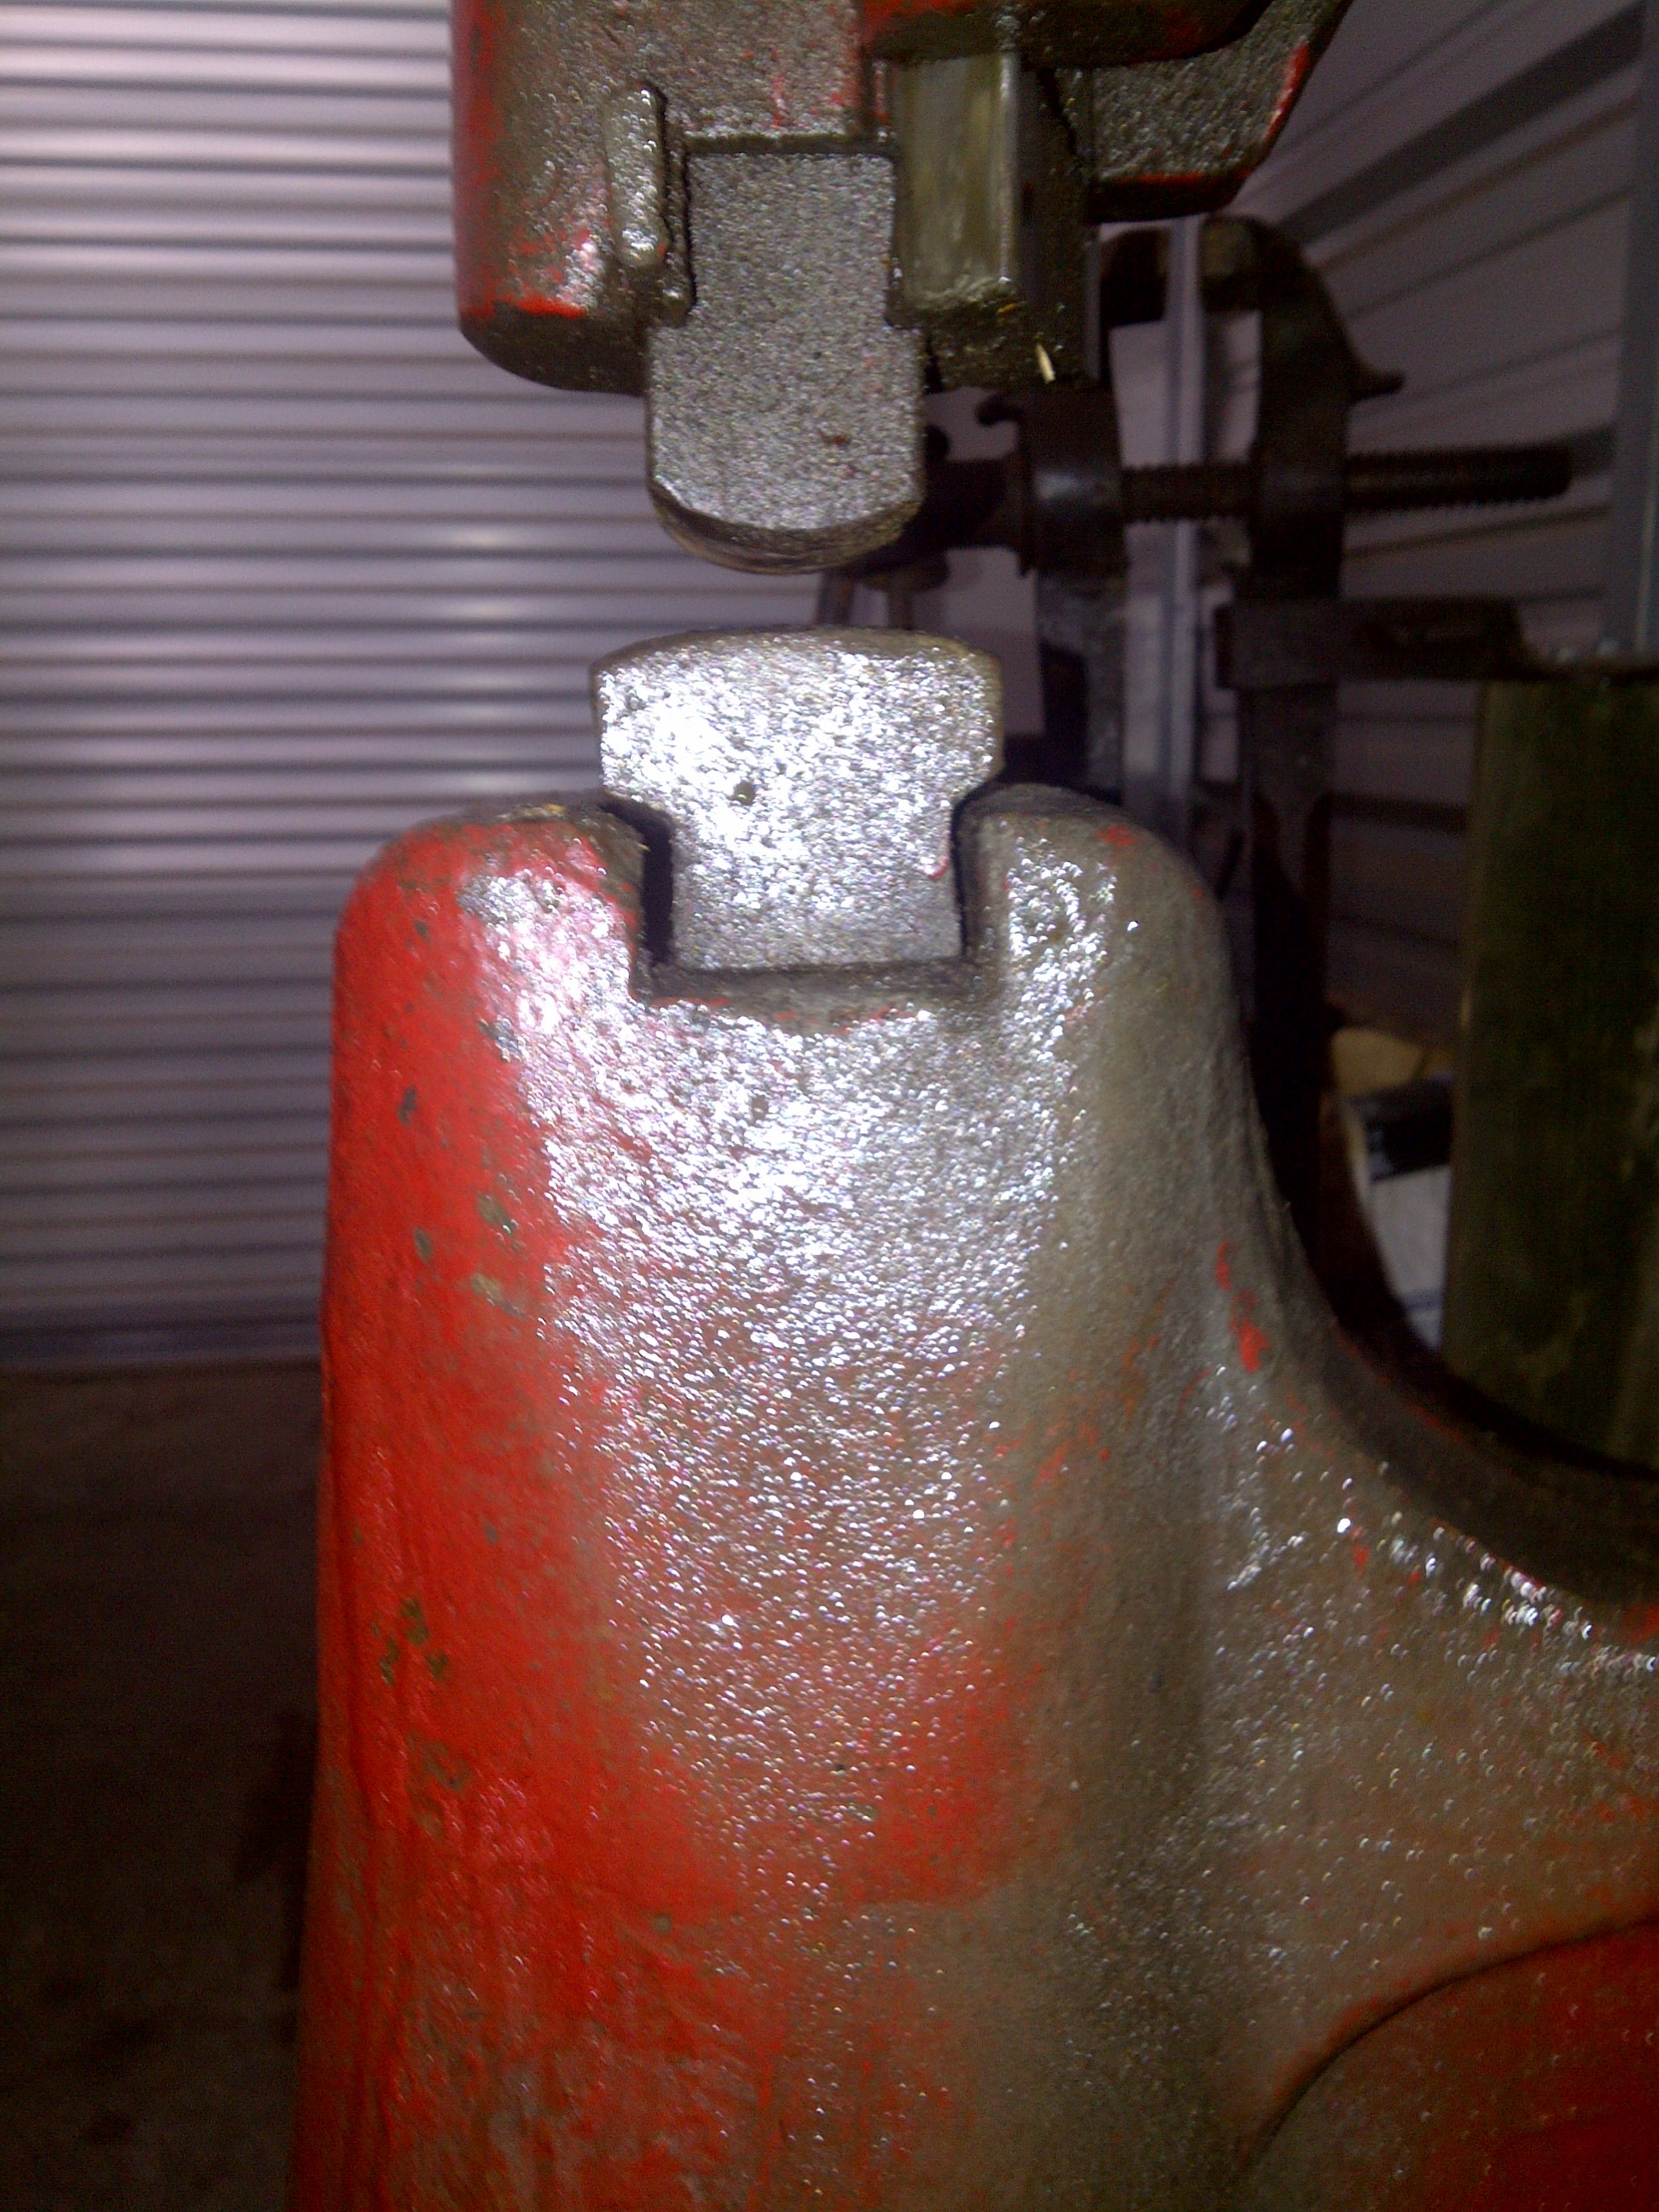
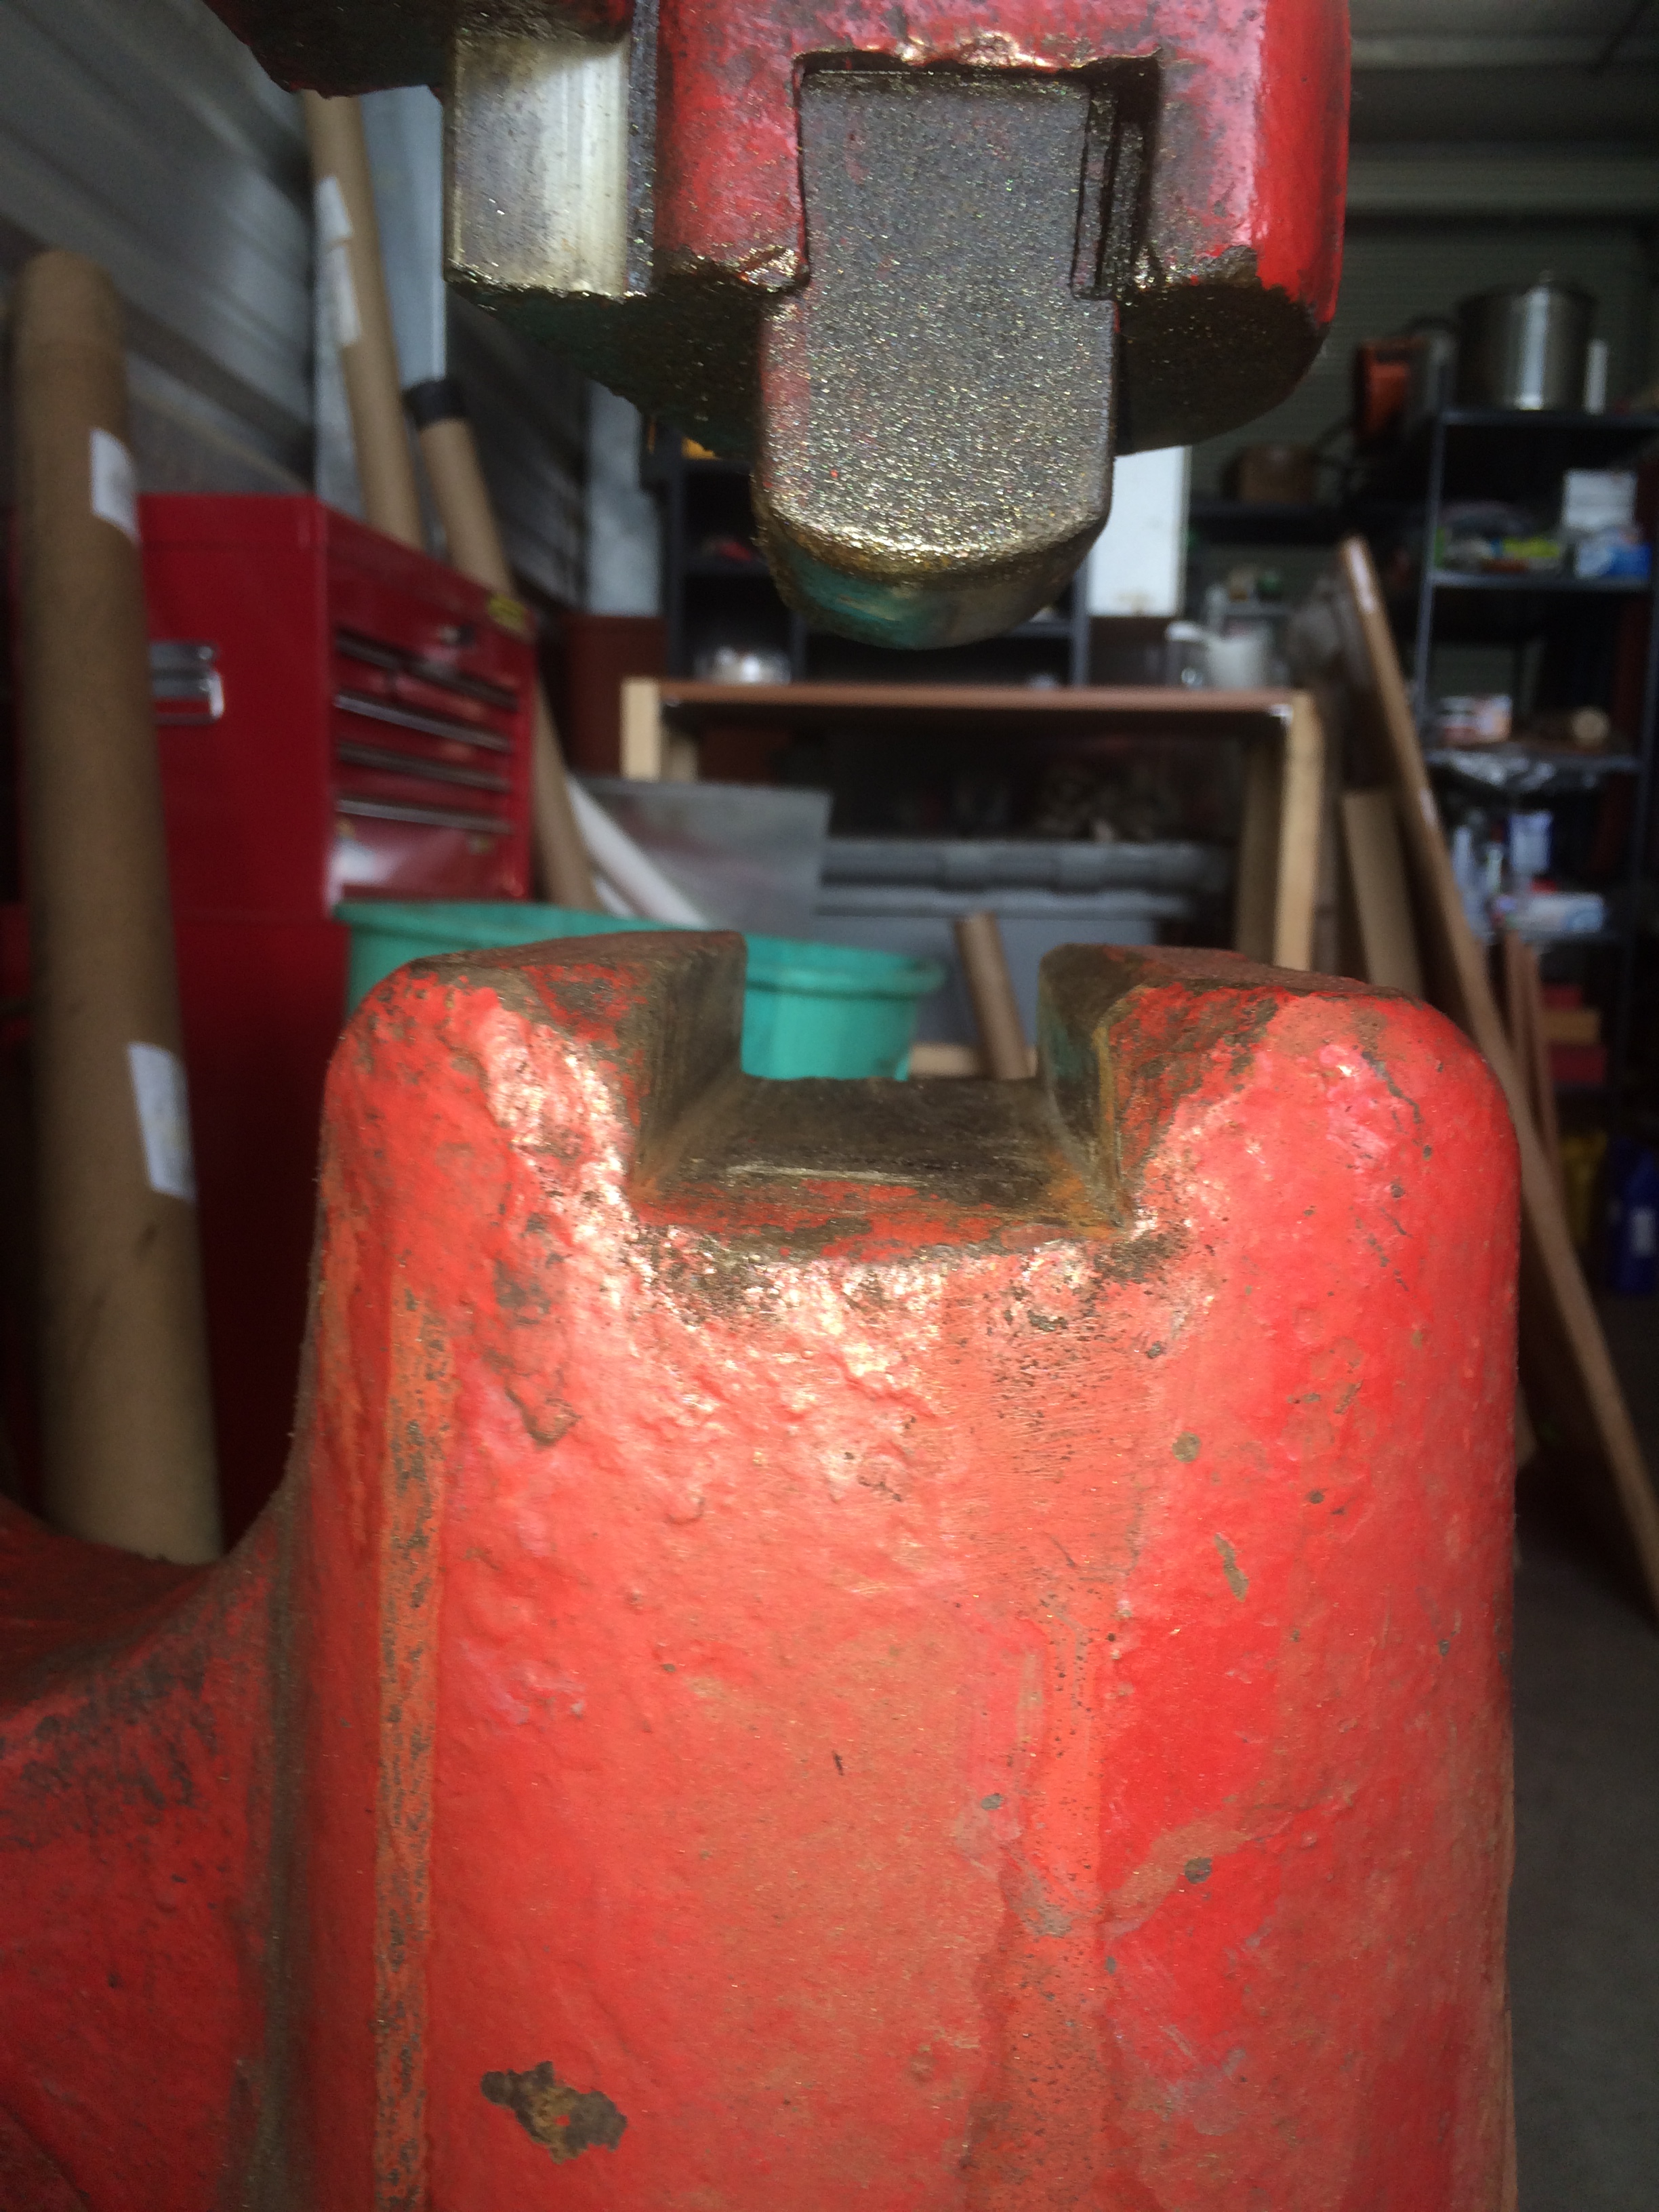
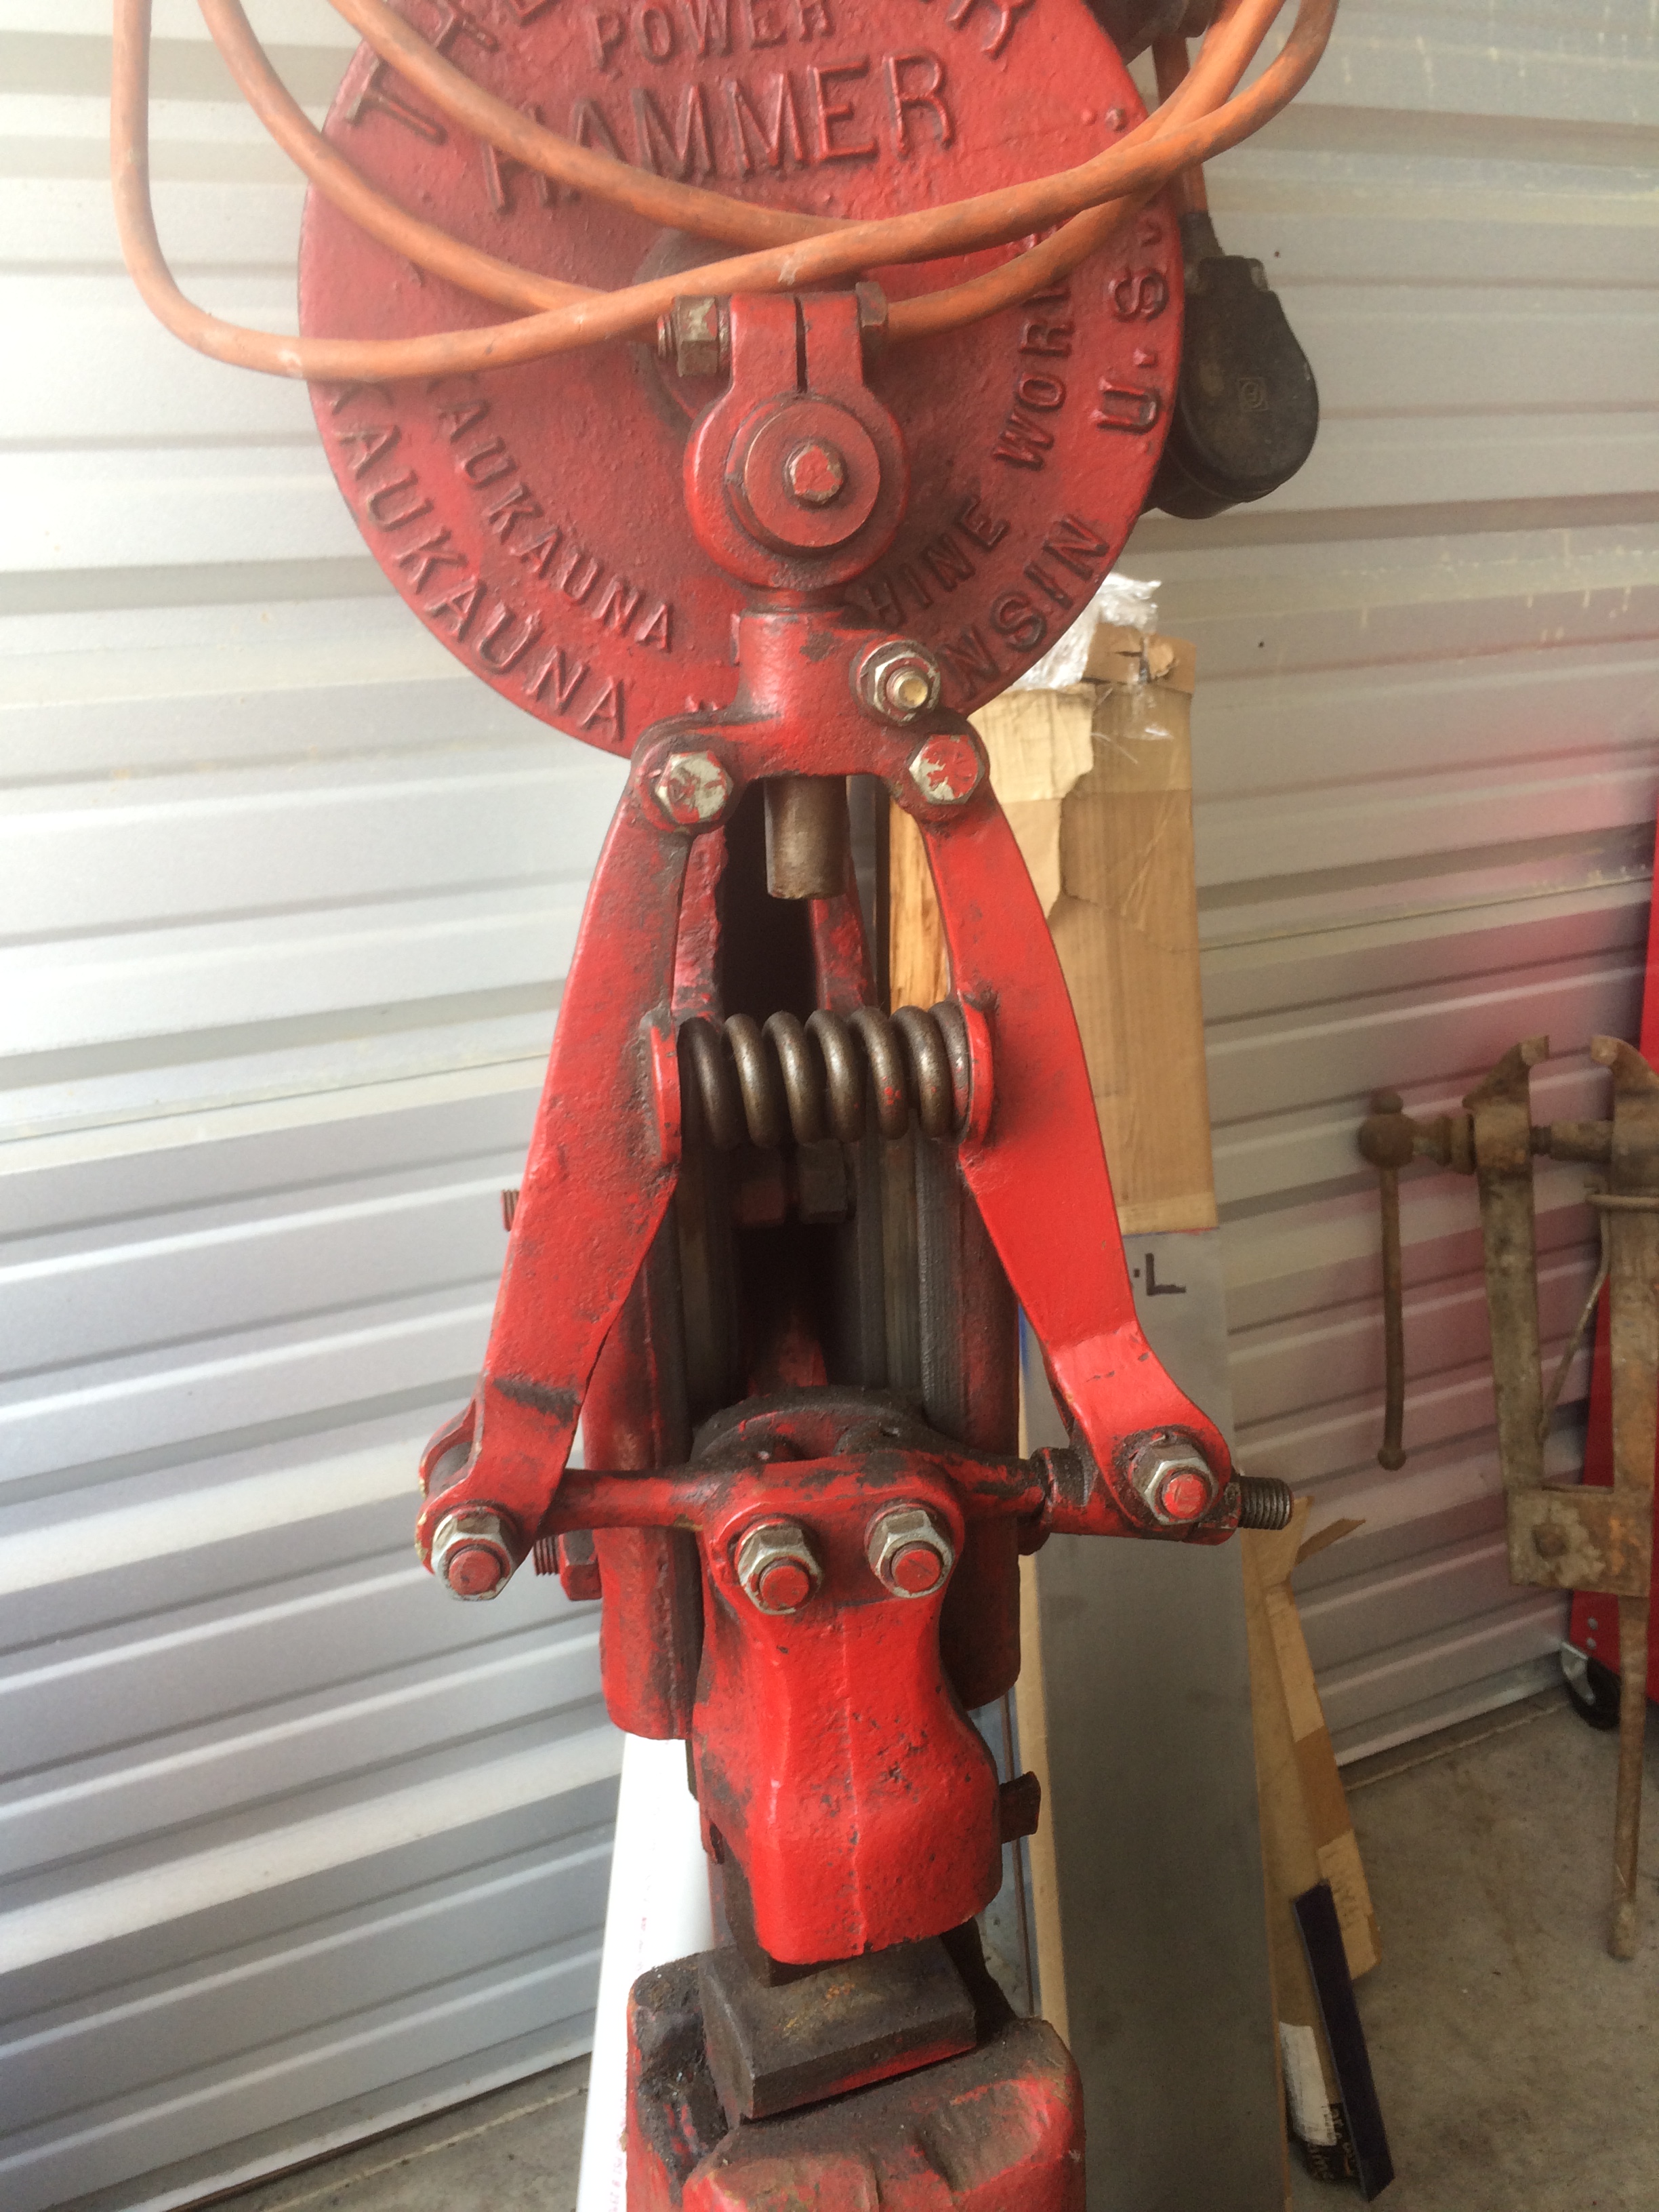
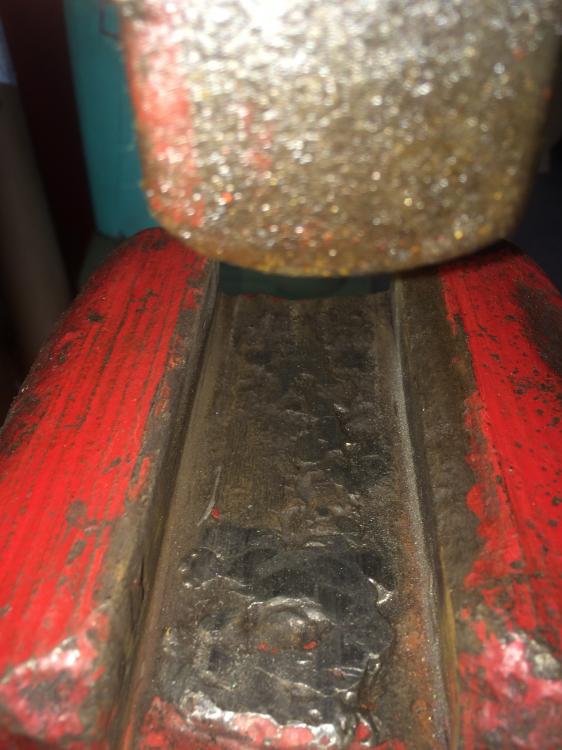
The main reason is because everything I've read said it is important that the key rests flush with the die and dovetails or else it will wear improperly and could break off the dovetail. Since this guy doesn't have the removable sow block I'd like to prevent that as best I can. I'd also like to replace the dies, the pair that was included are not really to my liking. Would you guys use a file? I'm not sure I could get an angle grinder in there and truthfully I don't know that I would use one even if I could for fear of removing too much material. Ultimately I'd like to have a pair of dies in it like the photo below. -Clint
-
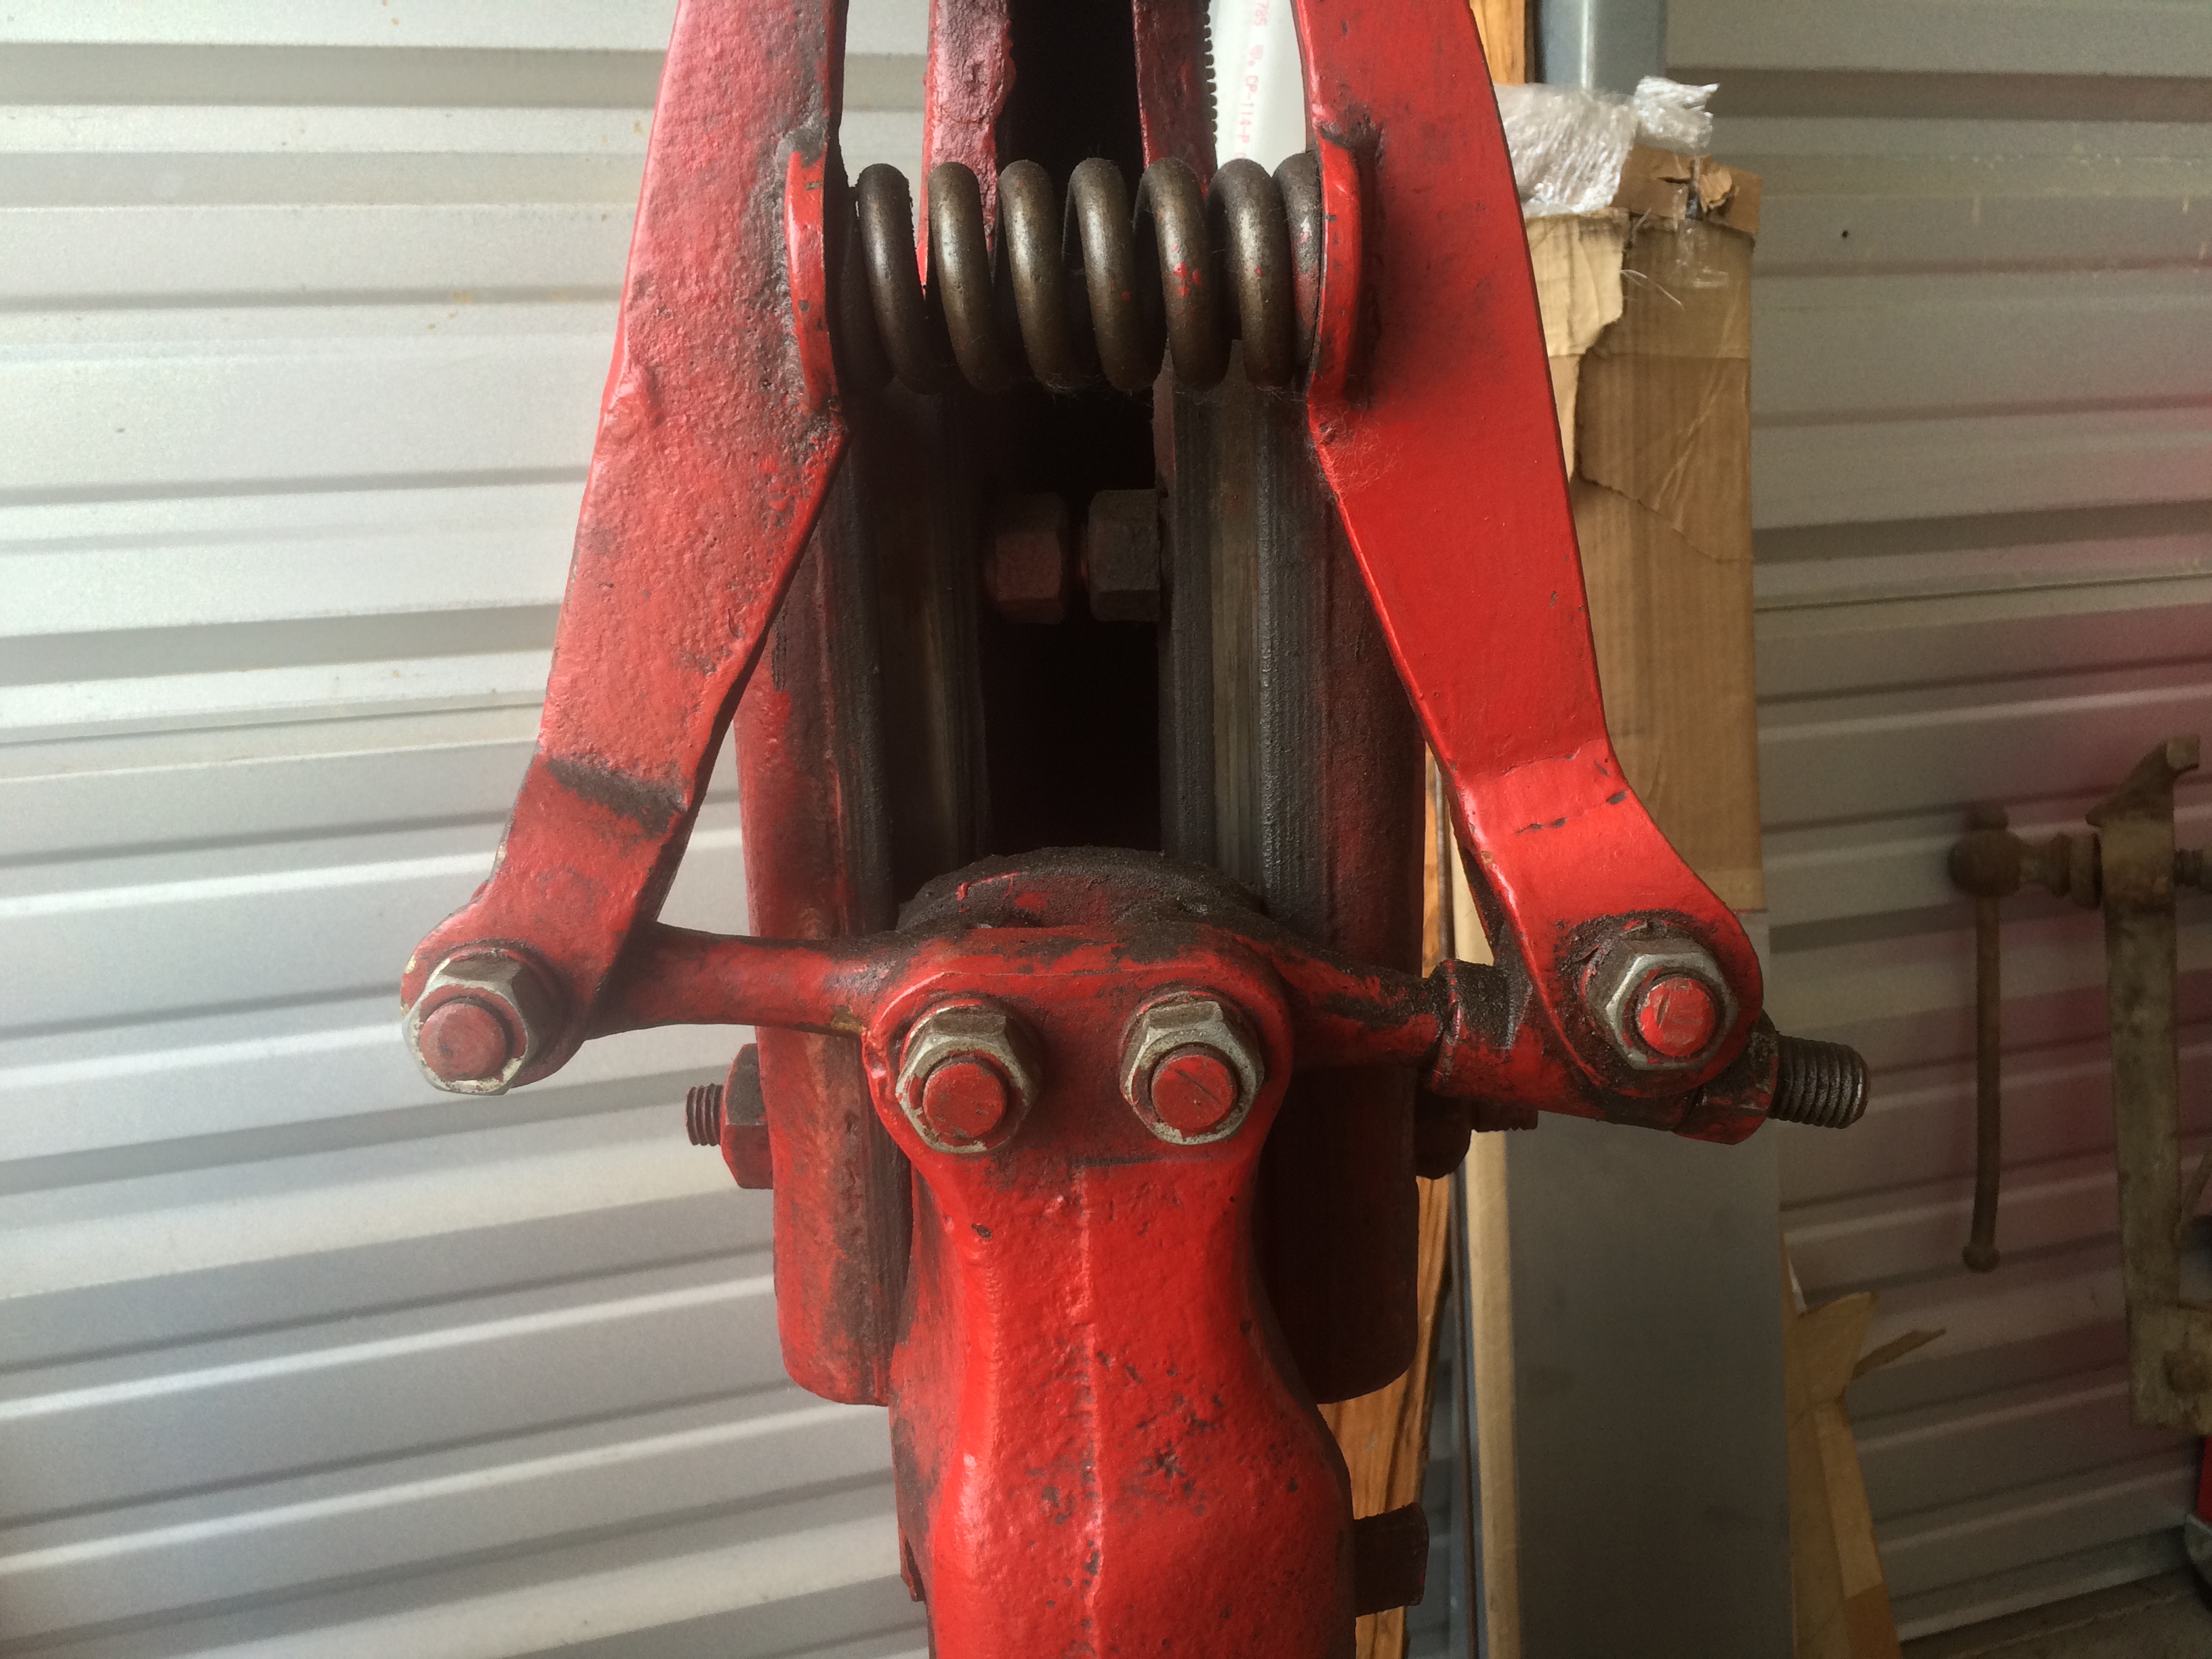
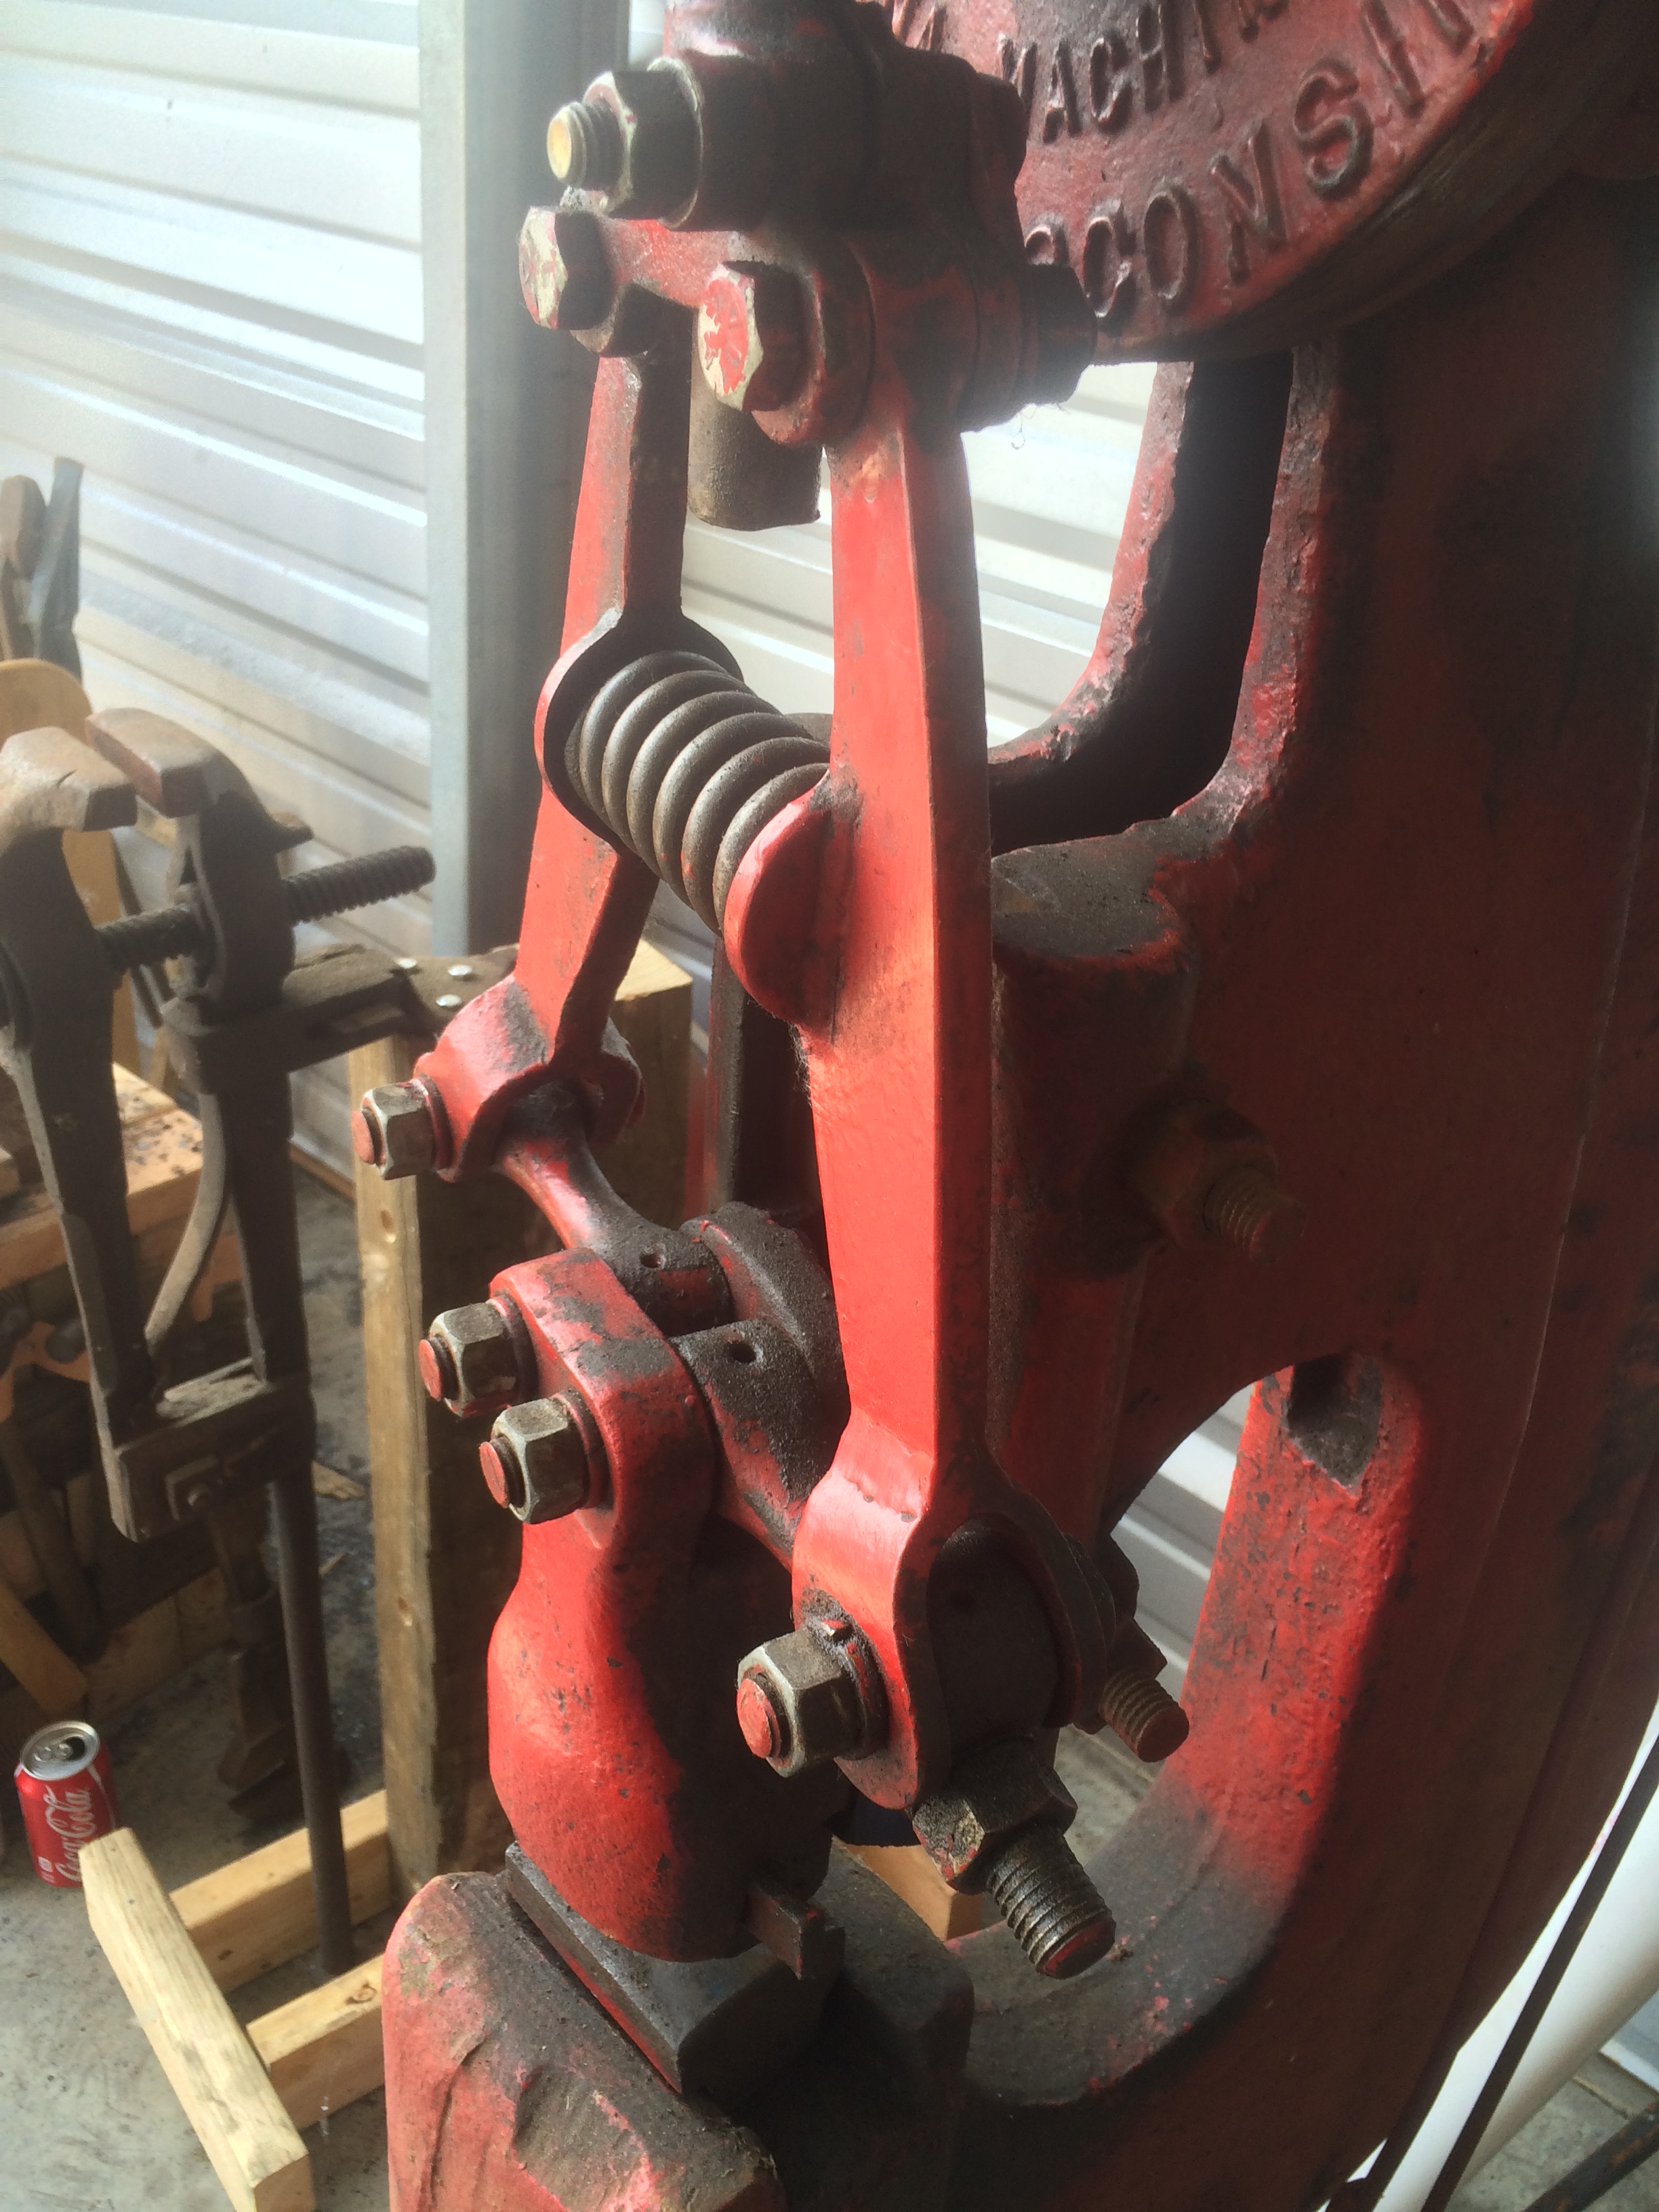
Hey Guys, I figured another Mayer Bros thread was just what the forum needed One of the few issues I've found with my hammer is the lower dovetails look worn to me. There is hardly any angle compared to what I see in photos and literature. So my question to you guys is how would you fix it? You can see from the photos that the top dovetails look pretty good but the bottom is almost a straight up and down. I do have Kern's book and a pdf from Sid, I believe, but none of them really detail what process and tools to use. I think the book says use a mill which is not an option! Also would you grind into the dovetail or grind the die and just clean the dovetail up? Thanks -Clint

-
Hey Larry, its funny you mention this as I'm about to make a post on my 25lber because the dies do not match up and I want to use it for knifemaking and would like more precision. I'm thinking of regrinding mine until I can get some steel and make my own. I've asked on here about making them and I know a lot of guys do. It was recommended I look at some scrap forklift tines. As far as actually making them or star hammers I'm afraid I can't be much help but I'm sure they folks here will chime in. Your Mayer Bros hammer is coming along nicely btw. -Clint
-
Cool video, quite impressive. I would have thought Thor's hammer would have been forged in Valhalla, go figure.
-
forge welding, and quenching
Augus7us replied to Tempered Warrior's topic in Blacksmithing, General Discussion
I feel compelled to read this book for no other reason than it being written by someone named Lord Bacon. -
Working on my Mayer 25lb
Augus7us replied to lloe01's topic in Power Hammers, Treadle Hammers, Olivers
Frosty if I understand him correctly it looks like the left arm will not slide into the crosshead. You can see in the last photo he posted one is in the other is not and I'm guessing that the one on the left will not slide into the ears on the crosshead. Larry correct me if I'm wrong here. I don't know that I would grind the arms because if you do get a proper cross head you may end up with play and have to shim brand new arms because of that. -
Working on my Mayer 25lb
Augus7us replied to lloe01's topic in Power Hammers, Treadle Hammers, Olivers
Mine has one as well I think Richard Kern referred to it as linoleum in his book. It may be there mine separated and got pushed back on the clutch cone so it looked like it wasn't there. In fact I was going to ask if folks glue them to keep them in place. -
Working on my Mayer 25lb
Augus7us replied to lloe01's topic in Power Hammers, Treadle Hammers, Olivers
Thanks lloe that looks a lot like mine so maybe it wasn't modified after all. May just be that its different on some or all the Little Giants which is what I was comparing it to. -
Working on my Mayer 25lb
Augus7us replied to lloe01's topic in Power Hammers, Treadle Hammers, Olivers
Very cool lloe thanks for documenting it. I will be watching it as you progress. I'd like to see some photos of the clutch and lever assembly as I think that may be the only area on mine that has been modified. Just not enough out there to compare it to. If you get a chance post some photos up. Likewise if you need any of mine just let me know. -Clint -
lloe01 please take photos as you restore her. Not a lot of documentation out there for Mayer's Bros hammers.
-
Very cool and sounds like you are going to have an excellent time. Please do post lots of photos! Always enjoy seeing something I'm passionate about through the eyes of a different culture! Be safe!
-
Here you go brother, hope they help. Let me know if you need more


-
Hey lloe if you still need photos I'll snap some of my 25lber when I'm back in the shop. Let me know if you need photos of anything aside from the ram
-
I was able to find a place by asking on here a few weeks ago. But all the ones I was recommended or called, before posting, told me the same thing, no more people in the yard due to liability.
-
How do I get in to blacksmithing?
Augus7us replied to Kromac's topic in Blacksmithing, General Discussion
I'll add my 2 cents here. I'm new to the blacksmithing world but had similar aspirations from the sounds of it. I would love to quit my job and hammer and grind all day. But I'm almost 40 with a family and that isn't in the cards right now. First I think you need to ask yourself do you want to make blacksmithing stuff like hooks, gates, tools, sculptures, etc. Or do you really want to make weapons? Most youngsters like yourself are usually more interested in making blades and axes than stair rails and fire pokers. Personally I find enjoyment in both. But you may not and may be speaking generally because you want more varied responses and hope to find some master smith toiling away in your area in desperate need of a young buck to help hammer out katanas under his tutelage. Sadly those days are gone and though it is possible to become an apprentice it is very rare as has already been stated. Depending on what your answer is to my question above, how much money you have to spend and what your space is like (you aint smithing anything in an apartment with angry neighbors). As others have said stay in school, get a good job and work in your spare time towards your smithing goals. If you want to blacksmith Frosty's post is an excellent start. In fact read all you can here on new guy stuff and watch videos that are out there to get an idea of what blacksmithing is all about. Go to local hammer ins and blacksmithing gatherings like Sofa's quadstate. If you want to get into knife making I've seen guys do it on 3rd floor balconies in apartments with little more than a file guide and files, some clamps, sandpaper and epoxy. That is probably your cheapest method of getting into it. If this sounds up your alley then start with stock removal knife making since you really need to grind every knife anyway, forged or not. My aim here is to encourage you and point you in the right direction because I wish I would have gotten into this when I was younger, starting at something like 25 would have been amazing to me and for you that gives you six years to build up a plan and equipment. You now have two "budget" methods to get into either. As well You may graduate, get a good job and have all kinds of tools and anvils by your mid twenties, it goes by quick. And if you want to do both eventually a lot of tools will cross pollinate. Grinders, drill presses, bandsaws, etc are useful in both blacksmithing and bladesmithing. The key to doing one or both is passion. There is more than enough free information on the internet in the form of forums, videos and how to sites to give you an idea what it takes. Read up and watch as much as you can. You will find that anyone doing this and worth their salt has spent many years perfecting the craft and acquiring and building tools and knowledge they need. Good Luck!