
boraeili
-
Posts
35 -
Joined
-
Last visited
Content Type
Profiles
Forums
Articles
Gallery
Downloads
Events
Posts posted by boraeili
-
-


Recent Blade I made for a client. Probably one of the nicer blades I've ever made. Im proud of it, what do you guys think?
-
i dont want to mimic him because i think its important to develop your personal style, but John Hounslow-Robinson is an inspiration for me to become a bladesmith.
-
21 hours ago, lanternnate said:
Hi all. I have a simple little cross peen hammer I picked up used from a gentleman who buys and sells used blacksmith tools. It's nothing special, just a little no name 2lb cross peen. I like the way it feels in my hand though, and it was my "first" blacksmithing hammer. This weekend the head started slipping off the handle. I hammered it back on with another hammer, but after a couple more swings it was coming off again. I set it aside before I totally lost it, but is there any way to fix it? I know people will put new handles on an existing head, but is there any way to get this handle and head fitting tight again? I'm kind of sentimental so if it can't be fixed it will probably stay set aside as is. Thanks for any help, and if pictures or anything are needed to help answer just let me know what angles you need to see. Thanks guys!
Yea, making a new handle aint hard... but you can always soak the handle eye in a oil that doesn't dry to keep it expanded, i do this to a lot of axes i own, and a few hammers. i will probably get ridiculed for this by the others but it can be a viable temporary option i suppose.
-
On 11/24/2016 at 7:12 PM, Kevin_Olson said:
I think that looks like a pretty good 2nd hammer. Tell us exactly how you heat treated it.
whoops haha, forgot i posted this on the forums.... i got both heads up to critical temperature and then i quenched it in a brine quench instead of just plain water.
On 11/27/2016 at 6:36 PM, littleblacksmith said:how I would go about heat treating a hammer.
Heat up only both of the two faces, not the cheeks, by flipping it over in the fire. Once up to critical temperature (depending on the alloy) I would quench in water. With the cheeks not being hot, the hammer will then cool quicker. Or at least that's what I've heard.
Then I would stick two hammer eyed drifts in the forge; one in the sweet spot, and one off to the side. once one was hot (a bright yellow) then I would stick it in the eye of the hammer, and let it cool. Once it is down to a dull red, I would grab the other drift that was heating up in the forge, and replace it. I would continue that until the face of the hammer was a straw color, and would quench. While it is tempering would be the time that I would apply a hot oil finish.
Littleblacksmith
i just used a heat treating oven for the temper, but the actually heat treating i just used a coal forge to get it up to temp... dunno why i did it that way now that i think about it.
On 11/25/2016 at 7:08 AM, Lou L said:What Kevin said. Nice hammer. I would love a debate about heat treating hammers. I have plans to make a rounding hammer next spring and would ferret away every scrap of information.
thank you. i need to make some slot and punching hammers in this next week or so.. power hammers make a world of a difference haha.
-
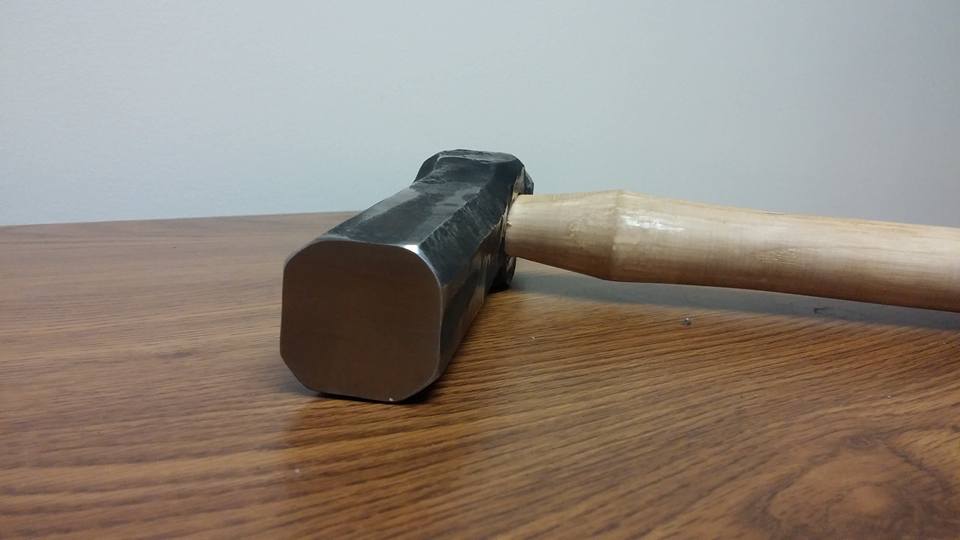
Been on a tool making kick lately and ive been wanting a rounding hammer, 4140 with a walnut handle, 3lbs.
.jpg.44a54414ed7edfe5317ccbaf616d99b2.jpg)
-
On 11/7/2016 at 6:54 PM, C-1ToolSteel said:
It is Absolutely inappropriate to put pictures of a naked hammer on a public forum!
¯\_(ツ)_/¯
On 11/7/2016 at 6:56 PM, BlasterJoe said:I'm new to the game. How do you heat treat with a pressure washer?
its pretty thick so i dont think just quenching it in water would get it down to temp fast enough, so i used a pressure washer... was probably overkill but better safe than sorry in my opinion.
On 11/7/2016 at 10:16 PM, swedefiddle said:Good Morning,
Heat treating depends on what you made it from. I use 1045-1050 and I quench with water, dip one end in the water and either flip it for the other end or use a garden hose. Leave heat in the center and you can watch the Tempering Colours run. Do all your grinding before Heat Treating.
Neil
yea that probably would've been smarter in hindsight.... i normally make blades so forging hammers is a pretty new process to me, this is my first hammer.
-
On 11/6/2016 at 10:40 AM, ThomasPowers said:
I thought that too but thought that the end user would dress it to suit themselves...
On 11/6/2016 at 10:17 AM, swedefiddle said:Good Morning,
It looks like it has too sharp of Edges to forge something without making Cold Shuts. I Know, It's your Hammer!! It's the way I want it!!
Neil
no you guys are right, i haven't dressed it yet, because i haven't used it yet.
-
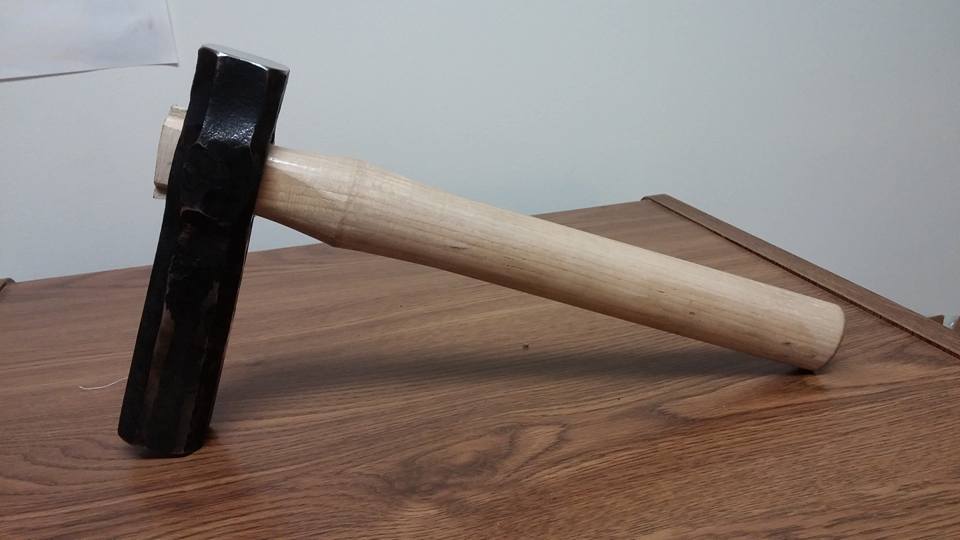
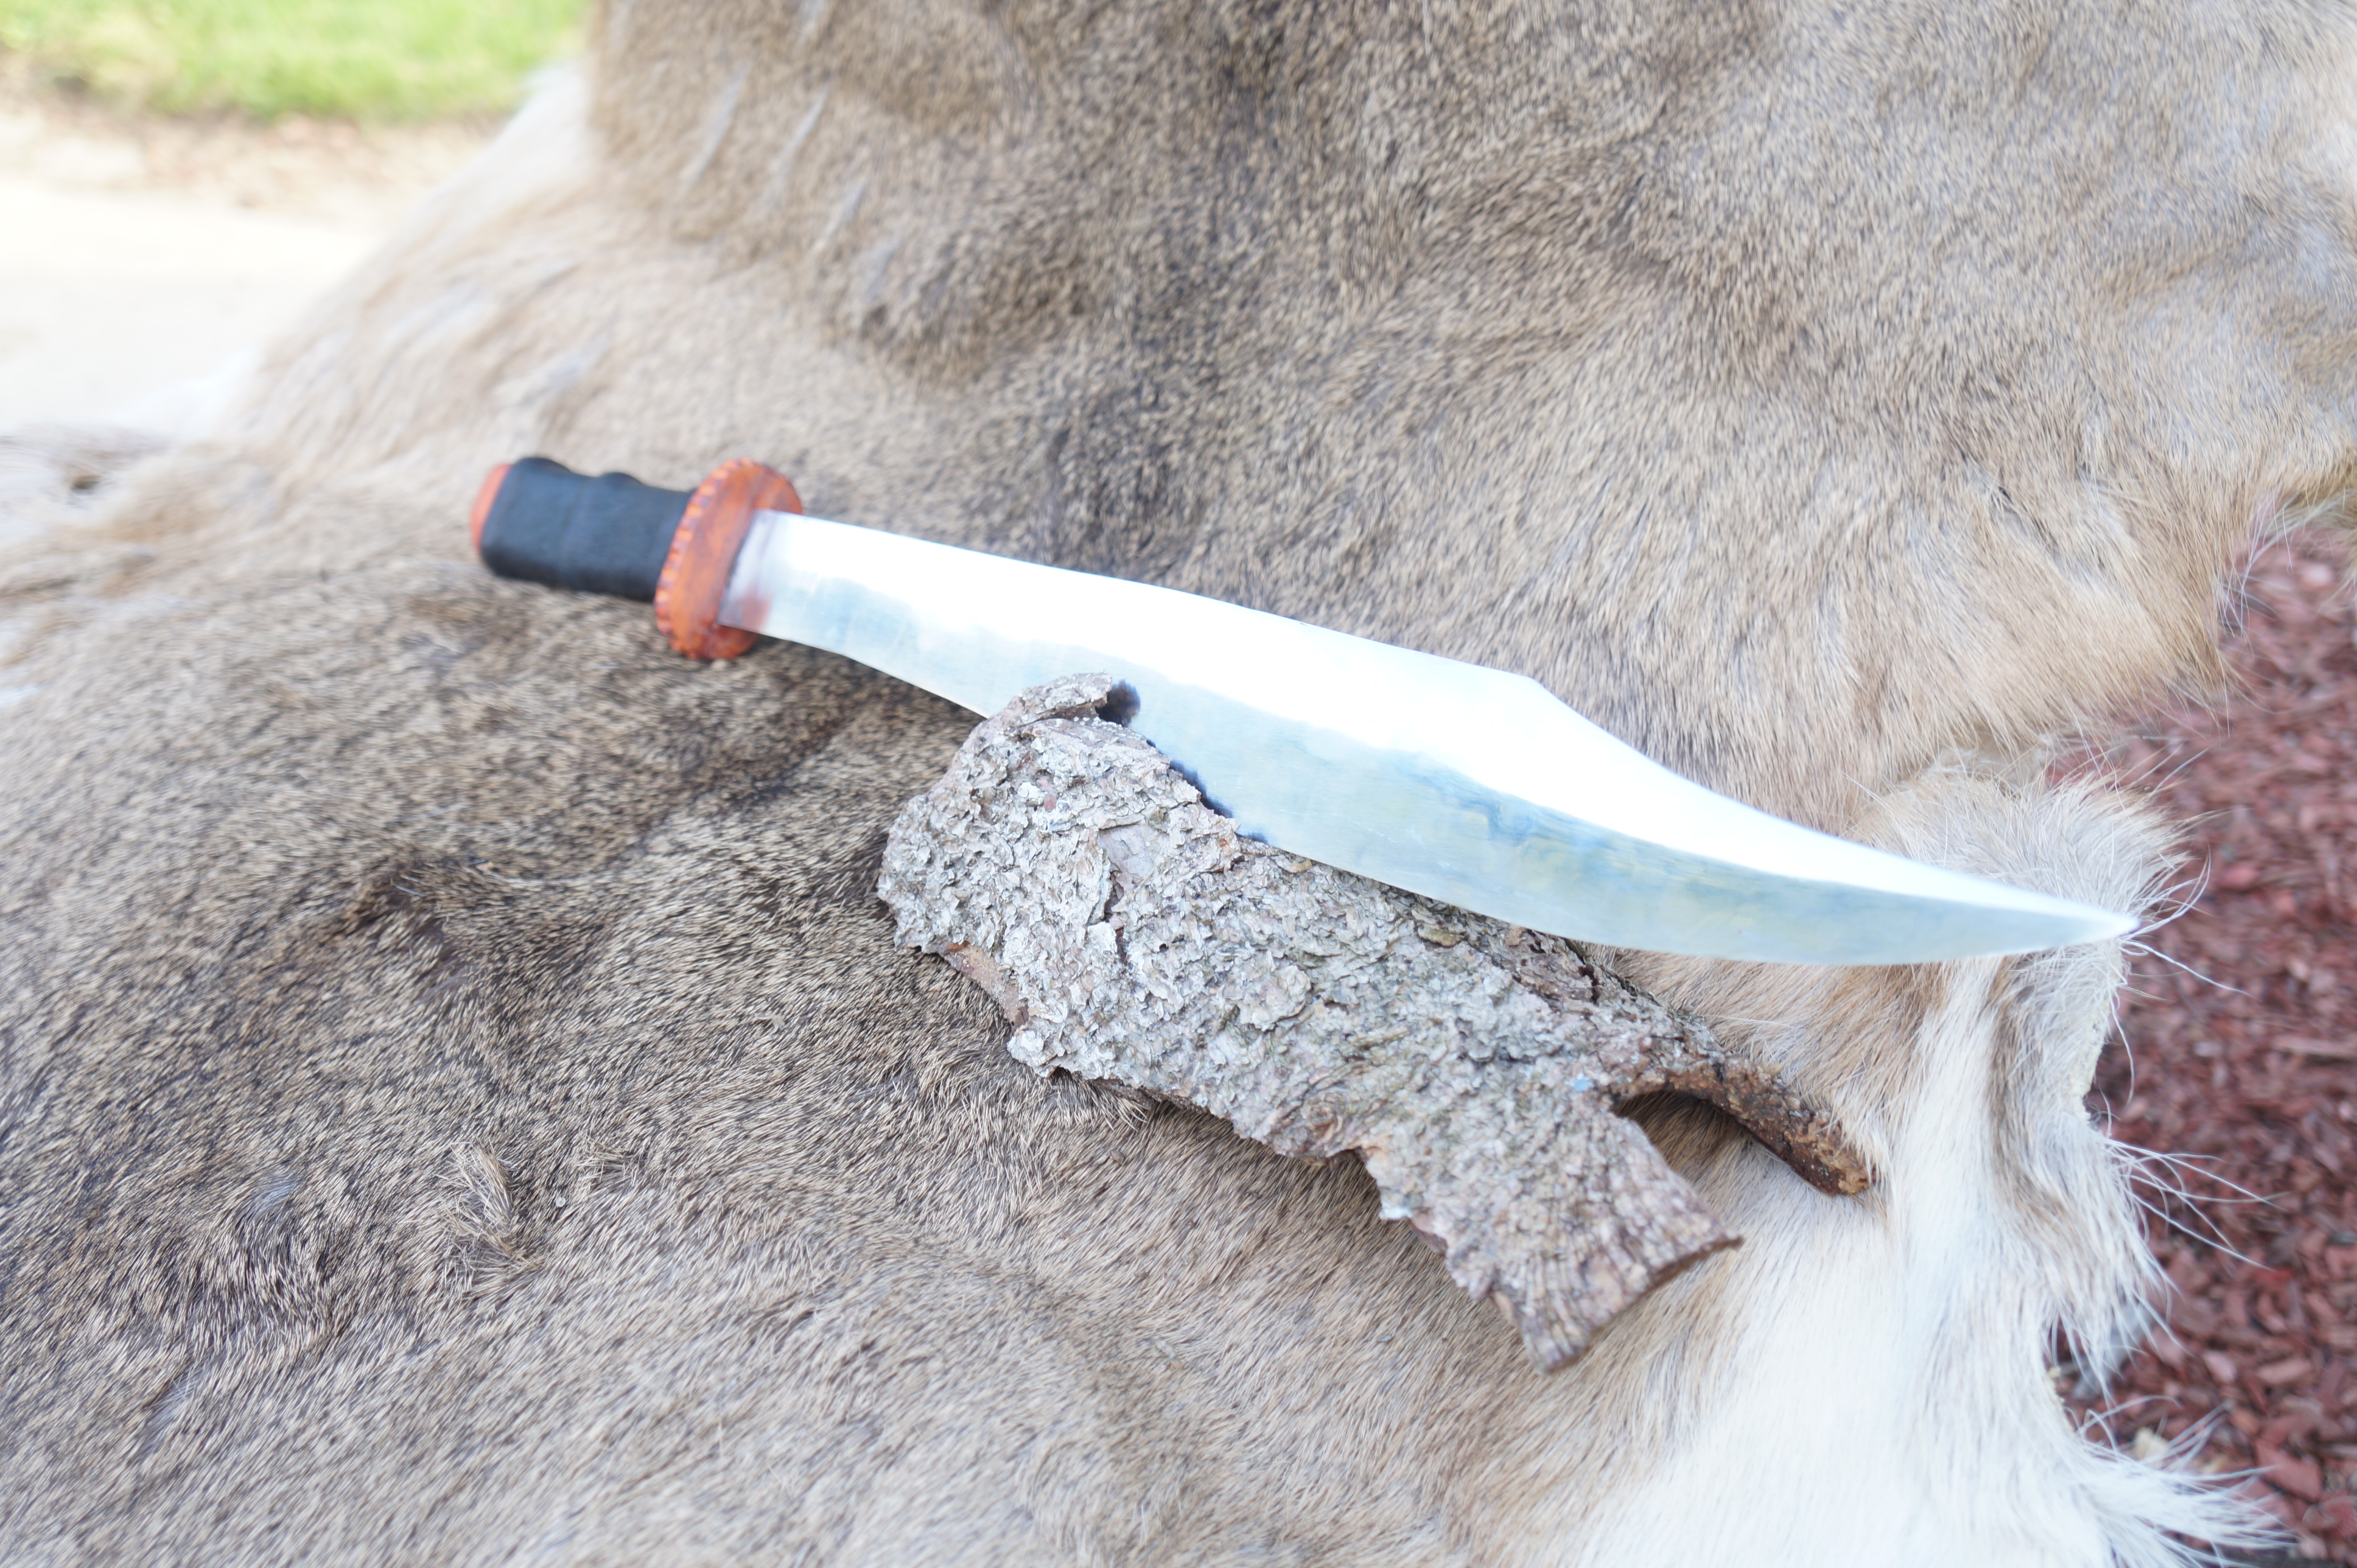
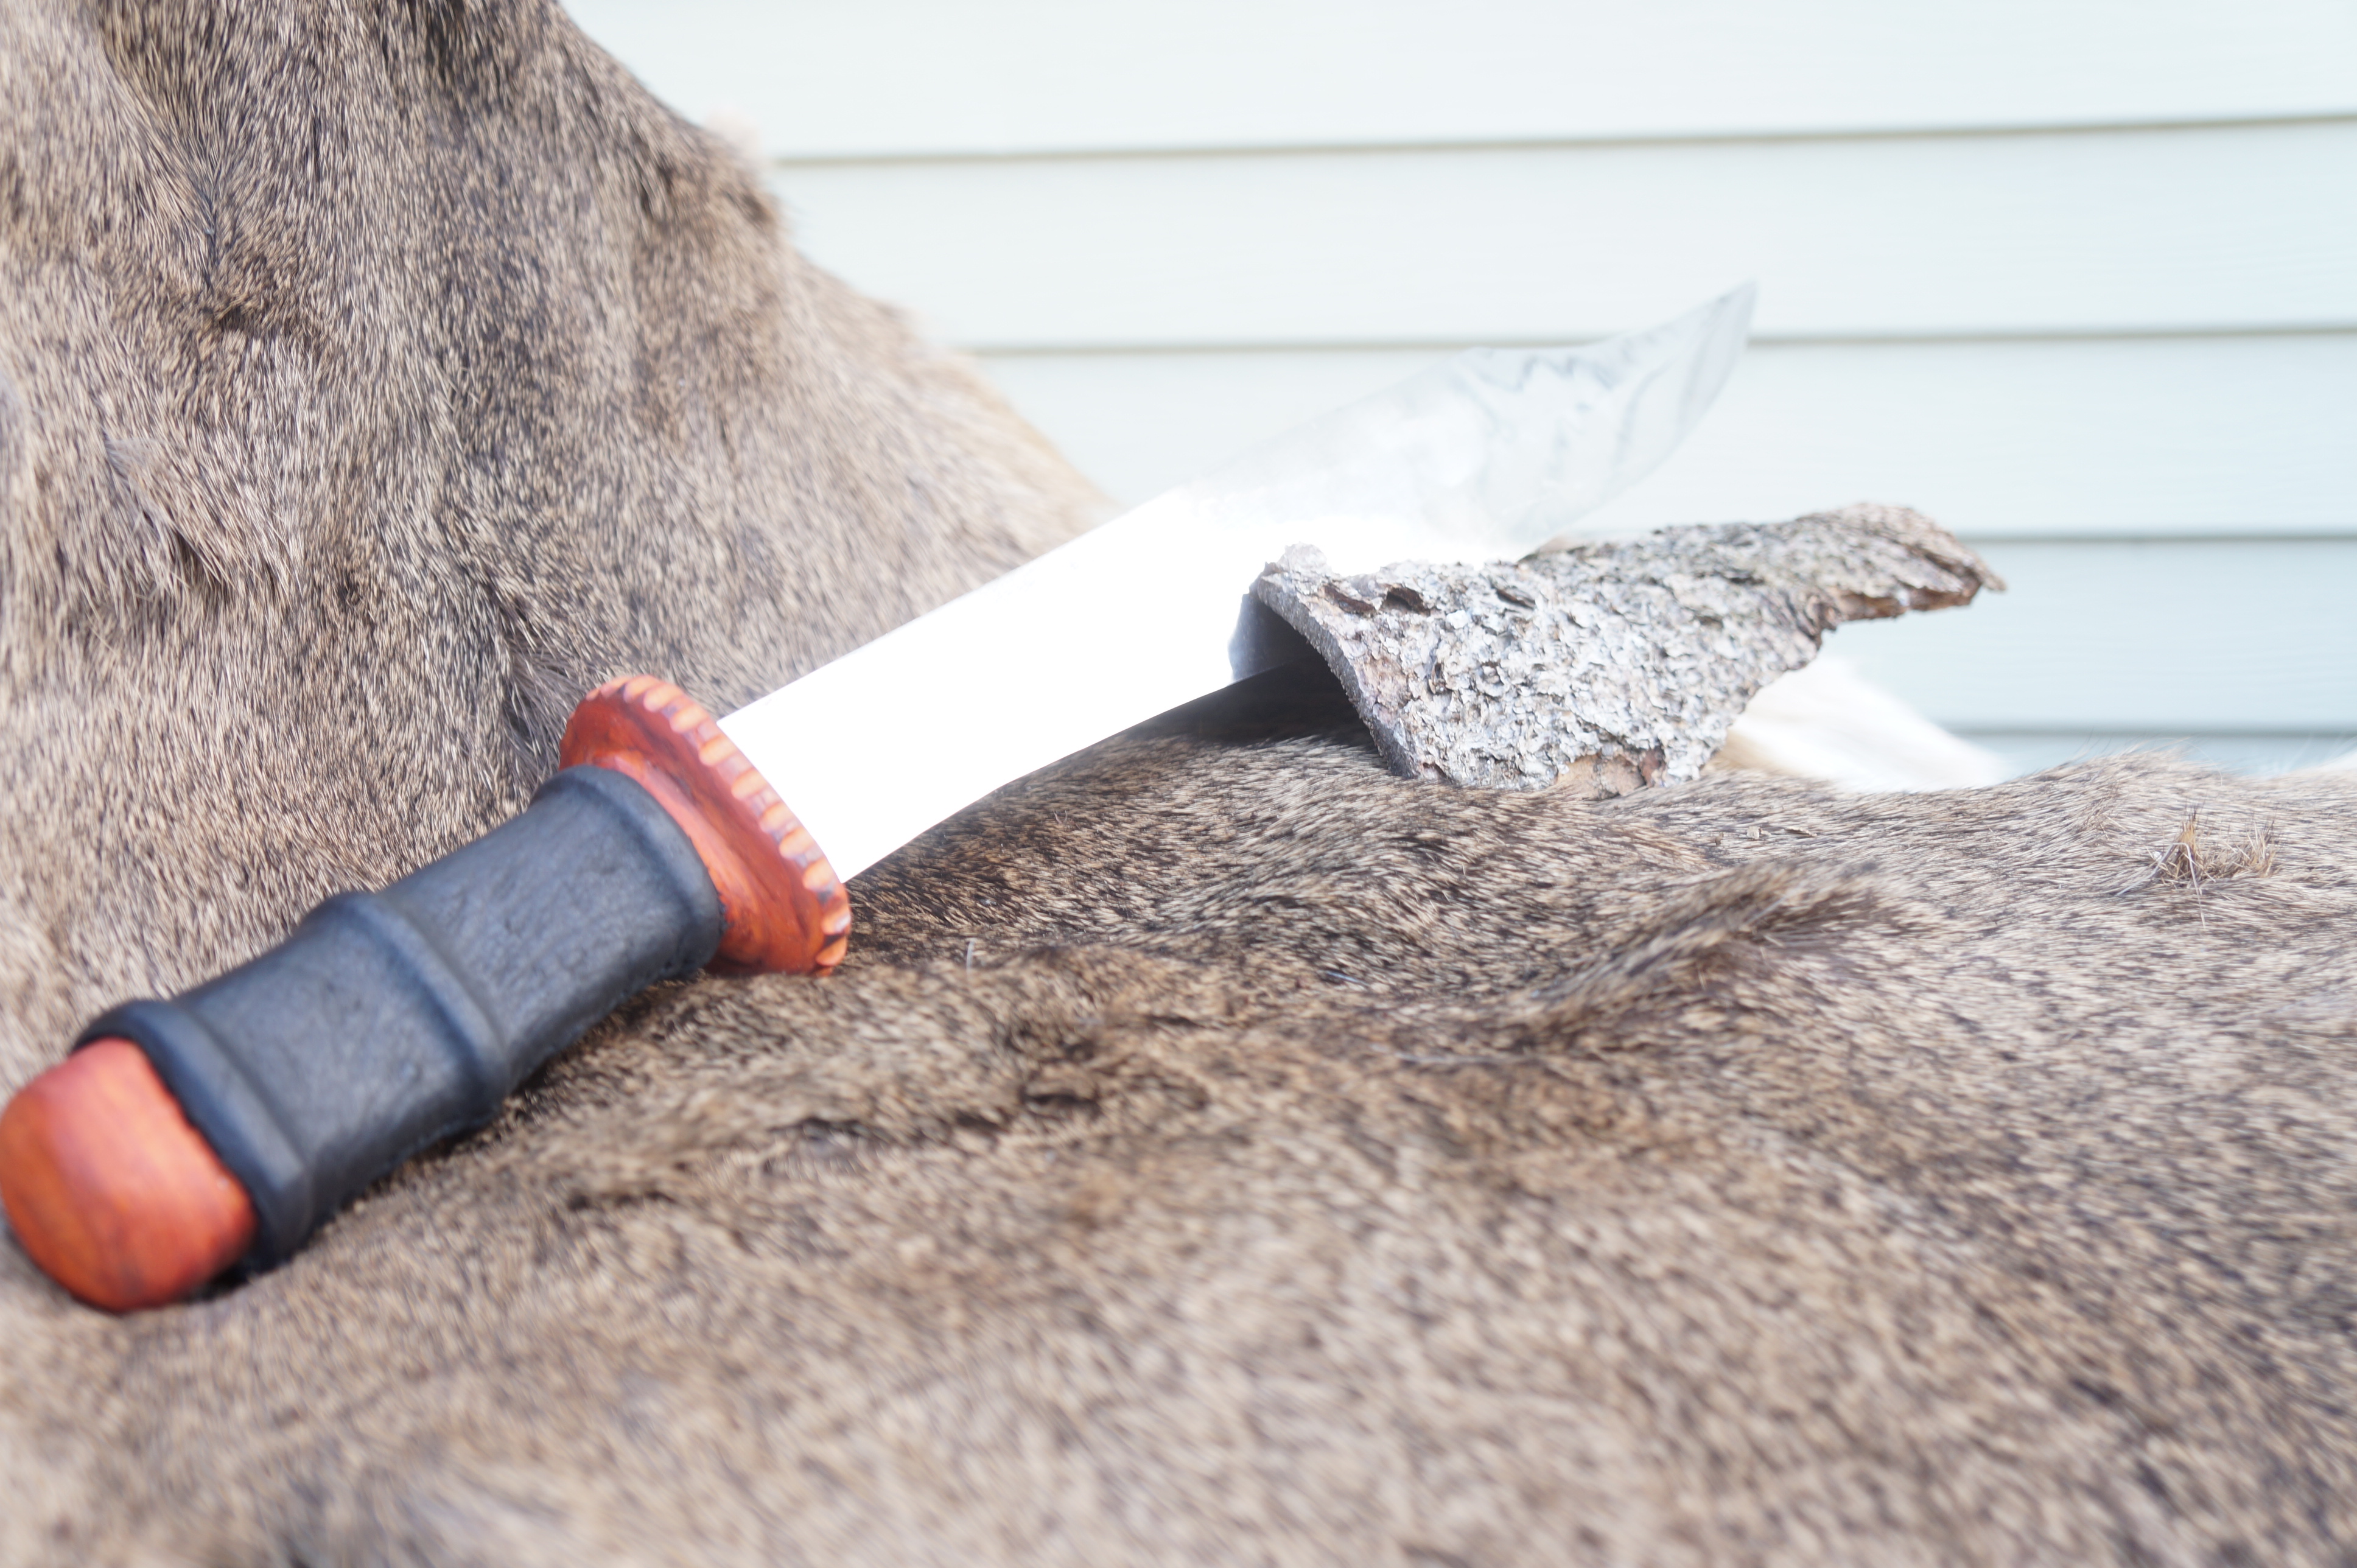
Forged a 4140 Dog head hammer, heat treated with a pressure washer and I was surprised how well that worked.
-
5 hours ago, Steve Sells said:
Is that a wooden guard?
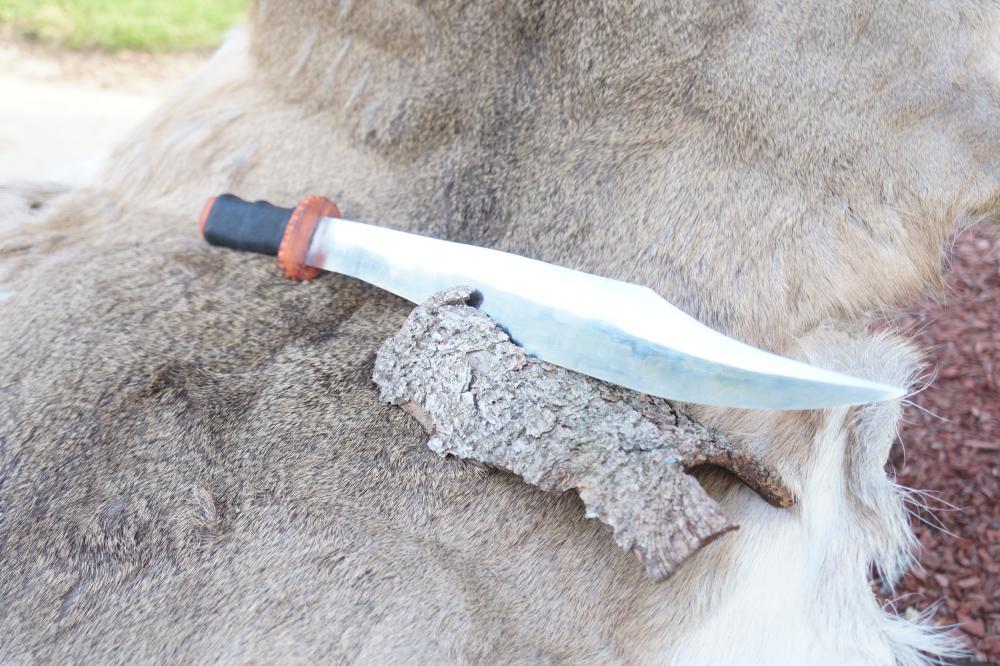
yea... The handle and guard is red paduke.
6 hours ago, Dustin Quade said:I like it alot. What are the overall dimesnions of the finished blade? Your leatherwork looks great. I have always been way to chicken to try any leather for my handles.
Its no very big, the blade is 18 inches, and the handle is 5.5 inches.
-
Recently forged a new blade... Im still pretty new to the swordsmithing scene, But what do you guys think?
1075 steel, Buffalo leather, Not quite sure what the wood is to be honest.
Inspired by Tormund Gaintbane's Sword from Game of thrones.

-
I recently created a blade for a buddy, but for the longest time I couldn't figure out how to do the fuller. I just gave in one day and I milled out the fuller.
Question is, How do you guys create your fullers without cheating like me?
")
-
So, forging in sub zero temperature outside. how often should i do this and how safe is it.
-

well, the axe is supposed to work like this... it works well, just i wish i could forge a proper one, mainly due to the lack of steel i have and lack of drifting tools. not my picture btw.
If it wasnt mild steal it would make a nice oloo, looks very nice regardles. It will be a beutiful decoration none the less.
To basic metal axes, eyed and tanged. Groved and wraped is much more of a stome thing. A tanged axe is just a big chisel mounted in the end of a branch with an aproriat nob (usualy a fork) if you turn the blace 90% and mount it in the end of the forked branch you have an ads, if you take the same blade and mount it in the end of a longer stick you have a sod cutter. An eyed axe can be either slit and drift, rap and weld, or split and weld (spit the back of the stock and form the eye, forgewelding the pole, seen on some viking axes) at this point you have two choices, a round eye or the clasic axe eye. The round eue is either taper one way like a pick head or drifted both ways as a hamer head. The clasic is usualy drifted both. The round lends it s self to found branches and no spliting if you need to rehandle in the feild and the pick type eye wont fly off. Wile the clasic "D" shaped eye lends its self well to either of the welded heads (tho split and drifted "D" shaped eyes are in the historical record) the "D" saves some work with spliting out handles from logs, and i think this is why some of the hamers and axes that are split and drifted maintained this eye. Tyoicaly these heads are drifted from both sides and retained by a wedge, but one sides drifting is posible.you ahh, you seem to know your stuff. I'll definitely use this in consideration. =)
-
welcome to the nut house. Next time try to leave off that curl, it will prevent the axe from getting into the wood far enough to split it. If yer ever in Ft Wayne call me and pop into the shop, we can make an axe together. i
I would really love that, im going to ft Wayne next Friday, maybe i can stop over.
-
I decided to forge an axe but I do not posses the knowledge of how to make a proper axes, so i took inspiration from primitive stone axes.
The axe is made from mild steel.

-
Boraeili, what are the alloys you got there? Looks like a nice assortment, did you hit a sale?
O1, A1, A2 tool steel. i got it from my grandfather(for free :) ), he special ordered it around 30 years ago back when he was a smith. he considers it "scrap" now
-
Im very excited.
these are an assortment of flat bar and square stock steel

-
Side note, I have been sporting a brown Kepi since I bought it at the Sandal Makers shop on Pier 39 in San Francisco when I was 14. All suede, and has held up to all manner of weather conditions, and use. Cost $25 back in 1979,which was a lot to me at the time, but it turned out to be one of my best purchases.
nice, since im preparing for the winter apocalypse, im wearing a fur trappers toque.
-
Look on the bottom of the anvil and report on the shape of any indentation in it.
The country it came from has some effect on possible brands; but all the PW in the USA and Australia did originally come from England so the correlation is not 100%
Some of the early Trentons were sourced in northern Europe and have the flats on the feet we think of PW with but had a large "coarse" hourglass indentation on the base IIRC.
Check along the front of the foot for a serial number and possible weight in pounds.I know this sounds very annoying, but there seriously isn't any numbers, words/letters or anything anywhere on the anvil, not even on the bottom. im not too concerned about what kind of anvil it is, i just thought it would be interesting to show off my "mystery" anvil.
-
well i kinda lied i built this thing a month ago, but since then its worked fine.
-
Chan it down, shame to have some crackhead swipe it to sell for scrap. Sorry to bring a bit of rain to the party.
they could certainly try, its on the log tight, not goin' anywhere, and its heavy as hell, the aluminum straps are stronger than you think.
Good lookin' anvil. I'd bet on it being a Peter Wright by the looks of it, though any quality anvil is a joy to use. For being in the family so long, that baby is in fantastic condition.
With your neighbors so near, you might want to consider betting the anvil in some silicone caulk or the like. That will deaden the ring considerably.
i was thinkin more along the lines of a big ass magnet, but caulk? how would i apply that?
-
well, the anvil is from Poland believe it or not.
-
yes those are flats on the feet
-
yes they are flat (ignore this post, this was a reply to a different thing, i dont know how to delete it)
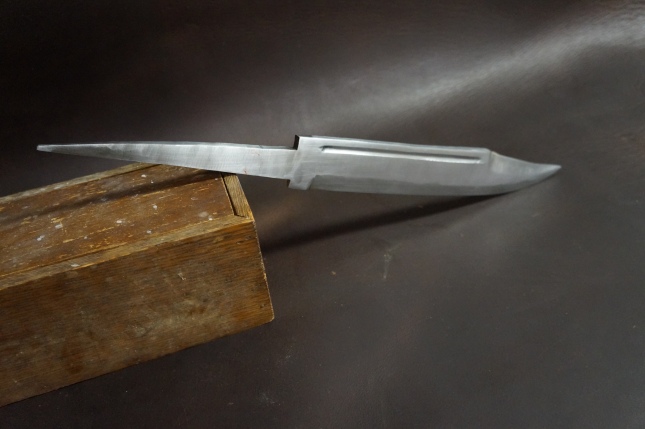
Recent Commissioned Blade
in Knife Making
Posted
Client wanted something flashy, Doesn't really intend to use it but it fits his hand okay,... 1095 heat treated in parks 50.