

GottMitUns
-
Posts
320 -
Joined
-
Last visited
Content Type
Profiles
Forums
Articles
Gallery
Downloads
Events
Posts posted by GottMitUns
-
-
Wilton has started to import some of there vices from China now and the quality is a couple of steps above HF IMHO. They do still make some in the US, and you do pay dearly for them but I think they are worth it. Before I became a educated blacksmith I was a dumb oilfield hand that would use a 4 pound hammer on a Wilton vice on a regular basis. I never had one snap but we did wear out the screw regularly.
Russell
-
Glenn,
Can you get the link posted on this thread fixed, I would like to read it.
Thank you
Russell
-
I have bought a new Snap-on ball peen!! I think it weighs 2 oz. for driving in very small and short pins and roll pins. I needed one and you don't find that size in pawn shops to often

when I'm buying used stuff I look at the following most of the time. (fortunately or unfortunately I never seem to get them in the same order).
Is the quality good enough to do what I want to do with it?
Do I need it?
Do I WANT it?
Can I afford it?
Russell
-
Well since this thread is pretty well hijacked already,,
I saw 2 jet engine turbine blades for sale just Friday!
I did learn a trick when looking for top tools and butchers in antique shops and junk shows, don't ask for blacksmithing tools, ask if they have any funny looking hammers! worked for me twice last weekend in places that were sure they had no blacksmithing tools.
Russell
-
I don't think I have ever looked at the brand of a used hammer, just its condition verses price.If its cheap enough for your budget pick it up, you will find a use for it sooner or later.
russell
-
Enriqx,
Please add your location info to you user profile so everyone will know what part of the world your in on your next new posting, it does help a lot.
-
If it passes the bounce test 150-200.00 USD is a very good price in my opinion. that's less than I have paid for mine that are not in quite as good a shape.
Russell
-
As Thomas said 2hrs drive can eliminate 6 months of learning curve.
-
Snag the books ASAP and read them and find the post on the 55 gallon forge on this forum and read it. Between that reading, your buddy's brake drum and a few trips to junk shops and garage sales you should be able to put a forge together.
Start looking around for big chunks of steel for a anvil.
GO TO A LOCAL CLUB MEETING!! even if it is a 2hr drive both ways it will be worth it. (take some cash if you have it, you never know what might be for sale)
Russell
-
Don't feel to bad Frosty, I manufacture a oil tool that hooks the packer to the tubing string. depending on what part of the world you live in and who gave you your training the bottom part of the tool could be called,
1. Stinger (Arrow, Weatherford/US)
2. Gudgeon (Guiberson/US)
3. Slick Joint ( Arrow, Weatherford, Guiberson/Canada)
4. Lug Nipple
5. Ear Nipple
6. Seal Nipple (Baker/US)
Russell
-
RDS,
Once you have the "get it hot" ,"hold it", "hit it with", and "hit it on" covered all you have to do if figure out what the "it" is.
 A drive hook that is listed in most beginner blacksmith books will teach you how to draw, taper and bend. Start with small stock as Frosty said and do 10-20 of them. start with a long enough stock that you don't have to use tongs to do most of the work, that will help a newbi a lot. Most of the hooks will probably still be in your stock pile a couple of years from now but that's the price of learning. After you have a bit of hammer control pick up some Rail Road spikes and draw one of them out to 18" and put a hook on the end to flip steaks with.
 have fun
Russell
-
Don't be to scared of the dragons head, there is a good tutorial floating around on the web of it. You will need a good vise, chisel, and some punches ground to different points. My first ones looked more like Scooby Doo than a dragon but my 8yr old son was happy with them.
-
I went about 15 years in a machine shop/fab shop with out a port-a-band until last year when I got a HF model in a trade. It turned out to be so handy that when it died I replaced it with a Milwaukee brand for my Christmas present to me.
Russell
-
I don't know the name but the look really useful!!
-
Frost, you are getting better with age!
-
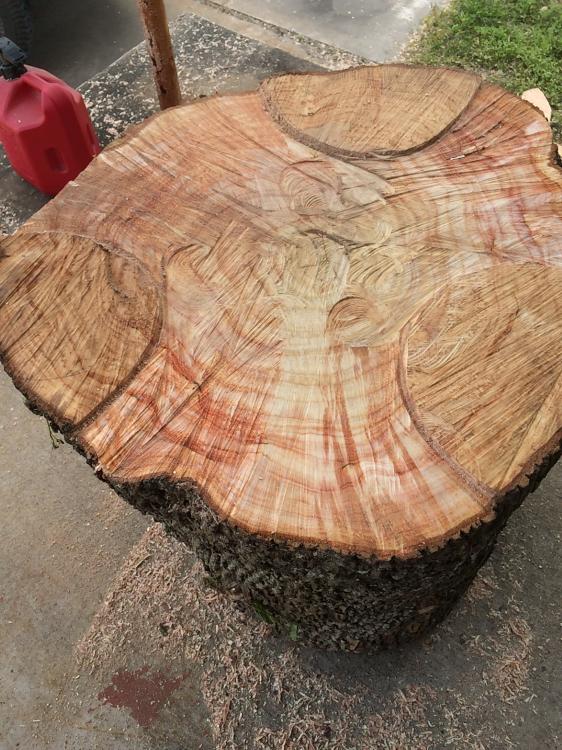
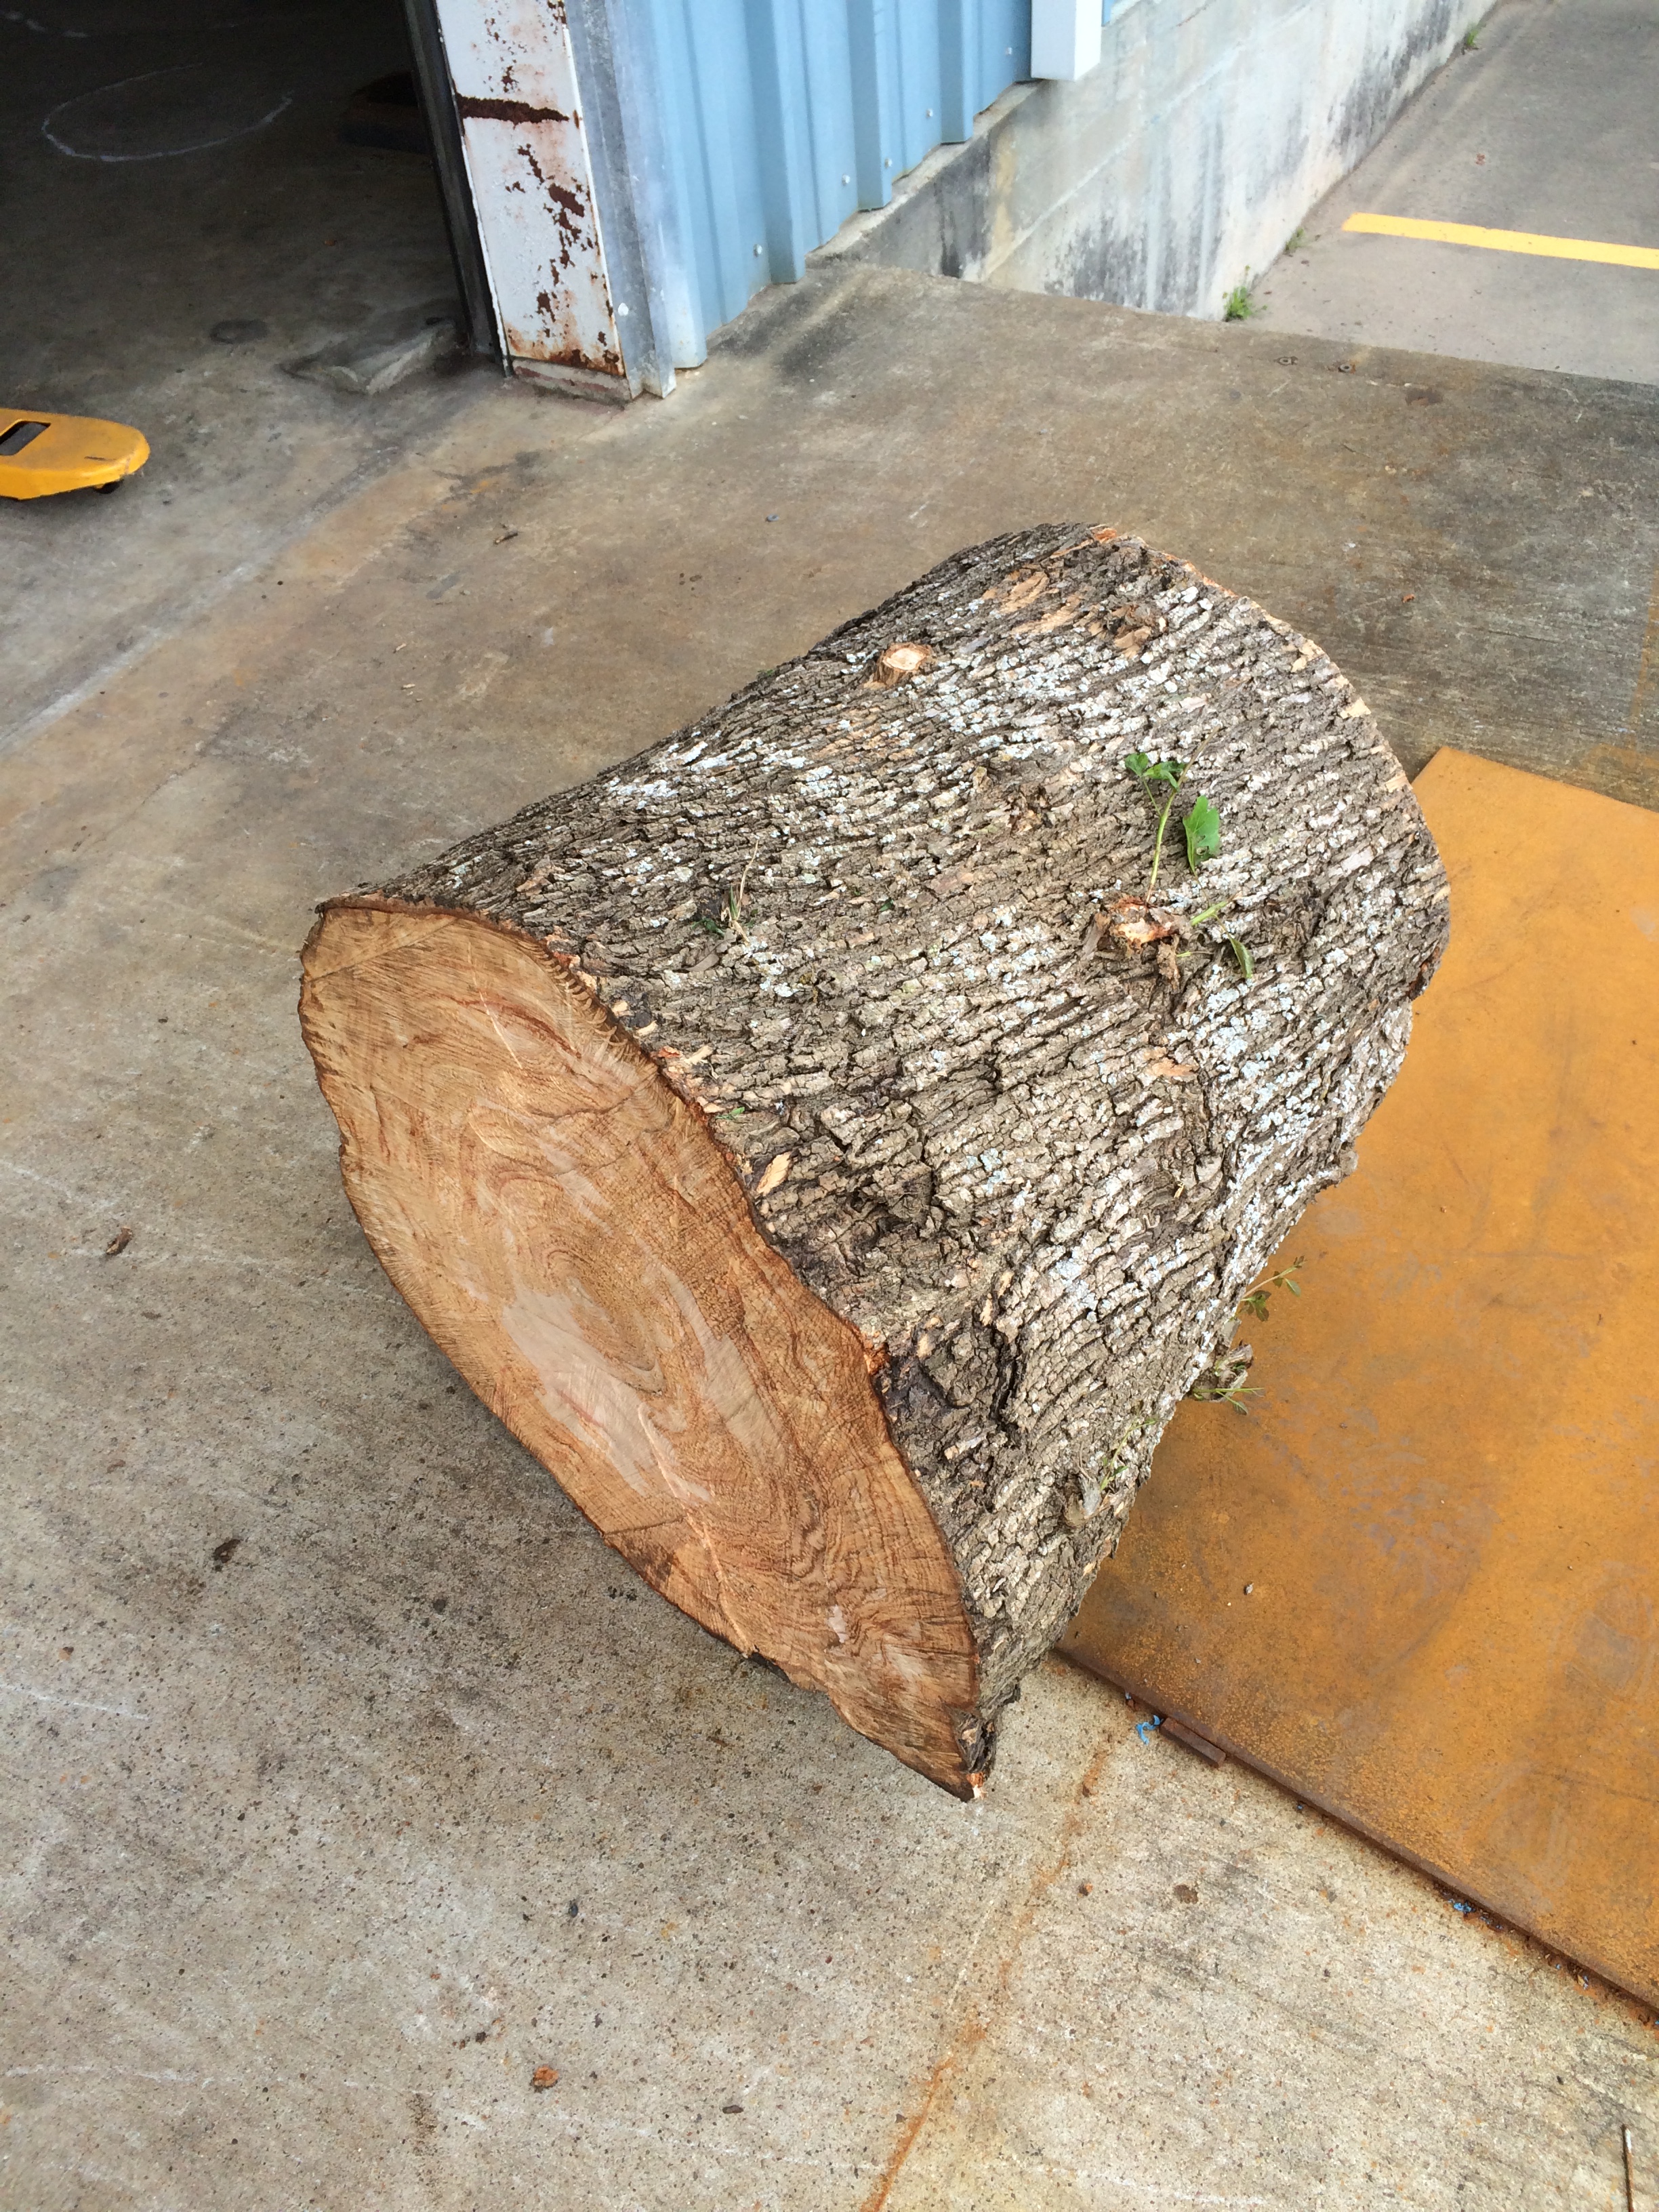
It is WET,WET,WET!! when I pealed the bark off the wood underneath smelled and felt like a just peeled potato!
I'm guessing by what Frosty, Glenn and Thomas wrote I need to seal the ends with something like boiled linseed oil and let the moisture work its way out the side grain. I'm going to try and run some steel pallet banding around it in the morning to put some tension on it while I get stuff together for a more permanent solution.
-
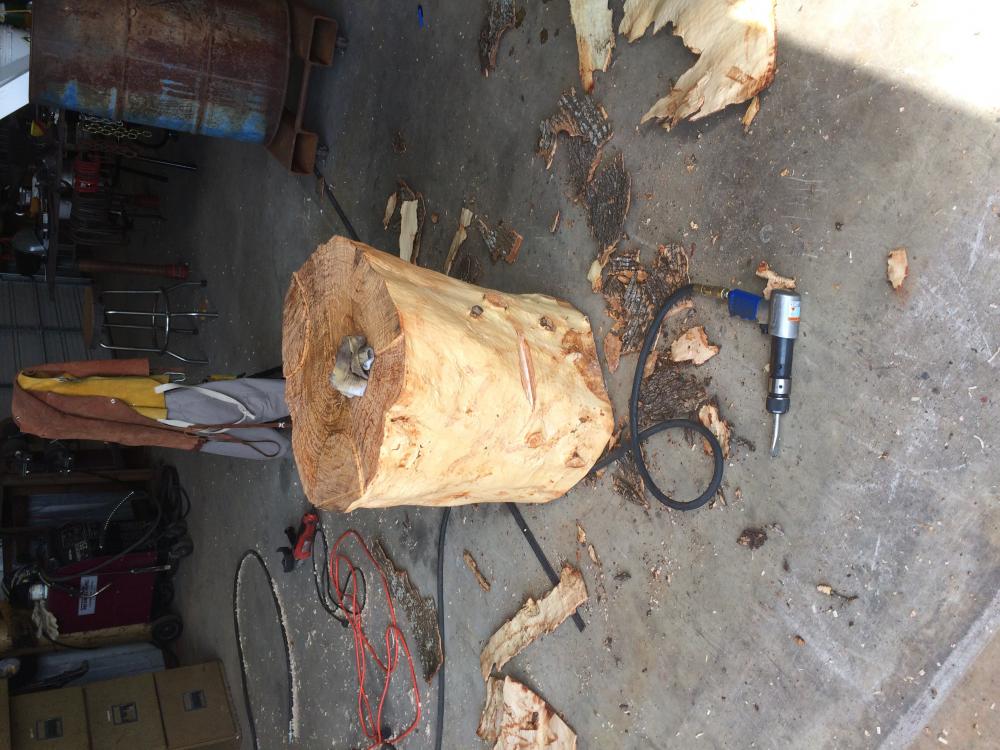
I used a air hammer with a chisel tip to de-bark the stump. Got it done in about 5 minutes. I thought it worked real slick!!!
-
Thanks Glenn!
I like the strap idea, especially for adding loops and such for hammers and hardie tools. I guess I'll start chewing the bark off of it tomorrow
-
Thanks Frosty!
I think I am going to leave the bark in place until it becomes a nuisance or starts falling off on its own. I like the look of it if nothing else.
Russell
-
If your at the point of doing Gorilla welds (strong and ugly) and you have a torch I would suggest a small BBQ pit. Lots of skill to develop trying to weld end caps on in the overhead position, if your cant make that work, and the pit is small enough you can stand it on end and weld it in flat. lots to learn on fitting doors, hinges, and stacks.
When your done with the first one someone will always take it off your hands so you will have room to do another one.
And xxxx NEAR EVERYONE will have a suggestion on how you should have done it different!

-
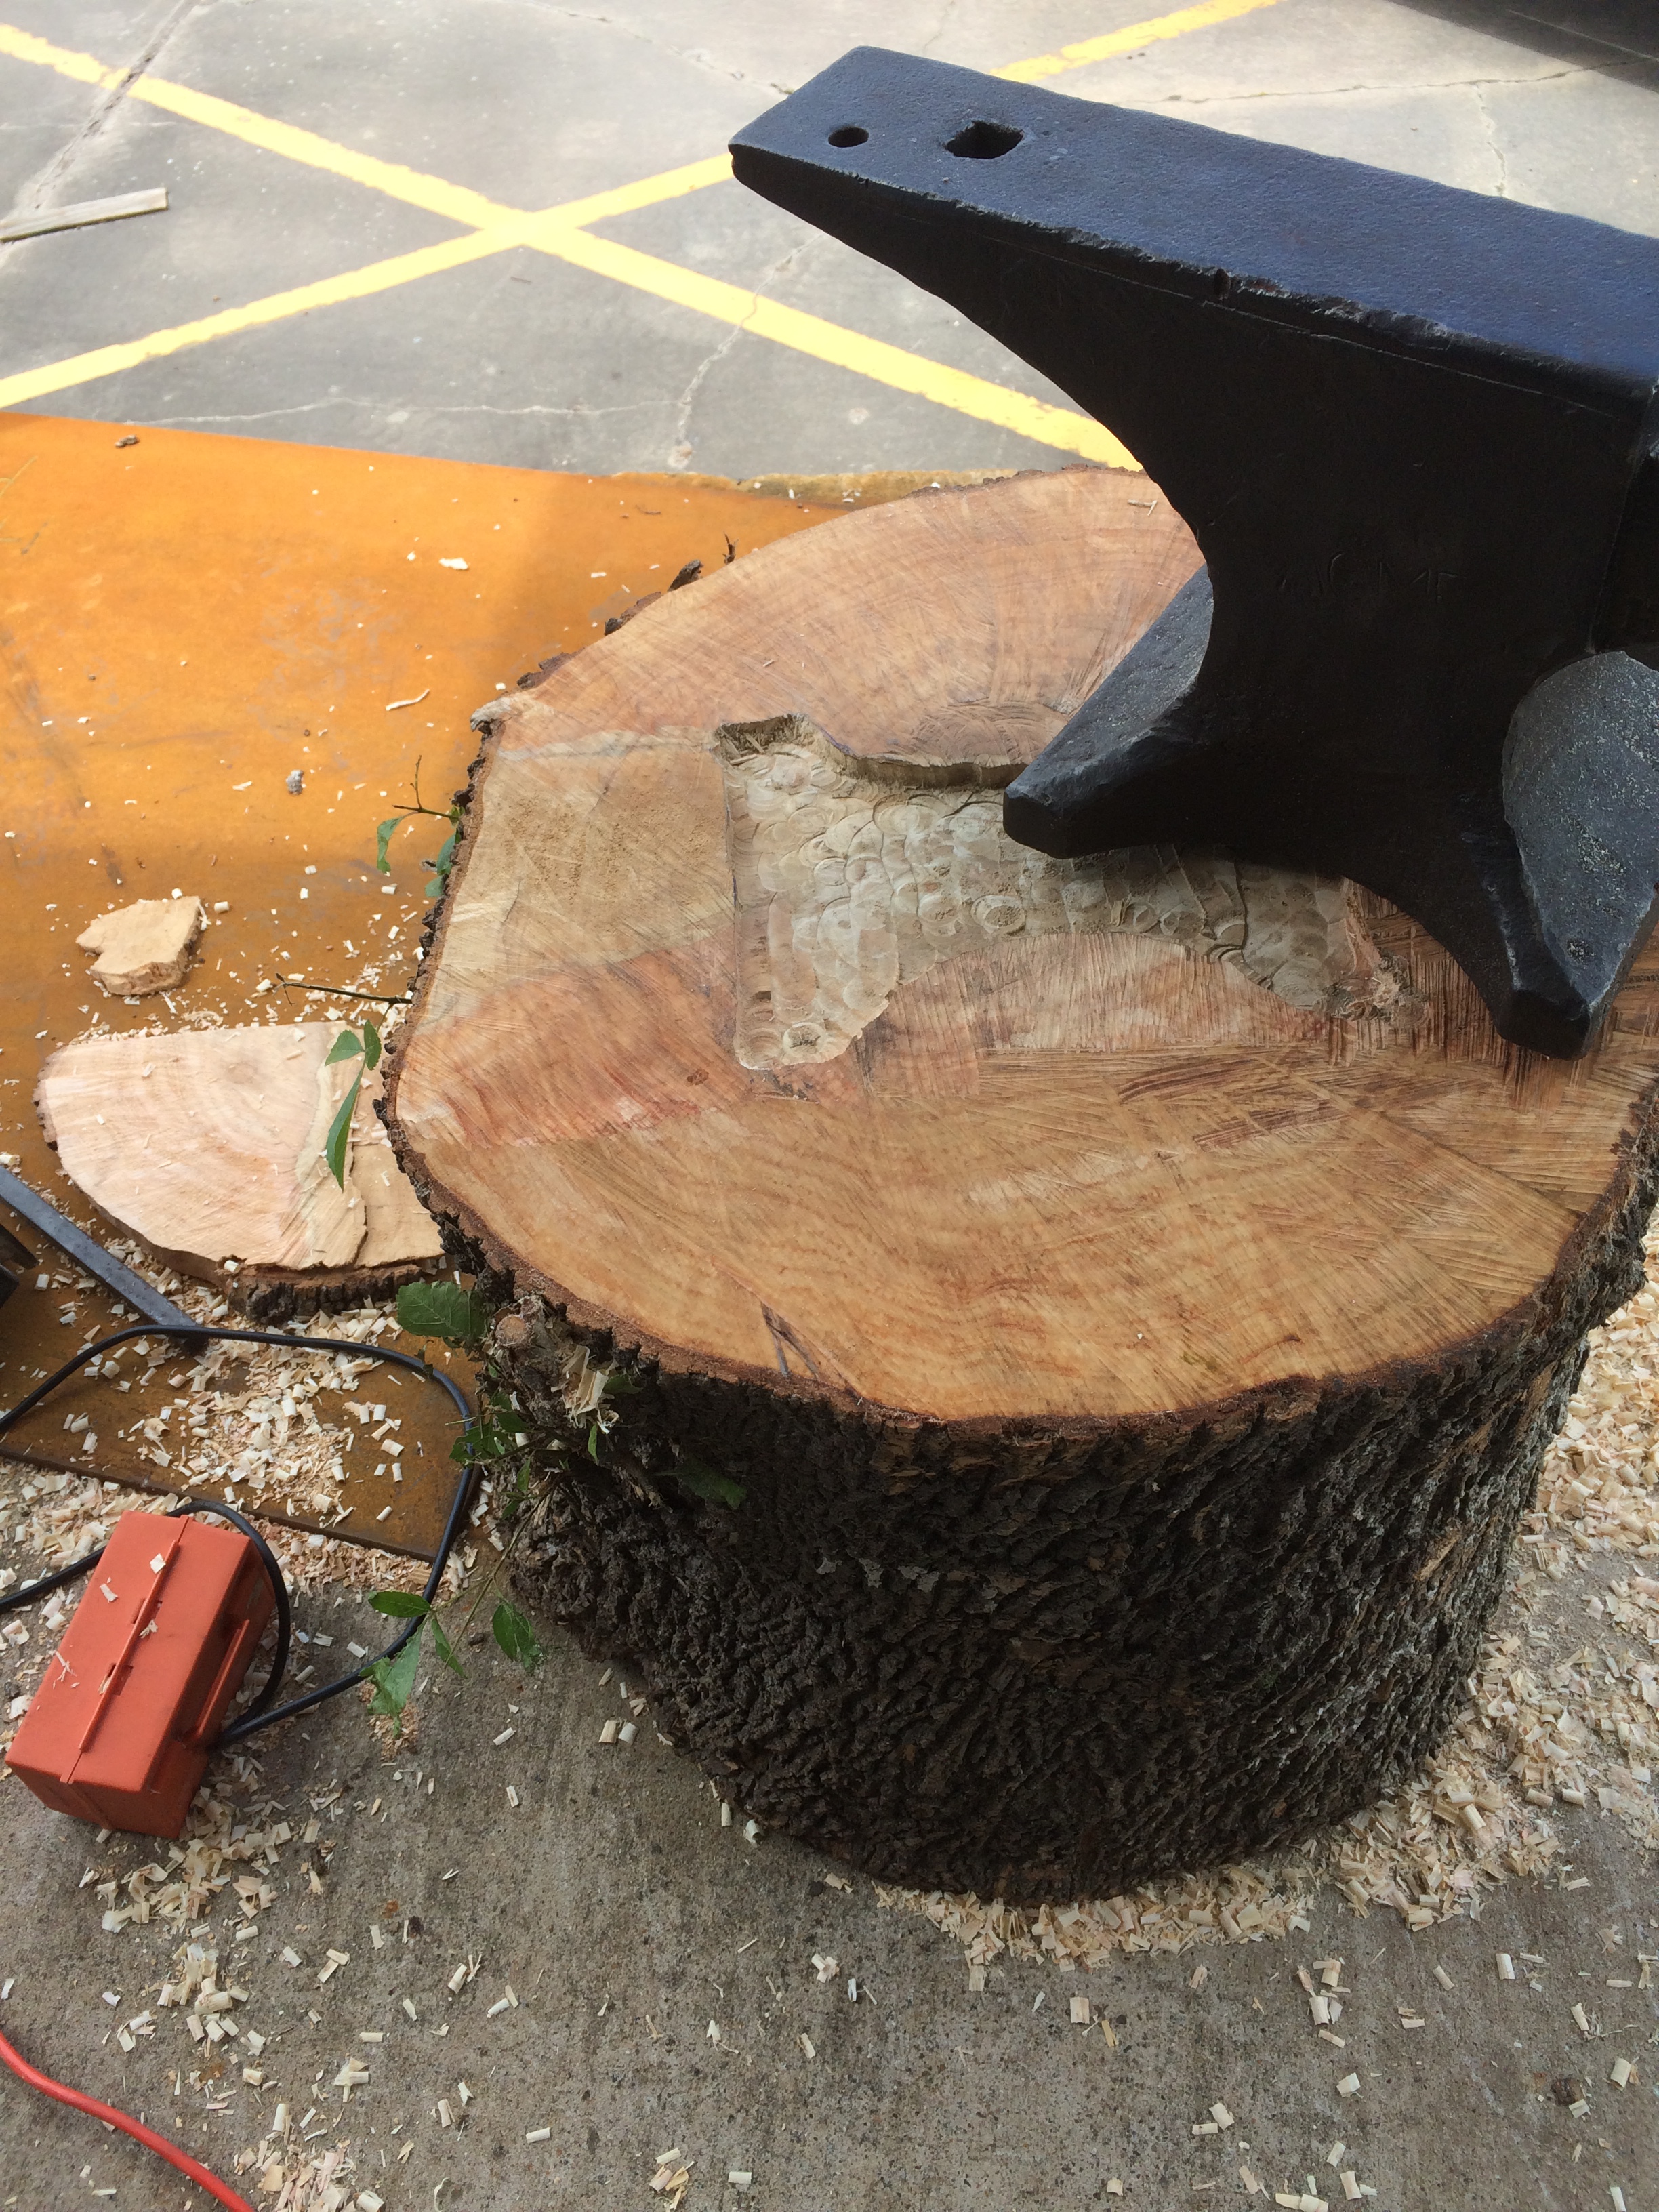
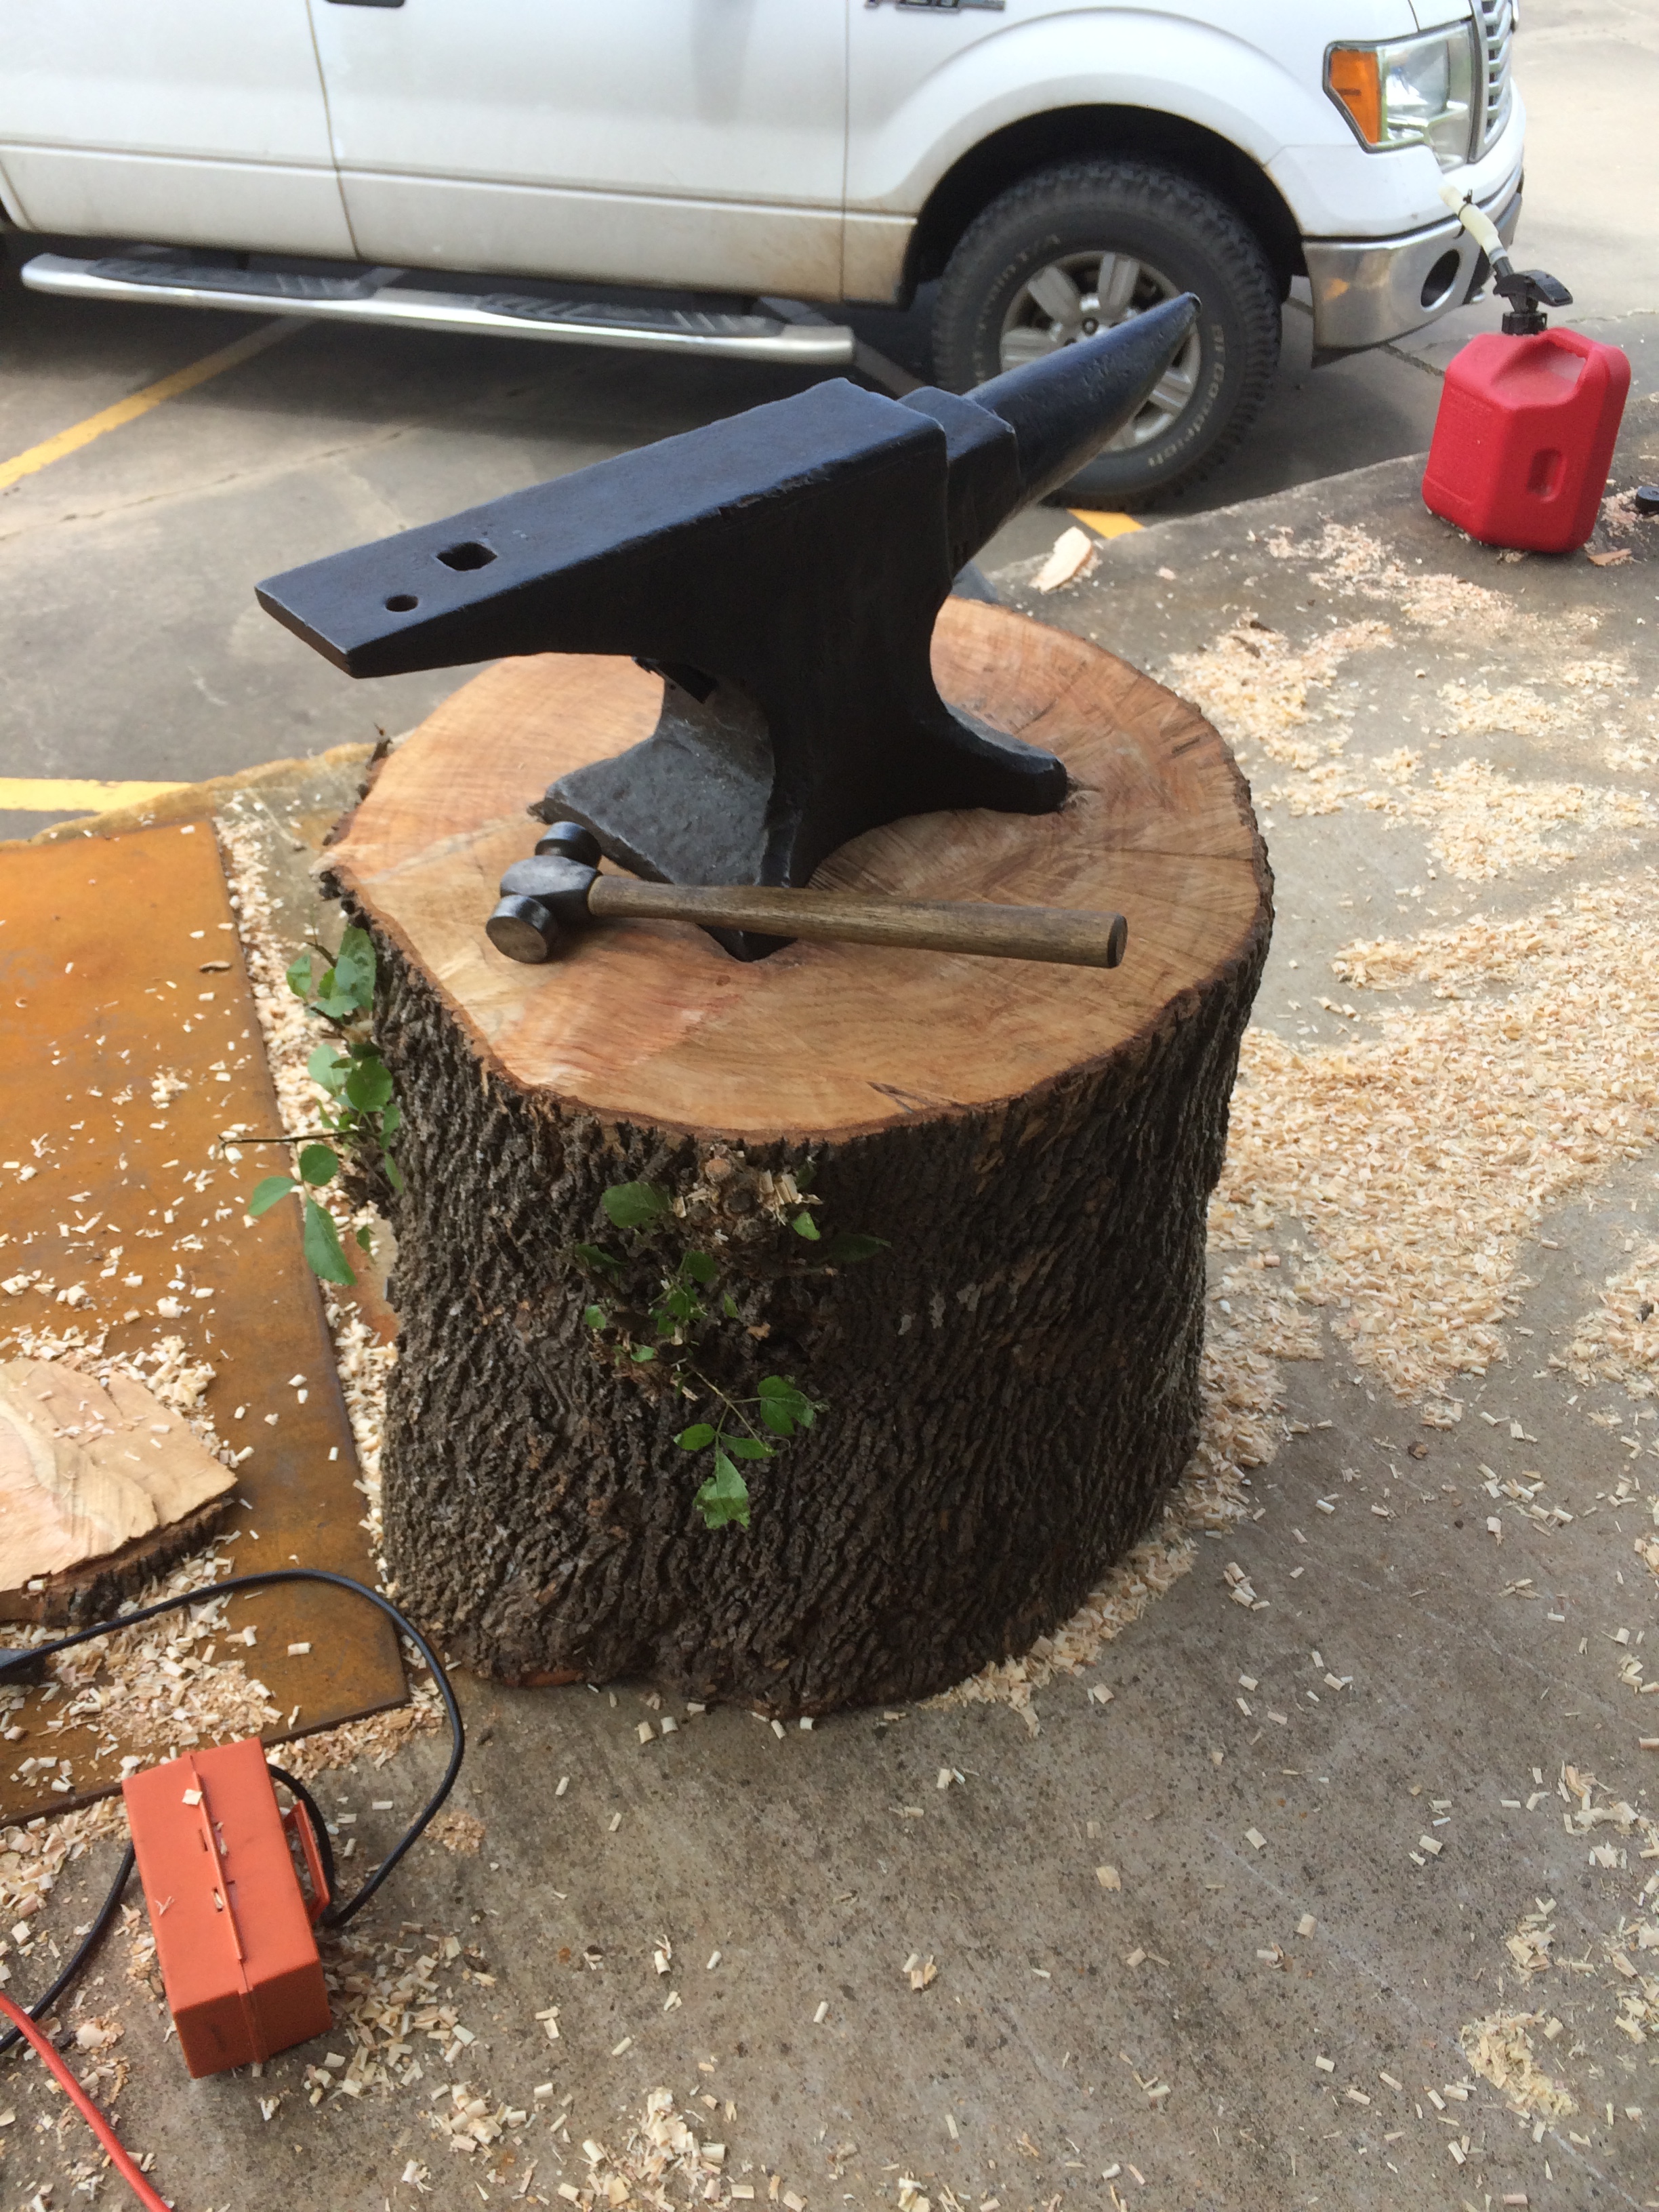
I acquired a 100# acme anvil a couple of weeks ago that has been setting on the shop floor waiting on me to get around to building it a stand, My other anvils are on 3 legged pipe stands so I figured I would do the same for this one. That was until I spotted some tree trimmers hauling off a cut up ash tree when I left the shop for a early lunch. 10 minutes and 10 bucks later they rolled a stump off at my shop door.

it had a bit of a slop to the top cut.
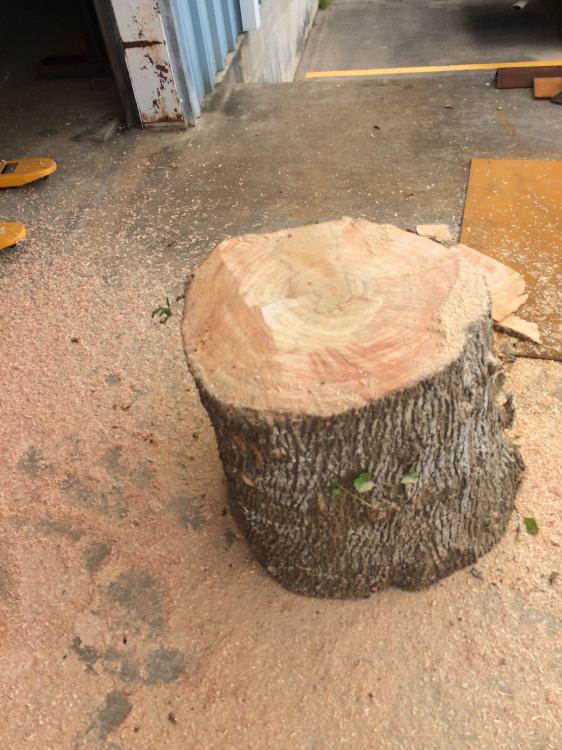
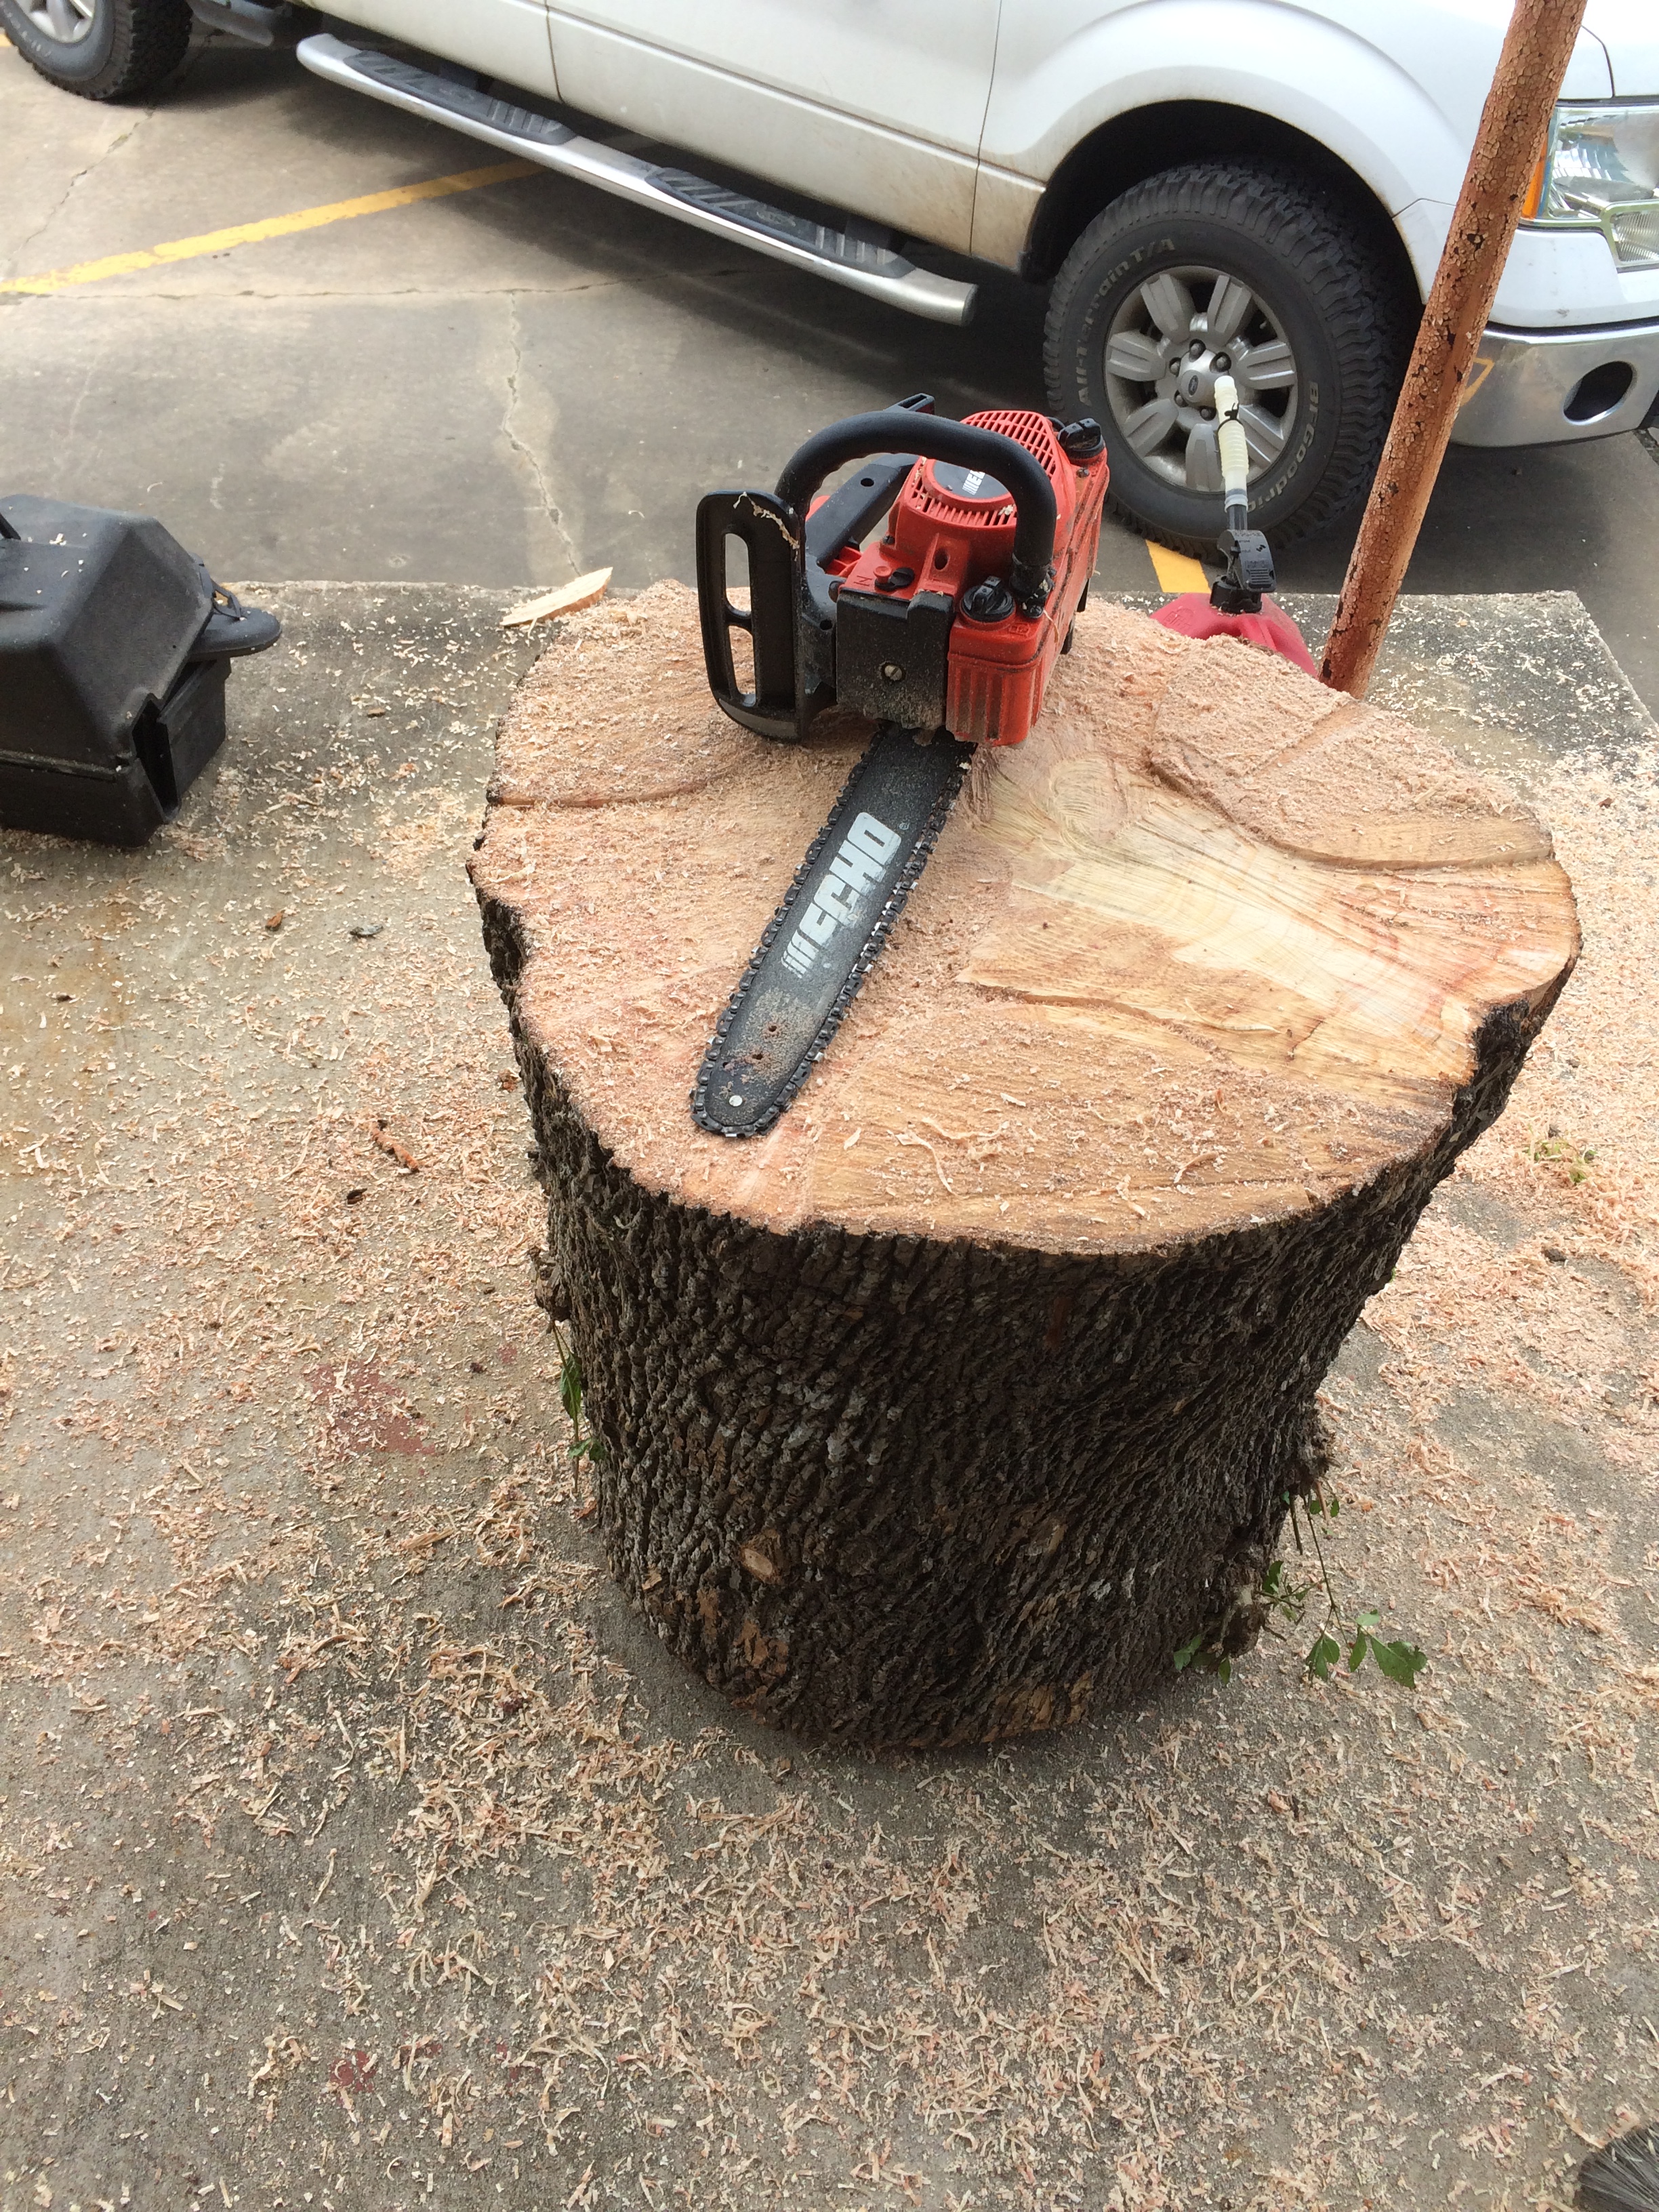
I stood it on end and fired up the chainsaw to "flatten" it out a bit

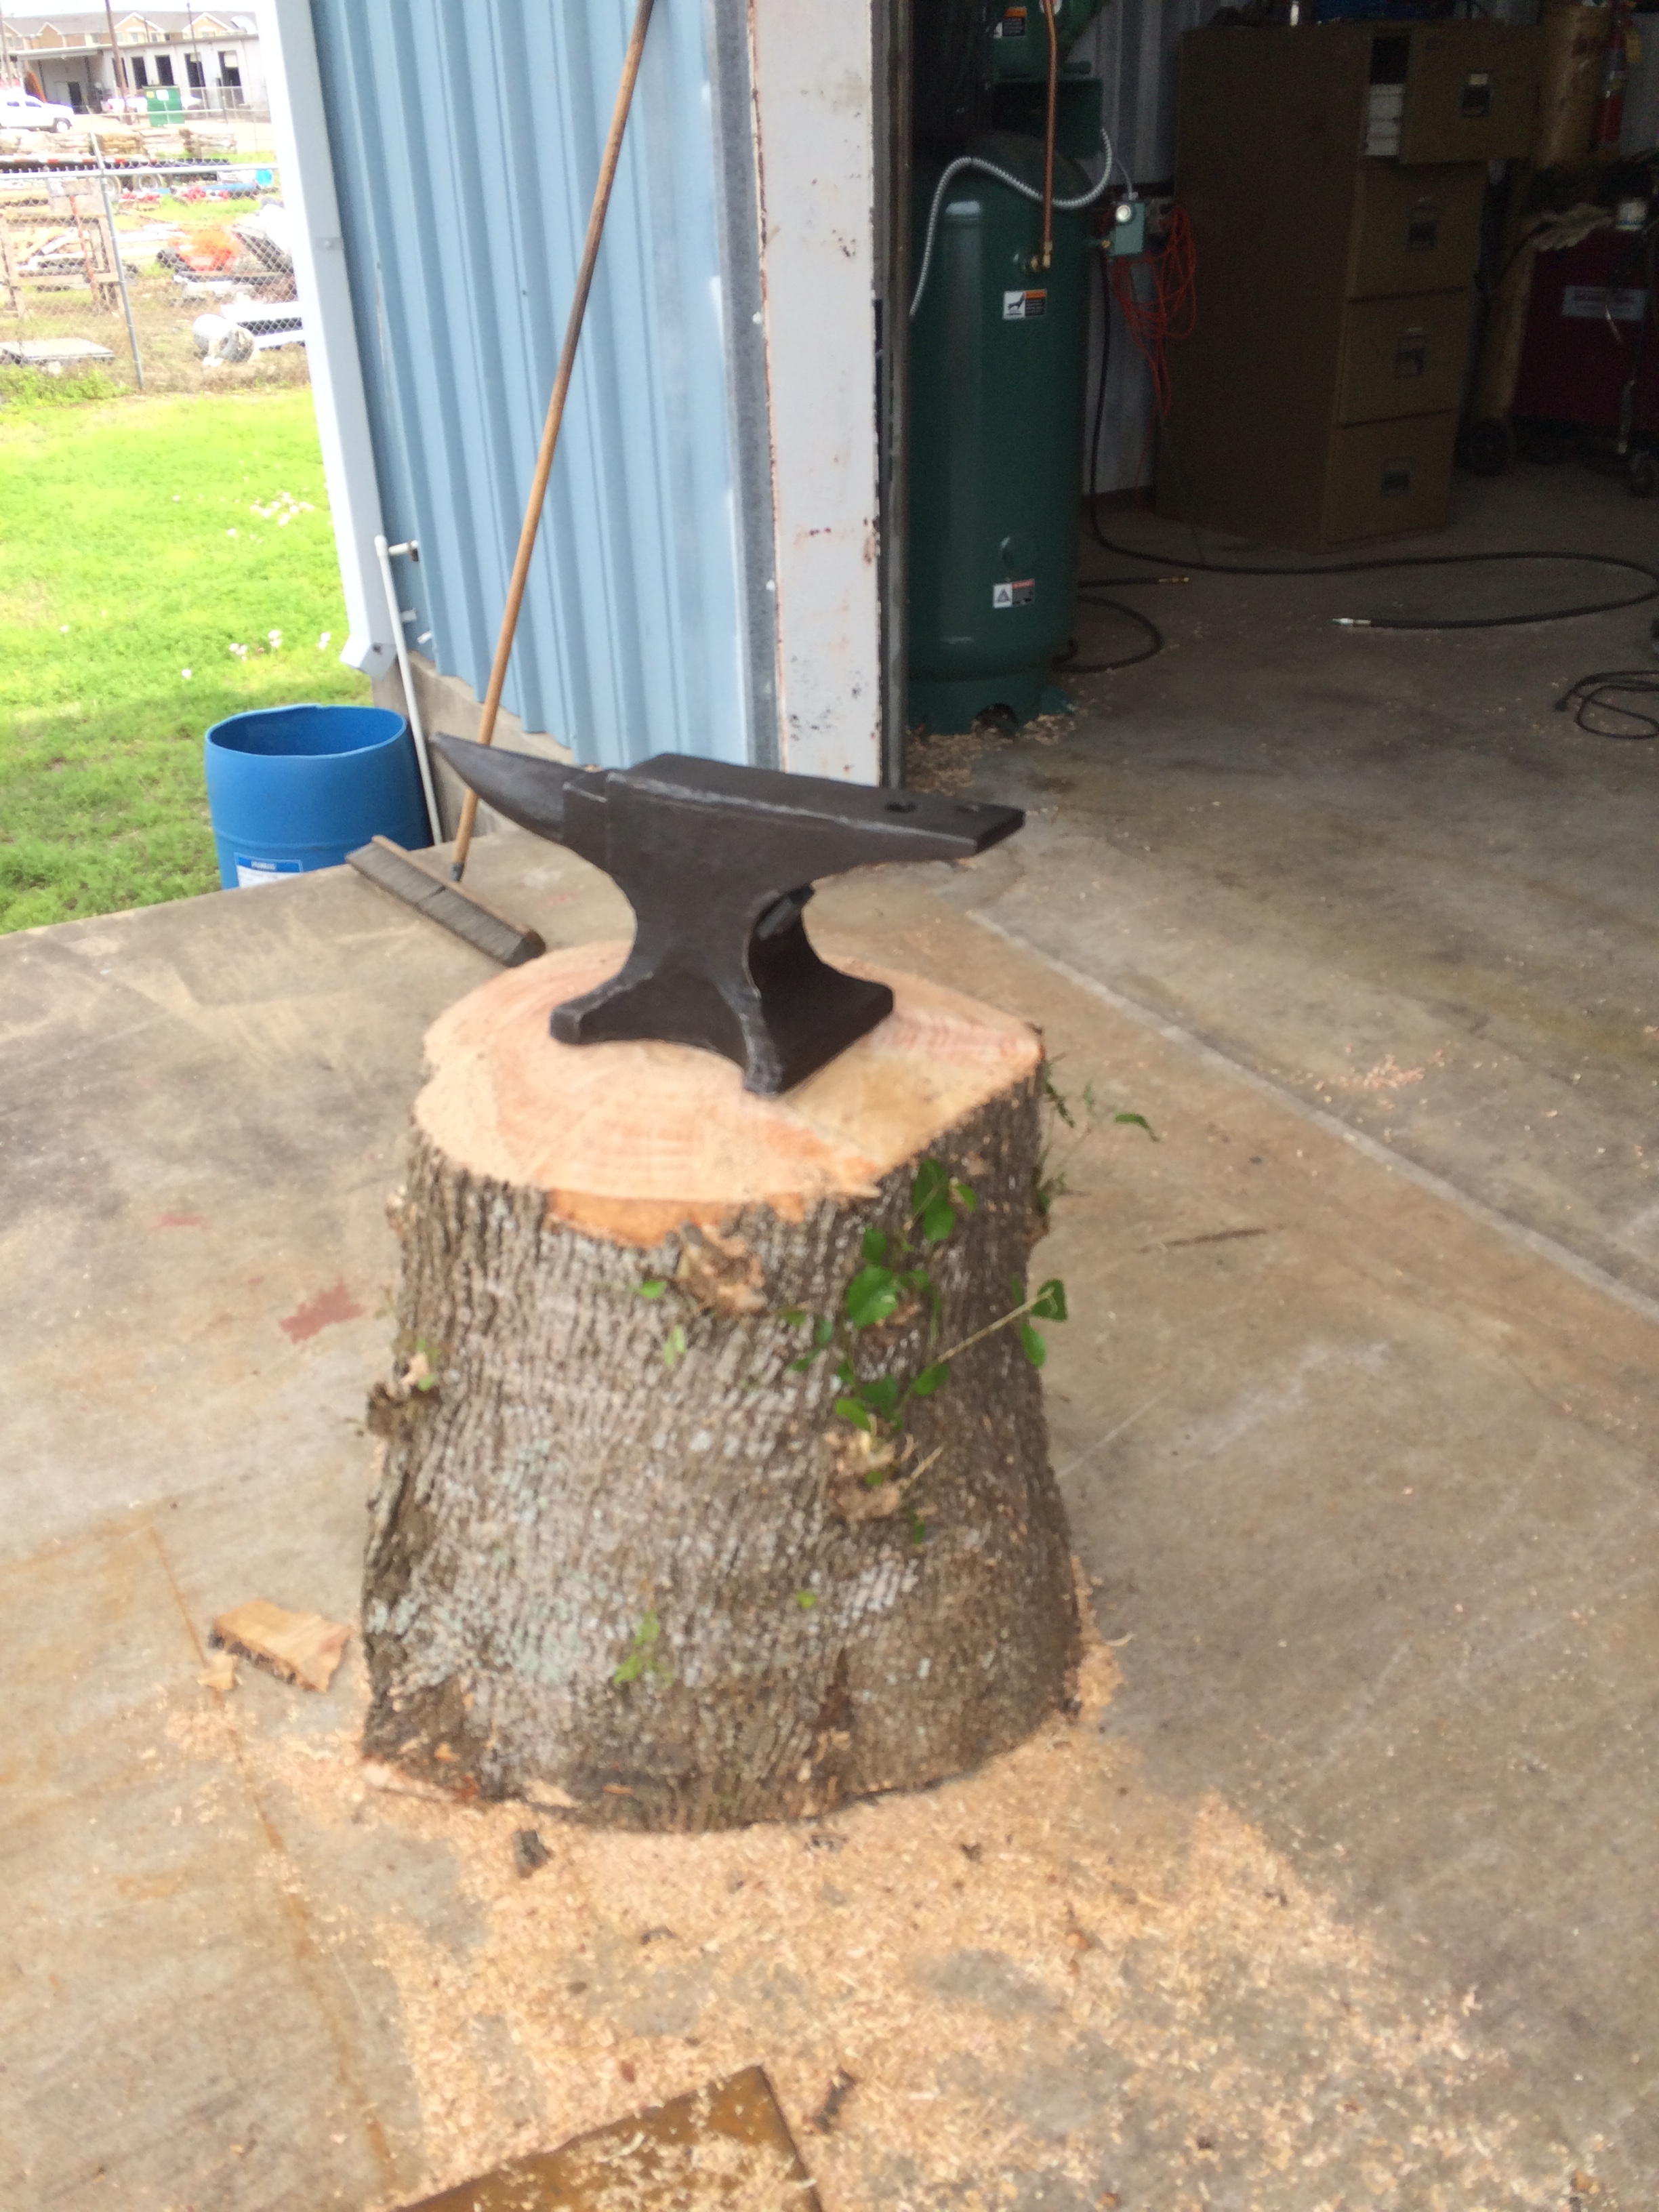
I set the anvil on it and traced around its foot print and then marked the "front" of the stump at the base so I would know were to cut in the feet.

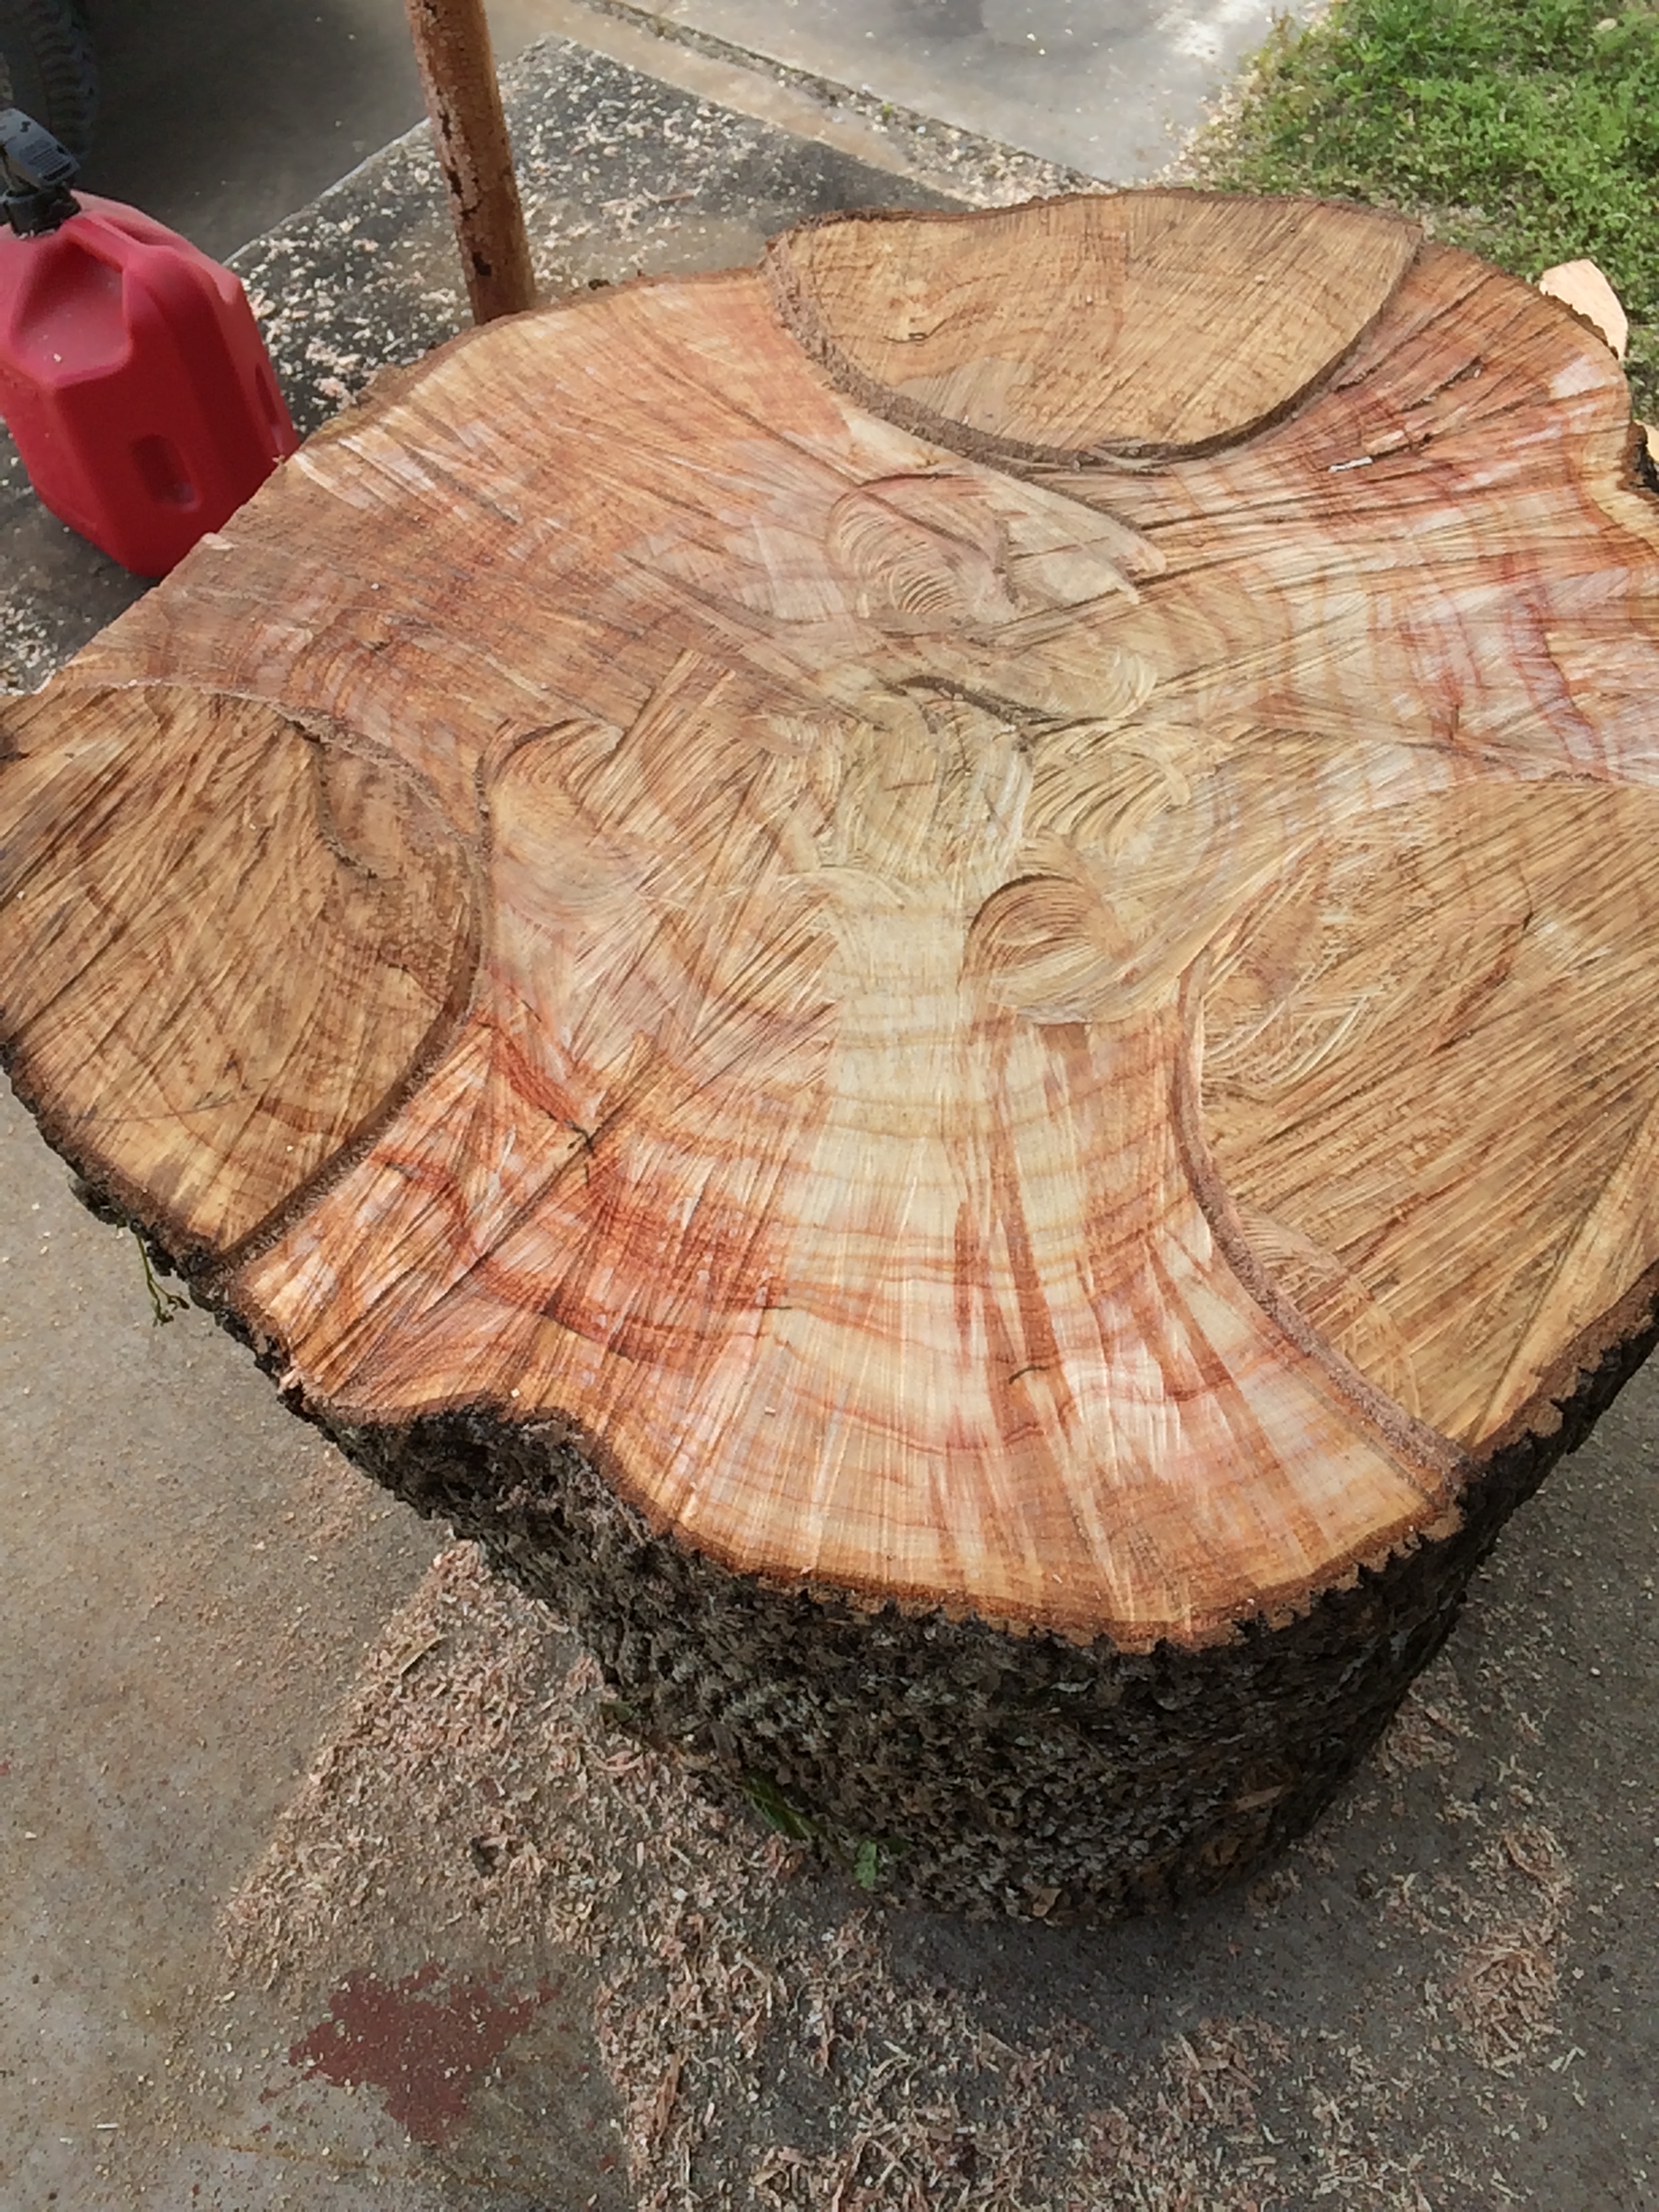
I scribe 3 feet into the base using a 5 gl. bucket for a pattern and then cut the lines in about 1/2" deep with the chainsaw.
I used the chainsaw to relieve the wood between the feet down to around 1/2"
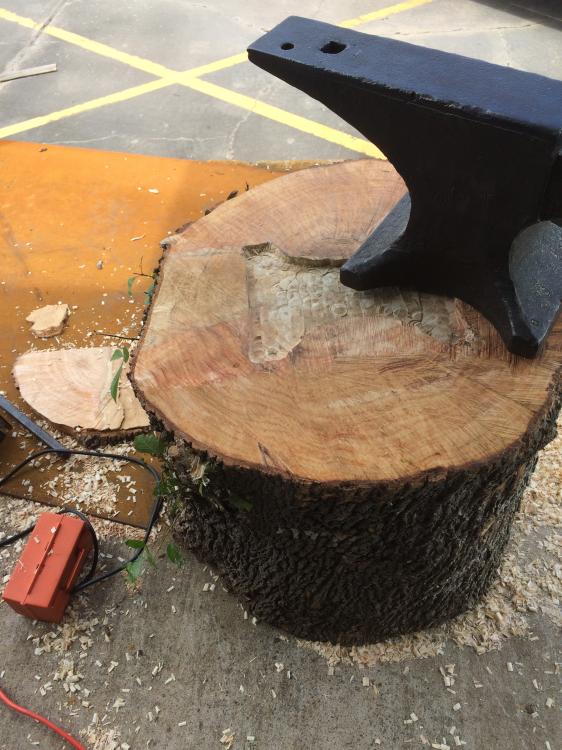
I cut the anvil foot print in with a router about 1/2" deep.

My 8" level says its about 1/2 a bubble off in the X and Y plane,,, but so am I..
I didn't think it was to bad for 1-1/2 hours effort
I'm sure a wet ash tree is not the first choice of wood but it does NOT rock and it does NOT roll, how many years I'll get out of it before it cracks is unknown.
The anvil it wrist high for me.
Russell
-
Spanky,
I figure for Easter sun rise service on a lake it will taste pretty good! I promise to use a new tee shirt for the filter.
Russell
-
Thomas,
How big of a chunk did you take out of it? I ask because you MIGHT be stuck with making the best out of a bad situation.
If the anvil is new contact the Manufacture or seller and see if they will work with you and replace it.
I hope you have a quality anvil that I just don't recognize but,,,, it looks a little like a A.S.O.
If you decide to fix the edge I suggest you put a large radius were it chip is (1/4"R or greater) and a smaller radius on the edge across from it. I have different size radiuses at different places on my anvil and they all get used for something.
let us know what you find out.
Russell
-
ianinsa,
that's the same thing everybody that has seen it so far has said


Wagon Wheels Metal Good?
in Historical Ironwork
Posted
b4utoo,
Go make friends with your local auto junkyard. 1 busted truck axel, 1 busted leaf spring, 1 busted 3/4 ton truck coil spring, and 1 busted small car coil spring and you will have all the stock you need for learning to make tongs, punches, chisels, and knives for a couple of years.
Russell