GottMitUns
-
Posts
320 -
Joined
-
Last visited
Content Type
Profiles
Forums
Articles
Gallery
Downloads
Events
Everything posted by GottMitUns
-
Looks good to me and I don't think I have seen it before. I looked at doing my own but in the end farmed it out to Columbia Marking Tools. You can always try and if you fail, bring in professional help. I read up on making my own and I'm sure the instructions are on here somewhere.
-
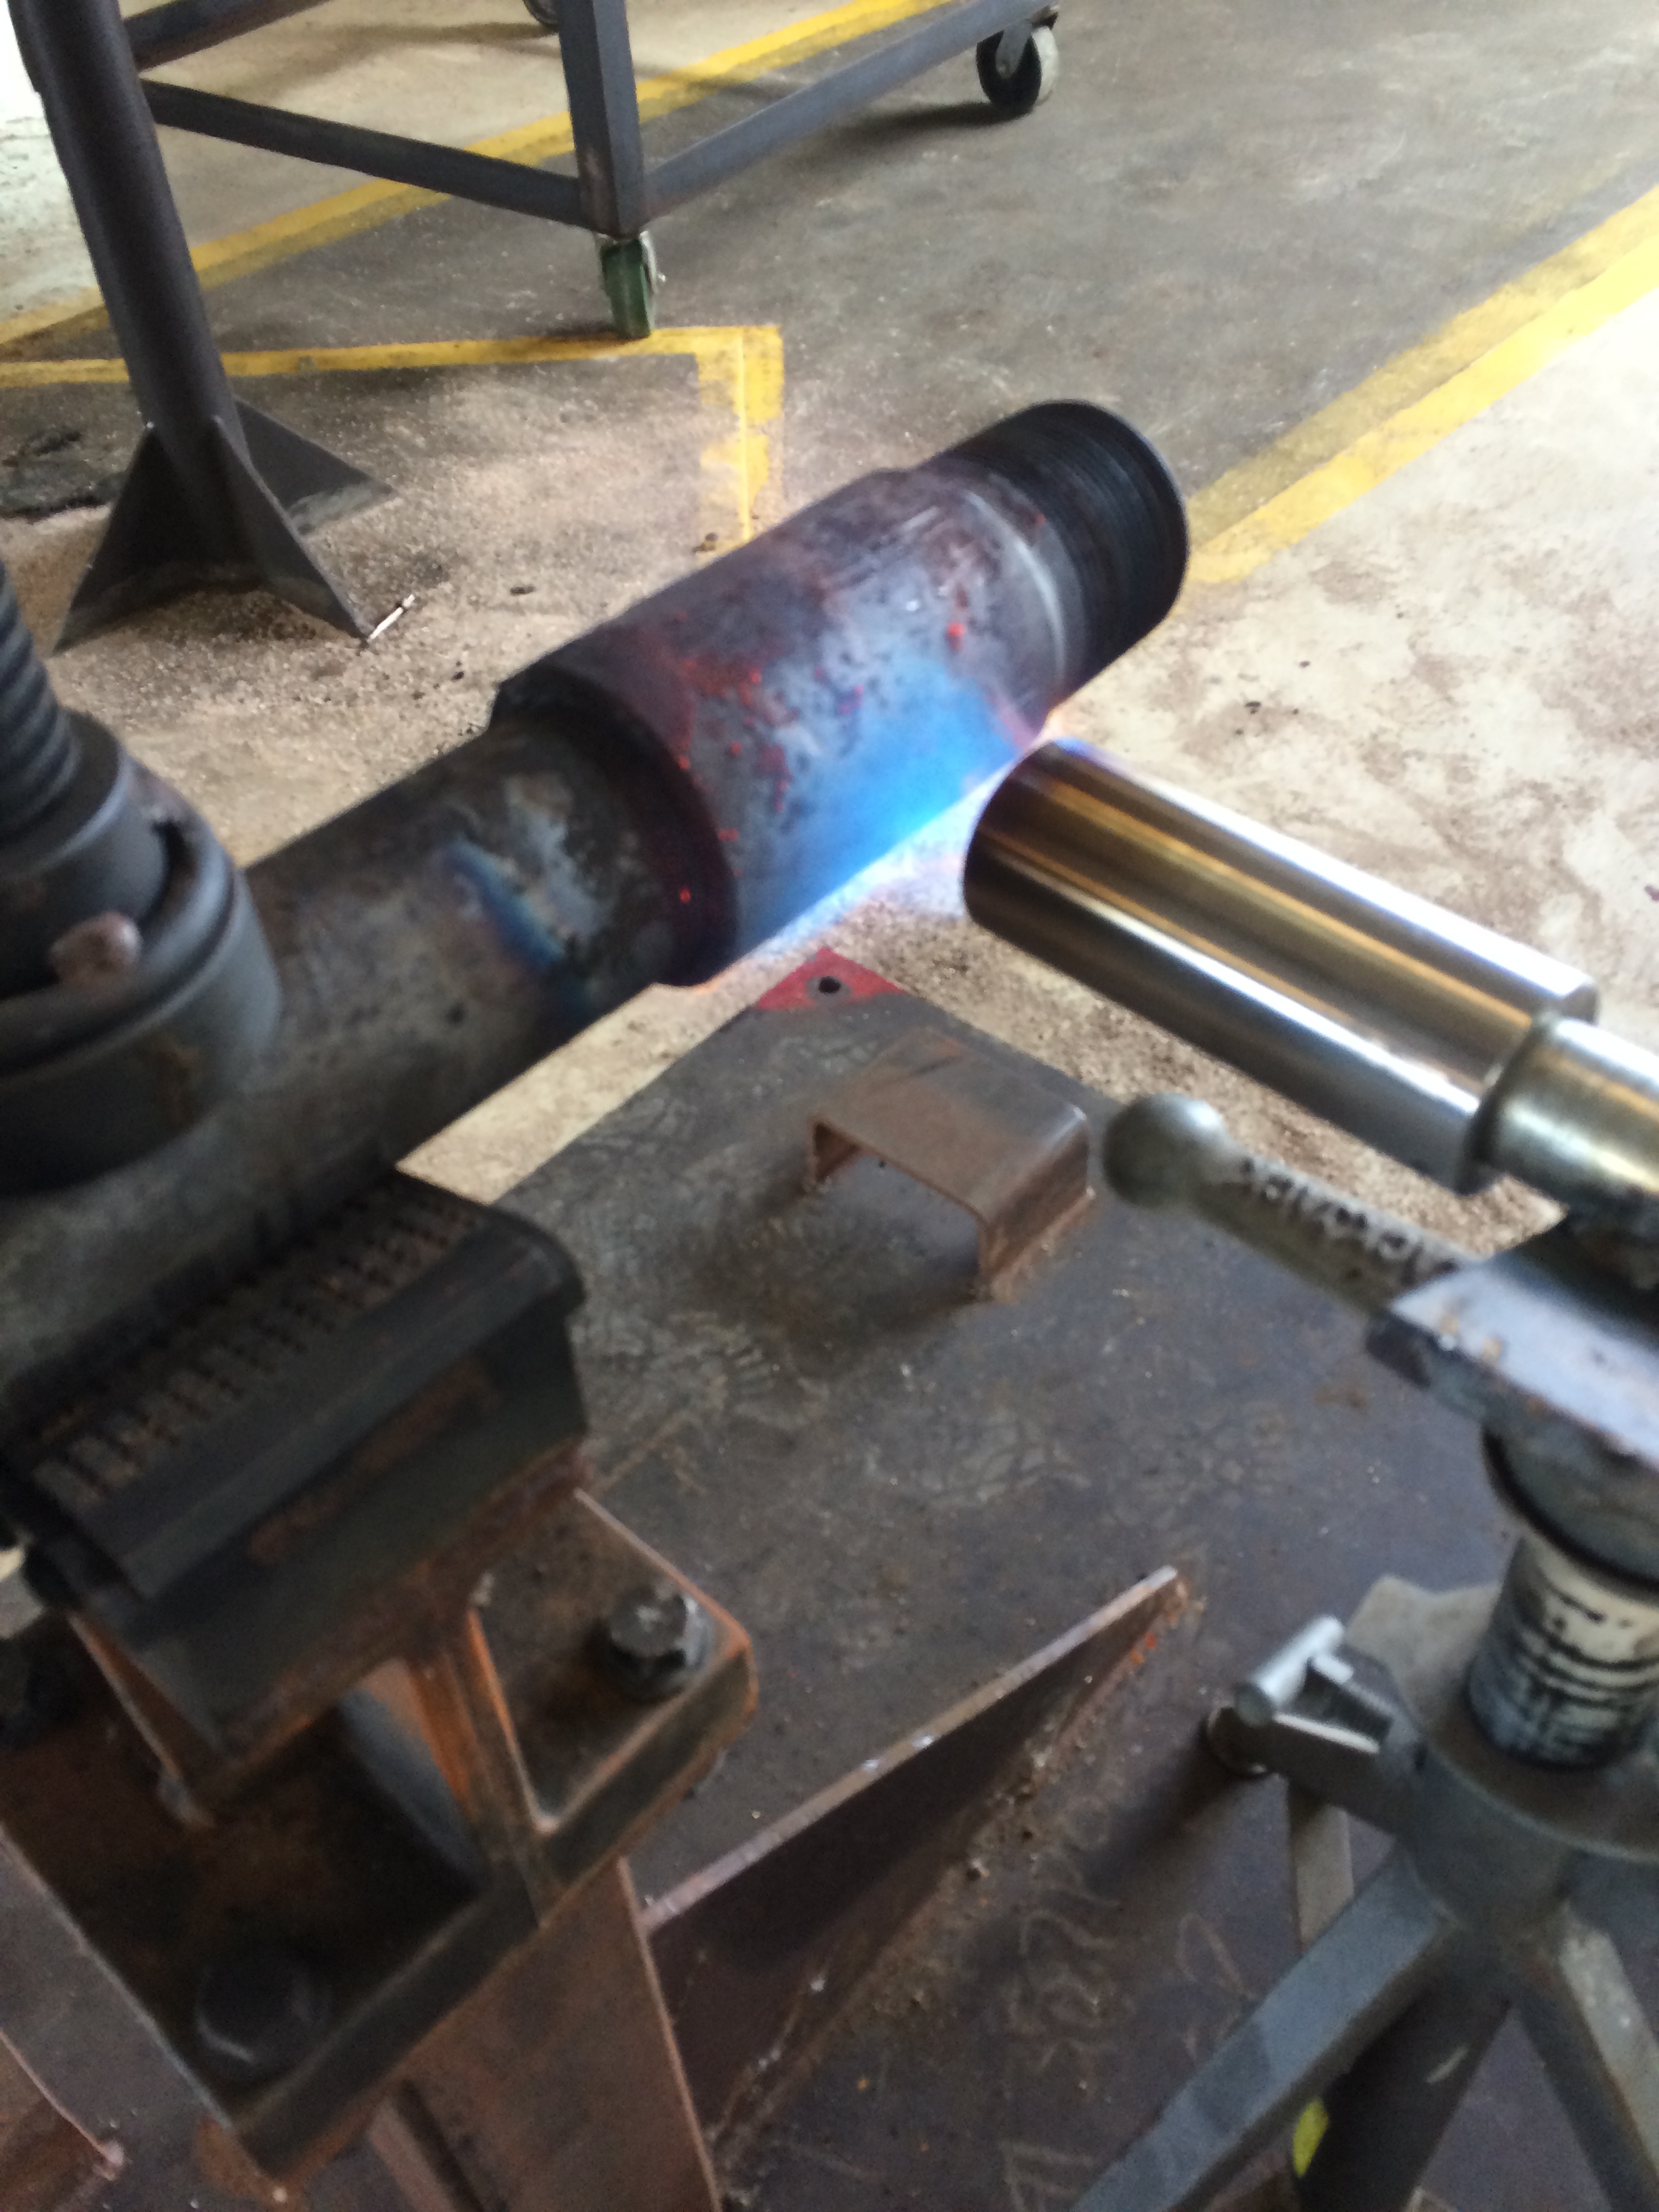
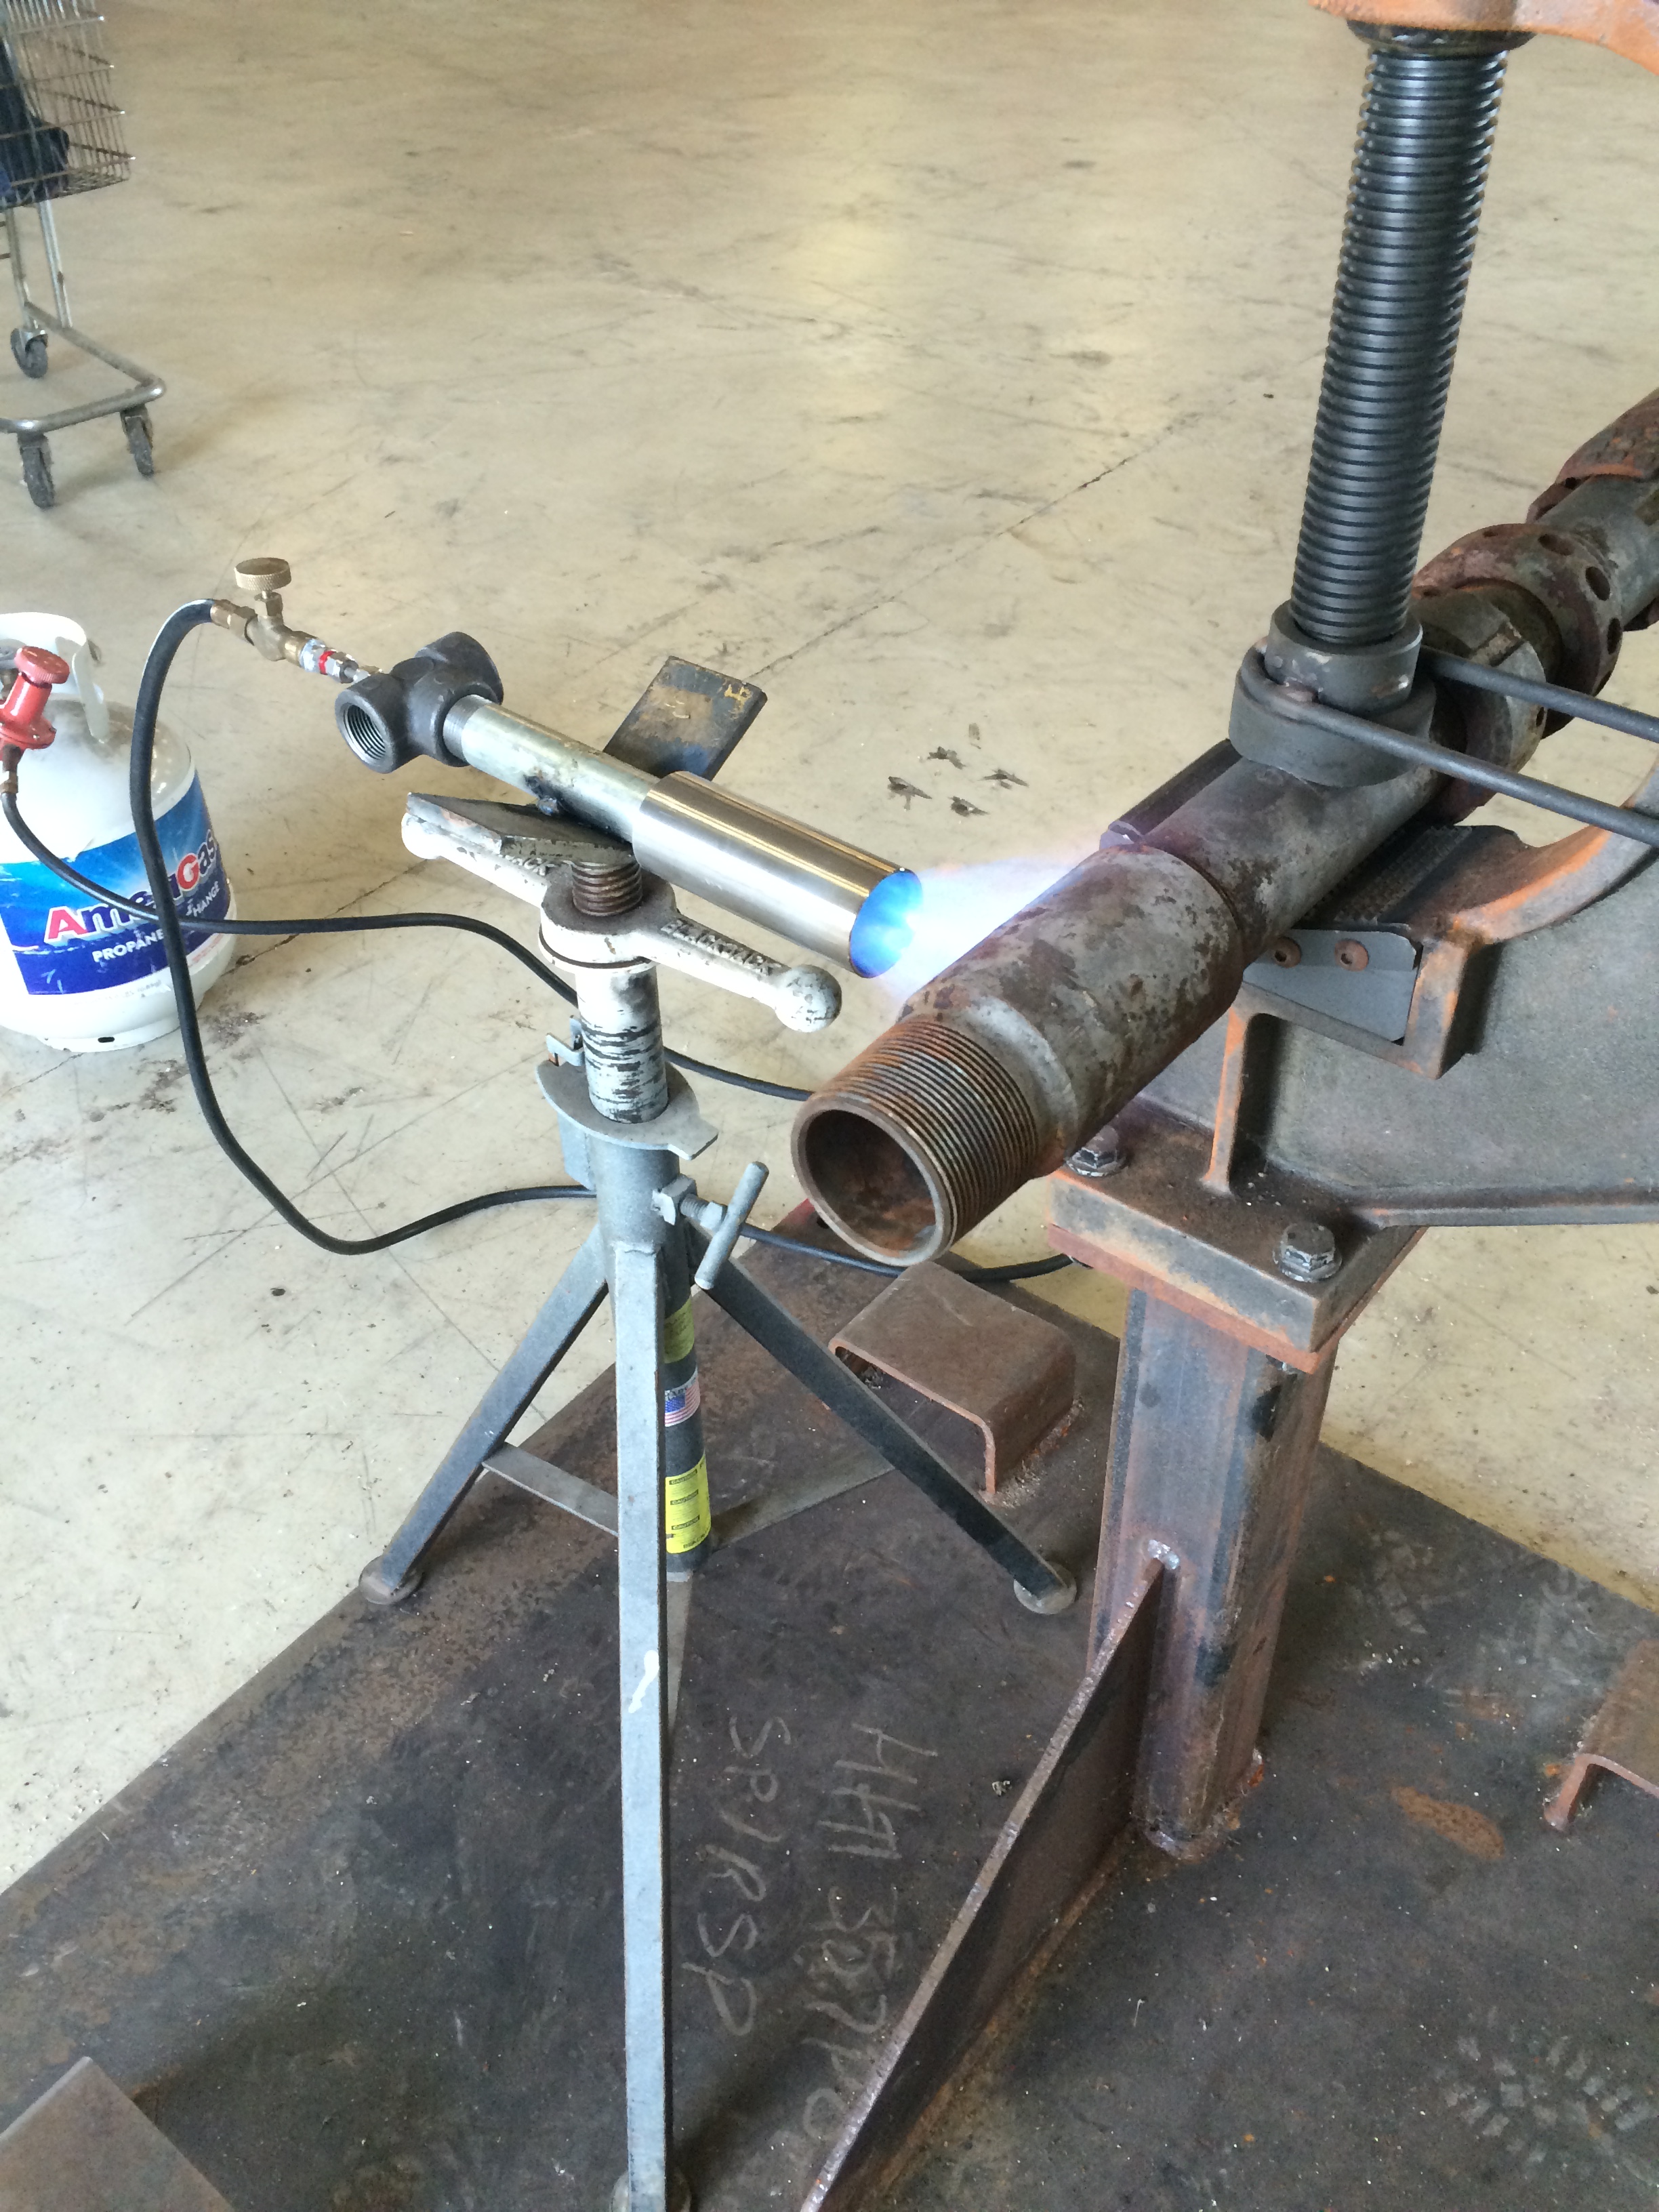
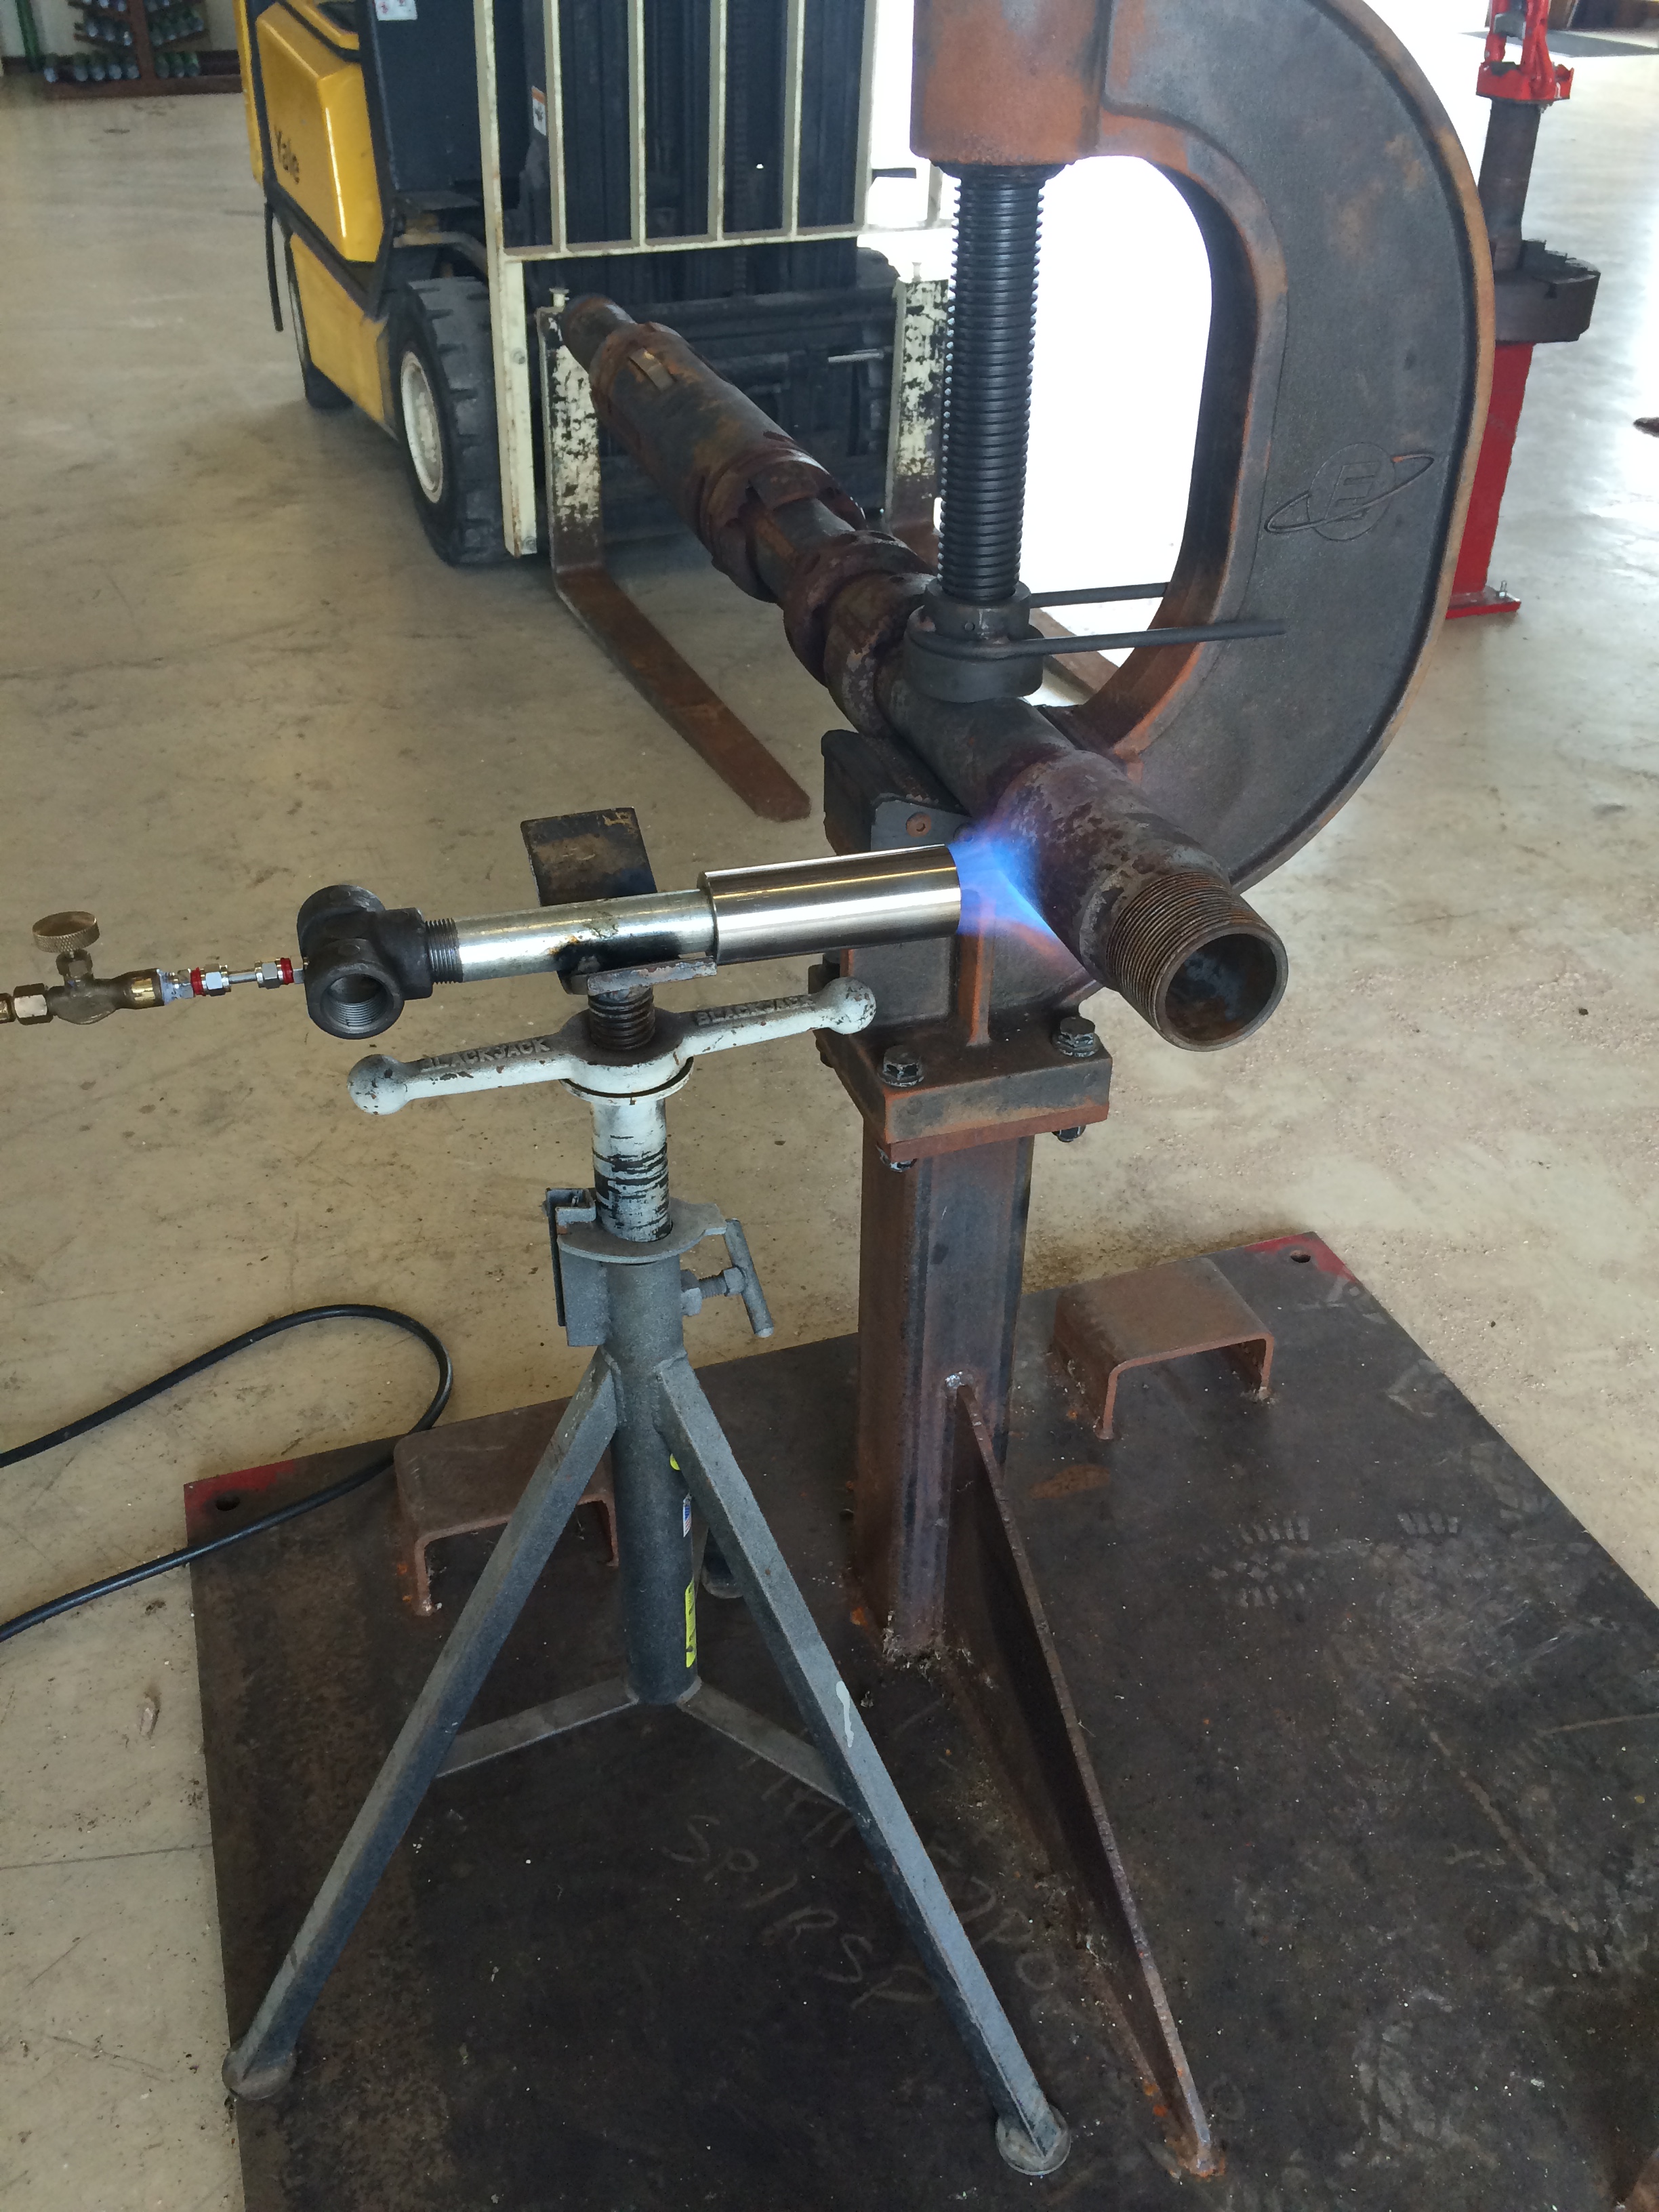
Thanks Frosty! I had a tool that didn't want to come apart at a 2-7/8 NUE thread (2-1/2" tapered pipe thread) I had a fork lift pulling on a 36" pipe wrench yesterday with no effect other than to flex the vice its in. I rigged up a 1" Tee burner this morning and fired it up for 5 Minutes, then broke the connection with a 36 by hand with very little effort. Normally we would have used a rose bud on a oxy/Acc torch but this was a lot easier to deal with. The shop guys say I cant have my burner back I rolled the tool a 1/4 turn about every minute and it got to dull red in about 5 minutes. IMG_1857.MOV Thanks guys. Russell


-
my wife has asked more questions about forging in the last 3 weeks of watching this show than she has in the previous 3 years since I started doing this stuff. I just hope they don't start talking about the cost of all the equipment in the shop
-
Prayer said.
-
Mine defiantly resembles Thomas's remark!!
-
beginner blacksmith question
GottMitUns replied to 314marka's topic in Blacksmithing, General Discussion
SirSparks, Just re read your post and realized you were talking about "in the field" tests. there was a post on here somewhere about that but I don't know where. -
beginner blacksmith question
GottMitUns replied to 314marka's topic in Blacksmithing, General Discussion
Sirsparks, try looking for a video of a "spark test" on a grinding wheel. I will try to explain as best I can but others are a lot better at this than me. when grinding look at the sparks generated, if they shoot off in a straight line and then go out it probably low carbon steel. if they start as one spark and then kind of pop into many this may be high carbon steel. If you have a grinder try this. First grind a lawn mower blade or store bought chisel and look at the sparks, then do the same thing with a piece of angle iron or square tubing. I don't know how scientific or un-scientific this is but it is a place to start. -
Wow!
-
If it works really good but sinks like a stone you will get repeat customers
-
I used "20 Mule Team Borax" from the laundry isle in the local grocery store. I think that's a good place to start. Russell
-
Thanks Thomas, I hadn't thought about boiled tea leaves, my wifes uncle told me about using that mixed with baby oil to get his perfect beach bum tan back in the 60's. Since this post has gone on to things that poke I must add the ever popular weesatche tree to the list. Russell
-
and you think your shop is bad..
GottMitUns replied to j.w.s.'s topic in Blacksmithing, General Discussion
Squatie Pottys As my niece called them after spending 5 years in Indonesia! I did learn that when booking a hotel on main land China to make sure they offered rooms with western plumbing Russell -
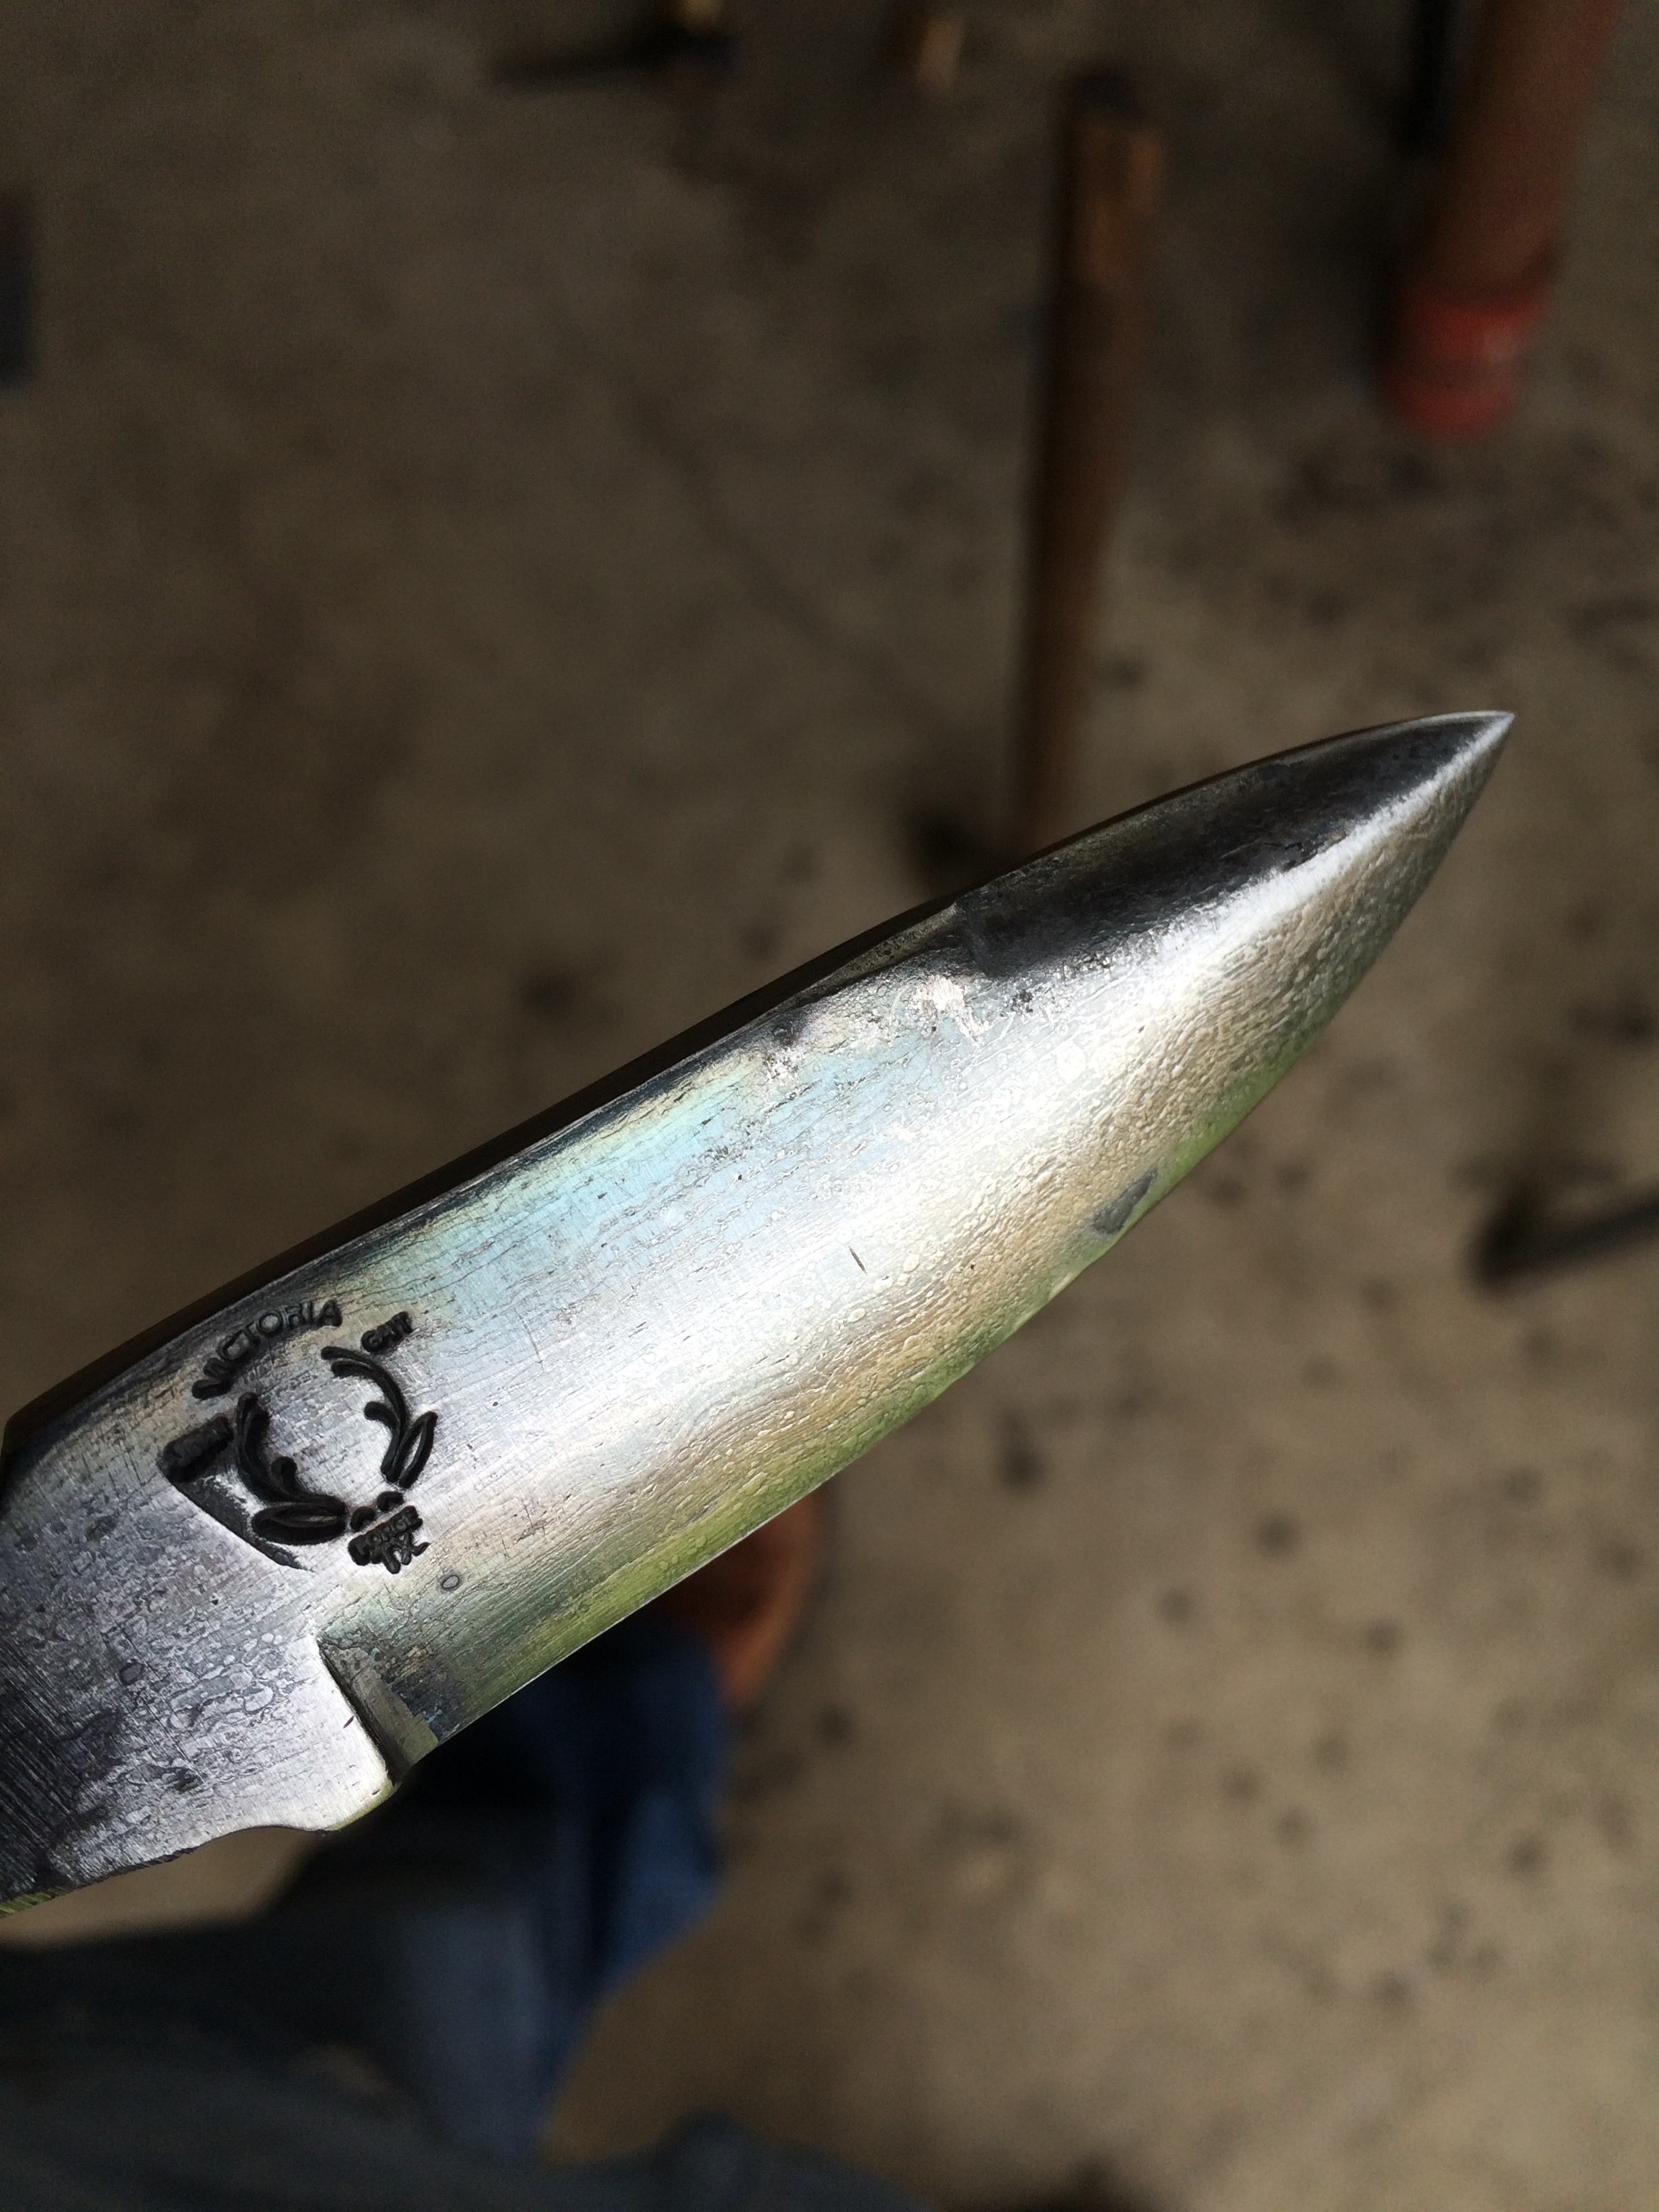
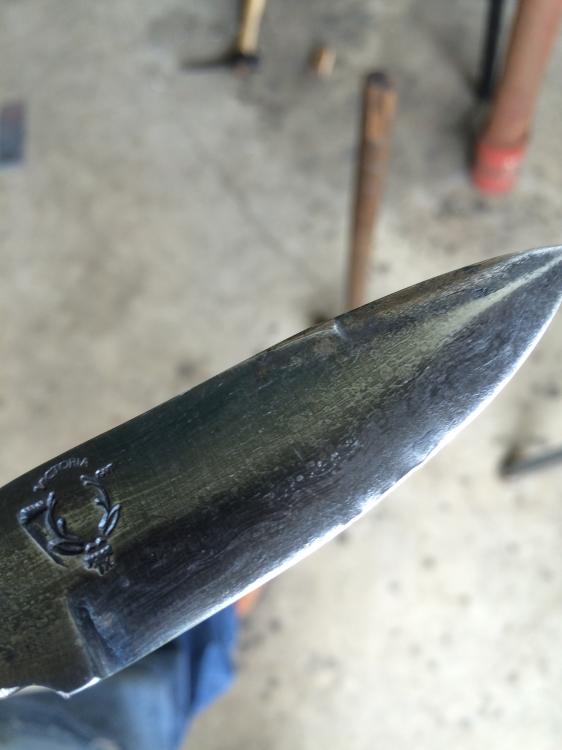
One of my oilfield customers brought me some 3/4" wire rope and I finally worked my nerve up to try and forge weld it. After 2 years of heating and beating and reading this sight pretty much daily I must say making the billet was easier that I expected and that doesn't happen very often. One observation I can make is 1 linear inch of 3/4" cable does not make near as much solid billet as it looks like it will! I forge a billet from cable appx 1/2"x1/4"x12", cut it into 3 pieces, sanded, stacked, tacked, fluxed, forge welded, and forges back to 1/2" x 1/4" x 12" I repeated this process again, only I turned the billet 90Dgr. after forge welding it and drew it out to appx 1"x 1/4" x 5". At that point I thought I might want to try and make a knife out of this. I free hand filed it into shape and sanded it down from 80 grit to 600 grit while it as in a annealed state. I etched it in a solution of hot vinegar and salt (thank you ThomasPowers) for 18hrs I brought it above non magnetic temp and let it air cool to black heat 3 times then quenched it in ATF. I heated the spine until the colors ran to blue on the cutting edge, then buffed it with a Scotchbrite belt on a belt sander The waves on the cutting edge came from me being careless with tongs during the heat treating process Thanks IFI Russell

-
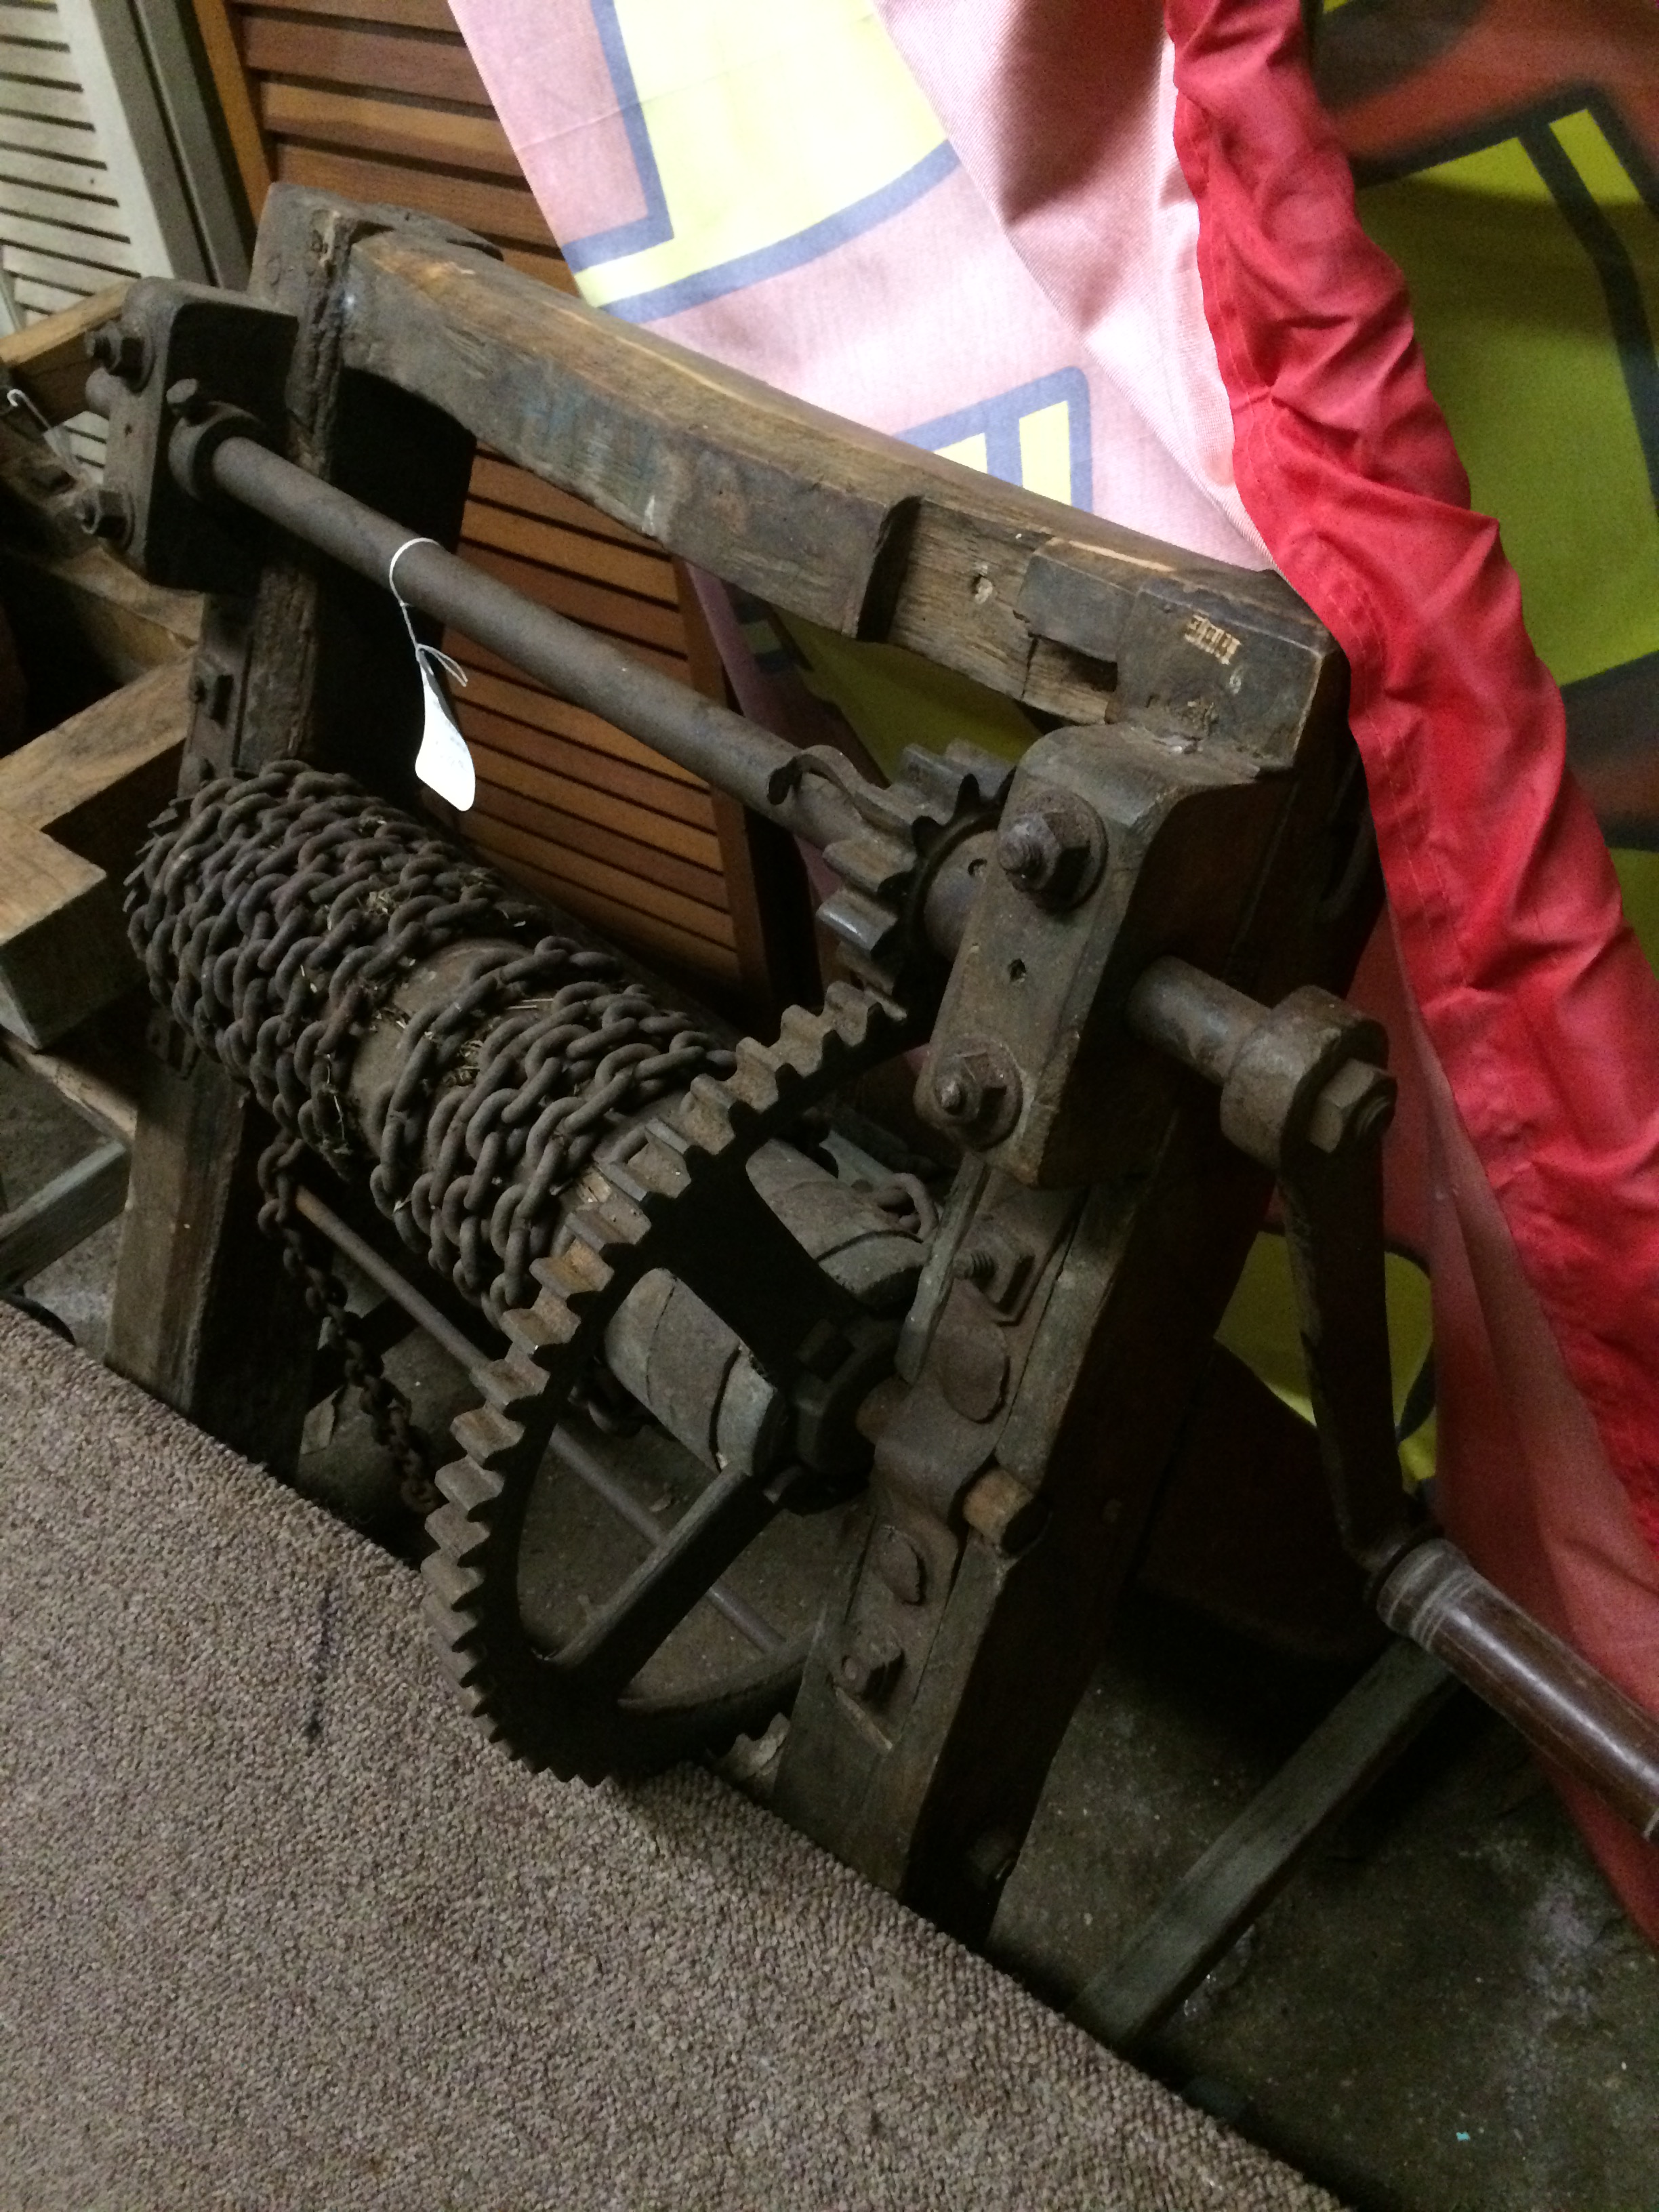
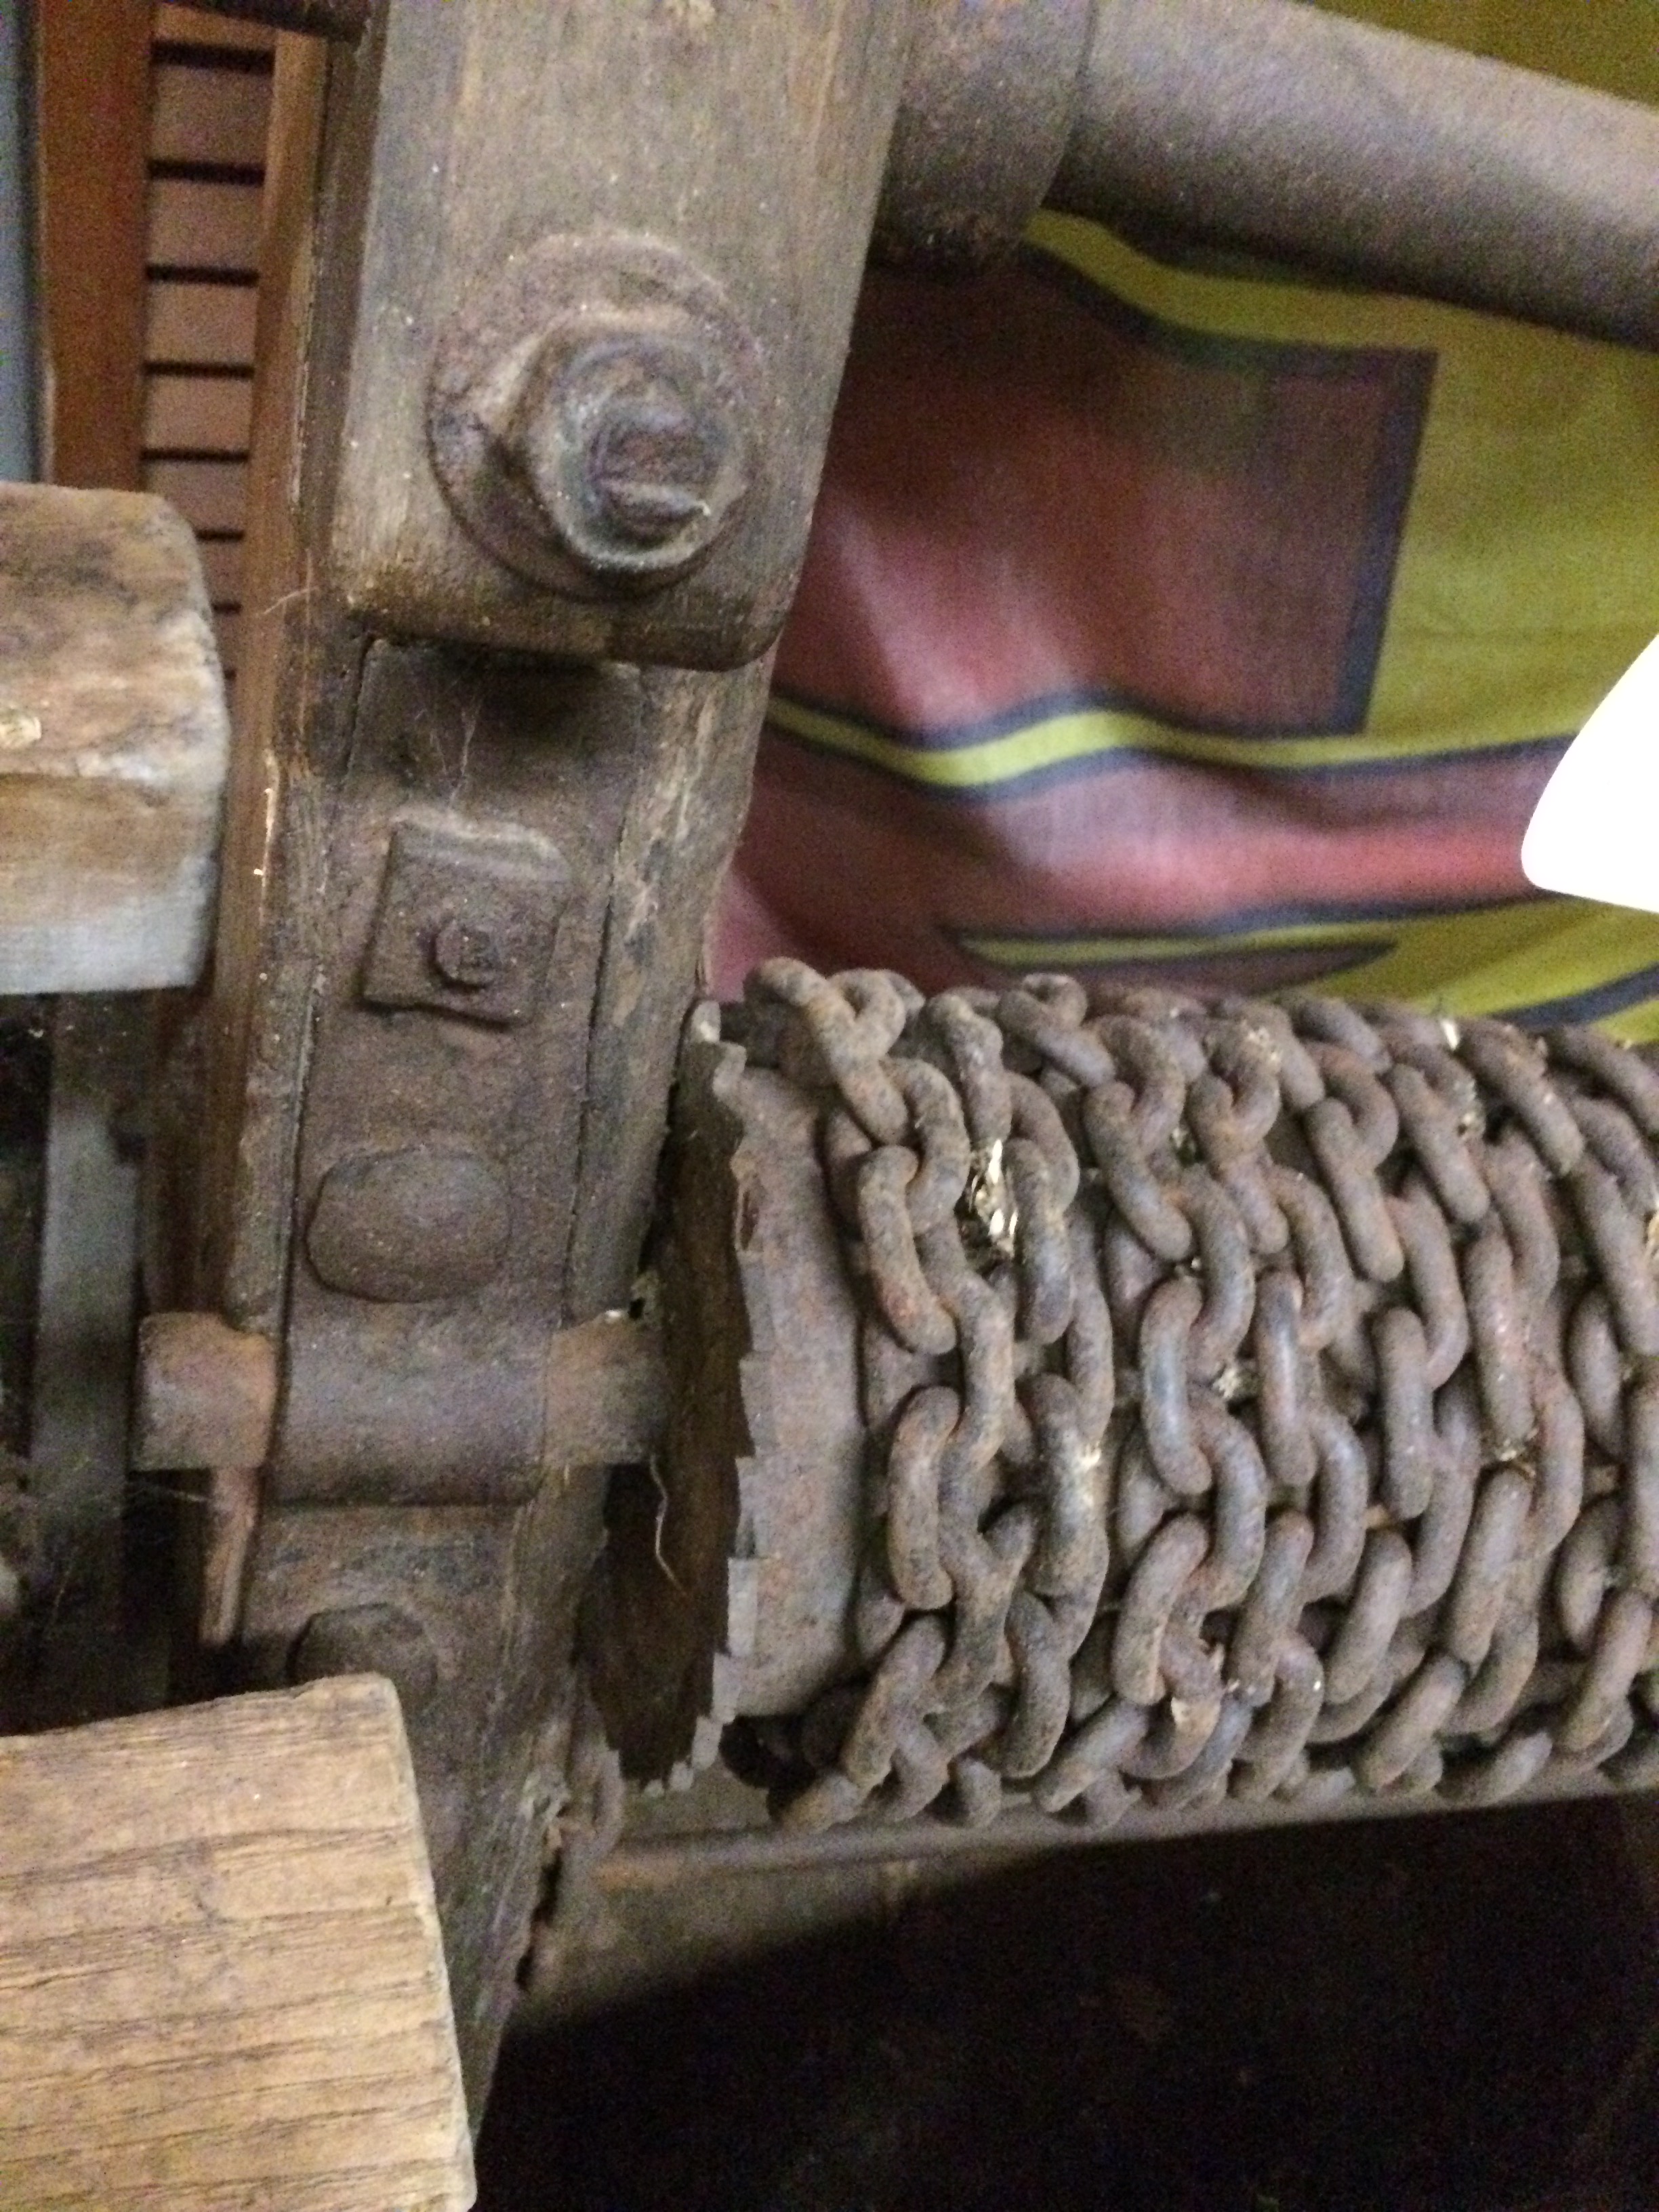
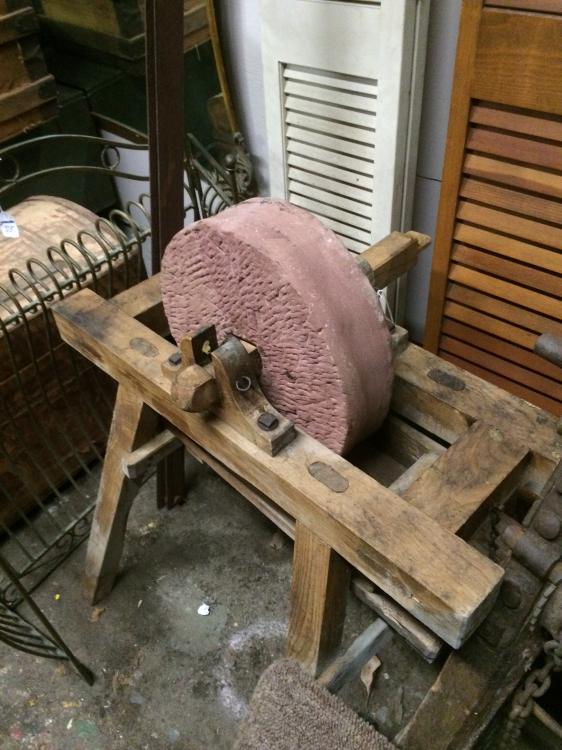
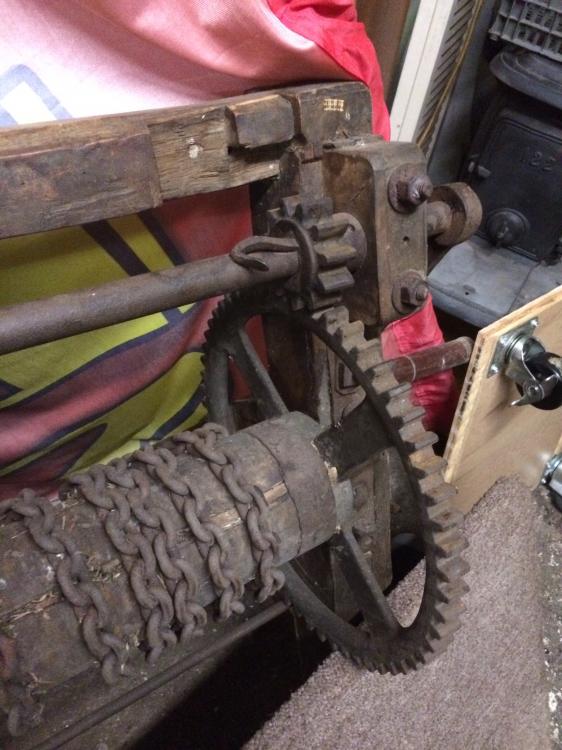
Alan, I was kind of thinking the same thing about the grinding stone setup. modern wood frame with a old stone. the bearing area of the shaft shows no darkening from heat or grease. I think someone had a old stone and a lot of time on their hands
-
Ausfire, I think the winch had 225.00 on it. I will look next time I am in there. RWD
-
How old do you think the "filer" is in the drawing?
-
I have been walking by these tools for the last year in a junk shop I pick stuff up in for a couple of years now. I figured everyone here might like to see them Russell


-
Why oh WHY did I watch the clip Thomas posted
-
Winne the Poo was my first thought, second was the polar bear holding a coke from the animated coke commercials. Russell
-
Unfortunately, or fortunately the old smithy has been converted into a tool crib and had 2 more structures scabbed onto it over the years! I think I could see the foot print of a old masonry built forge but the language barrier kept me from getting to much more info on it. I'm hoping that when they see a picture of a post vice and a champion blower someone will remember seeing them stacked somewhere. from what I remember from last year I think this camp was a working coffee farm before the Contra revolution and the Nicaraguan civil war. Russell
-
Thanks for all the input guys!! I have a coupe of years worth of the blacksmith journal, hammers blow, and the Anvils Ring that will go with me also. I am taking enough cash along to buy a machinist vice when we get there. The first day my plan is to set up the shop and build a 55 forge Second day make punches and chisels from coil spring and twist tongs from flat bar. Third day: look for simple jobs that need to be smithed around the camp. I am not going to plan anything beyond that because experience has taught me that a 3 day plan on a trip like this is about 1-1/2 days to long My contact down there is measuring the hardee hole on the anvil so I can make a hot cut for it here and save a little time down there. there was a complete smithy set up at this location years ago and I am hoping once some of the older guys see what the tools look like they remember what happened to some of the original tools that came along with the anvil. Thanks Russell Doerr
-
Thanks Charles! I found them online, but not as a printed book. I will keep looking. DWS I'm going to take a couple of set of wolf jaw tongs down with me, and they are trying to get a stick of 1"x1/4" flat bar to make twist tongs out of. here is my starting list Books 2 sets wolf jaw tongs 1 ball peen hammer 1 rounding hammer 20 3/8 rivets 1 1/4" handled punch 1 1/4" drift 1 3/8" drift
-
I built my first set of flairs out of 17-4 PH HH1150 ss. After 2 years the ends were burnt up and even more flared out. so flared that the would not come out thru the hole I put them in thru. I don't know what the life expectancy is on a flair so take it for what its worth.
-
I just ordered the following to take down and leave there. A Blacksmithing Primer by McDaniel New Edge of the Anvil. by Jack Andrew The Complete Modern Blacksmith. by Weygers Manual de herreria / Blacksmith's Manual. by Luis Lesur
-
Thank you Thomas! Yes it had a lot of drawings and simple tools if I remember correctly. I have been asked to try and set up a blacksmith shop it Nicaragua later this summer and I want to take a copy of it down with me, hopefully in Spanish. I have been in contact with Glenn about a side draft "55" forge setup to burn wood. they have a anvil on hand that looks to be around 150# from eastern Europe or Russia circa 1970 I have them scrounging up 55 gal drums, leaf springs, coil springs, buckets and other odds and ends I have to figure what I need to take down in my baggage for start up, any suggestions? I will only be there 5 days and everything has to go in my luggage at who knows how much per pound over 45 pounds. Thanks Russell