

chris freeman
-
Posts
50 -
Joined
-
Last visited
Content Type
Profiles
Forums
Articles
Gallery
Downloads
Events
Posts posted by chris freeman
-
-
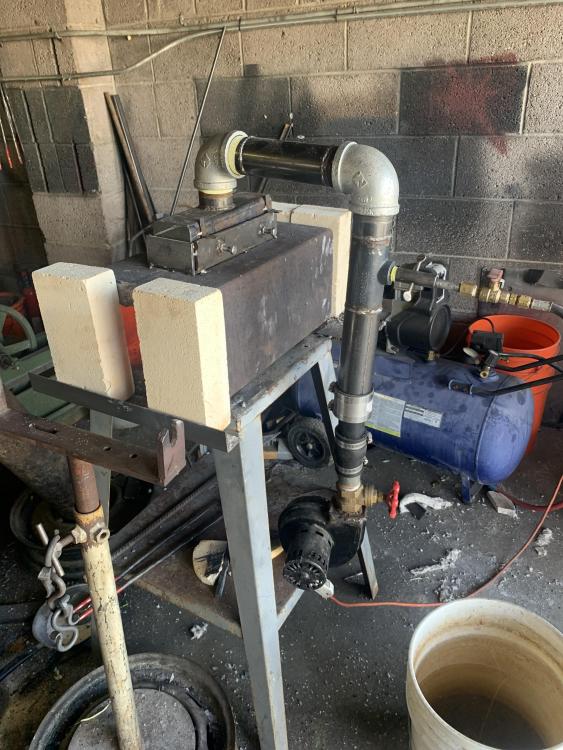
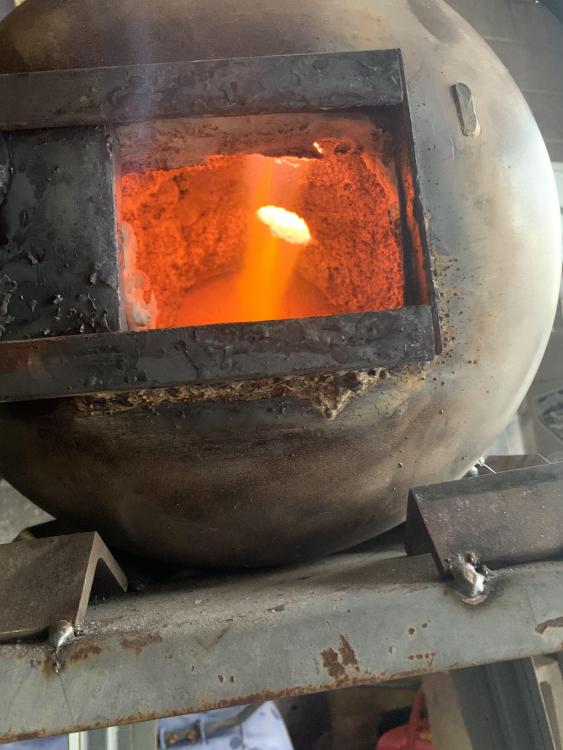
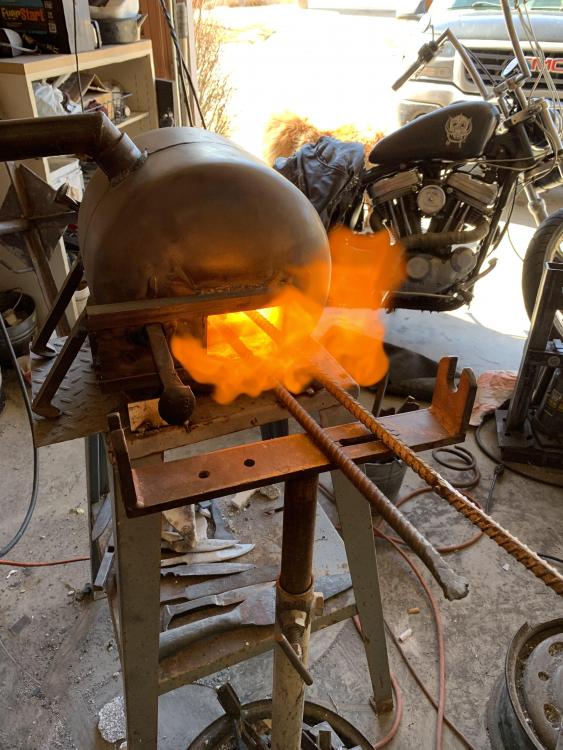
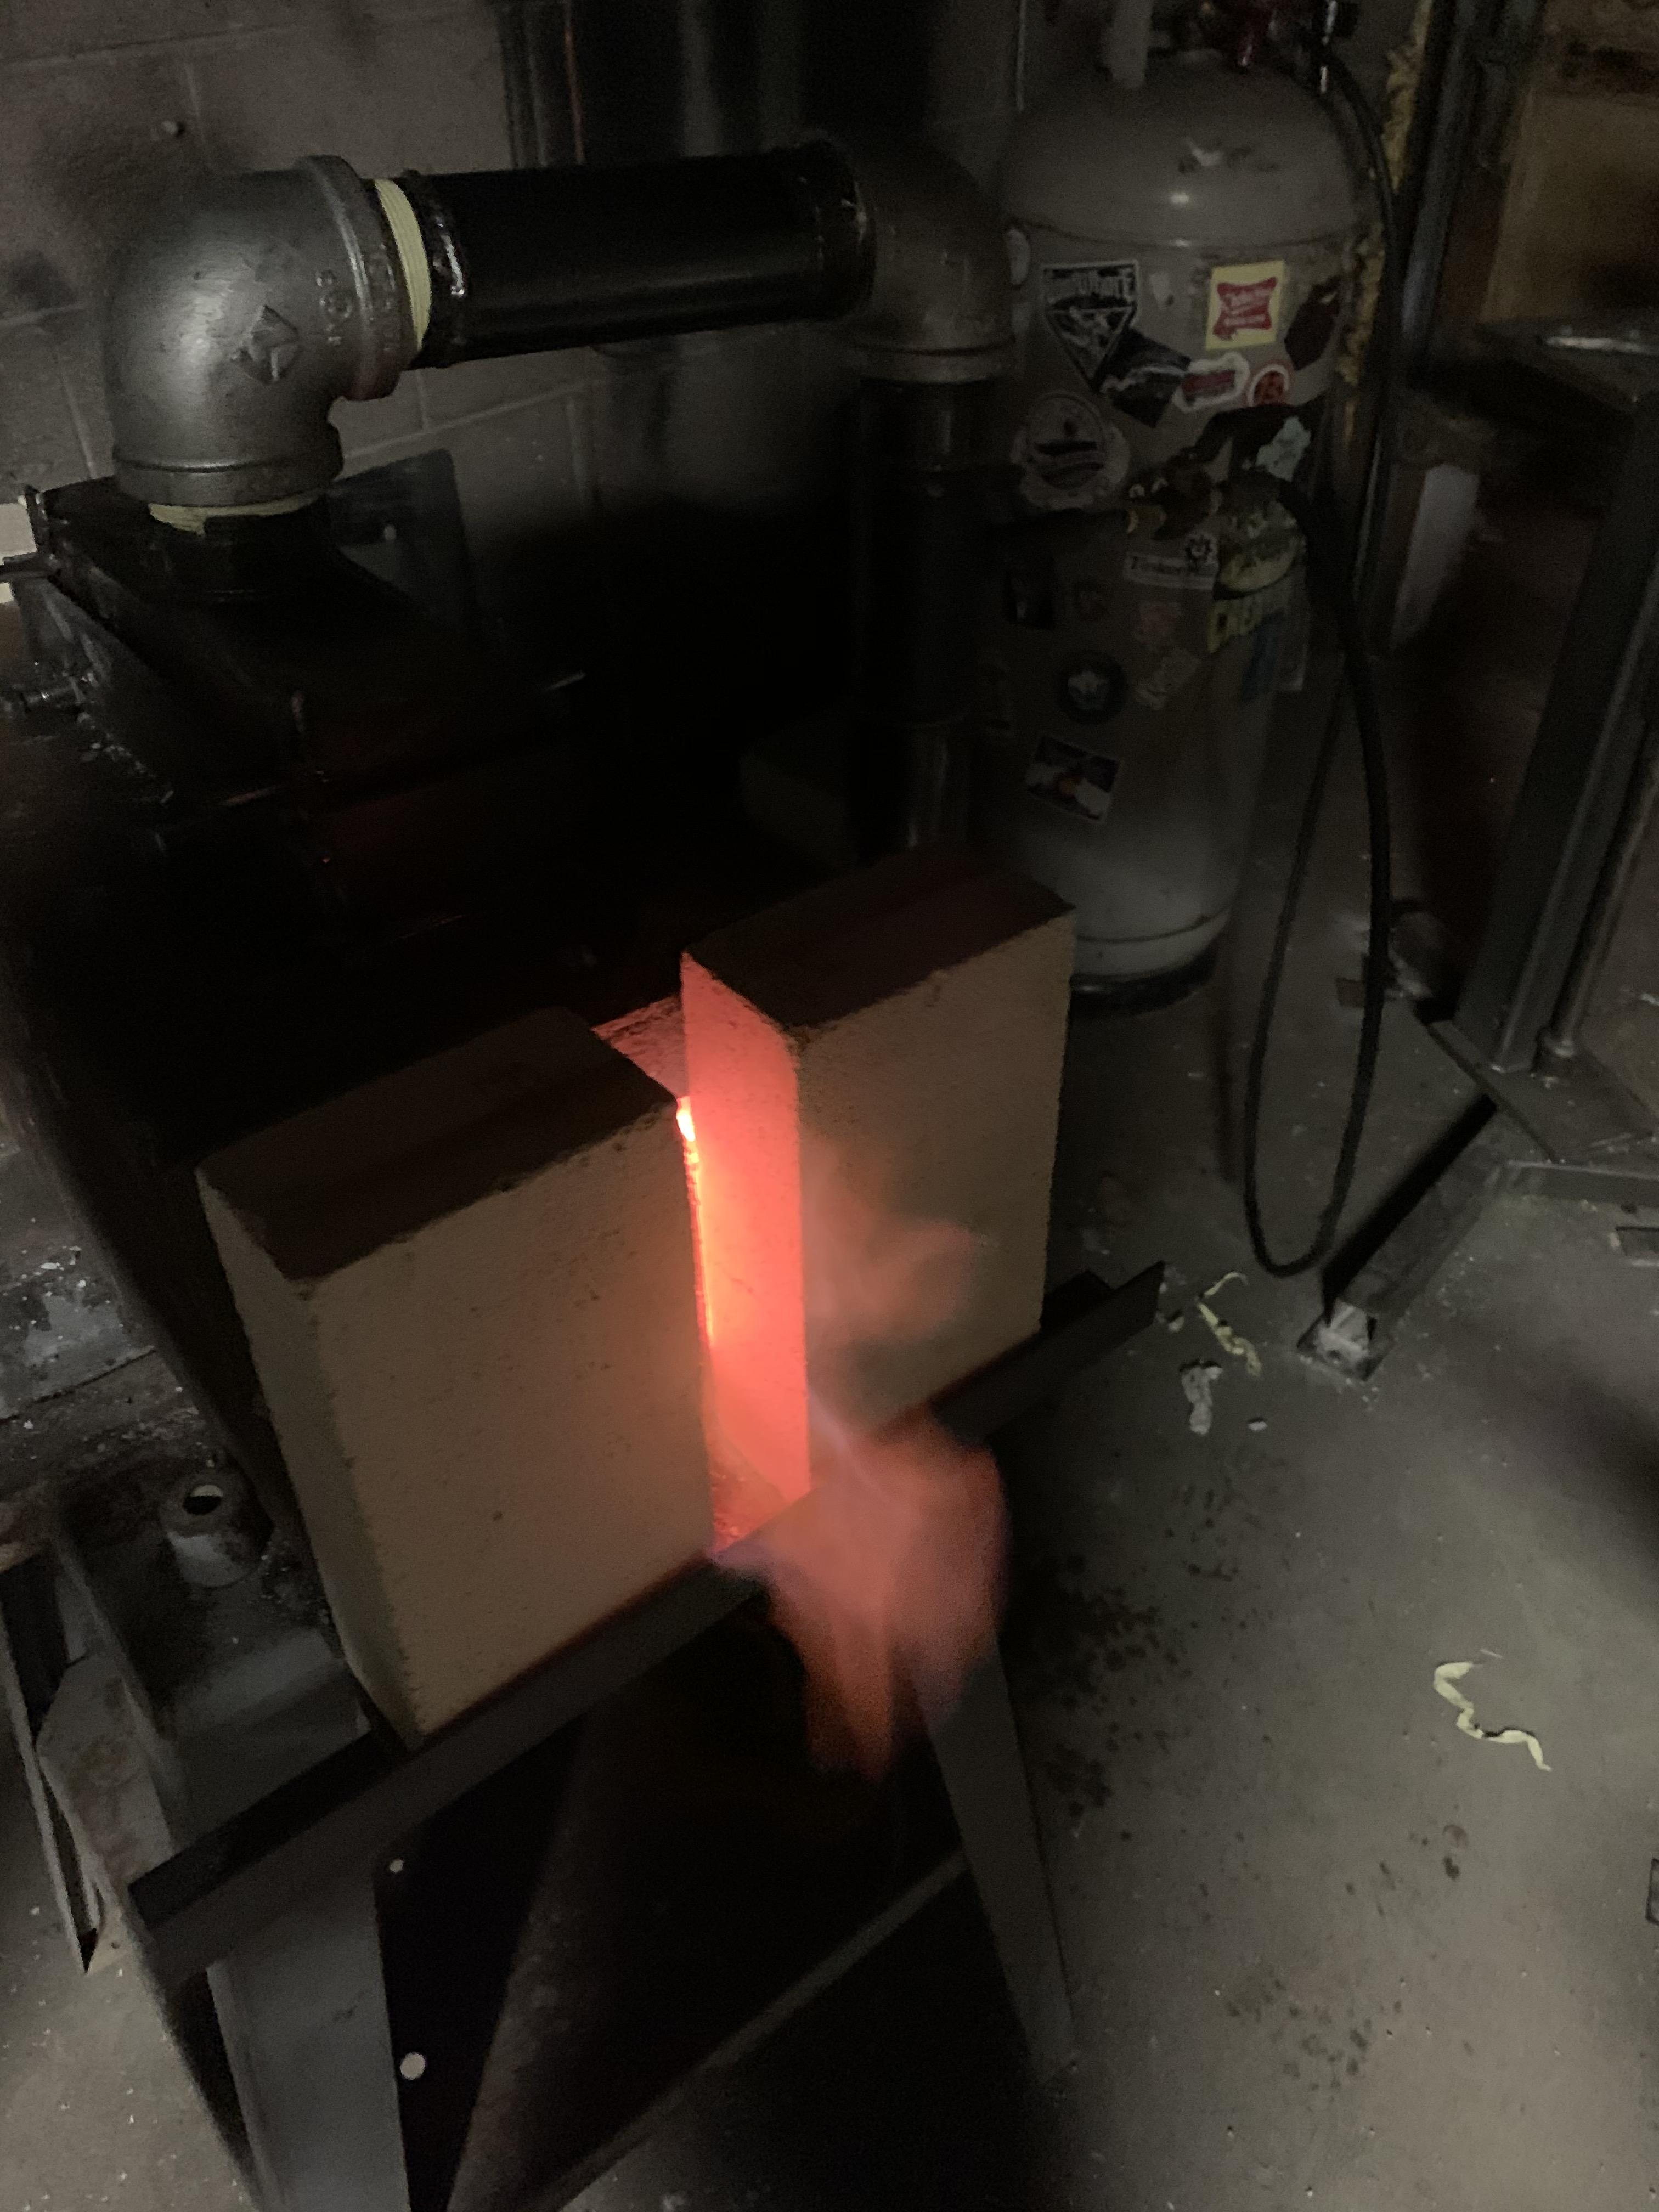
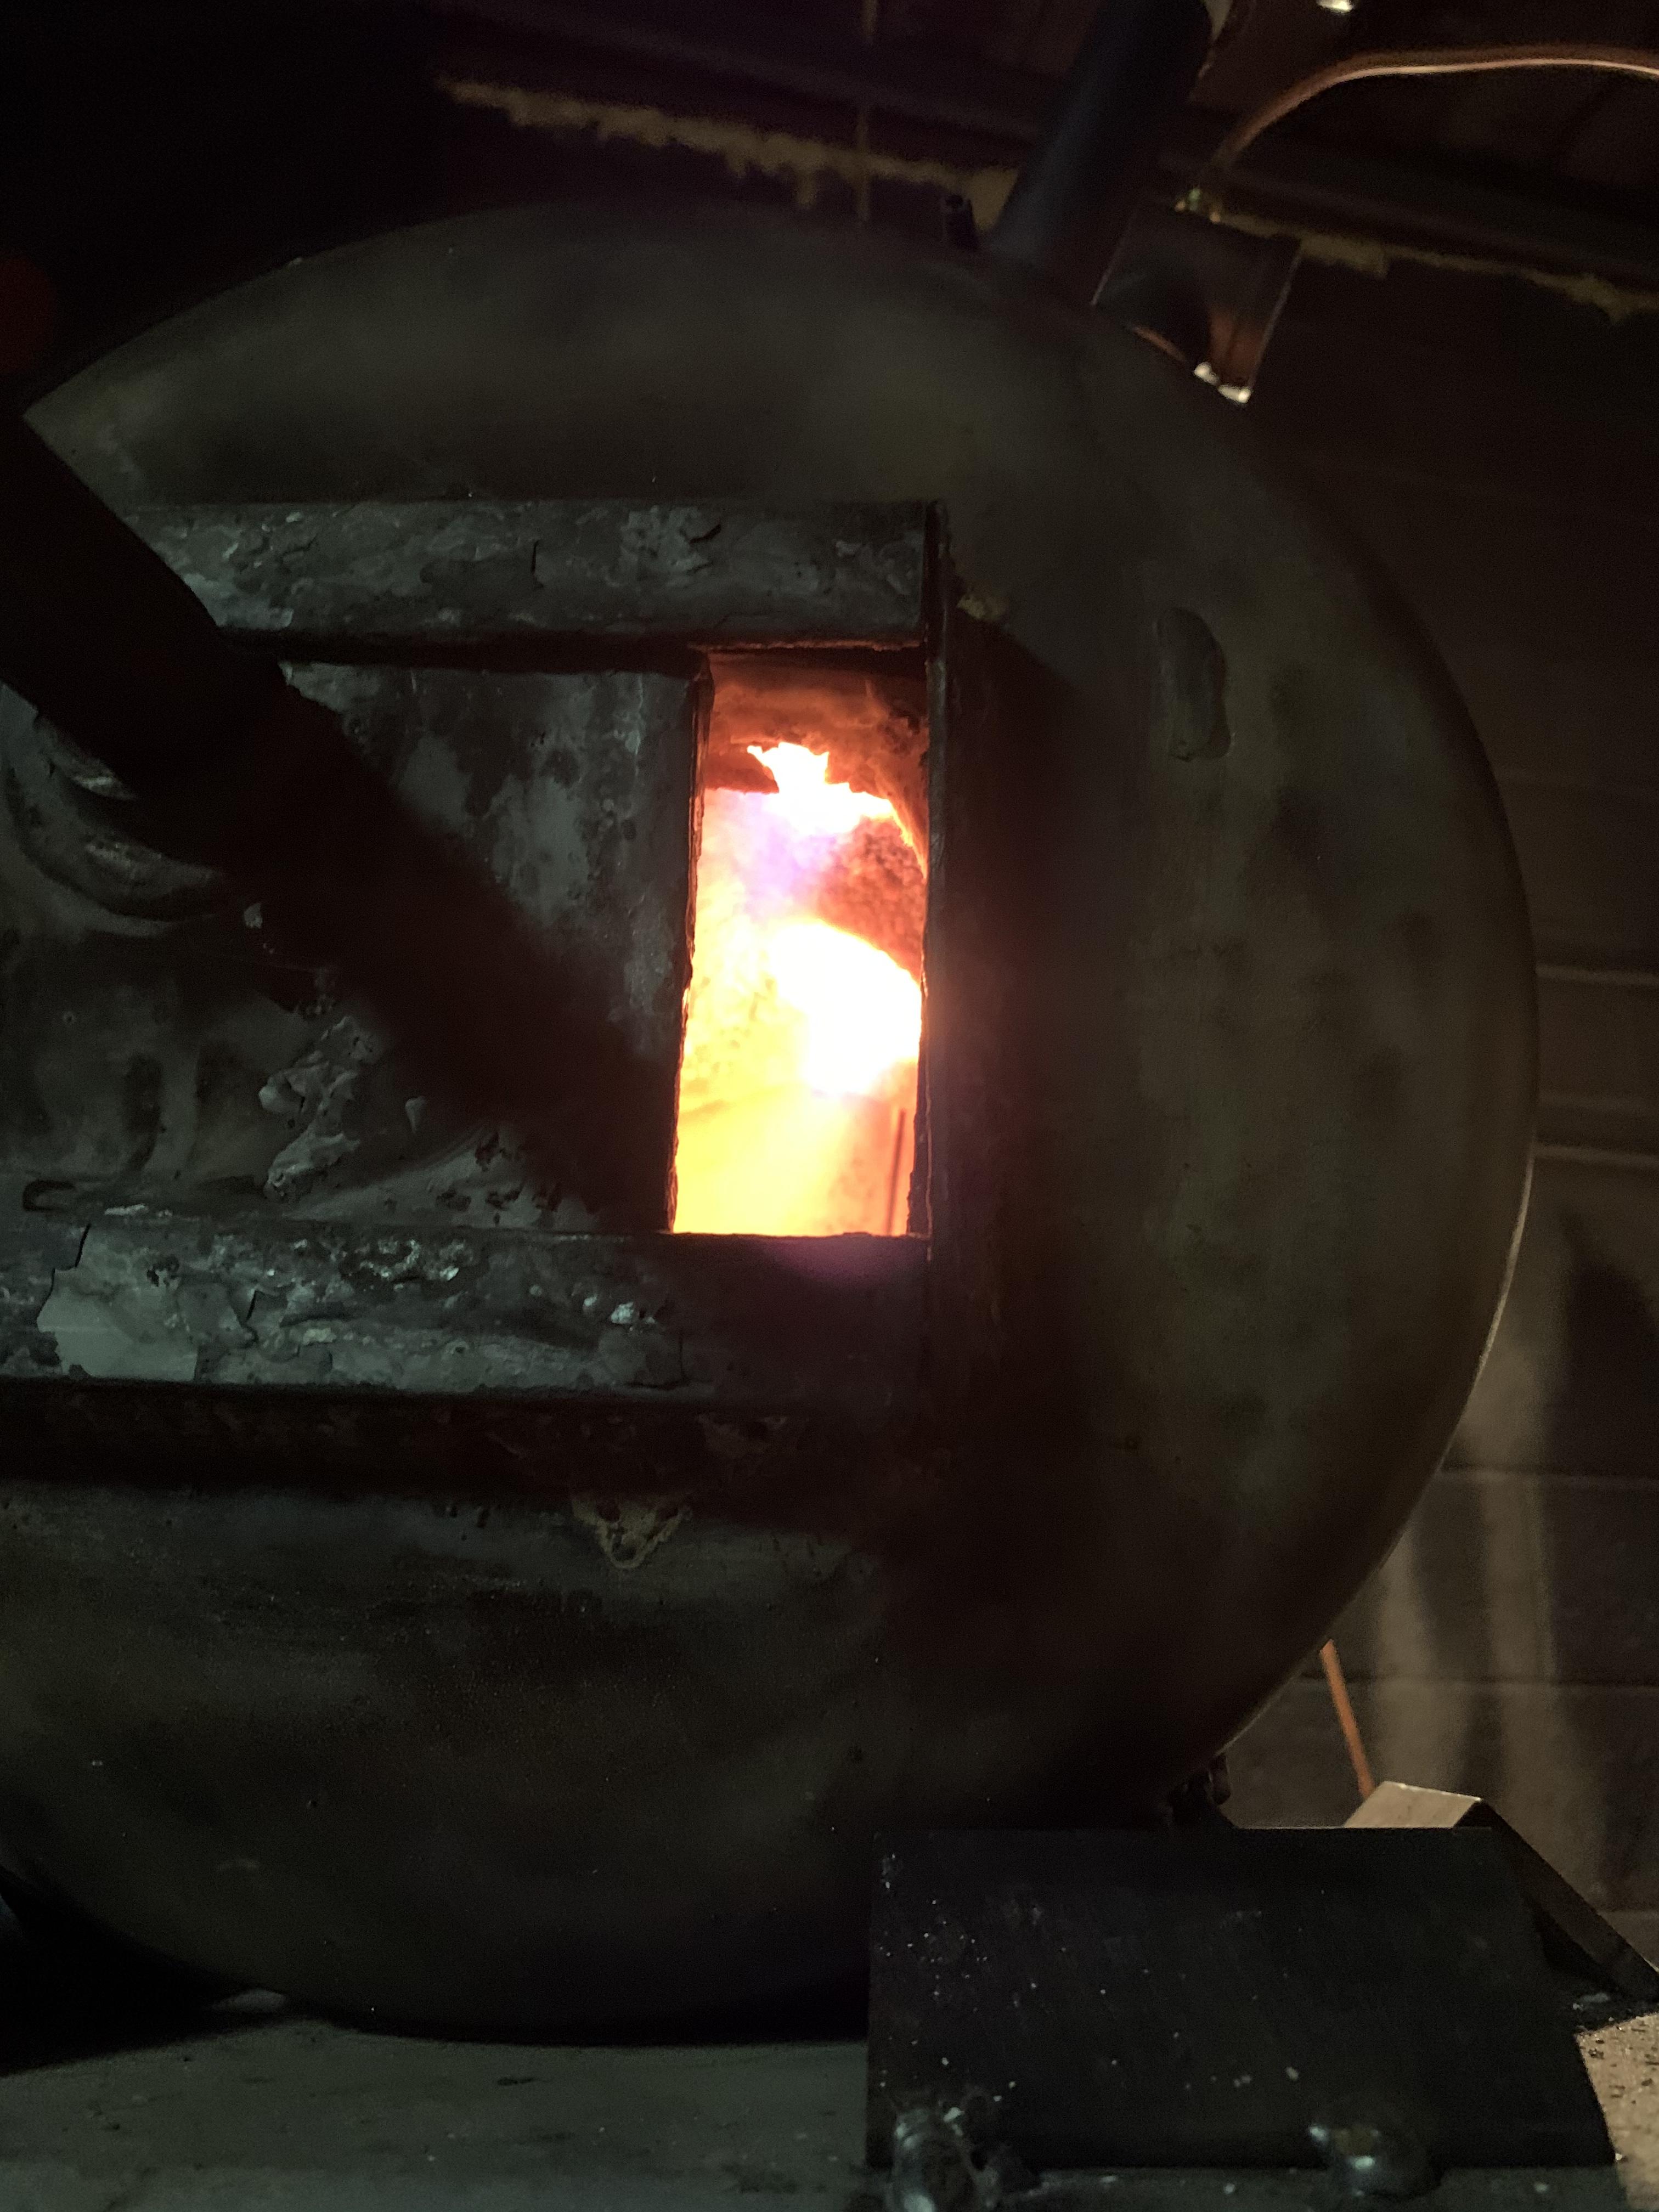
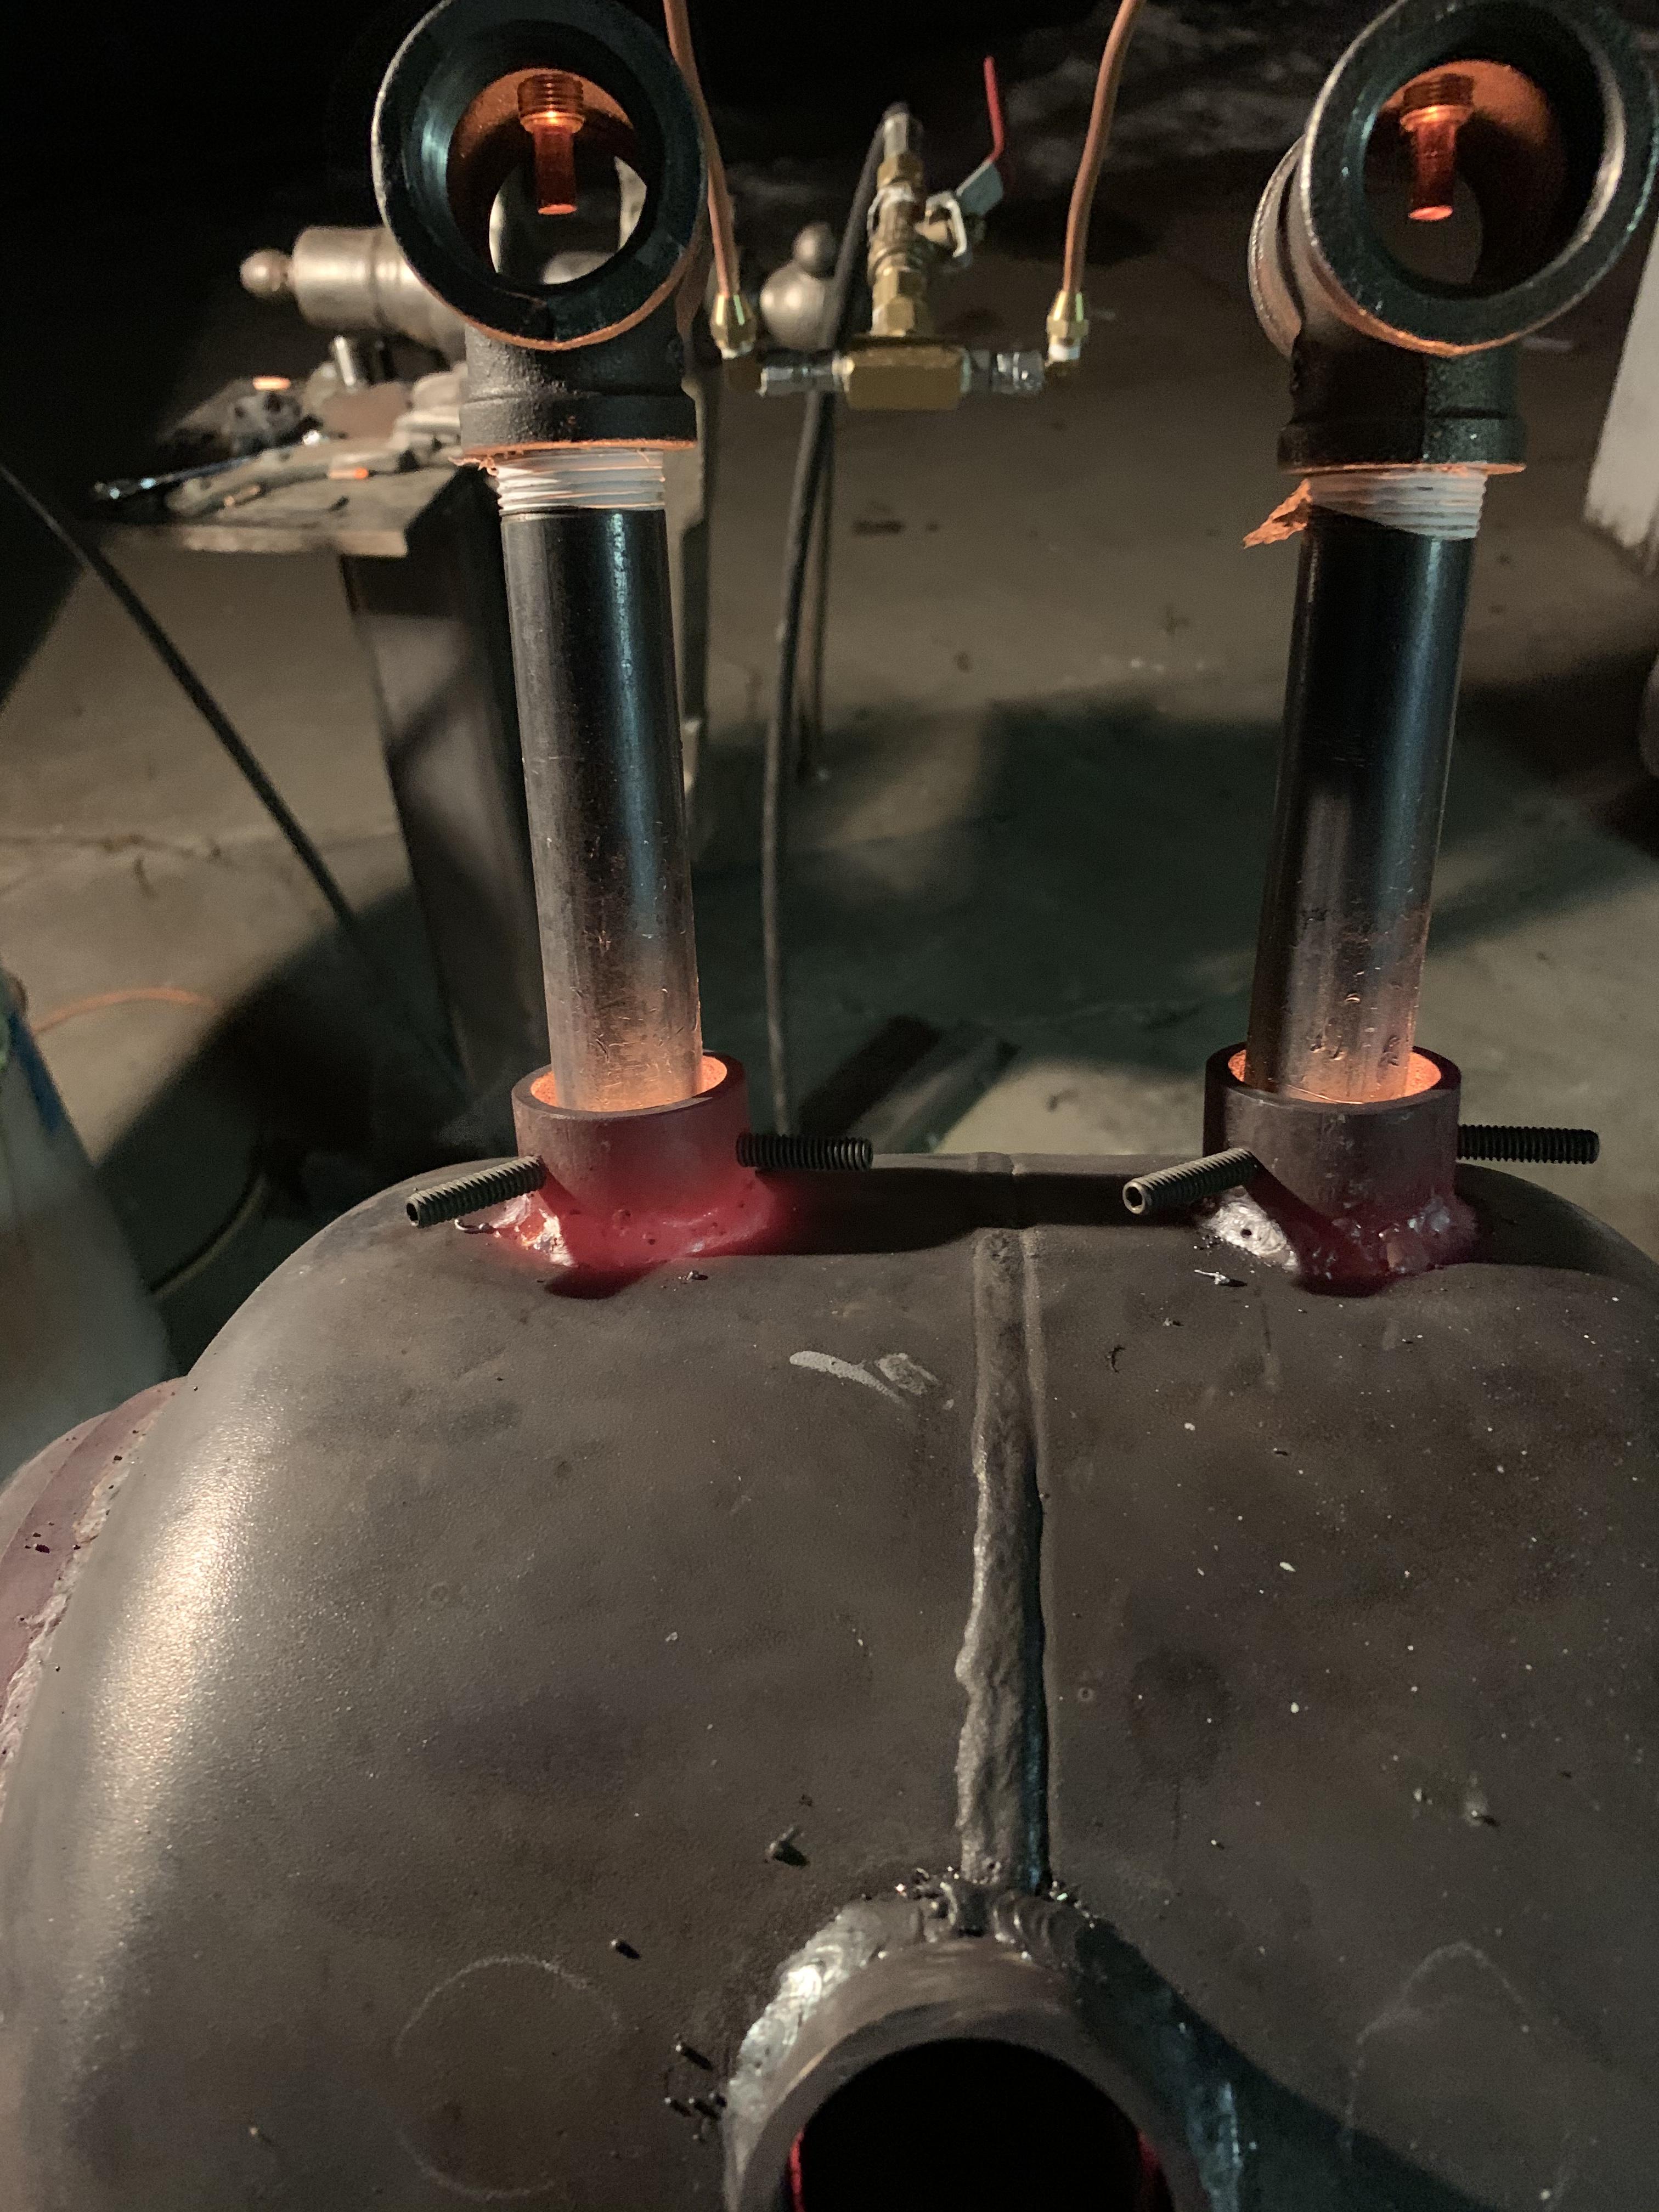
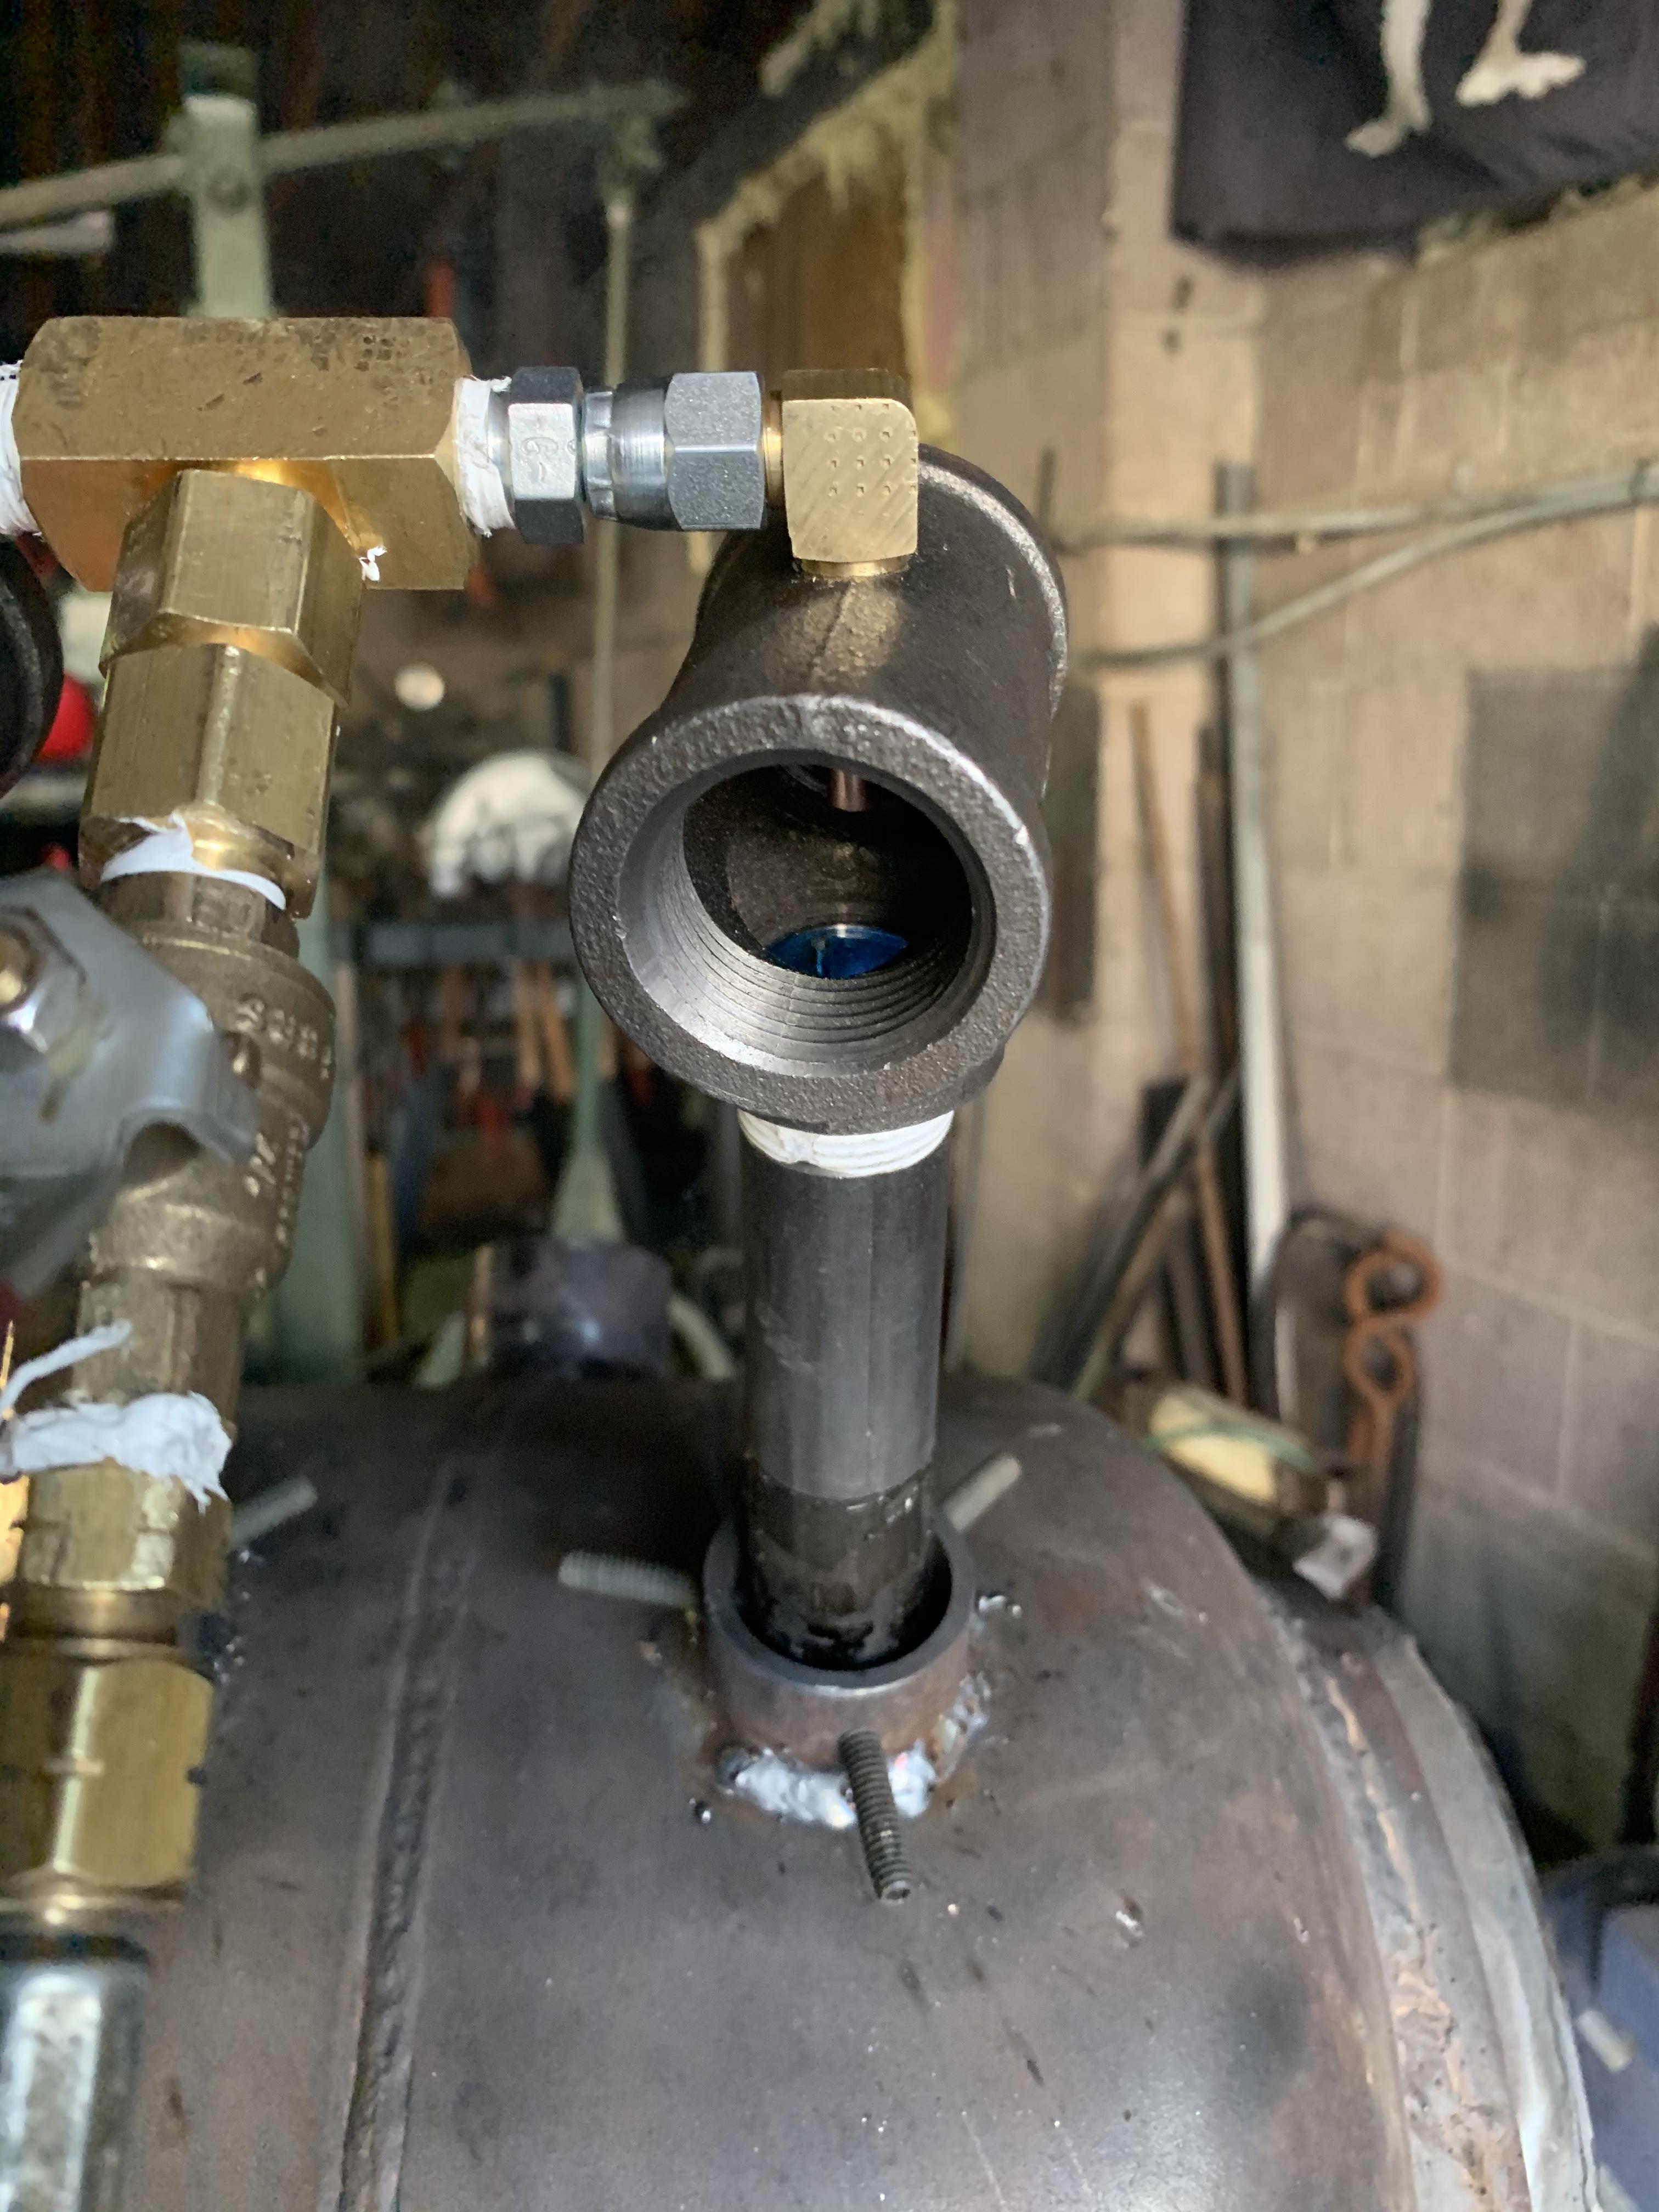
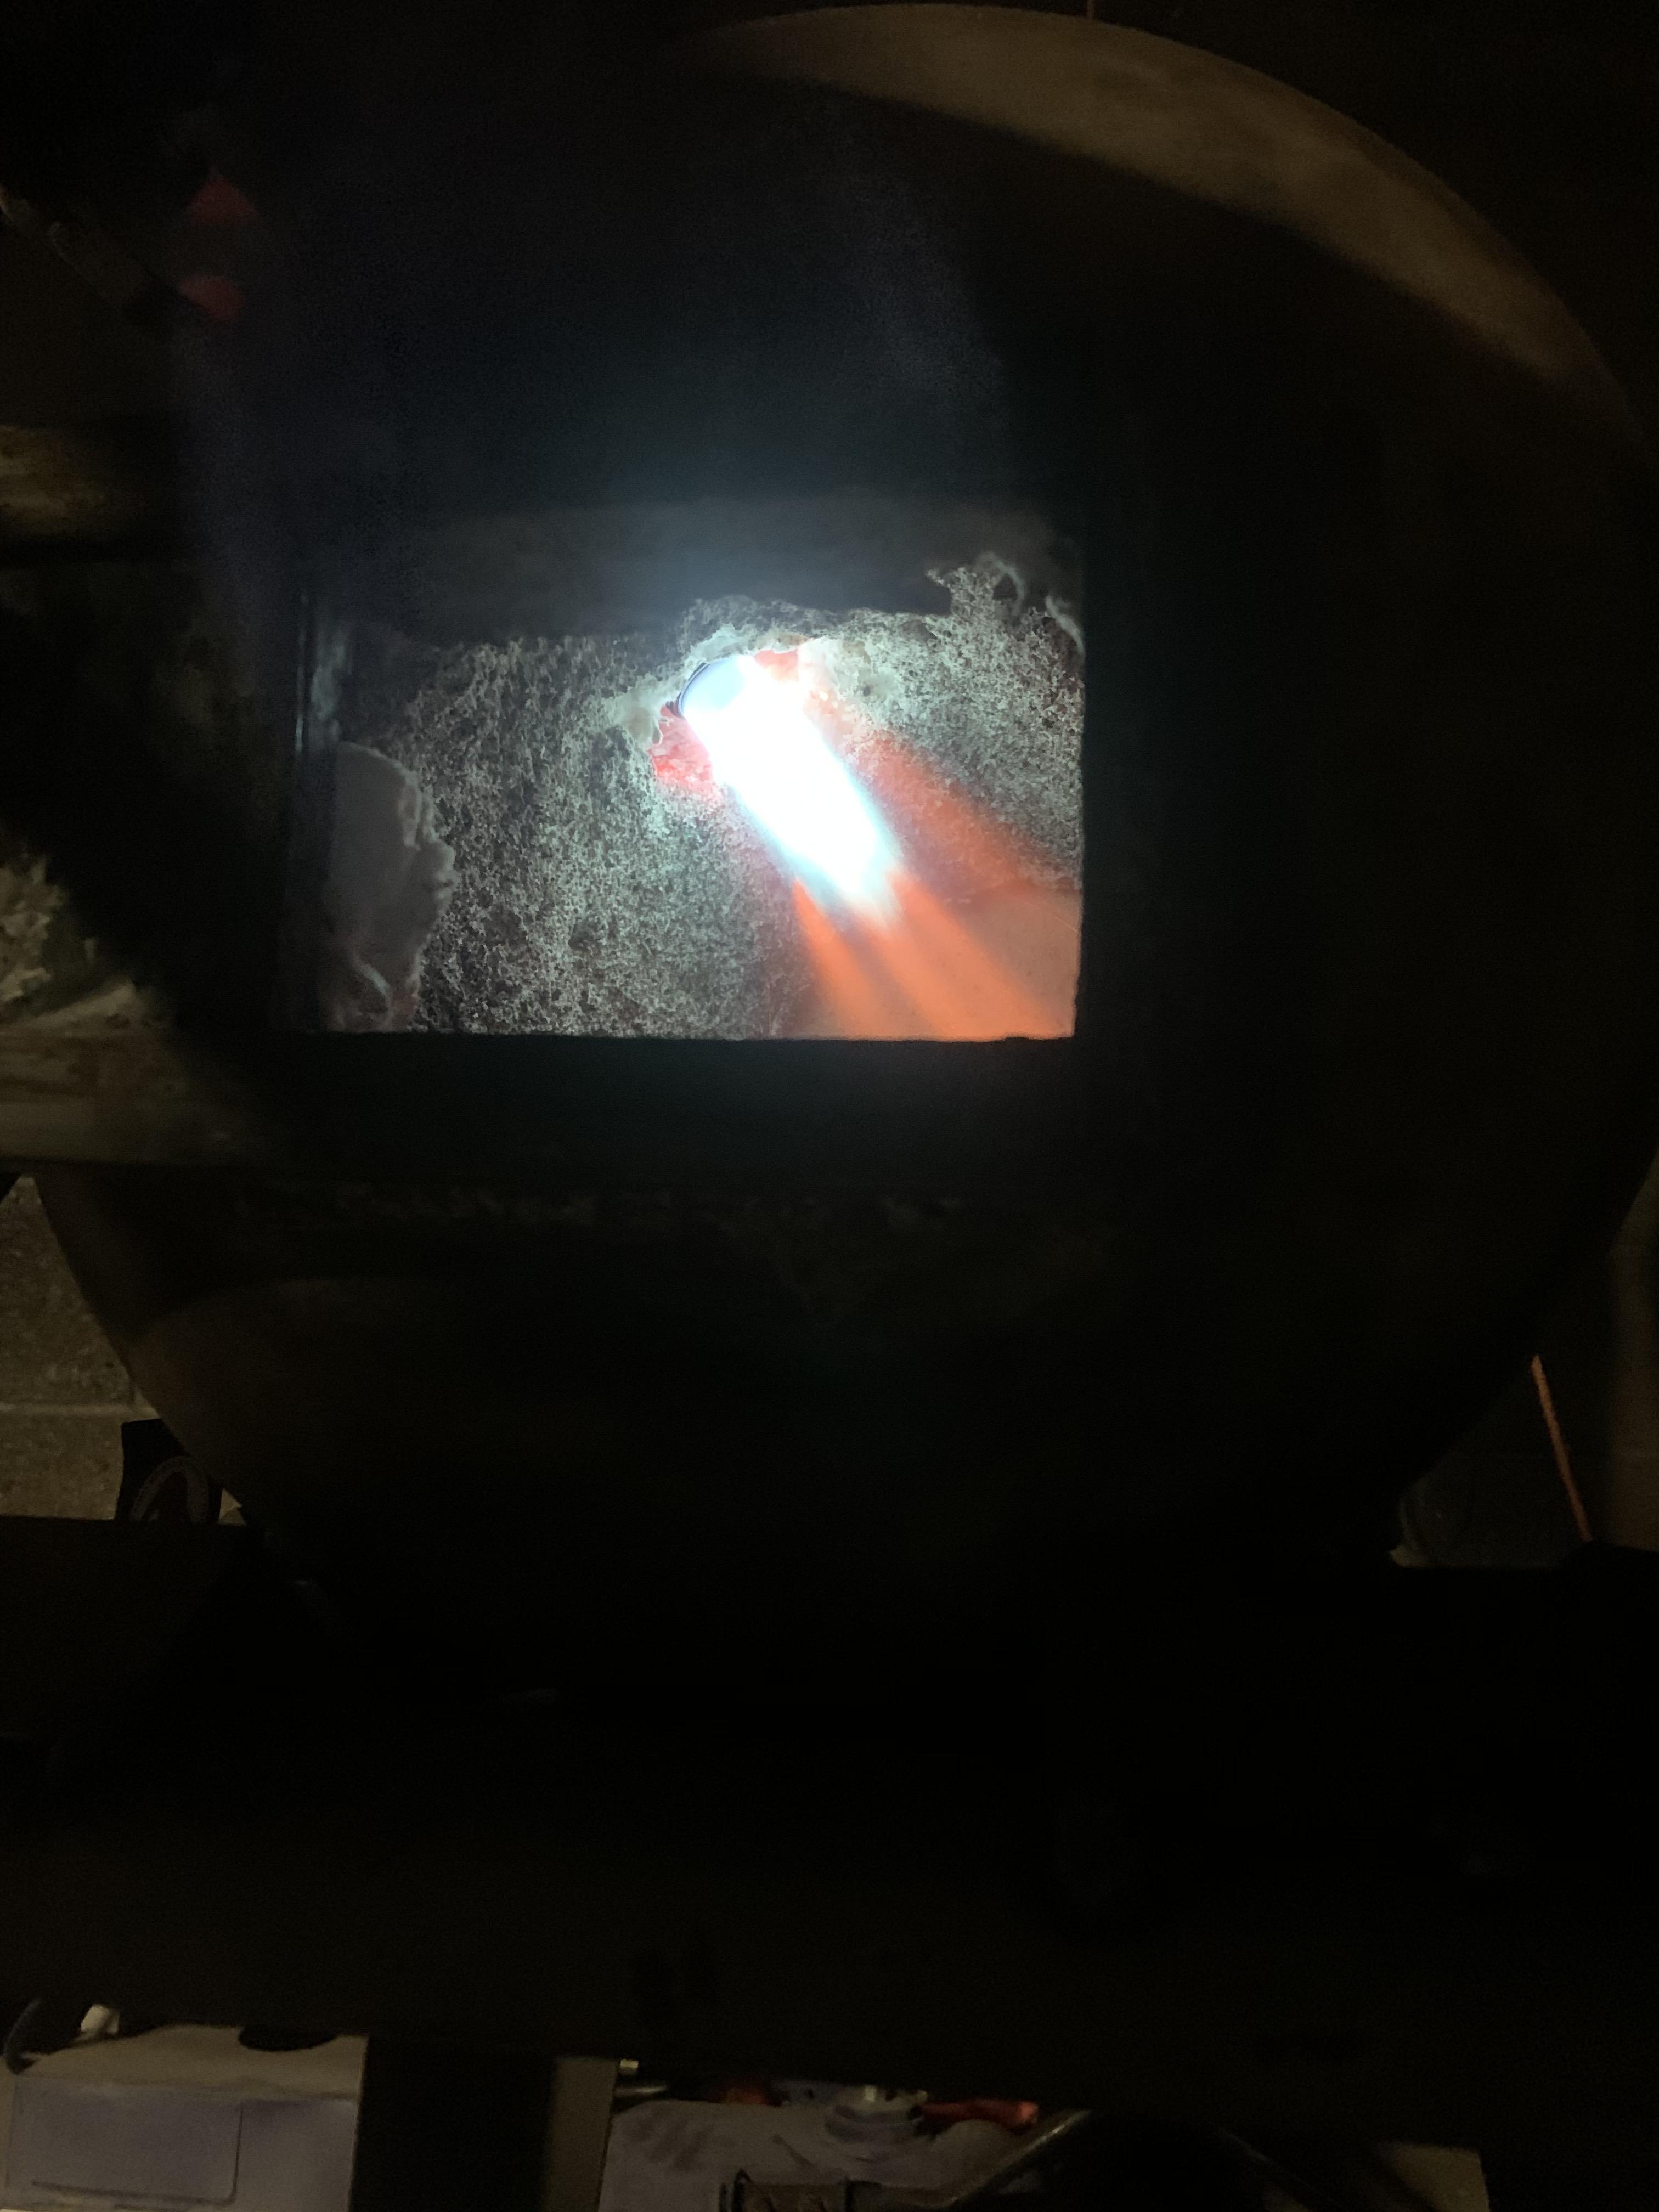
I was happily forging away in my new ribbon burner forge and as I was working all the sudden my forge went POOF! I need to say it scared the xxxx out of me. I tried to adjust a little bit and it did it again a couple more times almost back to back. I should everything down immediately and got on this forum to find out what that could be. I know one thing I do not want to get blown up. Here is a picture of my set up.

Chris
-
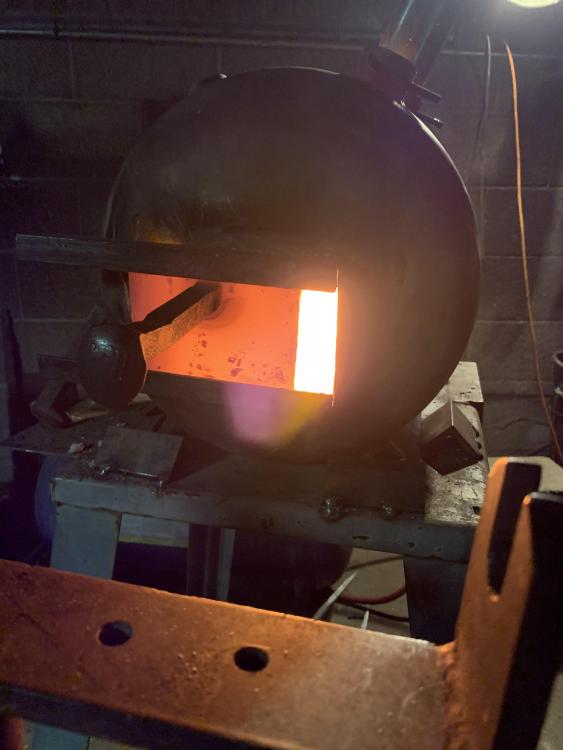
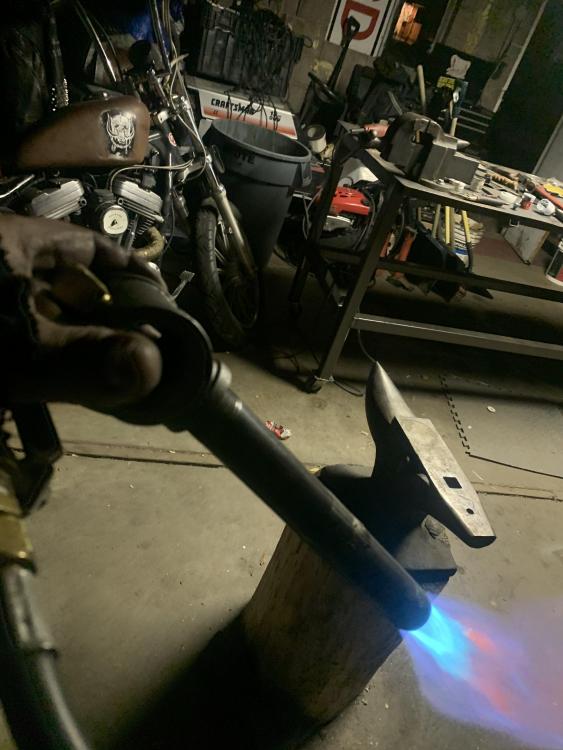
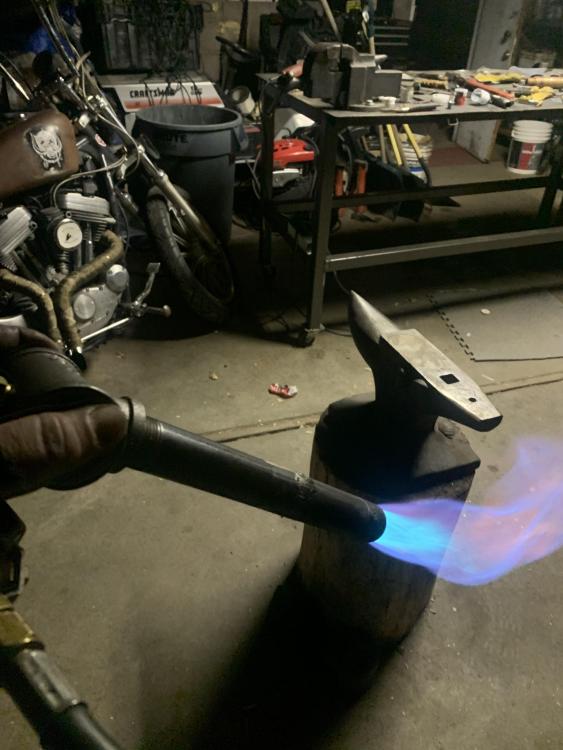
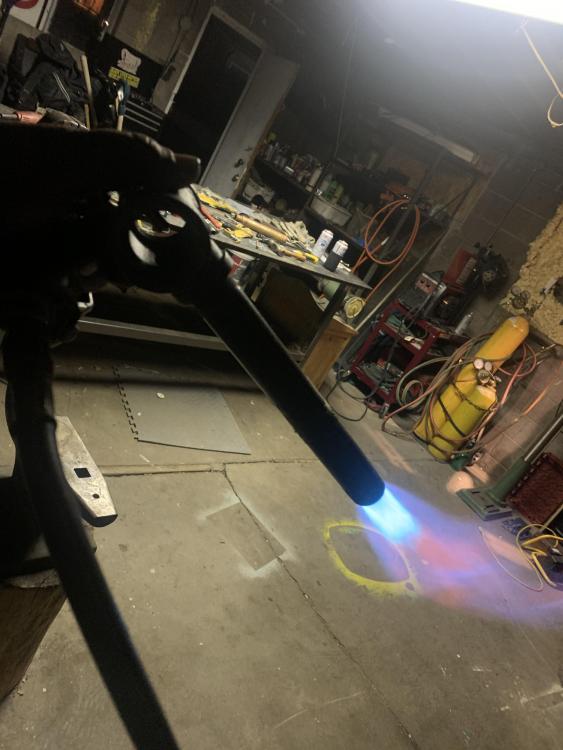
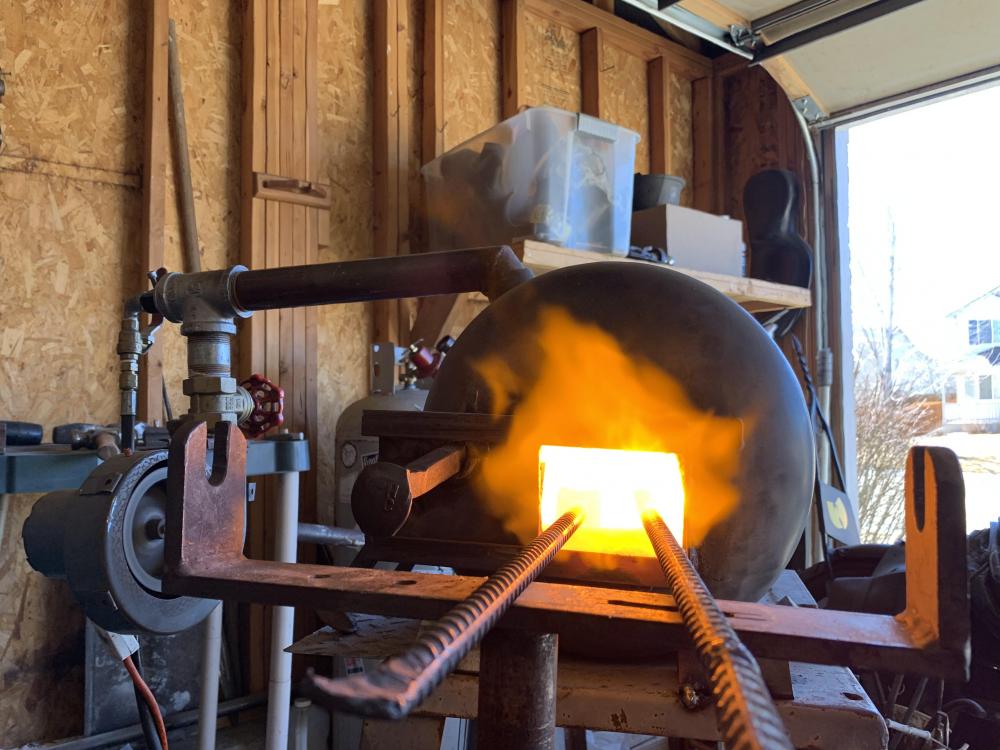
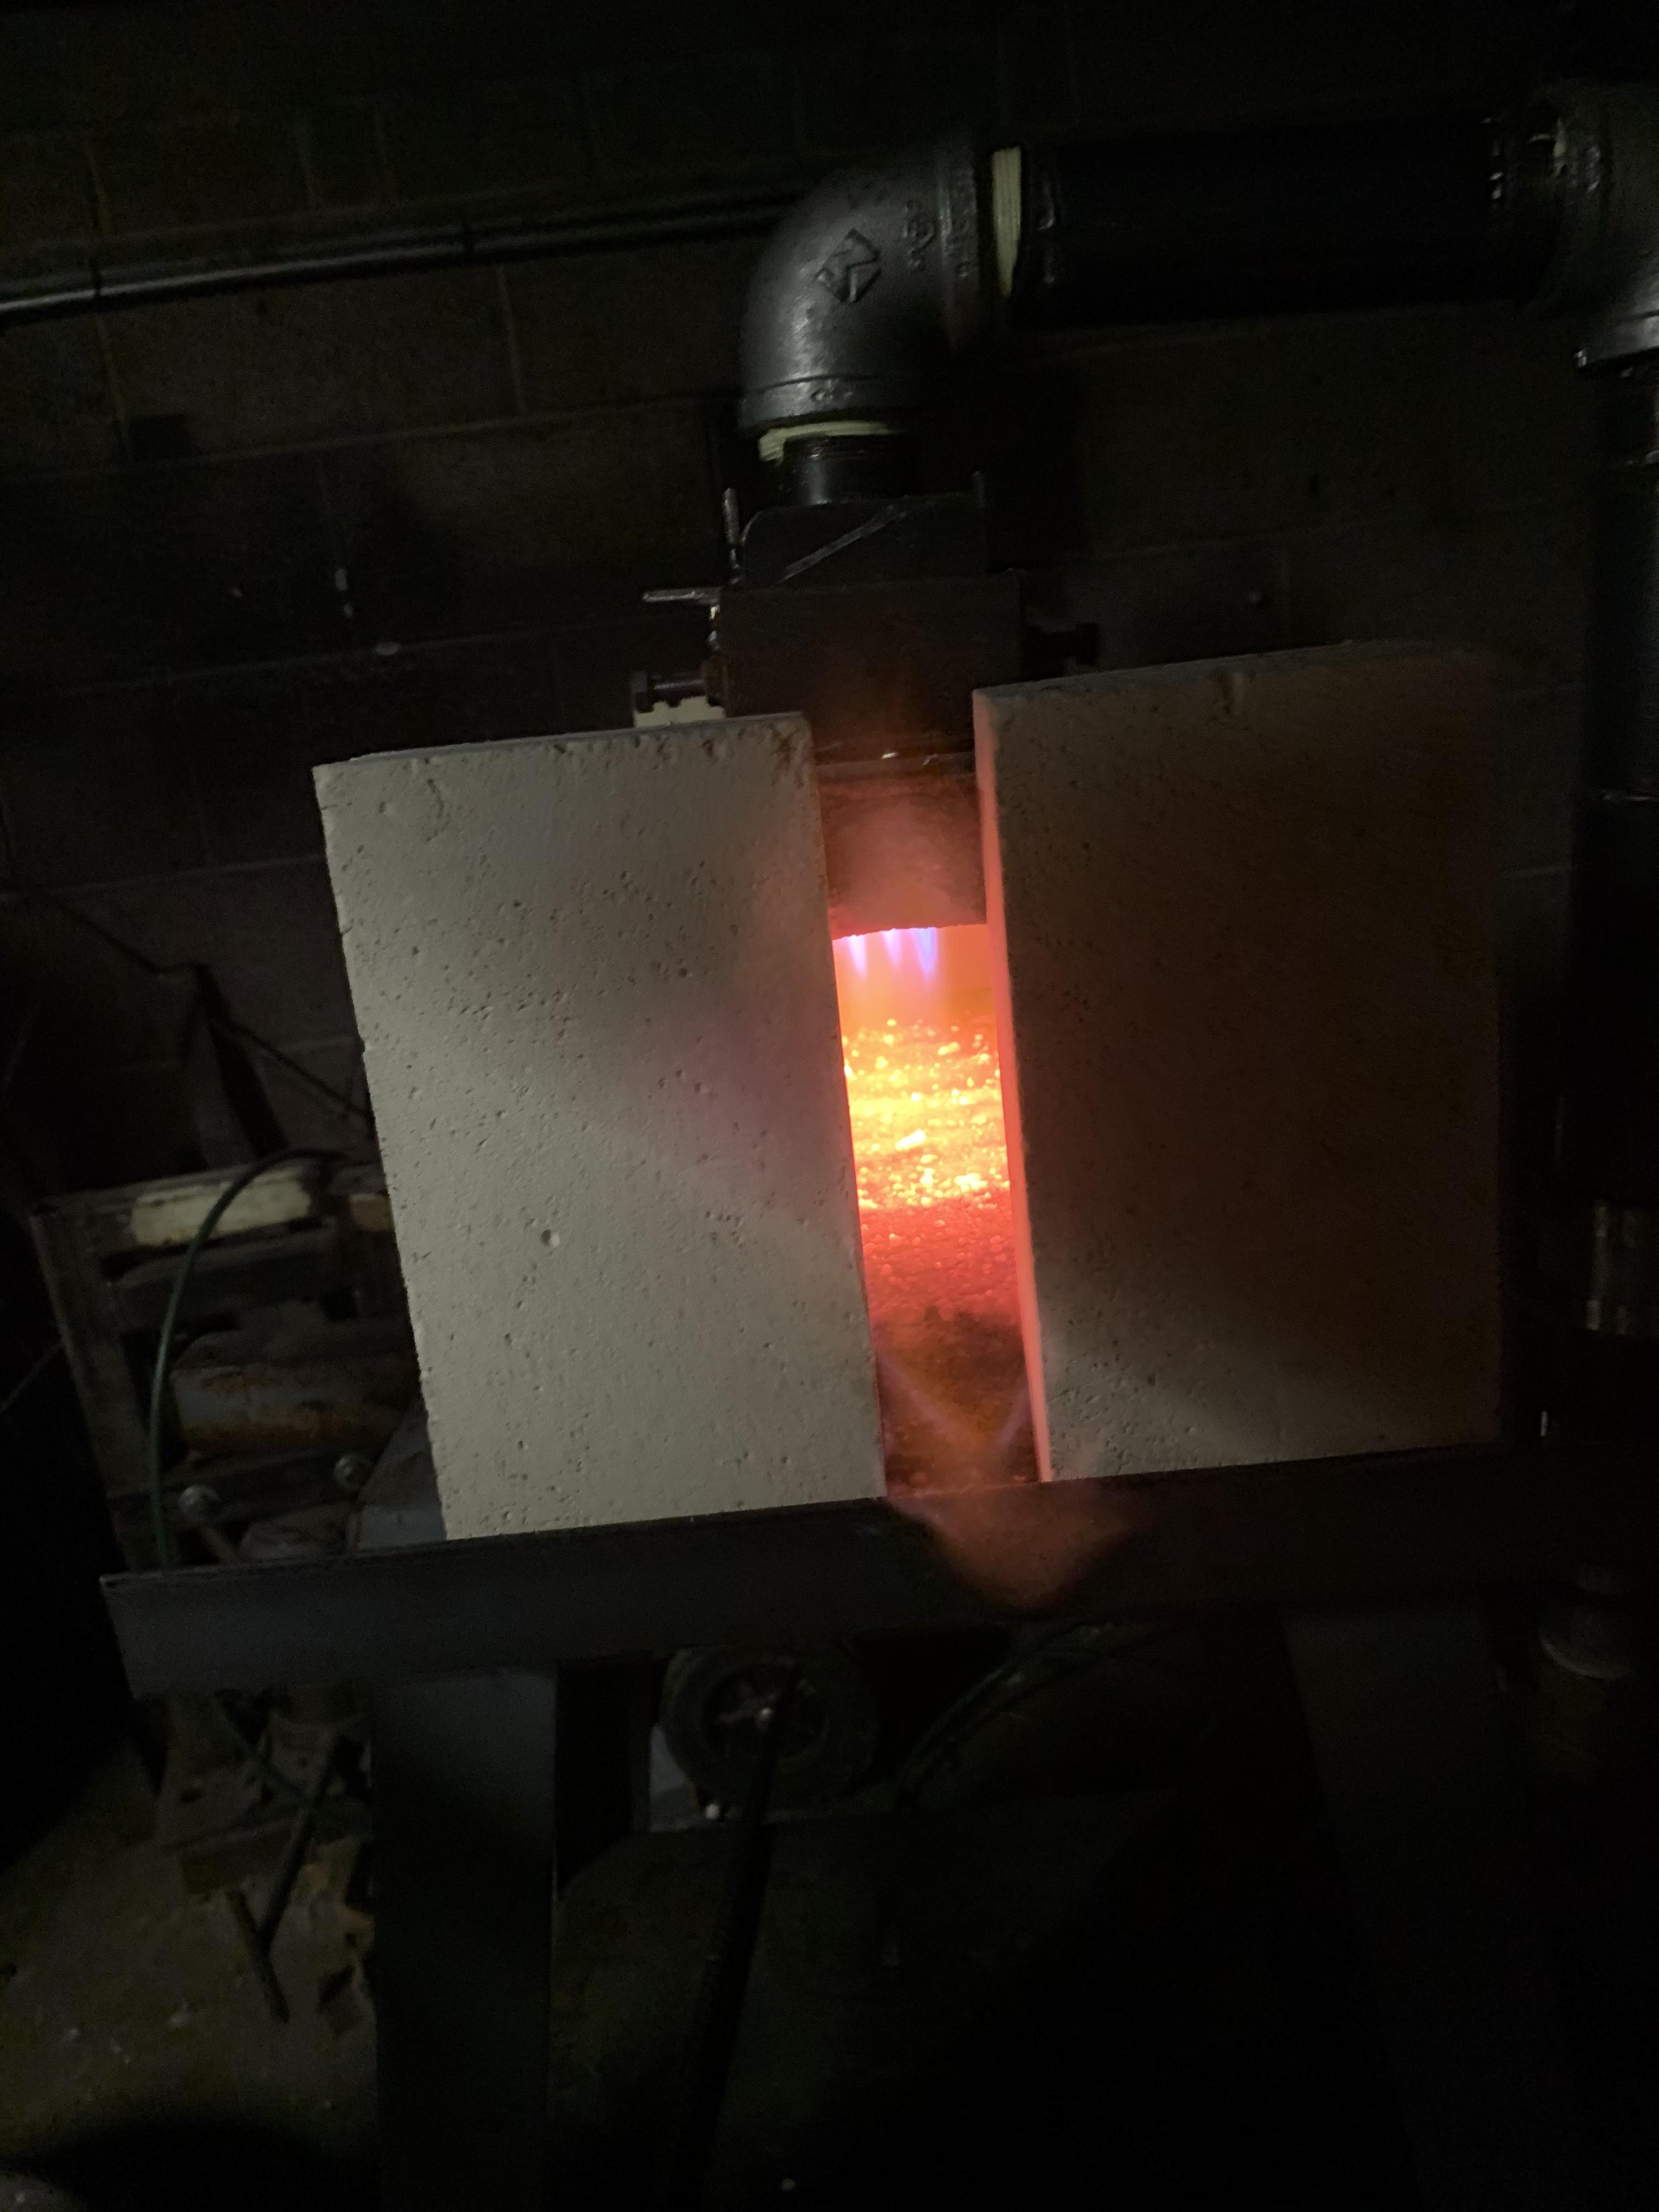
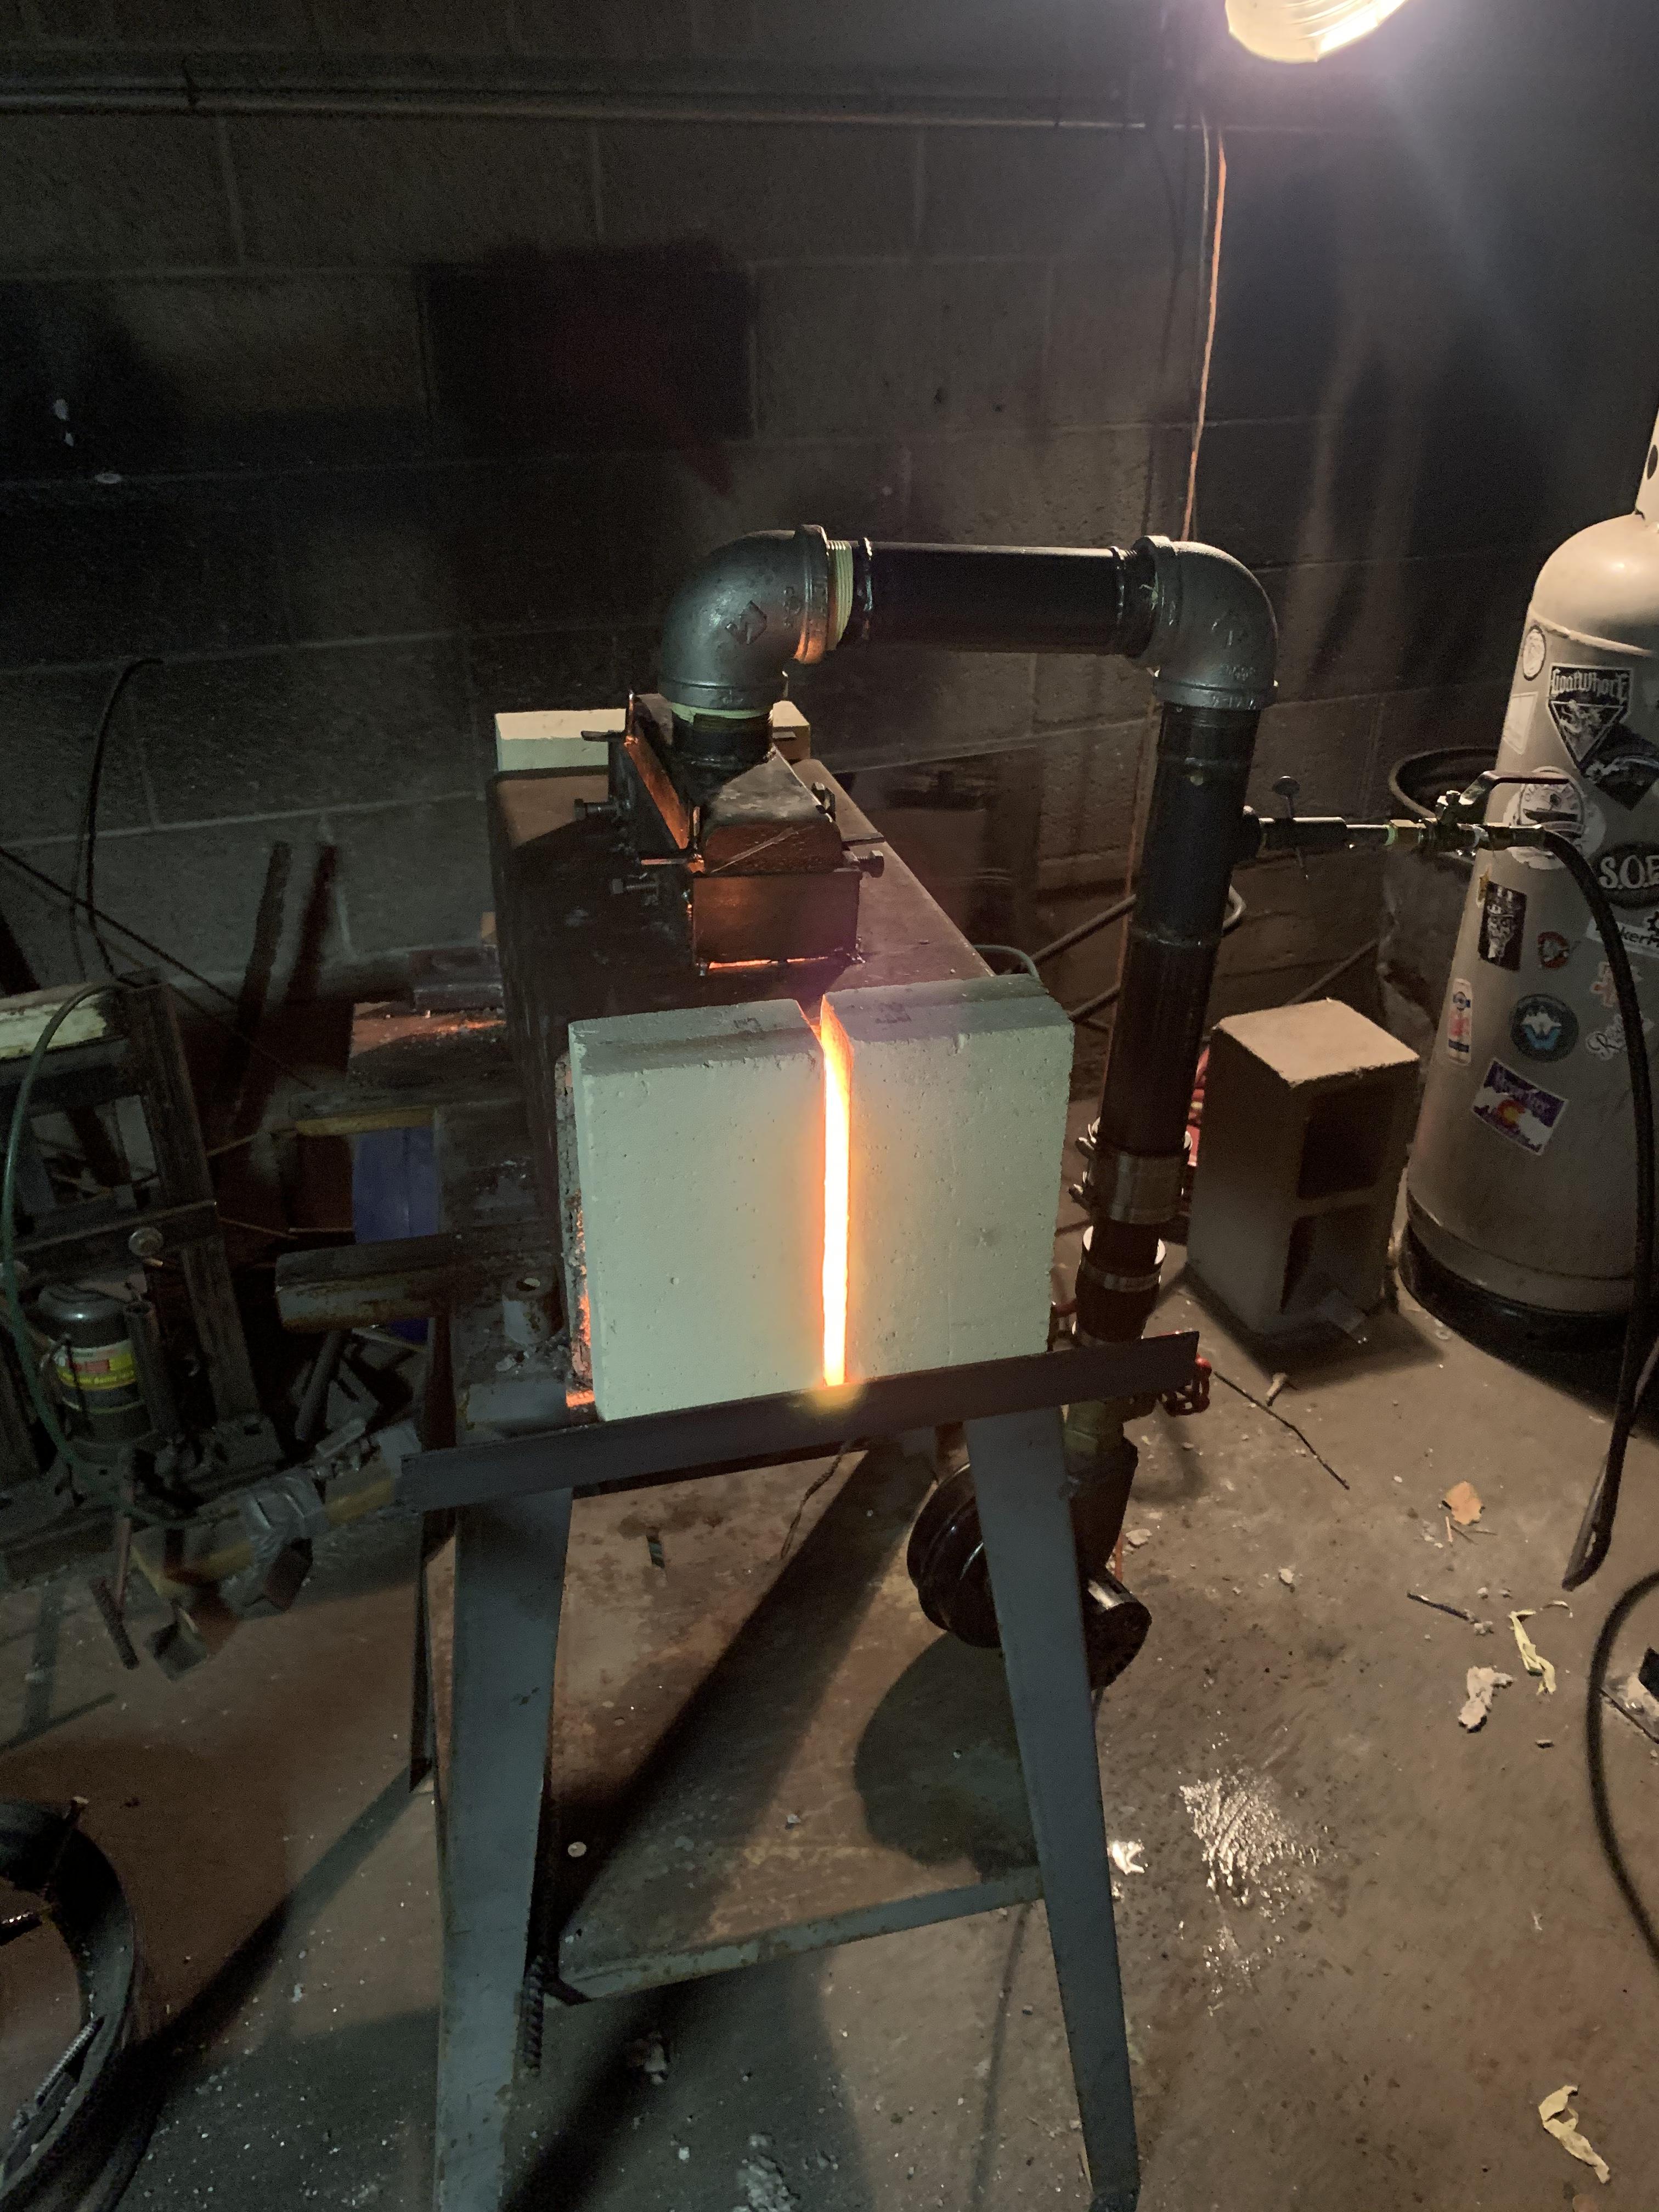
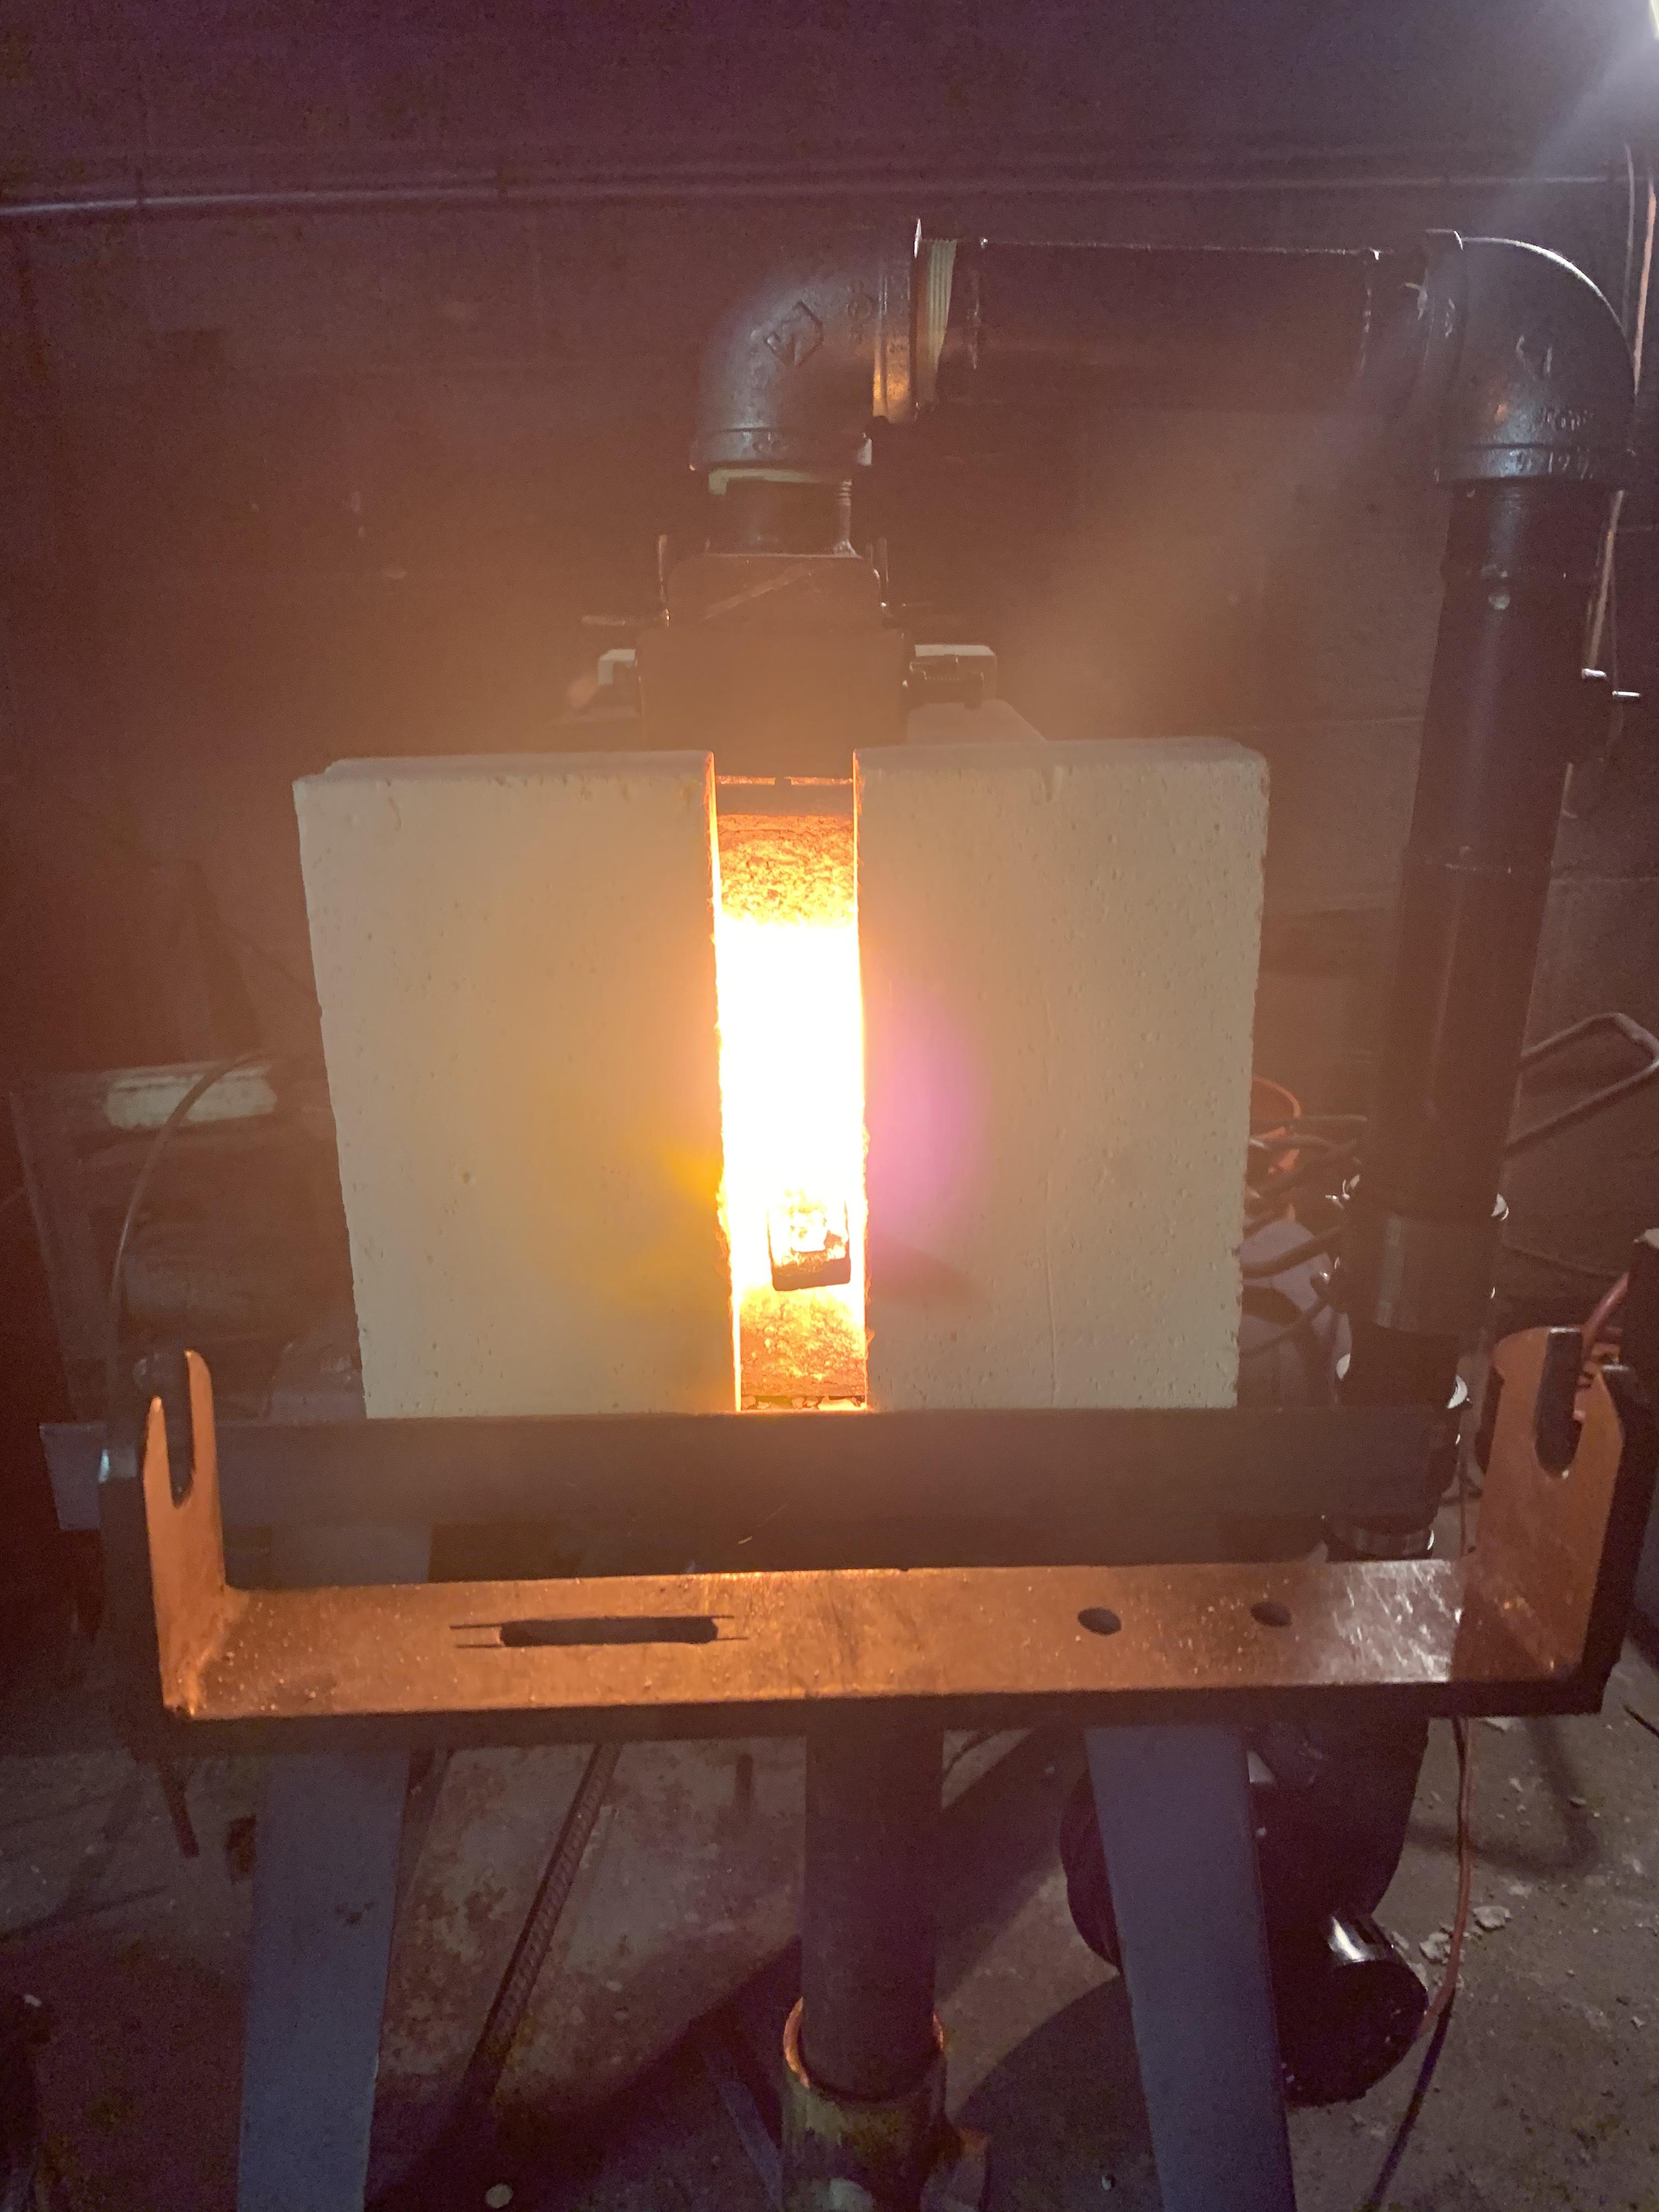
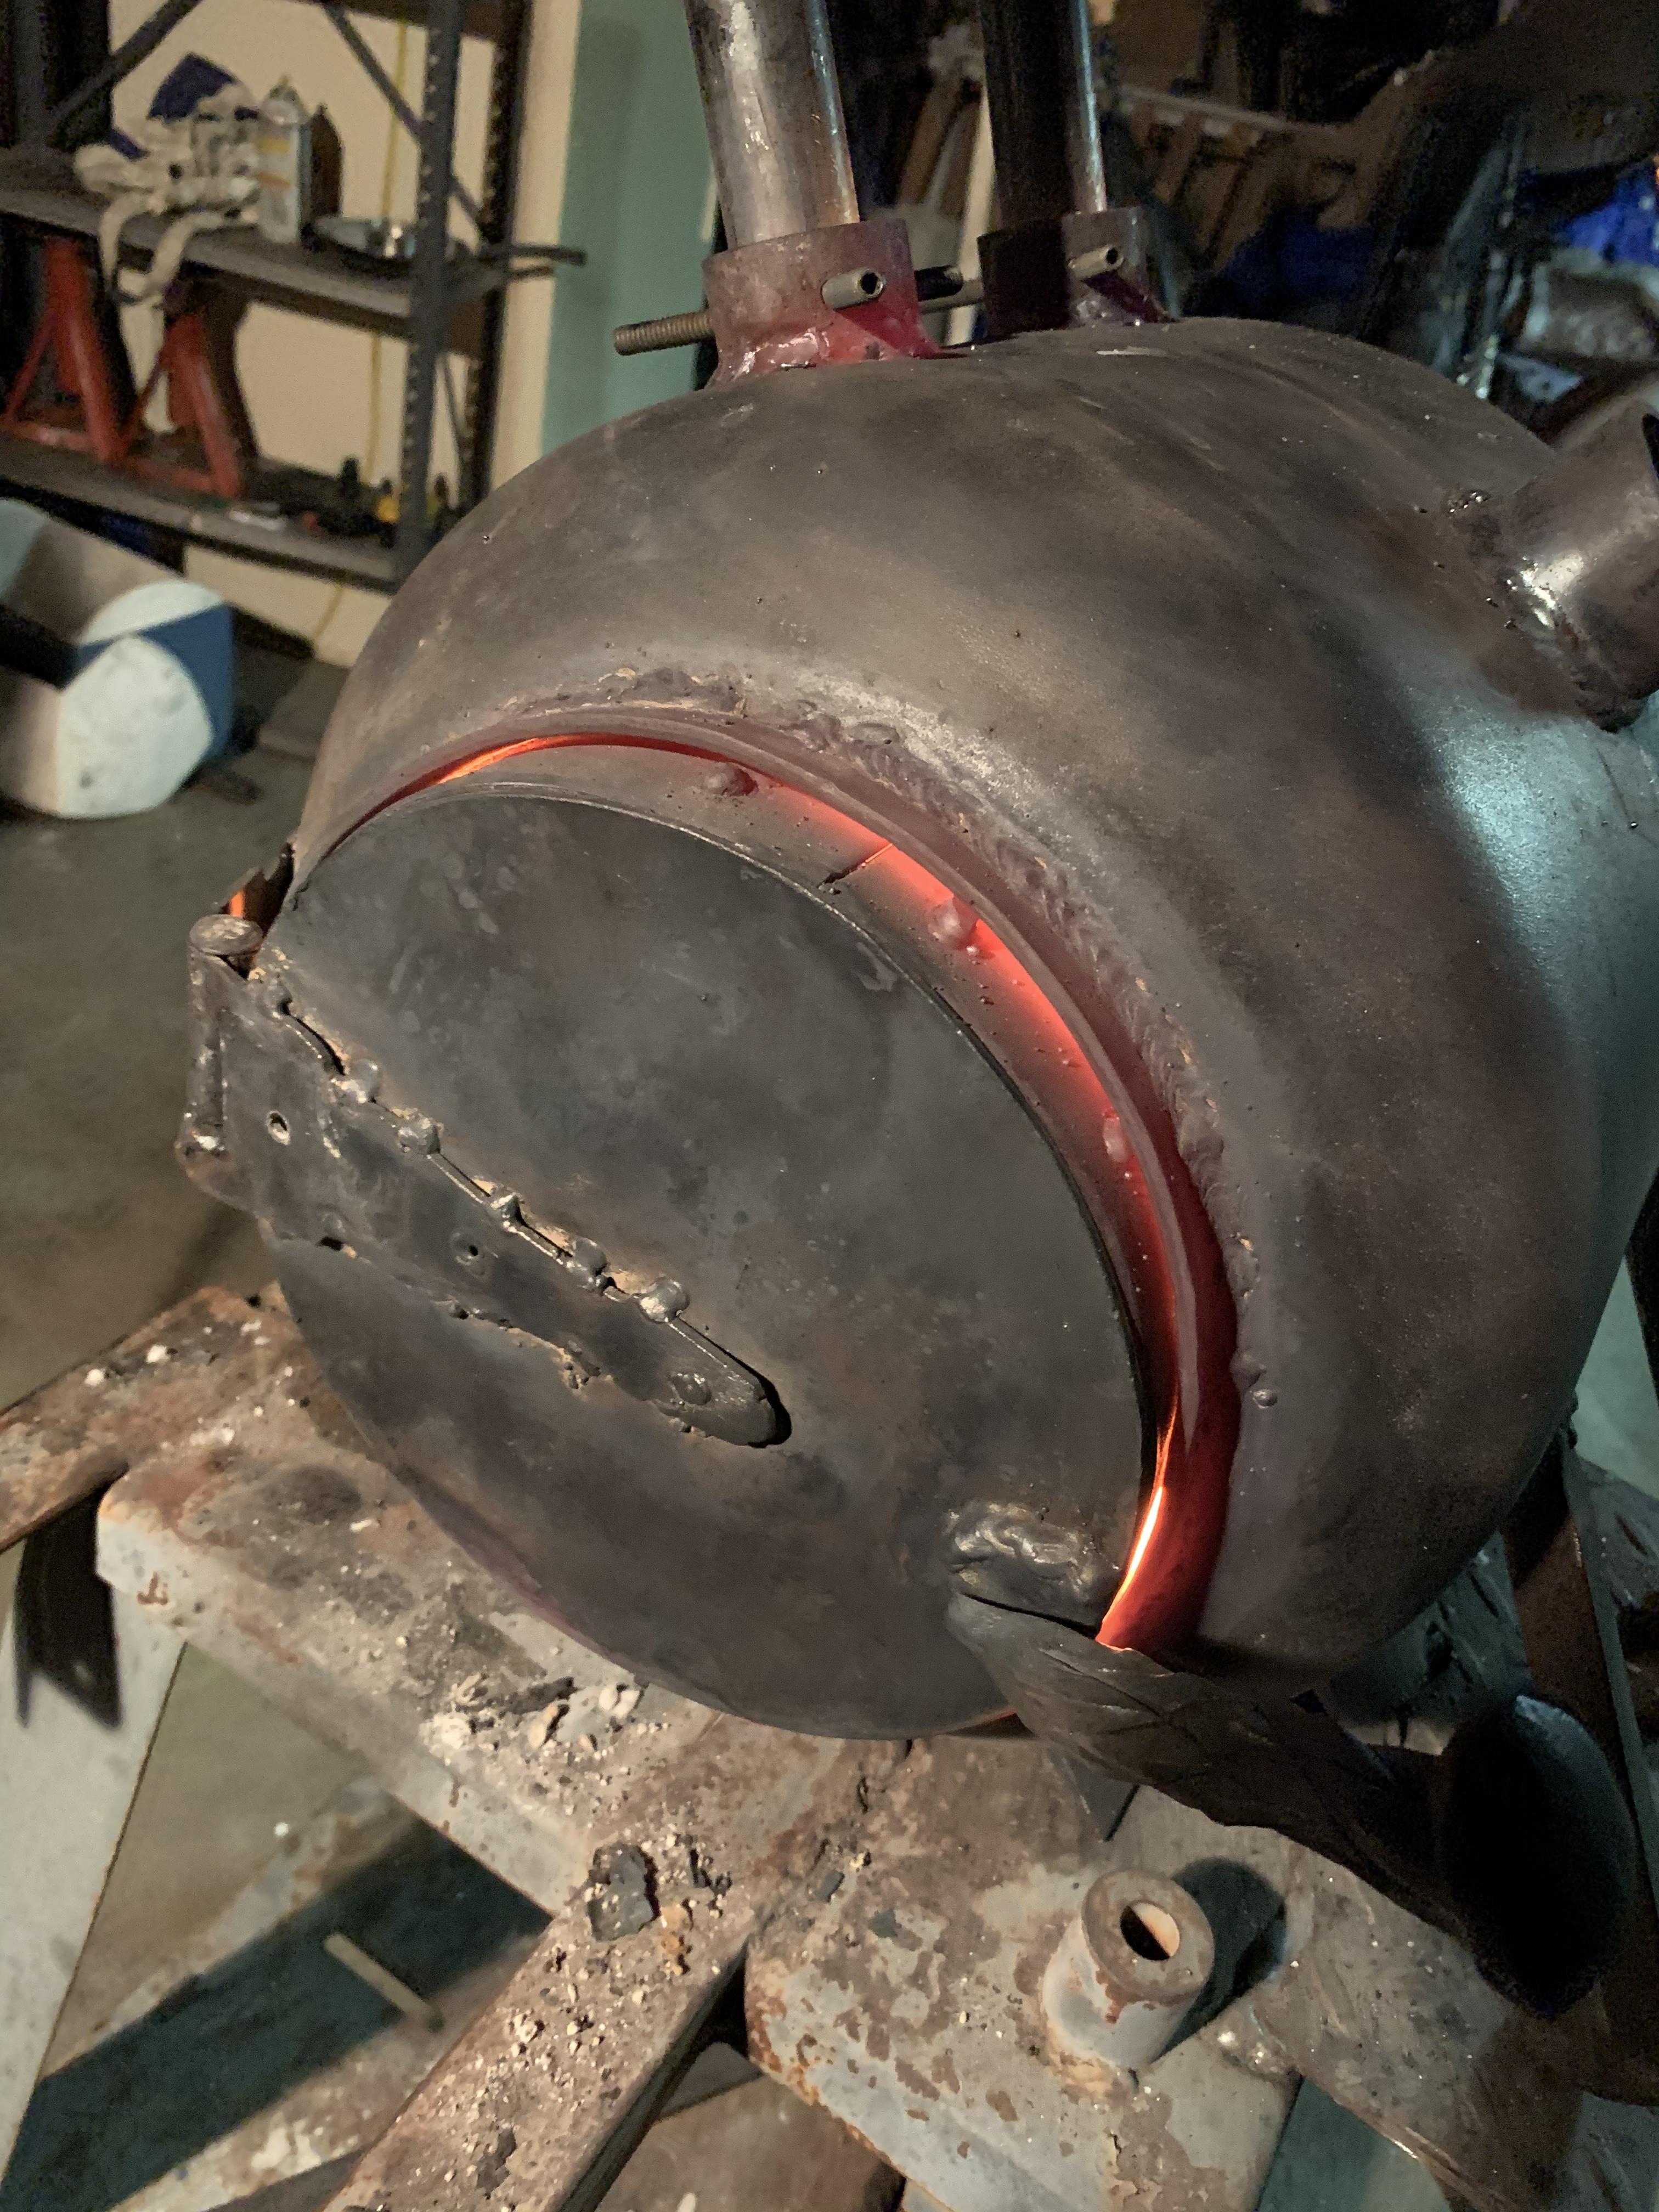
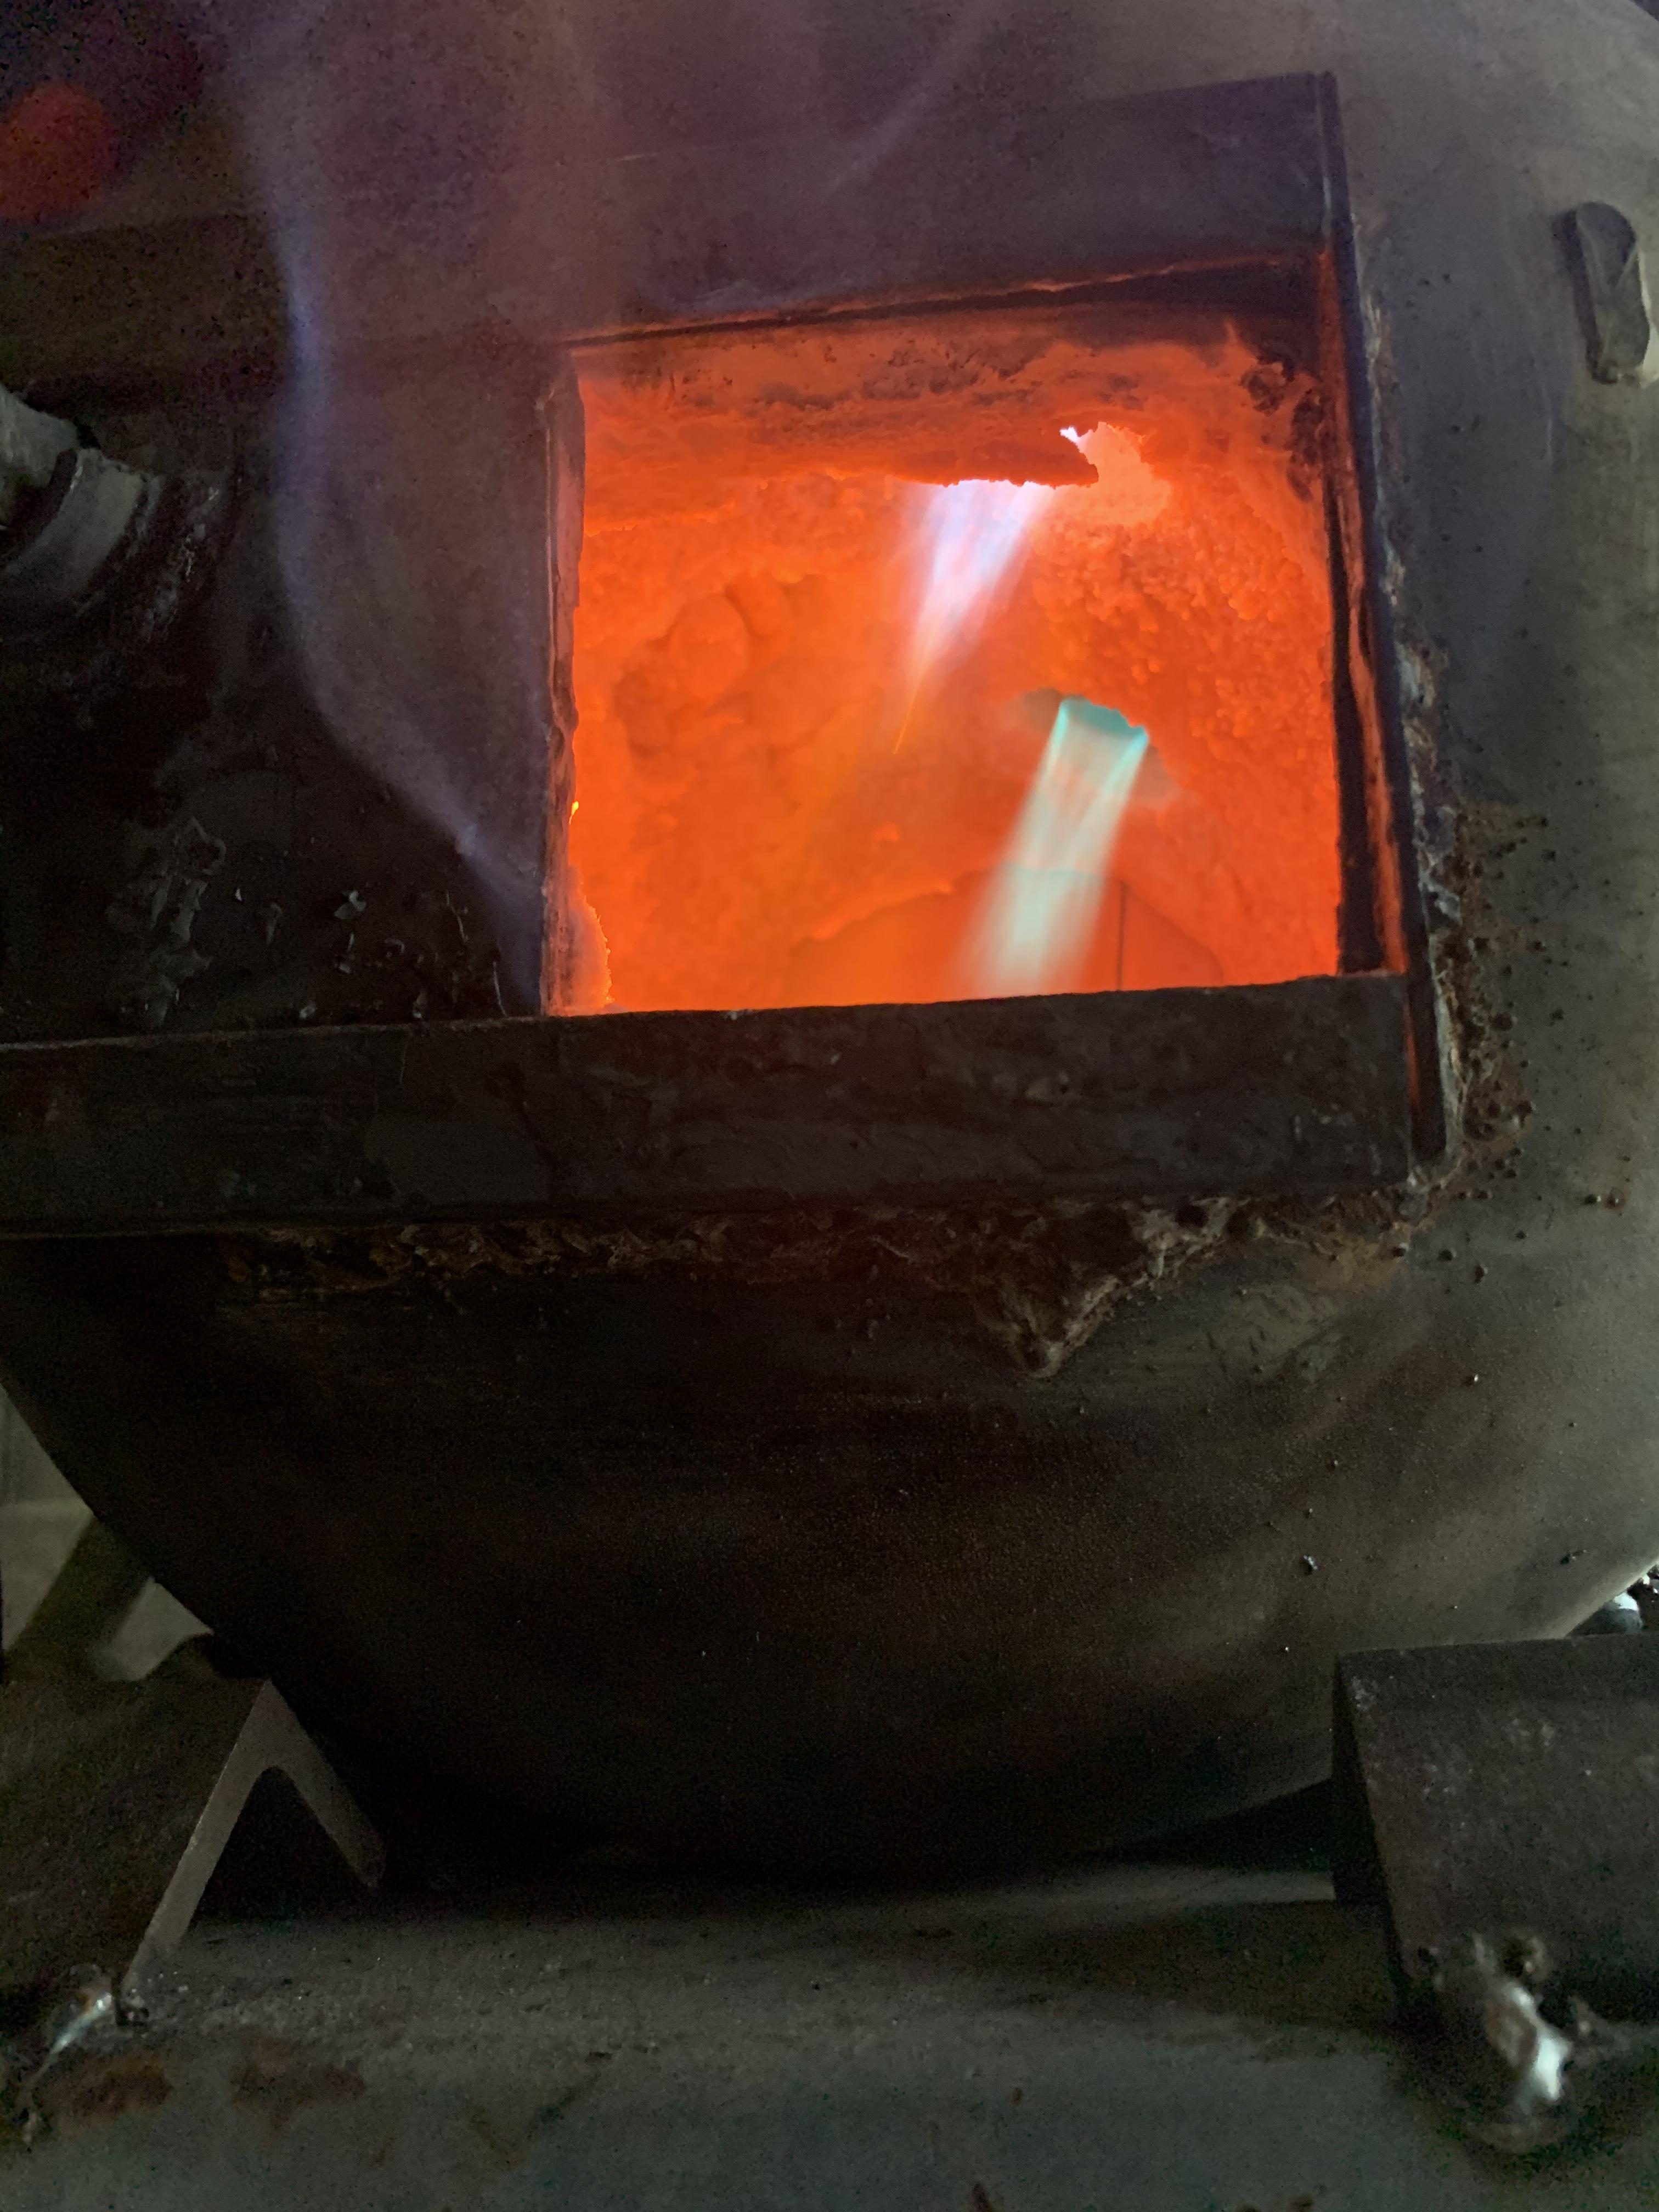
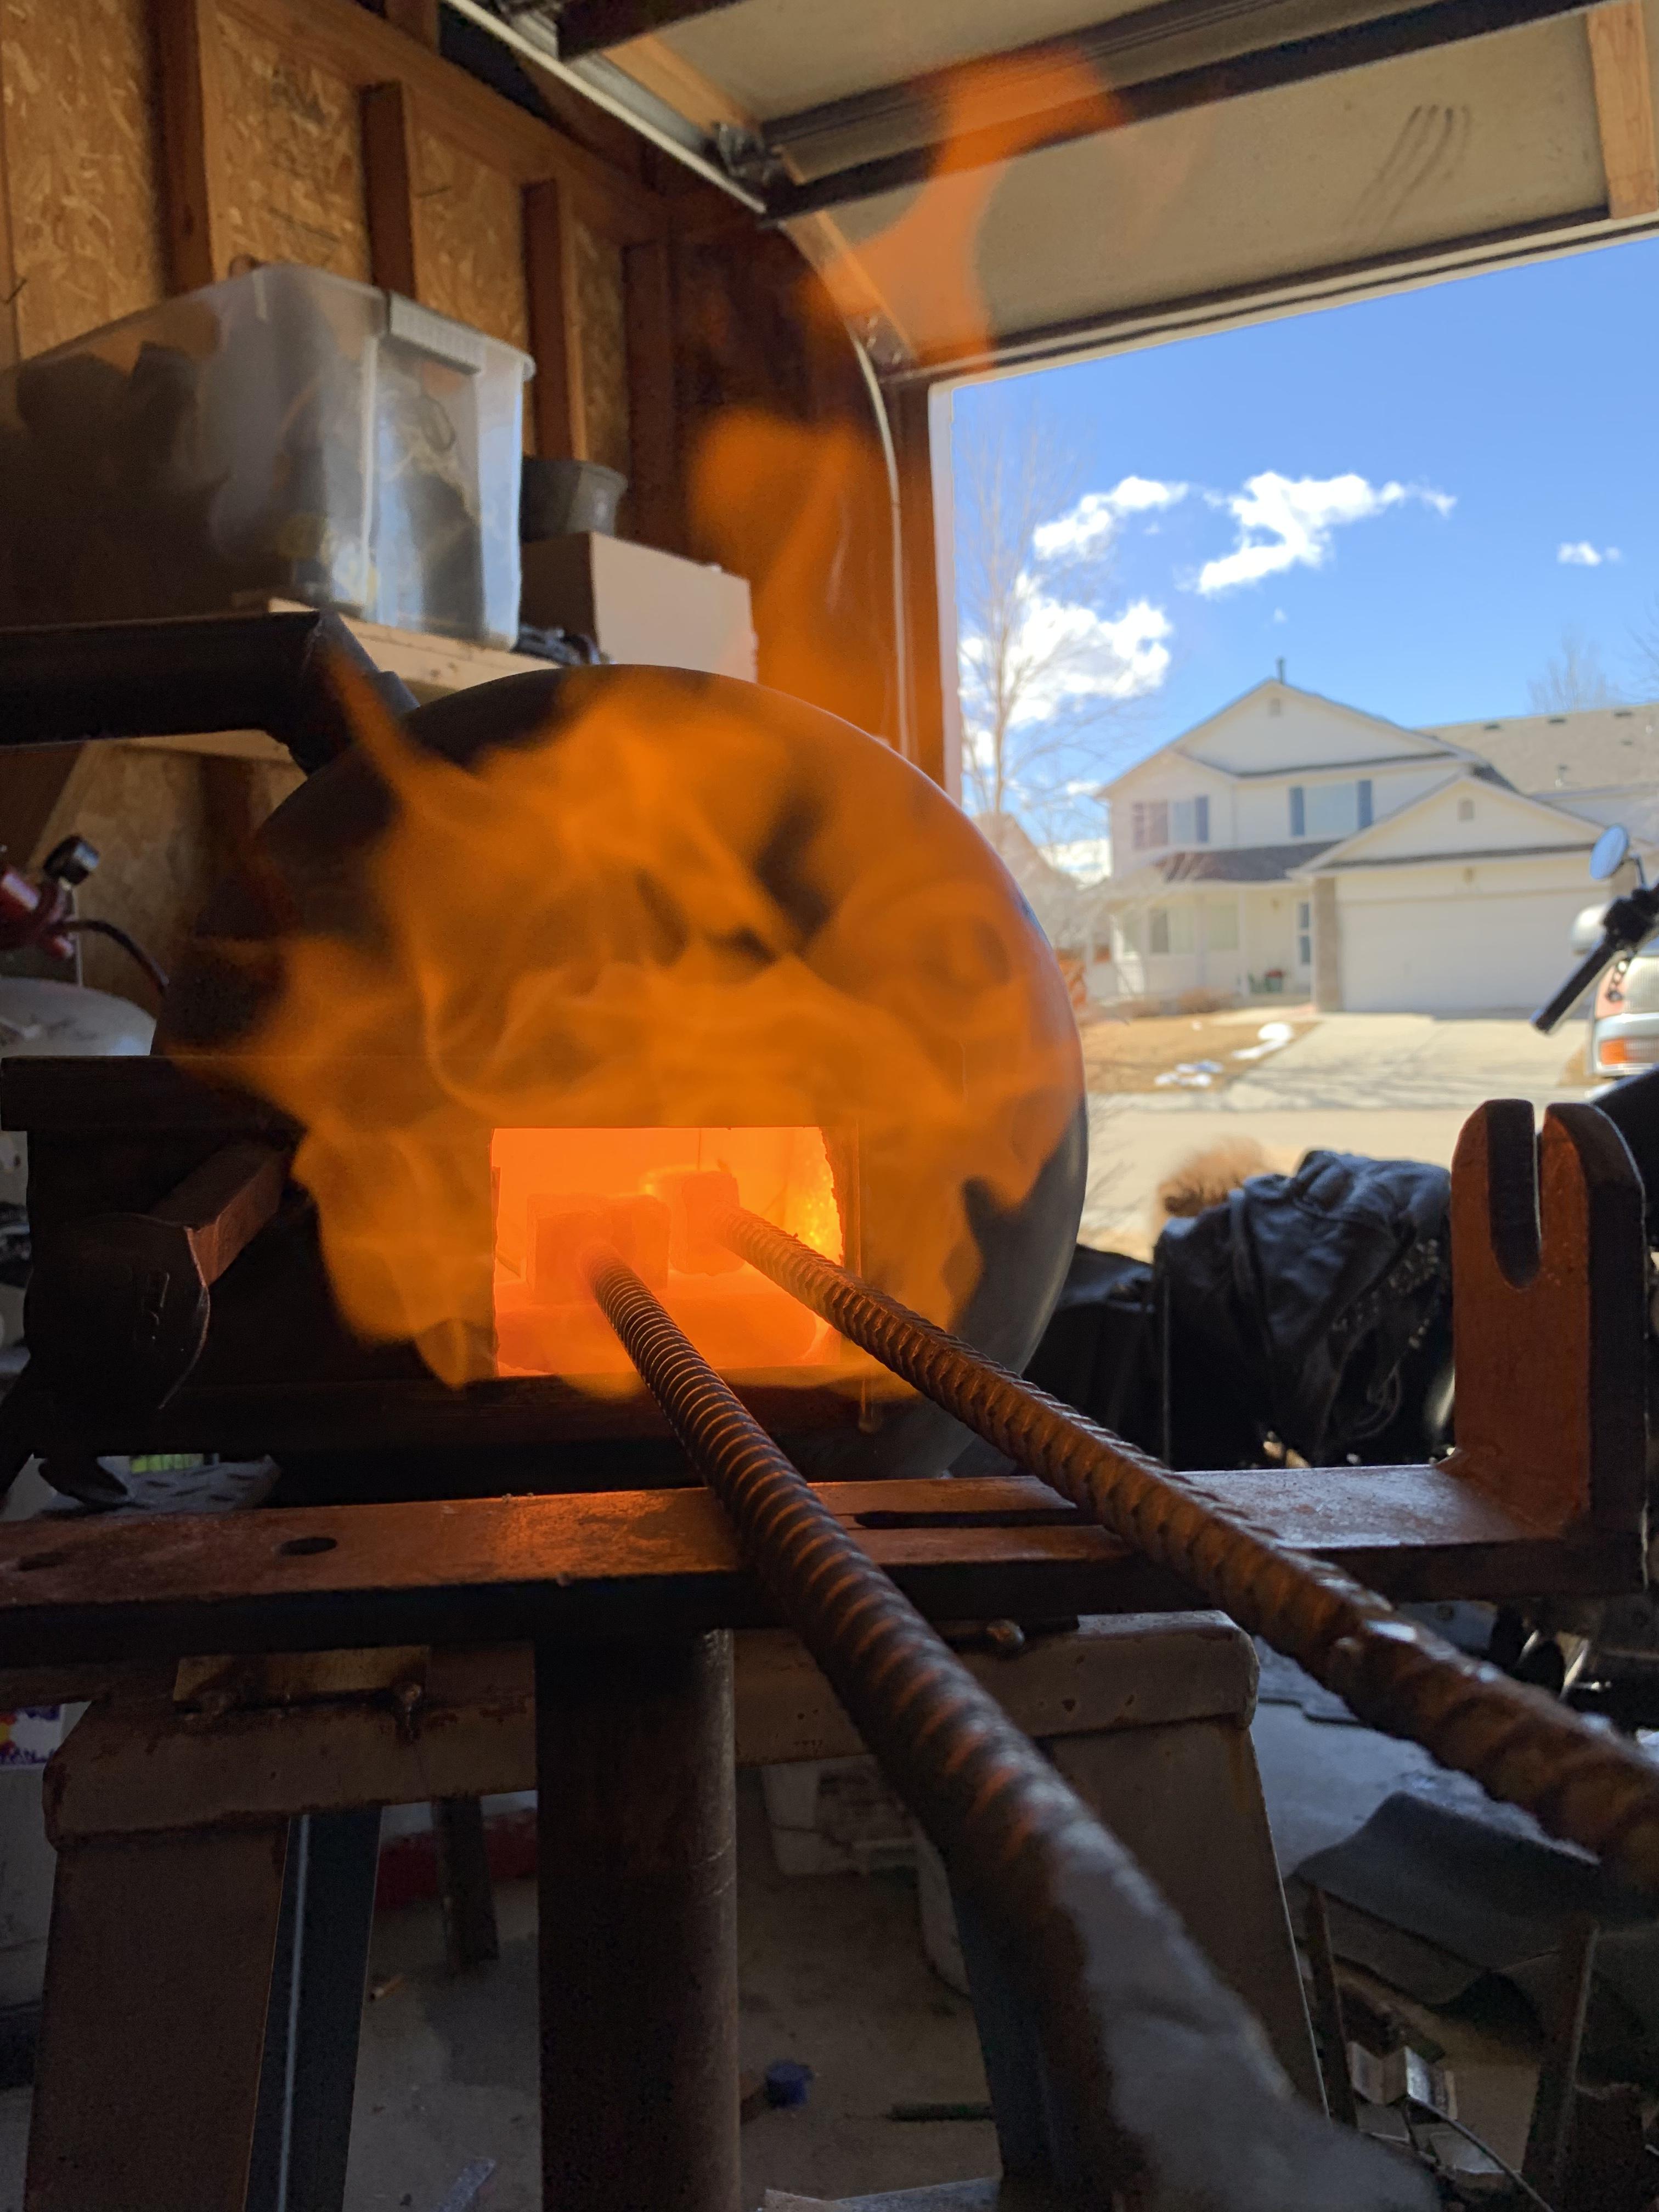
I'm happy...Welding heat achieved easily.


 On 1/12/2020 at 11:13 AM, swedefiddle said:
Good Morning,
On mine, I added couple little tabs so the burner would sit on top of the flange of the Forge body. Takes away the force of the bolts pushing on the side of the burner, cracking the bond. I see you have a tab for sitting in the mould.
Neil
Thanks for that idea Neil. I put tabs on by burner body and it does relive alot of stress on the mold. Thans, again for that.
-
On 1/12/2020 at 3:09 PM, Irondragon Forge & Clay said:
I can relate to that. This was going to be the back door to our forge. Settled on soft fire bricks.

Like I said< Oops!
-
Ya know, between me and you, I broke the burner because of the bolts. As I was trying to put the plumbing together I thought I had the set screws tight ( I did) and the burner wouldn't move. I'm pretty sure it did push on the side cracking the bond. It just fell right out of the burner body. Thanks for the advice. I will do that. Hopefully the tabs that I have on there will be good but I know that the metal should absolutely not protrude into the forge body.
-
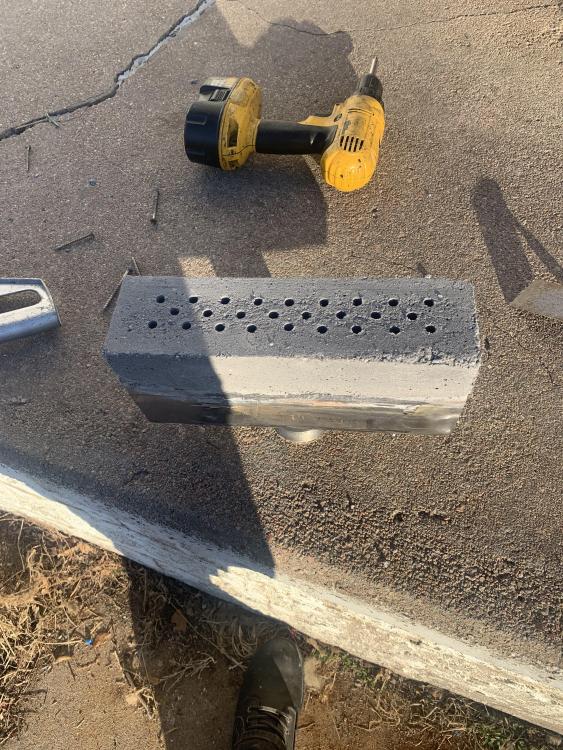
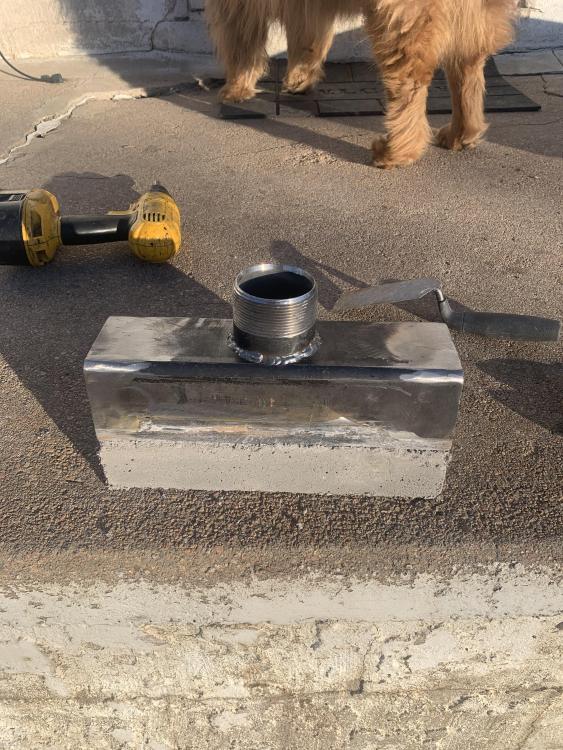
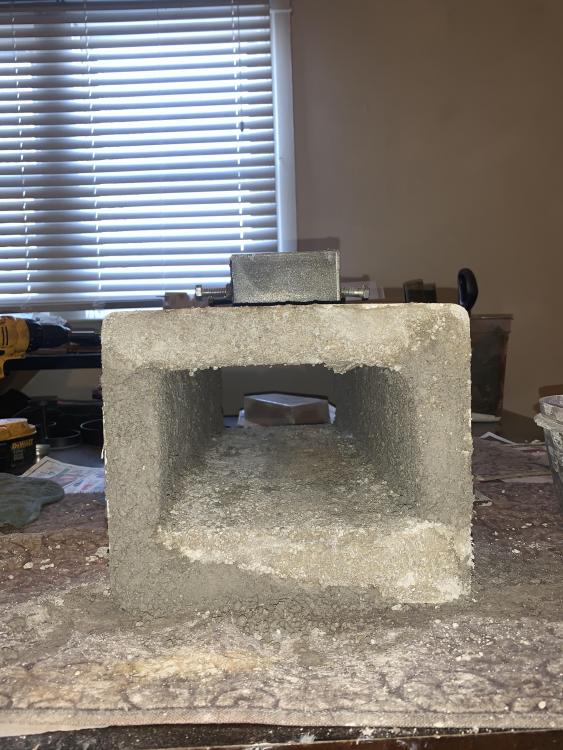
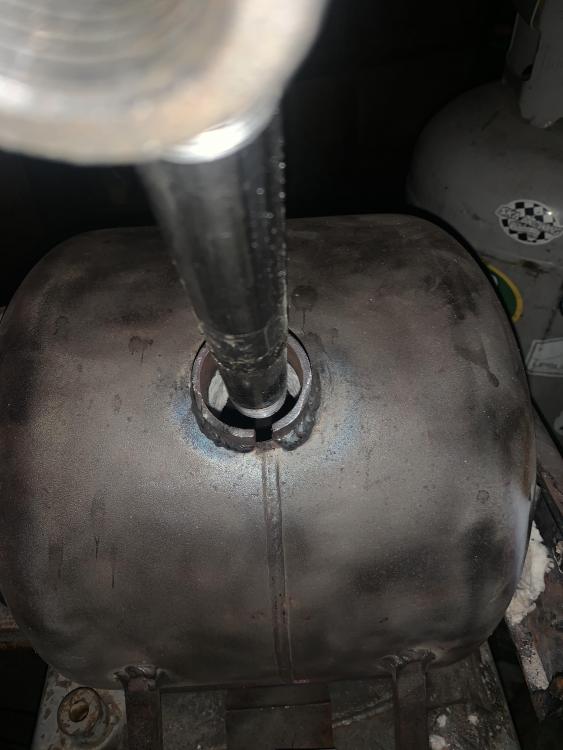
Frosty, It is basically Mizzou 3000. The Blacksmith and Farrier supply shop that I get alot of my supplies fro sells 55lb bags. I have experience using this refractory as I've had great results in the past. I'm just basically wanting to know if I would crack my burner if I didn't let it cure for the 3 days recommended in the plans for the ribbon burner plans that I printed up from Pine Ridge Burners. Honestly , I don't think I want to go off from the directions. They are written as such for a reason and I don't want any issues with this burner. I was just being impatient. The thing is, The refractory used for the burner is 3" thick so curing time is critical. Here are a few pics of my progress. That burner broke though. I dropped it. Oops


Number 2. Lets not brake this one Chris...

-
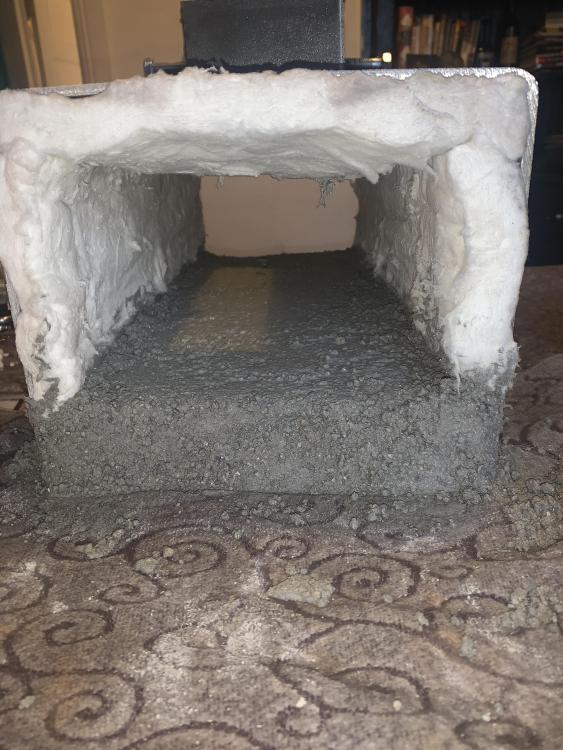
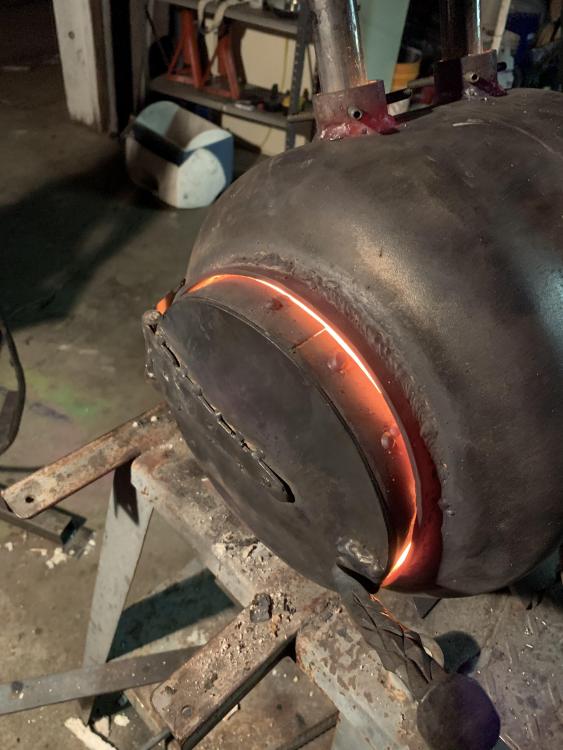
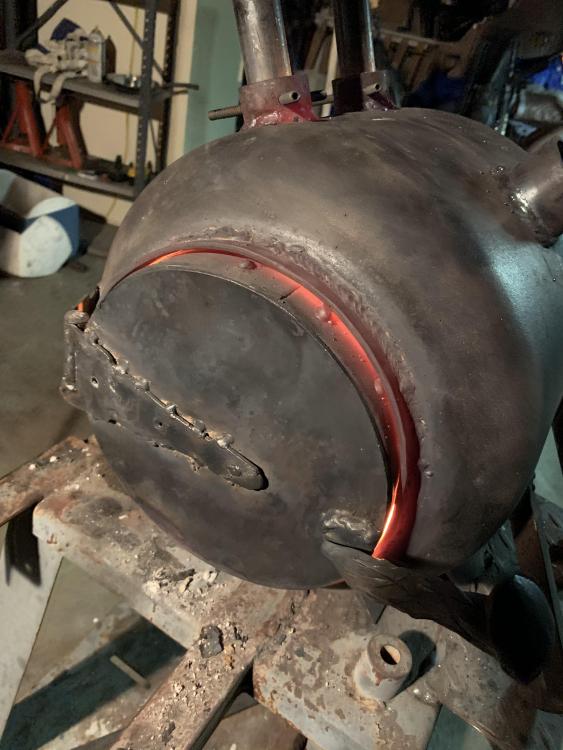
So I built a new forge from scratch. It's a ribbon burner forge and everything has gone smooth. Except the fact that I broke my burner as I was assembling the last tube and just about to fire up. Anyway, I have been firing the kao-wool & refractory floor, walls and ceiling every night after letting sit for 6- 8 hours in my oven starting at 195 degrees for 3 hours and then 300 for 3 hours. Of course that has only been 1/2" of cement too. I am curious to know if anyone has fired a ribbon burner after letting sit for less than 3 days. Yes I'm impatient. Especially after almost being done once. I was wondering how long it would actually take for 3 inches to set up and be ready for firing. I'm assuming 24 hours per inch, but has anyone done it sooner?
Chris
-
56 minutes ago, chris freeman said:
It’s wool with refractory
I apologize for sounding and acting to clueless about all of this. This is the first time I’ve built, ran or even owned an NA forge. It seems to me that I’ve tried everything but obviously I haven’t. Obviously I keep changing everything up all at once. Thanks for the help.
Merry ChristmasChris
Honestly It seems that I’ve tried every variation and modification and nothing seems to work. It’s seriously throwing me for a loop. I’m gonna go over everything one more time and like you said take notes and see if I can figure it out. Very frustrating. I’ll get it though.
-
23 hours ago, Jasent said:
What is your liner? Looks like just wool to me?
It’s wool with refractory
9 hours ago, Frosty said:Truth is Buzz, you have a pretty good handle on how these things work and I leave can it to you.
Unfortunately Chris has NO idea what he's doing and keeps changing several things at once and hoping. So, the more suggestions that come out of the internet the more things he tries at once and the farther in the hole he goes. His response to being confused is to gather more information but doesn't know enough to tell good from bad.
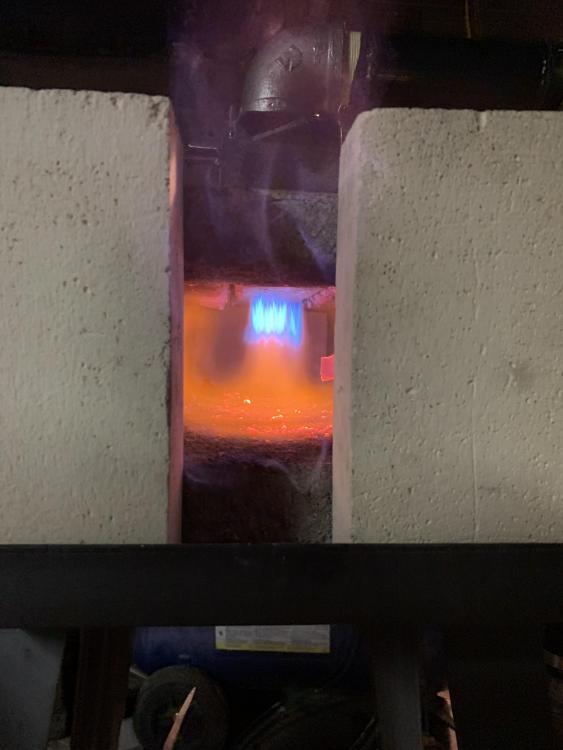
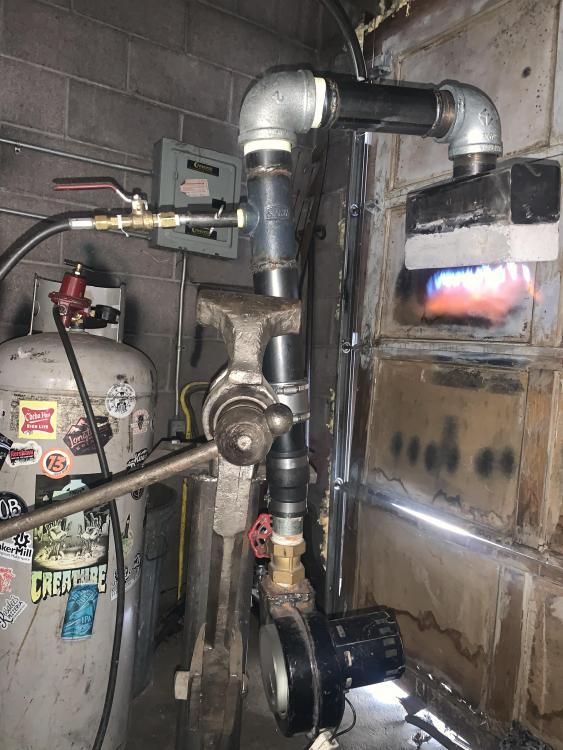
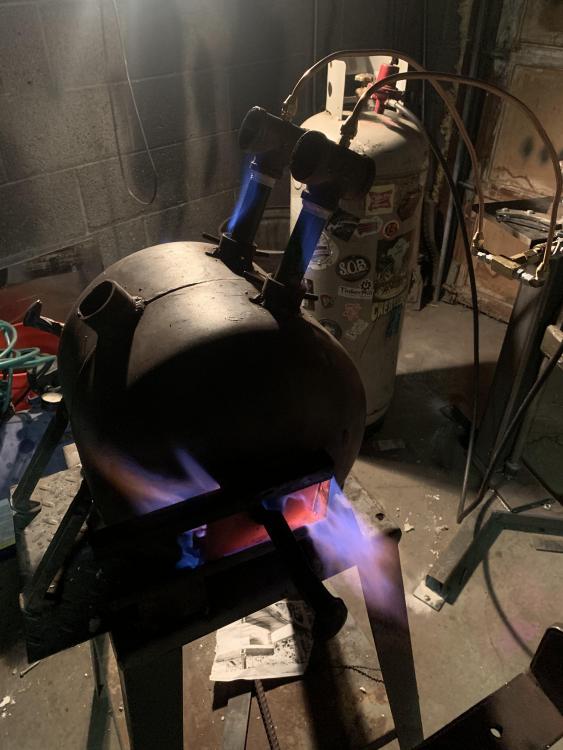
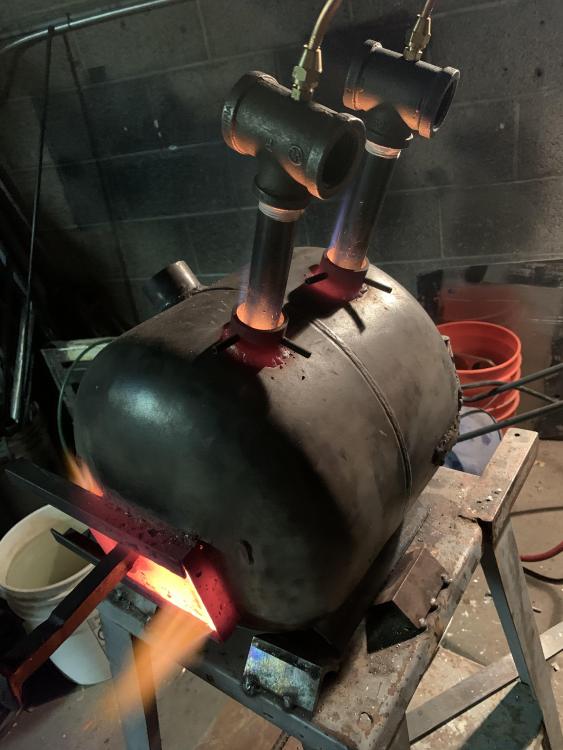
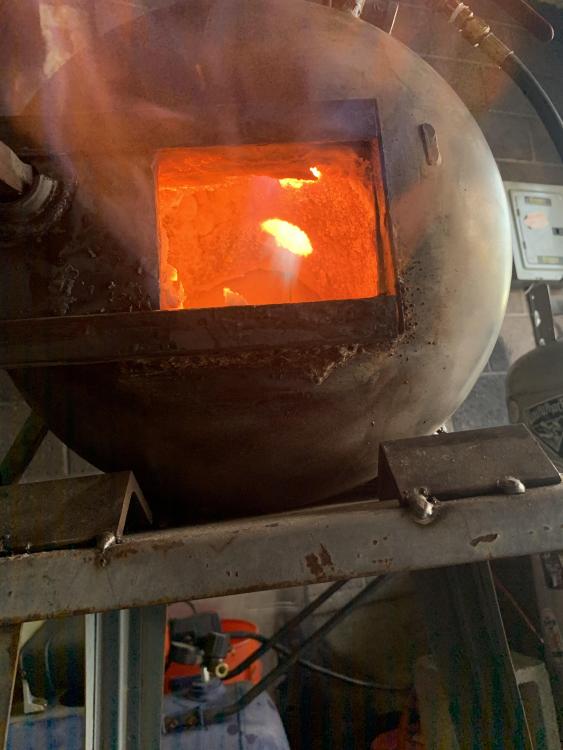
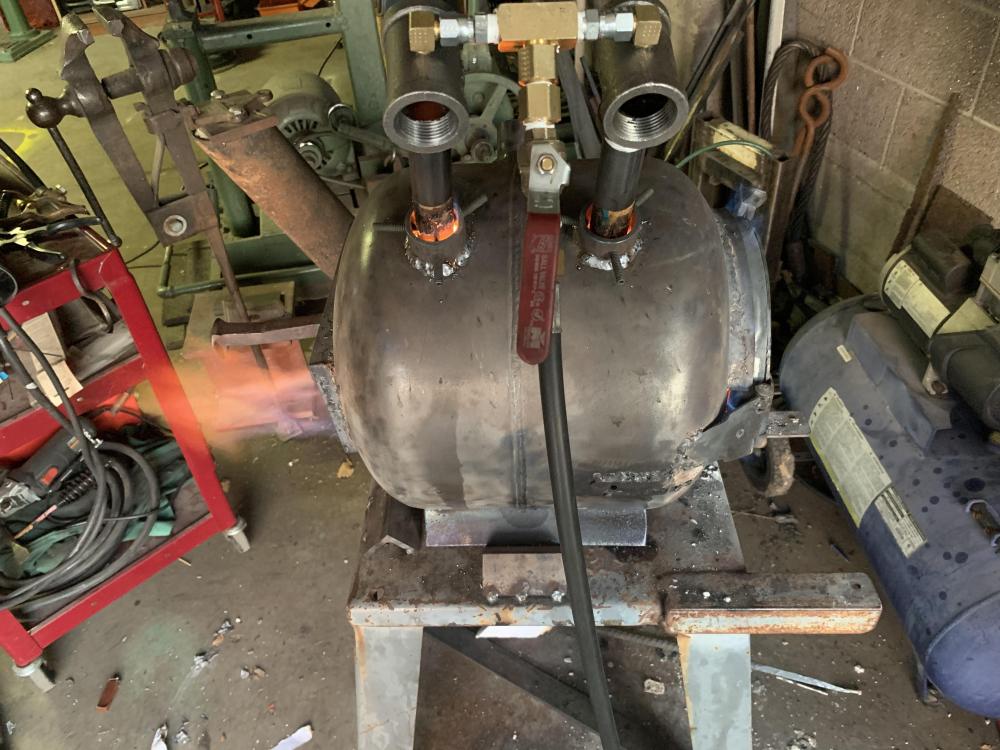
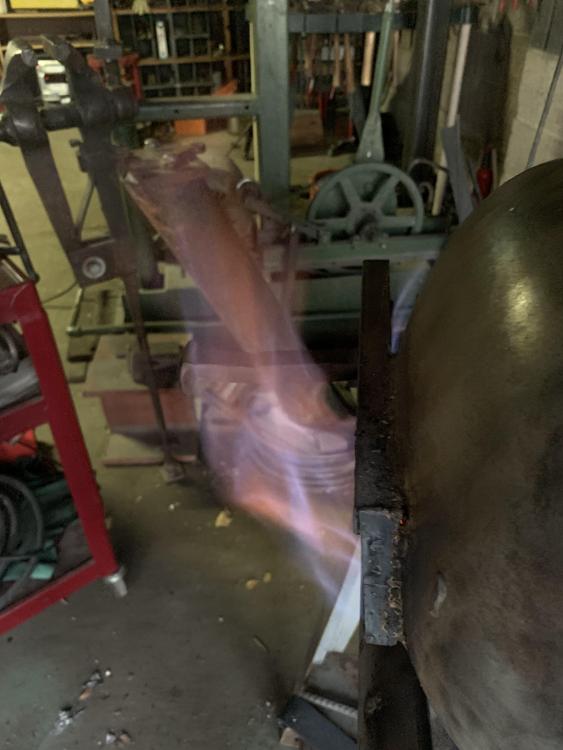
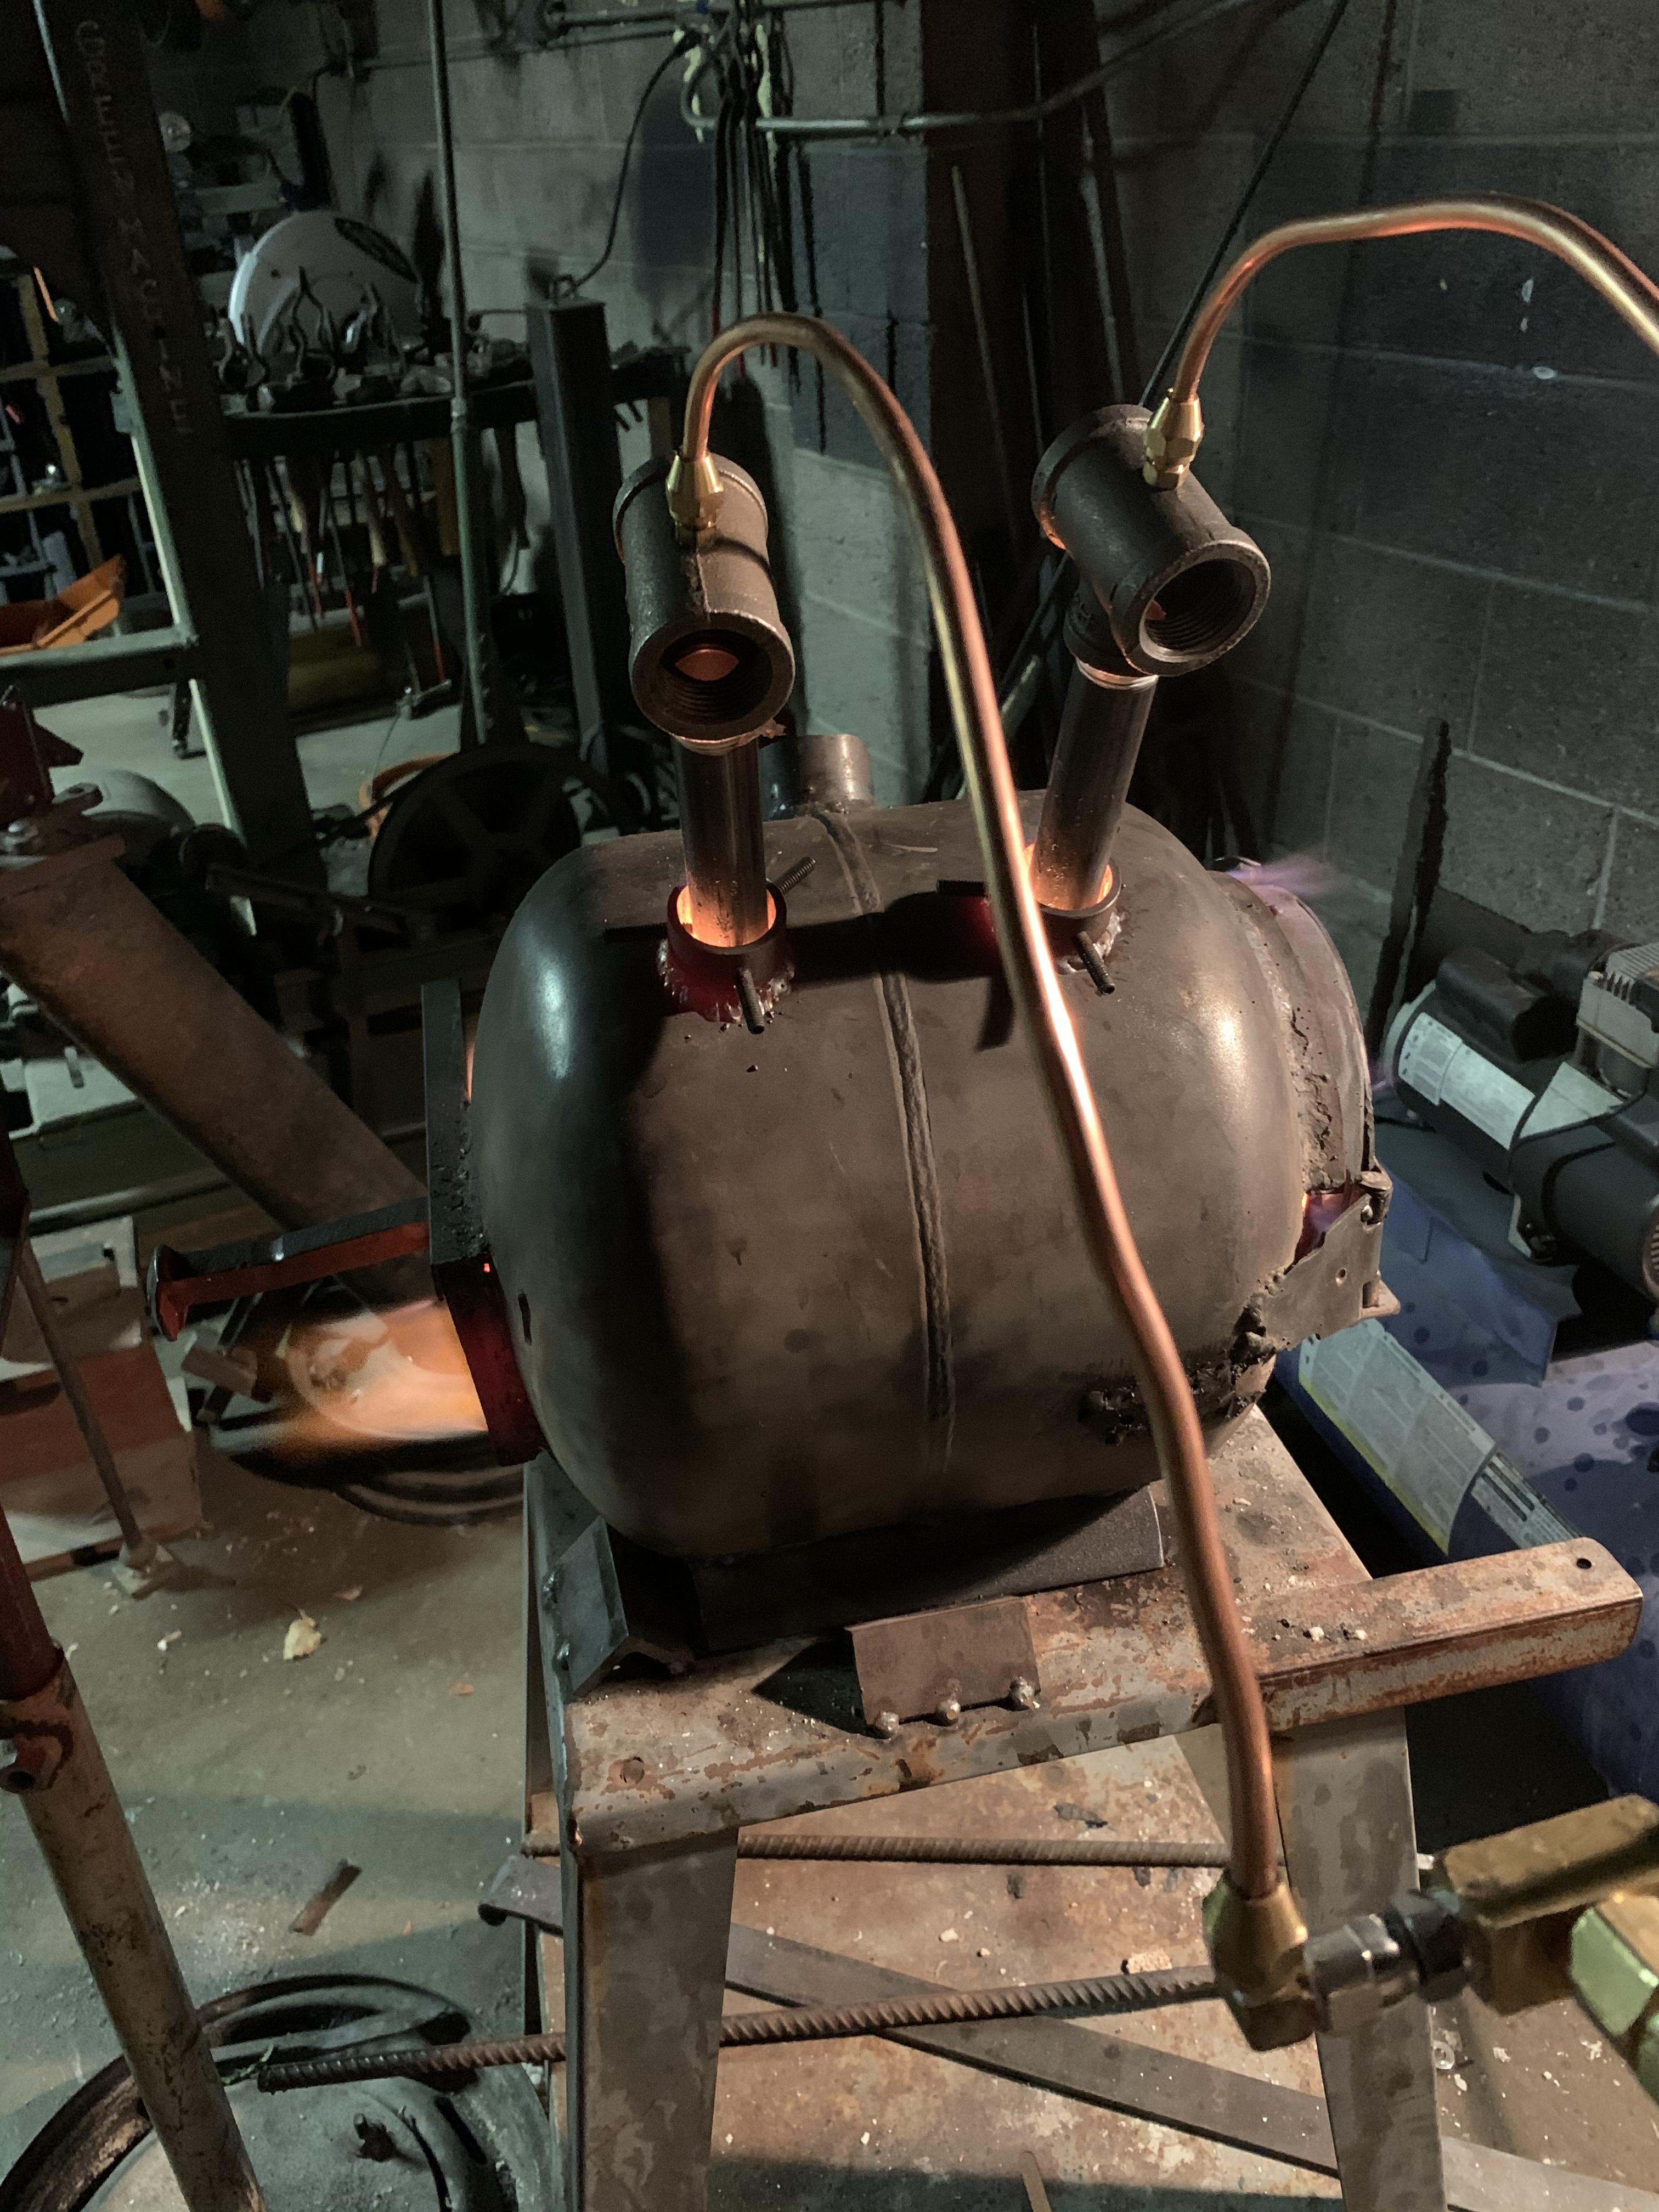
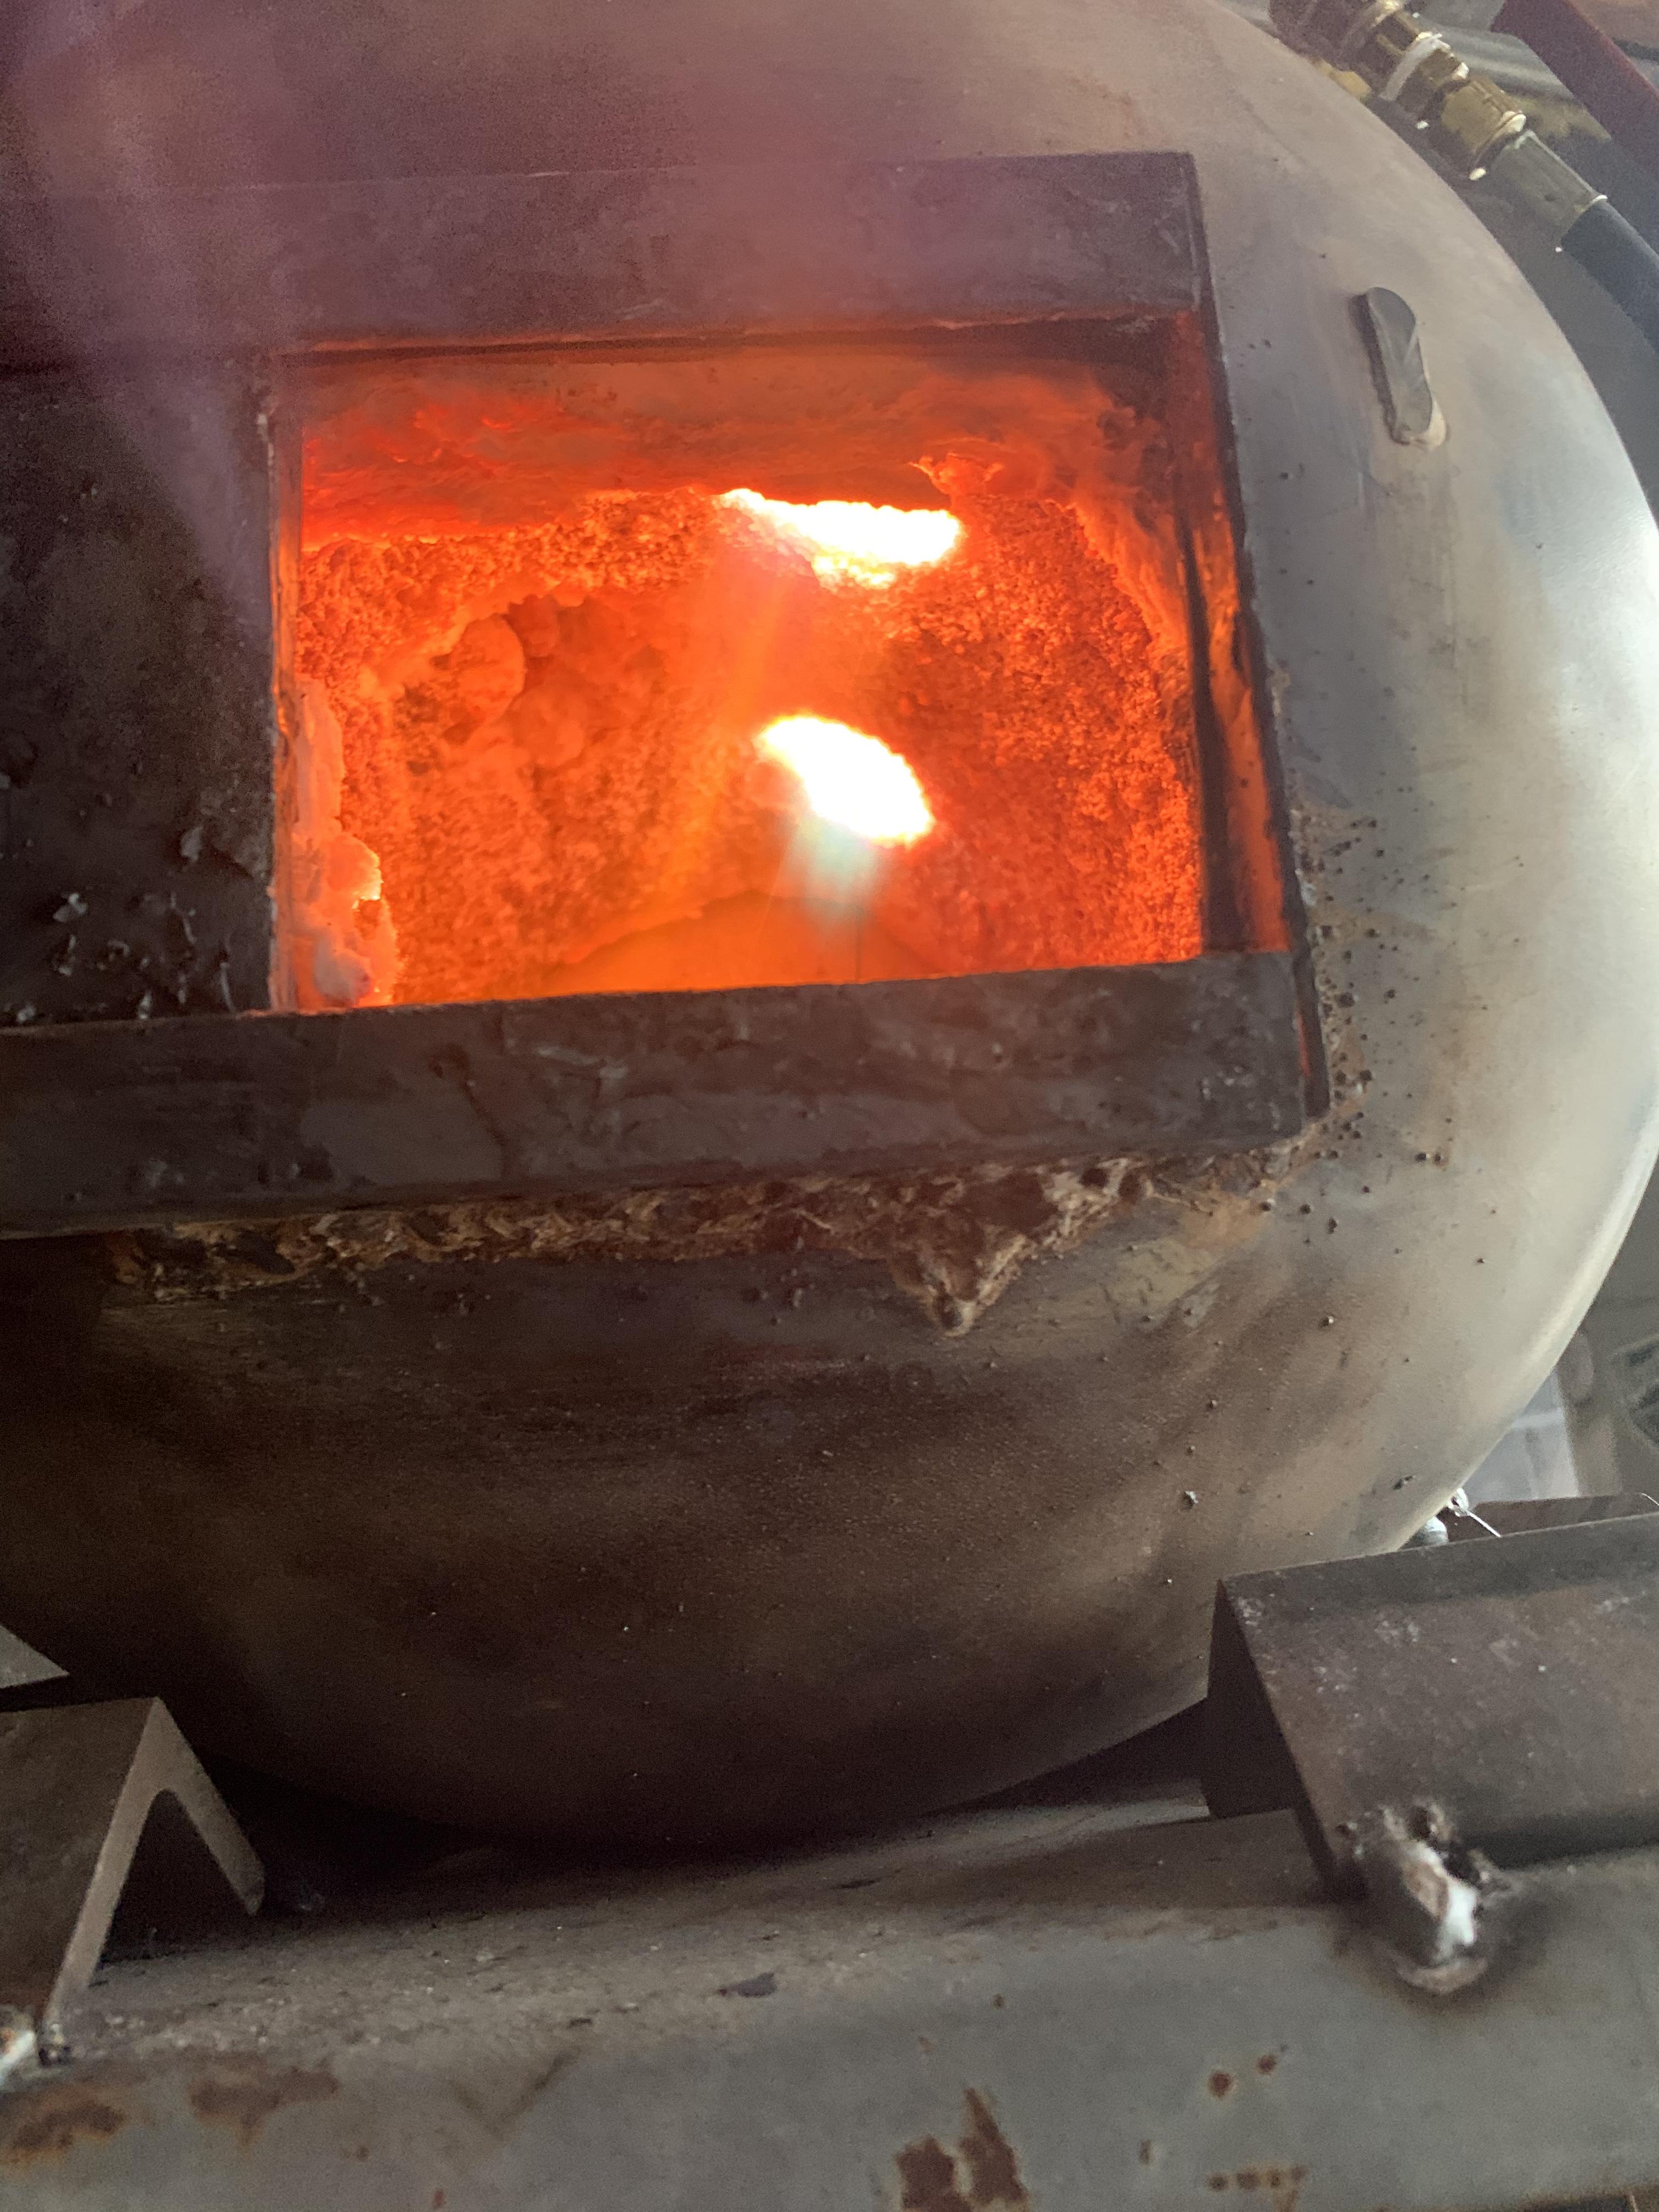
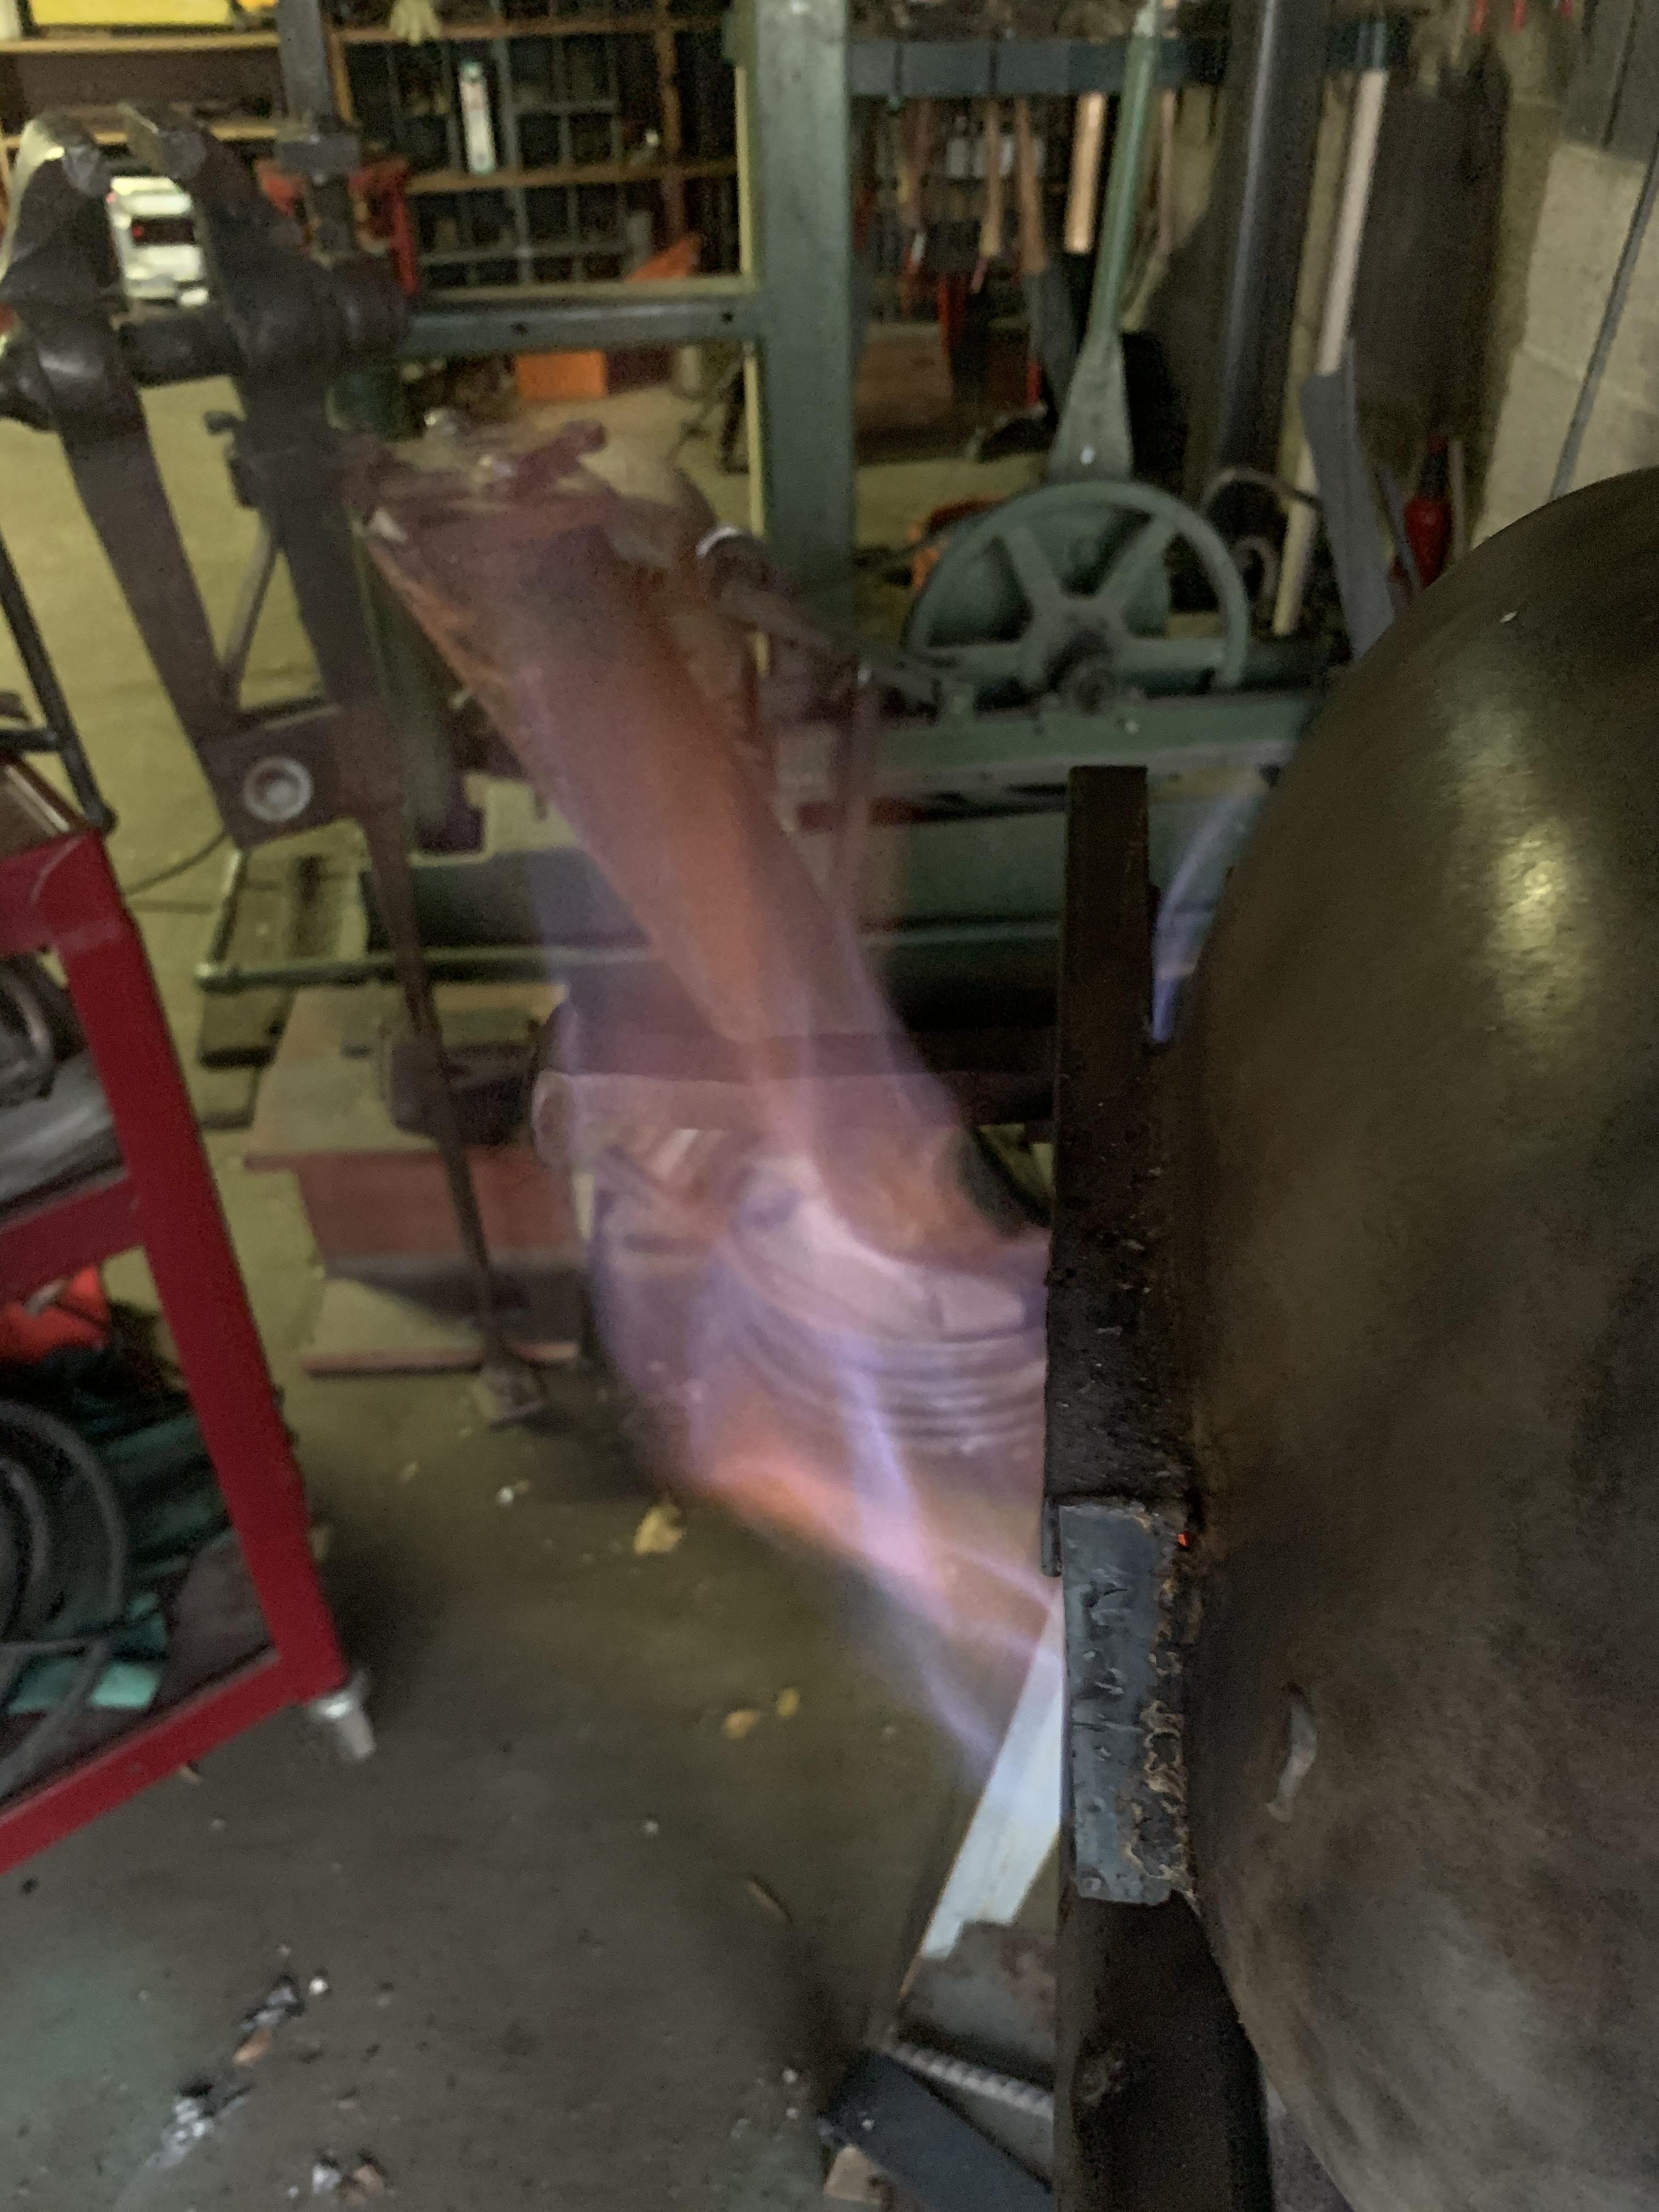
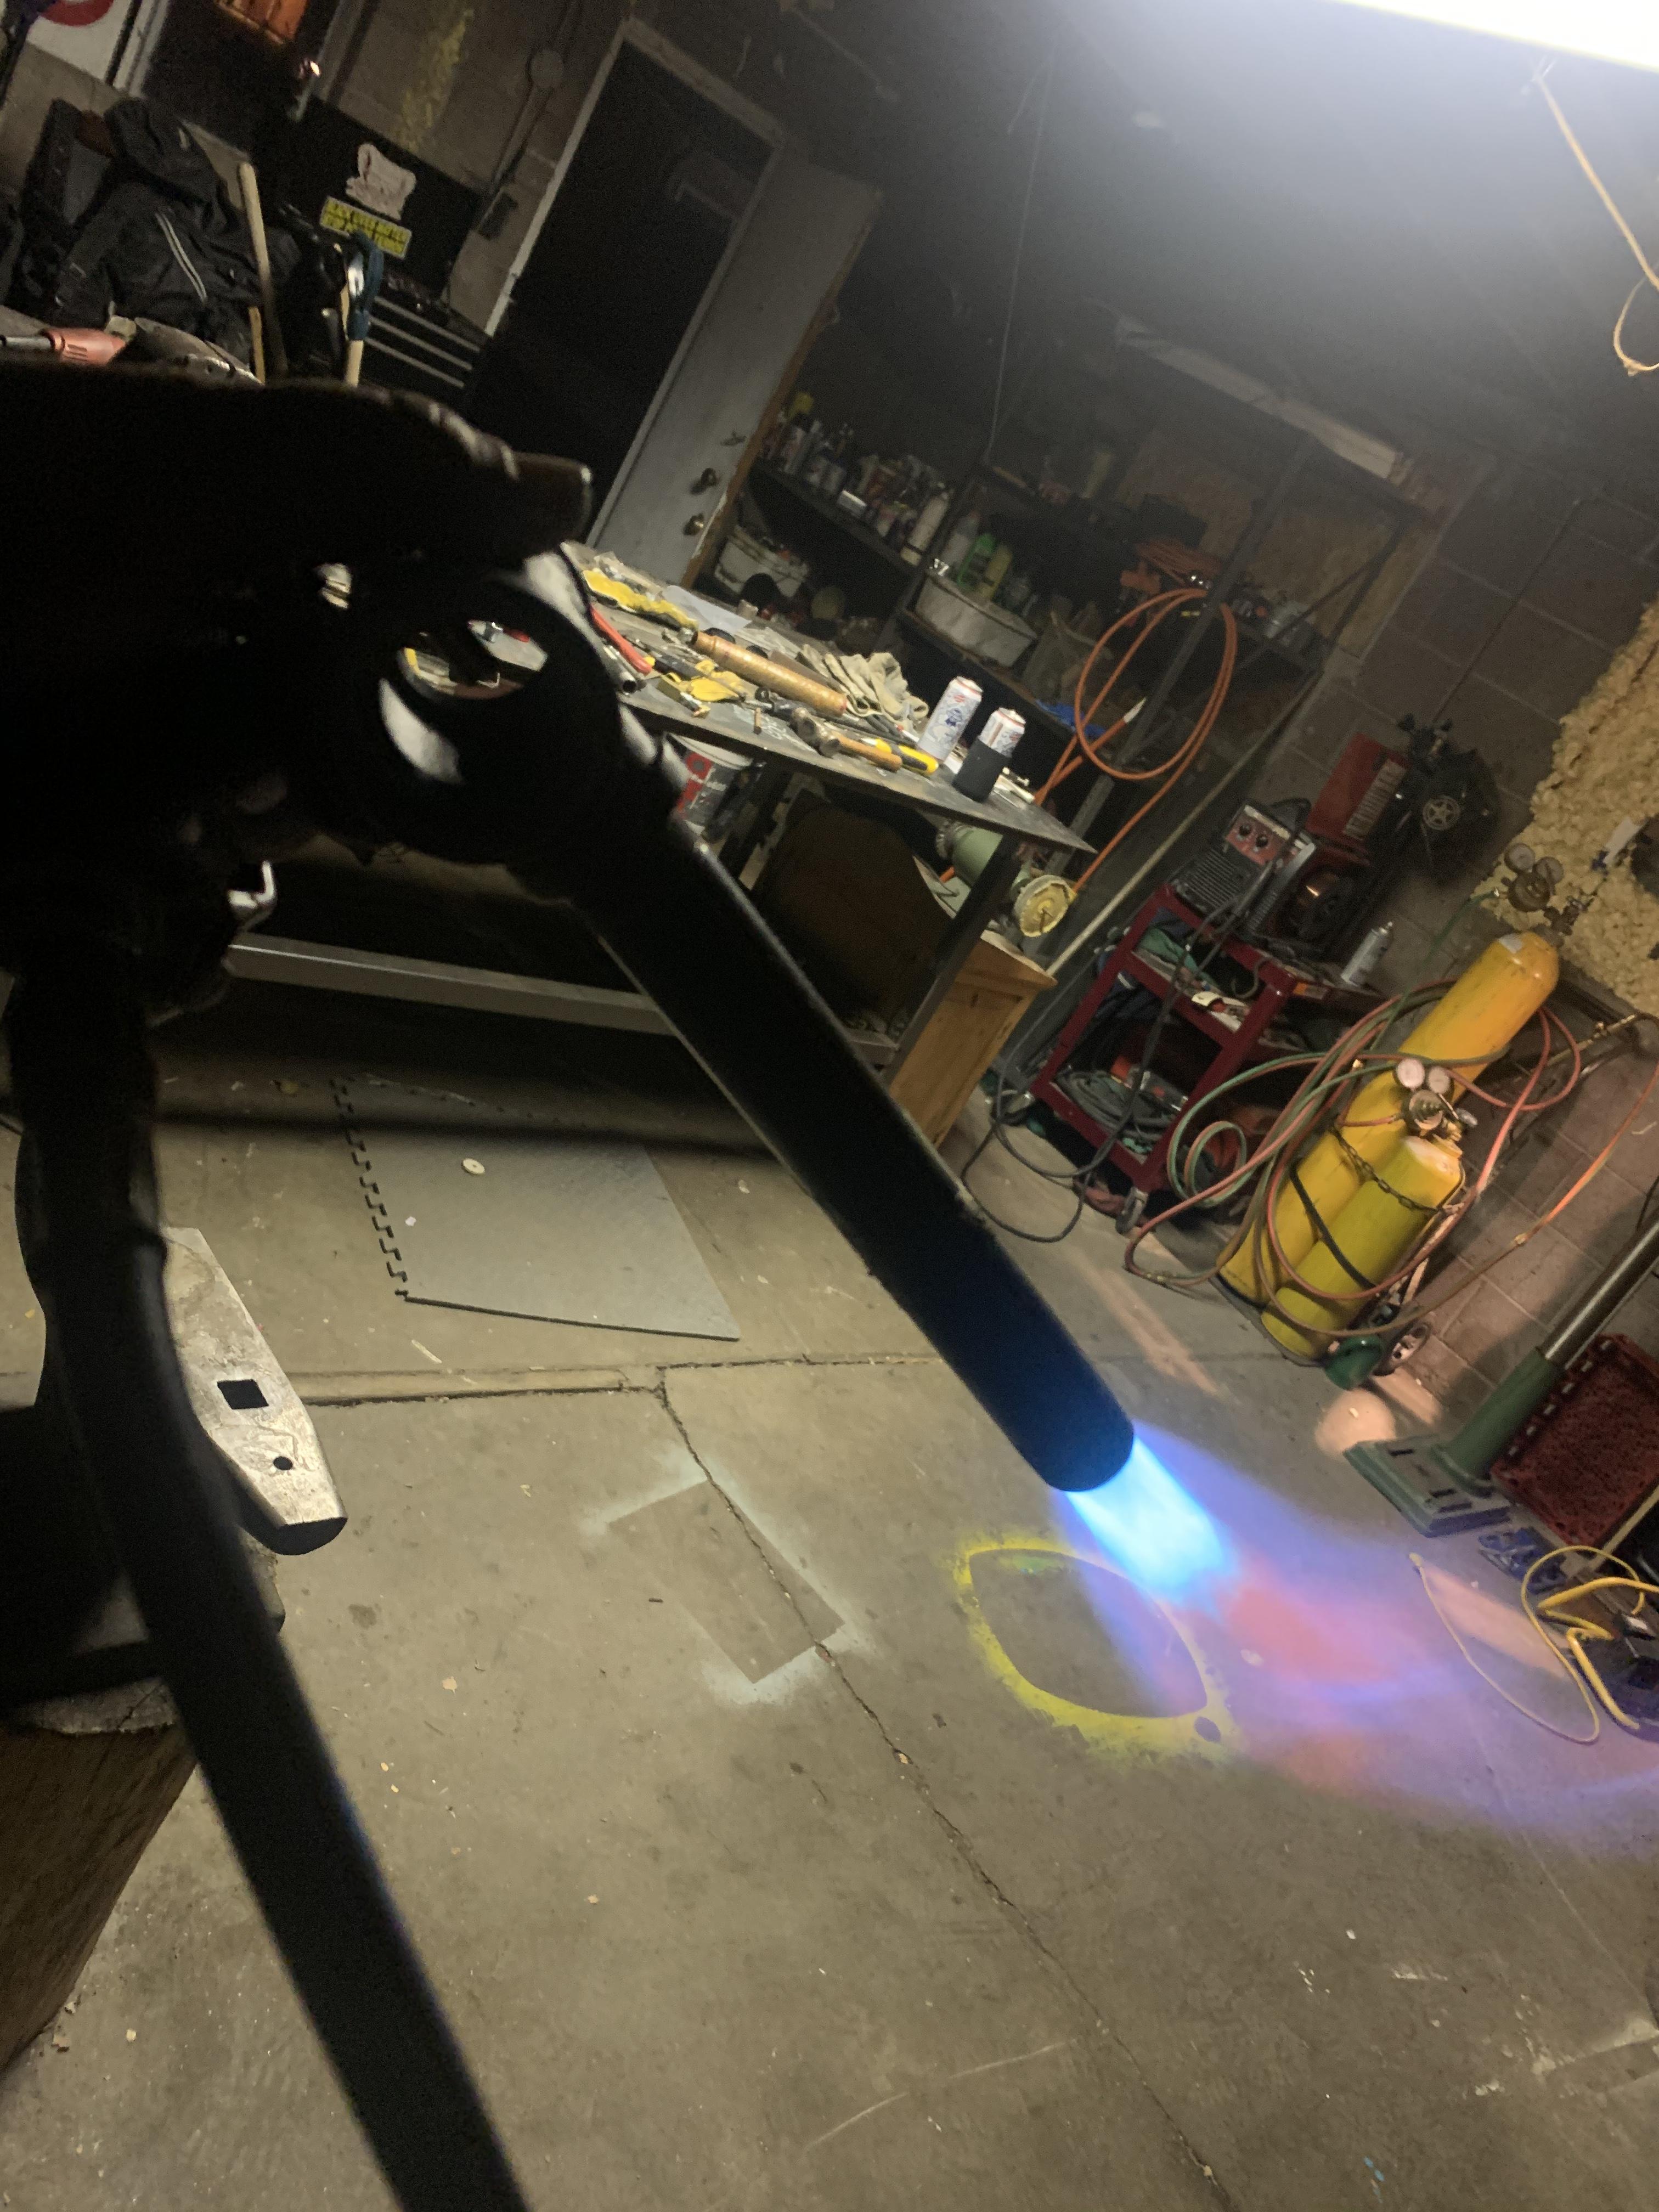
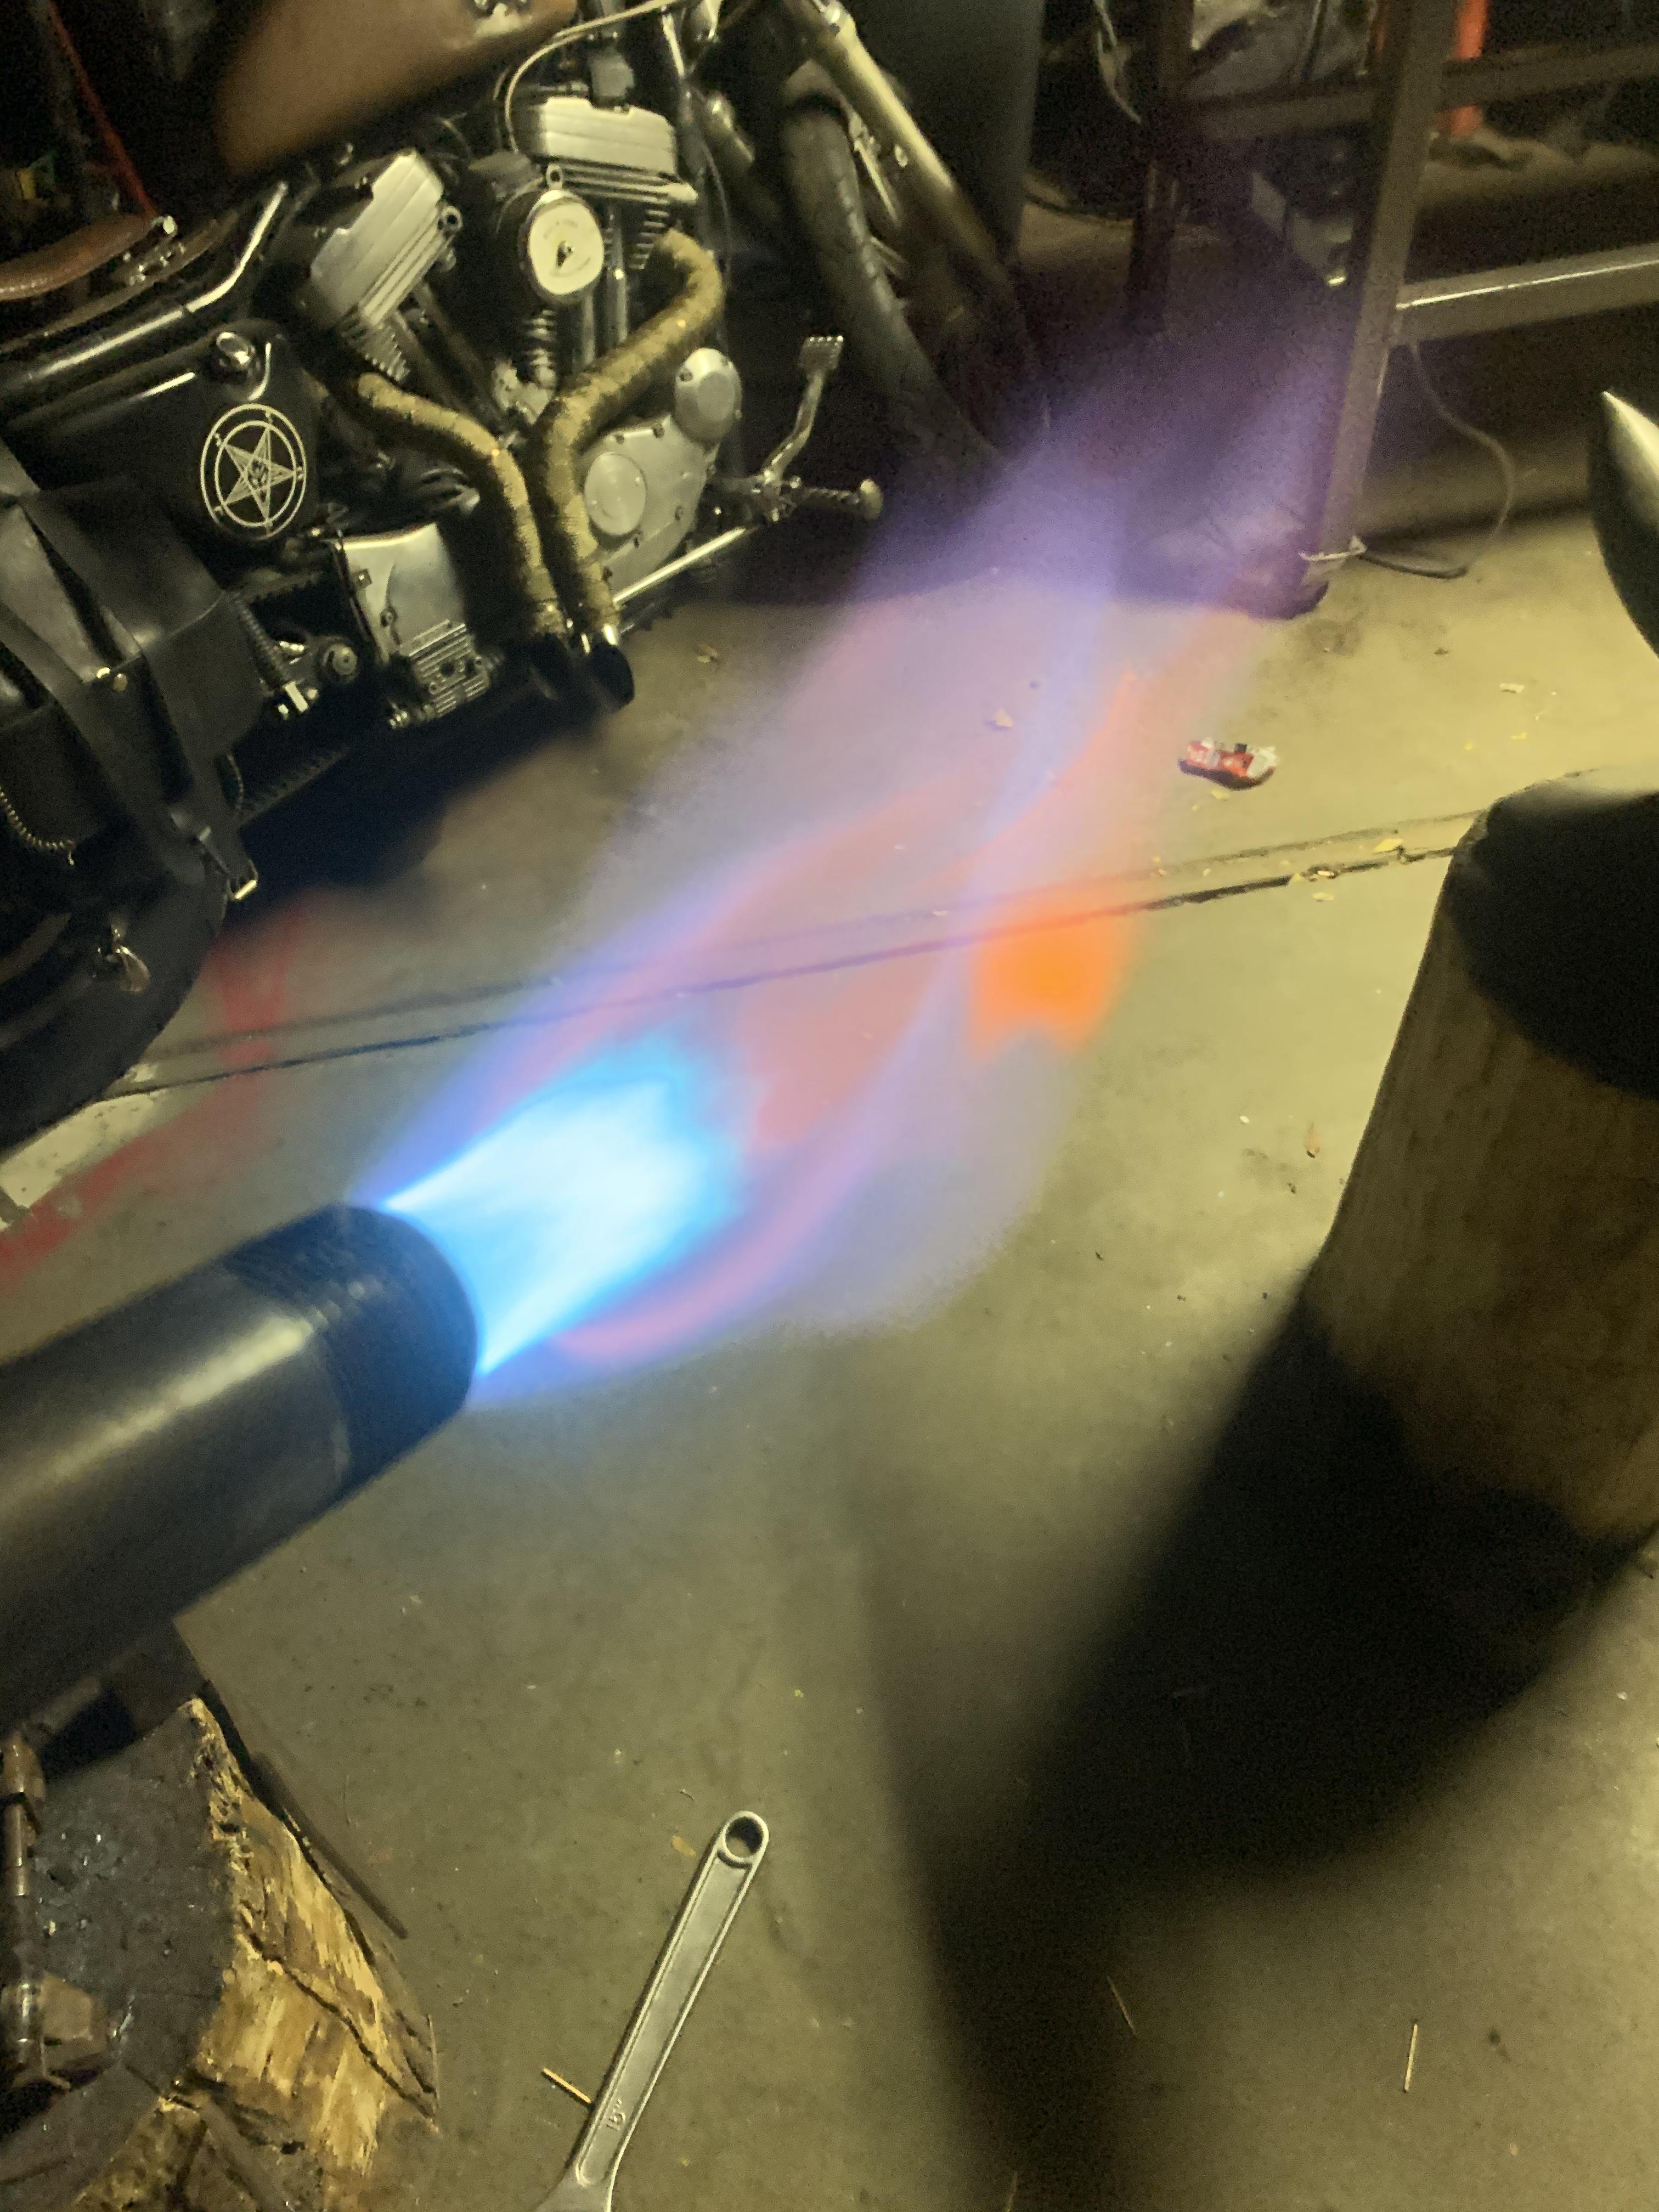
He can't or he's so stuck on what HE THINKS he won't read the basic cues. There are flames shooting OUT of his burner sleeves so he needs to close the forge up tighter?
 That's like saying my backpack was too heavy, so I put another 6 pack in and it's still too heavy. What color should it be?
His burners MAY need the large change of a different mig tip but he's so confused now if a change doesn't work he'll just start changing mig tips and get farther behind.
Chris: The above wasn't to be rude but I needed to talk to all the folks blasting you with often contradictory suggestions. I've explained this I don't know how many hundreds maybe thousands of times so I'm not going to spend a lot of time with you.
I was too vague in my above statement. There is a PRIME RULE of trouble shooting, which is exactly what tuning a burner is. Make ONLY ONE change at a time, test observe and note. By note I mean WRITE IT DOWN. Little spiral note pads are cheap, I recently bought four for $0.79. Keep notes.
First thing to DO is STOP watching Youtube or other how to videos. Most are junk some outright dangerous, sure there are good ones but you don't know enough to tell which are which so stop watching ANY OF THEM.
Next. there are only a few guys to listen to as of NOW. Mikey is better at reading flame than I am, listen to him. There are a number of others who know what's what and I just deleted the list, you're already reading too many opinions and suggestions. I know how to tune a T burner but I''m not going to argue with you.
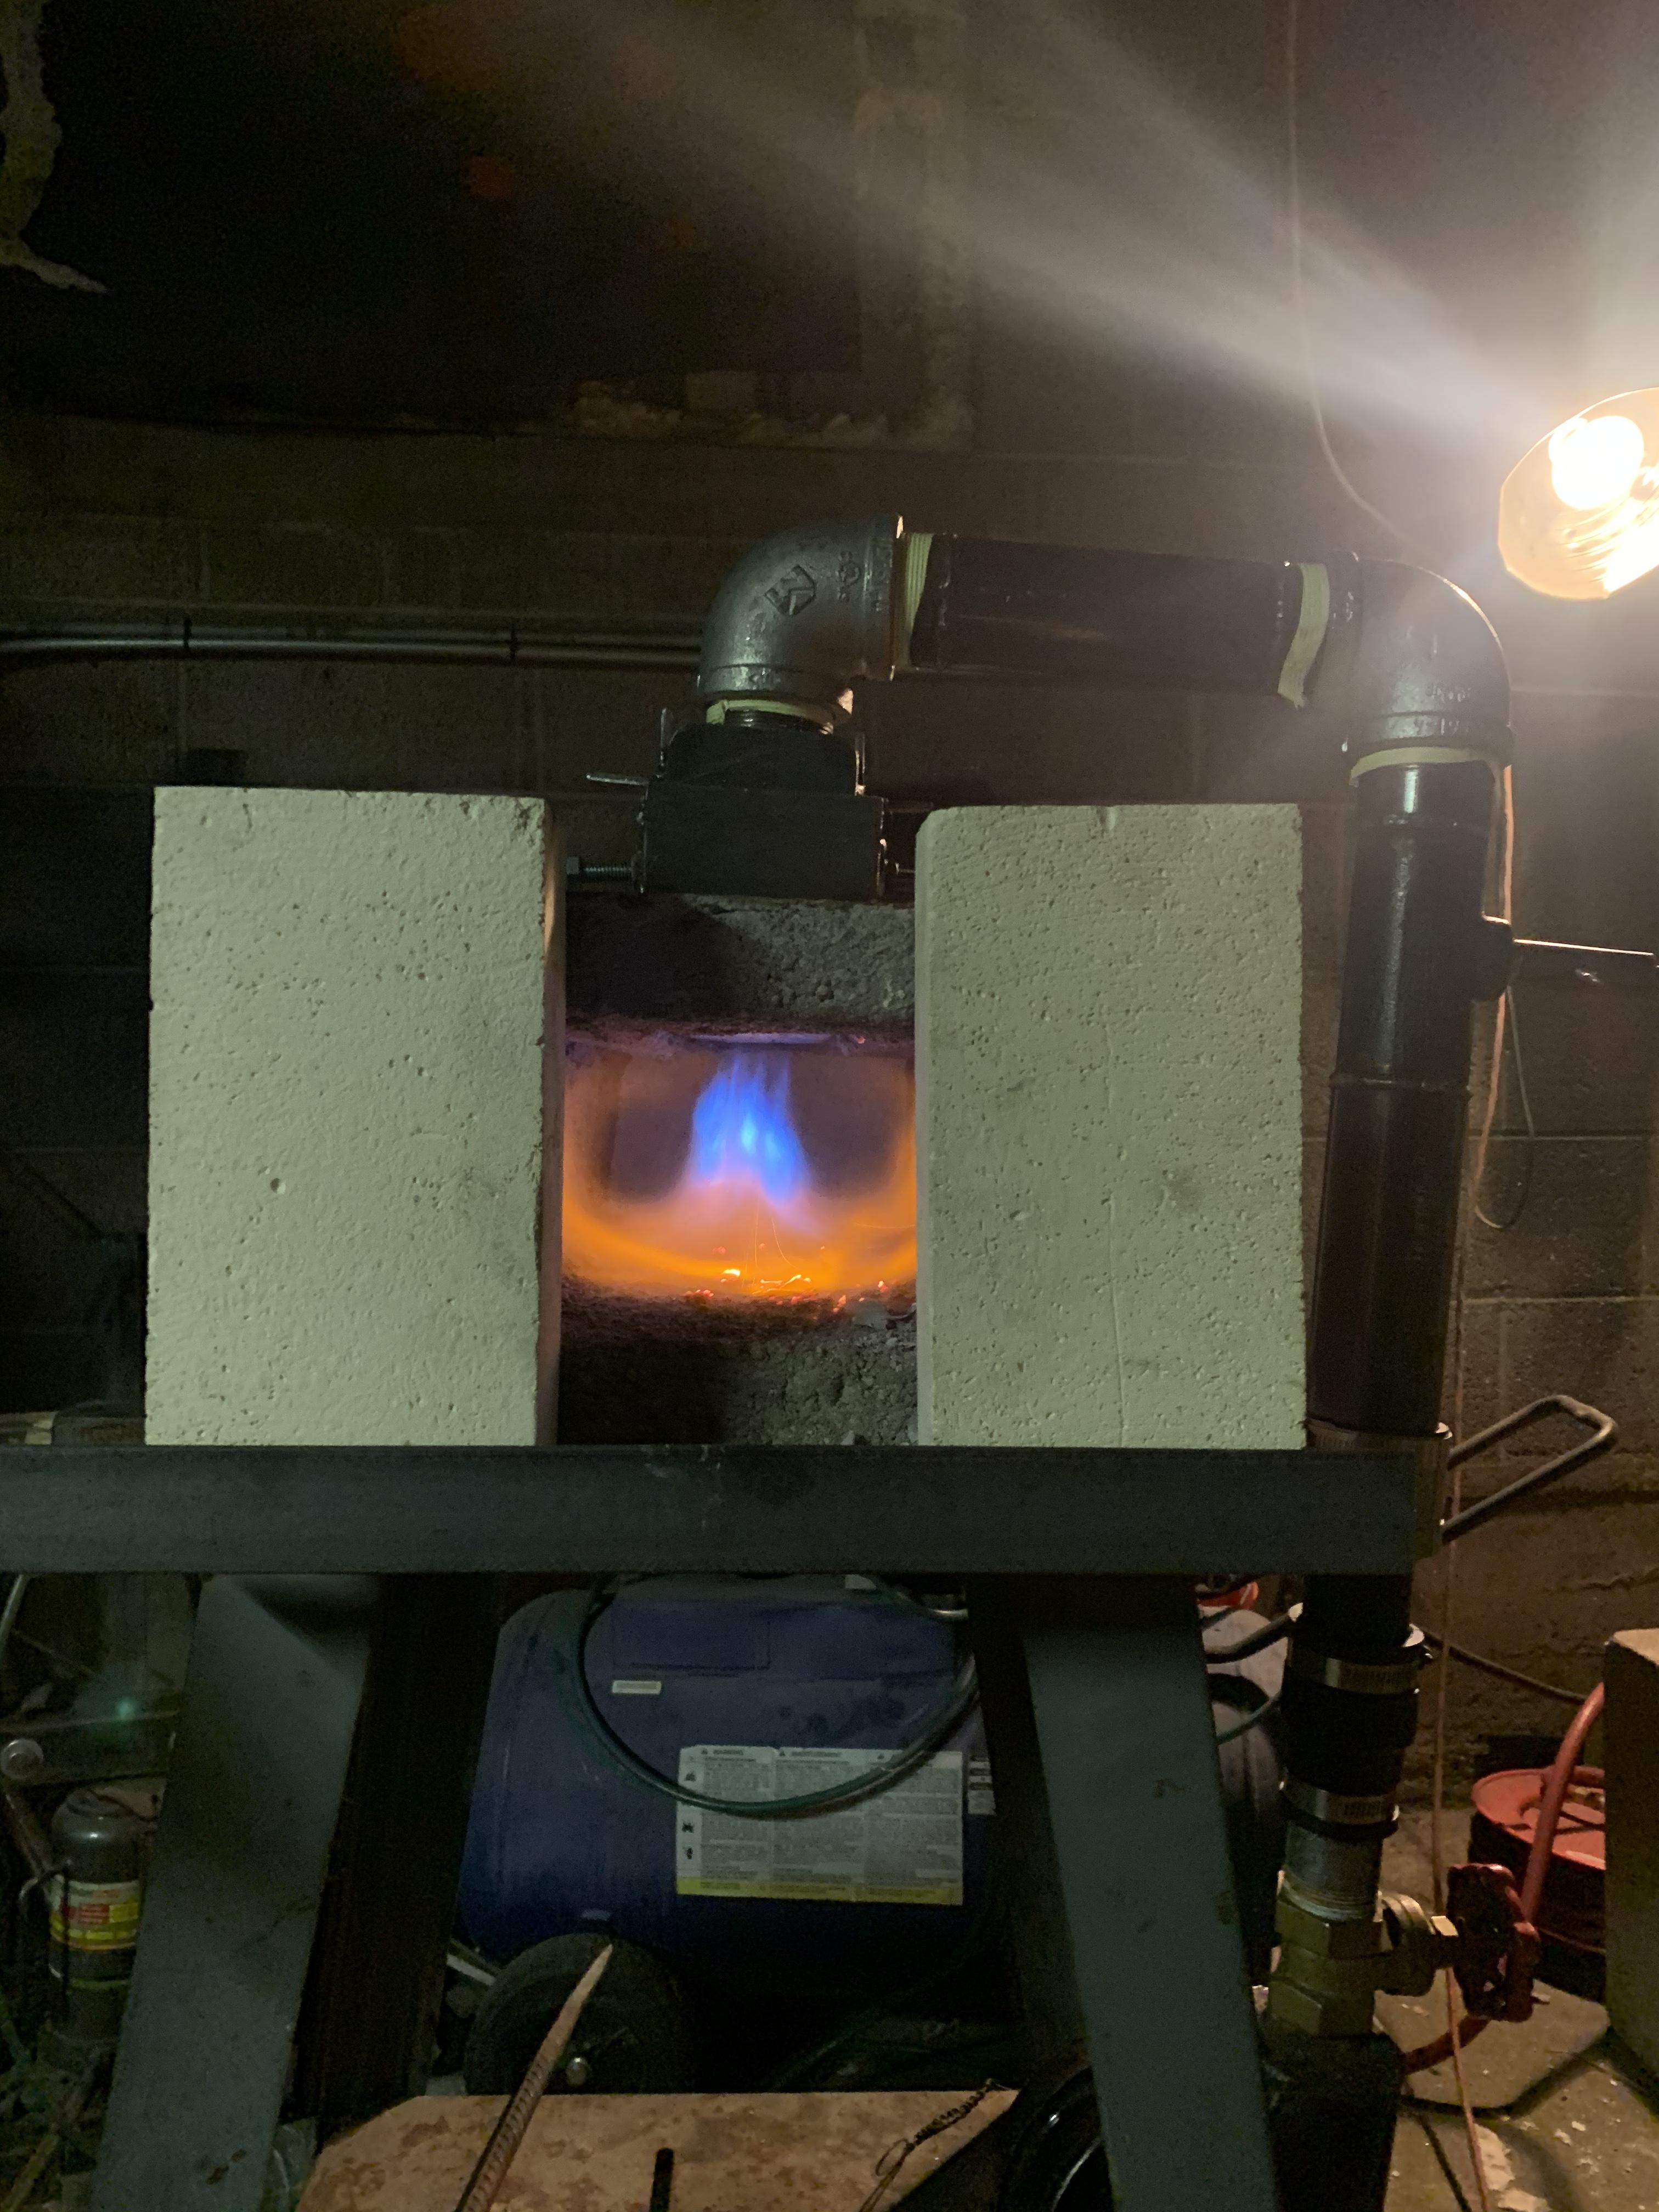
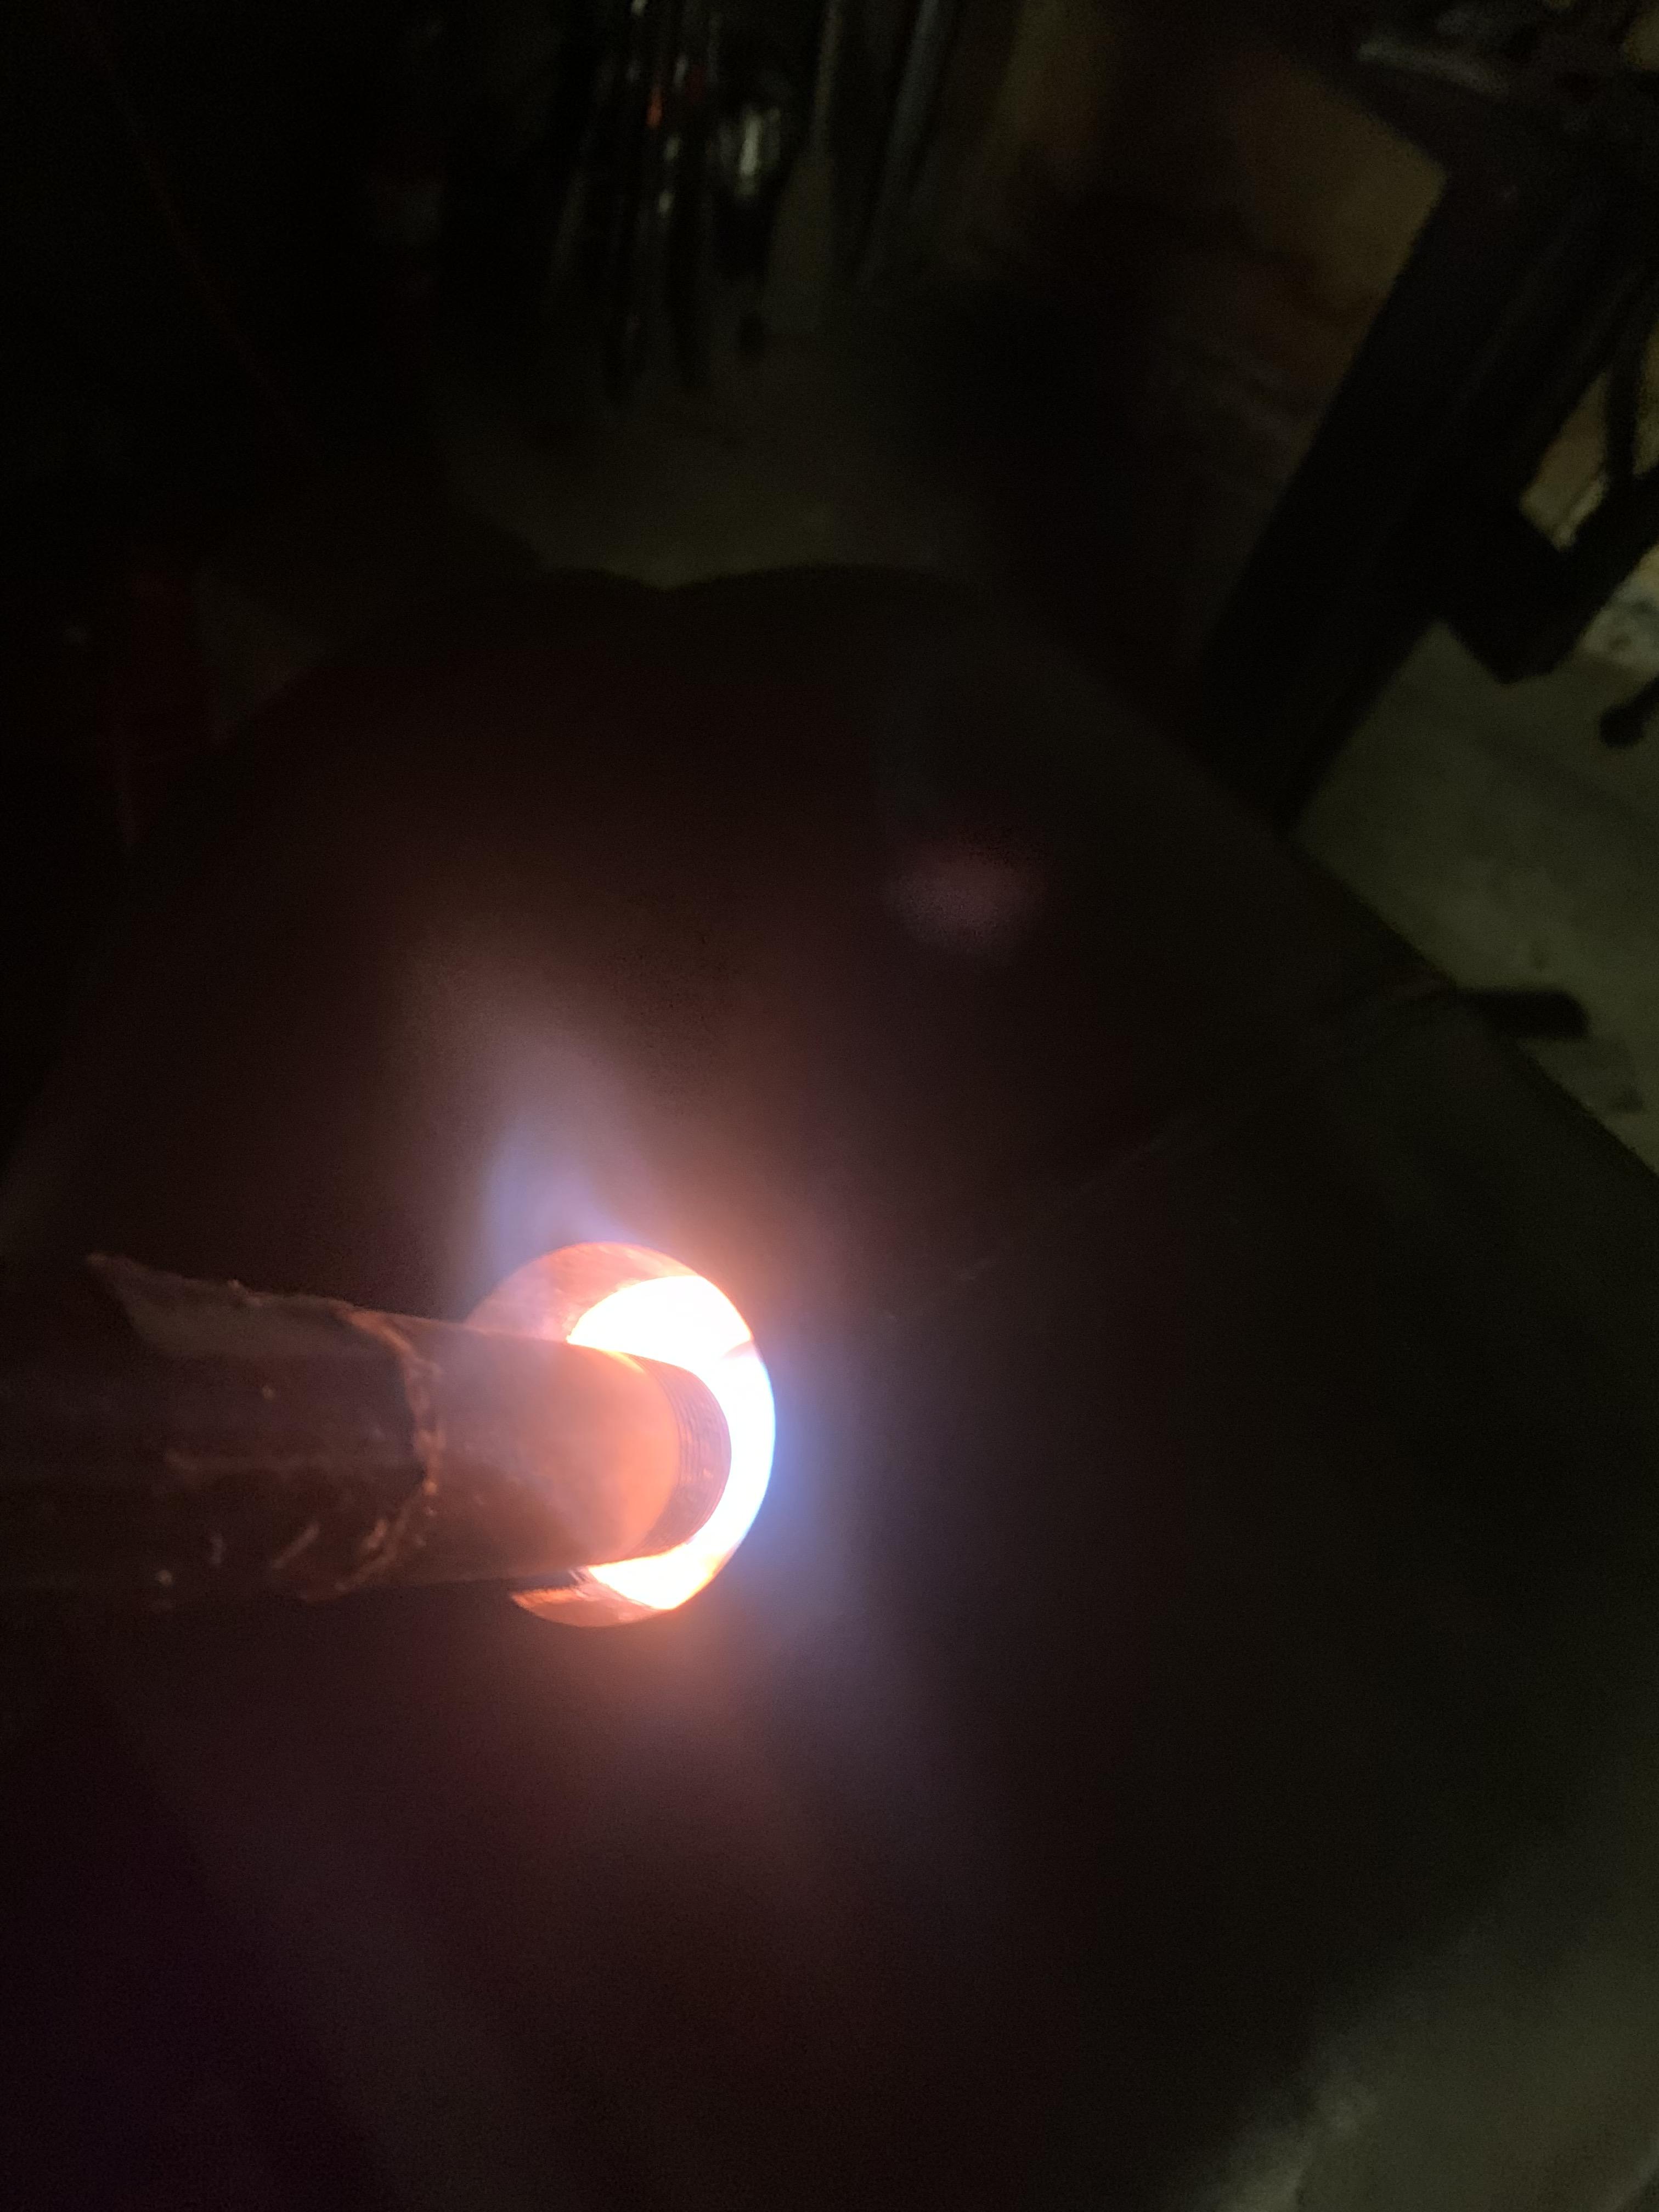
About the problems you're having. Where did you get the idea closing the forge up will make it hotter? It can NOT hold heat that isn't there. The T burner is (Naturally Aspirated) meaning it draws it's own combustion air rather than air being forced in by a blower. (Gun Burner) Being NA the flame has to be free to move or it prevents the burner from drawing enough air. This is called "Back Pressure".
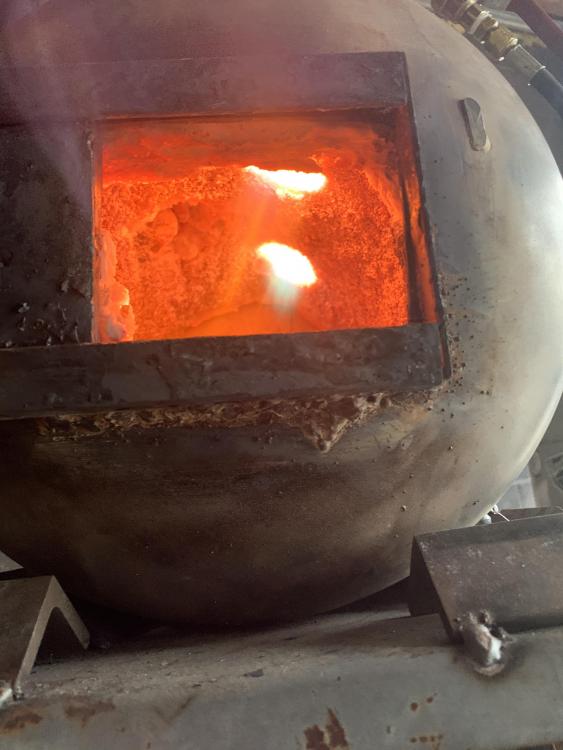
The more you close your forge down the worse it WILL perform. Flames being blown out around your burners is like someone screaming at you.
OPEN IT UP! It's not possible to tune your burners closed up like it is.
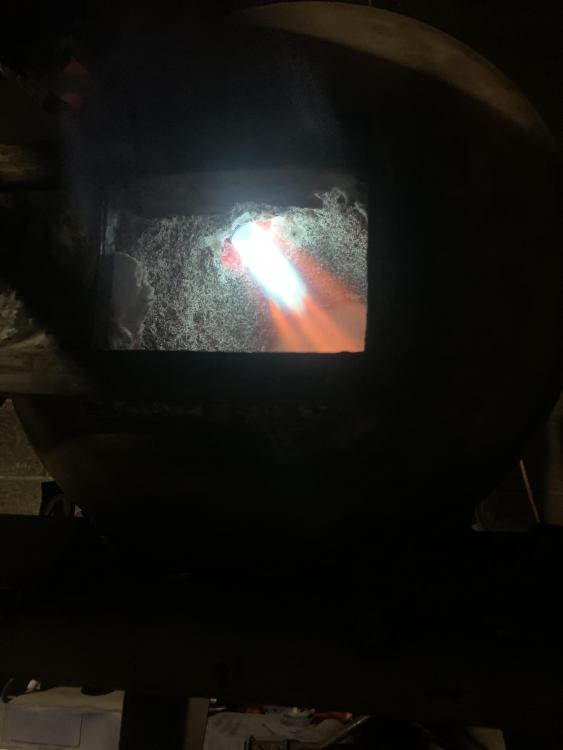
Please don't post a dozen pictures or videos, one or two still pics is all we need. One in the door when you light it and another across the doorway once it's warmed up so we can see the flame exhausting from the forge.
Frosty The Lucky.
I apologize for sounding and acting to clueless about all of this. This is the first time I’ve built, ran or even owned an NA forge. It seems to me that I’ve tried everything but obviously I haven’t. Obviously I keep changing everything up all at once. Thanks for the help.
Merry ChristmasChris
-
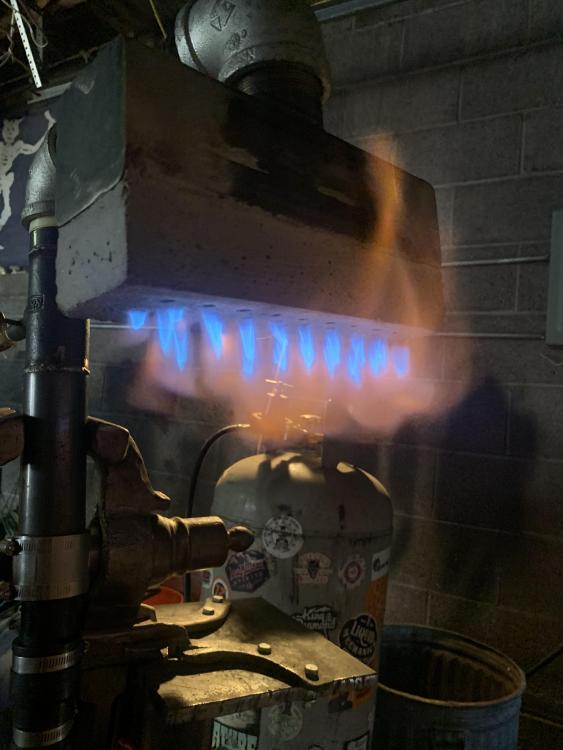
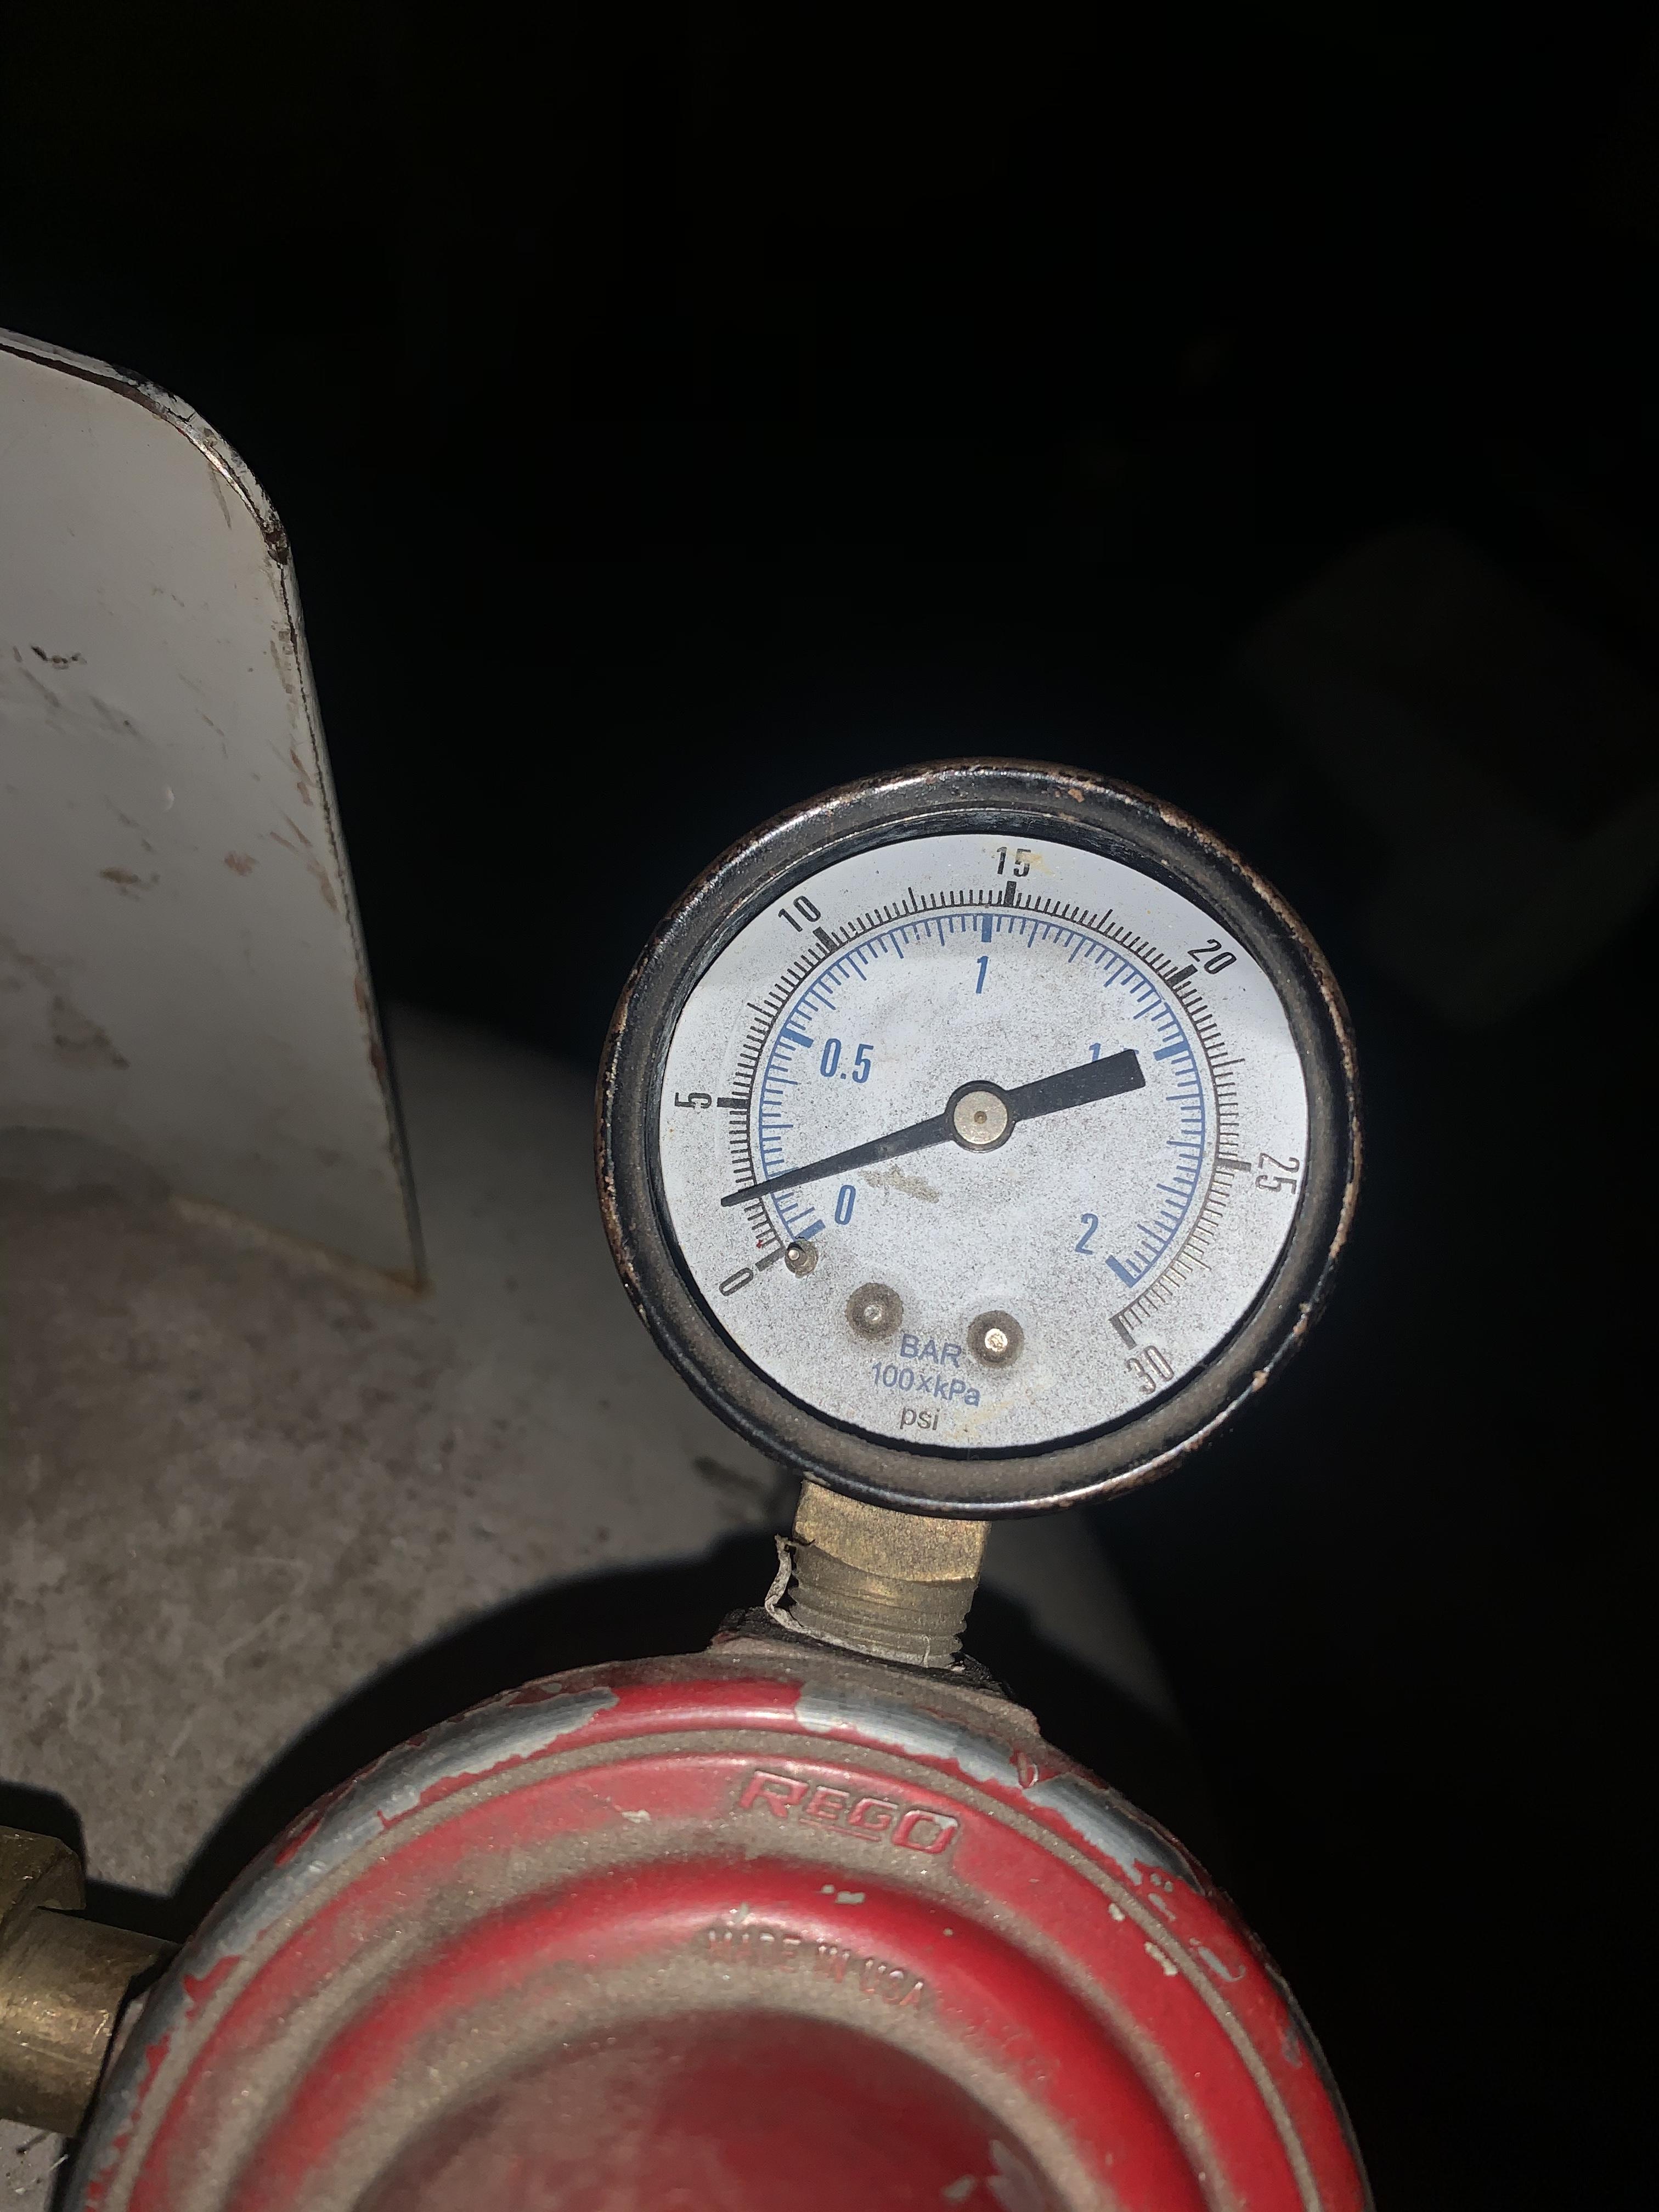
If that bad? That’s at 7.5 psi. I’ve said before like on my last post that yes I know my forge does not hold in heat worth a darn. I’m wondering if I should close those holes that the nipples are going into off completely.
-
On 12/20/2019 at 6:39 PM, Frosty said:
I beg to differ with Buzz on this one even if he's one of the guys who can make a NA burner do the dance with him. My difference sounds minor but it's more significant than it sound. Changing mig tips is a BIG adjustment. Visualize like the throttle pedal in your car. To go a little faster you give it a LITTLE more pedal. Yes? Pedal difference between cruising the boulevard at 45mph. and the freeway at 65mph. isn't a 50% increase in pedal.
The other difference is the recommendation of when to change mig tips. The jet (end of the mig tip where gas exits) being 1/2 way across the intake ports is no big deal. Even 3/4 way across isn't serious but you're approaching the point of diminishing returns.
I START trimming my jets from the 50% position. (1/2 way across as viewed through the intake ports) I trim starting with 1/32" and depending on the effects continue another 1/32" or take less off, usually less. I file length and torch tip file to clean the the burs. Remember to reinstall the burner IN the forge light it up and evaluate the burn. Buzz and I are on the same page regarding flame chemistry, neutral to SLIGHTLY reducing.(rich)
The essence of the difference is in large part the heart of why I run such large jets. The REASON for a burner is to put as much burning fuel/air mix in your forge per second as possible while blowing as LITTLE as possible on through and out the door.
Anyway, the trade offs are pretty straight forward. To put the same BTUs at a specific absolute flame temperature so many cubic feet of propane and the appropriate amount of ambient air have to pass the burner per second. Making sense so far?
The arithmetic is easy without going into the actual calculations, I eyeball it I don't do specific #s. For any given volume of liquid or gas to pass through an opening (or pipe) it MUST travel at a specific velocity. As a gross example fill a 10 gal. bucket through a garden hose or road culvert. A minute with the hose or so fast the momentum of the water snatches you off the side of the road. Follow so far?
To put a welding heat's quantity of fuel/air into a forge volume of 300 cu/in, the gas jet must emit propane at a volume and speed to induce the correct volume of air. Yes? The carrying capacity of a round orifice of tube is a product of the cross section area and the area is the square of the radius. Yes? Increase the diameter x.5 and the area increase is x2. The total BTUs increase double. An 0.035" tip is about 50% larger than a 0.025" tip and will carry about 2x the volume per given speed or pressure.
This means basically the flame is moving at 1/2 the velocity being pushed by a 0.035 mig tip for a given BTU or temperature.
The short story with all this Frosty rambling is welding temp in my forge blows MAYBE 3"- 4" of dragon's breath rather than 6"+ And better still my tanks don't freeze so quickly and 20 lbs. lasts a solid 8hrs. Why? The flame stays IN the forge chamber longer.
So, don't worry about changing to a smaller mig tip till the jet is trimmed to say <3/16" from the fitting at the back of the T.
Frosty The Lucky.
It does put things into perspective. Honestly I didn’t see this post until after I posted the one today. I honestly feel that adequate insulation in the Forge next to huge difference as well as far as getting up to Welding heat. Right? So you’re saying I should start With a 0.035 mpg tip but trim it down? Hopefully the pictures that I sent Today can explain a little more on how things are running.
-
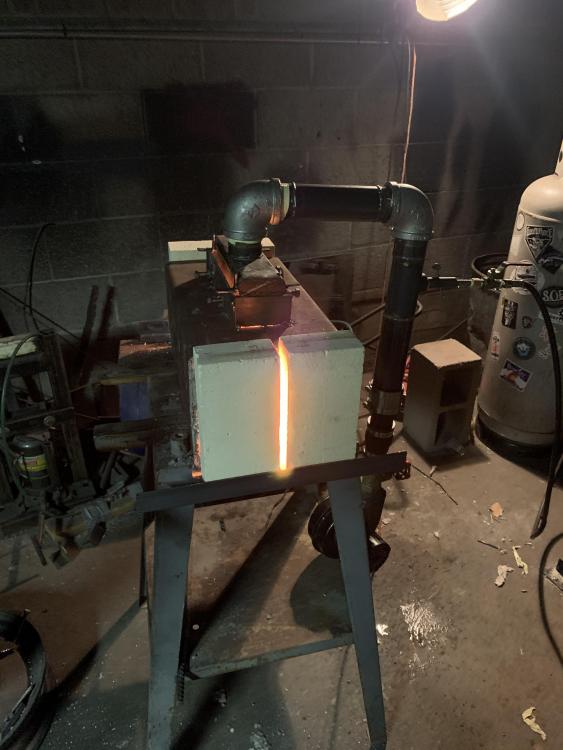
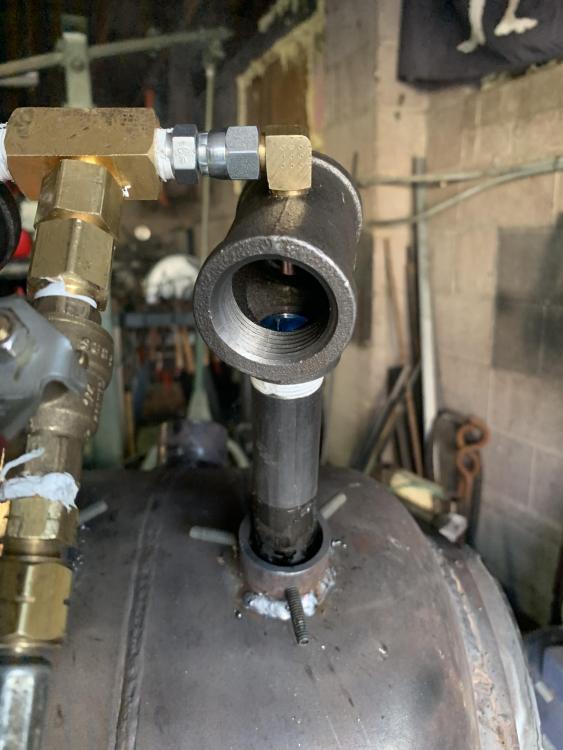
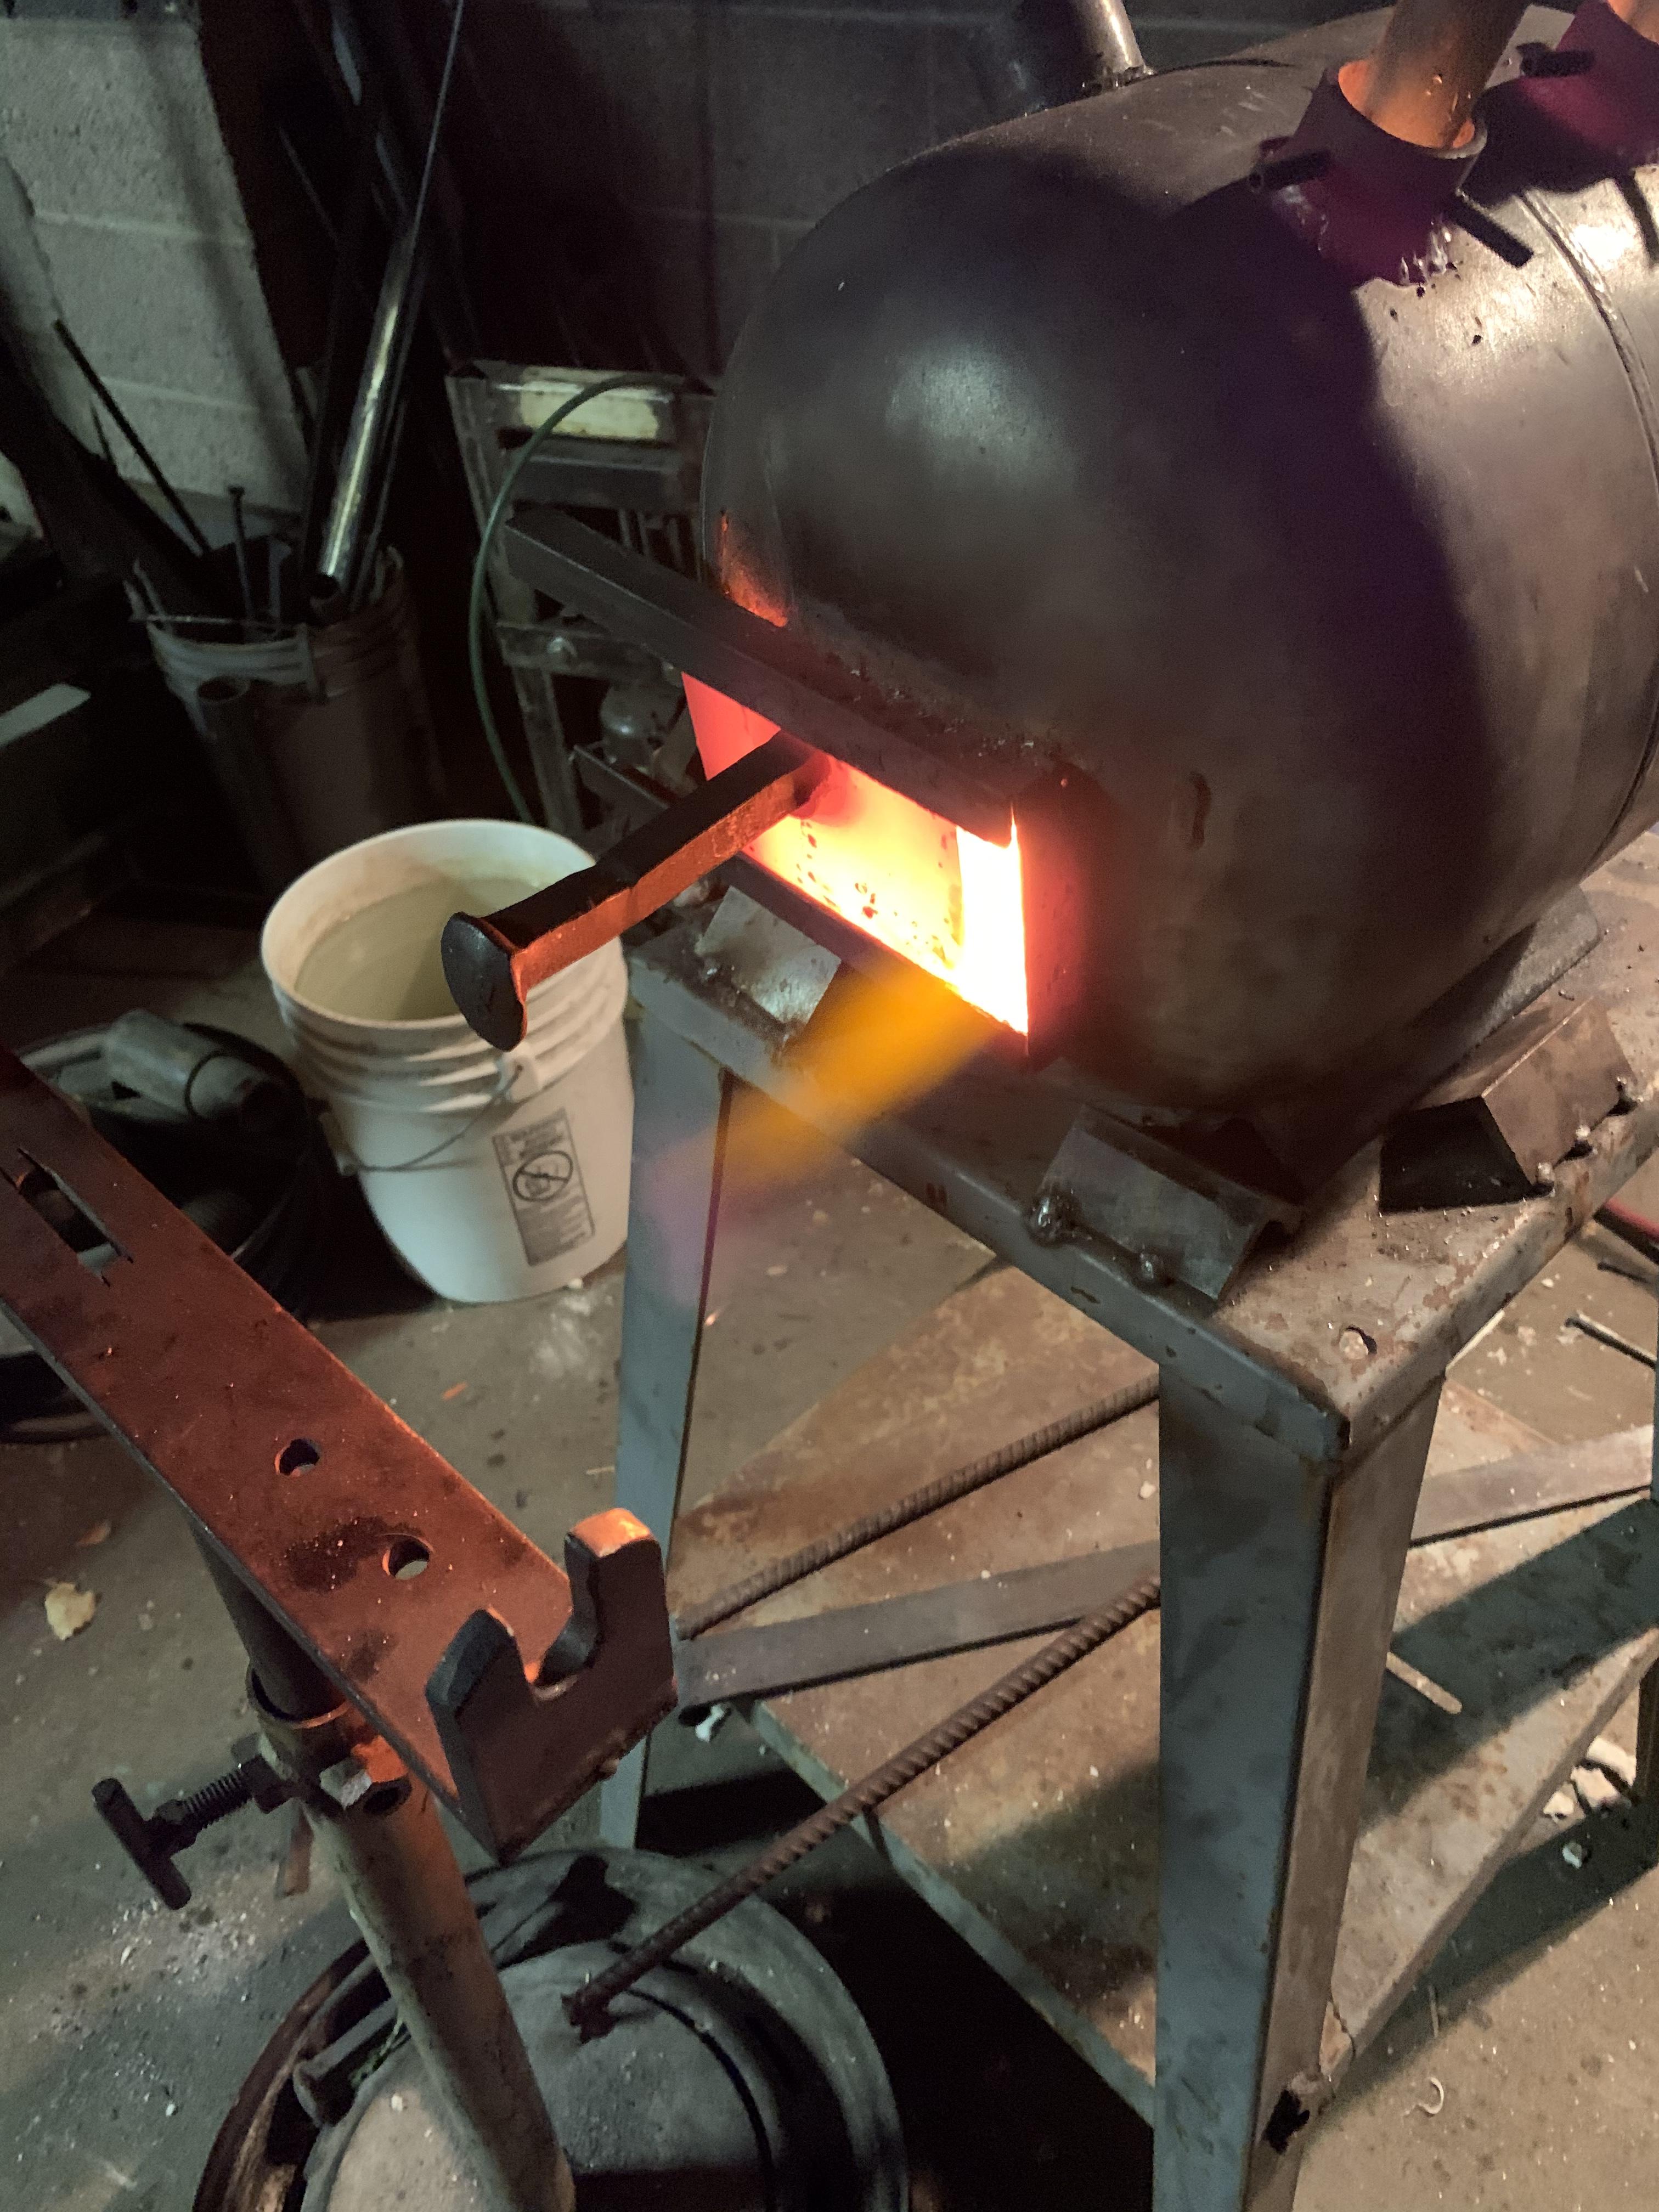
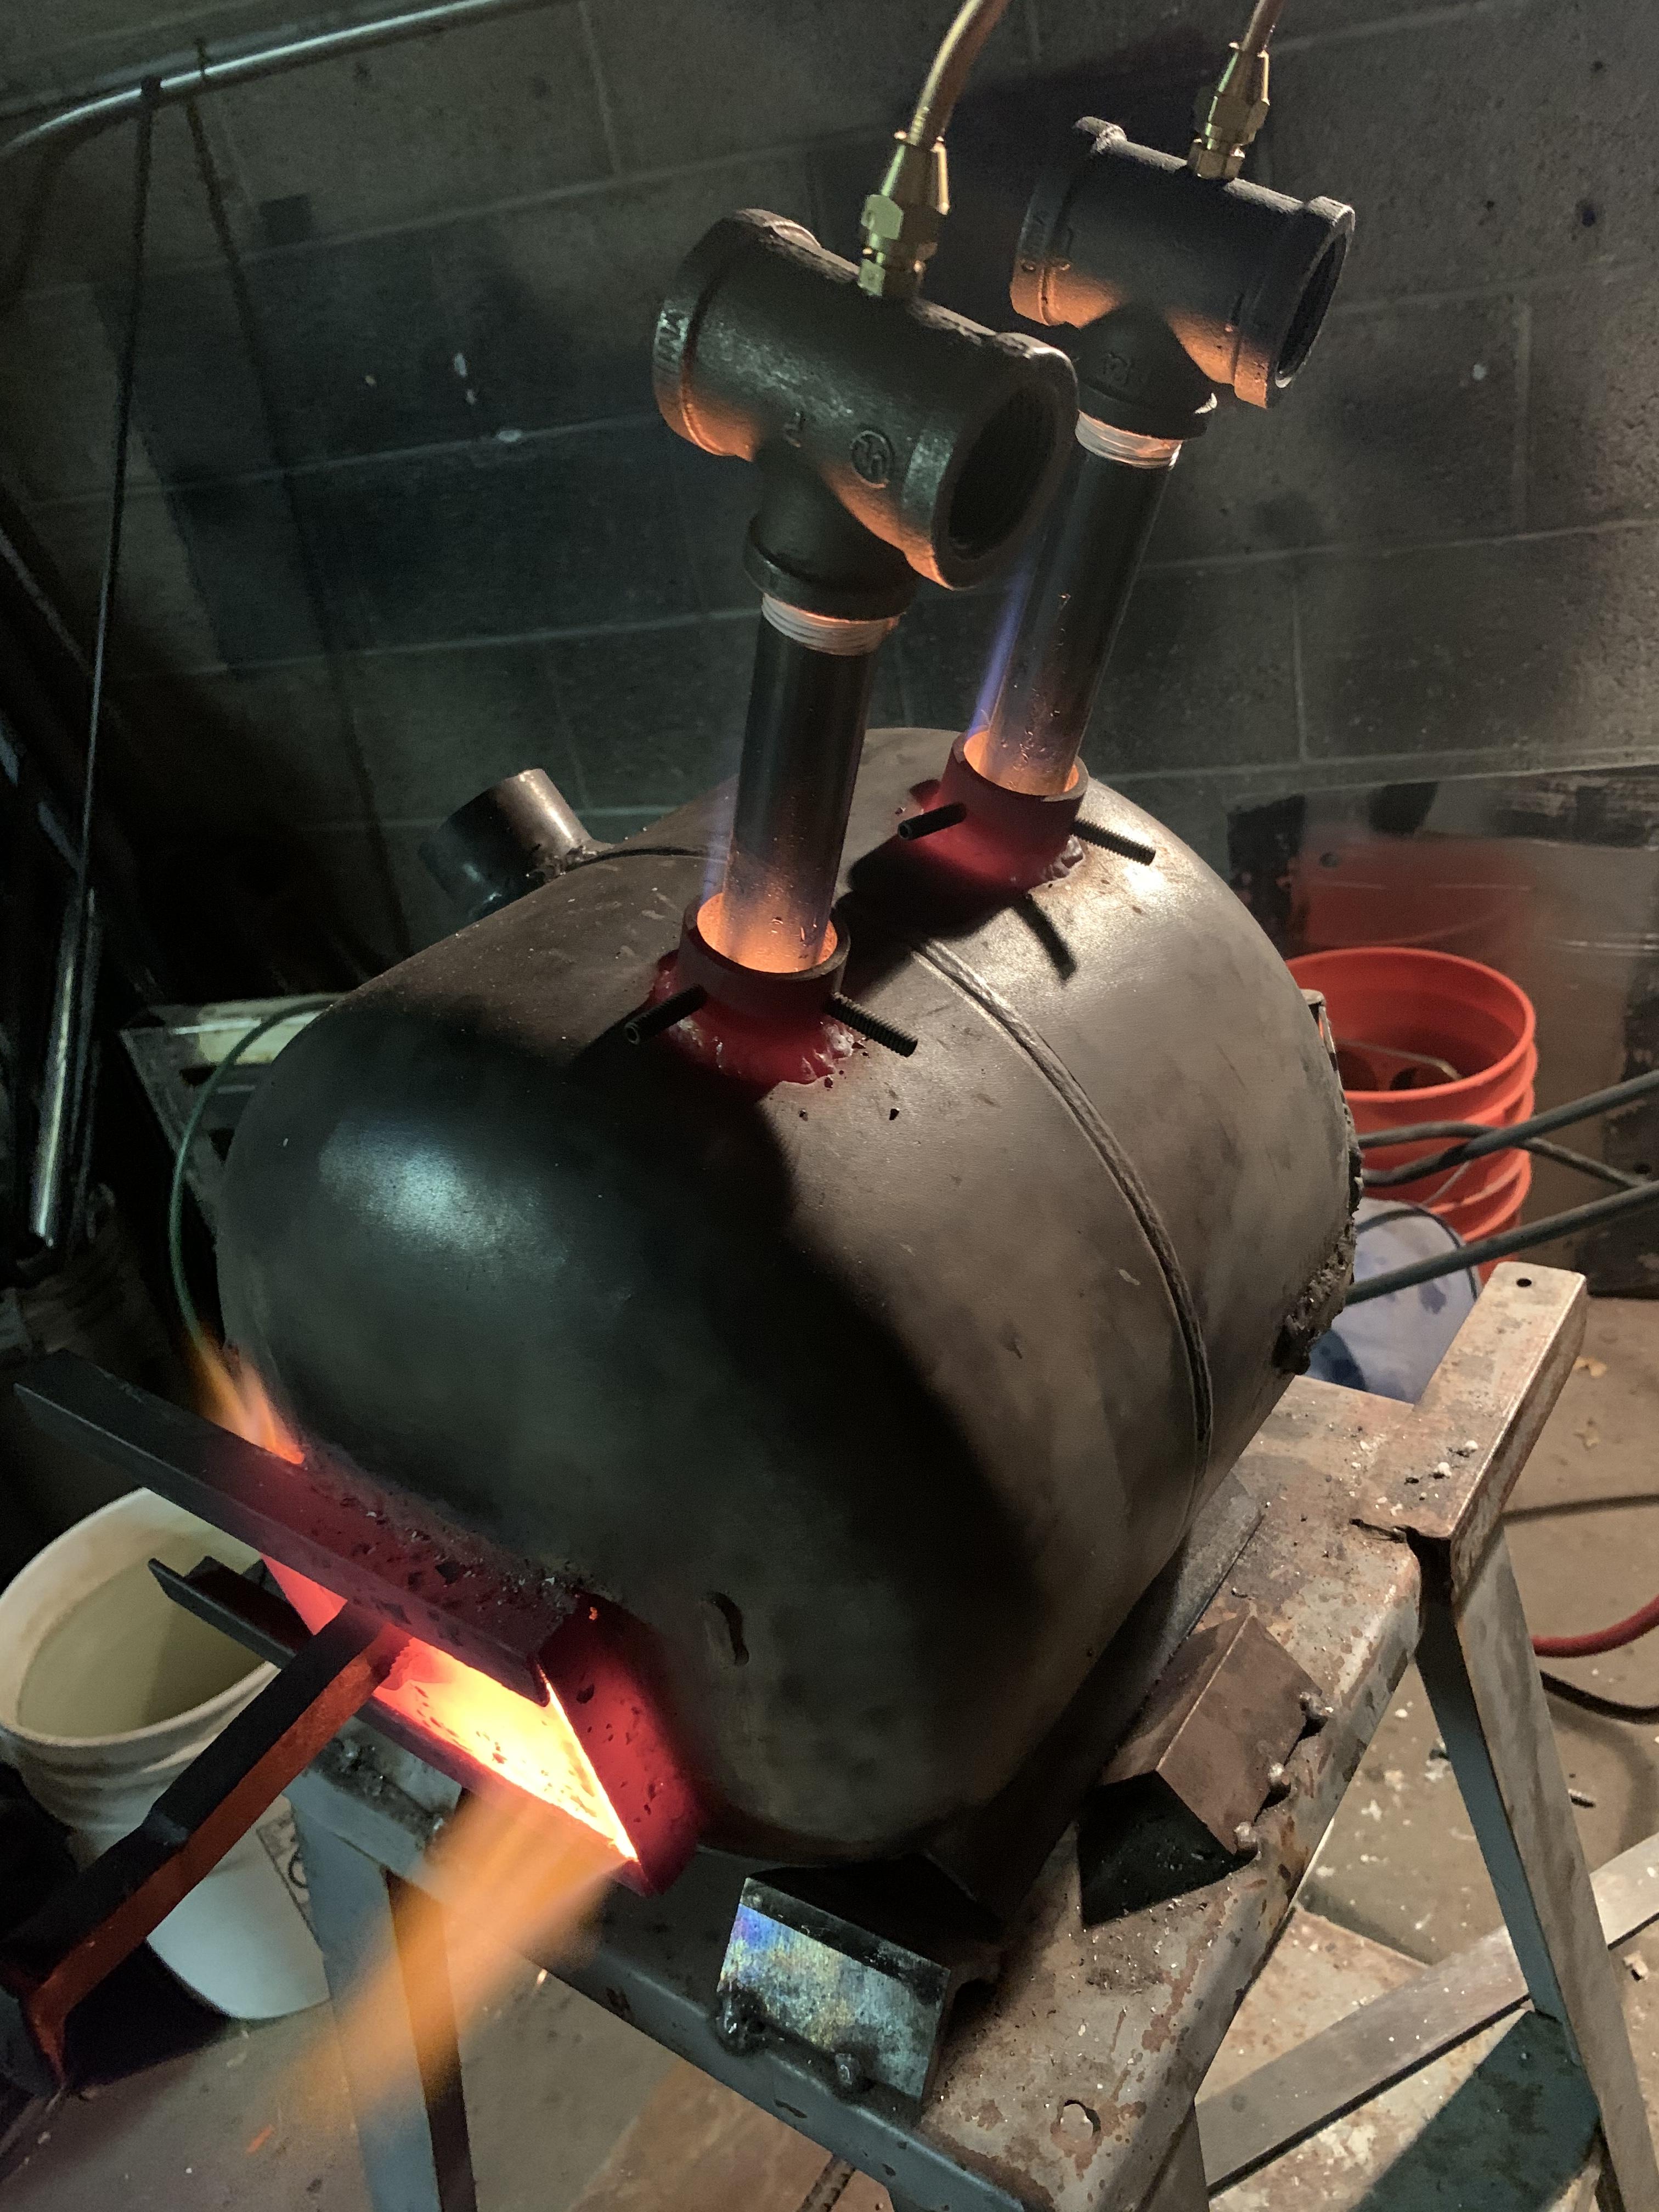
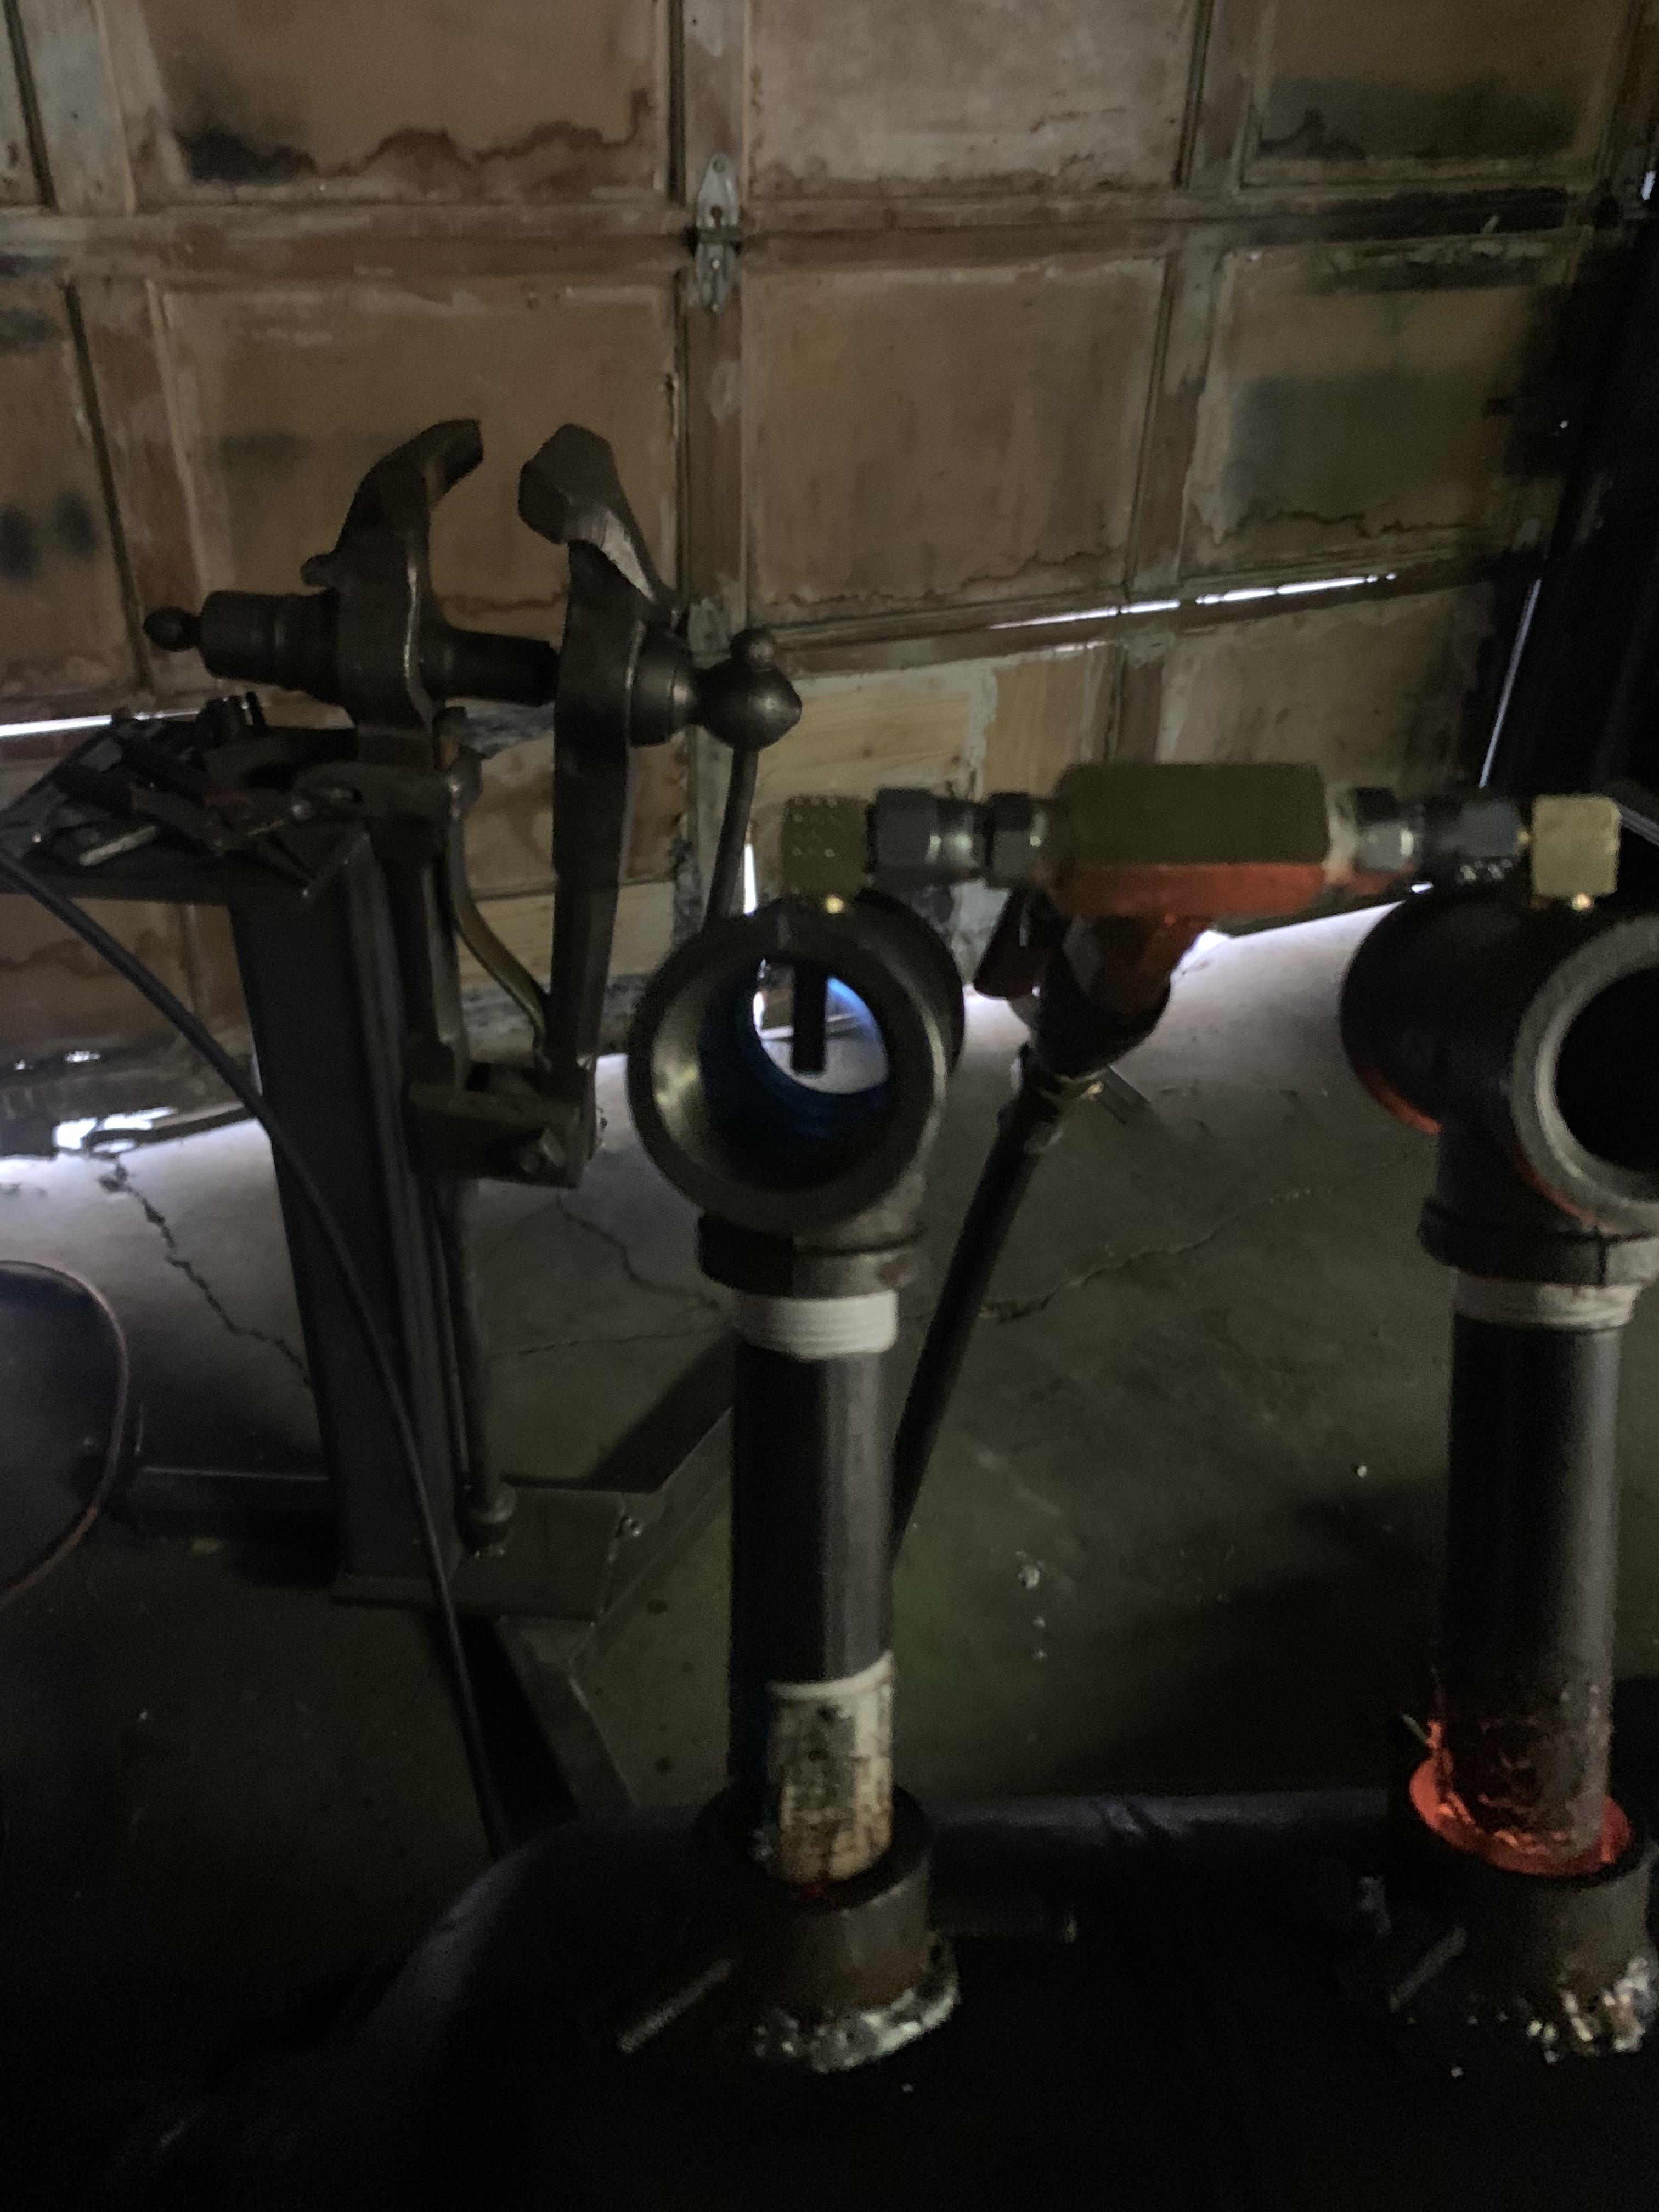
OK I have a feeling that my Forge is losing way too much heat and that’s why I cannot get up to welding temperature because my forge will not hold in heat. Also I finally got my Venturi burners working and I think their tune pretty OK. Again I still wish I had somebody here that can help me in person but it is what it is. I am using .025 tips cut down about 1/16” so that the Meg tip is about halfway through the T. Whenever I run it on about 8 to 10 psi flames shoot up through the holes that the nipples are in but they’re not going up into the tease at least. They are trying to sputter every great once in a while though. I am still thinking about usingWhenever I run it on about 8 to 10 psi flames shoot up to the holes that the nipples are in but they’re not going up into the tease at least. They are trying to sputter every great once in a while though. I am still thinking about using trying the .030 tips just to see. Monday I will be going to the blacksmith Monday I will be going to the blacksmith and farrier shop to get Either more wall either more kao wool or some bricks or both. I’m thinking about squaring off the inside of the forge. Anyways, more to come and more to forge.
Chris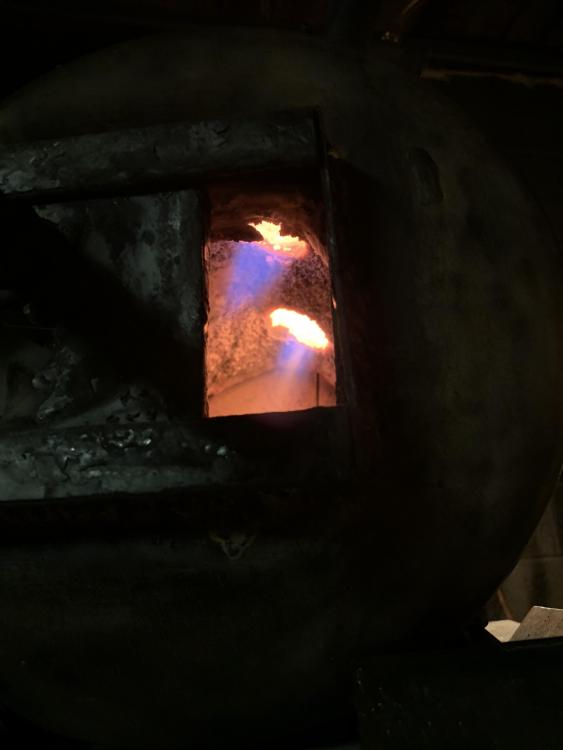


-
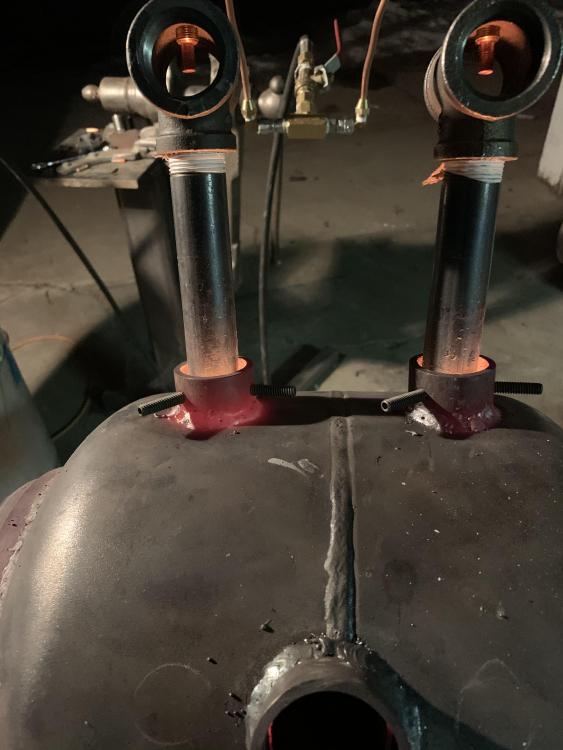
I didn’t change the length of the length of the mix tubes to a different length than from the plans I actually cut them down to the length in the plans. 8” to 6”. I’ll send some pics. Basically one of the flare tubes that go into T and receive the mig tips is stripped out. So it not being tight is messing things up. That particular burner is burning way too rich. I switched back out to a.025 and it was worse that with .030. I’m thinking I should try a.035 trimmed down tomorrow after I get a new T and flare. I’m hoping the actual T is not stripped out but I think I threaded it too deep and it made the whole too big since the tap is tapered.


-
16 minutes ago, Irondragon Forge & Clay said:
Your video's don't play for me, got sound but no picture.
I Know , gimme a bit to figure this computer thing out and I;ll re-send everything.
-
Ok I have video this time. I fired it upFor the first time and this is what I got. I’m using .030 tips instead of .025 which of what was recommended because of my altitude but I’m thinking more like.035 like the original plans say. I cut my nipples down to 6” instead of 8”. Pretty much everything is at original plans specs. -
Thomas thanks for the explanation. And I would have to agree 100% about having a vented shop opposed to a warm and toasty death chamber. I'll be fine tuning today and I think I'll go with the 45 degree instead of on top. The forge body is round anyway. I'll keep you all posted. I sure wish there was someone that lived close to me for some one on one hands on advice while fine tuning. I need forge welding temp!!
Chris
One more question though. is it in fact better to use a .025 tip opposed to a .035 due to the altitude? I'm in Denver. Or maybe split the difference with a .030? Idk.
Chris
-
Re-run meaning??? Do you mean blow-back or as in liquid terms, blow-by, as in coming back up through the burner or through the hole?
-
Frosty,
I'm going directly by your plans but I got 8" 3/4" pipes instead of 6". Also does it really matter where the holes are placed? I was thinking of putting the new holes directly on top instead of at a 45. What is a torch file set?
Chris
-
Questions, questions, questions. Ok, I built a Frosty T burner. In fact I'm building two. I live in Denver. it seems that I,m getting an oxidizing flame. Maybe not though. I've been playing around with it and here's what I've got. First I used a .025 mig tip because I've heard apparently it's better for higher altitudes, but the .035 seems to get a better flame. I did have to cut it off about half way though. How far down should the tip sit in the T? Should I use a 1 3/4" hole with set screws to mount the burners or is that going to cause blow back? or should I use a 1" hole? I wan't to be able to adjust the depth of my burners. I have about 2" of insulation in my forge. Also I think I need to install some air baffles. Idk, I still have alot of playing around to do tomorrow. Thanks, Chris


-
I guess what I’m trying to achieve is more heat. I’ve had this Forge Designed for about 10 years. It’s a propane bottle forge. It has one burner and it’s the same style burner that came with the original plans. It’s an old style and maybe Which has forced air. I live in Colorado so I was told 10 years ago when I made this forge that that’s what you had to have here. Well, things are different now. There are burner designs that work just fine here in Higher altitudes that are atmospheric. I’ll just go ahead and biuld me two nice T burners. Hopefully I can get up to welding temp pretty easy with that. I haven’t been able to get up to efficient welding temp in a long time and I’m about to just give up on my propane forge all the gather and go back to coal full time. I guess I’ll give this one more shot and build a new burner system. Wish me luck and thanks for everything, Chris
Btw If anybody lives close to Englewood Colorado please let me know I could sure use some Forging buddies.

-
Frosty, I hope all is well.
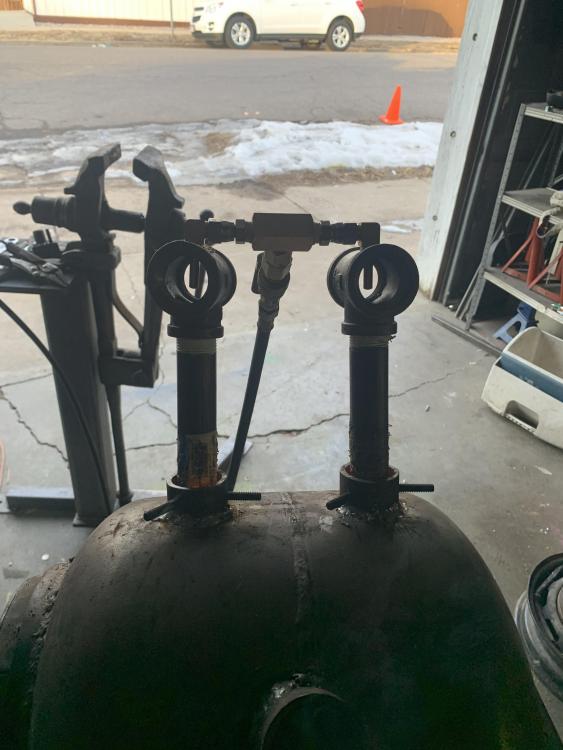
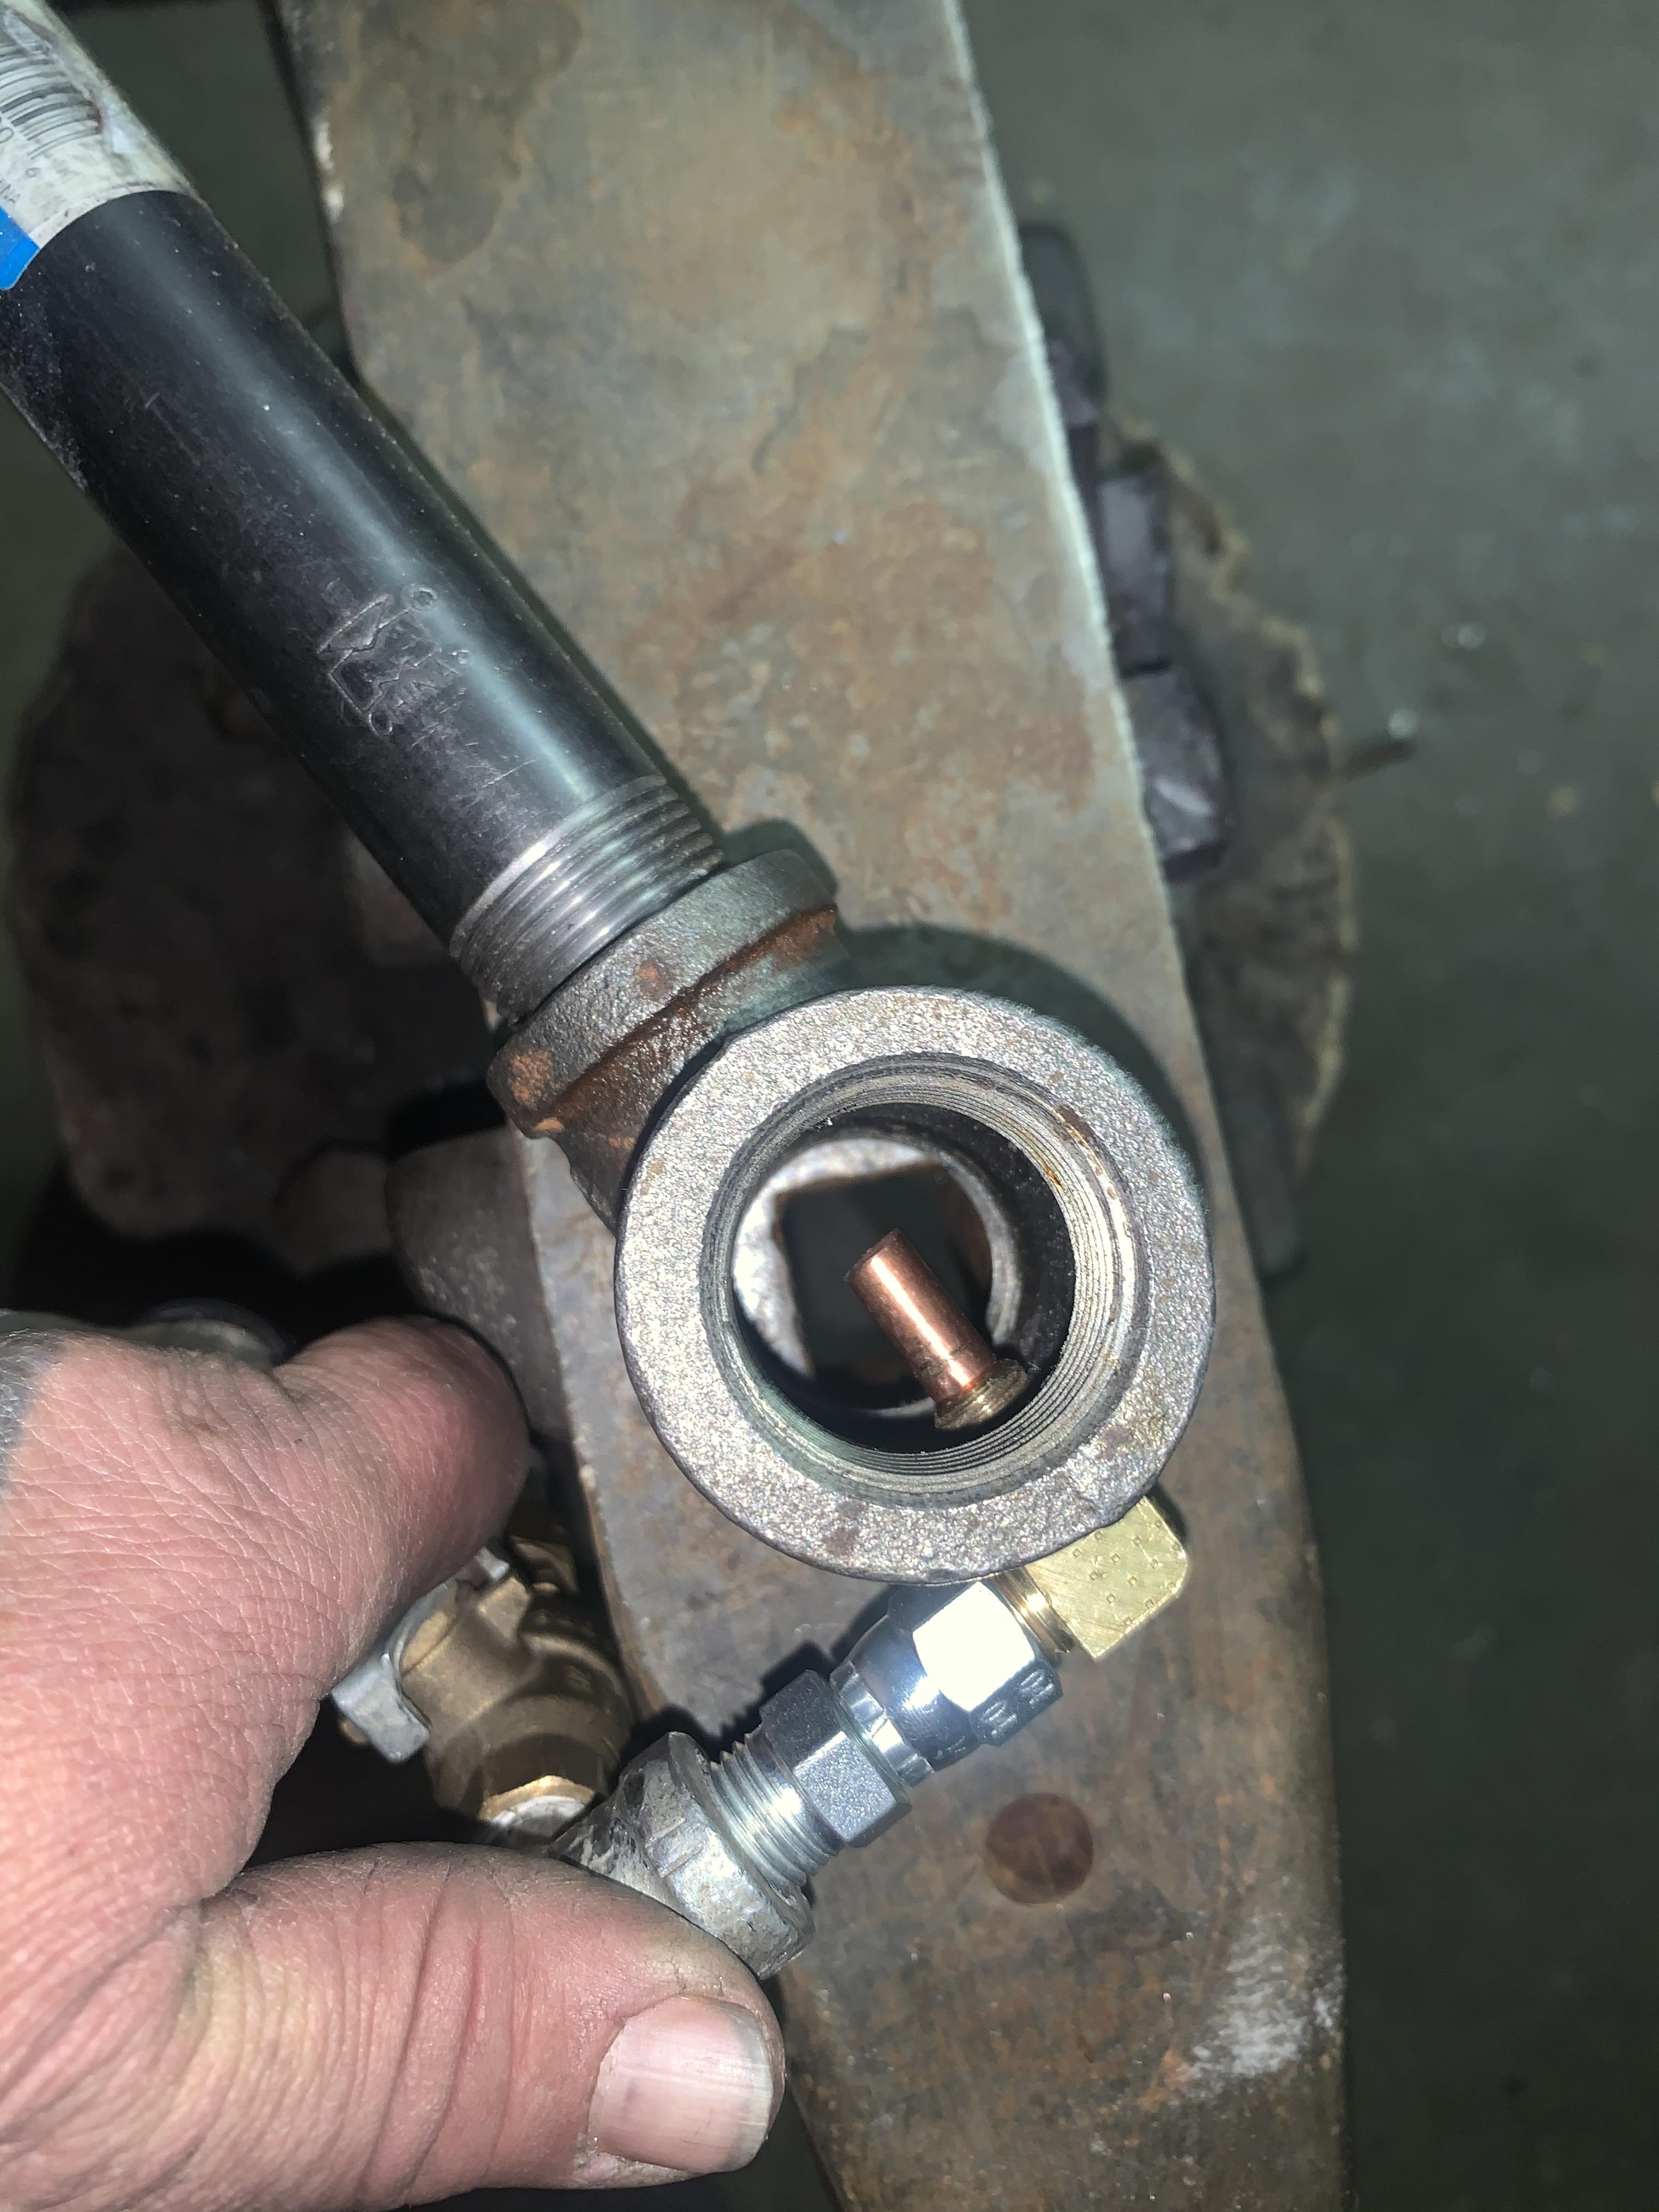
I have a quick question. If I run my single regulator and hose from my propane tank, T it off to two separate burners is that going to give me the same amount of pressure then just having one burner? Because it’s going to cut the pressure in half right? Another words what’s the point in having two burners if I’m running from one regulator and one tank?I’m actually out and in the process of picking up material to build me a dual t burner as we speak. I need to know if I need to go get me another regulator and hose to where I can run from two tanks or the ladder?As always I appreciate your help, Chris
-
10 hours ago, swedefiddle said:
Good Morning, Chris
From what you have stated above, you didn't allow the piece to "normalize" or "anneal". You quenched it.
More Lessons please. Life Lessons. The School of Hard Knocks, is in session.
Neil
Neil, As I did state in the first or second post, I did normalize. 3 heats. I truly think it decarbed because of too many heats. I guess from the way I worded it it sounds like that. I ment to say, I normalized 3x then brought it back up to temp and quenched. Thanks though.
-
9 hours ago, ThomasPowers said:
yes I did normalize it. I brought it up to critical temp then reduced it to just under and quenched. I didn't think I over heated it. They weren't course crystals. they were actually very fine.
I actually probably heated it too many times during the forging process. I bet I did get excessive decarb from that.
-
I've been using canola oil for years now. I've not had many problems except for recently. I have been trying to get a big bowie knife quenched. I forged it out of leaf spring. It would not harden. At least with a file check. The file seemed to dig in every time. I tried 3 or 4 times. Finally I tried water. The file seemed to dig even still but it warped my blade. I tried to straighten it and it broke. The broken ends were very crystallized. I guess it hardened. But why didn't the file skate off? Any help is appreciated.
Thanks, Chris


Forge went POOF!!!
in Ribbon Burners
Posted
Well if I want to have forge welding heat at my altitude then that’s kind of what I have to have. Trust me I’ve tried xxxx near every kind of burner.
You have a naturally aspirated ribbon burner? How does that work? Do you have any pictures? Because that sounds very interesting?