
norrin_radd
-
Posts
298 -
Joined
-
Last visited
Content Type
Profiles
Forums
Articles
Gallery
Downloads
Events
Posts posted by norrin_radd
-
-
Looks great. Got some exercise on that hack saw!
-
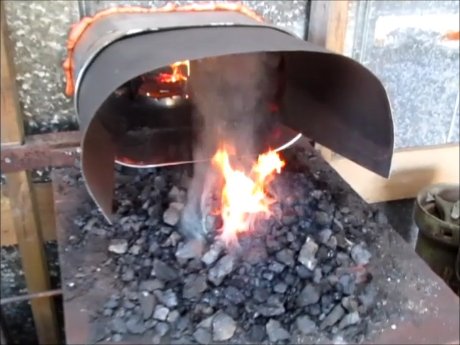
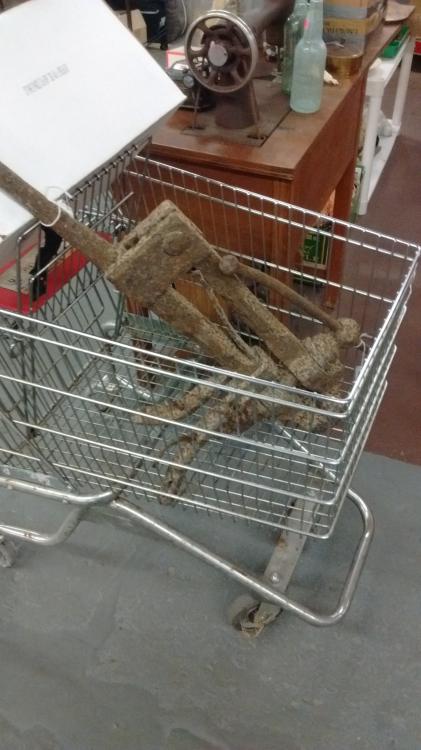
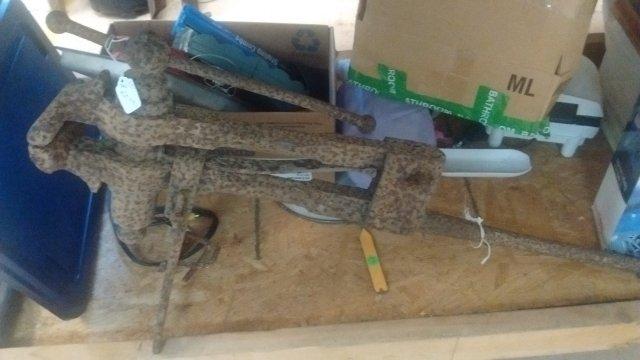
I kicked up a few of these old square bolts and other junk a few weeks ago.

One of these looked like it would be a good flatter, so I tried to make one.

Its a non handled version, a little on the small side but it works for what I needed. After I made it someone brought it to my attention that I should have forge welded it. I'm such a failure at forge welding I didn't even think about it. But maybe if I make another one.
Video'd making it for kicks, basically just me wailing on it with a sledge hammer. I do try it on a knife blade at about 3:48.
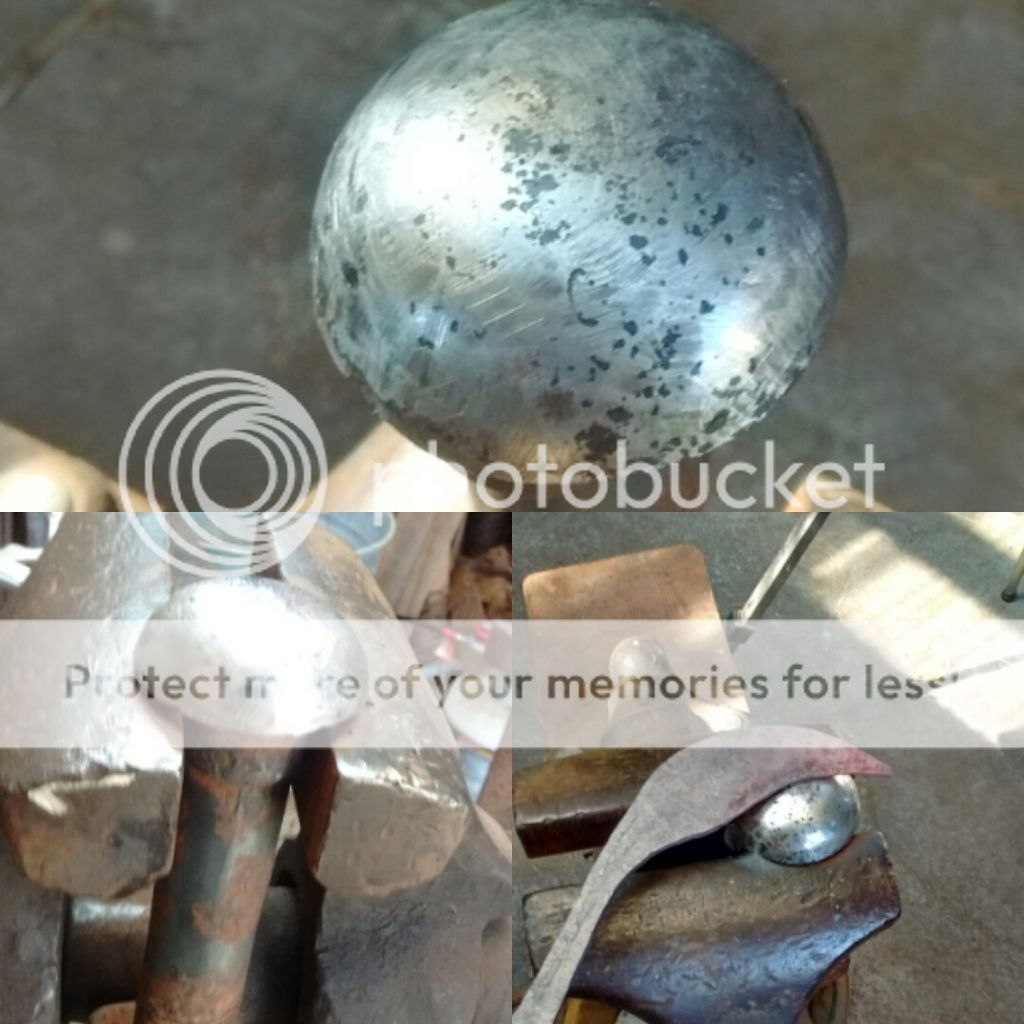
Another one of them was a domed bolt with "R S C" on it. I was told it might have something to do with the rail road. I used the suggestion I got here and soaked it in water for about 3 weeks. The rust came of pretty easy.
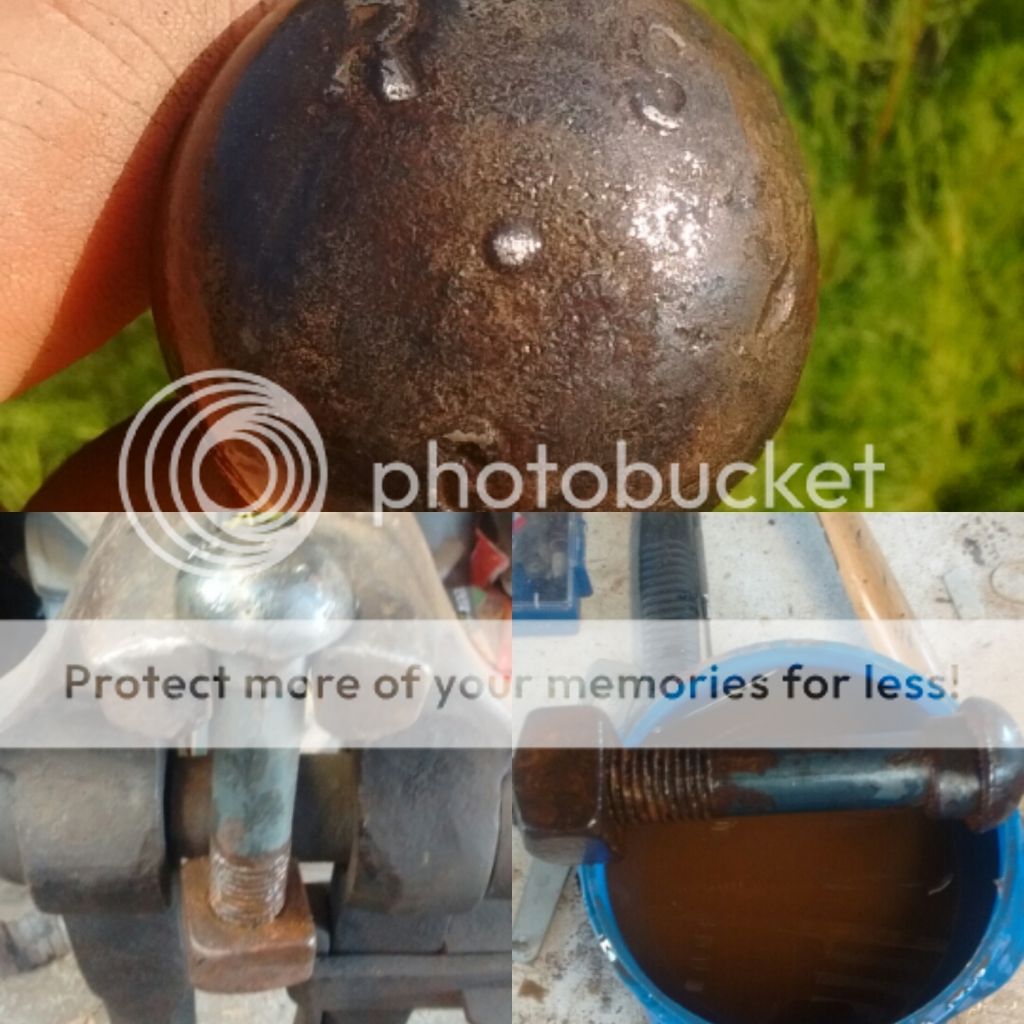
Hit it with a couple of flap discs. Not polished but it was getting close to eatin time, I might buff it up more later. Thought it might come in handy for something as a stake or hardy tool. It has to be close to 2" across.
Been a while since I was able to get out to the shop, had a good time.
-
seax
in Knife Making
Great job on this knife, I really like the sheath and the clip too. I've got a flat pry bar that I broke off one end, I think I may try to turn into one of these.
-
Thanks.
I'm not familiar with how to publish blueprints here. But if the powers that be think its worthy its fine with me. I'm just glad that I'm able to share the pdf here instead of just an image.
")
-
Update: Added 5/8" to the template.
-
Nice find. I found one with the same shape but smaller a while ago. Never knew what the original use of it was.
-
Those are some great looking pieces. The bulldogs are one of my favorites.
-
Thanks for the heads up.
To be honest I was going to try to throw together one of those ghetto deals using a plastic bottle, tubing and a blow gun with my 6 gallon compressor just to see what it would do

I've got enough junk around to experiment with, nothing fancy and probably won't work!

Still have to get the vise in some water. I have access to a pressure washer though.
-
the pipe cross was time consuming because I had to figure out how to get the seam aligned, I didn't do too well but I was in a hurry as usual.
the trick is to heat and twist the arms until the seams line up, BE PATIENT!!!!!!!!!!, I was not patient so the result is less than stellar.
The 1/4" sq stock is tough because of the size and the BURN IT UP factor.
George
Those with the scrolls do look very nice! never thought about making them out of pipe, thanks for the link!
-
Really, and to think I was getting all excited about the prospect of building a sand blaster, what a buzz kill
Sounds simple enough, I'll give it a shot.
Thanks
-
Are y'all saying to soak it in water?
-
Nice! I like the variations. I'm glad the diagram helped. Railroad spikes make great crosses.
Thanks for sharing the pic!
-
Well I got it. He took 50.
Now the fun starts.
-
So what do think is fair price for it?
-
Yeah I would have. I was in a hurry earlier when I said it looks bad sorry. I should have explained and said the working condition looks very bad.
I picked it up and there is no movement at all. It's hard to even see any seams where the pieces touch each other. It's like its one solid thing.
I may go make an offer and see what i can do. If I can get it cheap.
Thanks
-
Nice video...first class! I make a lot of these and it's always nice to see someone else's process. Great job!
Thanks! I always like seeing how others do their work, especially in far off places.
-
I was excited for a split second. But I think its actually all on piece now. Kinda sad. Tag had $65 on but nothing moves and it just looks bad. At what point is it too late?
-
Those are all good suggestions. I've been keeping my eyes open for a leather hammer lately. I like the idea of an old ball bat.
Alan, you need to slap an energizer sticker on that thirty year old mallet
")
-
That's how I learned about these. Great story too, 4-H is a good program.
I've never tried these. And have what very well could be a dumb question.
Anyway, the tutorial above uses Material that is nominally the same size either round or square (example 1/2"x1/2", 3/8"x3/8", Etc.)
My question is can these be made with material that isn't nominally the same size? stock that has a more rectangular cross section.
Or would that just not look right?
I have thought about this too, but I'm not sure. I wondered if you could put a 90 degree twist in the middle first, get the ends long ways perpendicular to one another, then split it? Might be worth a try.
-
Thanks, I really do appreciate you comment, and your opinion.
That's funny because this has actually been on my mind this morning.
When I was shown how to make these it was basically just beginner project, which I am still to this day, a beginner. And I would not insult anyone here by calling myself a blacksmith. I'm just here to have a good time.
Also I did not know the story behind the original product that you mentioned in your post. Which I think is a cool story and the fact that You can just pop in there for lunch was not lost on me. I always thought it had something to with a "Saint Friedrich", go figure. But your post has really got me wanting to try to make some like the original, sweeping niceties and all so I thank you for that. Not that I'll ever be able to produce such works of art, but it will be fun to try one day.
As for just wanting to sell them, that has very little to do with it. I made a bunch of these with my family as a way to work/learn together, there was more to it than just the Crosses. We did put some up for sale (underpriced), just so my adolescent kids might earn a little money. We gave almost all of them away.
Where I come from there's a saying, "I'm just going to have tell how the cow ate the cabbage" (fancy way of saying " to be honest with you") no malice intended either, seriously.
The Cross I made in the video appeals to Me, for what it means to Me, it's not supposed to be pretty.
There's only a few marks on it that really matter.
In the immortal words of Forrest Gump:
"That's all I have to say, about that."Again, I mean no offense, I do appreciate the discussion.
-
I've heard of that with a circular saw blade, never done it, but I dint know about it with a band saw. Be interesting to see.
-
That's the real deal right there. Nice pic.
-
Good video, lately I have been wondering how those cross are made so thanks.
Glad you liked it and you're welcome. They are a lot of fun to make hopefully you can give it a shot sometime.
Nice, I've made somewhere close to a gazillion of these, but I still learned a couple tricks watching your video, different takes that I want to give a try the next time I'm at the anvil. Thanks!
Thanks a lot, I appreciate that.
Thanks for all the great feedback.
-
Most wood band saws can't be slowed down enough for metal cutting unless you want to do some tweaking with the drive pullies.
I texture my spread crosses with a little tool I made up from a yard sale ball pein. I brought the old hammer head up to a nice bright orange and gently tapped it against my nice sharp hardy perpendicular to the eye. the hammer face and hardy are crowned so none of the shallow cuts go full width of the face. Moving and tipping it back and forth covered the entire face nicely. It is now my wood grain texturing hammer.
")
Frosty The Lucky.
Thats a good idea.
Yeah my band saw is the converted cheapo portaband but it has variable speed.
Ausfire, does your bandsaw have speed adjustment on it? I have a wood bandsaw and it runs too fast for metal, not even soft metal will cut good on it.
Thanks, norrin, for sharin that. I've never managed to get my depths just right and I believe this'll help.
No problem, glad to give back a little. I've learned alot around here, still learning.
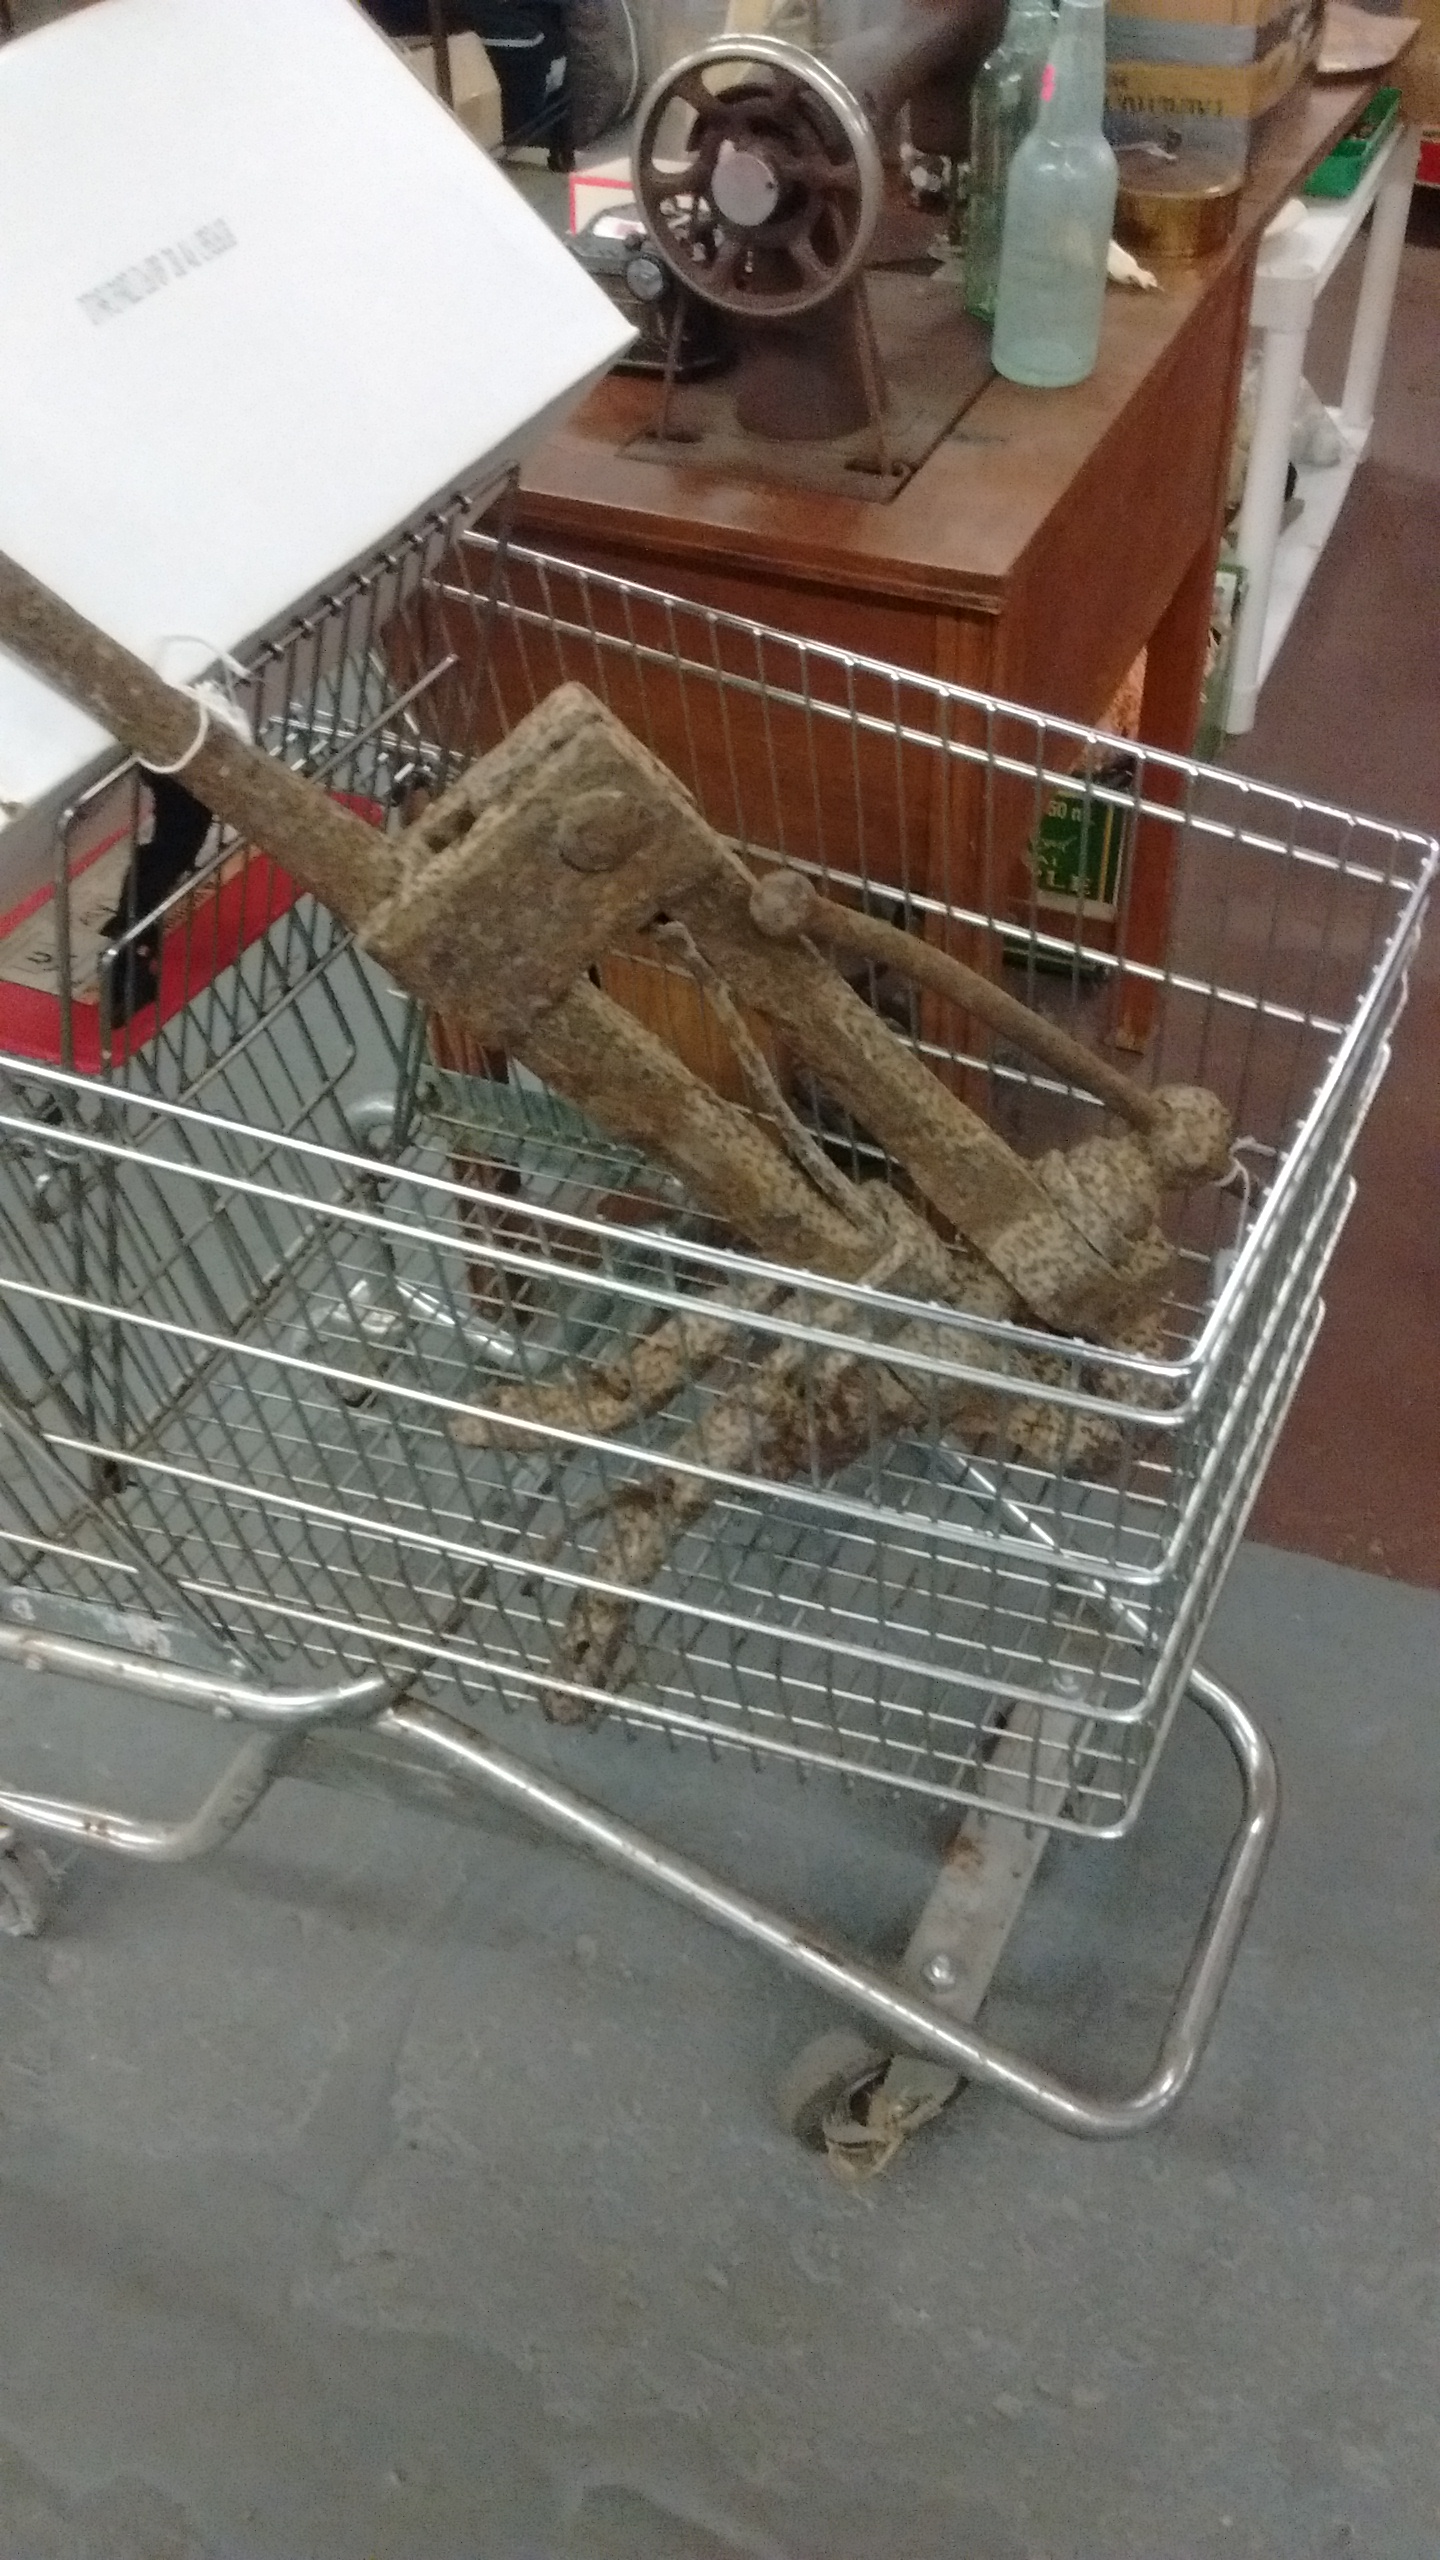

Tools From Old Bolts-Flatter and Mushroom Stake
in Tools, general discussion
Posted
i had a thought about trying to put a handle on it. Thanks for the idea.
thanks. I bet it made a good nail header. I've been wanting to make one of those myself.