rhitee93
-
Posts
252 -
Joined
-
Last visited
Content Type
Profiles
Forums
Articles
Gallery
Downloads
Events
Everything posted by rhitee93
-
I need to do a few final touch ups, and still hope to take some nice pics of this one, but wanted to share a quick snapshot of my latest project. I got bit by the mosaic fever bug. This is my second attempt at it. I had a little trouble with it getting crooked while squaring on the bias with one of the weld passes, but it turned out pretty neat none the less. The blade is comprised of 1095 and 15N20. It's about 7" long, 1.75" high at the heel, and 0.15" thich at the spine above the heel. Flat grind down to 0.005" at the edge before sharpening. (Which I haven't done yet) The handle is made from stabilized box wood burl and brass. I have the usual small collection of fit and finish issues, but i t turned out pretty good. Some day I'll make a perfect knife...
-
I'd call that a win. What did you use to make the center cut? The only nit-pick I'd throw out is that the handle doesn't quite live up to the steel. Great looking piece of work none the less.
-
That is perhaps the best quote I have seen on this board...
-
One more pattern welded this time with file work
rhitee93 replied to Zachary's topic in Knife Making
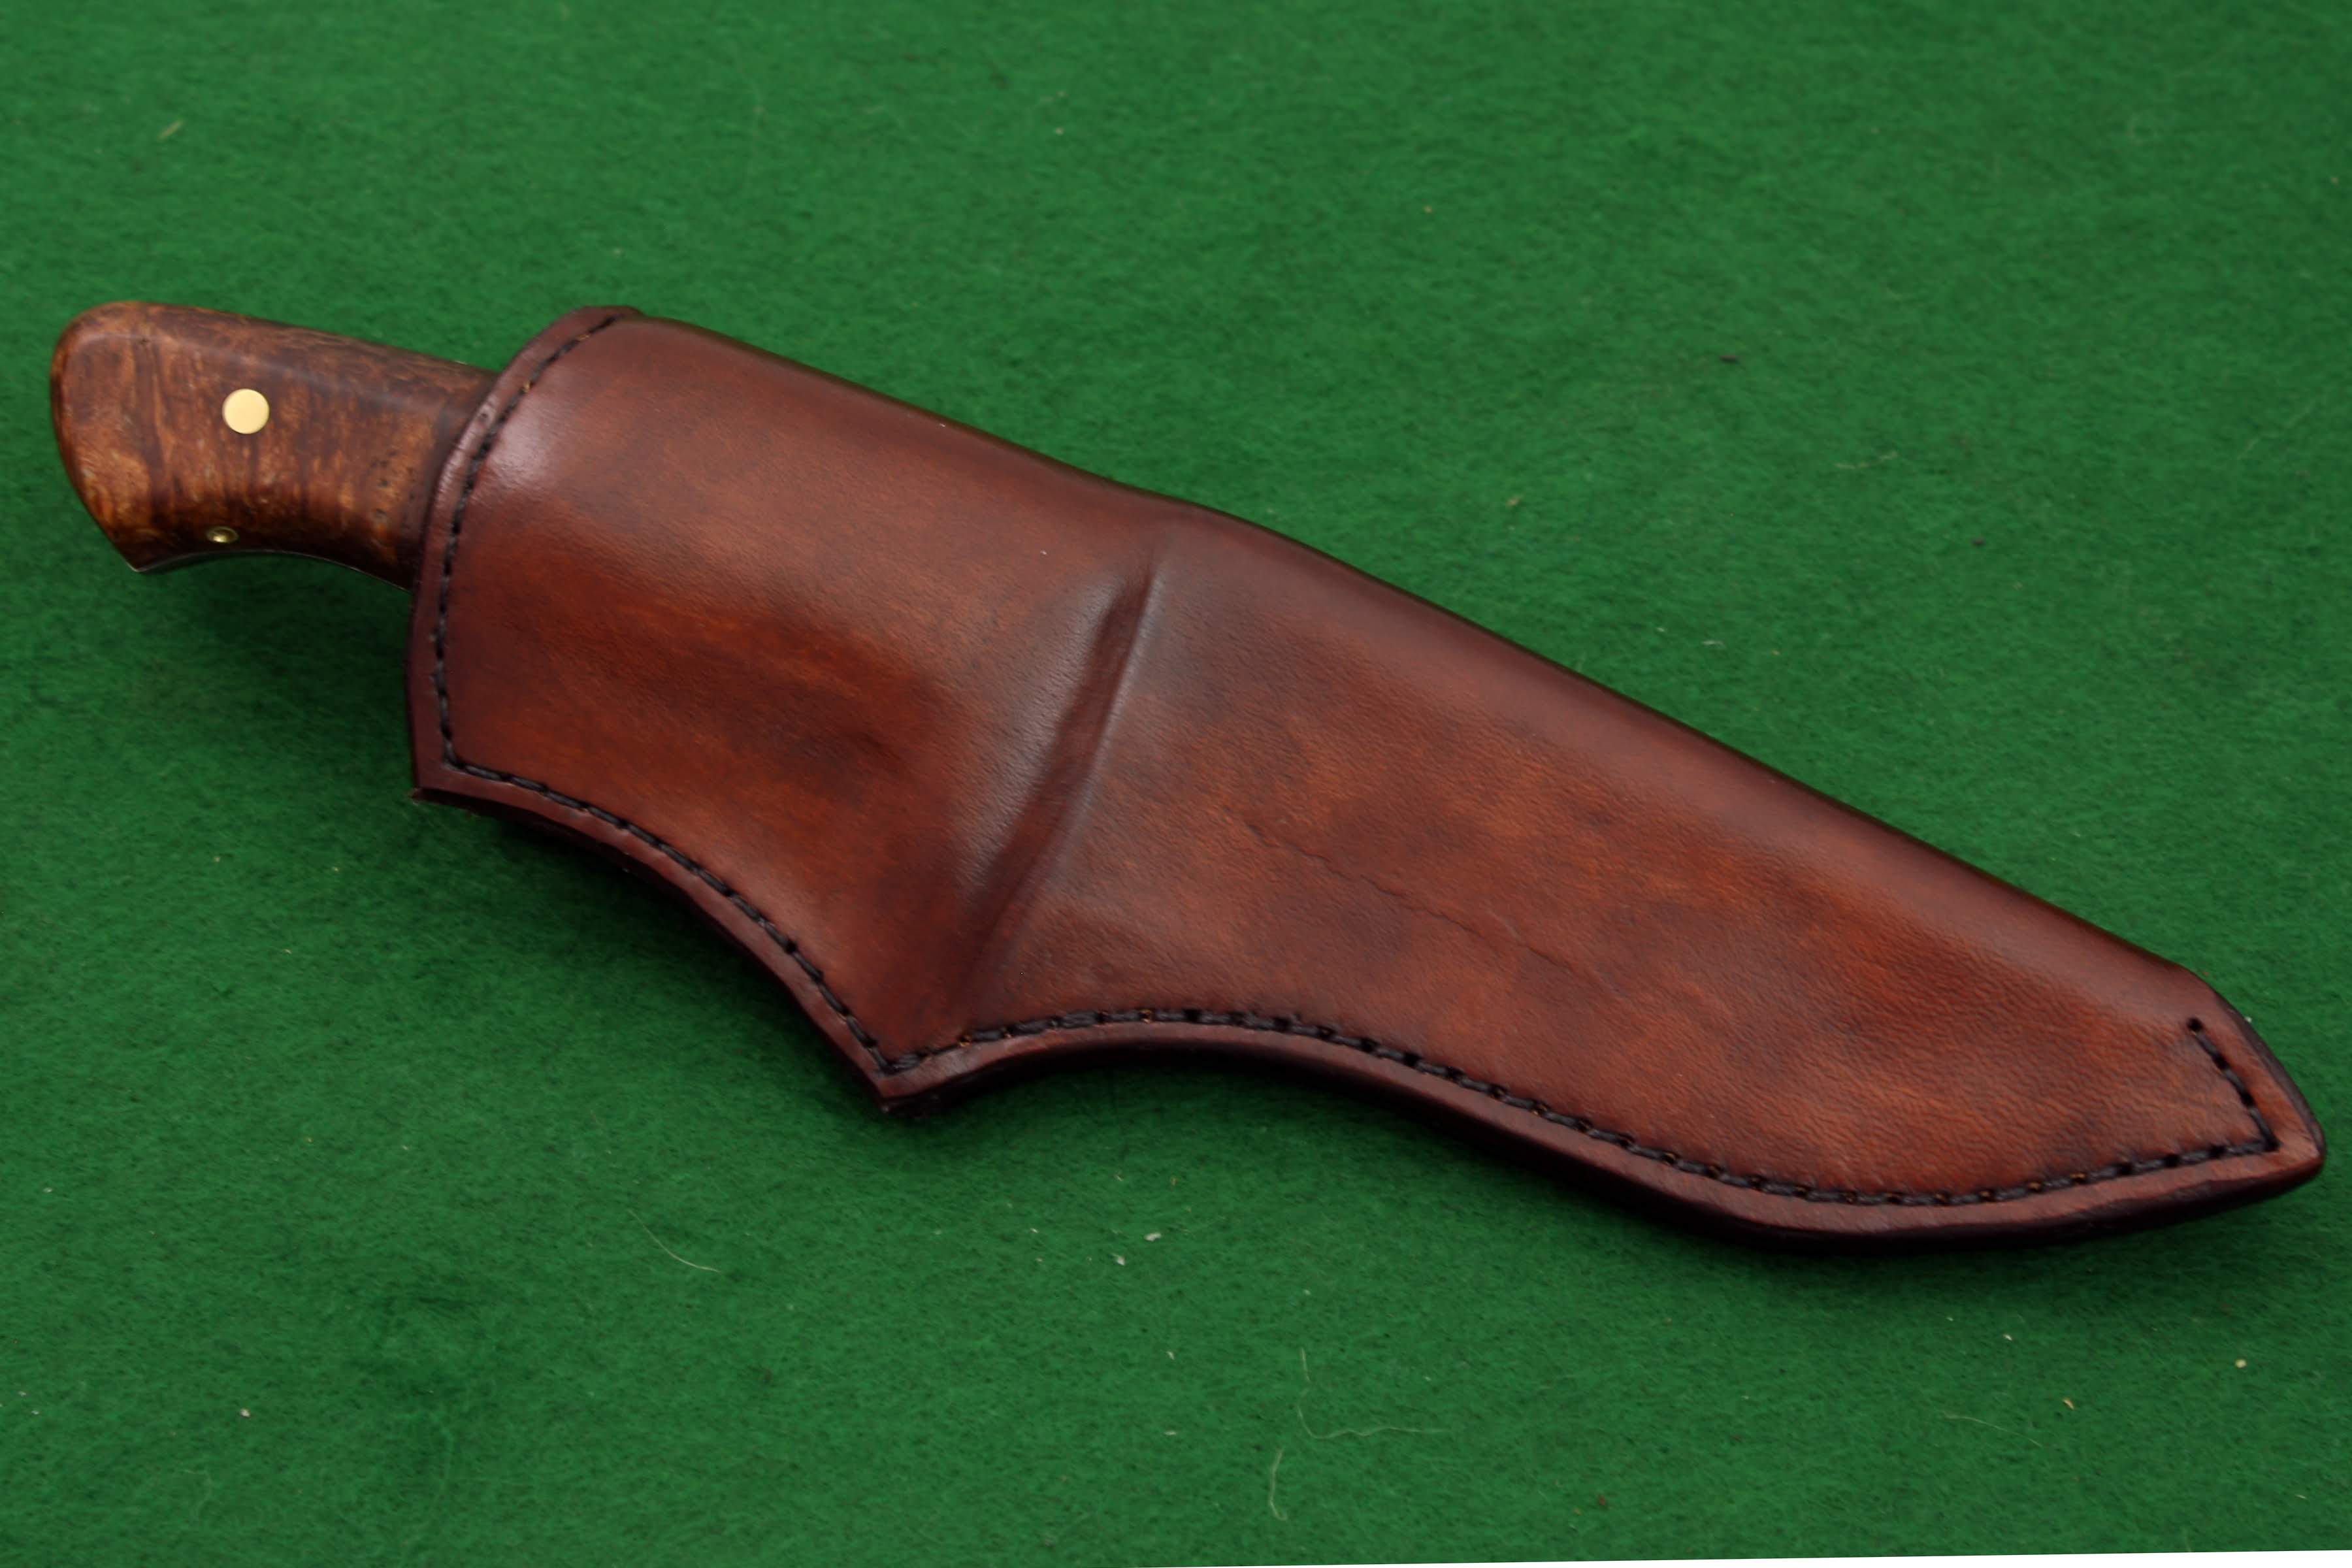
Yep, get your grind up higher, and I think you'll like where that takes you. I would also suggest some distal taper as well. That is a well developed pattern, and the finish on the blade looks good. Your leather work is quite good! -
I need to play with aqua fortis. I love that look. You'll find your grind referred to as a "Noob grind" in some circles. Many commercially made knives are ground like that, so it is understandable why people start there. Below is a pic of a similar blade I did a while ago, but the grind goes almost all the way to the spine. If you look closely, you'll see that most makers have grinds more along these lines. What part of northern Indiana are you in?
-
The steel looks good. Not washed out or muddy looking like a lot of early pattern welding attempts. The grinding and fit and finish will come along with practice. I'd encourage you to take the grind higher up the side of the blade. That a great piece of curly maple. Did you do an aqua fortis finish on it?
-
Lol Thomas. I am a horrible knife abuser. It'll be interesting to see how long it takes me to tear this one up.
-
Thanks Daswulf. It isn't so much of a trust things as a quality thing. I did have some concerns about welds at one point, but those turned out to be unfounded. There are a couple of small could shuts on the spine that won't be a structural issue, but I think are unsightly. The bigger issues are that since this was an experiment, I figured I would double down and try some hollow grinding. I don't do this very often, and am not good at it. As a result, the quality of the grind is pretty bad. (It looks better in the pic than in person) I also made a major rookie goof in building the mosaic pattern that I just wouldn't let out of my shop. It'll make a nice EDC weekend knife for me. It will also be nice to use some of my pattern welded steel for a while to see how it holds up. Unfortunately, most of my knifes just get looked at, and not really used so this will be a good data point
-
I've been wanting to try some mosaic pattern welding lately, and gave it a go. I made quite a few mistakes, and had a number of major problems along the way. This was never going to be a knife I would sell or let into the general population, but in the end I decided to slap on a simple handle and make it my new "Beater knife" I'm glad I went for it, and this won't be my last mosaic attempt. It's kind of addictive. This started as 11 alternating layers of 1095 and 15N20 that was stacked and rewelded. Additional 15N20 was inserted after making some crushed W's. Then I did a 4-way weld, but screwed up the orientation somehow. After that it was just a "Ferry flip" and I had a bar to work with. The balde is 4.5" with an OAL of about 9.5". I'll do better on the next one

-
I suspect this is the tutorial that Tom was referring to: https://www.bladesmithsforum.com/index.php?/topic/24166-simple-engraving-for-knifemakers/ It is quite informative.
-
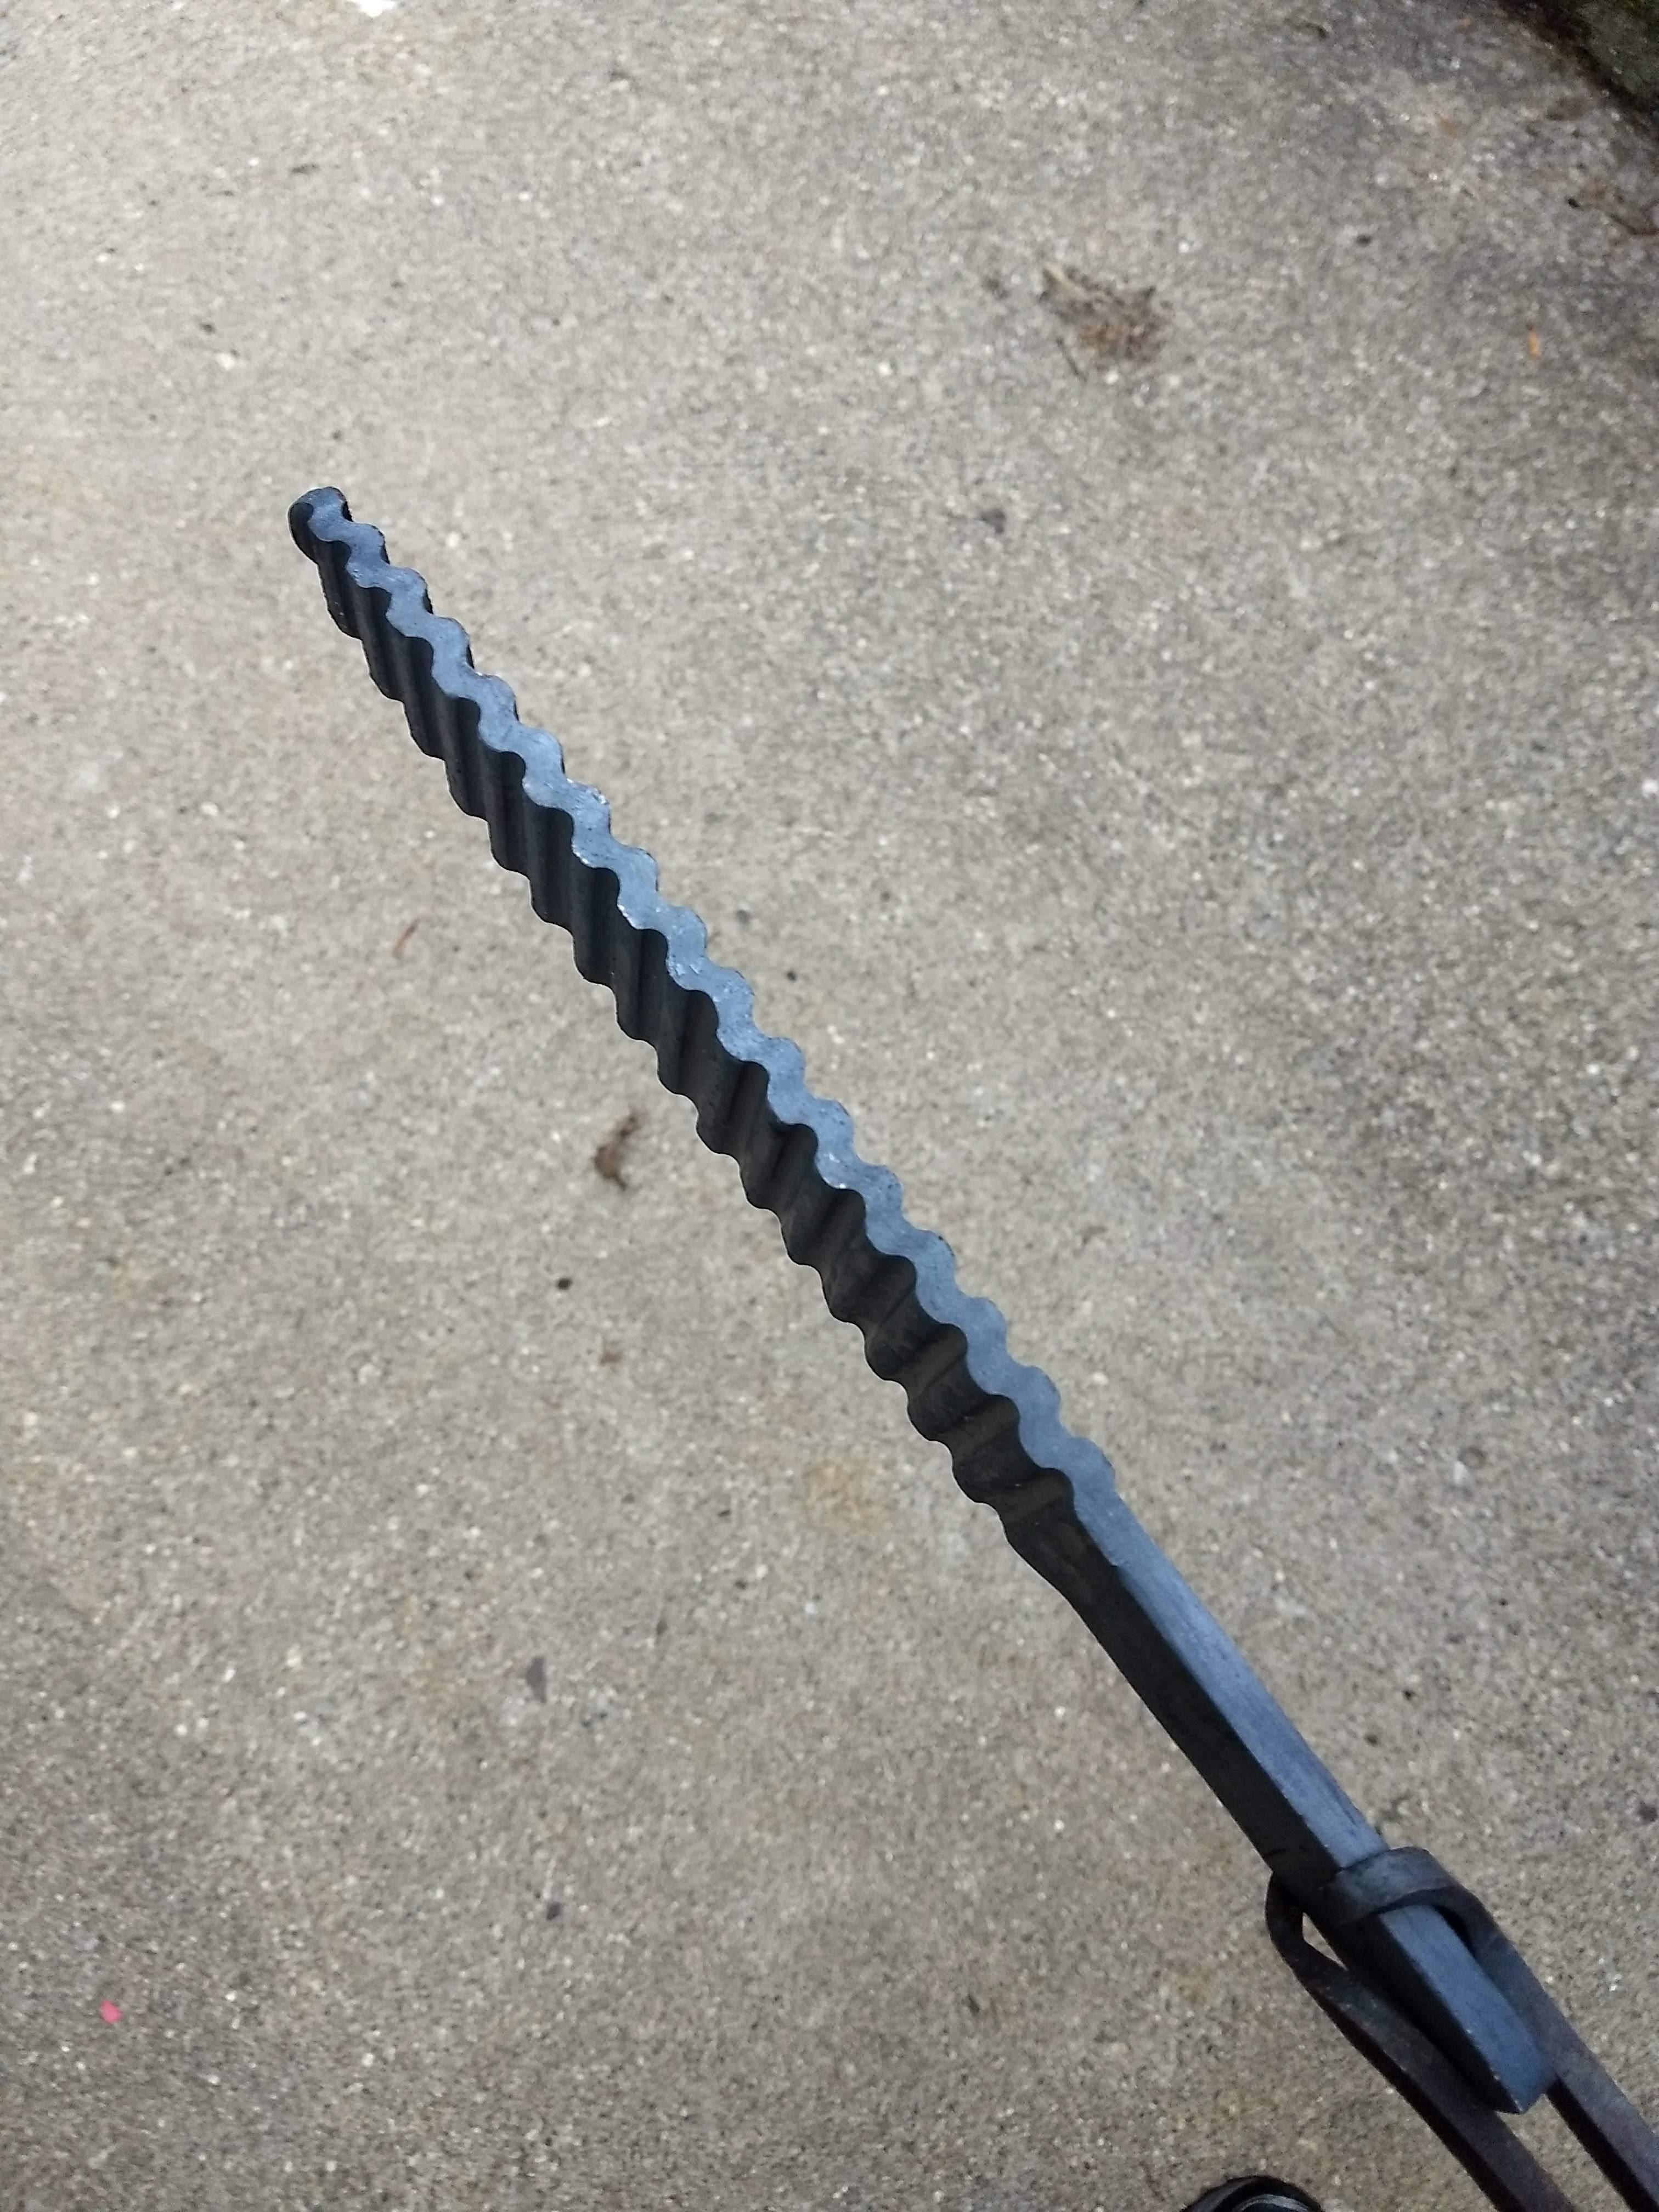
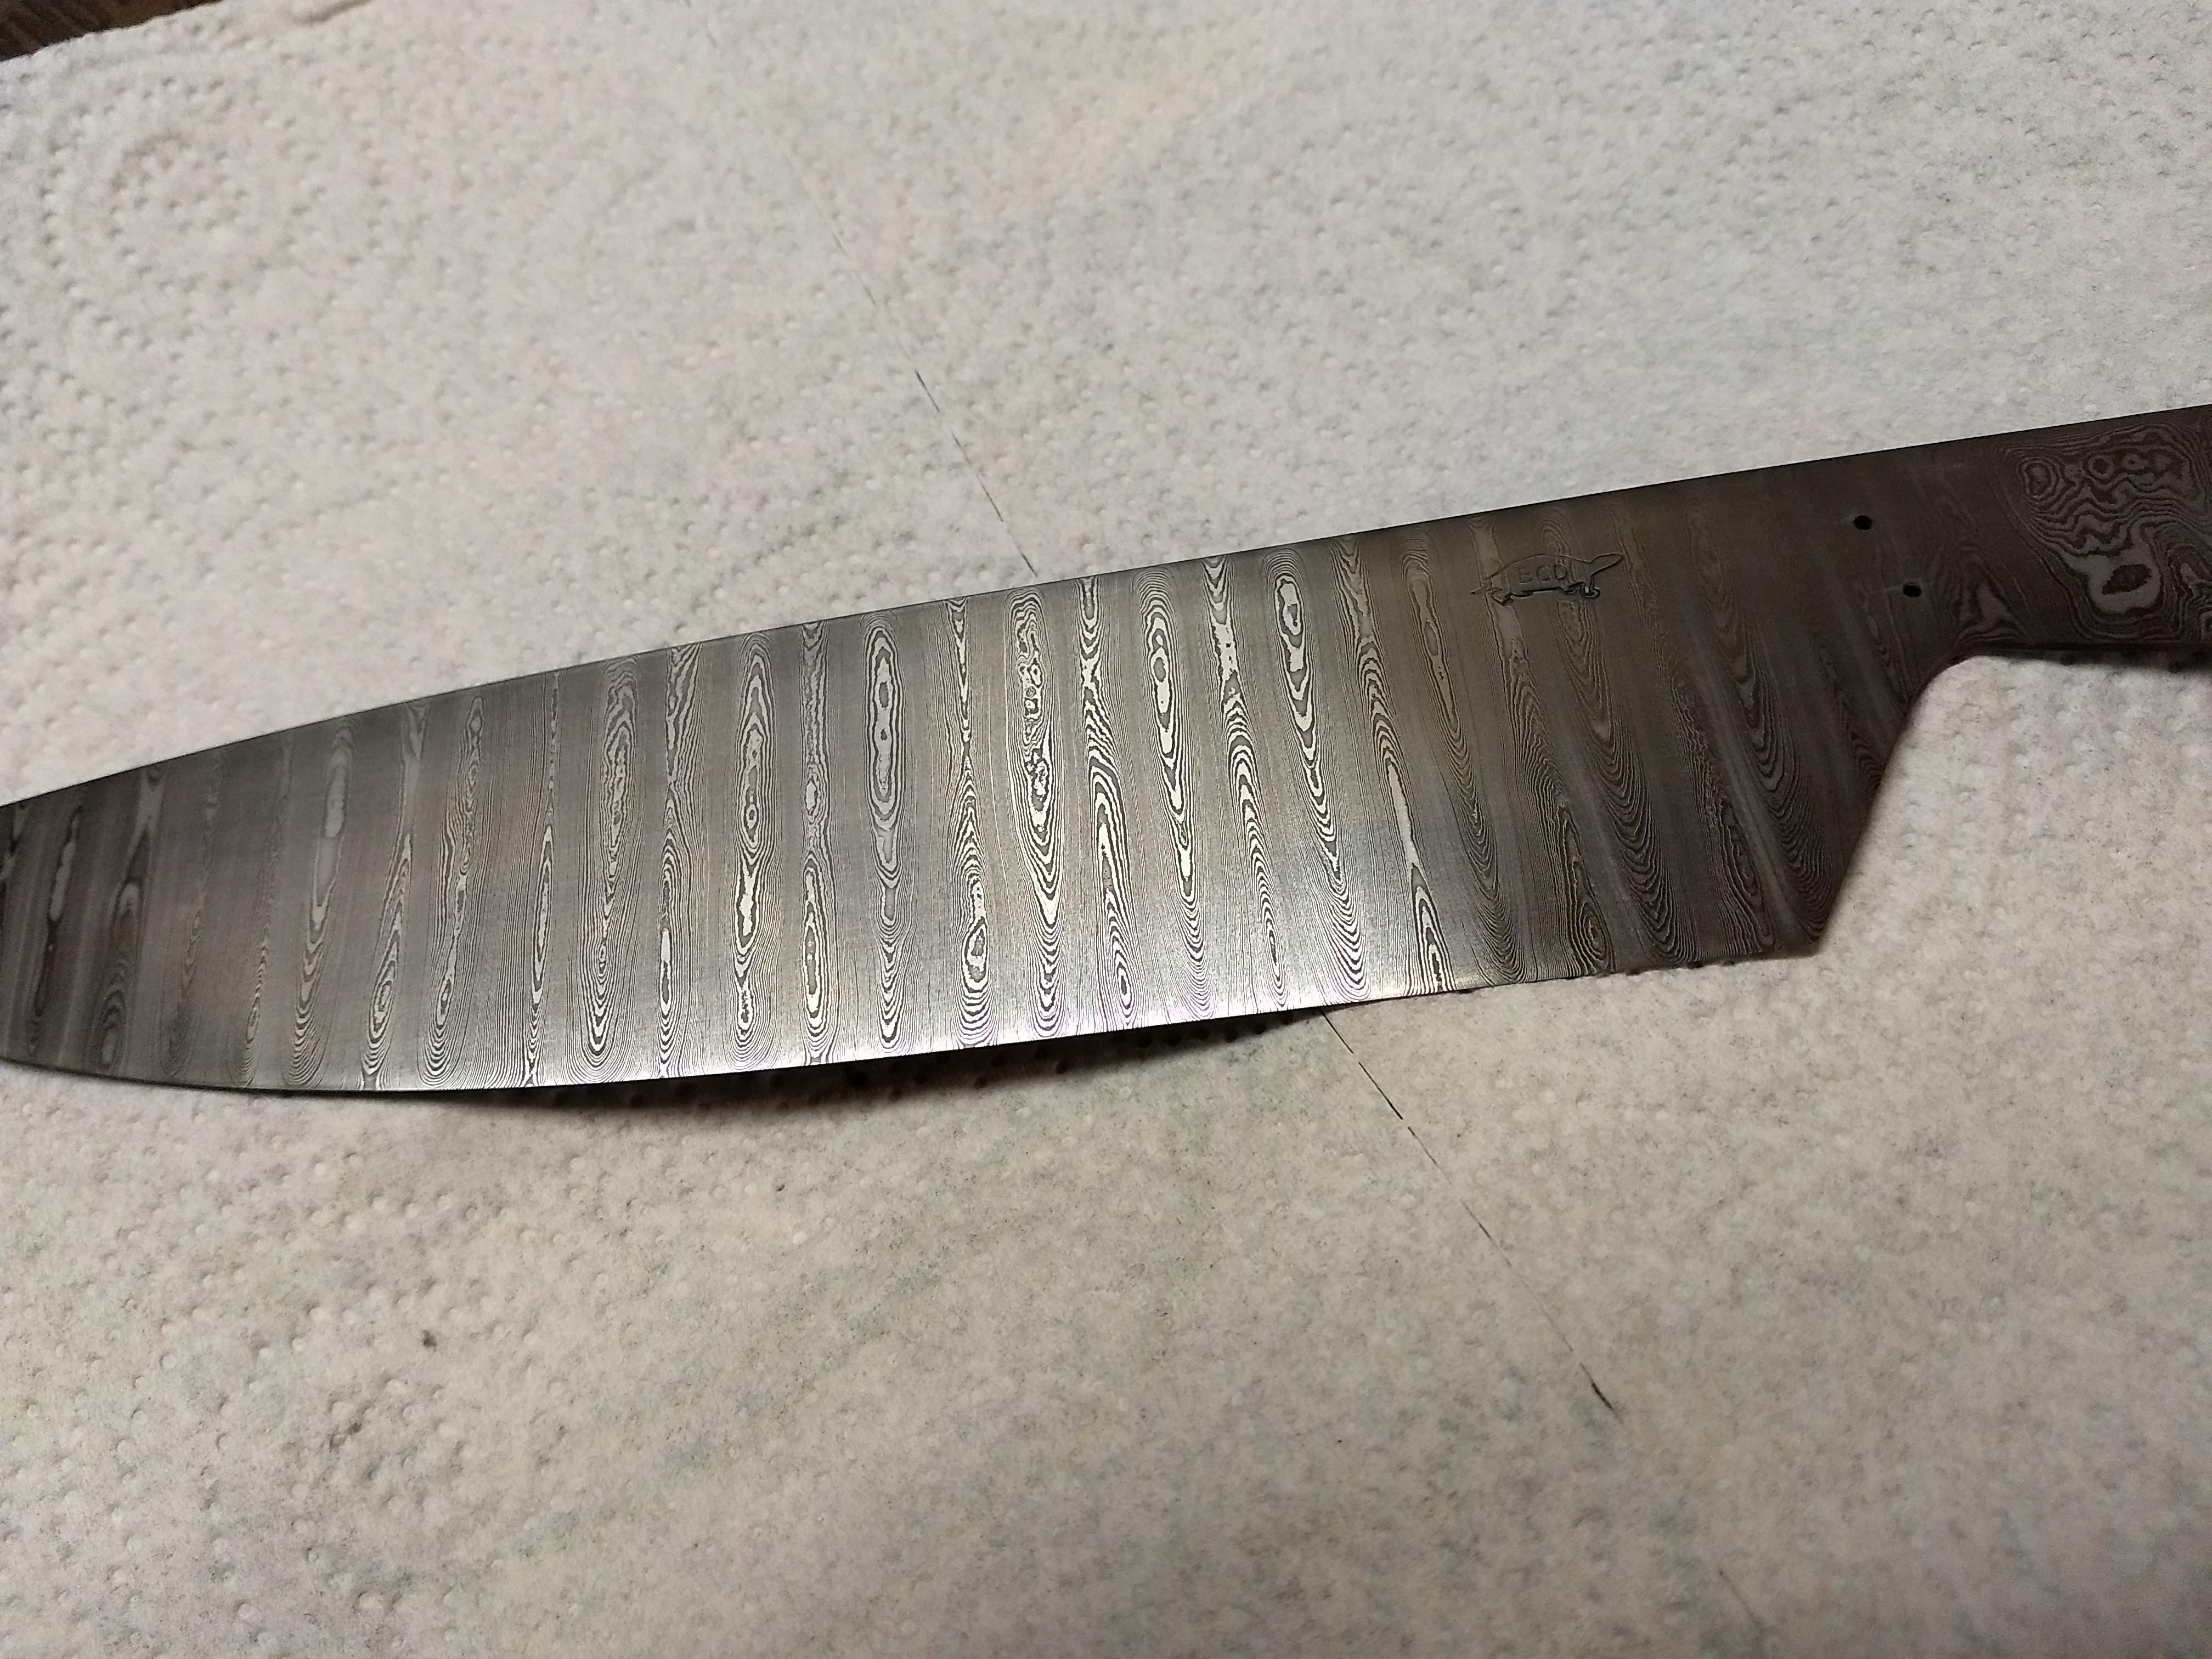
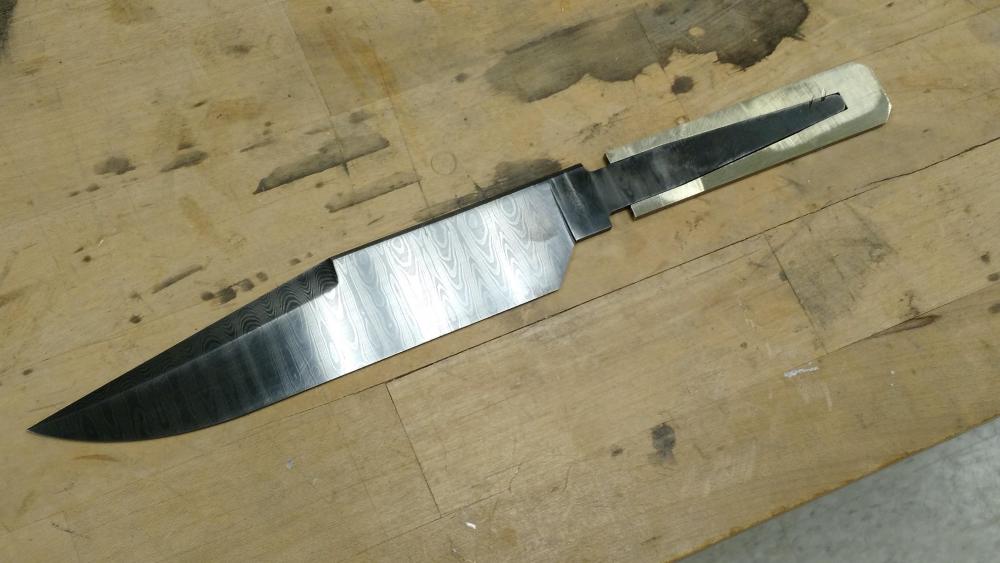
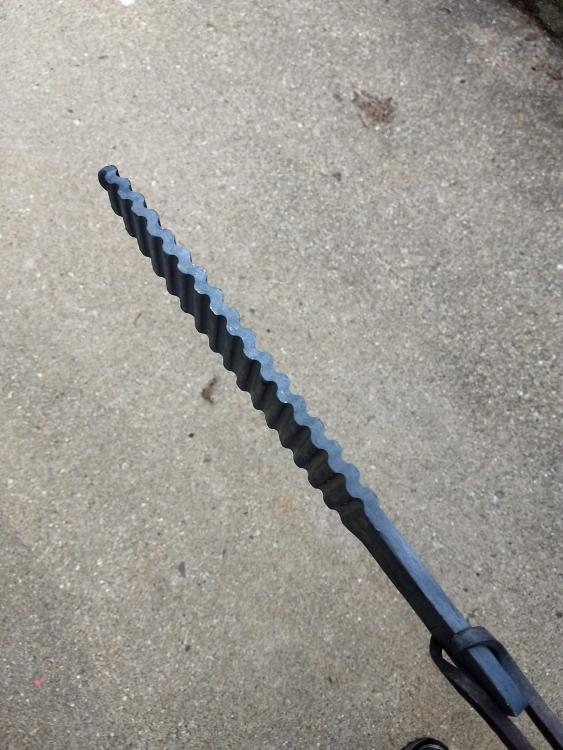
Here is a pic of the forged in "Fullers" for a recent ladder pattern I did. I have used both the cut and then forge, and the forge and then cut approaches, and prefer the latter. Between the ratio of the fuller depth to the bar thickness, the fuller radius, the center to center spacing of the ridges, and the layer count, there are enough variables to spend years experimenting with. One tip is to forge the distal taper into your pre-form before laddering. That way to don't get a lot of distortion in the laddered pattern by forging it in later. IMO, laddering looks the best if you grind the bevels in rather than forging. Here is the same blade mid-polish to give you an idea what the pattern looked like. This was 275 layers initially.

-
Good deal Max. I've seen a bunch of forges lately coming from eBay that have no rigidizer, and people have been firing them up not realizing the danger.
-
I'm in the same boat. I never wanted to make knives until I stumbled across JPH's books about a year into blacksmithing as a hobby. Then I got sucked down the rabbit hole, and my general forging skills have stopped evolving. Sure, I can forge a point, or a long taper, but my artisanal forging skills are not as good as what Max is showing. Nice work Max, is your forge lined with something other than the wool? I can't tell from the pic of your forge, I've seen a lot of newer forges popping up on forums lately that just have the Kaowool with no other coating. Uncoated ceramic fiber insulation will start to release tiny fibers once it is fired. These fibers can get into your lungs, and cause serious health issues. There are a number of slurry coatings that people use for this, but I'm not a good source of info on which ones are best.
-
This is what I do when I need any sort of mild steel. Look for either a "structural steel" company, or a "steel fabricator" in your area. They always have "drops", and I have found many are happy to sell them pretty cheap since all they will get otherwise is the scrap rate. This is actually how we buy most of the plate steel and aluminum at the place where I work. Once a local shop had a pile of 1/2" square and round bar stock that they wanted to get rid of. They had about 400' of the stuff when it was all said and done, and asked if I wanted it. I asked the guy how much he needed and he told me $7. I just shook my head, gave him a twenty, and told him lunch was on me today.
-
I think both of those knives show a good attention to detail, and speak well of your craftsmanship. Aesthetic design is a personal and subjective thing so I rarely comment on it, but I find both of those knives pleasing to look at. The first one looks like it would be a good utilitarian knife as well.
-
Like they said, it varies. I've seen people achieve a very nice brushed look at 220 grit. I think that is harder to do and make look right than taking it up to 600 grit. (Maybe that is just because I can't seem to do it well ) It's all about technique, and one of the biggest things is that the finishing strokes on the blade need to be one long pull from the guard to the tip. As straight as you can go, and don't stop mid stroke. Sanding back and forth like a sawzall leads to a muddy looking finish even if you go all the way up to 3000. I use mostly oily woods, or stabilized woods for handles. Generally I get them to about 800 grit, and wax them.
-
I don't really do much with wrought iron, but the folks that do seem to report that each piece behaves differently when etched. You may need to experiment a bit to see what give you results that you like on the material you have. I've seen a lot of people use ferric chloride, but I think I'd do as Thomas suggests and start with something a little less aggressive. Vinegar or lemon juice are probably easy to get where you are, and not likely to lead to something irreversible. I have become a big believer in coffee as a final etchant for 10XX/15N20 mixes of pattern welded steel, but I don't know what it will do to wrought iron. It would be easy to try though. If those don't yield results, ferric chloride, or even HCl might be my next steps.
-
Frosty FTW!
-
Thanks guys This is about as good as I can do right now, and I am pretty proud of this one. However, I also realize it is pretty "mid-grade" compared to what a lot of people are doing now. There are makers that are really inspiring me to push the both the quality and design aspects of my knives. I've only been at this 4 or 5 years, and probably only have 25 knives under my belt so I am very much a rookie. I have a lot to learn, and a pretty steep hill to climb yet. I'm probably going to start squashing some W's and playing with some mosaics soon. We'll see how that goes
-
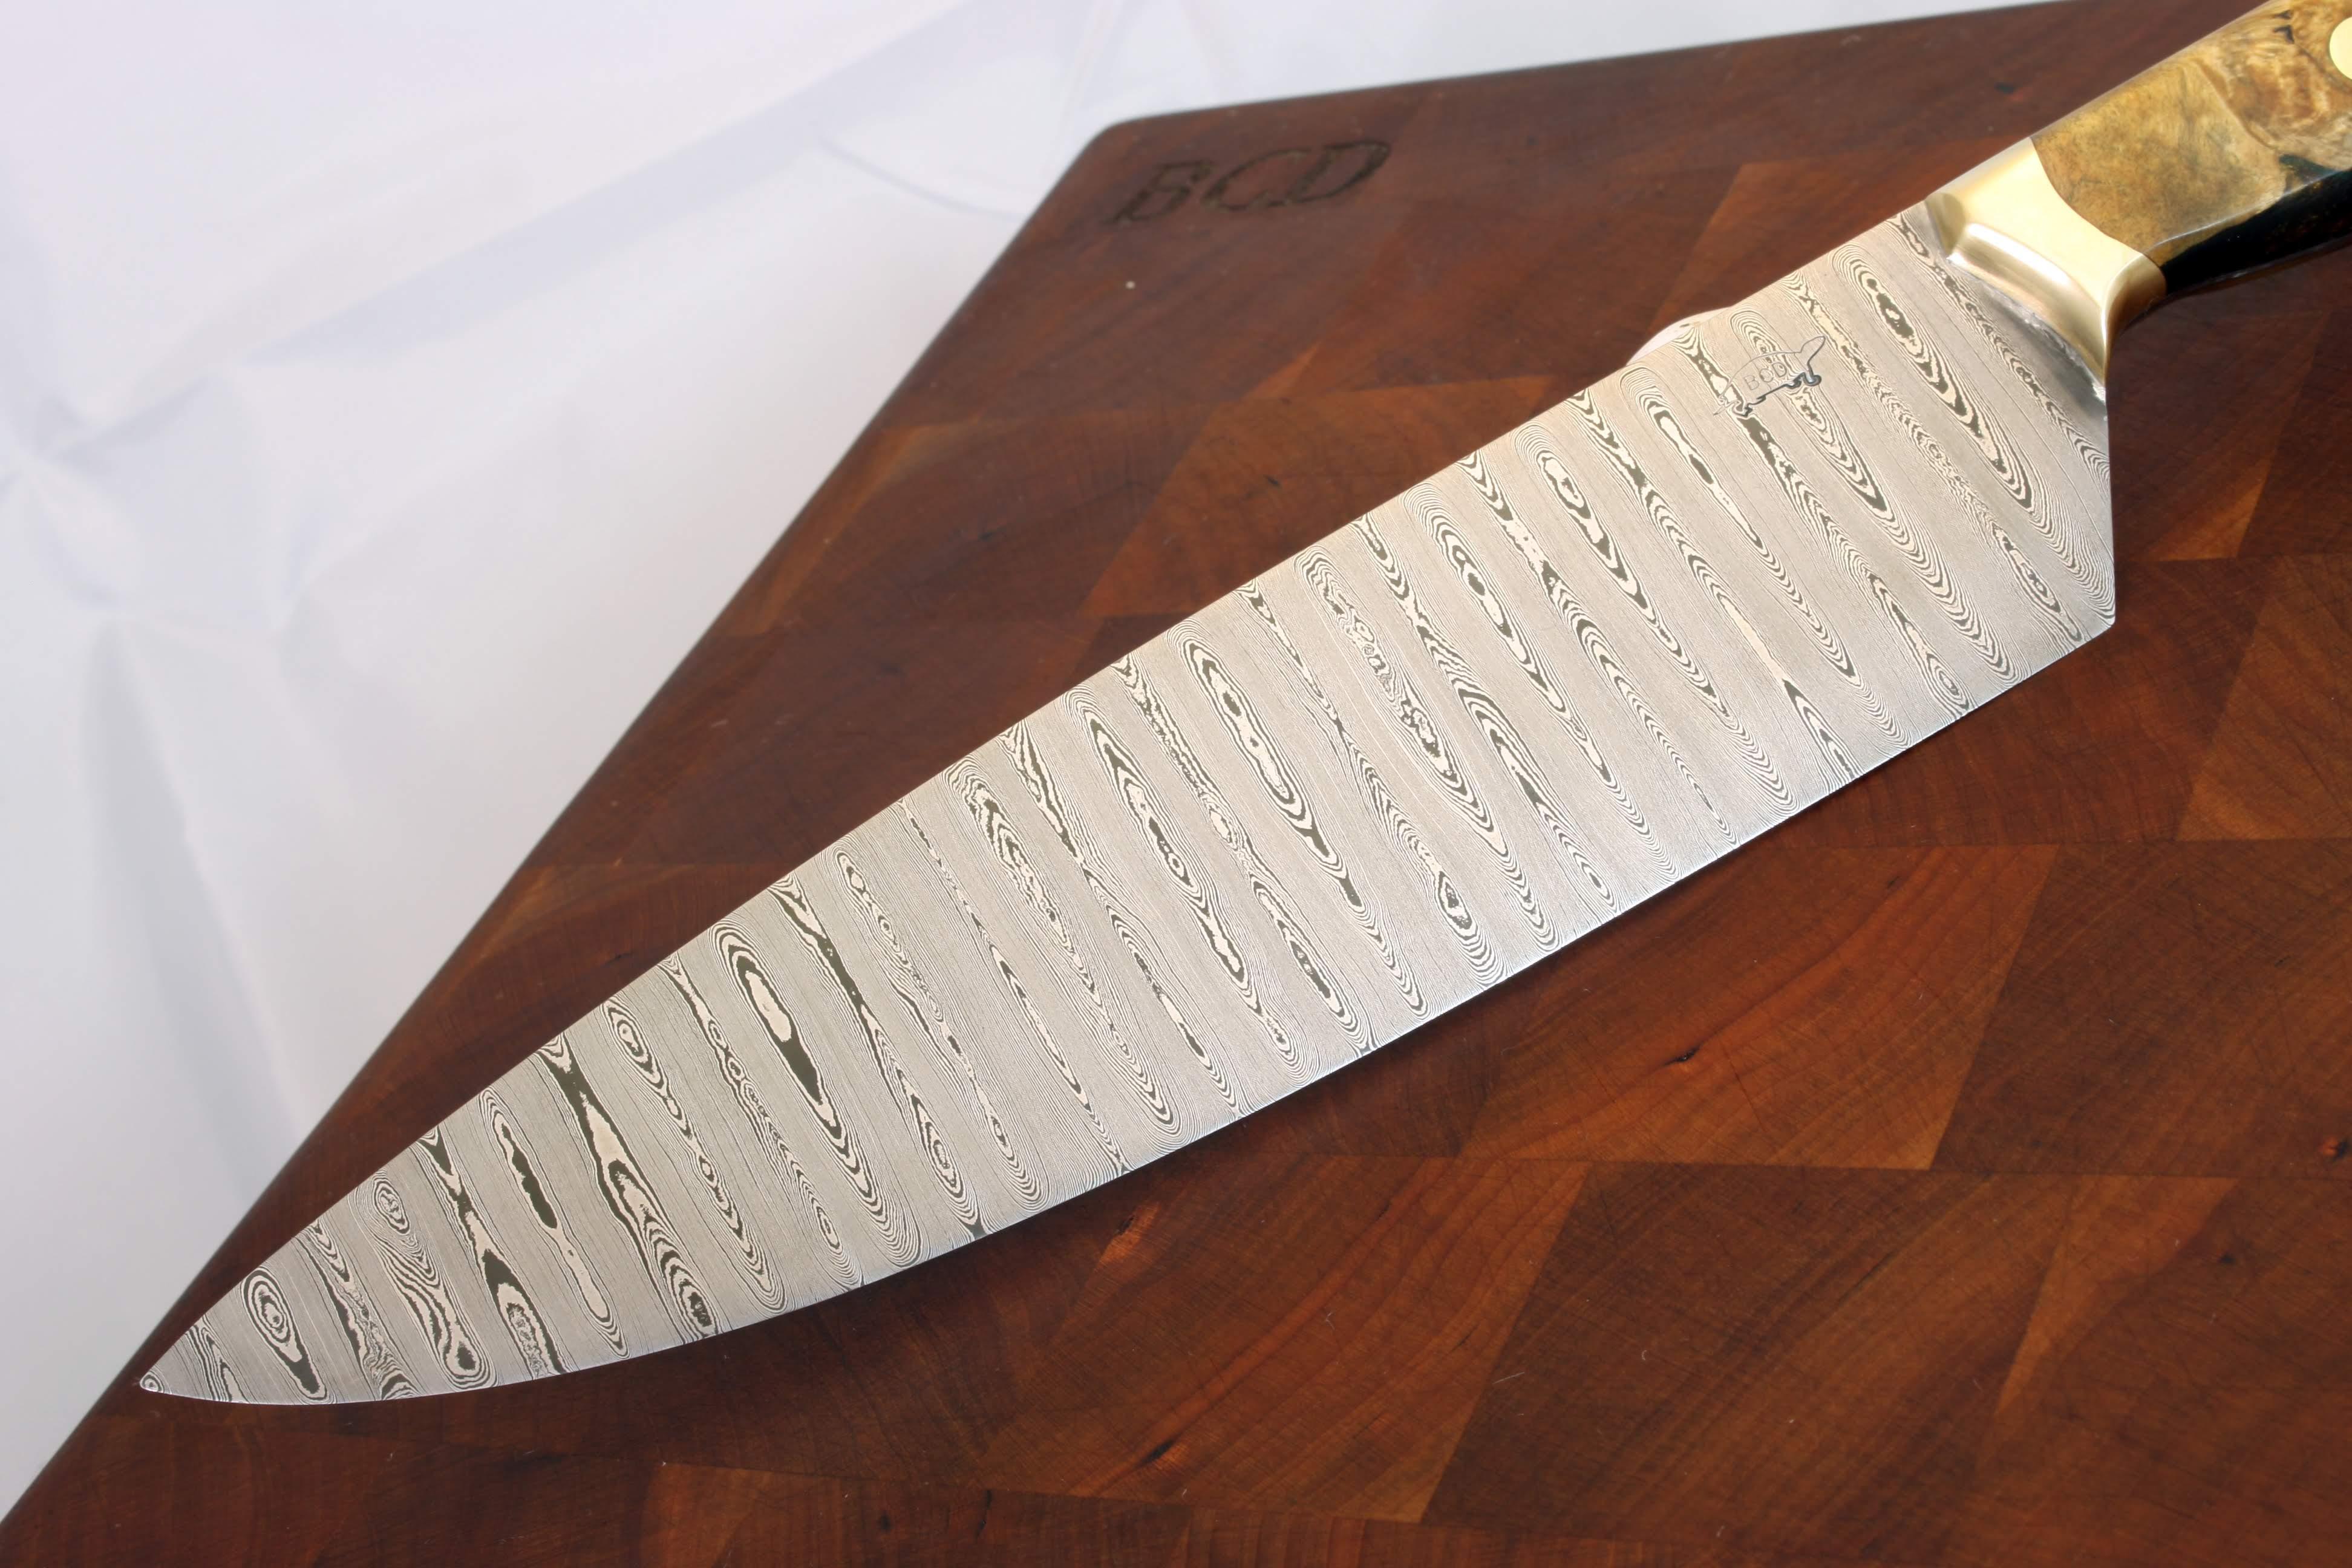
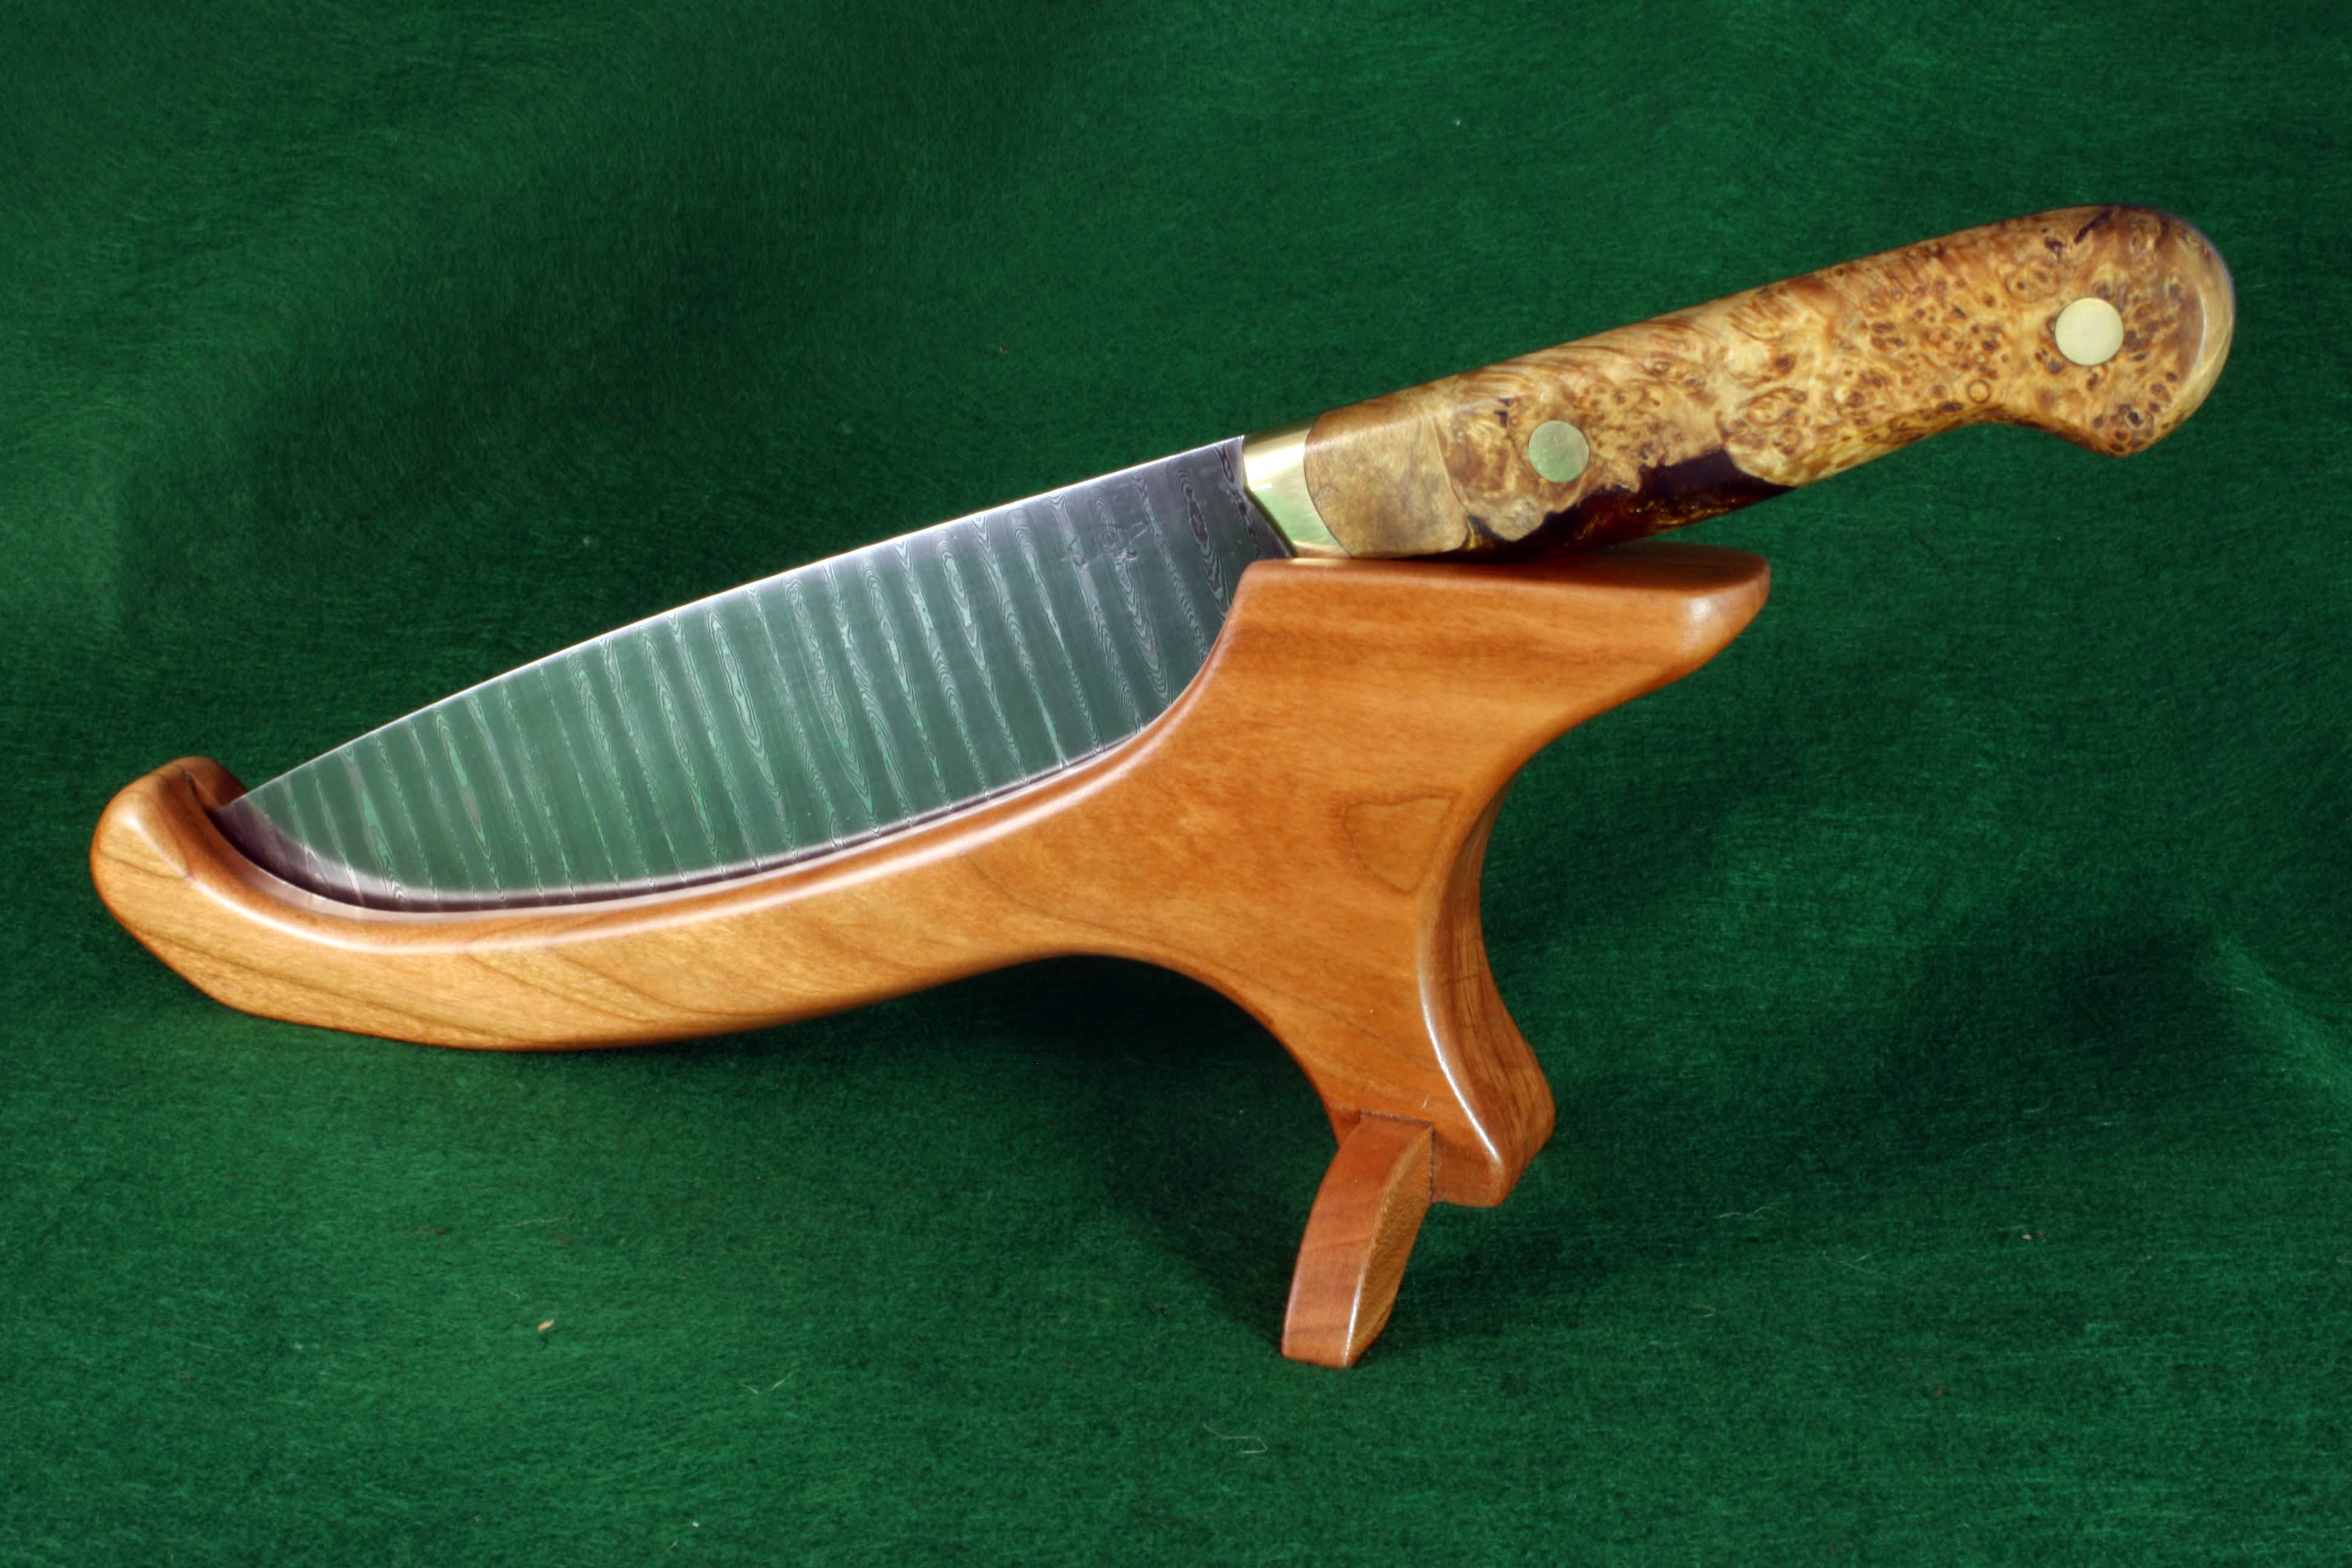
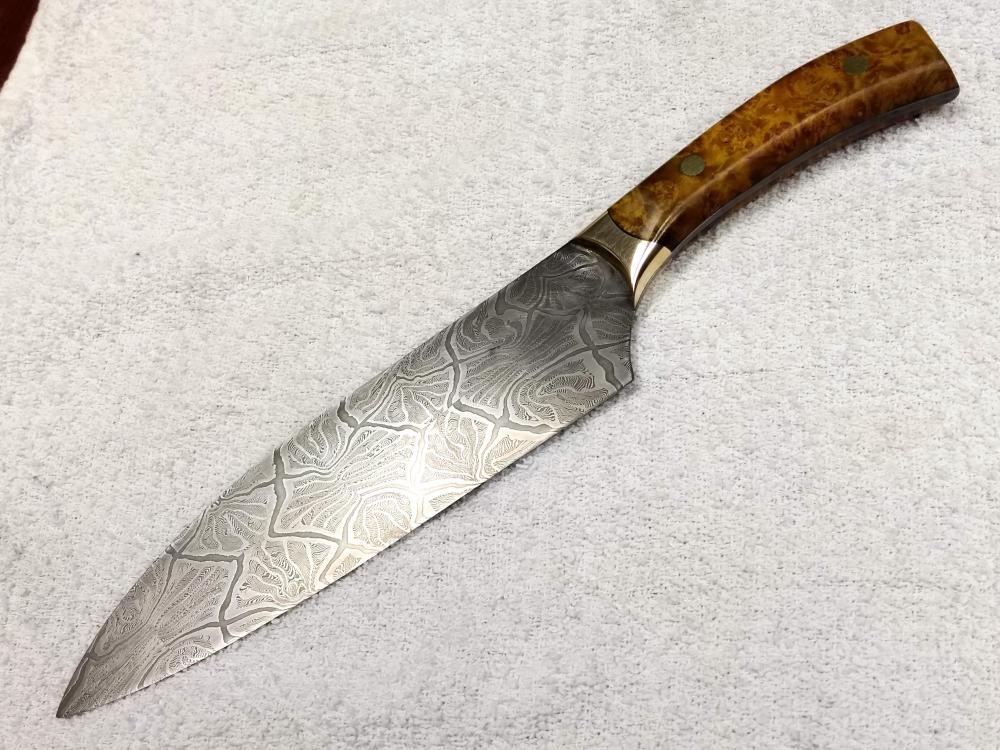
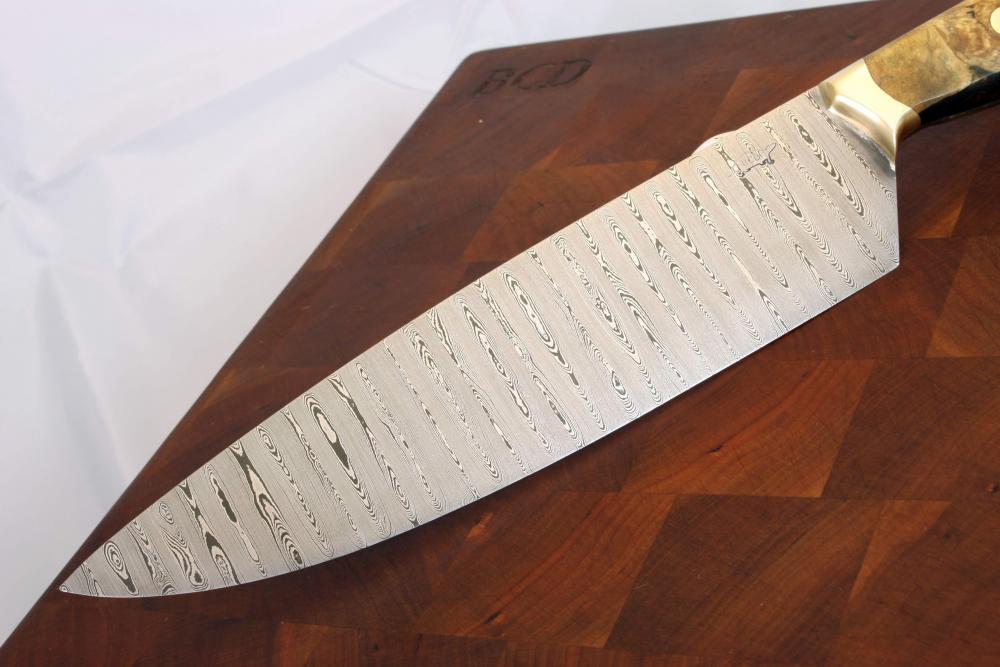
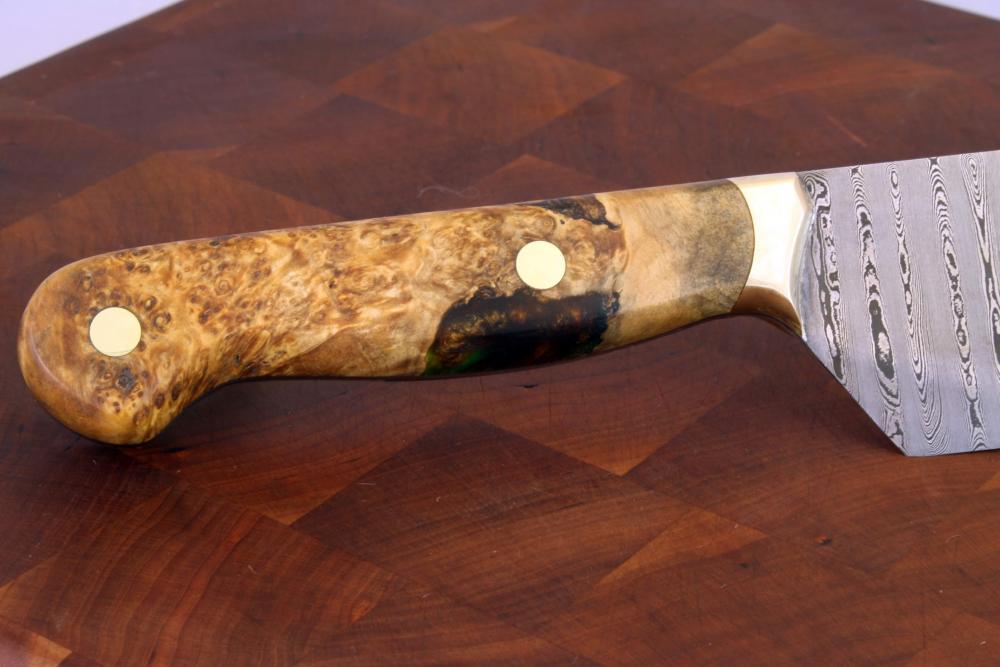
I just finished this one up this week. Here are the particulars: Nominally 275 layers of 1095 and 15N20 8" blade, 13" OAL 2" high over the heel, 0.10" thick at the spine tapering down to a point over the last 3rd of the length Full flat ground to 0.010" thick at the edge before sharpening. Soldered brass bolsters with hidden pins Stabilized Box Elder burl scales held on with epoxy and cutler's rivets. Thanks for looking


-
I think they are good, but if you want the nitpick issues, I'll give them to you The pin placement on the wood handled one looks a bit off. I think the center pin needs to be a bit higher. Sometimes you have to space the pins unevenly to make them look right after the handle is shaped. The plunge line for the second one appears to run up to the spine. High grinds are good, (ie no noob grinds) but it is a pet peeve of mine to see a plunge line if I am looking straight down at the top of the spine. It looks like the plunge on the first one has been washed out by buffing, but that may be caused by poor lighting in the pic. Nice crisp grind lines are a must for me. I'm not sure I like the triangular notch in the second one. Stress risers like that make my skin crawl because I am an engineer by trade. To be fair, however, someone would have to be doing something pretty abusive to cause it to break so it is more of a personal thing to me. I need to play with micarta some. It looks like a nice practical grippy handle material. Nice work
-
Nice That ringed gidgee looks a lot like koa.
-
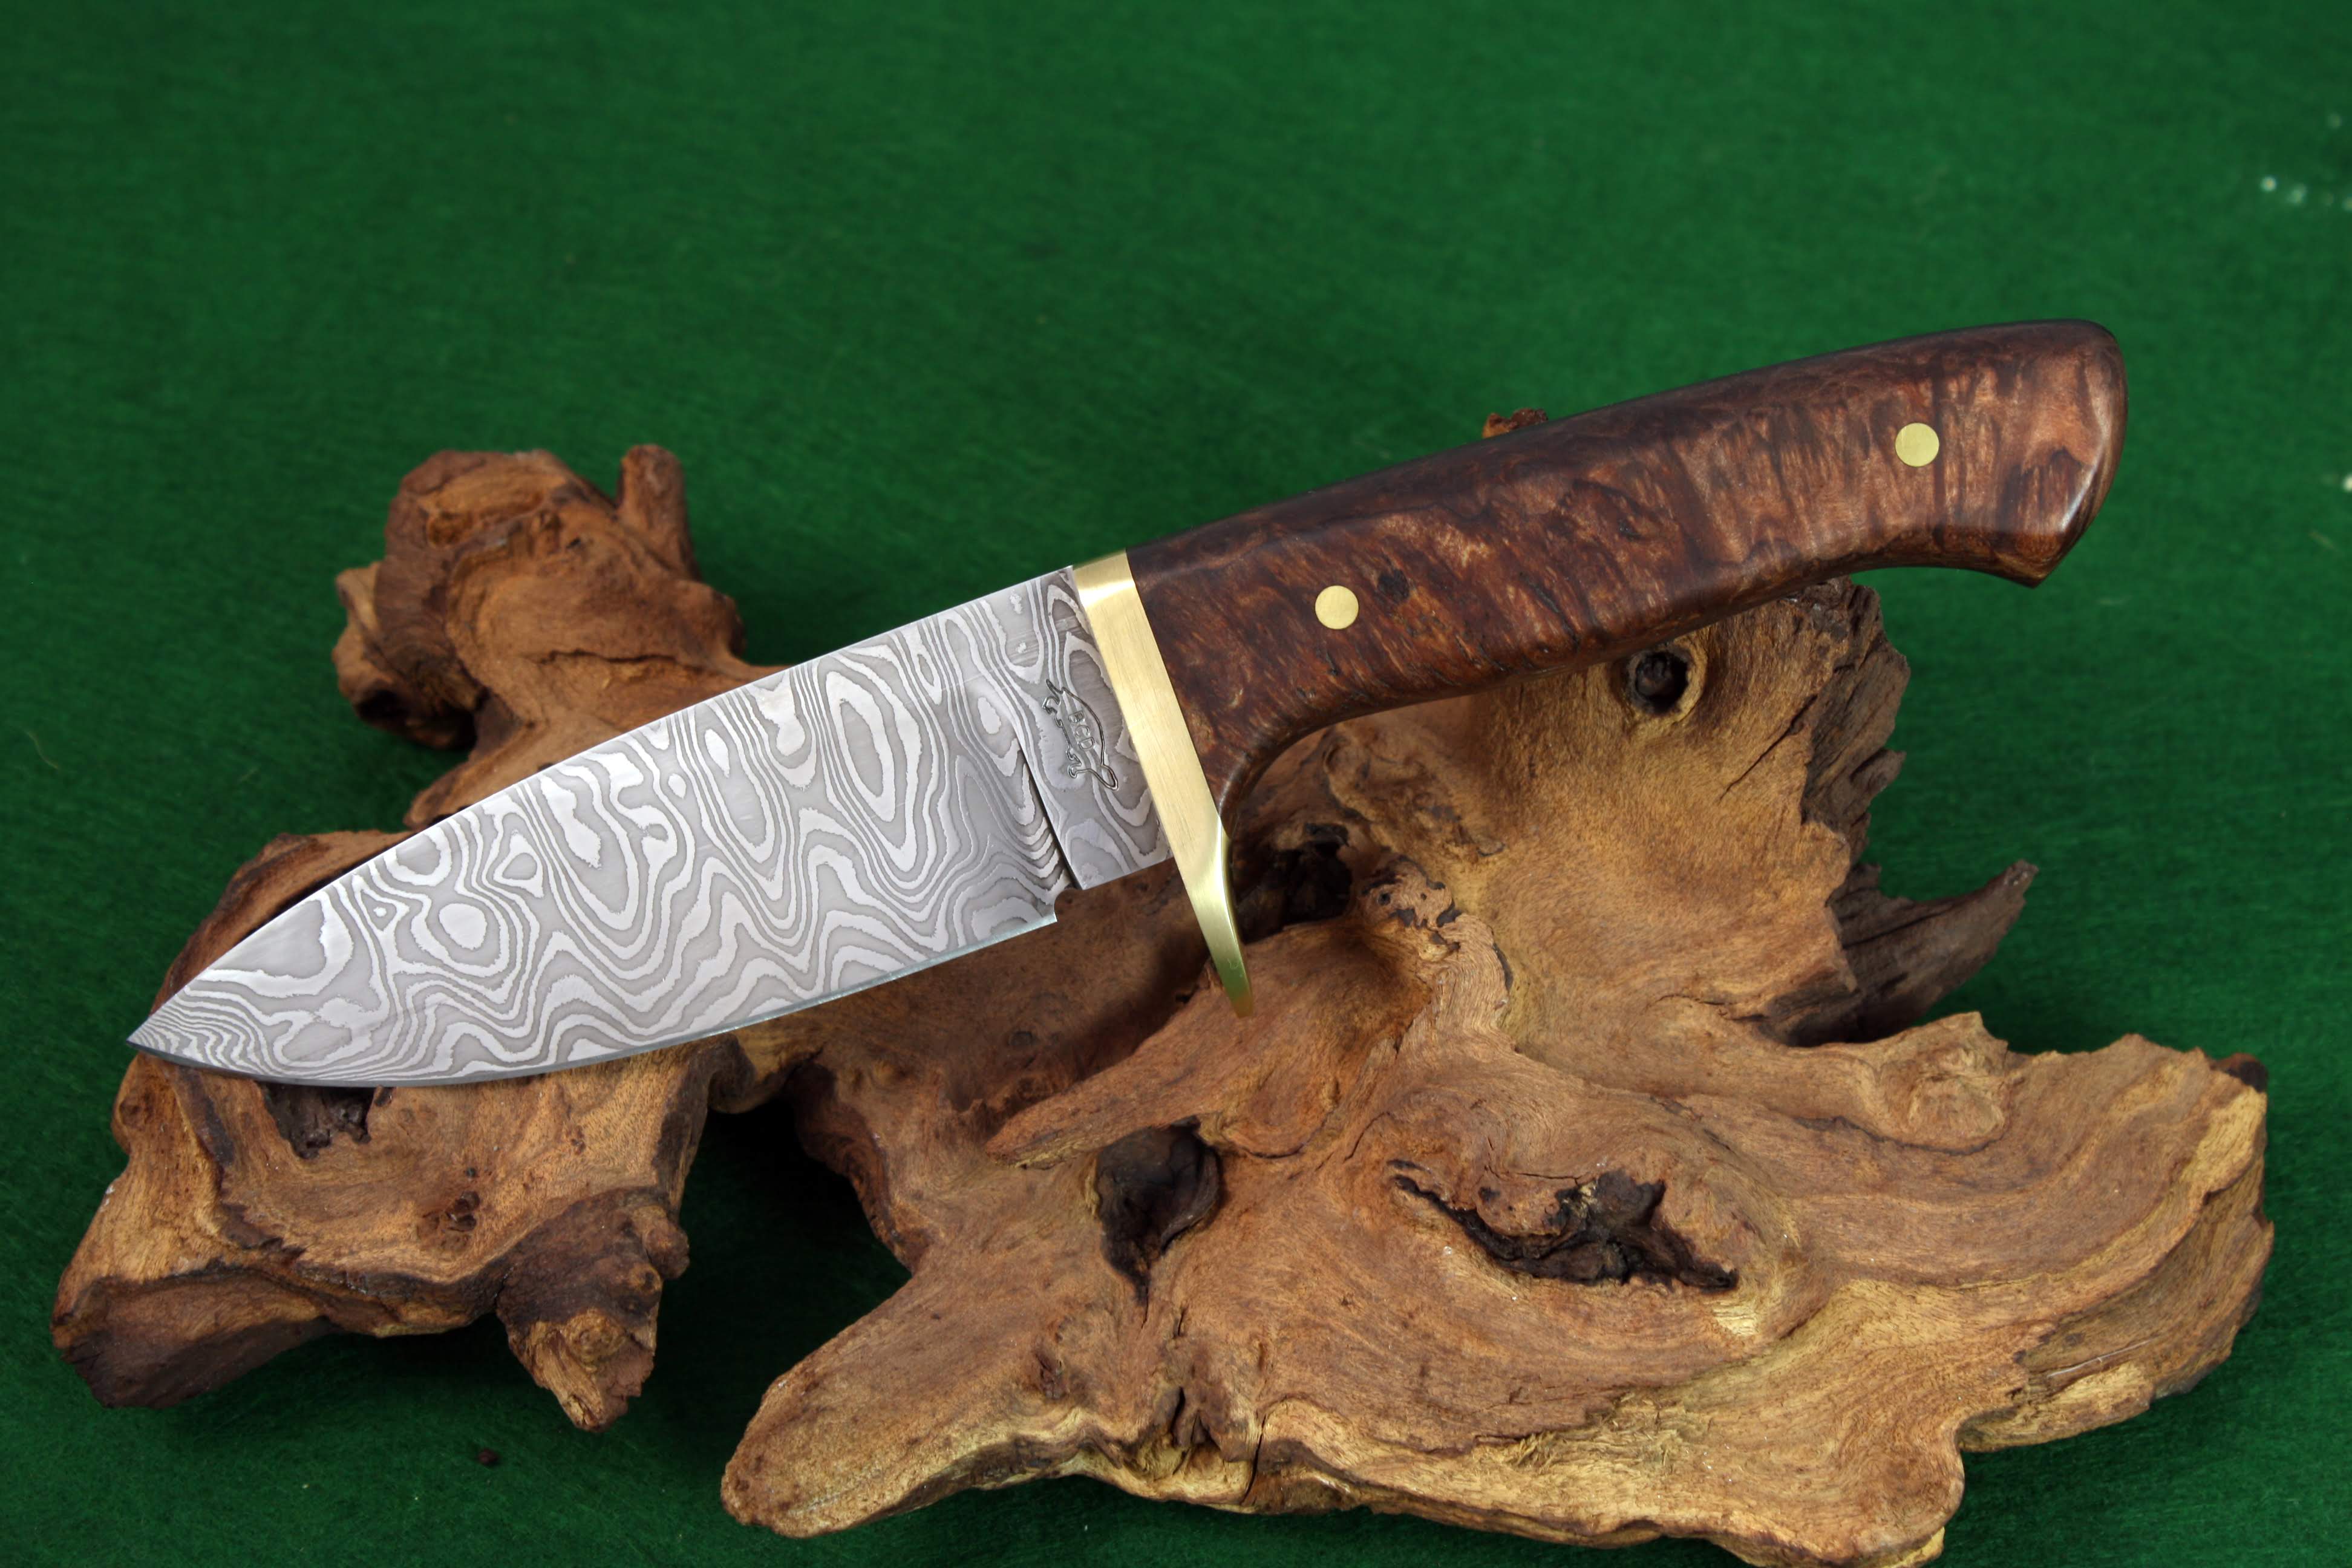
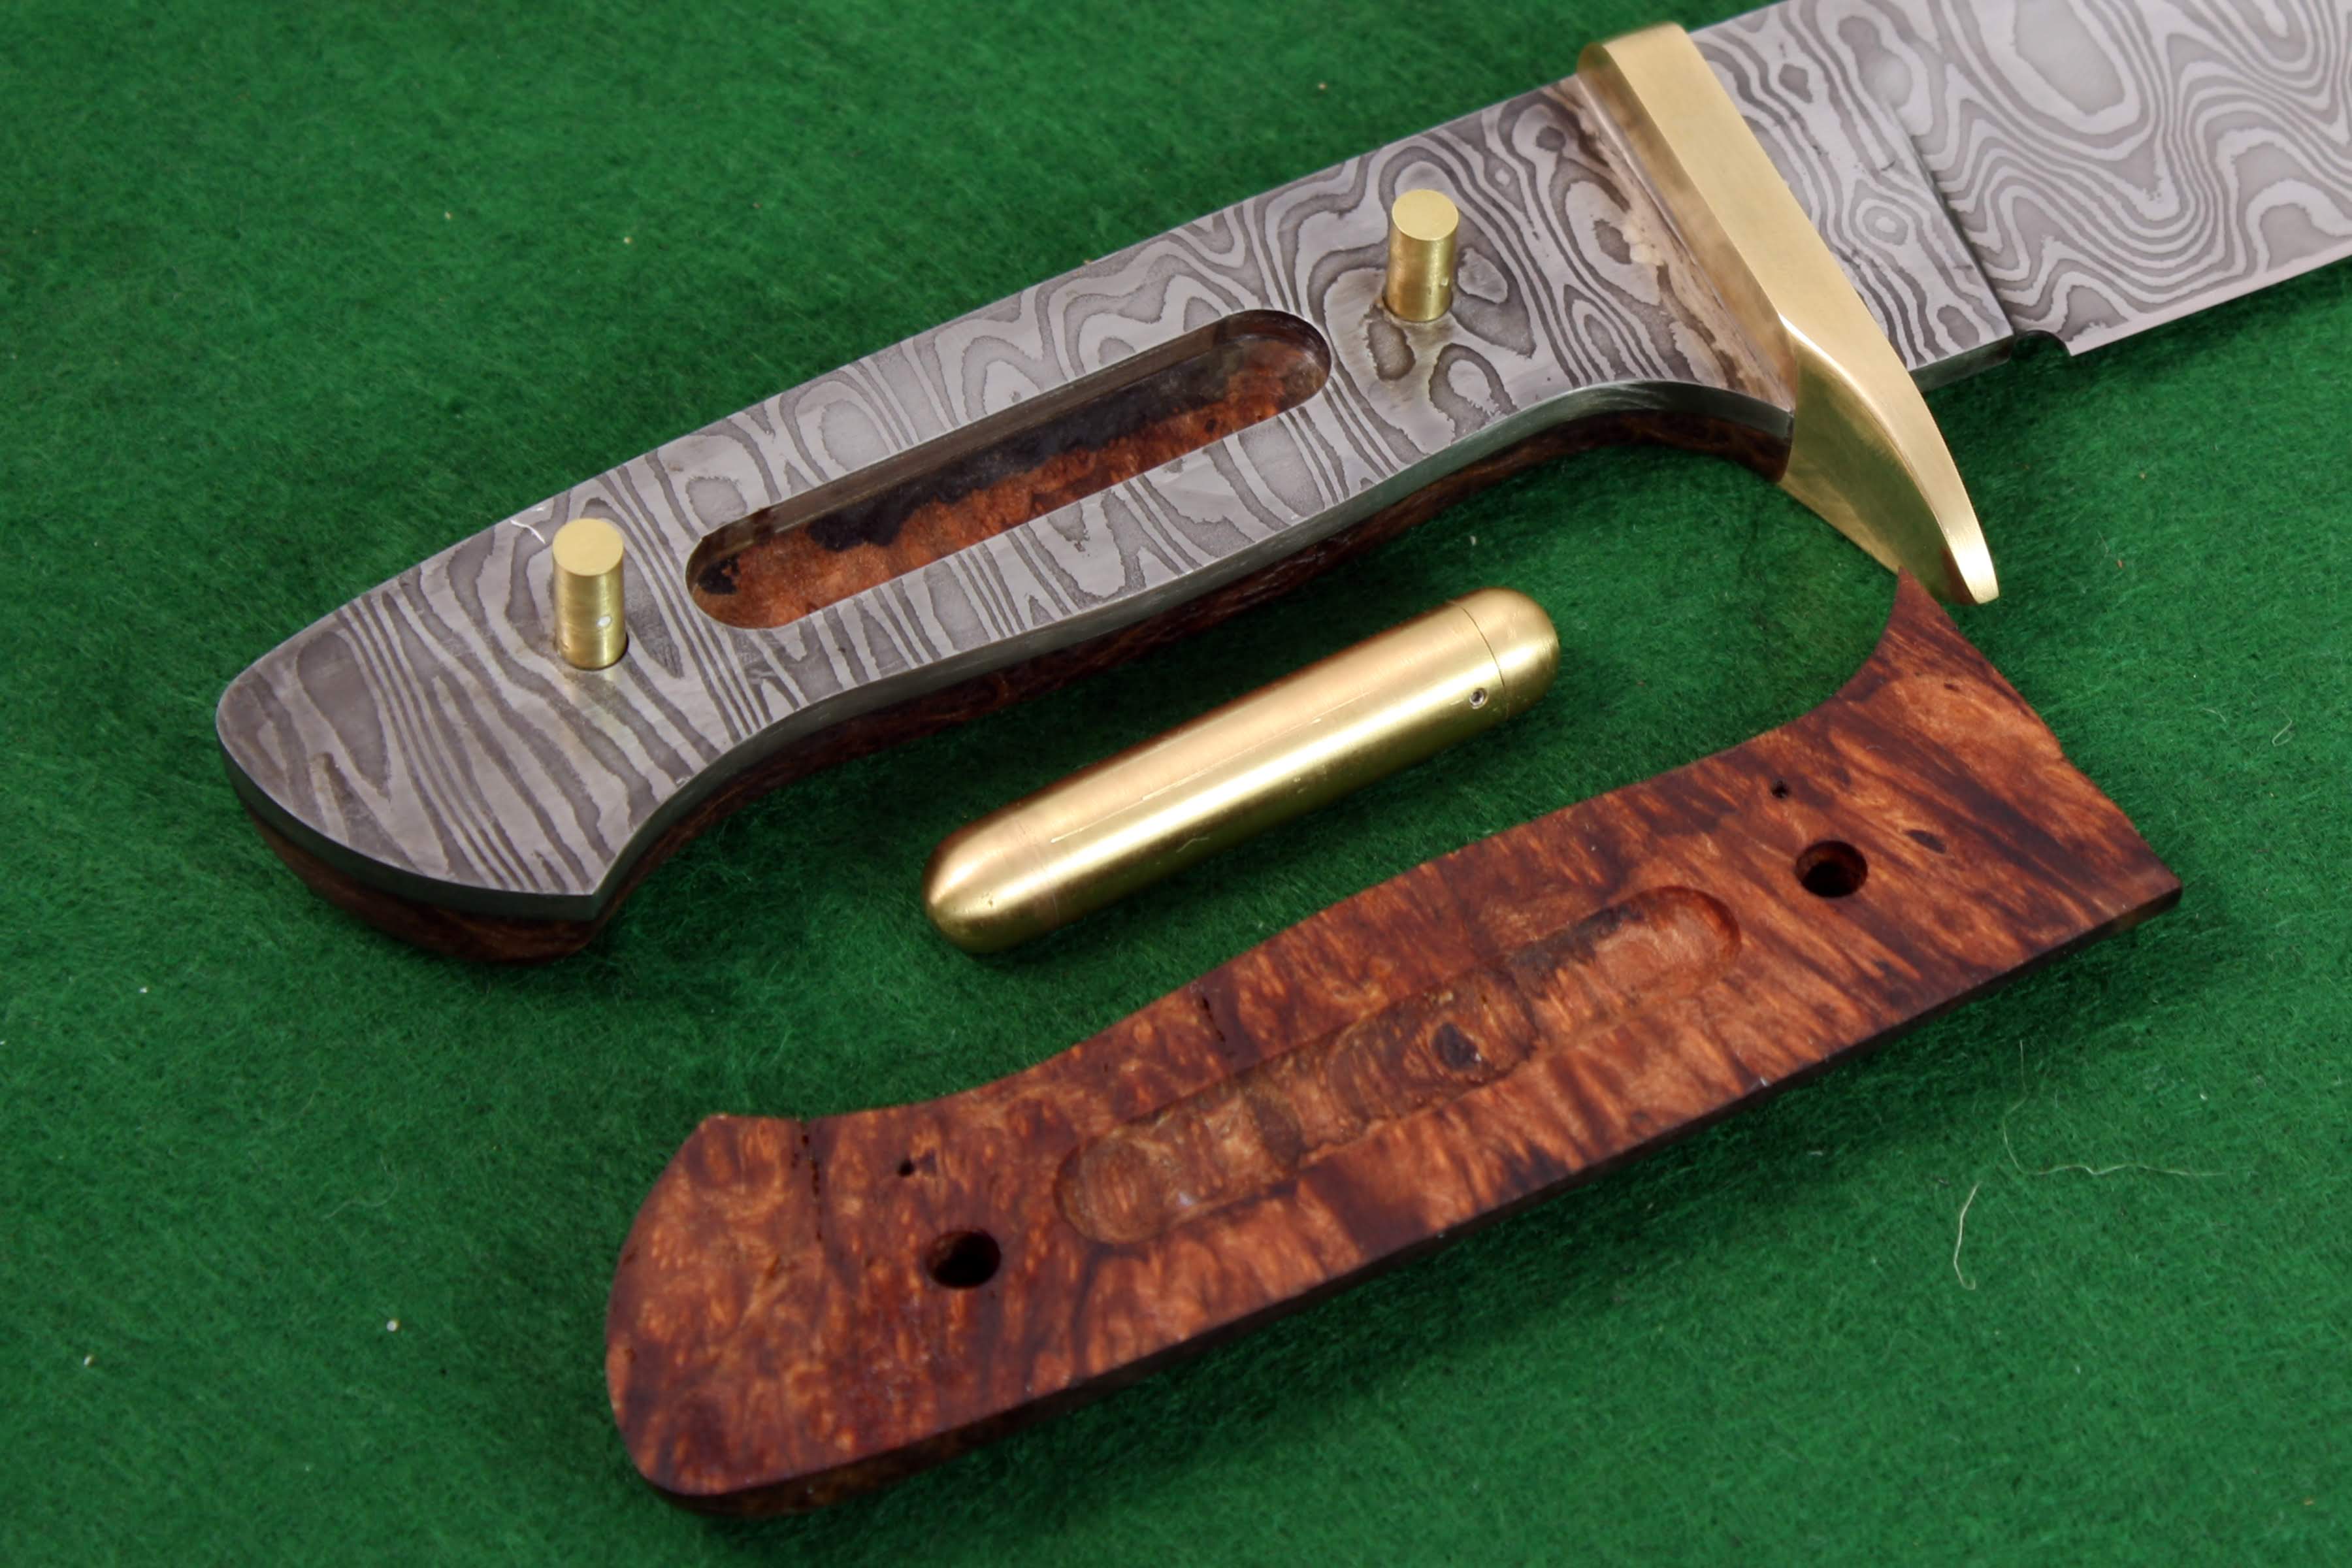
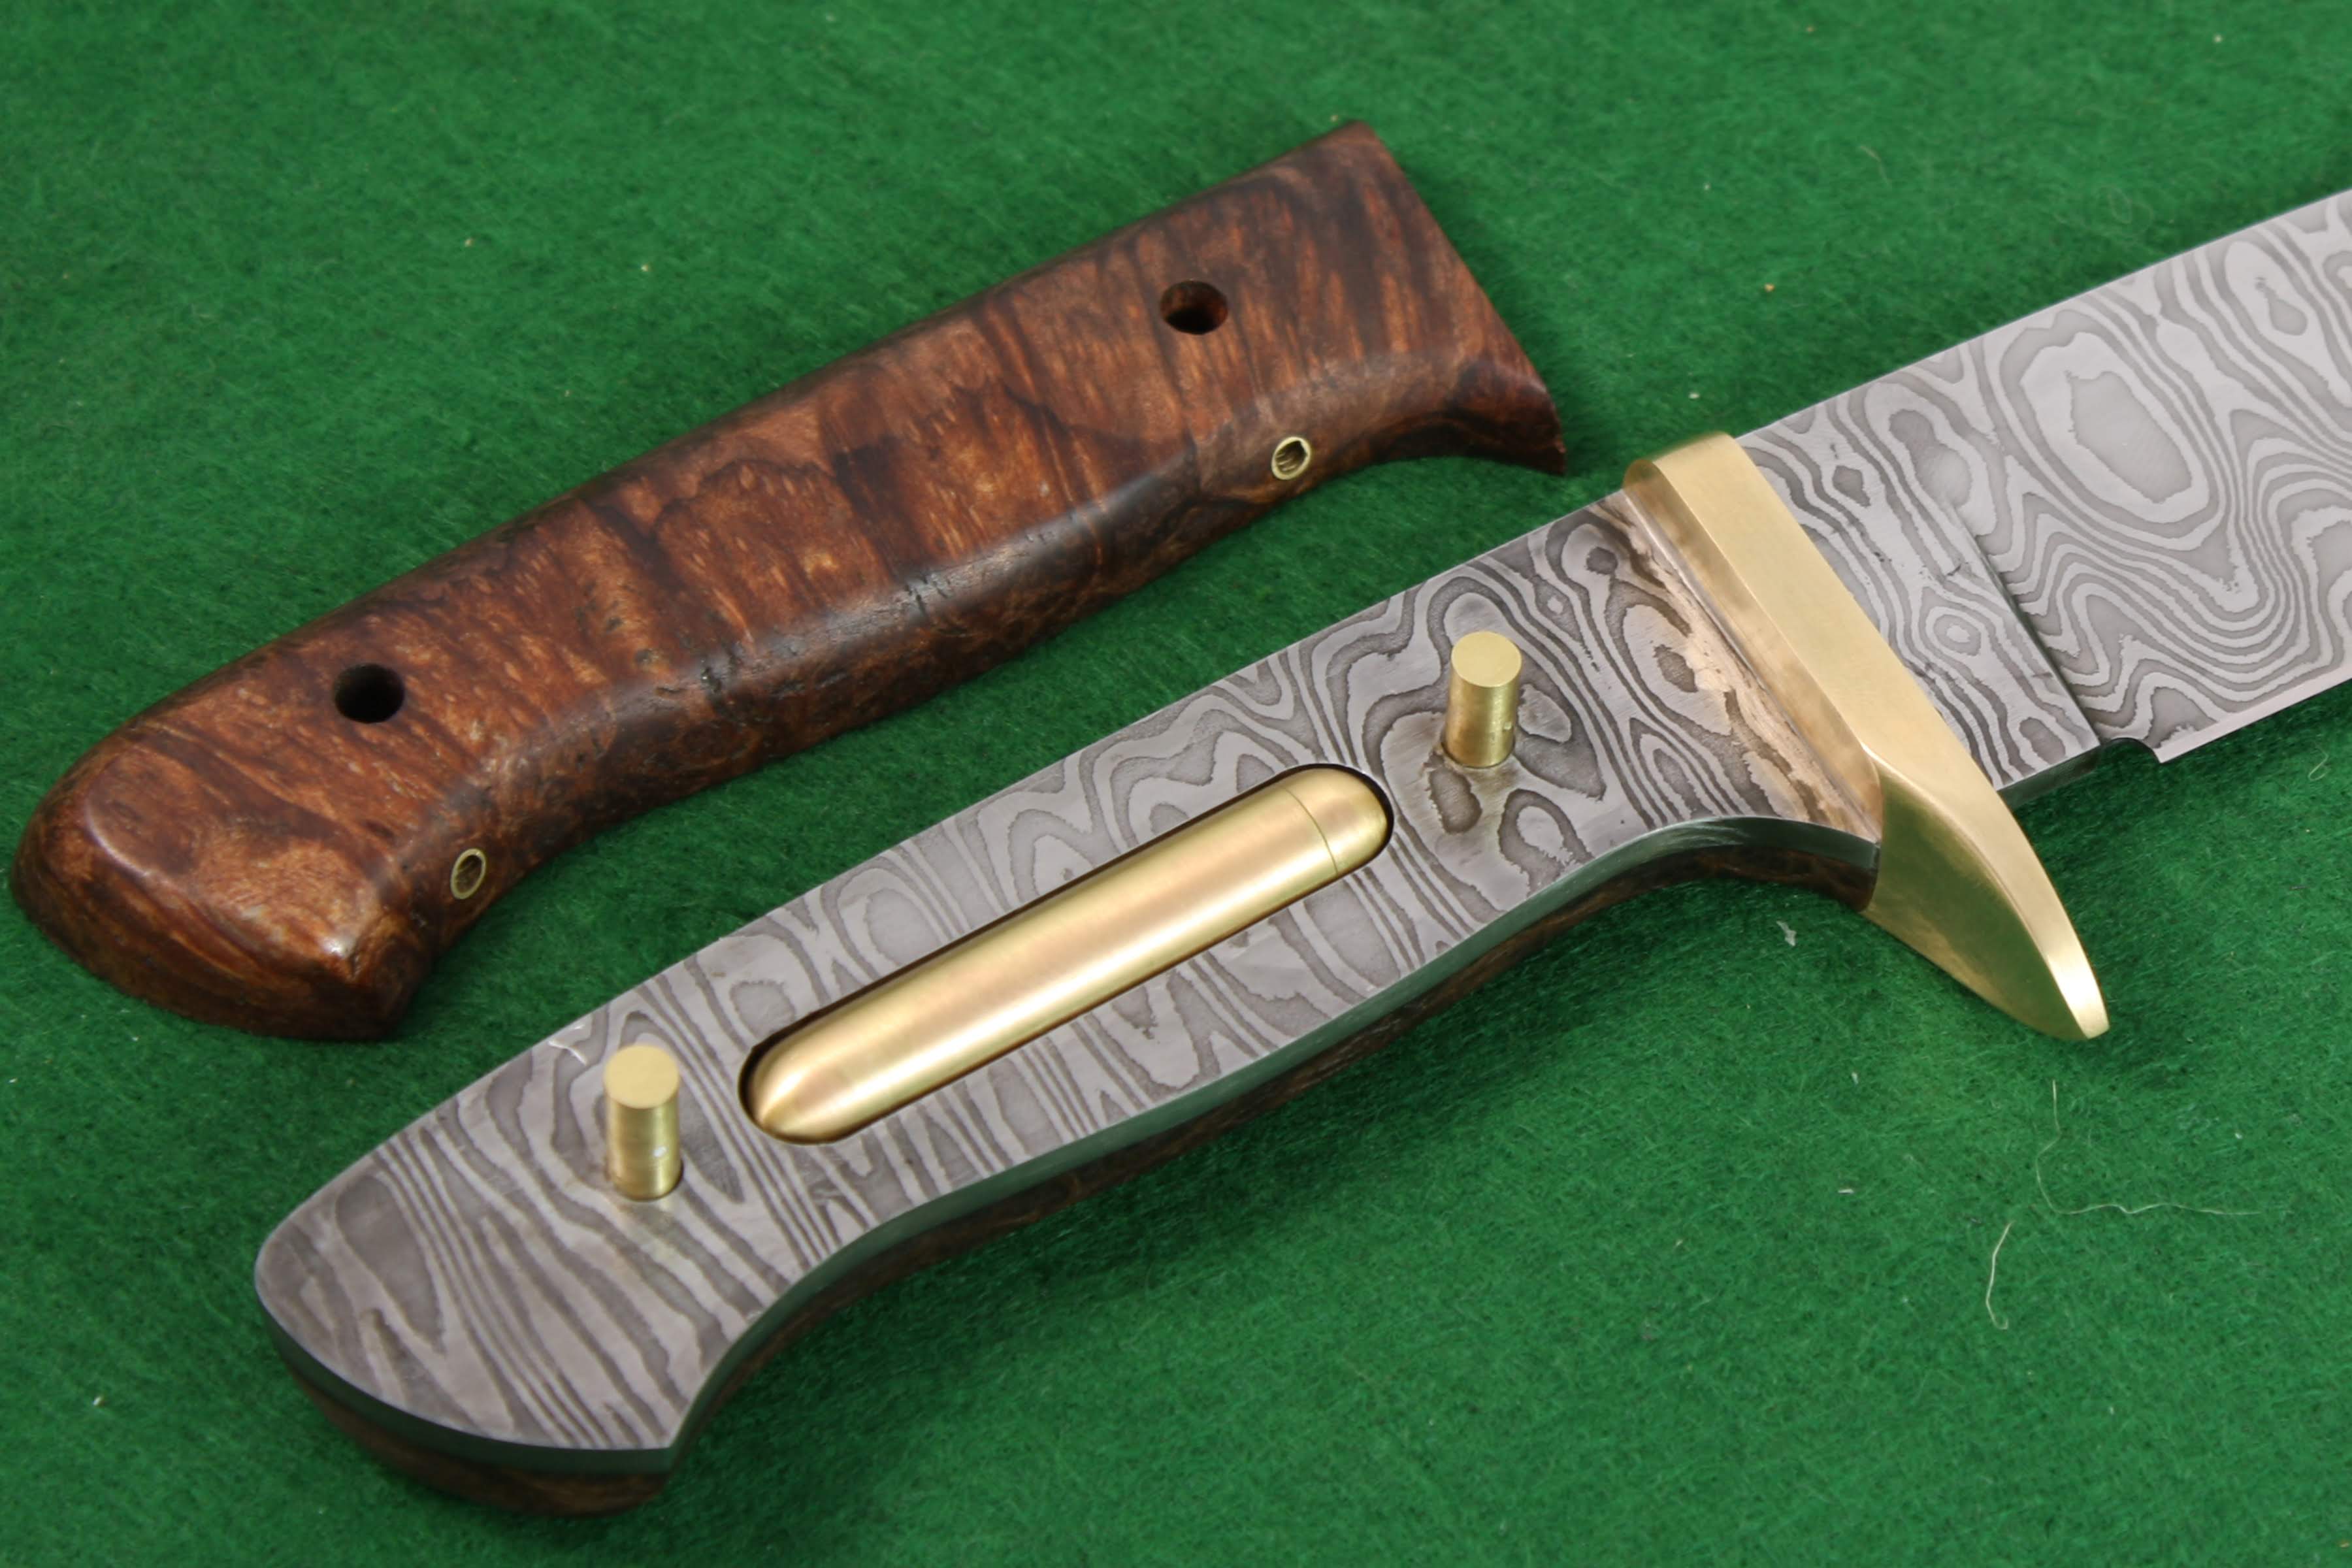
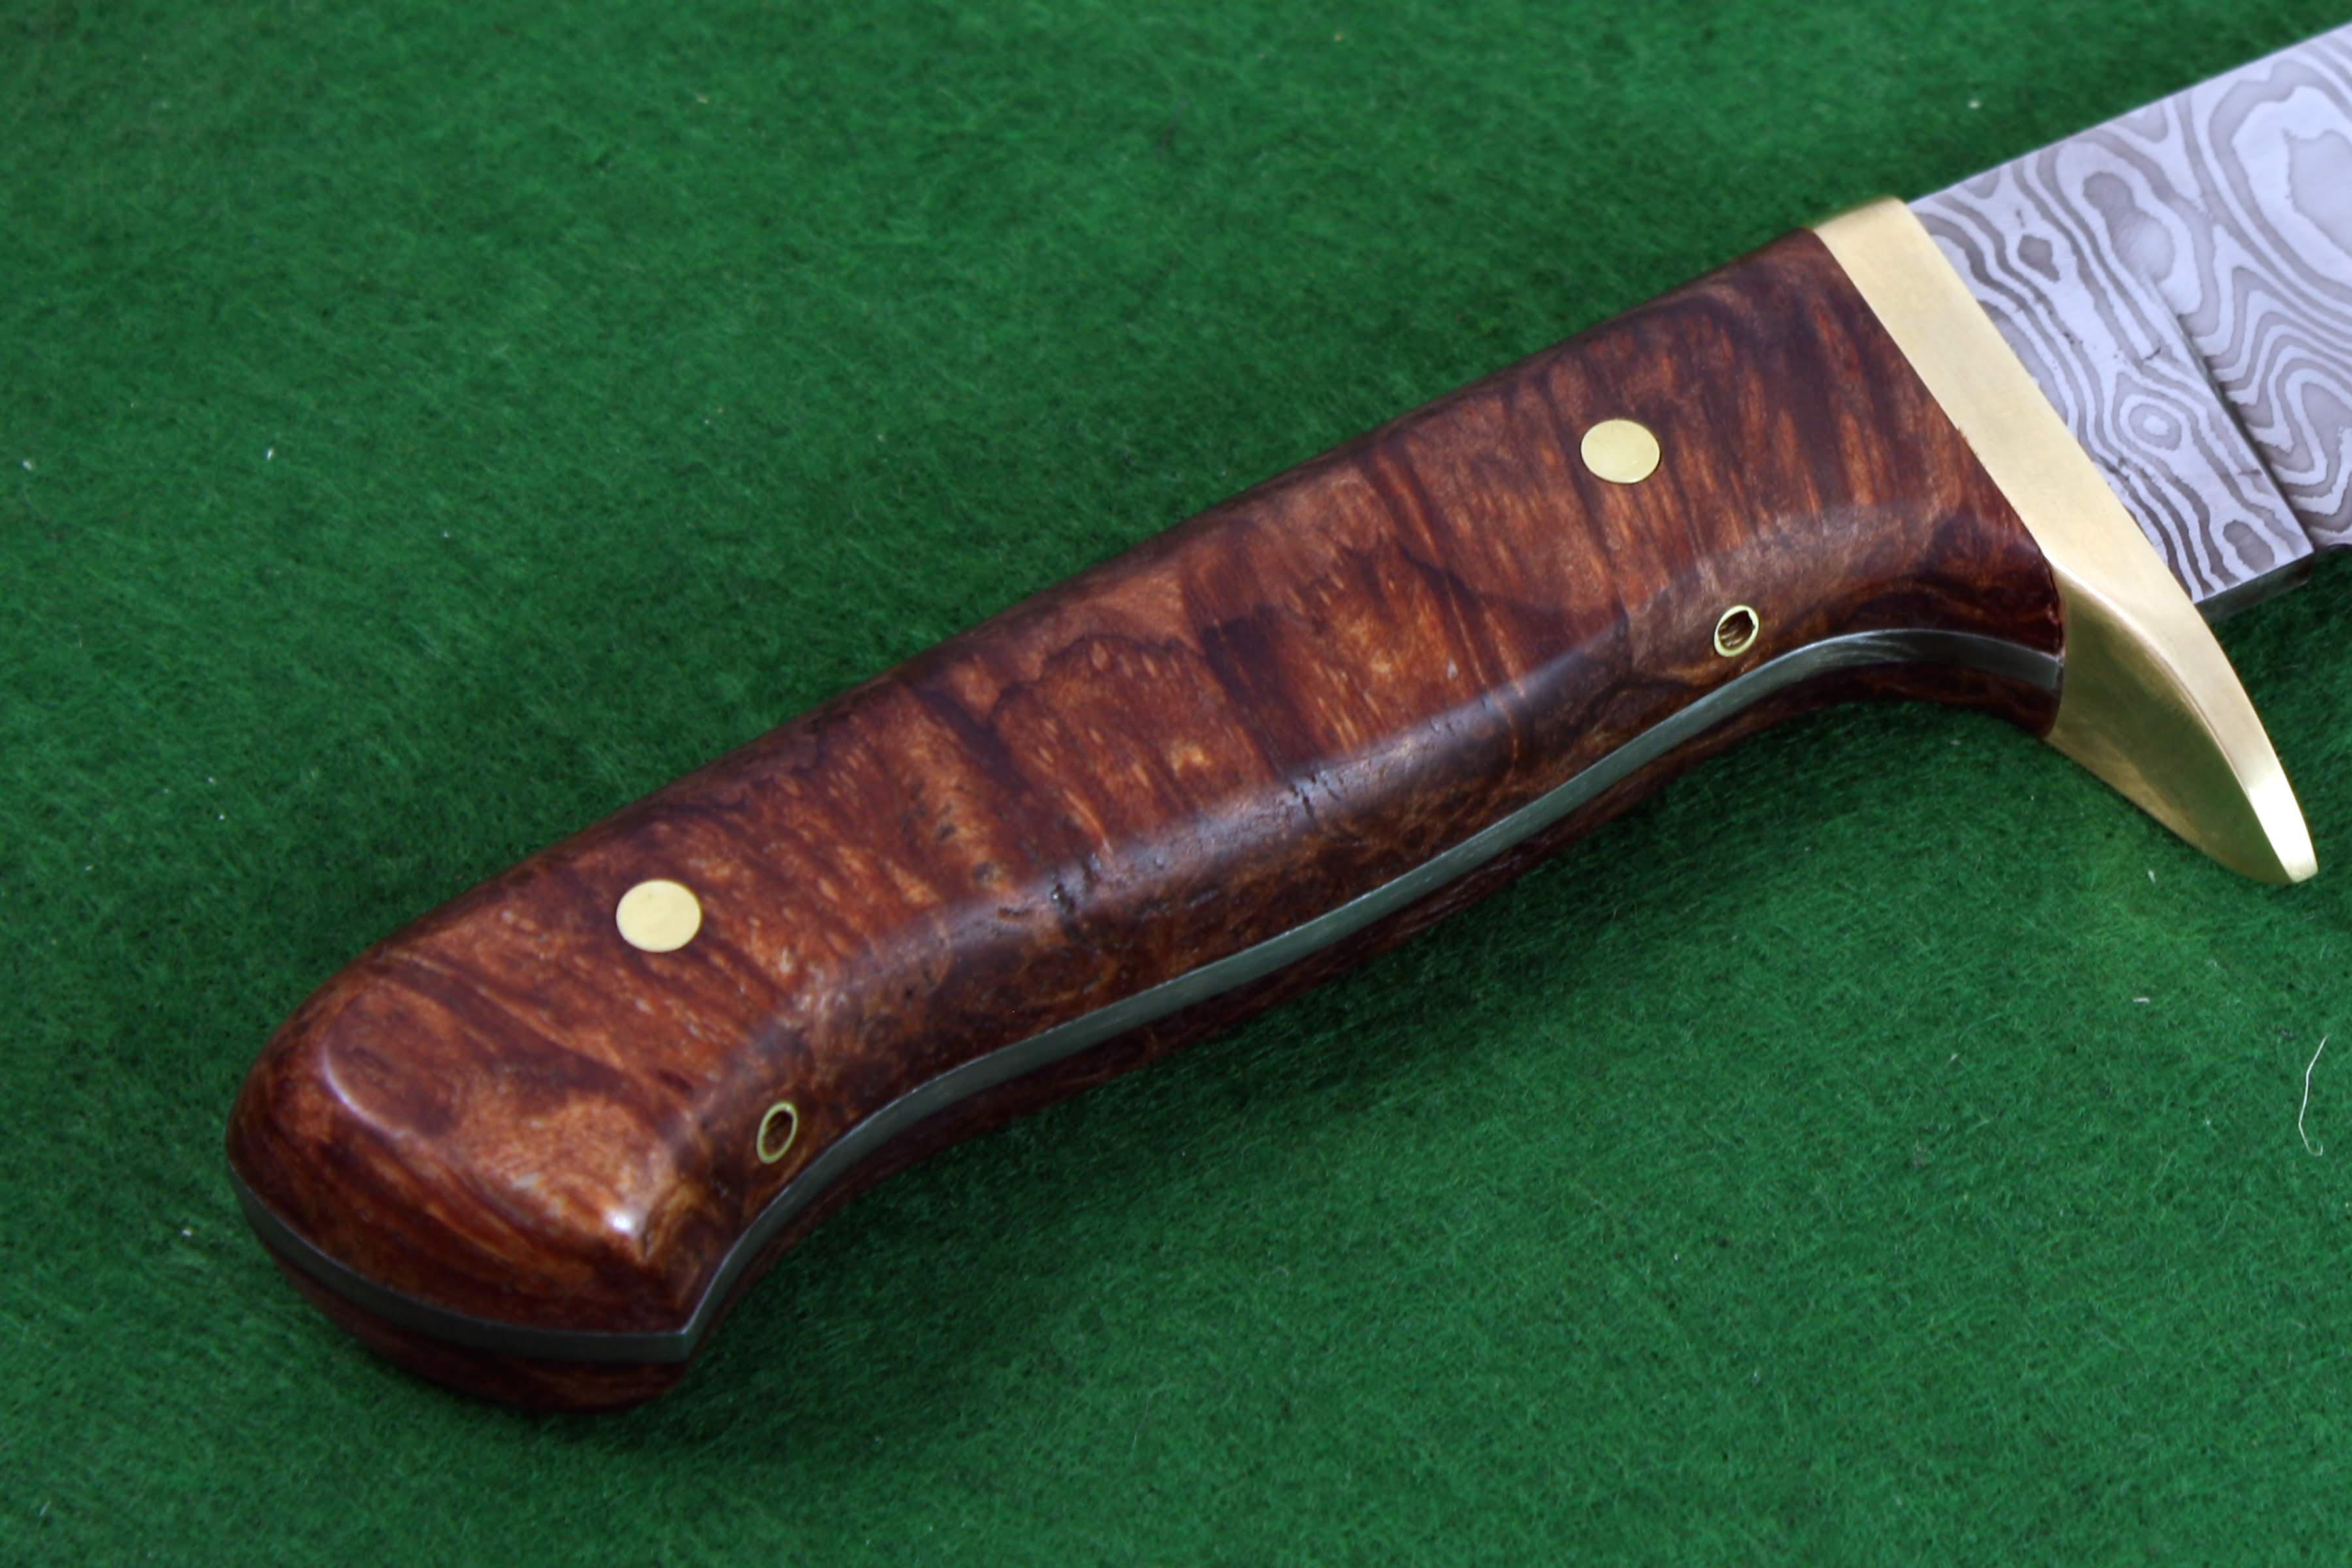
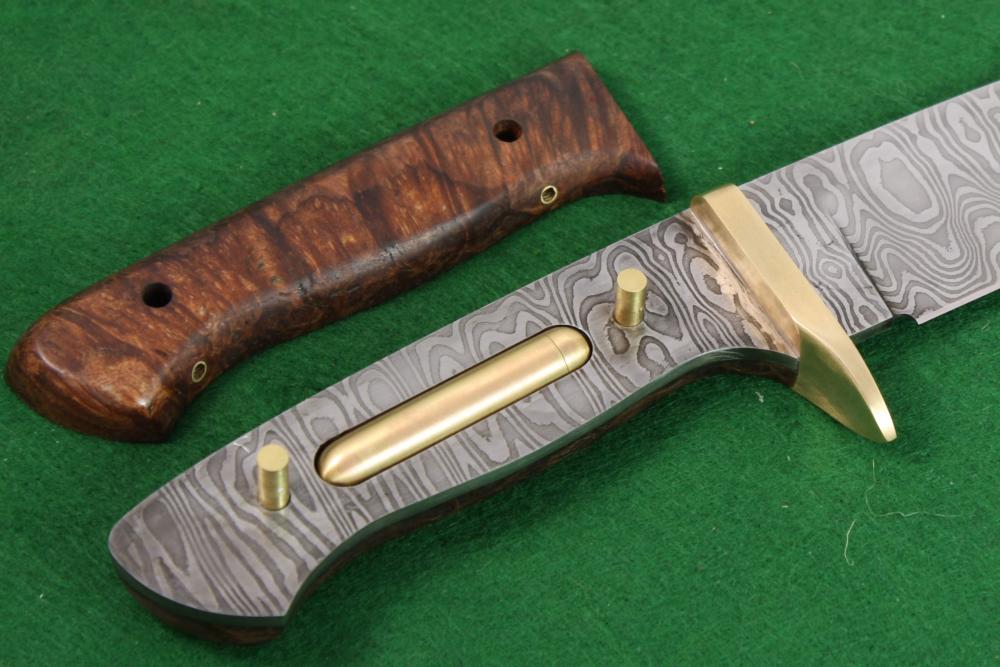
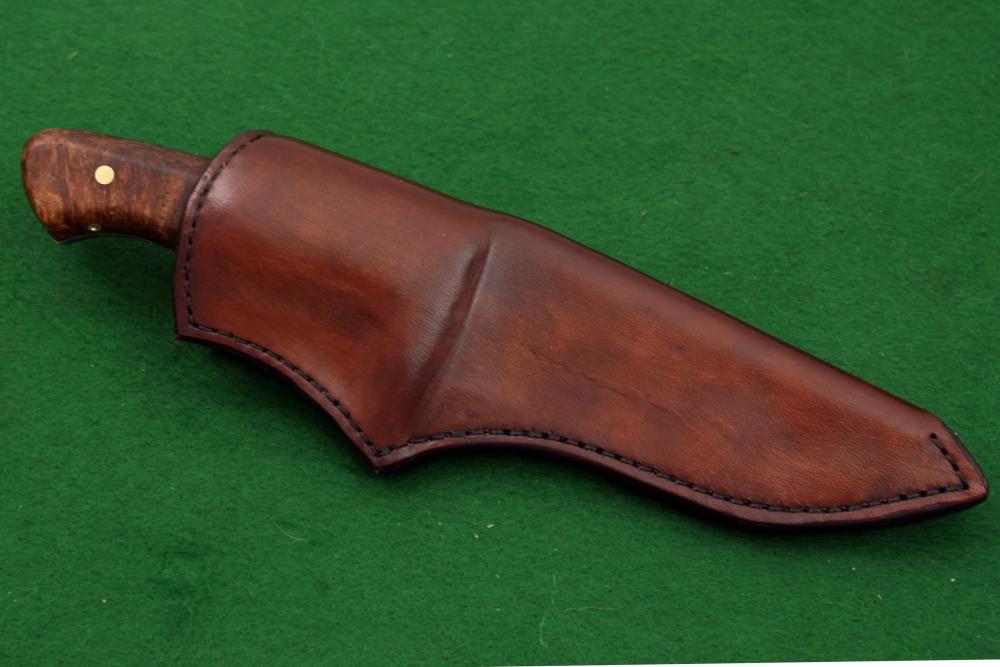
My apologies for not having shared anything here for a while. Life has been busy, and this is only the 3rd knife I have finished this year. This was made for a friend in exchange for a favor. He asked if there was a way I could incorporate some ashes of a close friend of his. This was my solution. The right scale will slide off of the pins if you loosen two set screws that are in those two little brass tubes on the bottom edge of the scale. This reveals a pocket in the handle that contains a capsule I machined to hold the ashes. I hesitated to try this concept because I hate gaps in my handles, and I knew this would require some precise fitting parts. In the end I managed to get everything to fit up pretty tight. The blade is just a low layer count mix of 1095 and 15N20. It is from a billet I made quite a while ago so I don't remember for sure, but I think it was 44 layers. In person the blade has interesting contrast, but I didn't capture it very well in the photos. I managed to get the 15N20 to a highly polished state, while the 1095 is more of a matte etched state, but there is hardly any topology. I like the effect a lot, and hope I can repeat the process. Overall length is 9.5" with a blade length of around 4.75".. The handle material is stabilized redwood burl.


-
Cool The pattern reminds me of the lines in the enamel of the megalodon tooth I have sitting on my desk.
-
What does a grandfather do when a grandson wants to make a knife
rhitee93 replied to MotoMike's topic in Knife Making
Nice That kind of experience can have a significant impact on a youngster. The fact that the knife came out so well is just the sprinkles on the Dairy Queen. Well done!