rhitee93
-
Posts
252 -
Joined
-
Last visited
Content Type
Profiles
Forums
Articles
Gallery
Downloads
Events
Everything posted by rhitee93
-
It's easier with top and bottom tooling, but it can also be done half-on the anvil edge. There is a guy in Poland that does some fantastic reproductions of Germanic spear points with central ribs. He does all of his work with just a hammer and anvil. I suspect the answer you don't want to hear is that you don't forge the rib, you forge everything else away from it.
-
Mr Powers made me think more. "Yellow" is subjective, but it is where I weld high carbon steel at. (about 2200F) However, I can't weld mild steel at temps that low, and I wouldn't have said any of the samples in your video indicated high carbon content.
-
RToons - This is a bit of a thread hijack, but I'll give you a quick response. Some steels have alloying ingredients that make them very difficult to forge weld. Your prep and approach sound pretty good. Since you don't really know what those steels are, I suspect the alloys are your problem.
-
Wow, had to go back and look at the 3V datasheet again. That stuff tempers much higher than S35VN. Based on what you have said, I can't help but wonder if you are right about it being a lower alloy steel. Does it rust if you leave a drop of water on it overnight?
-
I've not used 3V, but have dabbled with S35VN recently with decent results. The data sheets look similar in process, although the temps are different. What temp did you decide to quench from? What temper temp did you use?
-
Something has reacted with it, but you may never know what. I don't like to stick tape on my blades for any operation where they get wet because this sort of things always seems to happen. (I am assuming you are wet sanding) When I get up to the higher grits, and need to flip the blade, I just wipe down the surface of the board I have the blade on, and fold up a clean piece of paper towel to lay between the blade and the board. I also used glass cleaner rather than water when sanding. It doesn't cause rust as fast.
-
Wow, I haven't seen an old Shop Smith in a long time. I remember those infomercials on saturday mornings in the late 70's. (before infomercial was a word) The knife shows some improvement over the first. Fit and finish are pretty rough, but you knew that already. Focus on one aspect of your next one and make that aspect as good as you can. Do that each time, and you'll make good progress. I suspect you are shaping your handles on that 1x30. I've messed up more handles with a belt grinder than I care to admit. I do most of my handle shaping with rasps and files now. It goes pretty quickly, and allows for much finer control. You might consider giving that a try.
-
Look for Steve Culver's book on the subject. It'll tell you everything you need to get started.
-
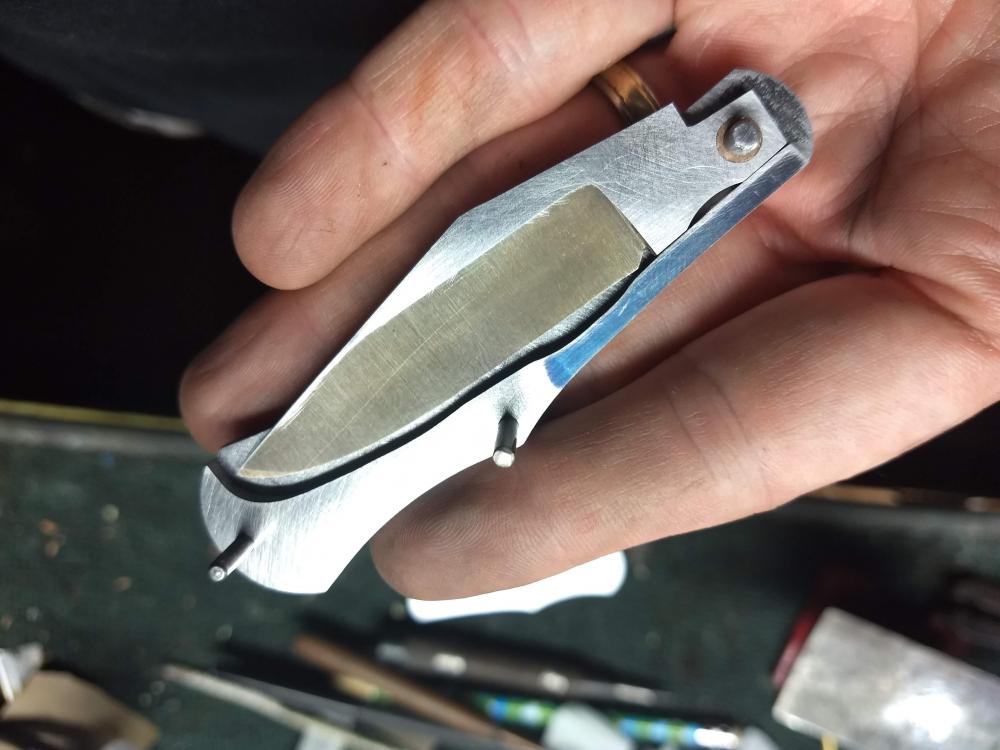
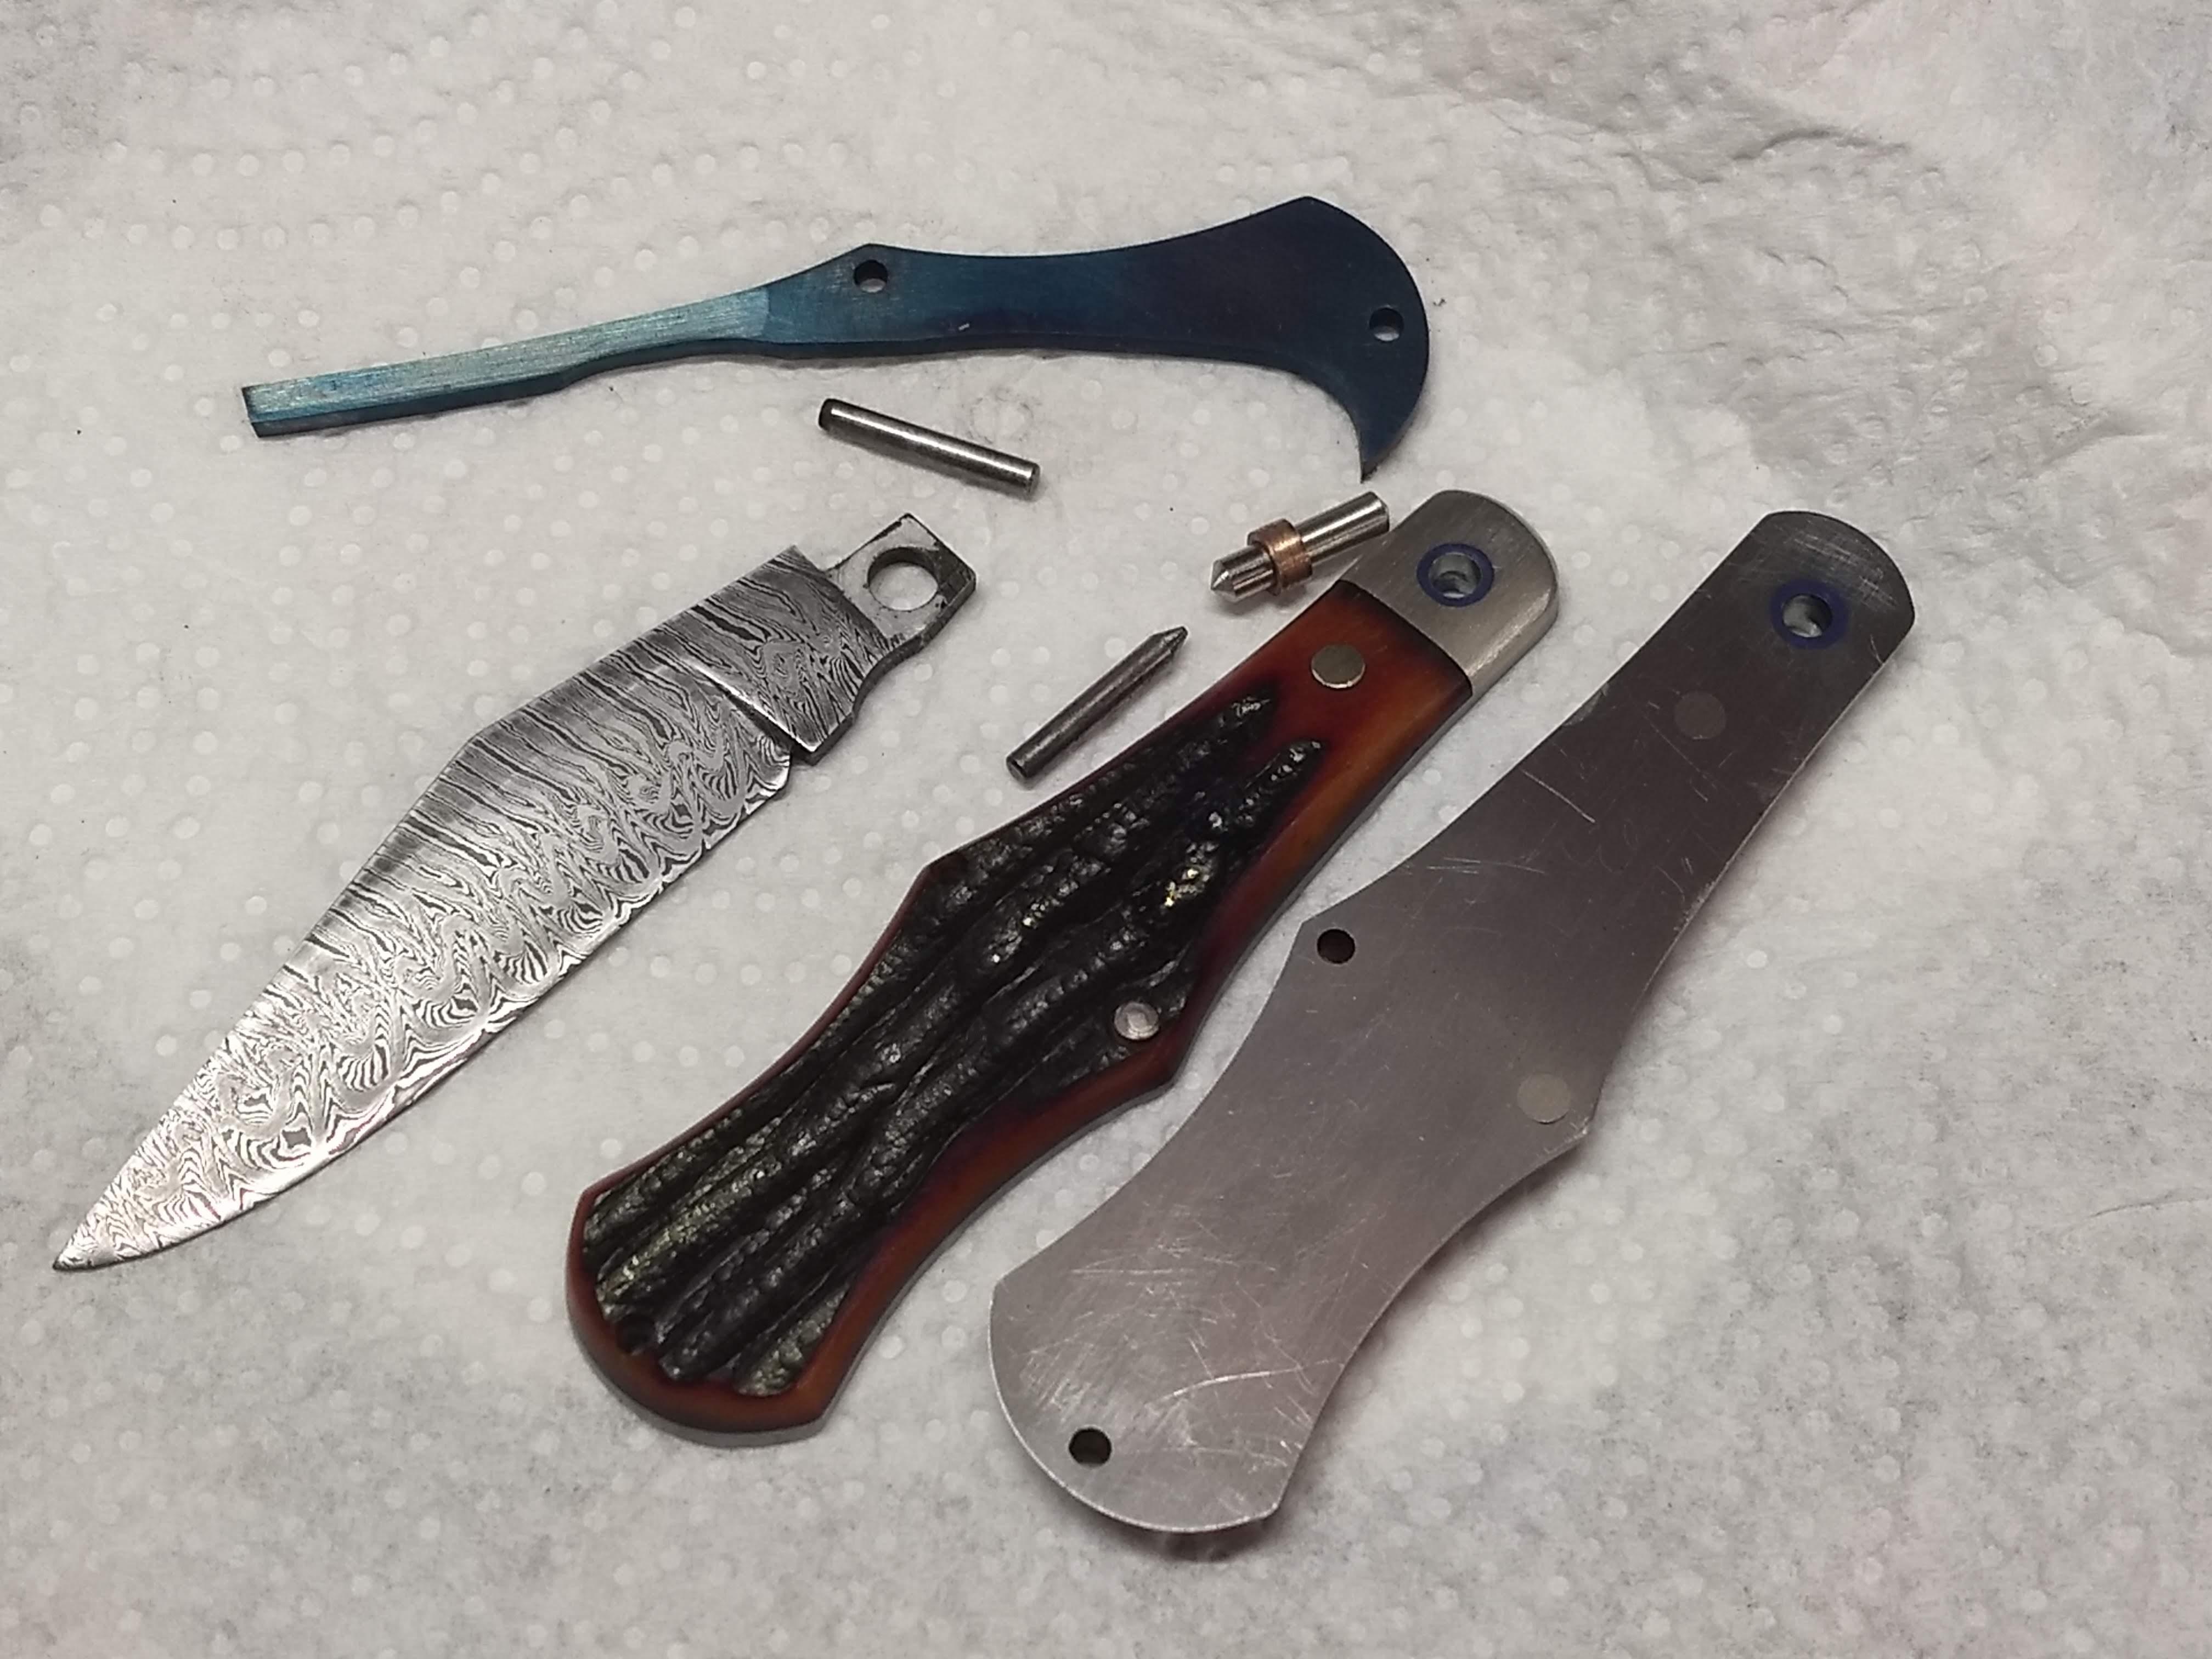
Thanks for the kind words guys. Anachronist58, we are all just hacks in our own right. The guys that start with dirt (ore) and make blades are the true masters. Mason, Here are the parts shortly before final assembly. The pins in this pic were just fit-up pins. I cut new nickel silver ones for the final assembly. Here is an earlier shot that shows the interaction of the parts:

-
I can't give you any advice on micarta as I don't mess with it much, but I wanted to say your knife shows a lot of promise. One suggestion, and take it for what it's worth, is to take your bevels up much higher. I would have run the bevel up a little more than twice as high as you did at the heel and run it out perpendicular to the plunge line until it broke out on the spine of the knife. (Ok, that probably isn't as clear to you after you read it as it is in my head when I wrote it ) My opinion is worth exactly what you are paying for it, but I feel that gives you a better performing knife as well as a better looking one. Keep it up! That level of fit and finish on a second knife is rather rare, and shows that you are not afraid to put in the work it takes to get good at this.
-
That is nice clean forging.
-
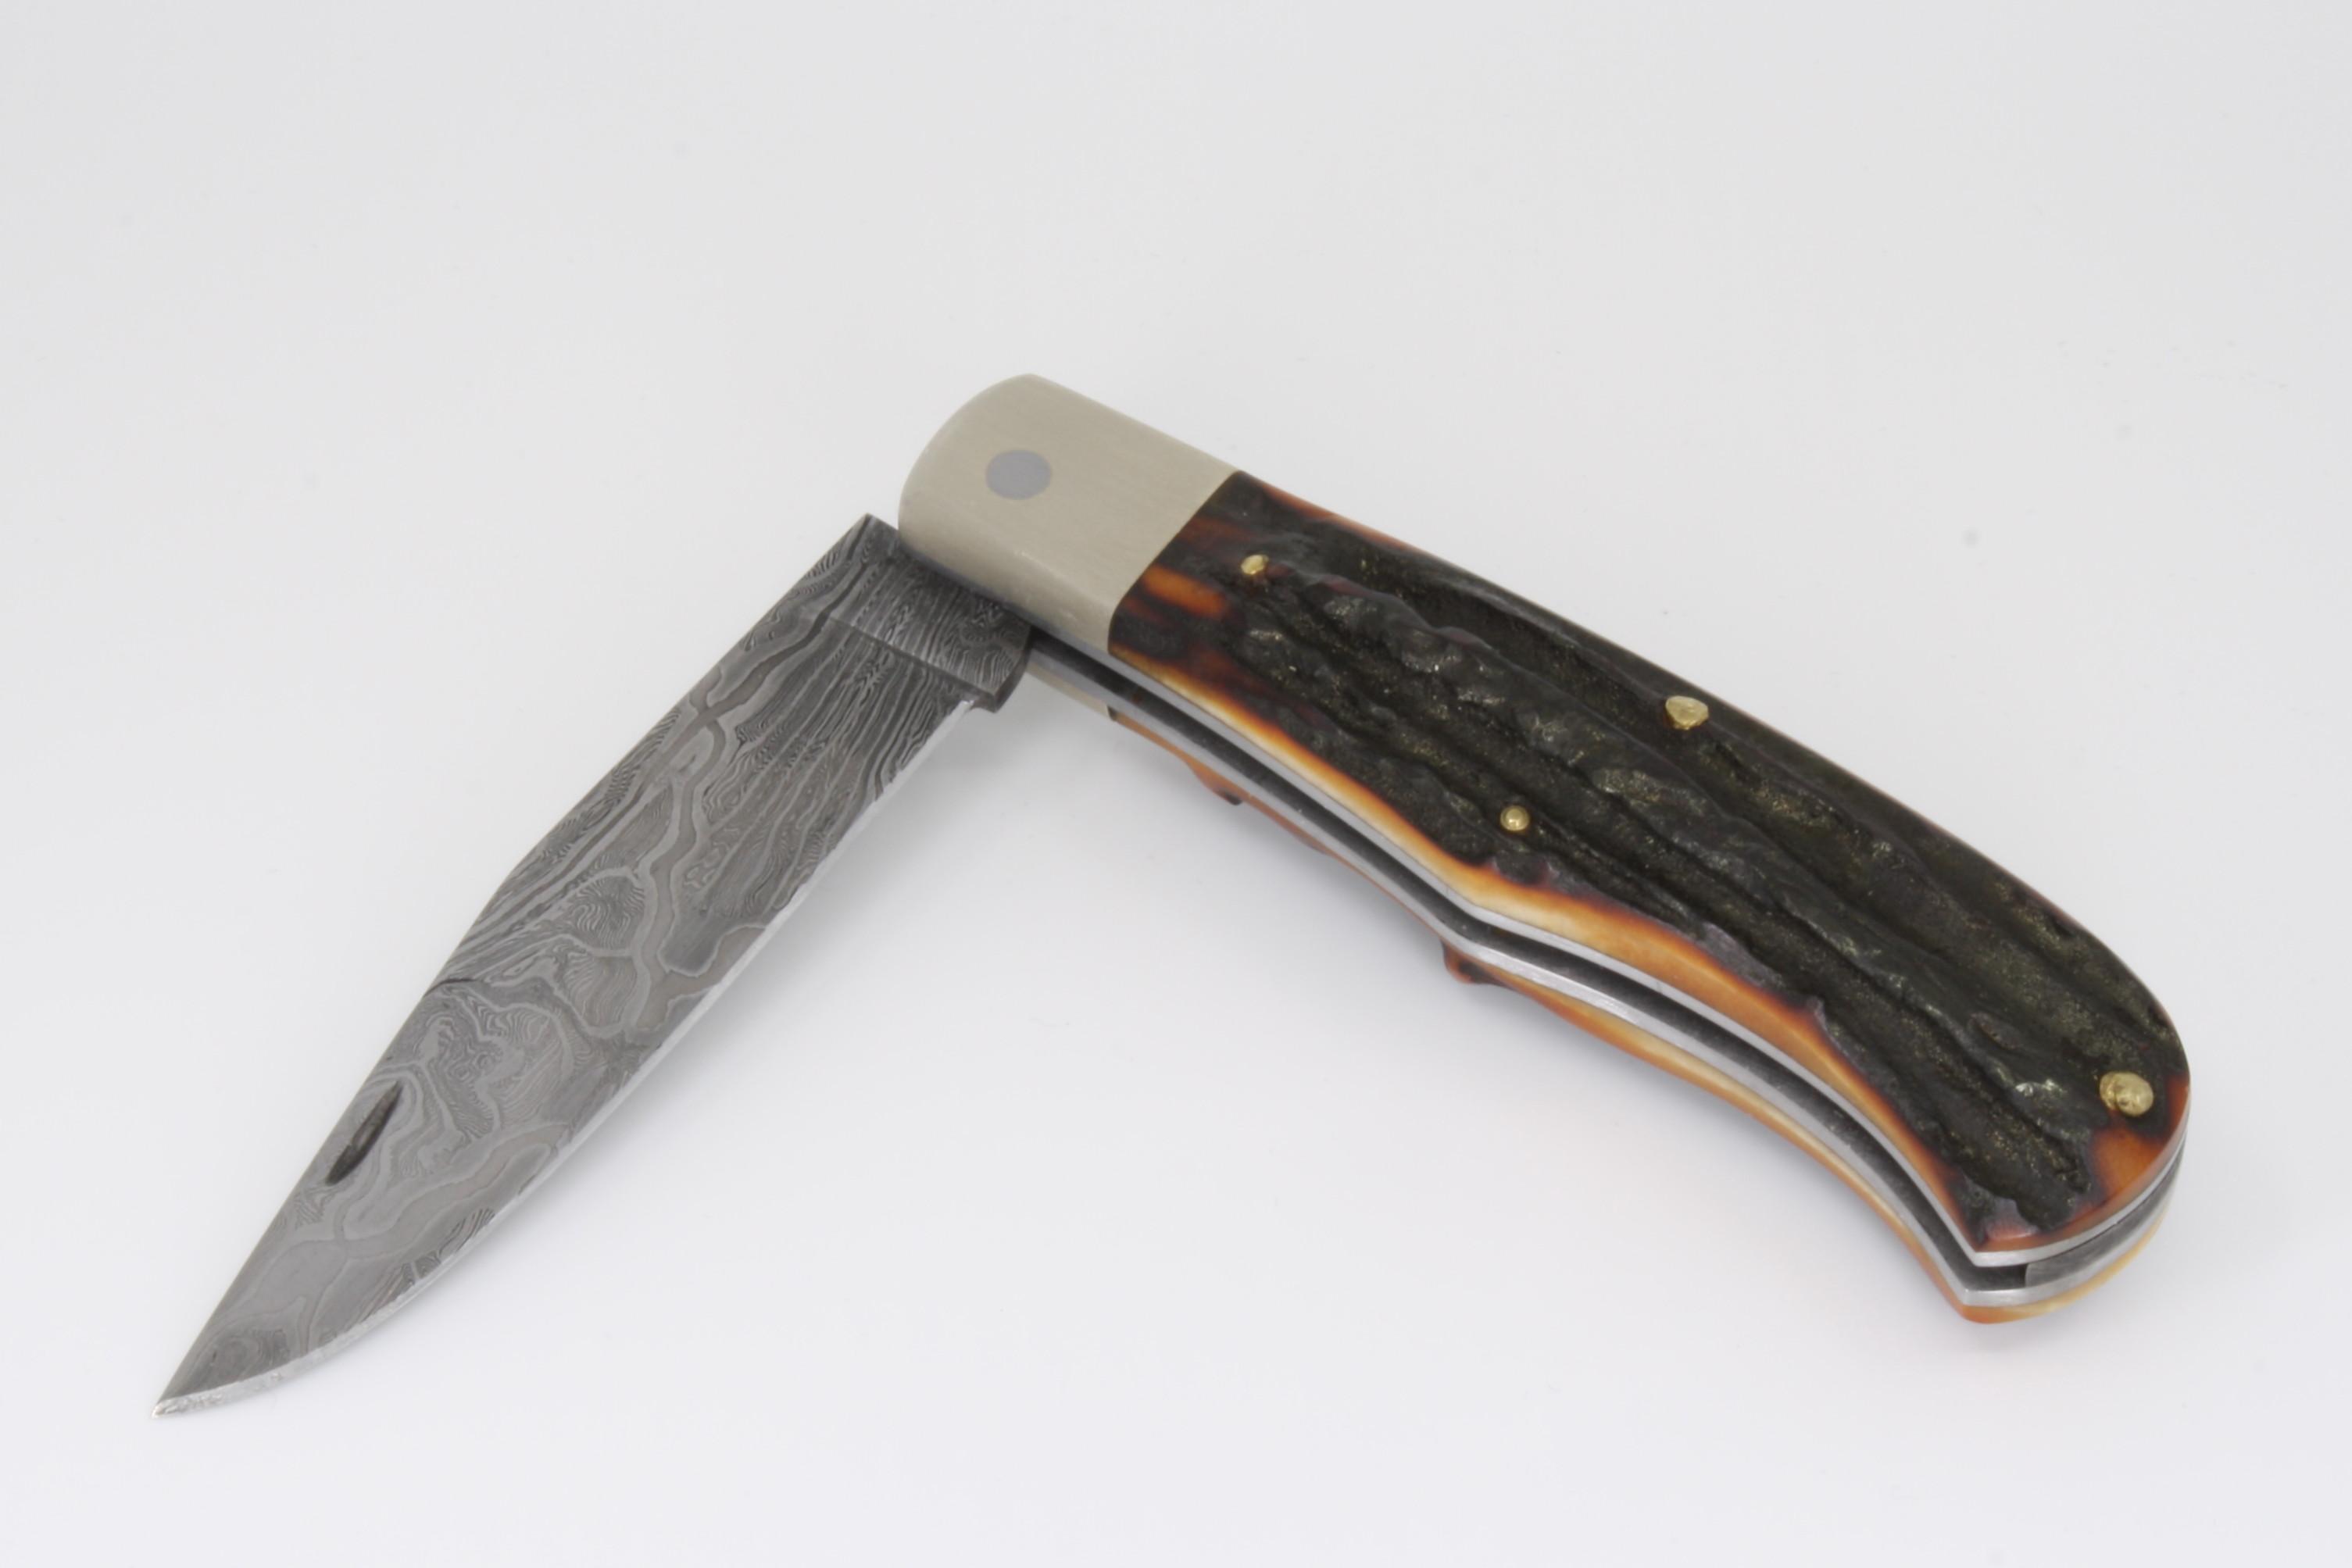
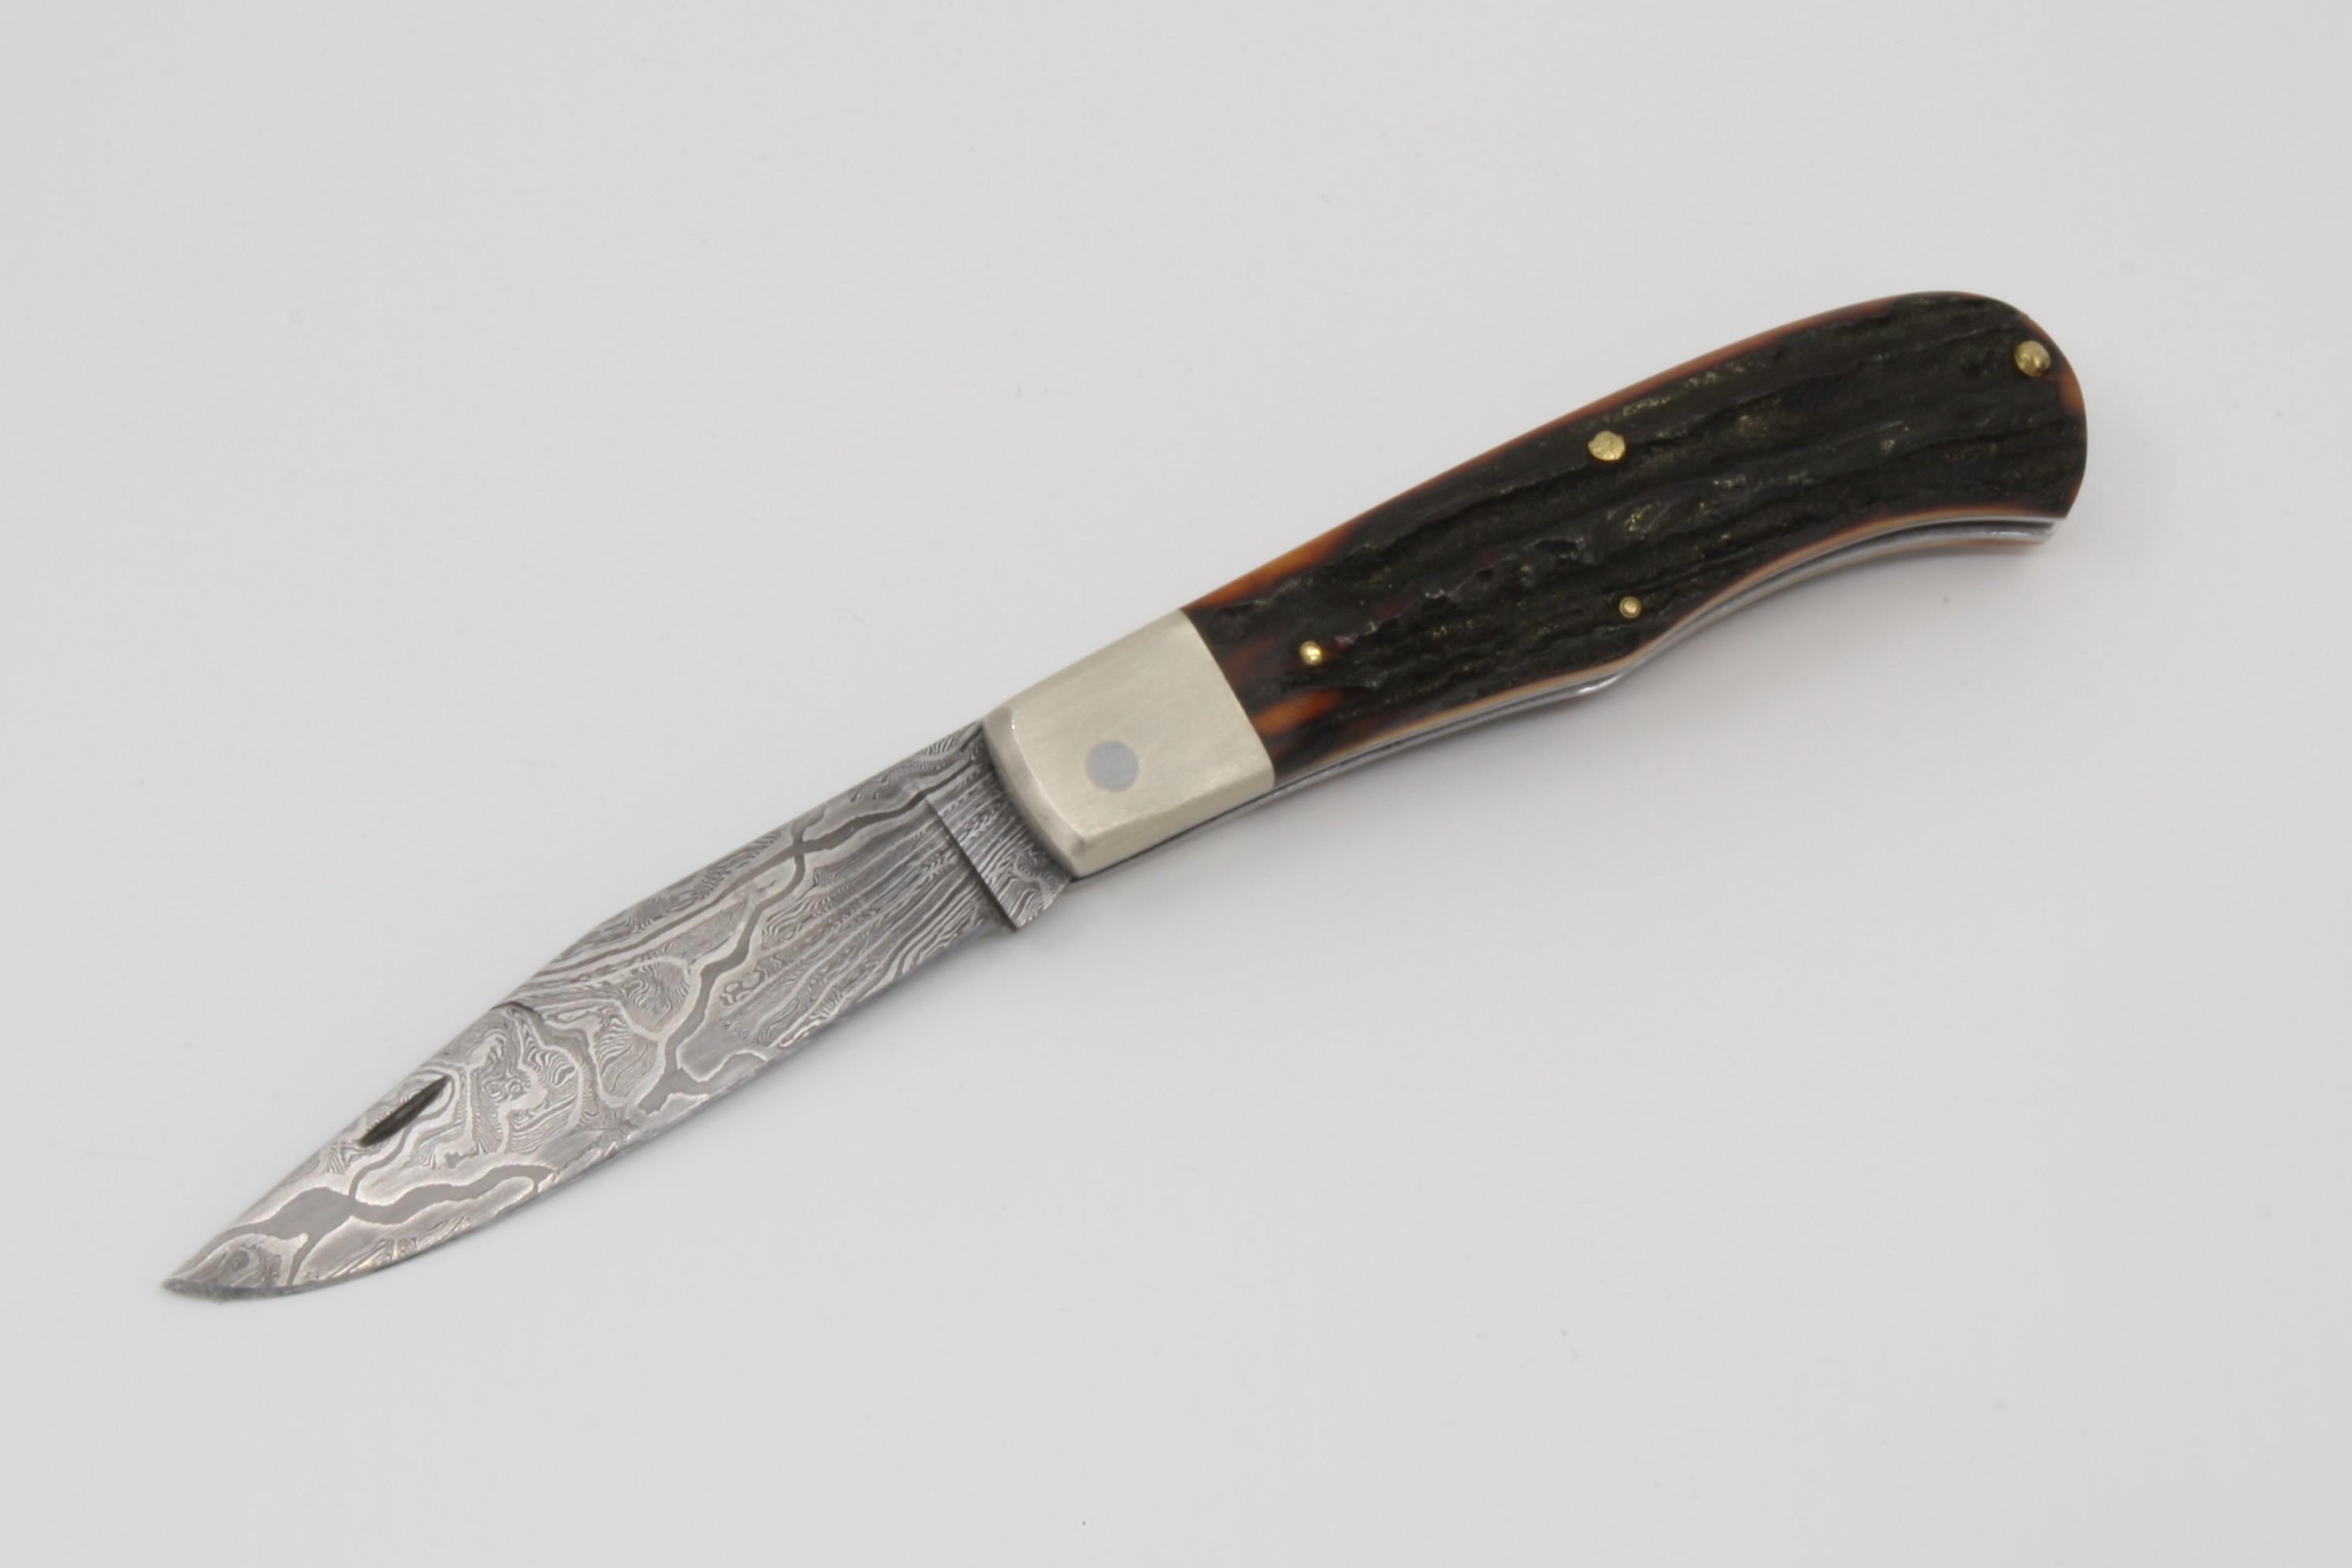
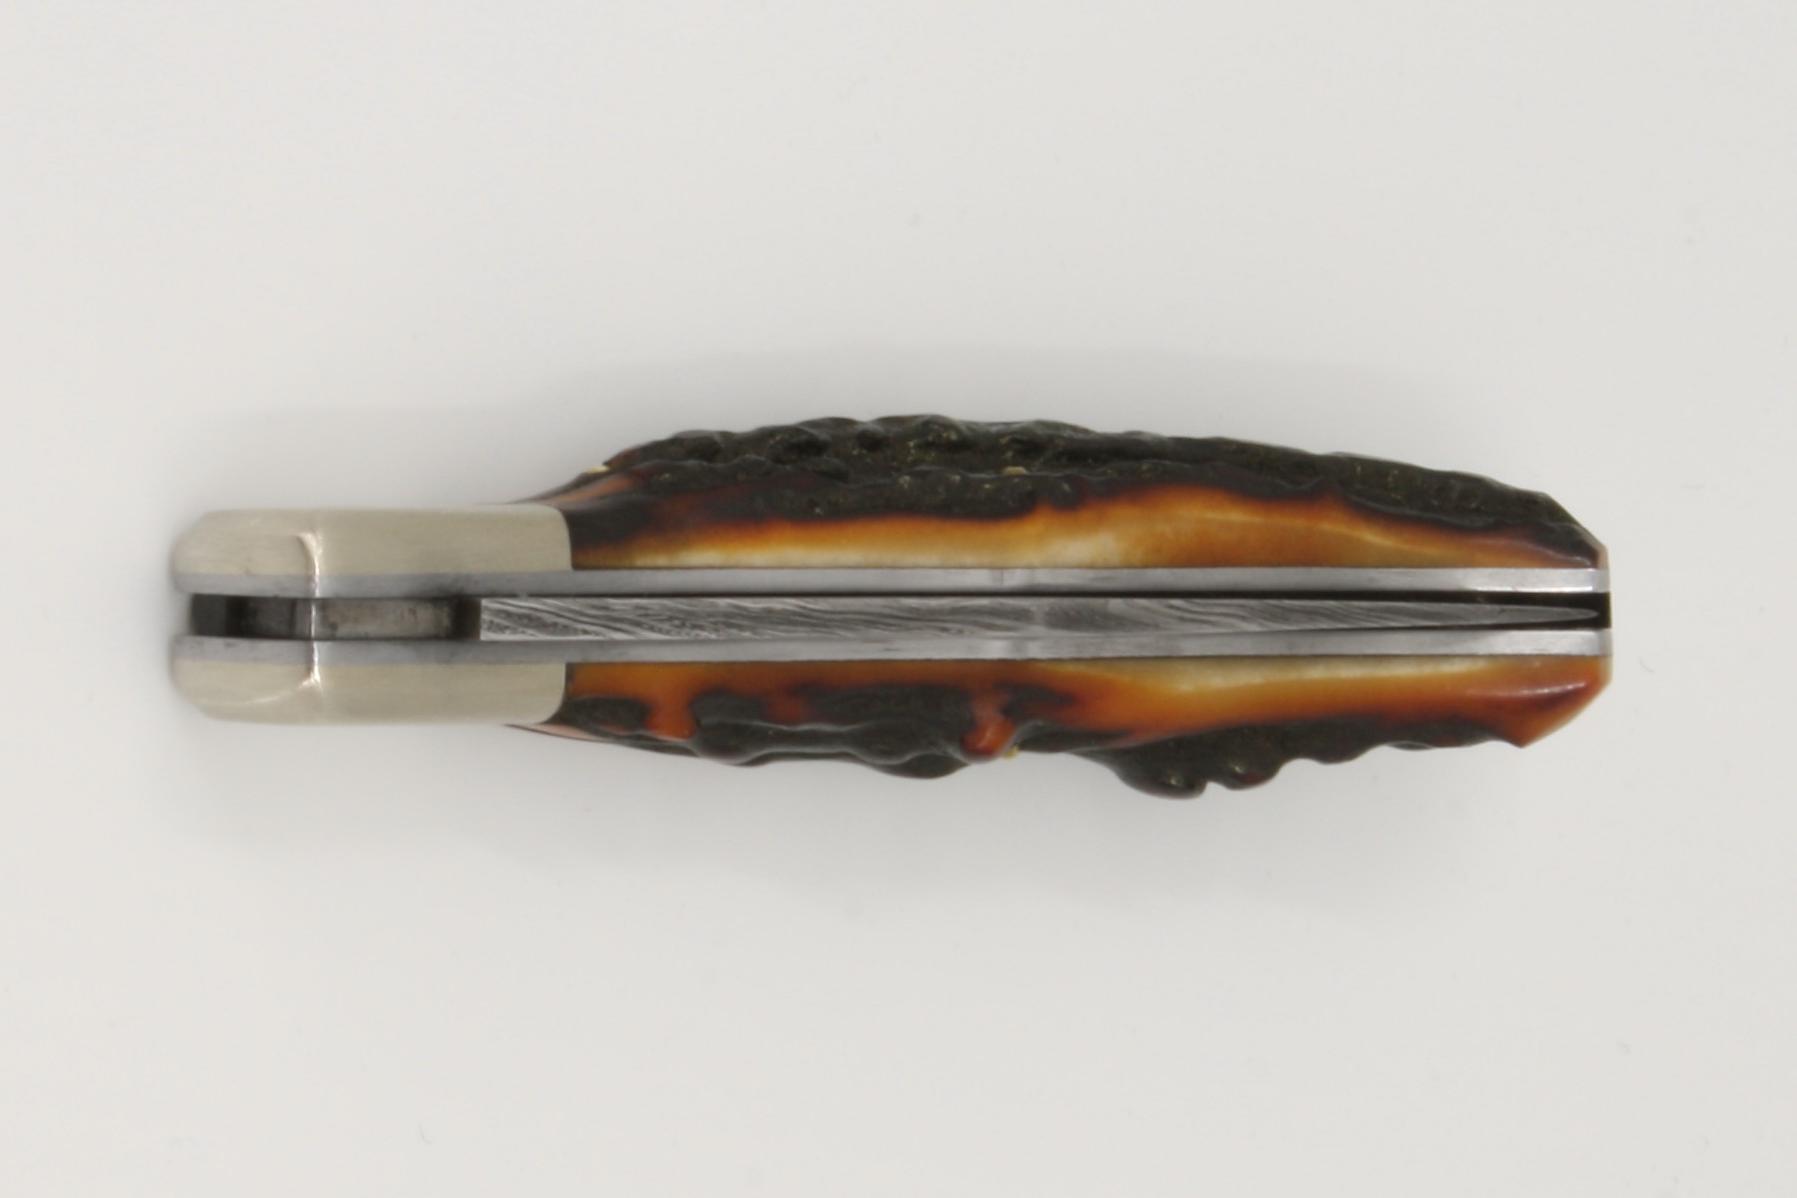
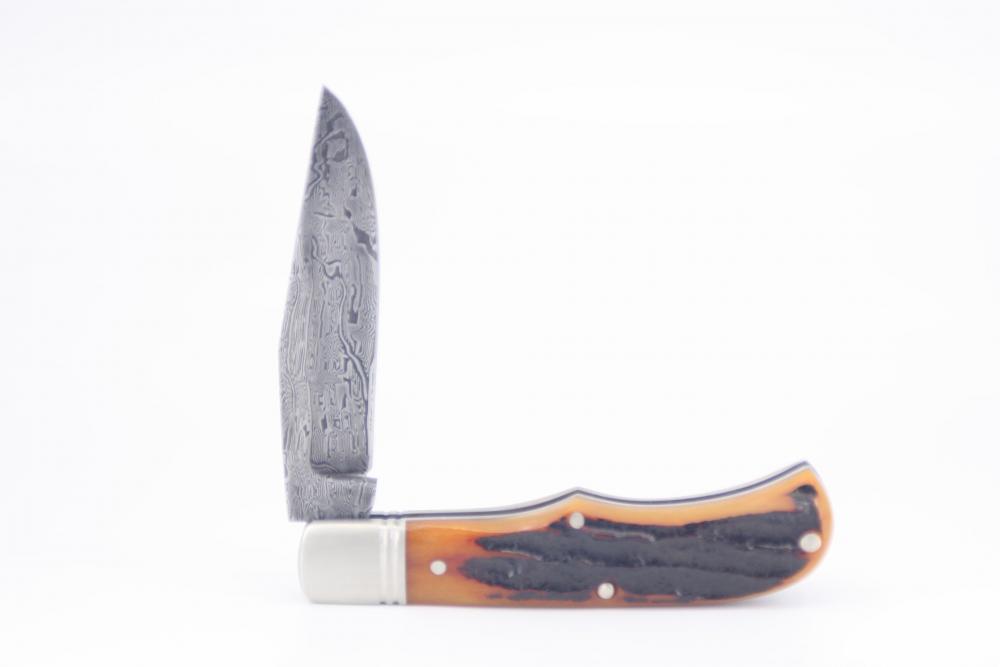
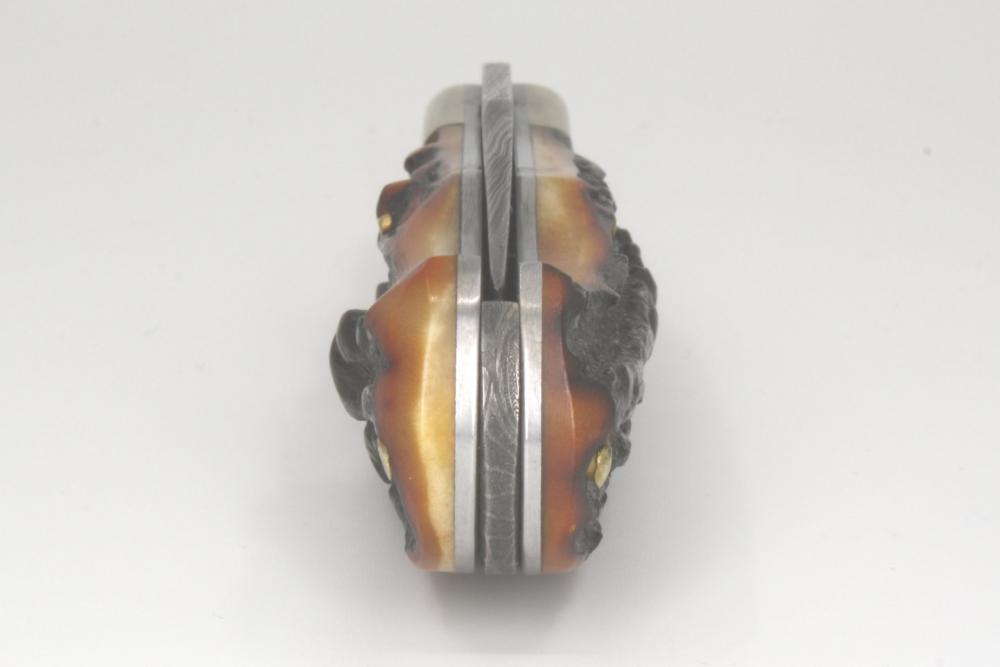
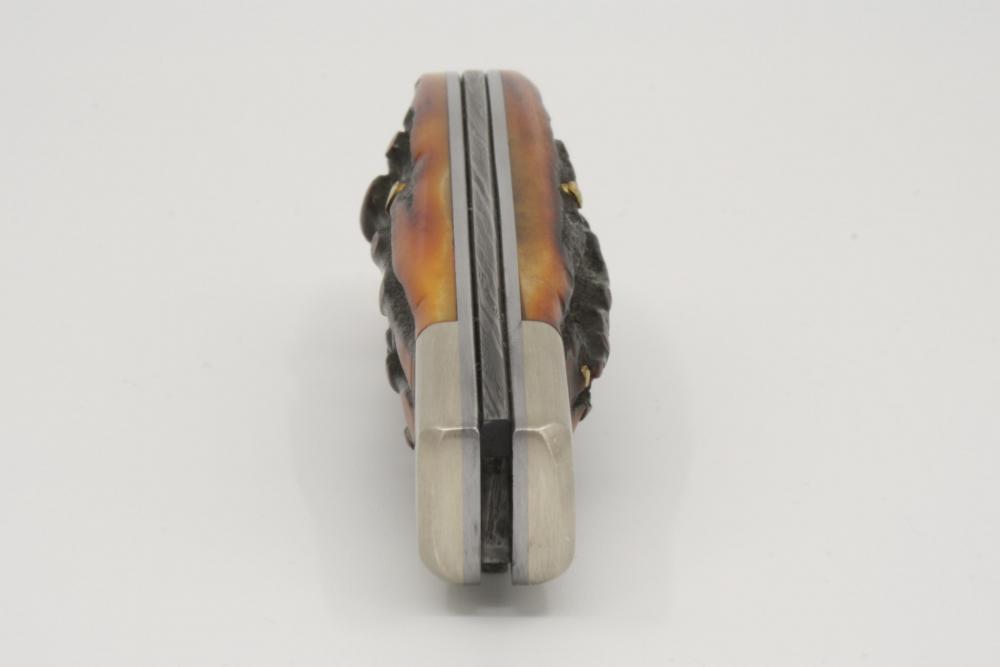
I finally went ahead and sketched up my own slip-joint design. I like the old Fiddle-back or Coke Bottle style knives, so that is the aesthetic I was after. This is the prototype, and mechanically, the action turned out pretty good. I might go for a few thousandths more spring preload in the next one, but not enough to really change the design of the parts. I'm going to reduce the diameter of the pins and move them in a bit on the next one. These are 3/32" pins, and look a bit too large after being peened. I might try 1/16" pins on the next attempt. The blade is 2.5" overall and a two bar twist of crushed W's in 1095 and 15N20. The scales are jigged bone with nickel silver bolsters and mild steel liners. I made this one just to prove out the design, but it turned out well enough I'll let it out into the wild.


.thumb.jpg.27f6fb30bbfa4e49ea71be982e5947ed.jpg)
-
They guys aren't kidding about the beryllium copper thing. I forget the actual number but it's something like 30% of people are sensitive enough that a low level of exposure to inhaling the dust is fatal.
-
Bluing v Forced Patina - Kitchen Knife
rhitee93 replied to jameson1881's topic in Finish and Polish for Knives
Carbon steel blades will oxidize over time with any practical level of care. The idea is to get them to oxidize with forms of iron oxide other than red rust as they are less problematic, and tend to extend the time it takes for red rust to form. Many of them happen to look pleasing as well which is a bonus. To my knowledge, there is no concern with bluing and food safety as long as the blade is cleaned of all the bluing chemicals after it is done. Hot bluing requires a pretty significant commitment to do in the home shop. Some do have setups, but unless you plan to do a lot of it, you'll probably find the hazards and expense are not worth it. There may be a gunsmith reasonably close by who can hot blue your parts. -
This is one of the reasons I like to make kitchen knives. You can make an artistic piece like this, (ok, mine aren't that nice), and people will actually use it every day. If I make a hunting knife with a similar level of artistic flair, people tend to stick it in a desk drawer. All of the knives I use at home are ones I made, and all pattern welded. It is my test bed. Daily use with good care brings on a patina that I think helps the pattern. On the other hand, nobody else in my family gets to use the better ones because they do things like leave them in the sink and run them through the dishwasher. I have made a couple of san-mai beaters as an acid test that the rest of the family use every day. They look like crap now, but do still work well.
-
I agree that I won't be coming up with anything novel or new in terms of shape. I just want to get away from blatantly using someone else's pattern, even if it was published in a "How to" book. I'm kind of leaning towards a Coke-bottle profile for the next one. Yep, slip-joint is a catch-all for for most forms of non-locking knives with a back spring. THink old-school Case knives, swiss army knives, barlow, etc...
-
Thanks guys. I've made 5 of these in the last few months. Each one is a little more refined than the last, but there are still plenty of warts to deal with. Another dozen or two and I might be happy Other than the overall scale and handle material, I haven't changed the esthetic design at all. I've been focusing on tweaking the design of the pivot pin and bushing to get a nice "Snappy" action while still getting a good enough peen on the pivot that the pins disappear. I'm feeling pretty good about where I am at with all of that for now, so I hope to move on to my own design next. I really like the look of Culver's design, but feel after 5 knives I am wearing out my welcome and need to move on to my own.
-
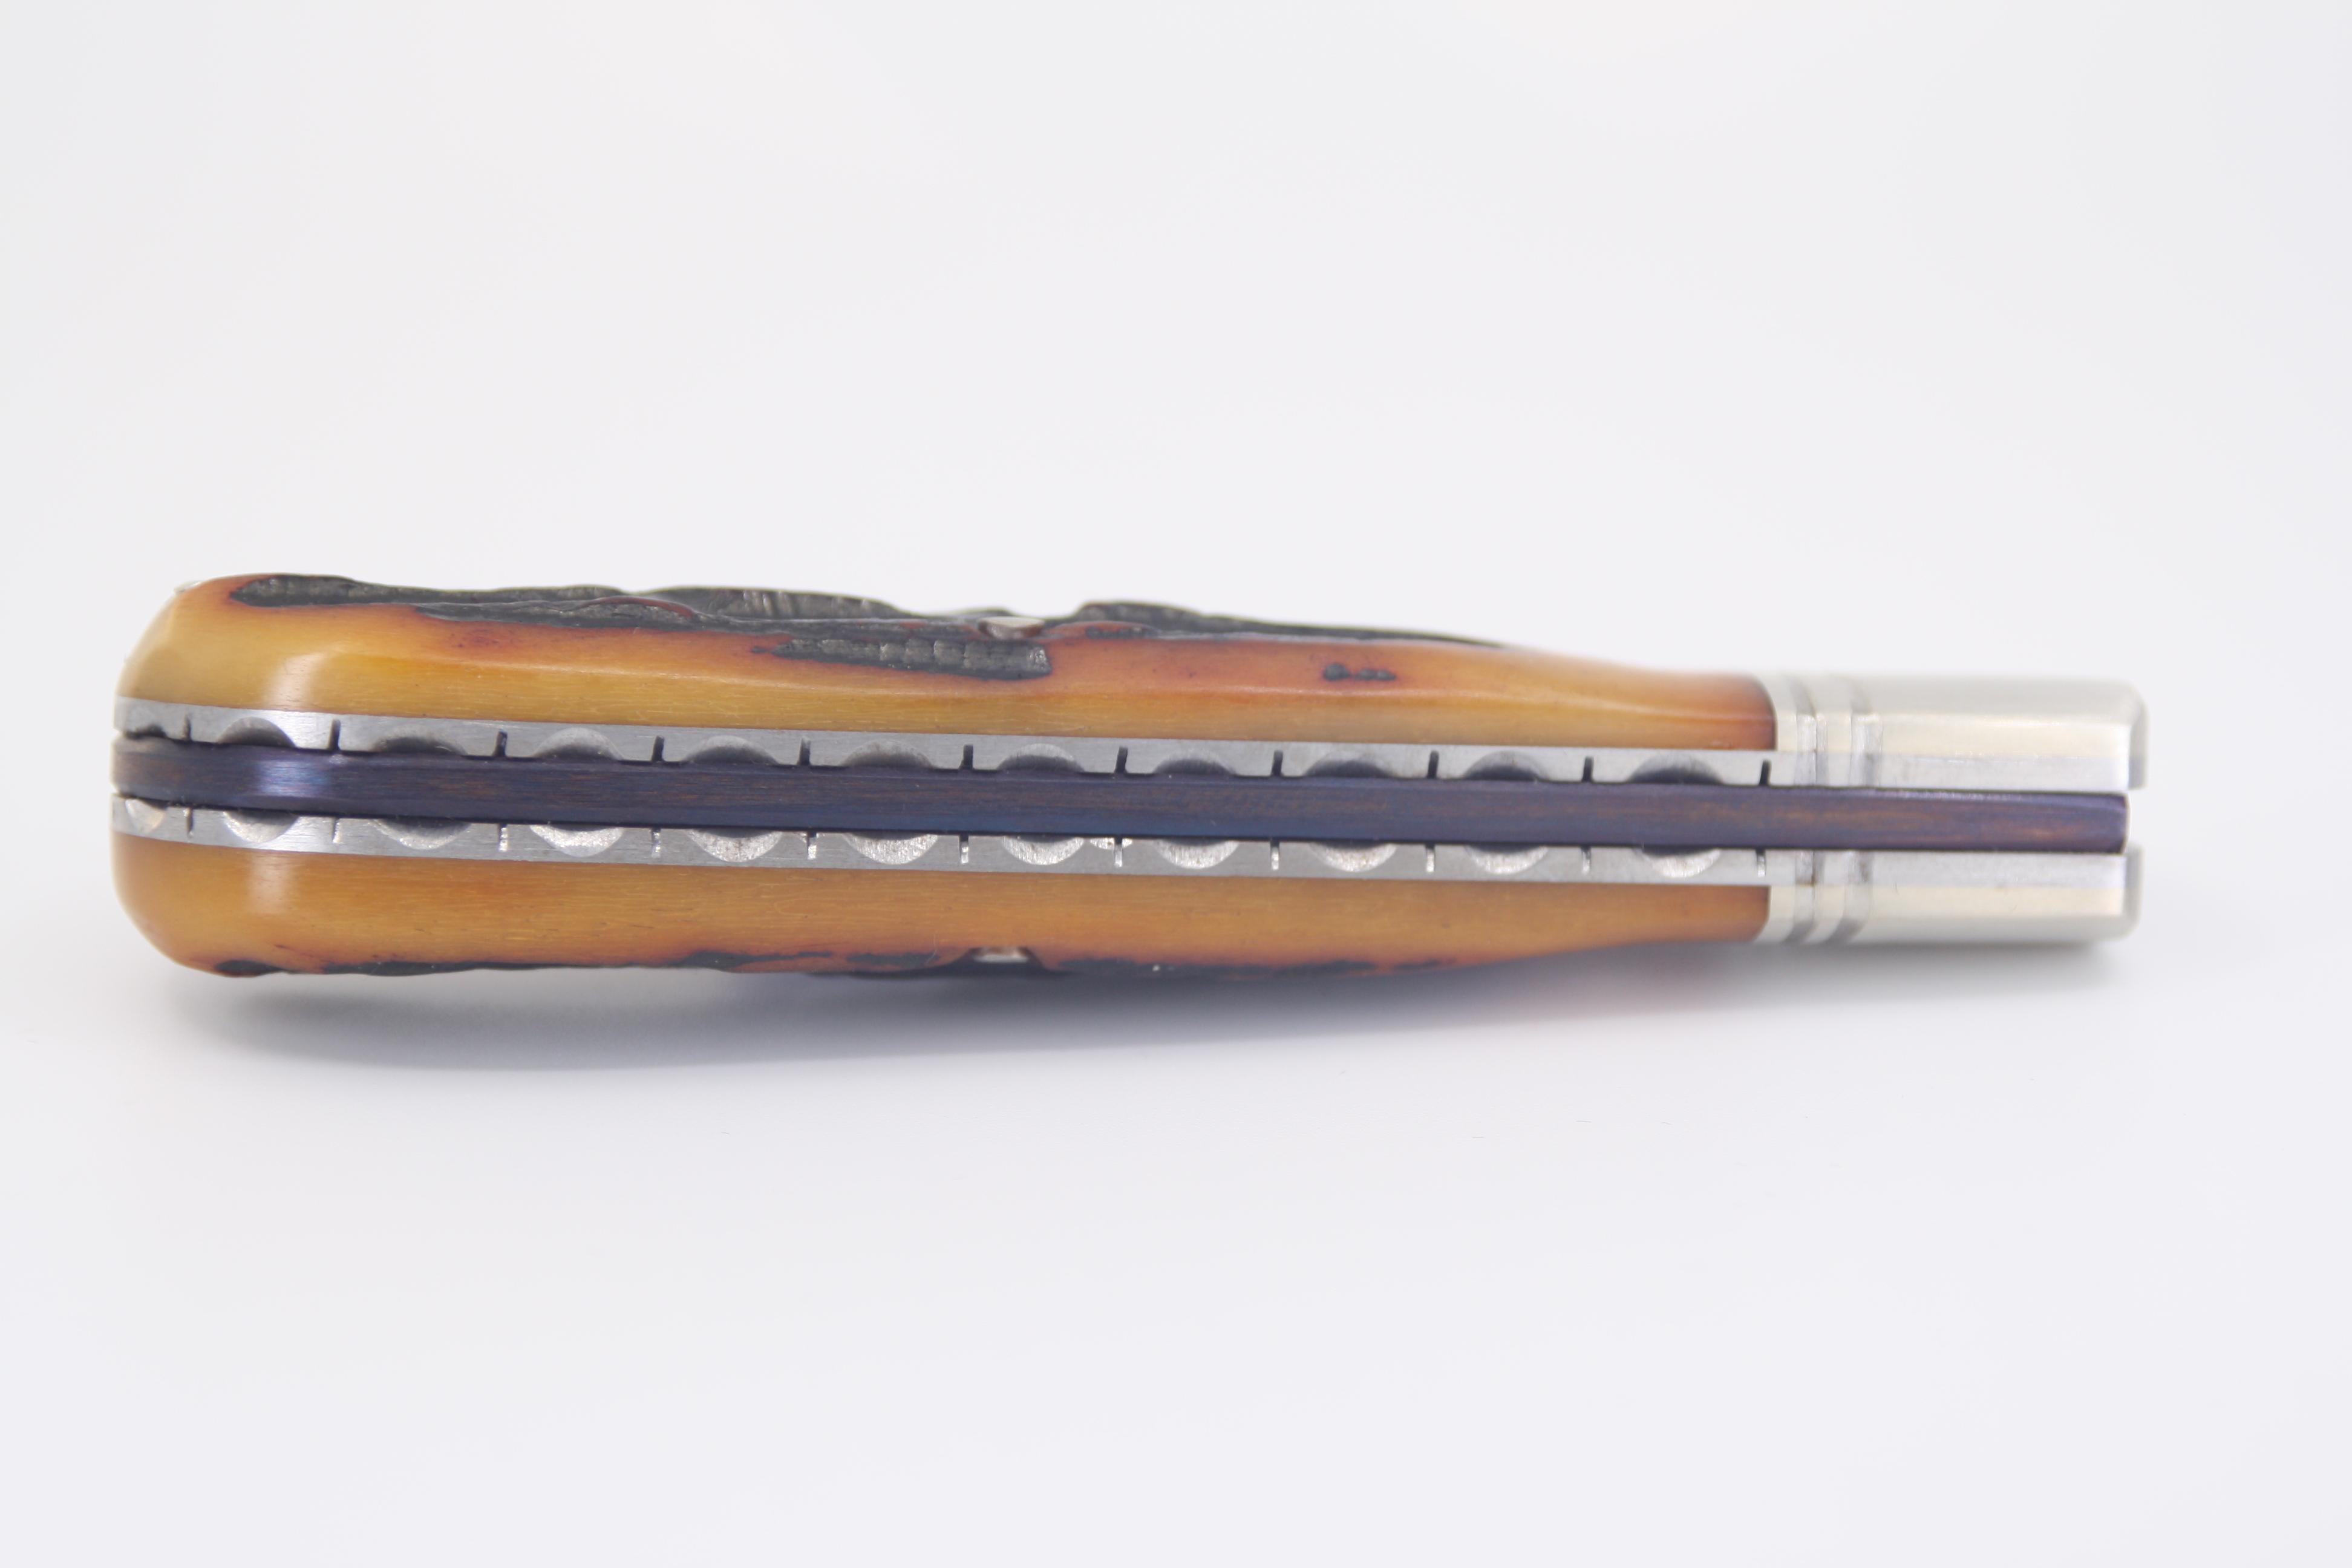
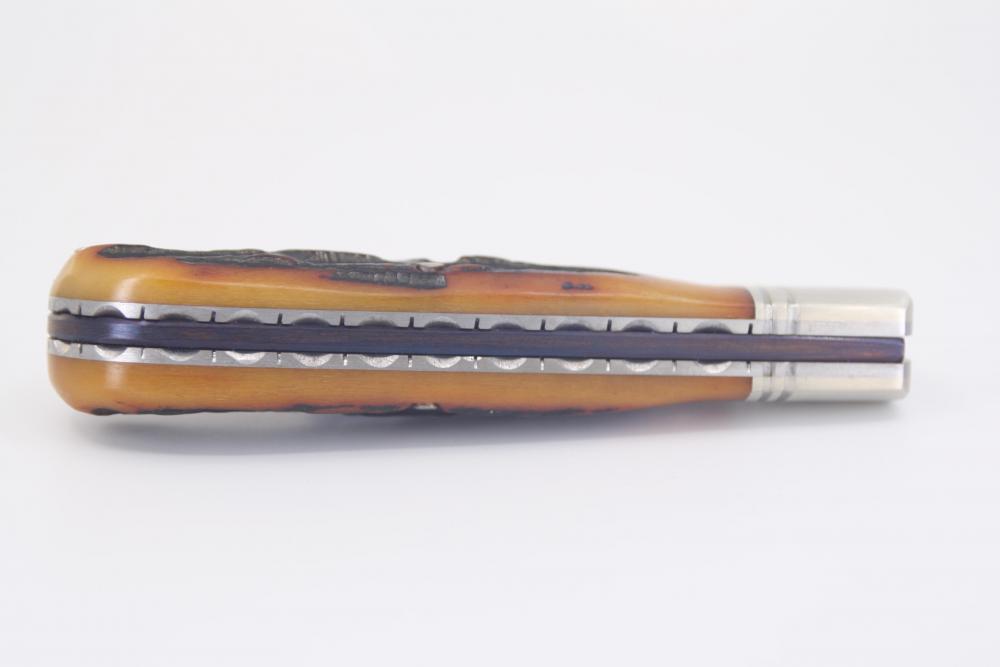
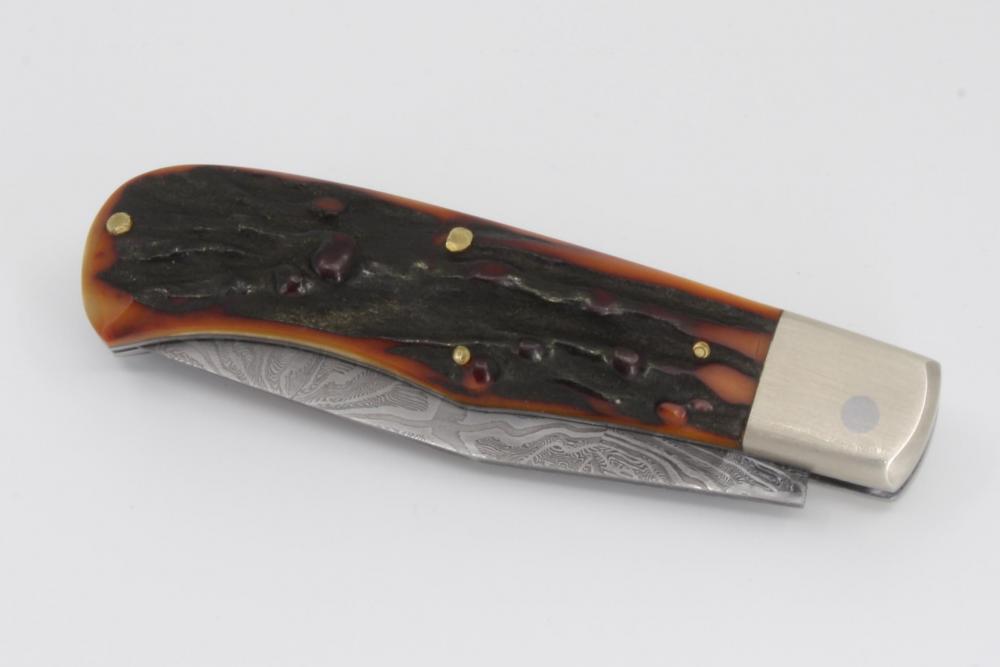
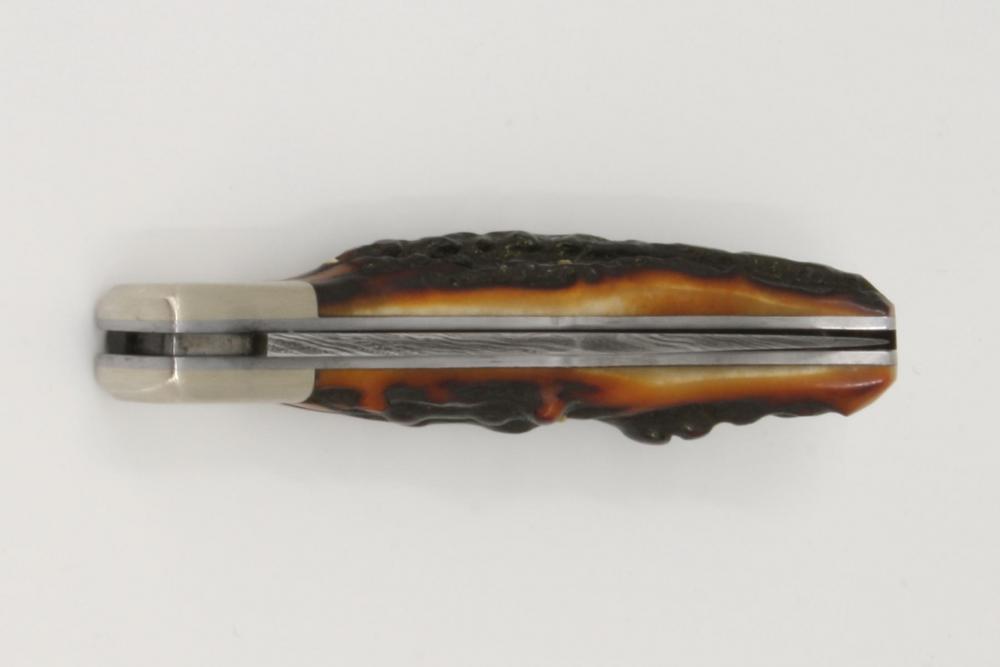
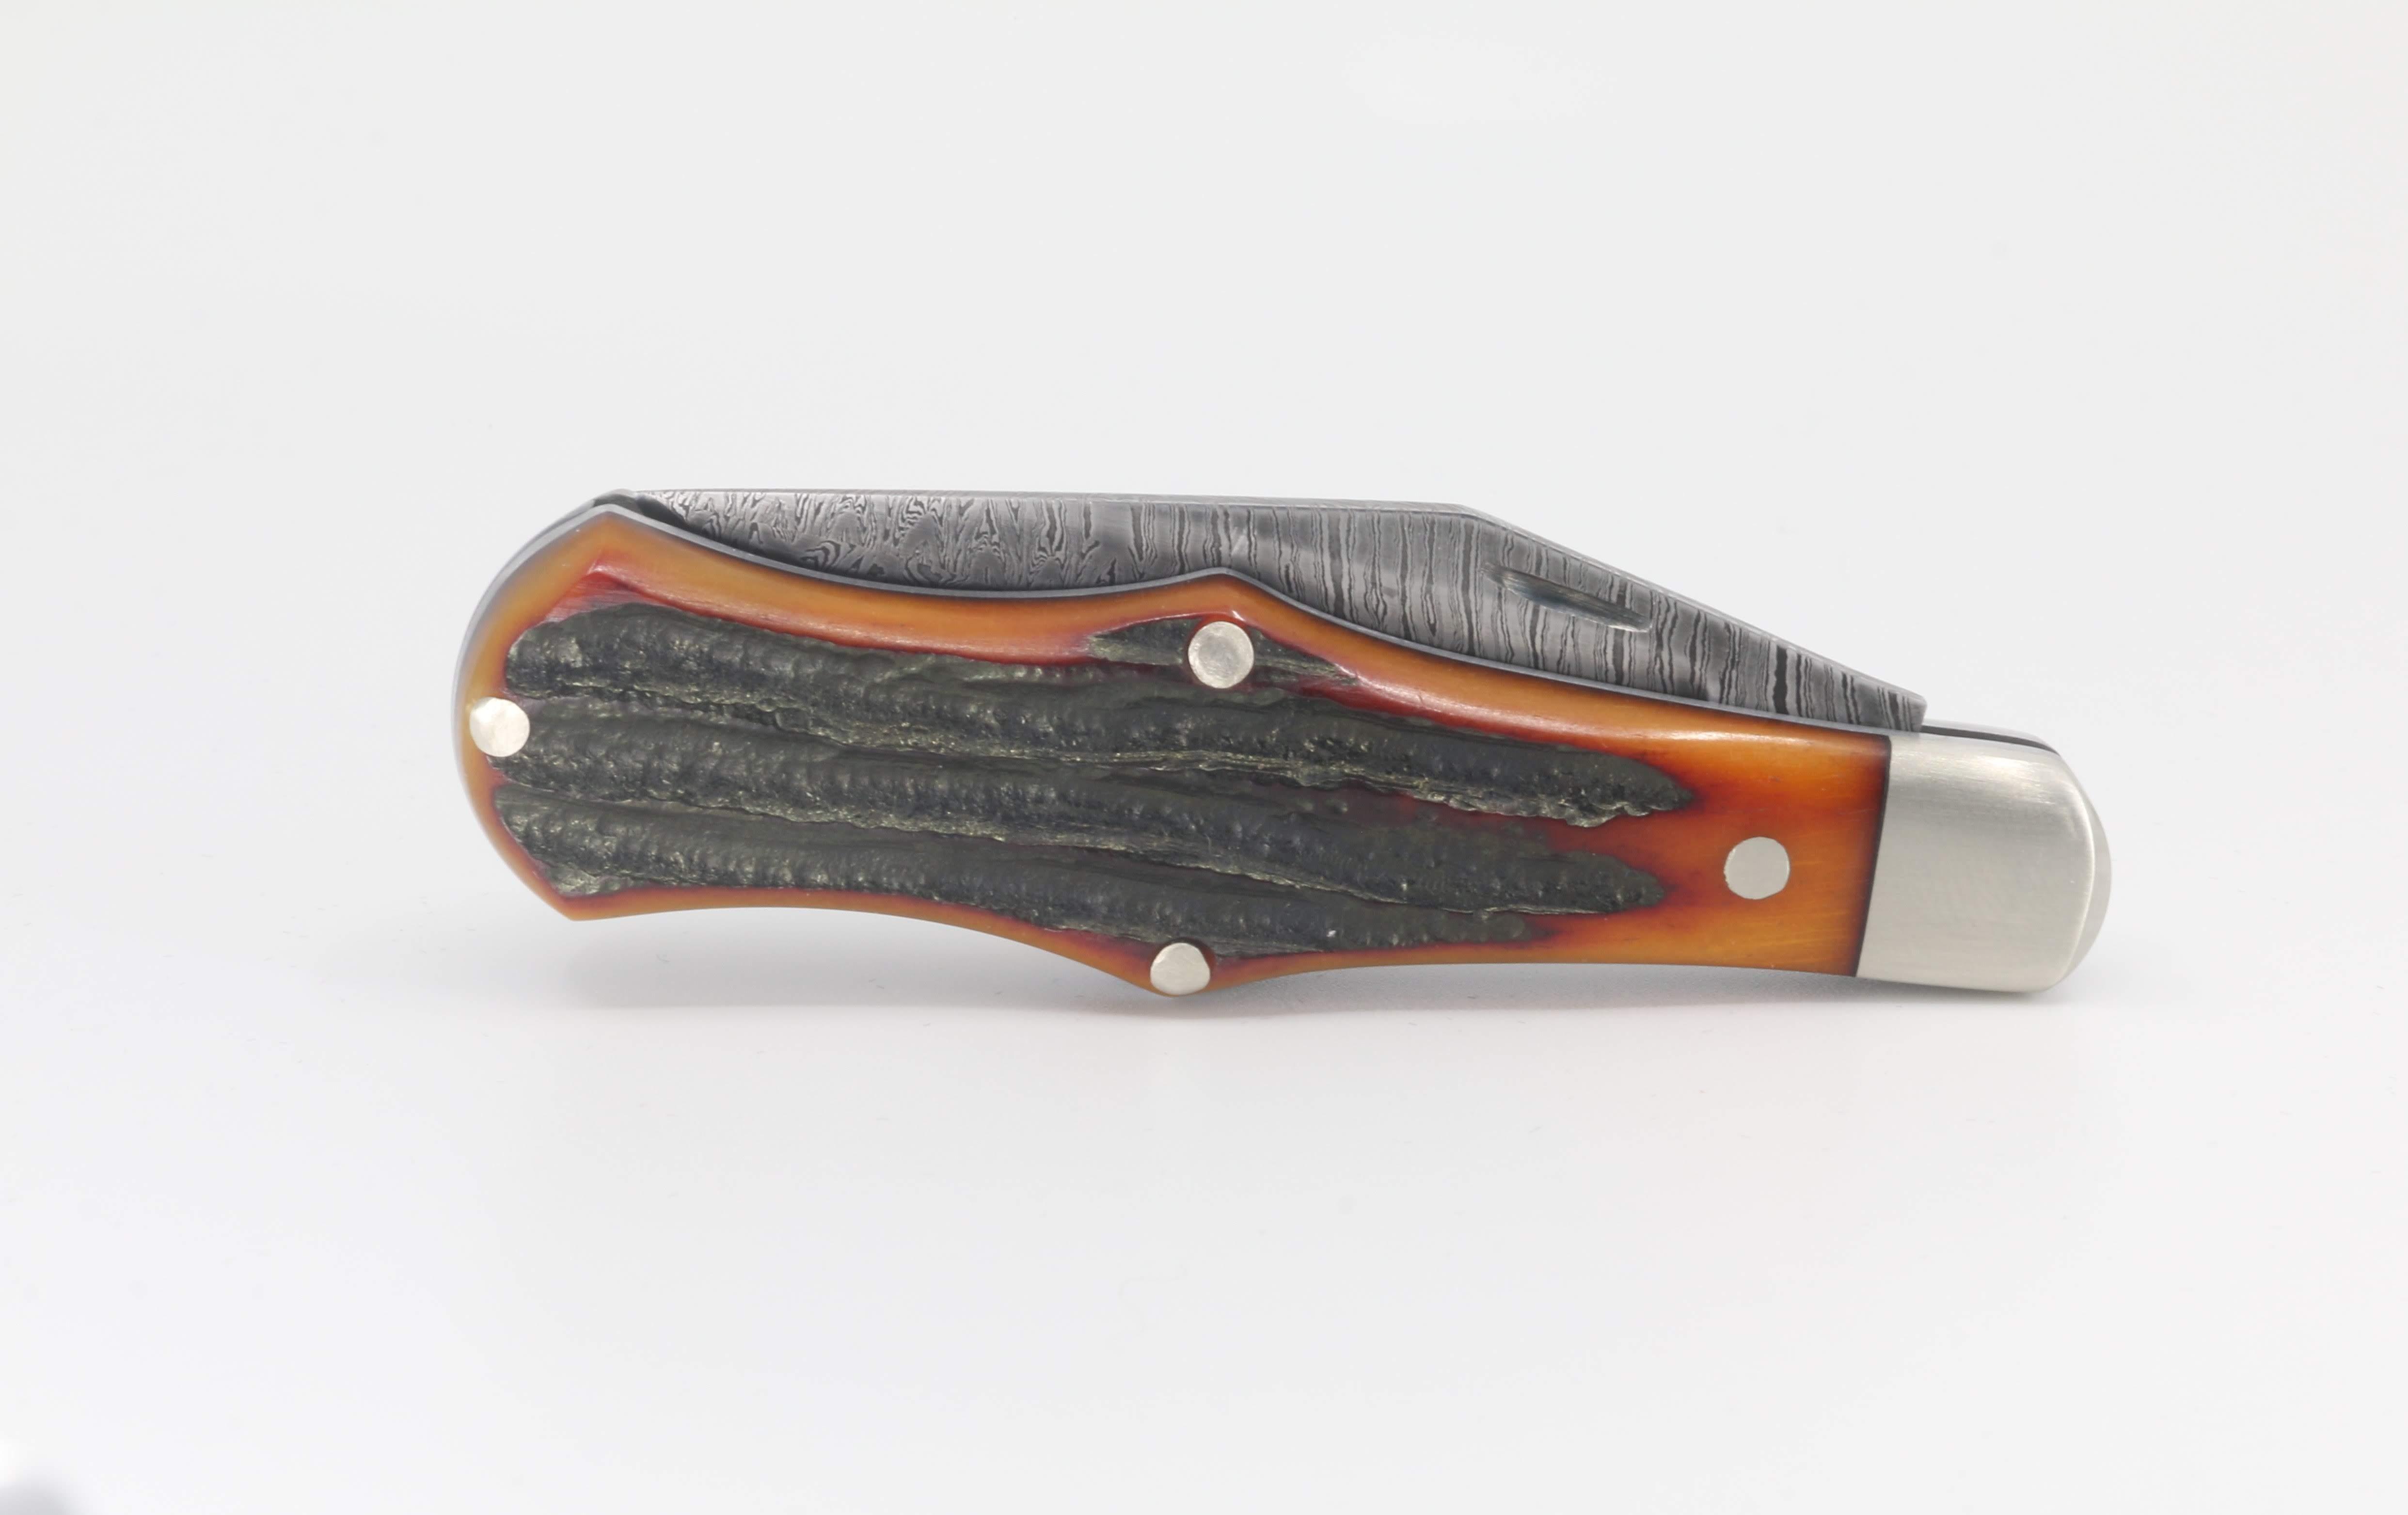
I've been having fun learning how to make these. I'm still pretty much using the design the Culver published in his book, but have been tweaking mechanical bits to get the action to where I want it. This is the 5th attempt, and just about right. The blade is a mix of 1095 and 15N20. The bolsters and pins are nickle silver. This one has a pivot busing made from A2, and the scales are jigged bone. The spring is 1075.

-
Nice! I love the dear head feature on the butt. I assume that required some time with a jeweler's saw?
-
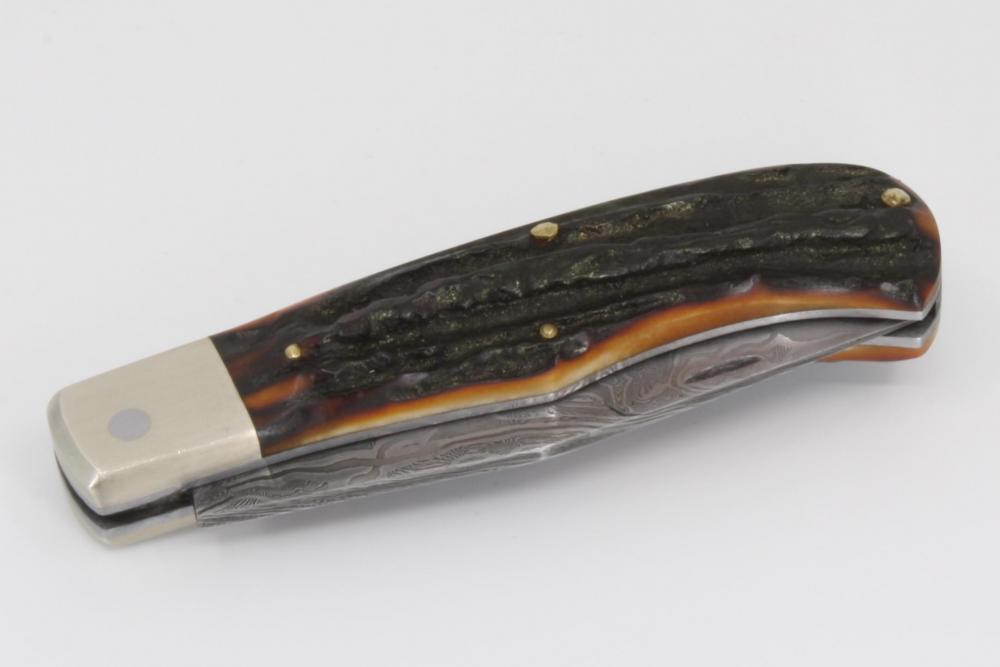
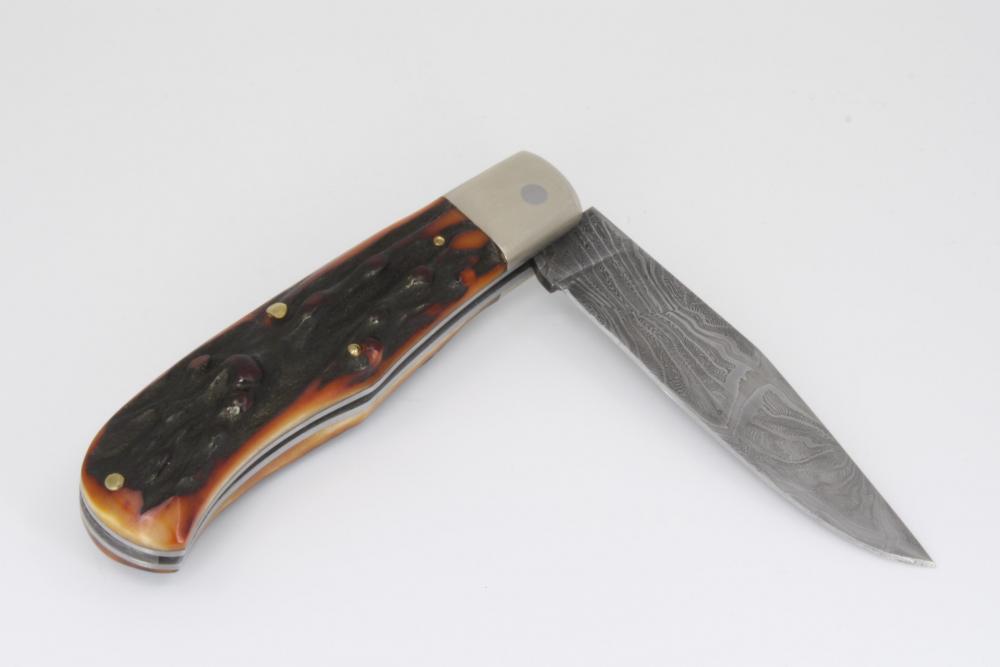
I thought I would share my first attempt at a slip-joint. This is pretty much copied from Steve Culver's plans in his book, and was a pretty educational process. Made a few goofs, but this won't be the last one of these I make The blade and spring are made from a remnant of a mosaic bar I made from 1095 and 15N20. The liners are mild steel, the scales are dyed stag, and the bolsters are nickel silver.


-
EDM stones were all the rage a few years ago, but people seem to have drifted back to Rhynowet paper. I still use them sometimes when I am working hard to preserve a crisp corner, or trying to polish some strange crevice that is too awkward for paper. However, I find the abrasive paper to be faster than anything I have tried. Nobody likes hand finishing, but it is what separates the rest from the best.
-
Nice pattern
-
Ya did good.
-
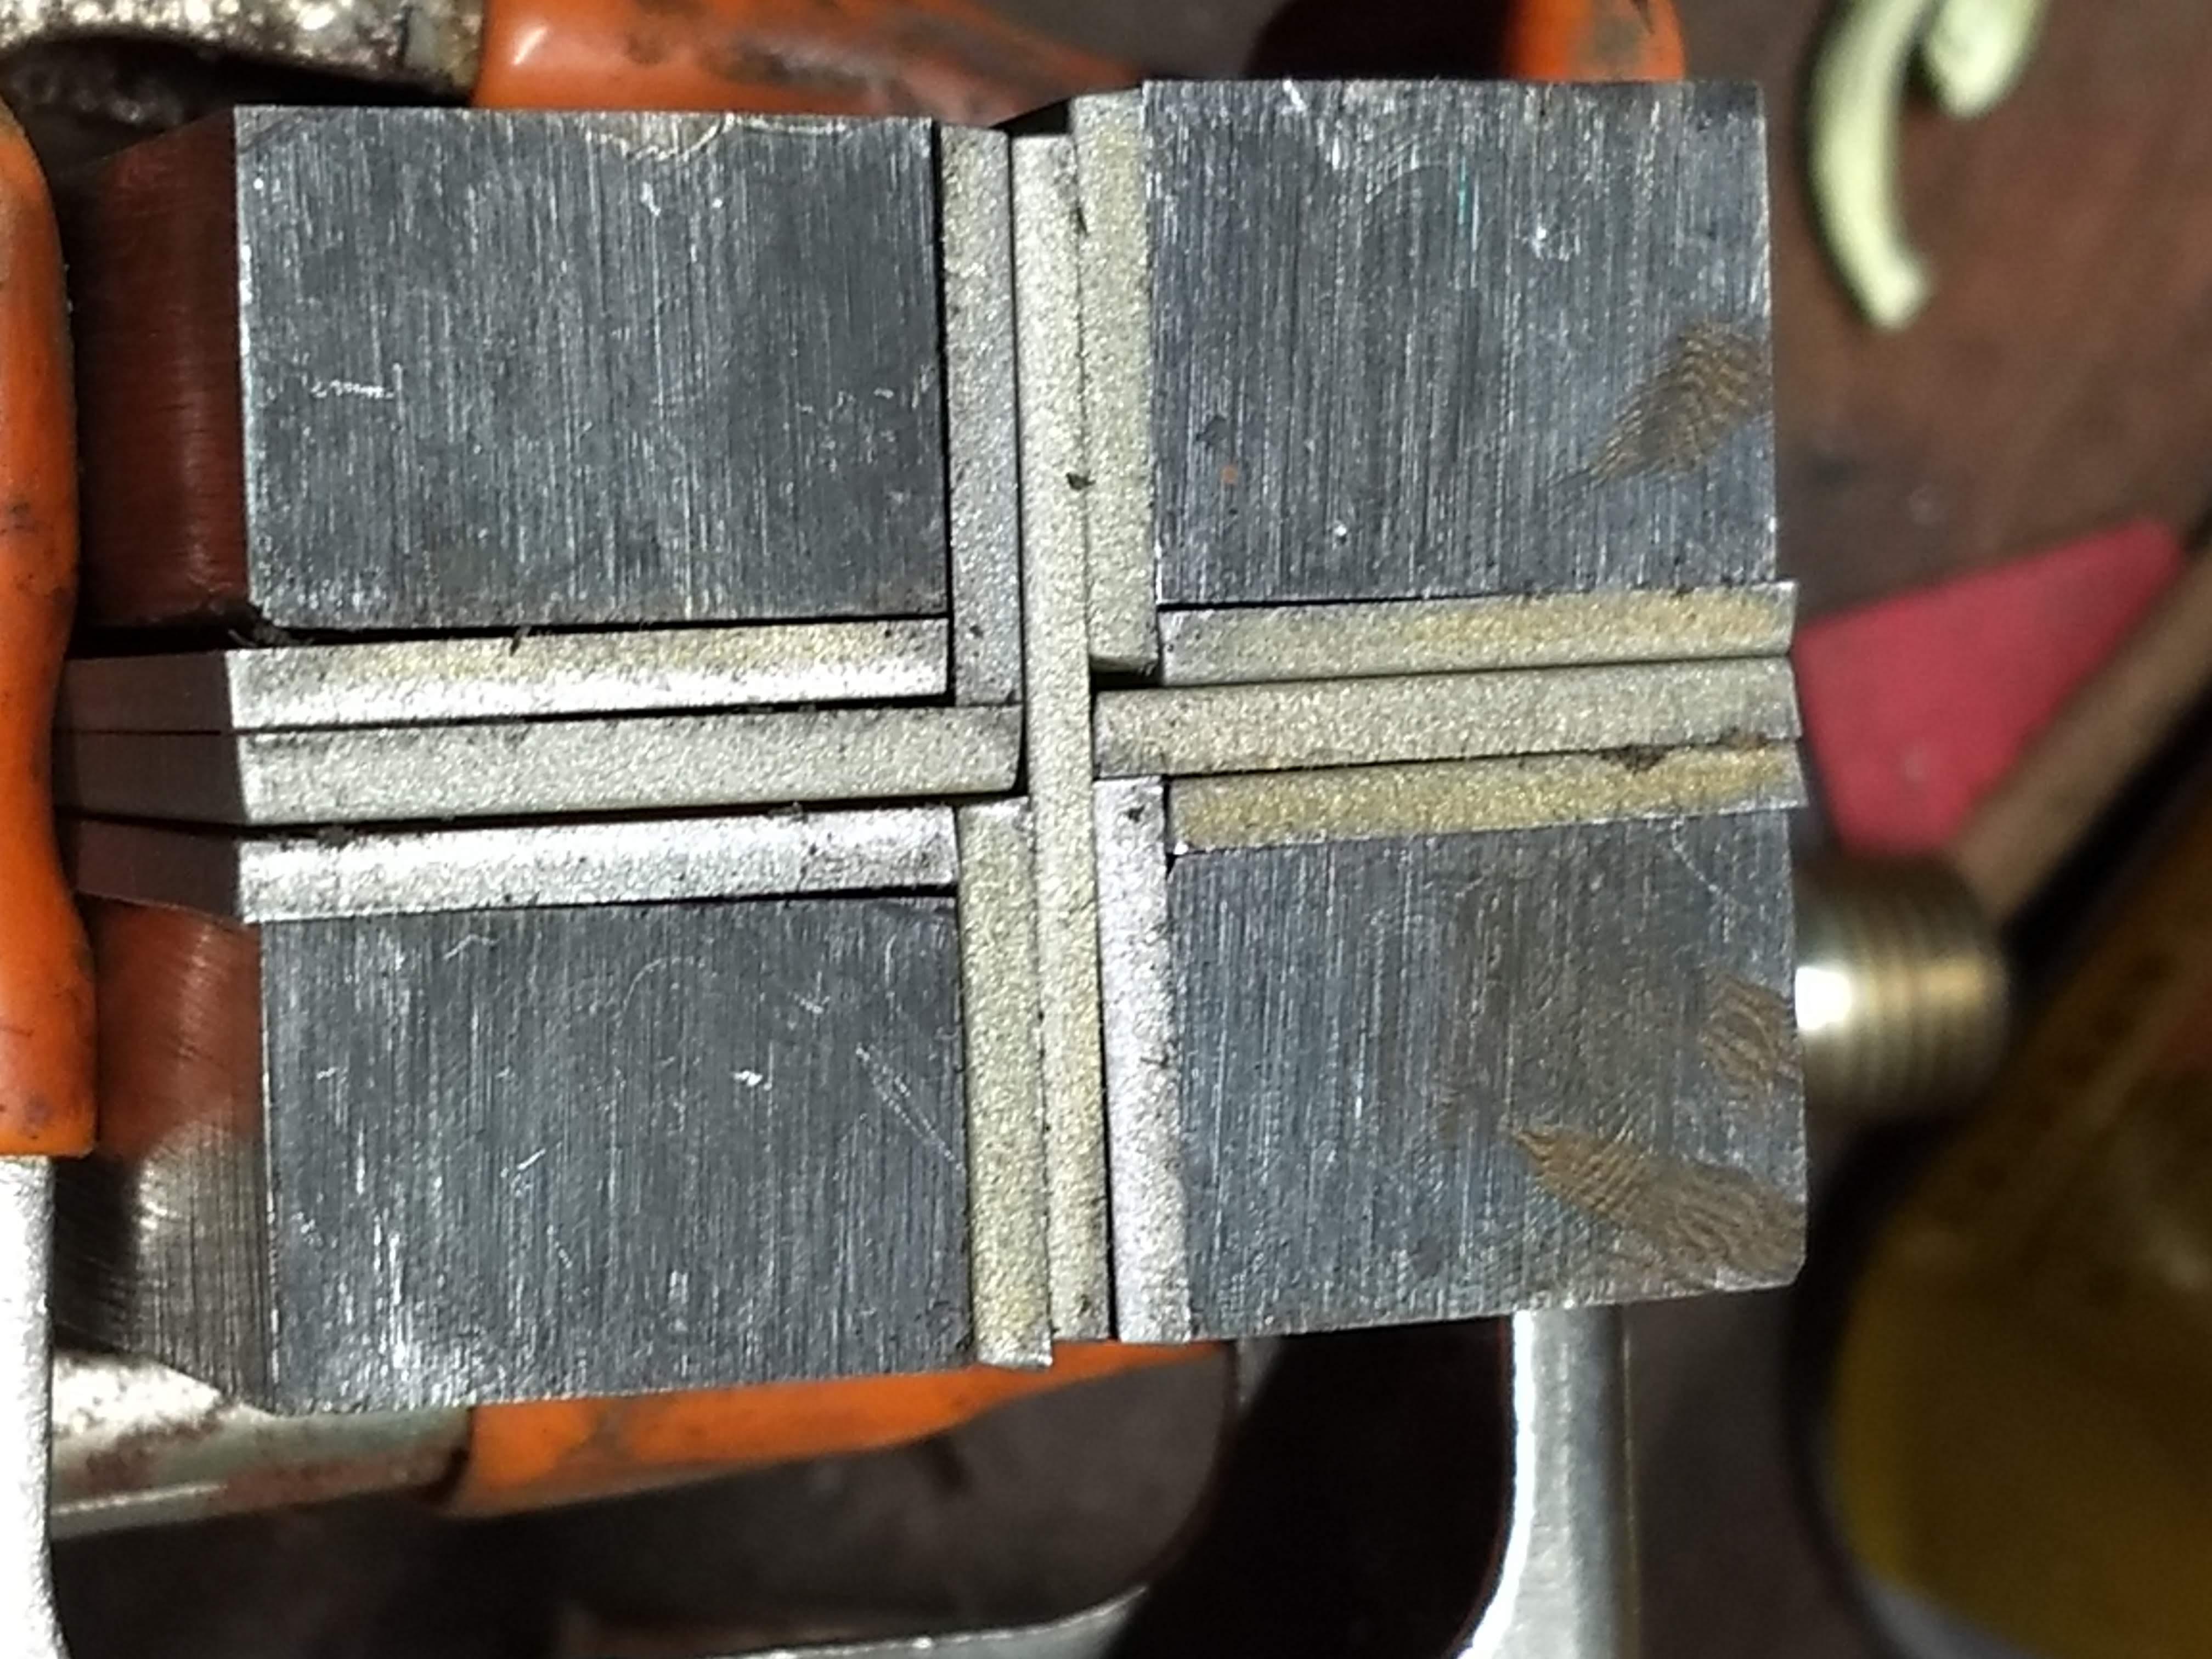
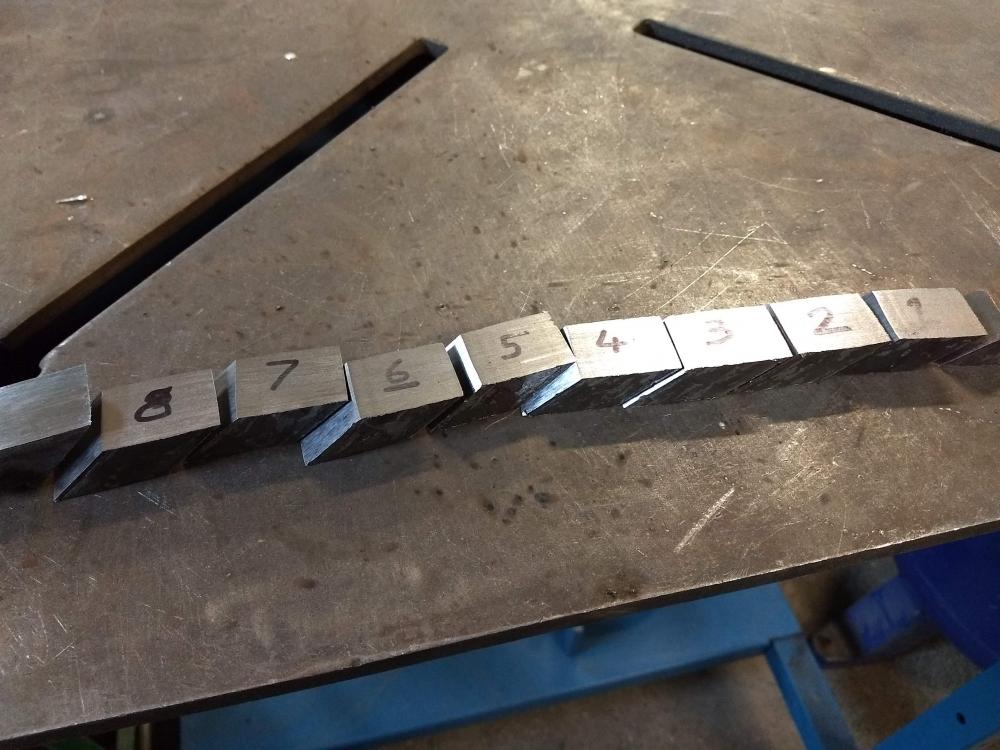
It's a mosaic, so layer count sort of loses meaning. The initial bar was 45 layered before being crushed to make the W's. That bar was quartered and restacked with some additional 15N20 between each piece. The resulting bar was quartered and 4-way welded with several additional pieces of 1095 and 15N20. This last addition of steel creates the bold "X" shape you can see. This bar was then quartered and 4-way welded again. All of this creates the pattern I was after on the end grain of the bar. The final bar was cut into 3/4" thick tiles that were welded on edge (Commonly called a Ferry flip) to create a bar that I could forge the blade from. OK, that was a horrible explanation. Here is a pic of the first 4-way weld. It might help make it a little more clear. Here is another of the tile cuts:

-
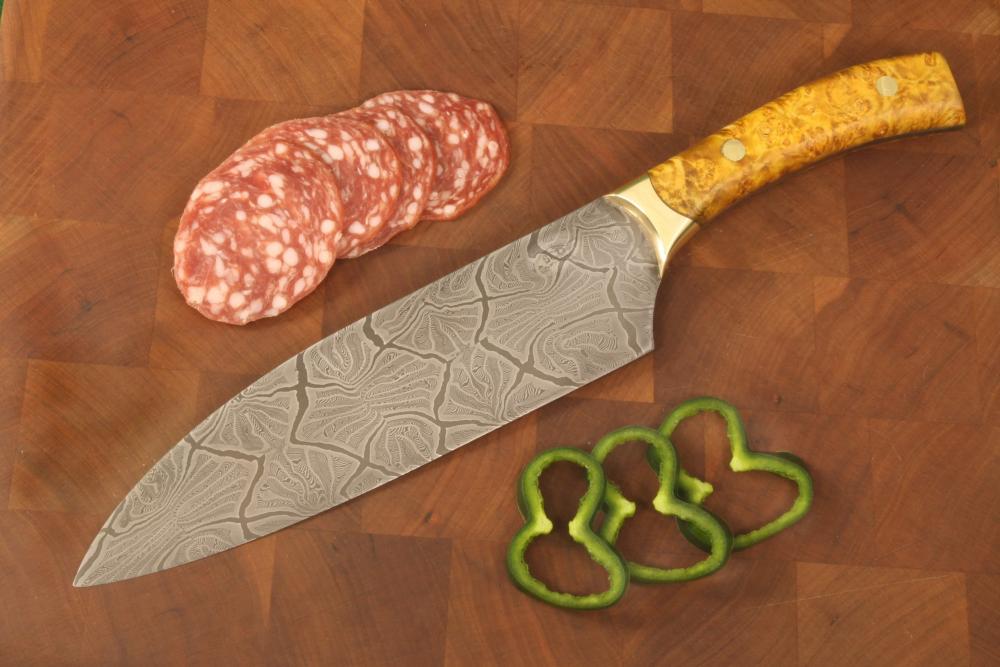
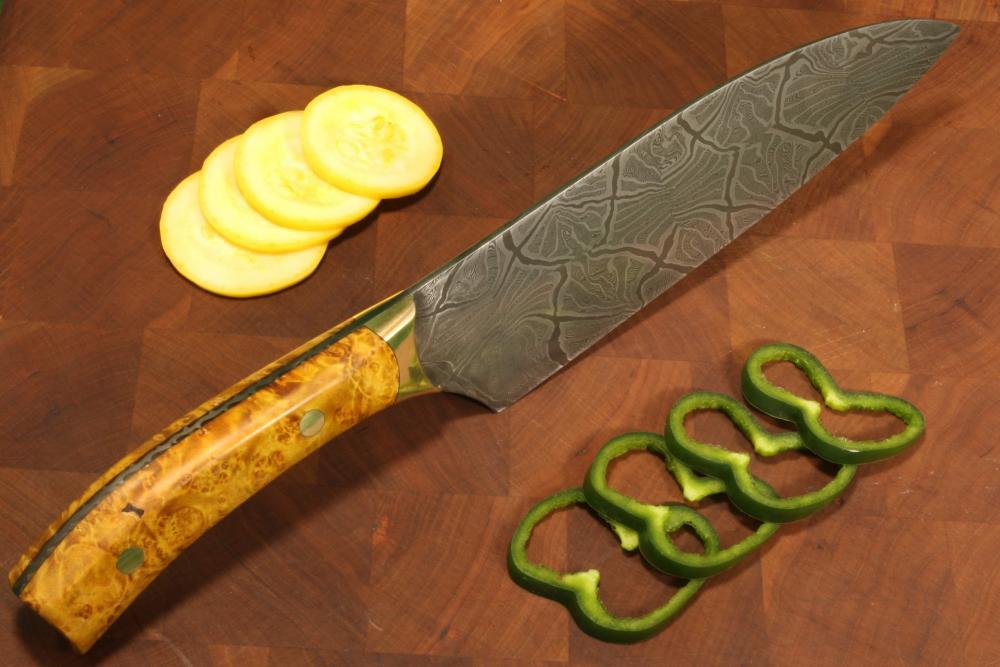
Thanks guys. I got some final pics taken this weekend, and then got it sharpened. It works pretty well for chopping up veg.


.jpg.2c558e79eebde9d9a17c17df55ae8150.jpg)