Avadon
-
Posts
986 -
Joined
-
Last visited
Content Type
Profiles
Forums
Articles
Gallery
Downloads
Events
Everything posted by Avadon
-

Casting vs Fabrication - Small Tank Tracks
Avadon replied to Avadon's topic in Smelting, Melting, Foundry, and Casting
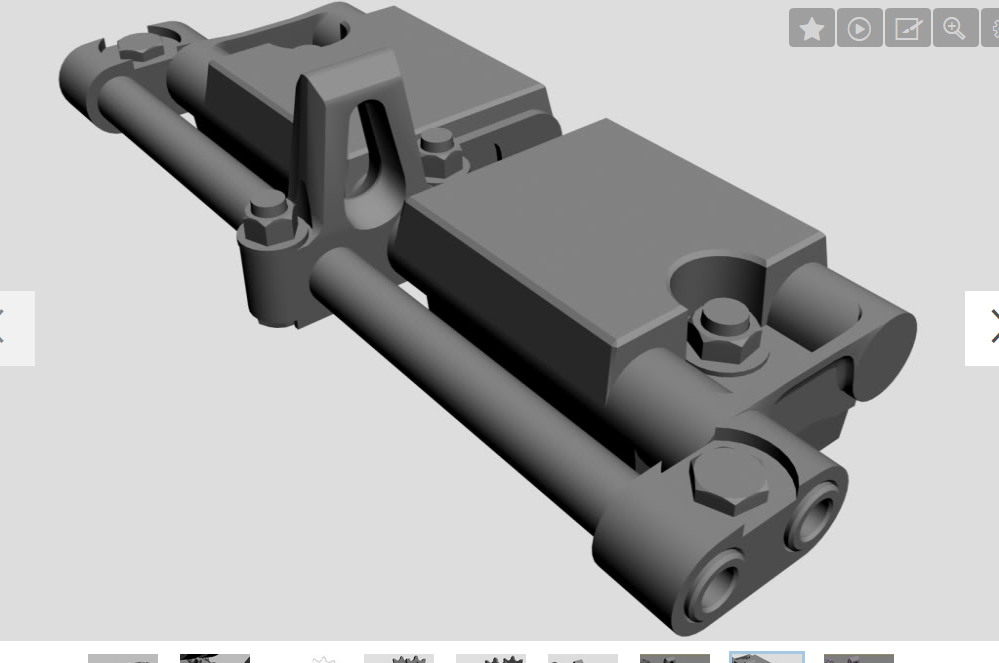
I think if the castings needs machining then I should just have them all machined. In the last picture: I can make the pins, I already have the outer links, and I can even make the inner horns. What I can't easily make is the track pads. They are ~2.5" x 1.25" and they have holes in their lengths to accept the pins and obviously I need a ton of them which is why I was wondering what the best way to do this would be. -
Cutting retaining rings / snap rings for roller chain
Avadon replied to Avadon's topic in Welding/Fab General Discussion
Thank you for the reply that really helped clear up a few things. and ps I did look at a tracked dumpster. It's not a bad piece of machinery. lol -
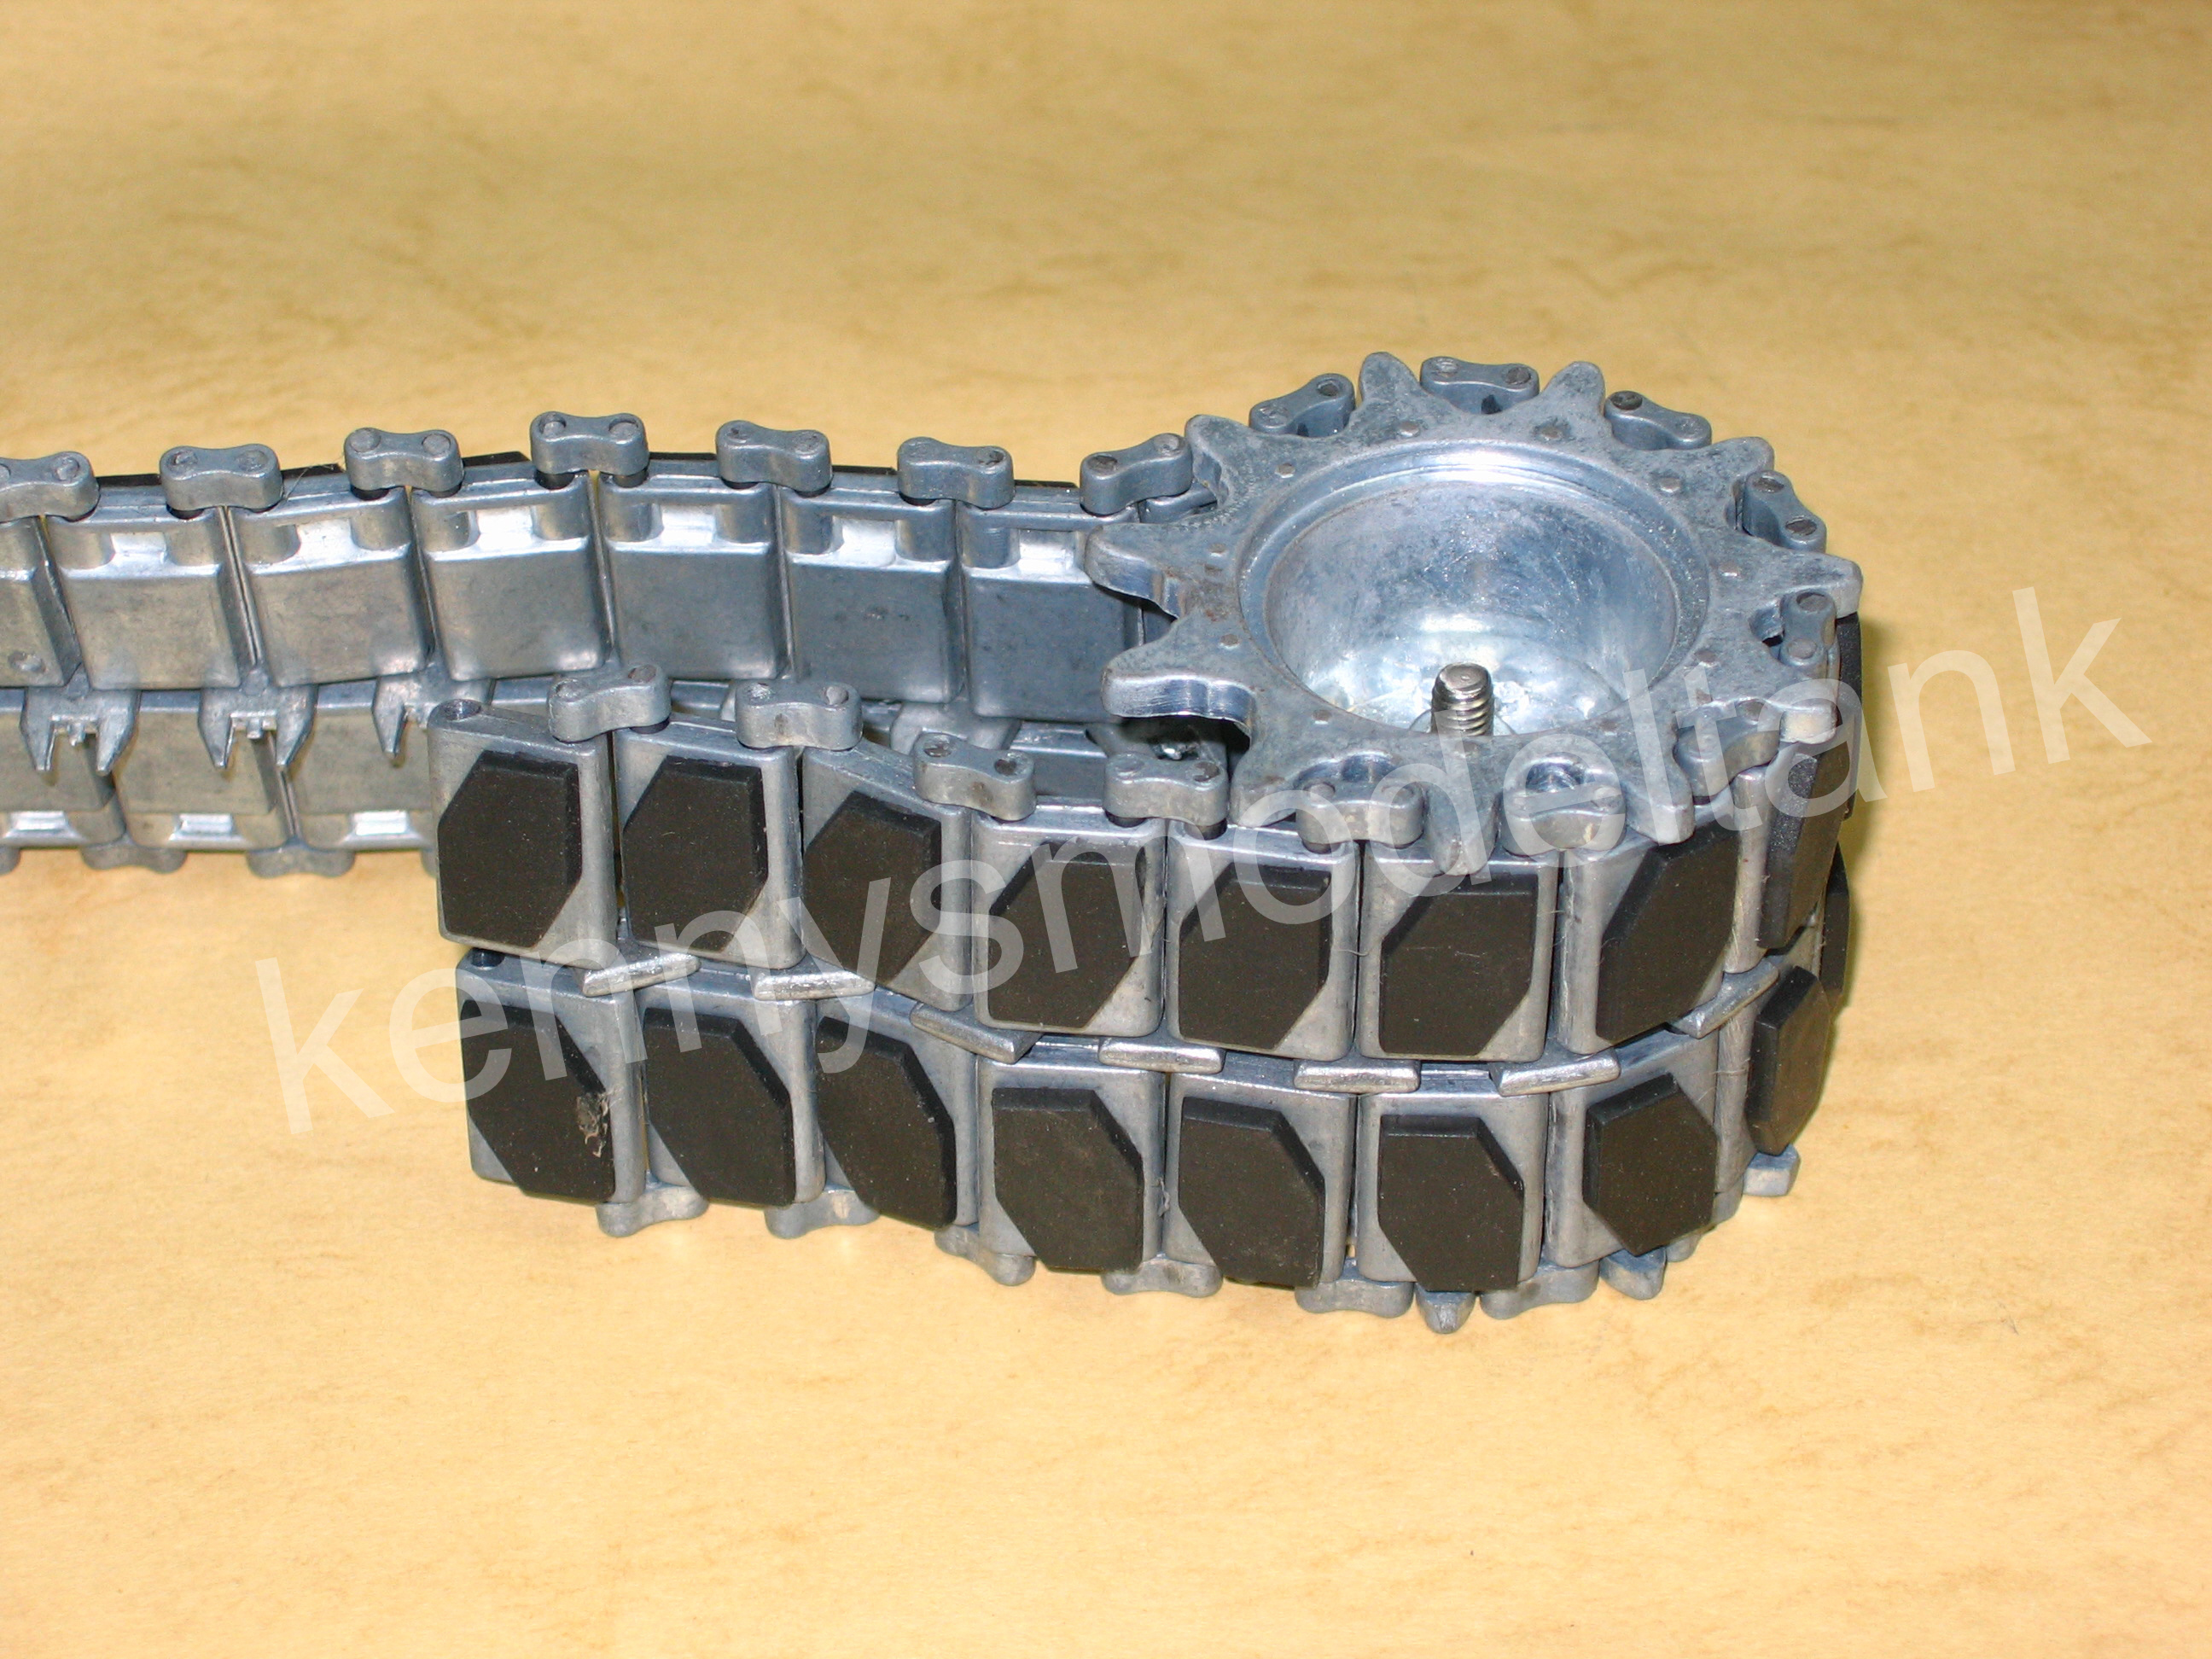
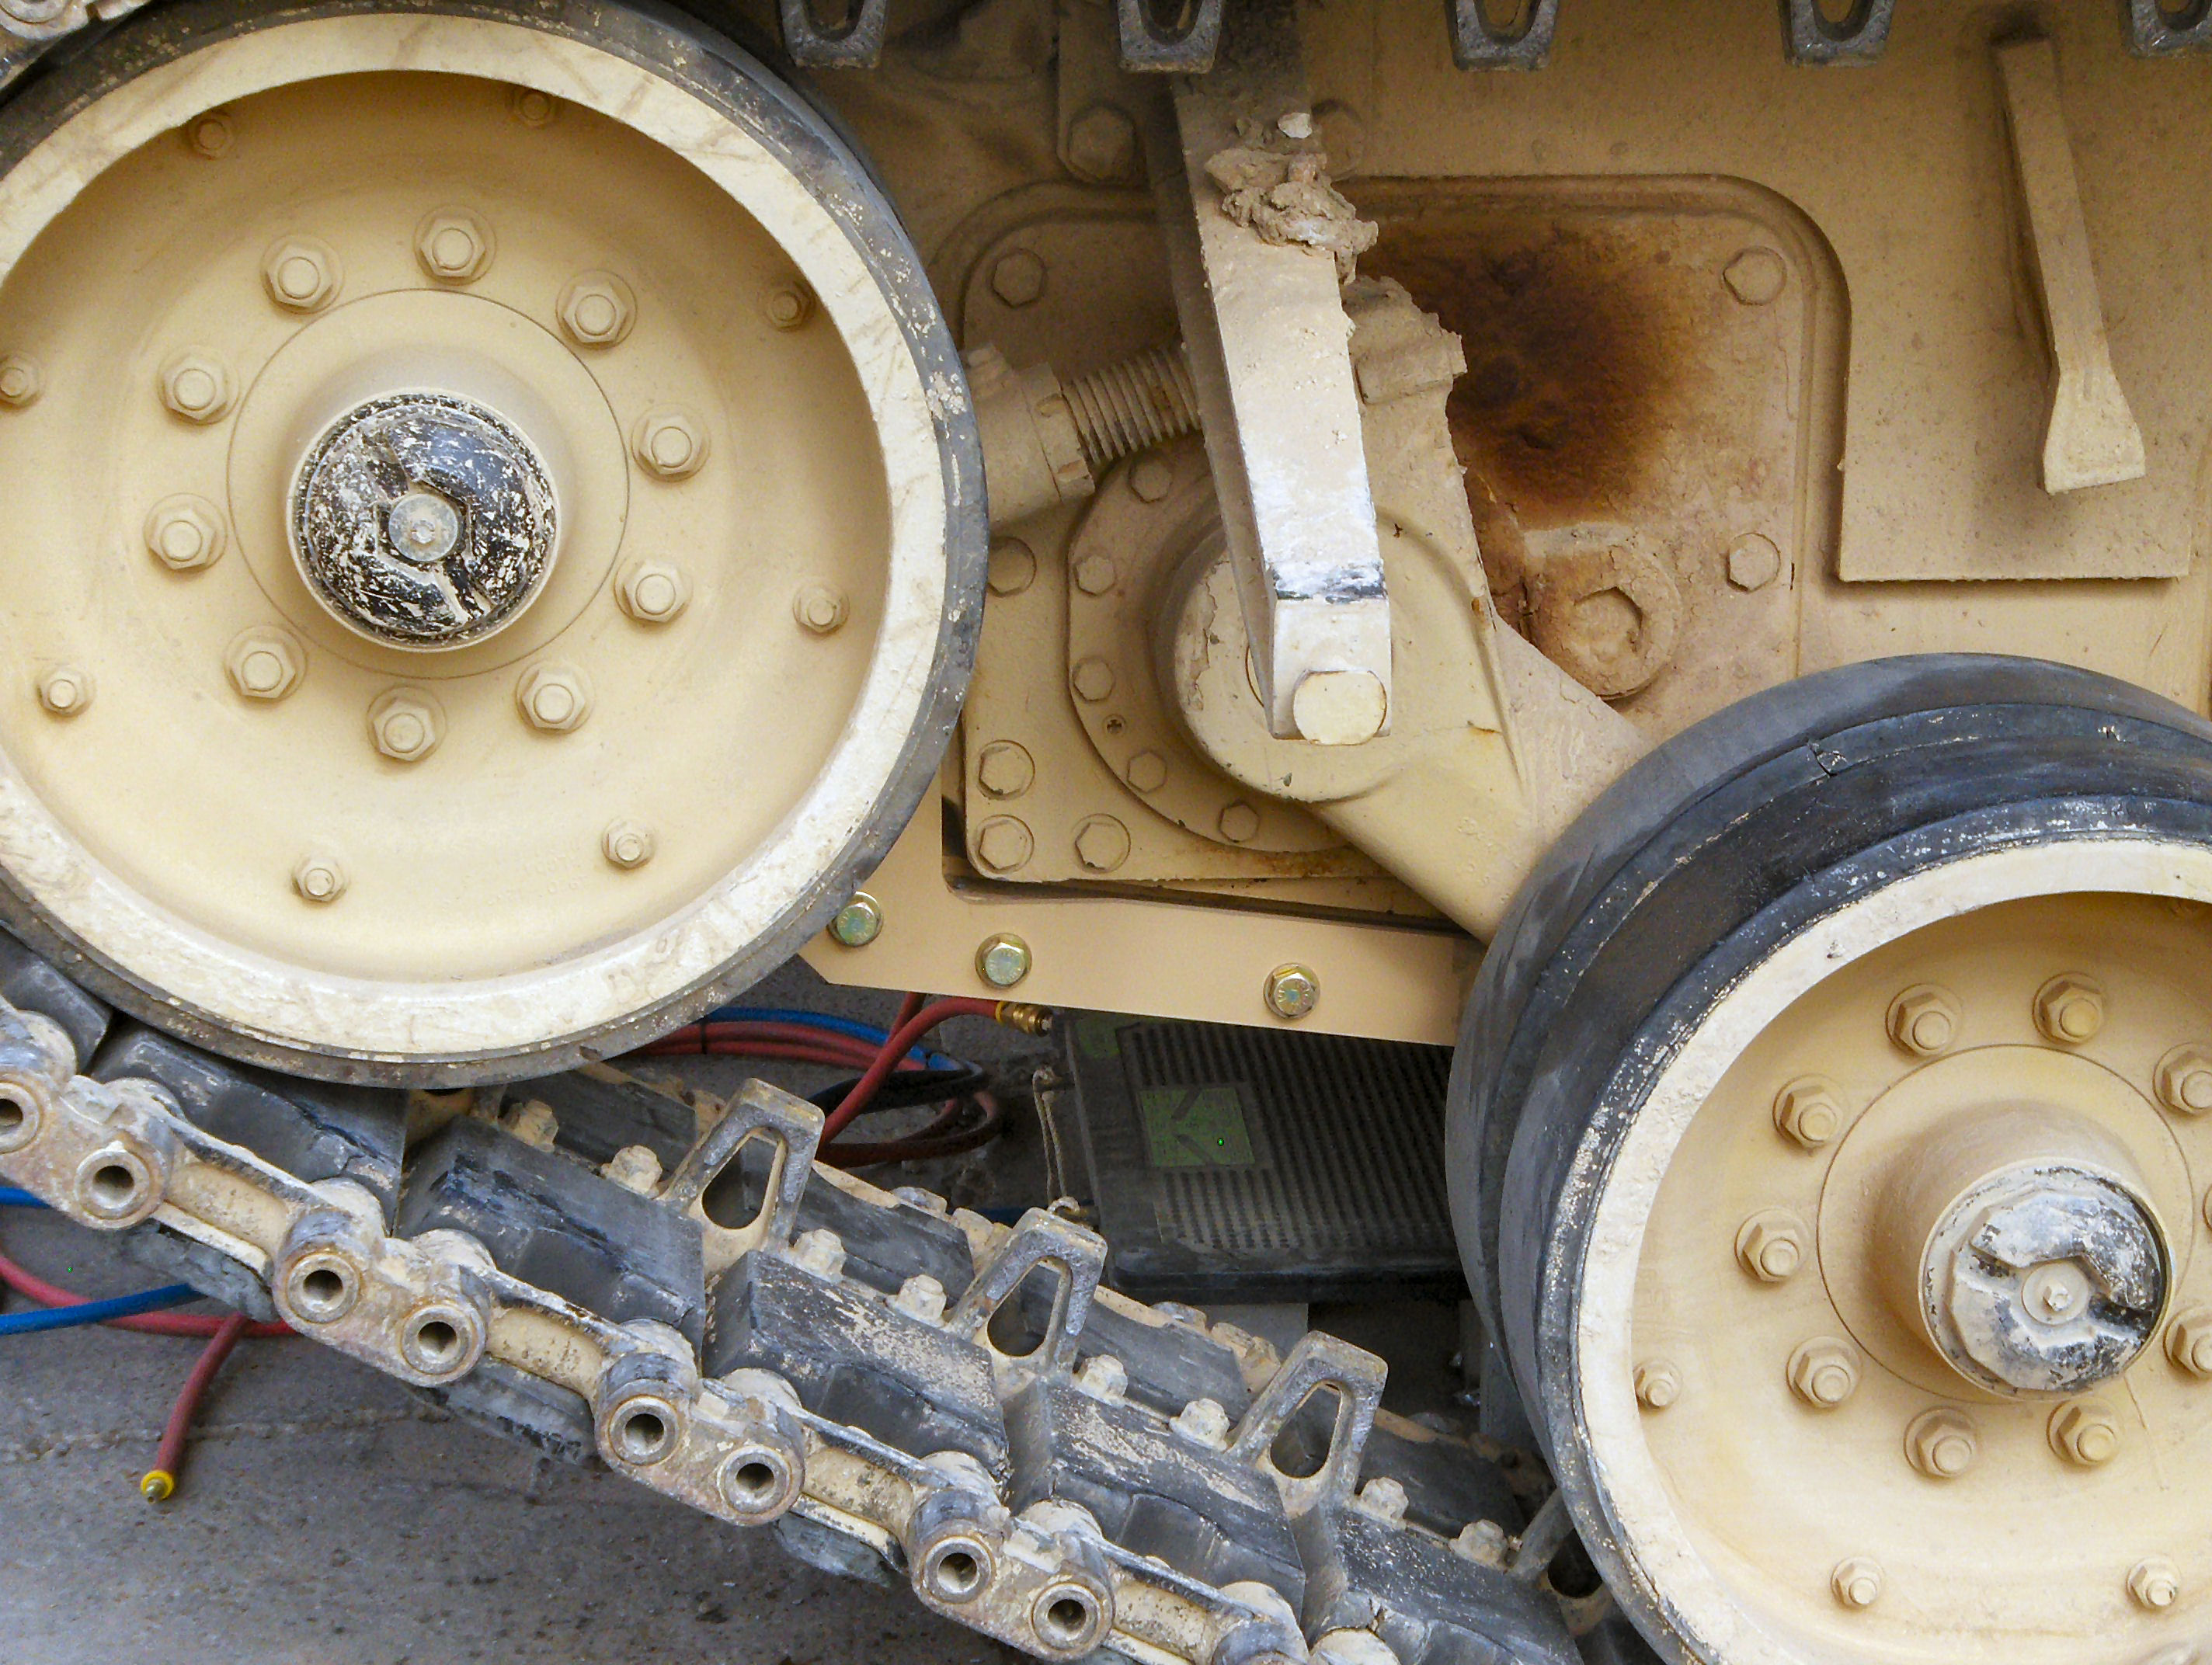
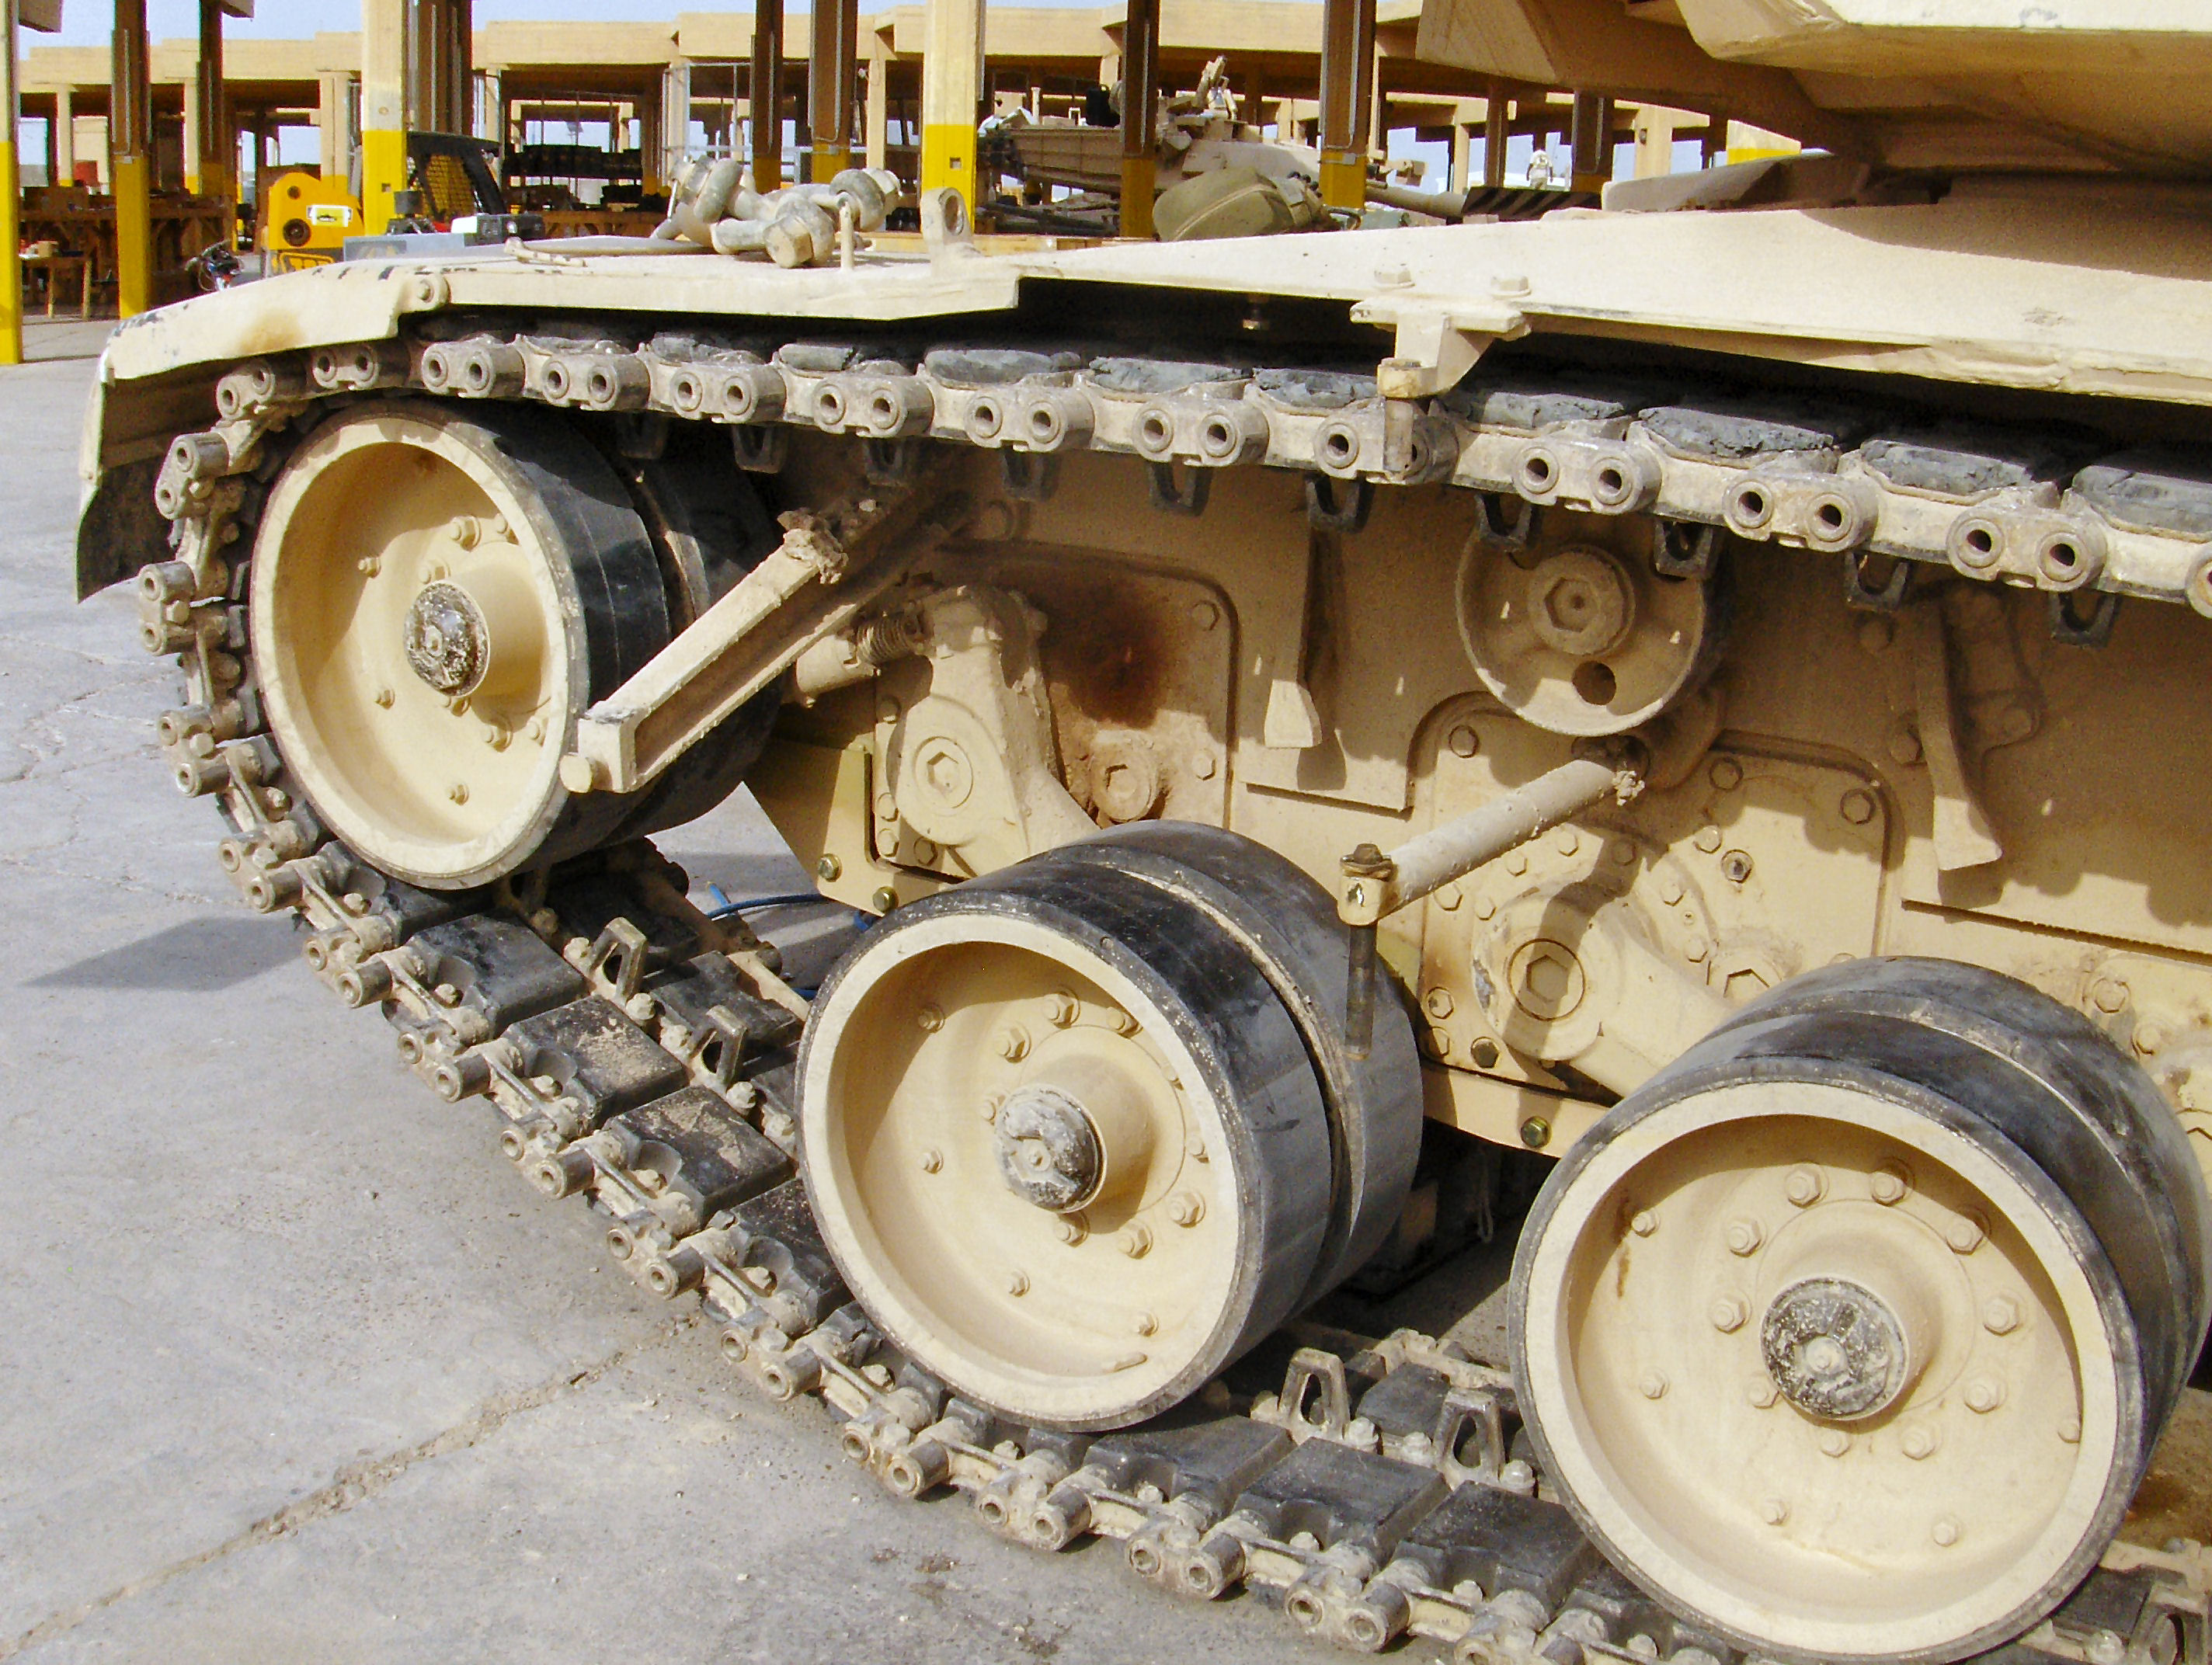
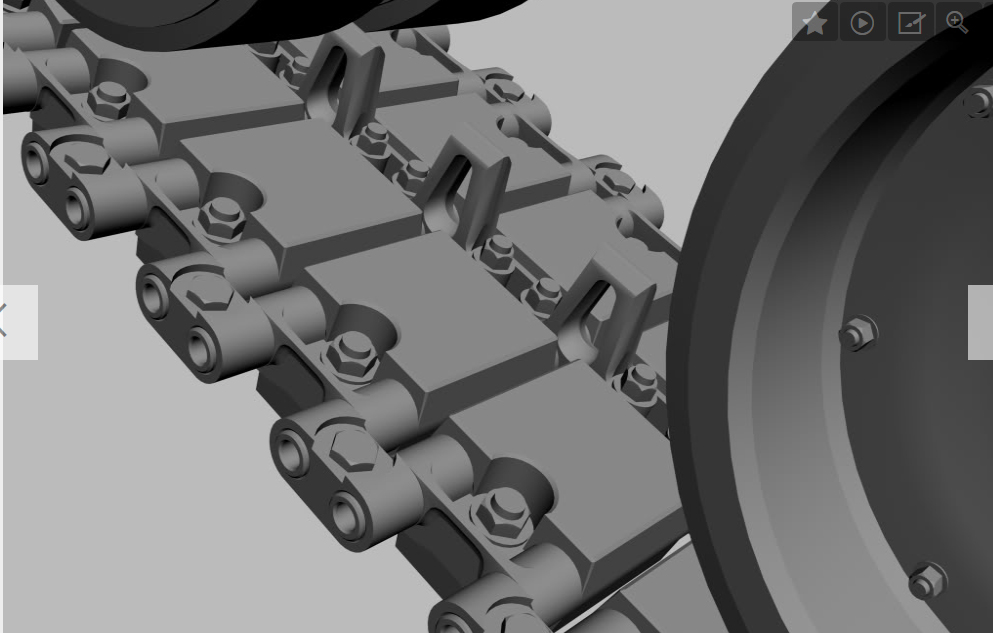
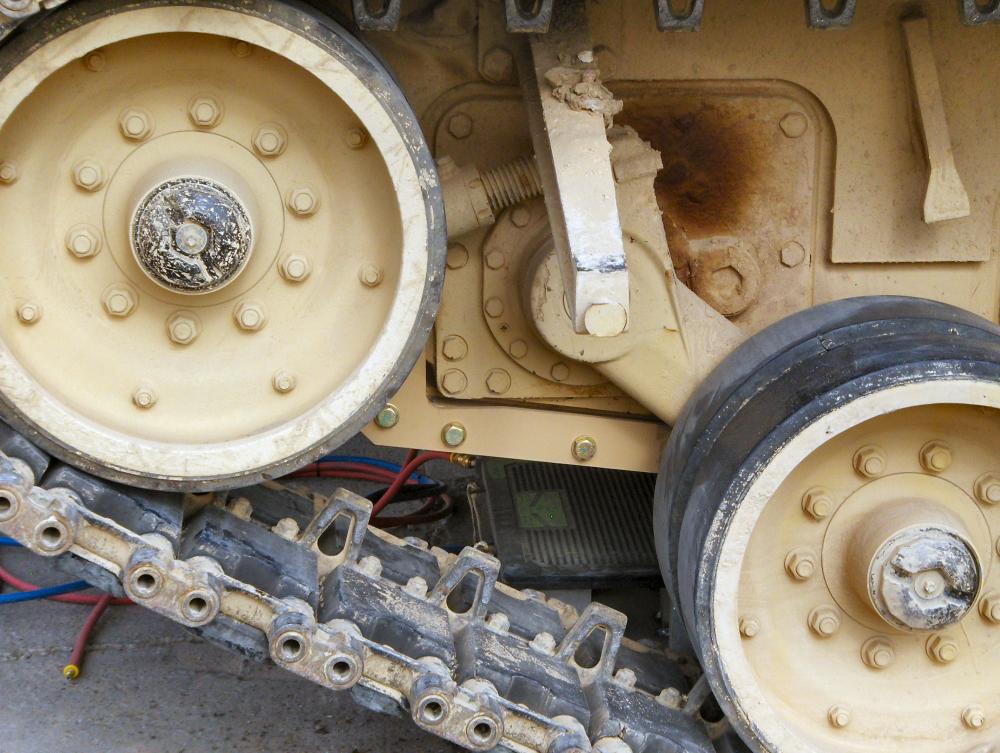
Hello fellow metal workers, I have some questions regarding making aluminum tank tracks for a robotics project. The tank tracks are 4.25" wide x 5/8" tall (length TBD) they are made up similar to the way an Abrams tank track is put together. I found a metal works company who specializes in turning small 6061 aluminum - rubber coated wheels and though expensive they can produce what I'm looking for. So now I'm back to the tank tread portion which I'll probably make myself. My experience: 10+years experience with TIG welding/fabrication and can weld most things. Many years ago I read a book on backyard metal casting because I wanted to cast aluminum tank treads. Back then the guy was using a Pyramid furnace (the company is no longer in business) to cast aluminum tracks. So here I am wanting to pioneer this venture again with many questions. After reading the beginner pinned thread and all the safety precautions, Aluminum casting seems a little scary/intimidating as well as an enormous investment of time to learn a whole new universe of skills and the safety surrounding them. Therefore I've come to these questions which I hope others can help me answer. A:) Would a furnace produce acceptable enough results in fit and finish for this type of application? (or am I better off in fabrication?) B:) How much cost investment is there in buying a high quality furnace, crucible and safety gear? C:) Roughly how much time investment is there in learning to cast small aluminum parts? D:) What is the mold material needed? E:) Are there any up to date extensive youtube videos or good book recommends specifically for casting aluminum. I have concerns with doing it safely as well making sure the mold is built correctly. Additional massive concerns about what the results will be after I Invest huge amounts of time and money in it. Will the results be good enough for this use? And more importantly will they be better than a machined/welded/fabricated alternative. In other words: Which route is shorter and produces the best results? I'll attach some drawing and pics of what I'm trying to manufacture. Thank you, Av


-
Cutting retaining rings / snap rings for roller chain
Avadon replied to Avadon's topic in Welding/Fab General Discussion
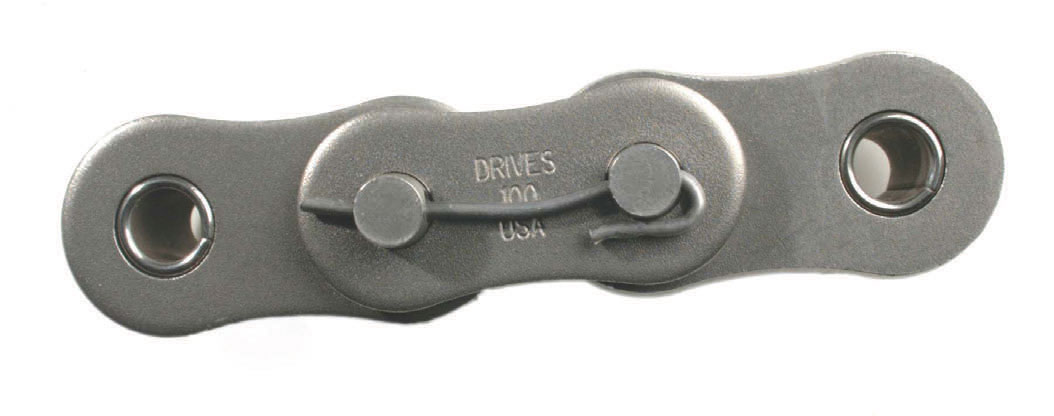
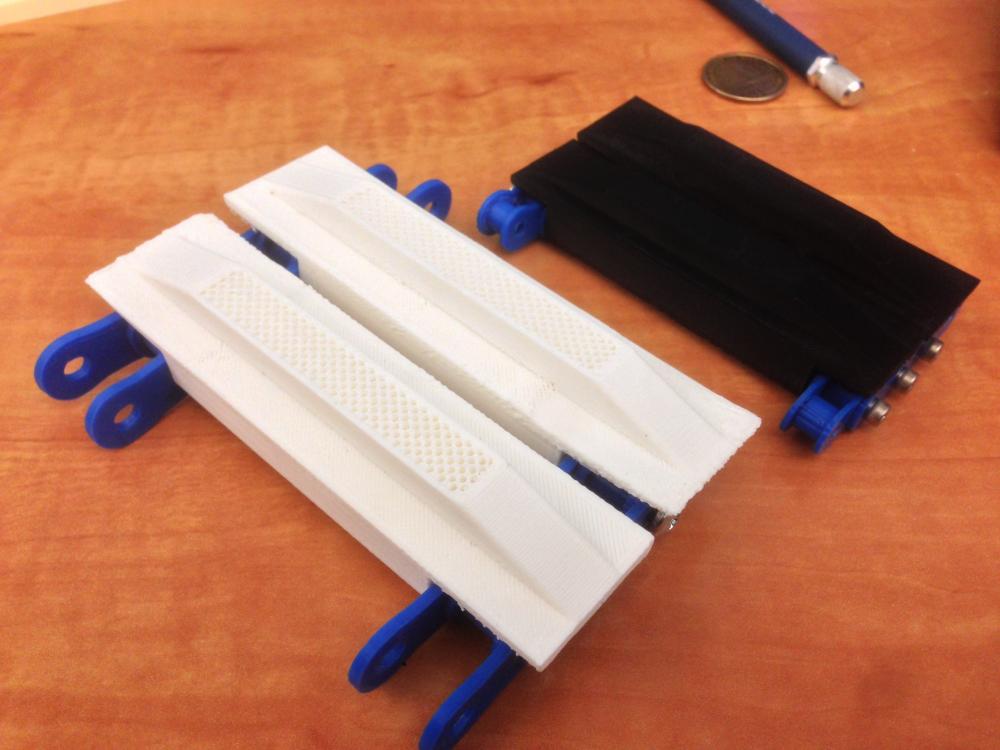
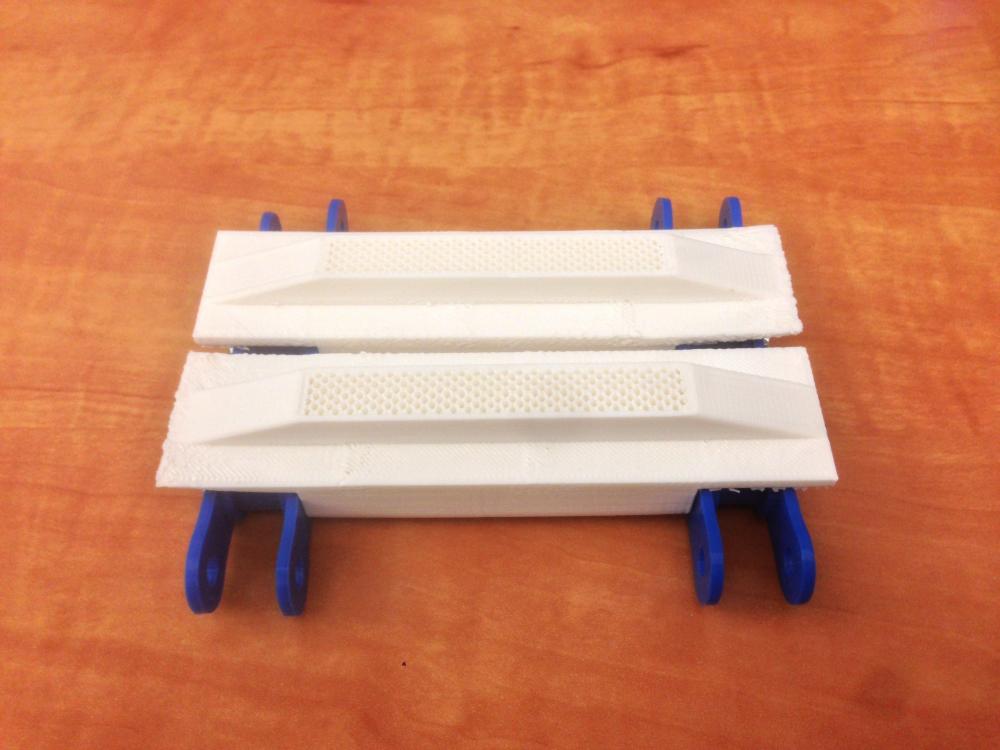
I did look at hollow pin early on and I felt to unsure about whether the plates would pop off the links if they get to much twist or torsion on them. I don't think I saw that attachment chain but that would work. Only thing is if you bolt or rivet plates for treads you have to be careful the track treads stay 90dgs. That is you have to make sure both pieces of chain stay parallel to each other. Maybe welding them would be more secure. What I'm gonna try as an experiment is to solder on small bushings like these http://www.aliexpress.com/item/200pcs-metal-shaft-sleeve-screens-sleeve-stainless-steel-axle-sleeve-for-2-mm-3-mm-4/32450525432.html I got some very low temp solder that supposedly works exceptionally well even at 300dgs F. It should hold the entire assembly very tight, or at least that's the idea. And since it's not a lot of heat I don't have to worry about the chain links warping or distorting. Tig welding put to much heat into the rods and bushings I tried that I was too worried about messing up the chain. But I think I'll have to come up with a middle piece of track like they have in the pics above with the white/black resin. Hopefully it comes together like it does in my mind lol. Thanks for the good ideas. -
Cutting retaining rings / snap rings for roller chain
Avadon replied to Avadon's topic in Welding/Fab General Discussion
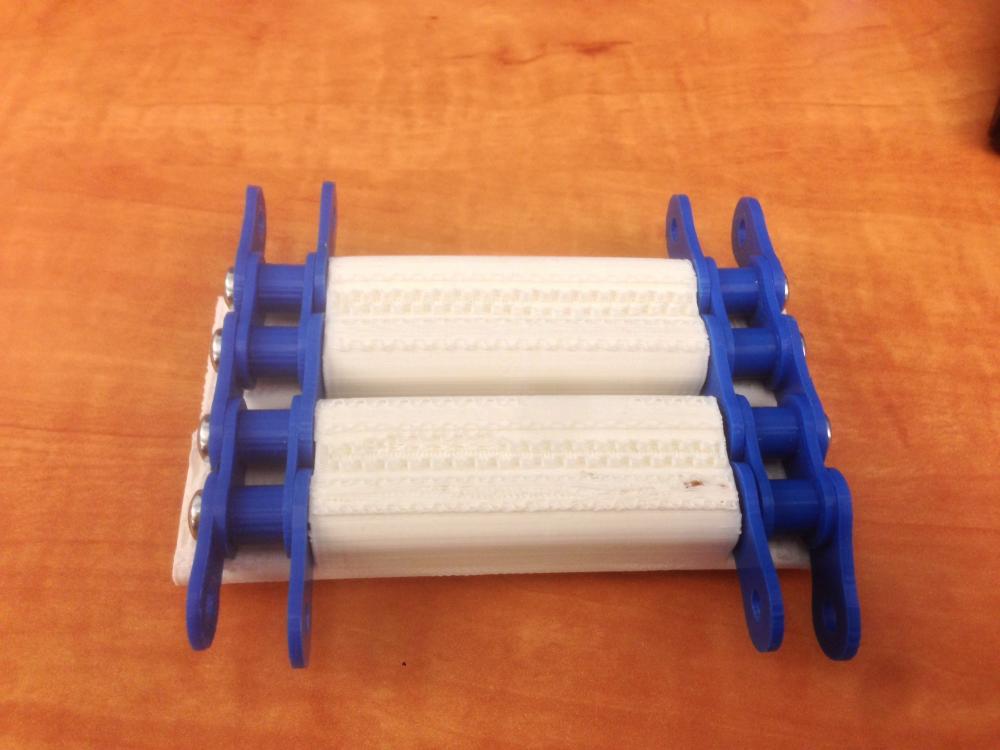
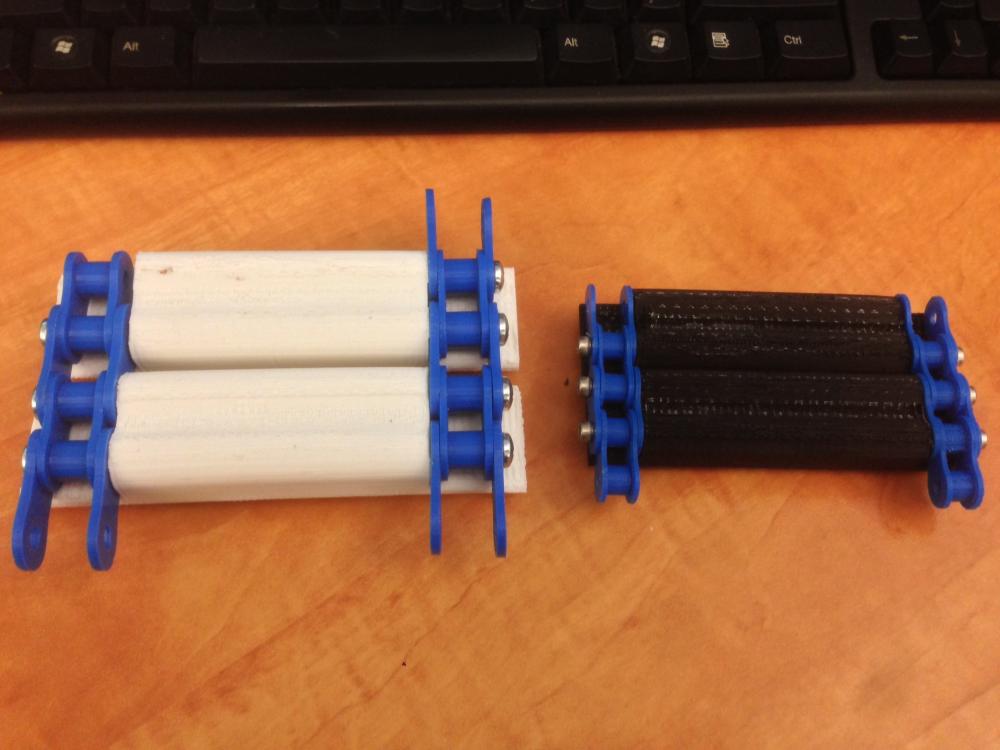
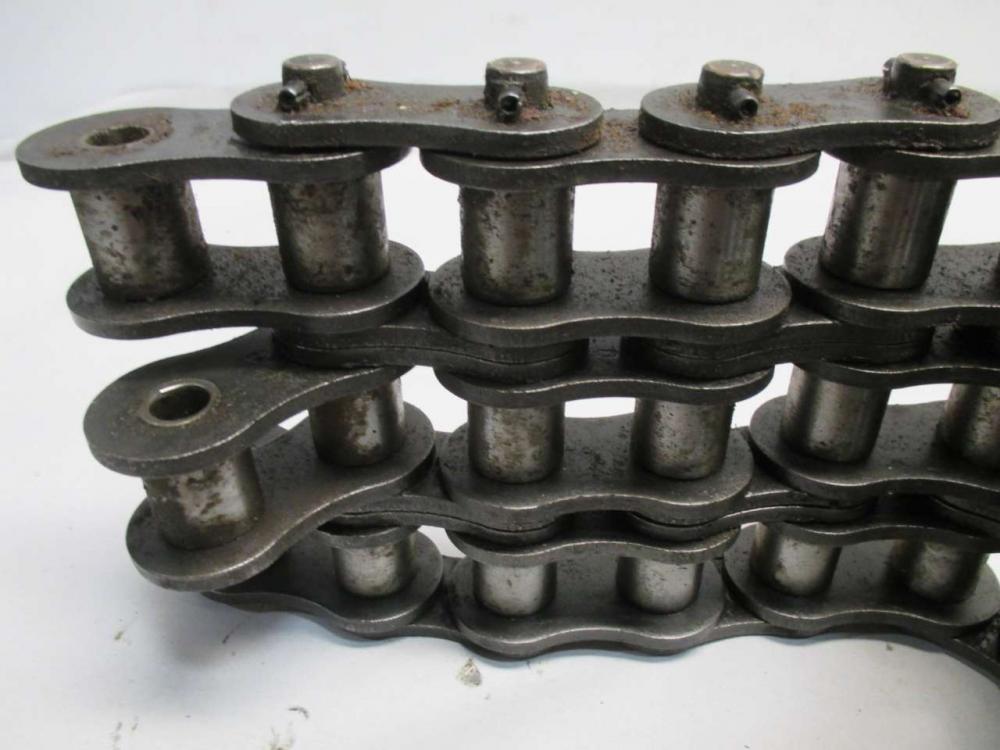
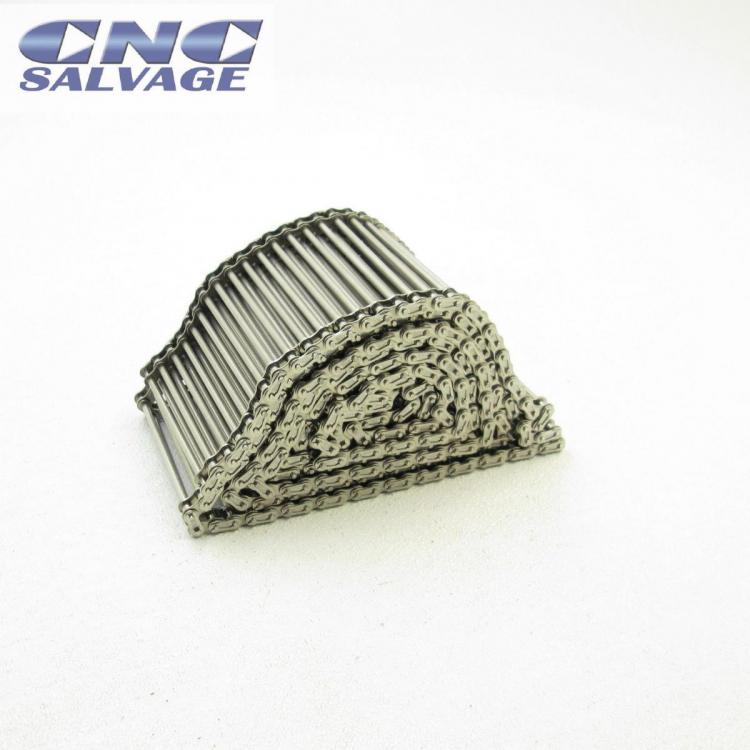
Thanks for the reply. Oddly enough my 4mm stainless rods I bought off of ebay are .156 and not 4mm (.1574) so they fit perfectly. I tried welding a stainless washer onto the stainless rod. Not going to be easily. I'll have to re-configure my tig for very, very light work and then I'll be able to do it much easier without burning through the washer. Still it's going to be very difficult even for a seasoned welder because the rod is so much thicker than the tiny washer and care has to be given to make sure the washer stays at 90dgs to the rod. I suppose I could also find a much thicker washer or even a small stainless bearing. That would be much easier now that I think of it. Or even 4mm tubing cut into little 1/8 or so pieces to weld on. The final product is going to look like the cross rod chain above and it's for robotics. Sprockets will drive the outer links and over the inner rods will be tank tracks that will go under the chain portion on both sides. I don't think we'll have too much strain on it the chain. It just has to be tightened a bit to get the slack out but it's not going to be under considerable strain otherwise it would start binding up the motors. We are in the desert here so moisture is really low so I'm not too worried about the galling effect. We actually bought tripple wide stainless 40-3 SS chain, drove the pins out and got all the best links and plates and now we can make our own crossrod chain in the width we see fit. I'm beginning to think I'll probably have to find some sort of standard pin length already made so I can use spring clips or cotter pins, otherwise welding little bushings on the ends of the stainless pins seems the next easiest way. Trying to set up hundreds of pins on a lathe to cut those grooves seems insane as does trying to drill a little hold dead center in the ends of stainless rods at very precise locations lol I'm in Terrebonne, OR and there's not a lot of suppliers here in the high desert for this kind of stuff from what I remember The middle piece on the pics below are 3d printed white plastic and black rubber. I want to make my middle piece out of aluminum or steel, but hopefully from these pics you can get an idea of how people are constructing these tracks. Maybe you can tell me if I'm going at this right or not. Another way that's possible is some type of threaded material inside the inner track and then use machine screws but I didn't really like that idea. I felt like there may be too much slop and not enough stiffness. Thanks for any help you can give.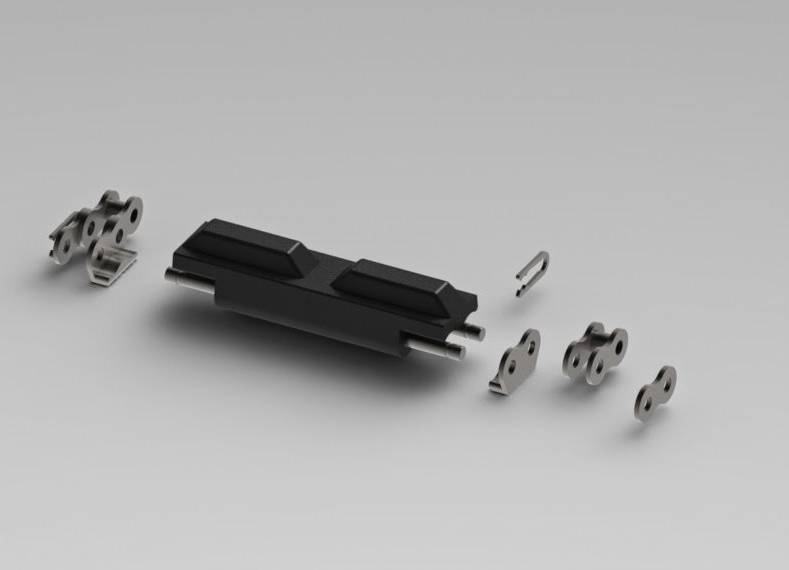


-
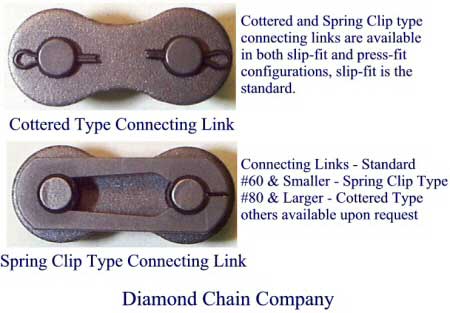
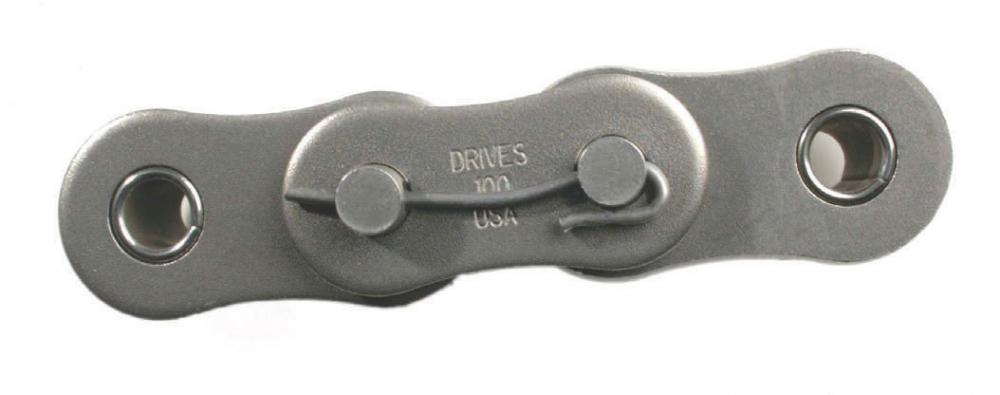
Hi there, My girlfriend and I are trying to pin the end of roller chain rods to keep the links on since we are creating custom roller chain that is 5" wide. We are essentially creating cross-rod chain. My first thought was to peen the ends of the chain but that makes it very difficult to do without pinching the chain. So I did some research and apparently there are numerous way to terminate the end of a roller chain rod: I've seen drilled holes with cotter pins or very small retaining pins. I've aso thought about retaining rings or snap rings which I think would look the best but I'm under the impression you need a lathe to cut those indentations in the 4mm rod. The chain parts we are using are #40 stainless and the rod is 4mm stainless. Obviously drilling a very small hole on a rod isn't exactly easy either. The other thing I thought about was trying to order pins directly made through US Tsubaki or Diamond chain Co but I think this will mostly likely be very expensive compared to getting 4mm stainless rod and cutting the lengths myself and then drilling/lathing the ends to come up with some kind of retaining method. There are obviously a ton of different ways to do this. It would be interesting to know if there's a way I can cut the rings in the rods themselves so I can use the standard spring clip type connecting link but I'm guessing I need a metal working lathe and tons and tons of time. Did I mention we have about 18 feet of chain to do!! any ideas? Thanks, Av


-
I get this question quite a lot in my business as this is primarily what I do, make various hardy tools for the last 6 years. I've even made a lot of custom 1-1/8 and 1-3/8 hardy tools for customers. That is certainly one way to go if you want to be a truist. Otherwise shimming is going to be the order of the day as everyone said here. To me it really comes down to how many hardy tools you think you want for the work you want to do. If all you need is a couple of hardy tools then I'd stick with the original hardy size and either make them myself , if you have the skills and ability, or buy them from a company like ours. I don't even charge the difference since I normally stock that material for hardy posts. But if you're thinking you want a large array of hardy tools then I'd try to figure out something similar to a permanent shim down to 1" so you can get tools from anywhere and everywhere. I should mention that even if you do make them yourself they can be time consuming and expensive. Look at a really good custom pair of tongs, not cheap. Hardys are the same way for the really good ones. The reason being is the material used, the advanced levels of welding (Mig/Tig) experience needed, and also plenty of sanding and polishing on striking surfaces. It's like detaililng your own car vs someone else doing it. Either way there's going to be a lot of sweat equity. ;-) There are sooooo many types of hardy tools and I've even invented a lot of custom shapes for people particular projects. For me, when I purchase hardys it comes down to usage. You can find so many cast iron ones for nothing on ebay, those might work if you just want to start with the basic shapes. They are very soft and can wear out quick, especially if your heat runs out. If you already know what work you'll be doing, know the size, height, material, etc. you're working with then spend the money and get tools made of high carbon steel or chrome steel which will virtually never wear out. That's my 2cents from the guy who's welded hardys day in and day out. -Damion78, I also live in Redmond (well just outside) cool to see someone local in the thread.
-
Does anyone know what kind of machinery/equipment I could use at home to make these?
-
Yah good idea ;)
-
I was thinking about that.. If I bought them all they cost about $2500 with the caps I like from this one distributor. At 22$ a piece (i'm hoping I could potentially get a discount for volume if I went with this guy) that would be such a tempation for anyone. They unscrew just a few in the night and make 100$ just like that. They can just resell them, no need to even get scrap prices for them.
-
If I were to try this can anyone show me pics of the machinery/equipment I'd need and maybe it being done on a piece of thin copper or similar material?
-
Thank you for the description. Yes it does seem quite lengthy of a process with numerous challenges in it. I wish it was easier to do. Maybe making them out of wood and just painting them copper will be easier lol I've definitely done the buffing and for me it was always the little hairs that were all over you. For that reason I switched to stitched wheels, though they are harder and not as delicate. Some of these copper caps are 8$ for the cheap ones up to 22$ for the more expensive ones. Yikes.
-
Sounds like a serious pain in the you know what. Maybe i'll just scout around and see if someone can get me a bulk price on these. This, sheet metal forming of caps, isn't a part of my business, nor do I really want to make it. But I did want to check in case it was easy to do. Doesn't seem to the case. By 1/2" plate... I meant construction a pyramid shape from 1/2" steel plate then construct the other die over the top of it with the same material, then invert the whole thing so it basically looks like a dradel going into an upside down pyramid. The copper would be quite thin, like roofing copper. Not 1/2" copper.. that's crazy. lol
-
Yah that's what I was thinking.. taking thin copper .. annealing it and setting it in the die, having it pressed.. then just using snips to cut the edge and make it more or less square.
-
So in everyones opinion is something do-able with the 20ton brake press from harbor freight?
-
Would a die made of 1/2" plate hold up to forming copper around it? It wouldn't have to be two solids would it?
-
Wow I didn't think it would be that difficult. How do you think they fabricate these things? I have held them and they are indeed one piece. Do they heat them/anneal them and then throw them into a press? Thats what I was wondering about, if they can be drawn that deeply without having to weld/braze a seam, something that's very time consuming to do well. I'm not too concerned with having them super polished like that. I even thought of hammering them over a form, but I'm guessing that will seriously take forever?
-
I have 6x6" wooden columns/posts that need caps. I really like the idea of making tall, pyramidial post caps of copper. How do I go about doing this? Has anyone done this? Would I have to use something like 1/2plate to make two dies top and bottom and use a hydraulic press to make them? I have 121 to make and buying the cheapy ones i don't even like would be almost $800 Anyone use a press to make something like this? I was thinking of the 20 ton el cheapo central machinery press at harbor freight. Is there a limit to how deep the copper can be pulled? Is that why most of the post caps are pretty shallow? How difficult is it to make something like this? 6"x6" I.D. with a 1" flat brim around it
-
I've heard good things about cement board, but outside of it's use in bathrooms I don't know much about it. I'm not sure how well screws drive through it or hold in it. I would guess about the same as drywall, which isn't saying too much. Someone reccomended MDF for my STC interior walls as MDF is just amazingly dense at 1", but as for something you can actually hold a screw in, it fails terribly. It acts like pressed cardboard when you're talking about driving big screws or lags in it. The problem that DSW mentions is if you start getting too thick of a wall and plywood isn't near the surface you wind up having to use really long screws to install anything. If you need a 2-3" screw just to hit a stud, then you have to add the thickness of whatever wood or metal your trying to screw to, you start easily getting to a 3-4" screw or more just to hang something. Eeek.
-
Yes, the codes get very heavy when you have a residence upstairs. I'm sure in such an instance you may even be dealing with two laters of 5/8's on walls, maybe even ceilings in regards to a shop below a residence.
-
PLEASE edit your quotes bettter, I am not going though all this mess
-
I wonder what the denses I wonder what the densest ply material I can get my hands on in central oregon is and is it denser than the 1-1/8'th T&G. I'm try to avoid having to do two sheets of ply and two sheets of drywall. The two sheets of drywall is unavoidable but if I can get away with one really thick sheet of ply I think that would be great. http://www.plywoodcompany.com/application/home/itemdetails.aspx?categoryid=155&itemid=444 $65 a sheet for the 3/4" I might call them and ask if the HDO is more dense/better STC than 1 1-8 T&G. I'm guessing probably not as it's got another 1/4" or more actual dimension on it. The 1-1/8'th T&G didn't feel anywhere near as heavy as I actually thought it would. Normally that ply is used for subfloors.. that's why I'm amazed your depot's don't carry it. I have a trailer but I can only take on about 600-1000lb so driving far to get it and coming back with a heavy load isn't really possible. I could blow my trans out. But for people who have a big work rig it's definitely possible to go a few hours to pick up the right thing. Annoying, but possible.
-
I would imagine they'd have the same thing at the home depot near you? No? Because that's where I found it. http://www.homedepot.com/p/t/100056755# I can't quite remember but I think it said on the bundle (where HD was getting it from) company name and it was out of Idaho. I would think their prices would be the same nation wide. I haven't even checked at my Parr Lumber ( our real lumber yard) to see if they can beat that price. I'm kinda weird with wood and sheeting. I like to only pick out the straightest and best wood and plywood. That probably irks them, but I'm kinda OCD that way. lol Probably because I hate untwisting boards with screws and I'm finnicky about things being very square and flush when framing.
-
After much thought I'm leaning towards using 1-1/8'th T&G Ply sheeting. It's not cheap (40$ a sheet) but you can avoid seams (a plus for fire rating) and then covering this with 5/8's gypsum (taping+mudding every layer) and gypsum on the ceiling. This way I get lots of mass from the ply (improves my STC rating) and also a fire rating from the gypsum. I'm going to use green glue in between the ply and gypsum and if I do a second layer of 5/8's gypsum I'll use green glue in between that too. This should make a very solid wall. From there if I just have to have wooden looking walls I'll just put up a vaneer. Not sure about that. I did find this stuff though http://www.homedepot.com/p/ForceField-FireGuard-E-84-5-gal-Intumescent-Primer-FFGD-E84-g05/203582028 it is amazing. Gives virtually anything you put it on a 2hr burn rating. They've tested this stuff and you can see it on youtube too, and they cover sheds with it and try to burn them down and it will just not burn. When the paint gets hot it encapsulates the wood/ply/osb/etc and makes it fire resistant. Pretty neat stuff, especailly for some who already have wood walls and want to add fire protection without going the drywall route.
-
5 layers? I've never heard of such a thing. Min code here for an attached building is 1/2" type x gypsum. I beleive it's only 5/8's for a living space overhead. 5 layers of drywall gives you what 5 hrs of burn time. lol Just in case you wanted to take a nap through the fire, wake up and then put it out? lol