Avadon
-
Posts
986 -
Joined
-
Last visited
Content Type
Profiles
Forums
Articles
Gallery
Downloads
Events
Everything posted by Avadon
-

Brazeal Anvil Rising * 4" Plate Anvil (with pics)
Avadon replied to Avadon's topic in Anvils, Swage Blocks, and Mandrels
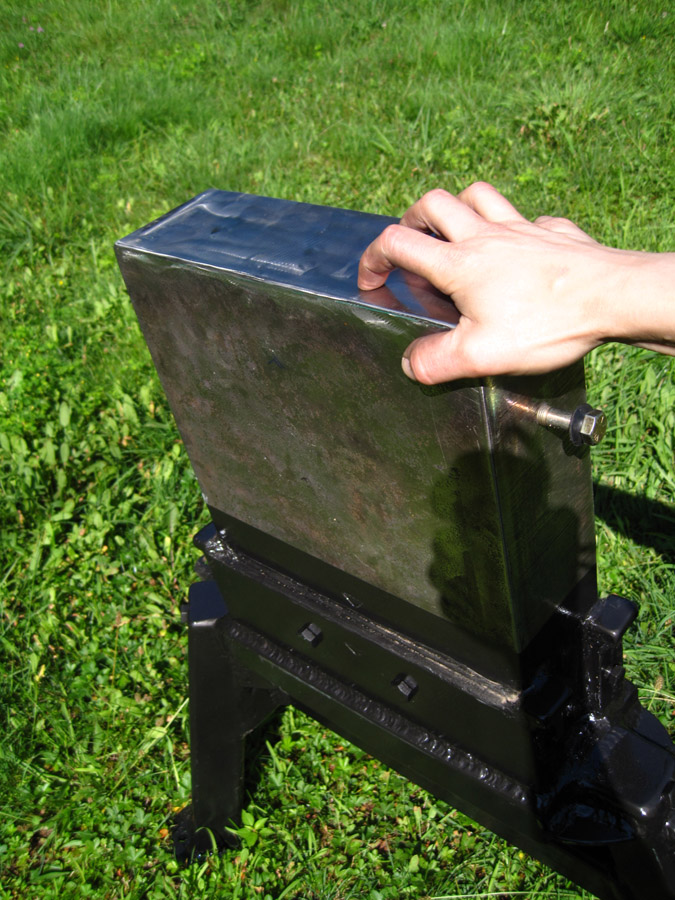
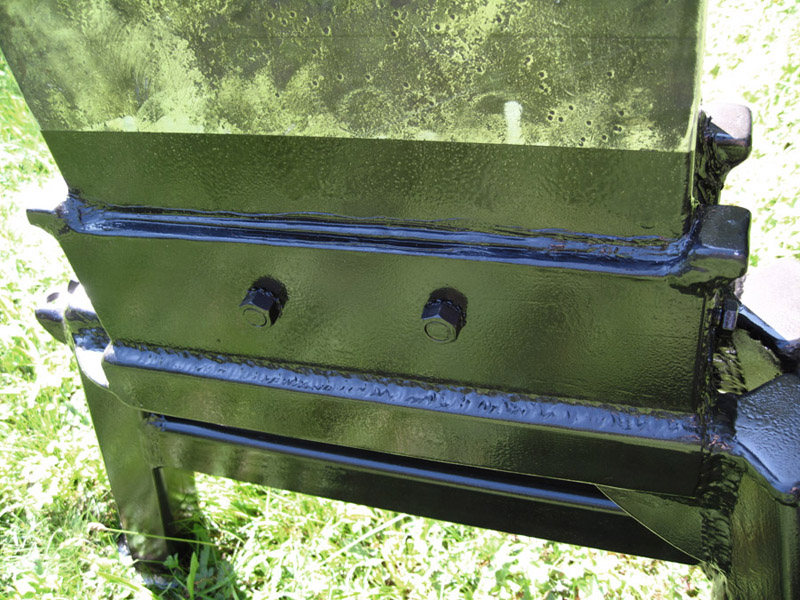
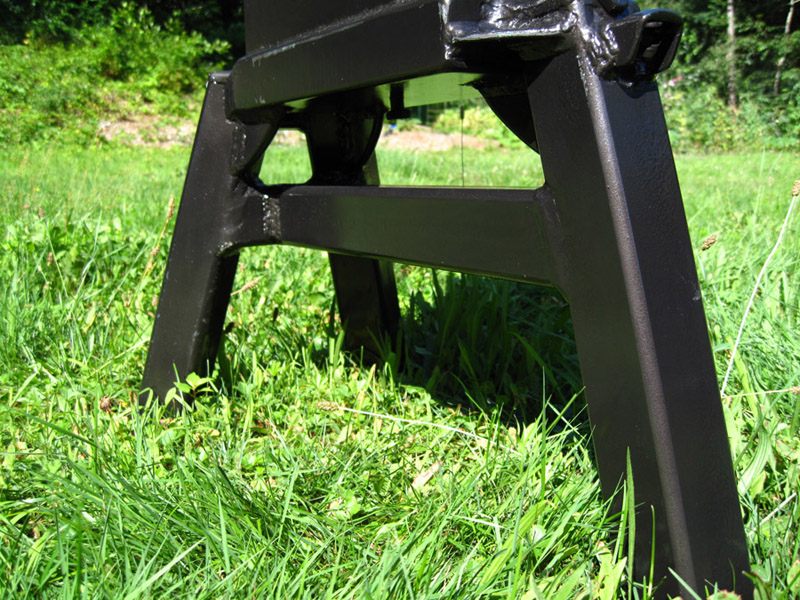
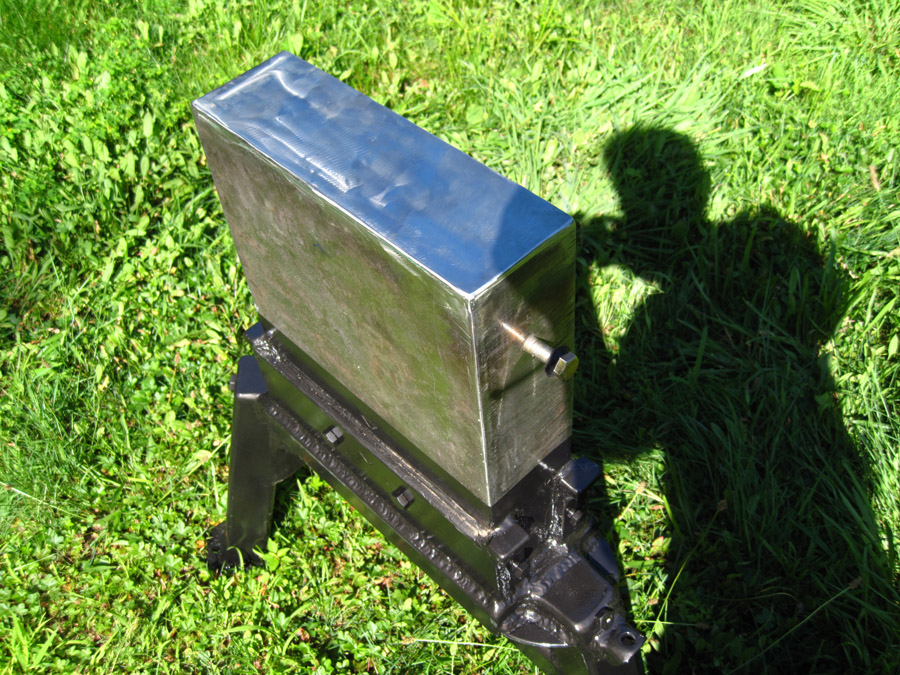
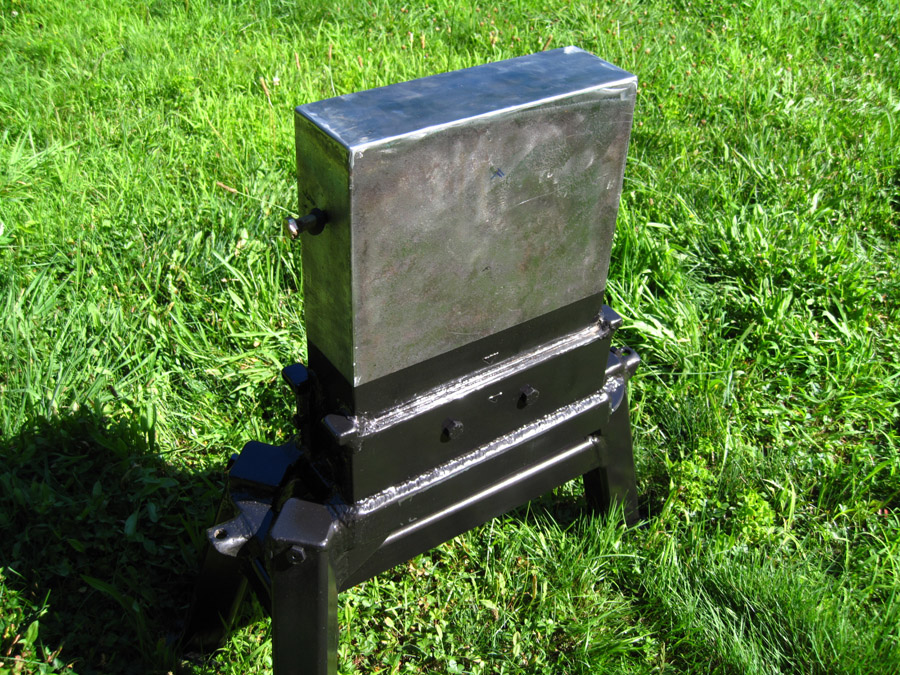
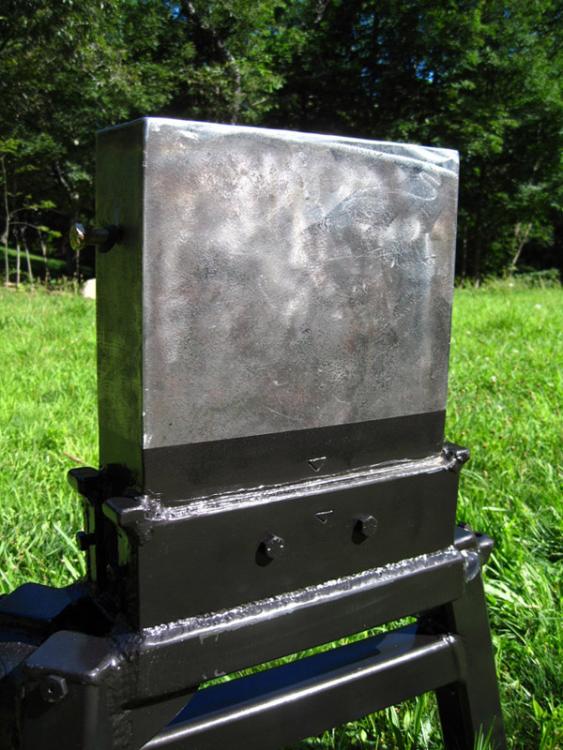
You're very welcome. Any questions just pm or post here. It's basically a big heavy mass with S7 welded onto it. I suppose if you had any gigantic piece of steel you could weld S7 onto that area and you'd basically have the same thing haha but the shape does lend it to be easy to work around and it can be moved. The width/thickness is 4". I had the 4" piece of plate cut for me at Turner Steel in Massachusetts. The torch cuts were just cleaned up with angle iron flapper wheels. -
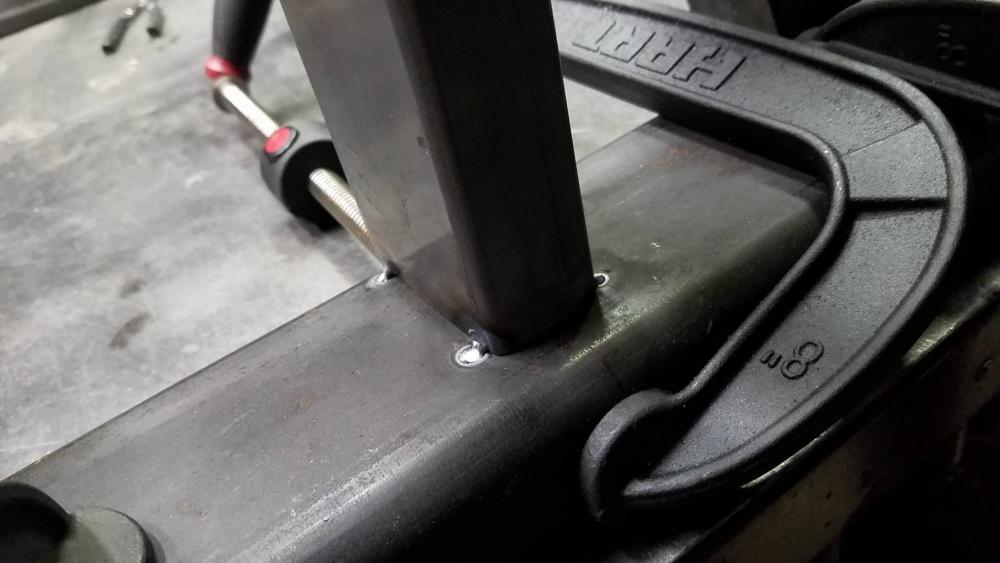
Haha I did. I have about a dozen of those HART clamps and I love them. Don't know if you can get them up where you are. That's a good idea. But I don't know how you'd get the torch to the back side. I like the idea of tack welding the 45dg braces. I thought about that but the clamps were on there so tight I thought it might be unncessary. I filled in the welds today and so far it looks really good. Only will truly know when I take off all the clamps
-
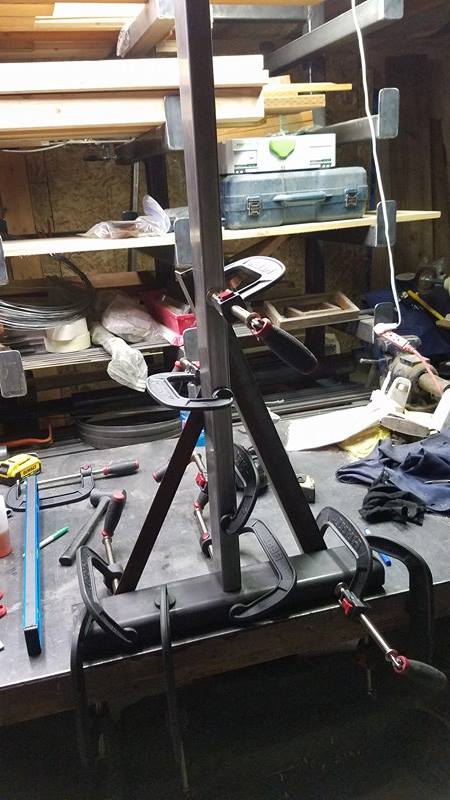
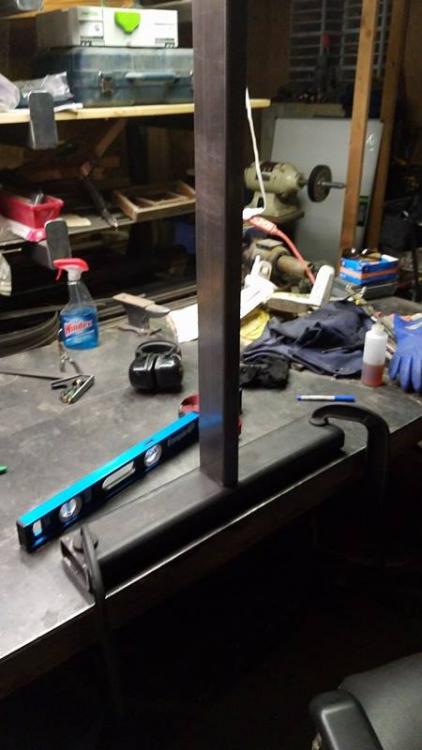
Thanks for all the great advice guys. I choose the easiest method, cut the existing structure apart and use it for scrap. Then I went and bought new material. The new material is the short part of the "T" and it's 3/8's wall, very thick stuff. I didn't have a lot of confidence in heating the old structure up and bending it back into shape like suggested so I scrapped that idea. I figured if I weld the long piece which is 1/8'th wall to the 3/8'ths material I should overcome the problem. But to be sure I took the 3/8's stock and I used a ton of clamps to clamp it to the desk. I also heavily clamped two 45dg angle iron members as suggested above and I clamped a brace to the back so it's butted up heavily and not going anywhere. Total I think was 10 bar clamps. haha It's not going anywhere. I also was very easy about the tacks this time. Put in 4 tacks, then cooled it all down. Then I went back and put in more tacks and then cooled it all down again. Tommorow I'll carefully weld it in, only doing small sections at all time and not making it very deep. It doesn't have to be the deepest weld as it's not holding much structure. This is the base of a "Eric Thing" forge. So there will be two other arms coming off that bottom T shape and casters will attach. The top long part of the inverted T will hold the cone like shape of the forge chamber. I've welded a lot of things before but never seem to run into this. Might be that most of the things I weld do not have disconnected ends on both sides and thus don't warp so easily. Thanks for the help, all. I'll know after I finish welding it tommorow if it still stays true


-
Brazeal Anvil Rising * 4" Plate Anvil (with pics)
Avadon replied to Avadon's topic in Anvils, Swage Blocks, and Mandrels
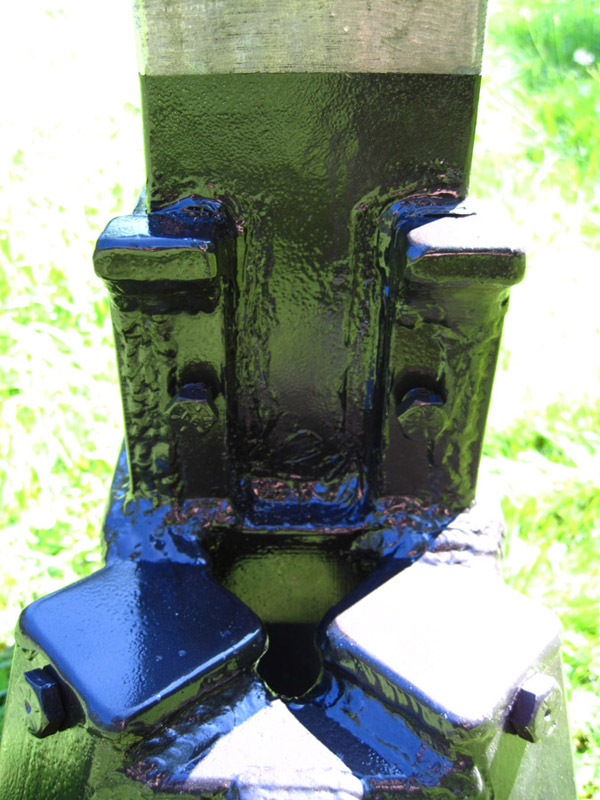
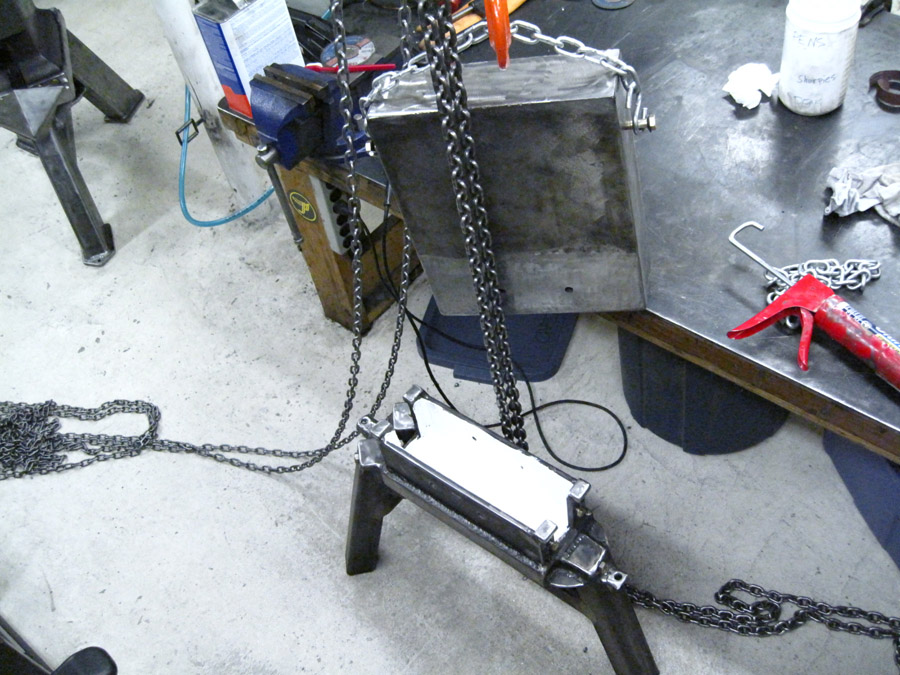
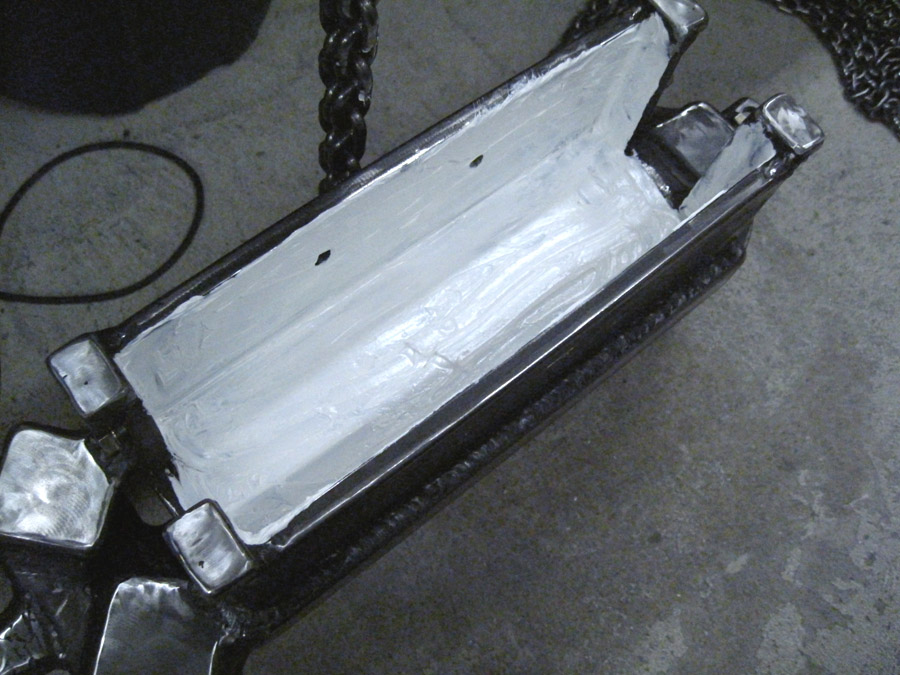
Here is a relist of all the pics. If anyone has any questions I'll do my best to remember how I built it all.


-
Brazeal Anvil Rising * 4" Plate Anvil (with pics)
Avadon replied to Avadon's topic in Anvils, Swage Blocks, and Mandrels
Hi guys, very sorry that I didn't see this post and that I didn't get back here lately. My email has changed and I think I didn't get it updated here. It may have been when I changed my domain my pictures don't come up anymore I can't go back and edit the original post which is frustrating. So I'll try to add the archive of pics for this anvil here again.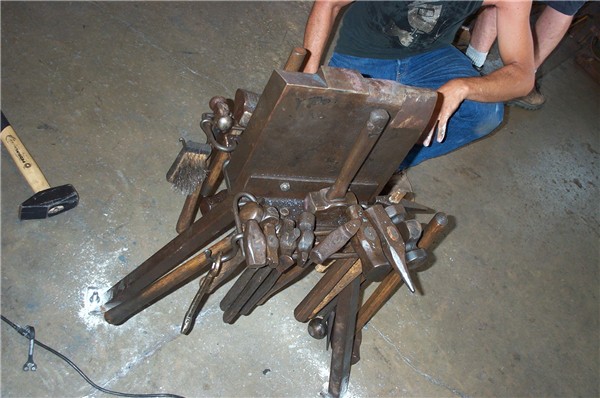

-
I'm trying to weld an inverted T shape (and failing horribly). My shop is full of things I've welded successfully so I'm curious what's going on. I've tried to weld this twice and now messed up a lot of material. Let me explain my process. I am trying to weld an inverted T shape. I put one side of the small part of the T-shape in the vice and weld the long piece so that's sticking up in the air (over my head) at 90dgs. But everytime I weld this, even if I use tons of clamps and braces the small part of the inverted T shape warps/bows upwards towards the long part. The material is 1.5x3" rectangular tubing with 1/8'th wall thickness. And I'm welding the broad side to broad side. I used angle iron at 45dgs to brace the long pieces so it stays dead perpendicular. But the problem is the either goes on one side or the other or sometimes equal on both sides and throws it all out of alignment. The material I used before was thinner and I blamed the warp on that. Now i'm using 1/8'th and it's still happening. I'm using tig welding and making very small tacks and letting it cool in between. But it seems that it's still warping the short piece. I thought about going up in wall thickness to something crazy like 1/4" but to me I think the problem would still occur when you pour enough heat in to get the weld it will still warp the piece since you're putting heat on one side and not on the other. I can't believe such a simple weld has perplexed me but I'm not sure I've welded much rectangular, or maybe it would happen with any material? Maybe the answer is to vice it to a desk or something flat with immense force in the hopes of counter acting the small piece from warping up? Or maybe heat both sides of the small piece before welding? I'm really at a loss since I've tried to complete this weld twice (with different material) and failed. Oh and I did think about clamps like this (below) pr even a clamp for "T" shapes but I don't think they'll stop the piece from warping. http://www.trick-tools.com/Deluxe_Welders_Angle_Clamp_Large_WAC45_1325
-
Thank you. I am indeed aware of that I just thought he might have a suggestion or preference to add before ending my thread.
-
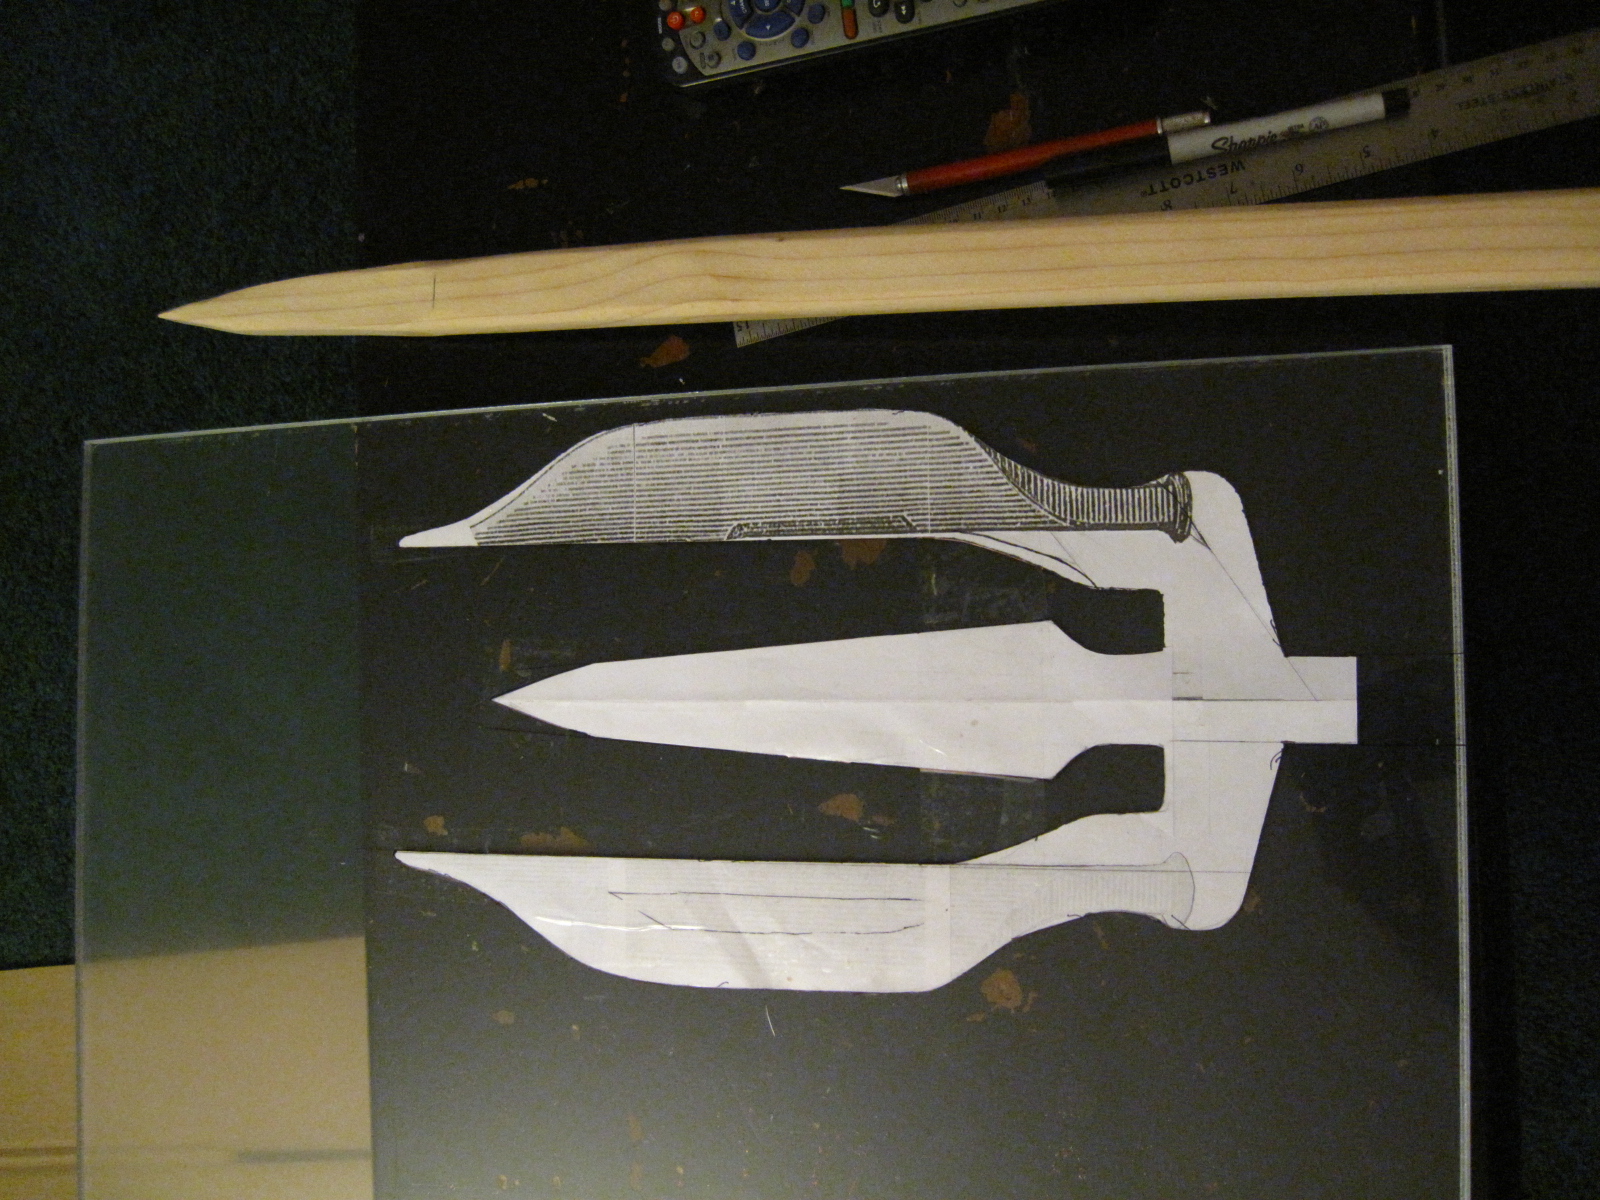
Excellent, thanks for this breakdown. Can you steer me in a direction that is good for tridents, pole arms and this sort of thing? Ideally I'd love to make some pattern welded steel/damascus but I've got to put in my dues first. Wondering what would be some good entry level steel grades for this project? Thanks for your help.
-
I was thinking 1045 or 1095 or something in 4140. I'm not exactly sure yet because I'm just starting and will likely make the first one or two in mild until I get a grip on how to move the metal.
-
Can you walk me through how I would normalize the entire trident and then just harden the tips? Would I heat soak the entire thing to correct temperature and then let air cool? And then harden just the blade edges or tips with a rosebud torch? What exactly are the practical steps in doing this. I just read a bunch on normalizing, hardening and tempering on another site and seems like people are in disagreement over temp, method, etc. So I'm trying to get set straight here.
-
Trying still to get these questions answered: When you are quenching something thin like blades that are wide and flat doesn't a horizontal quench tend to want to warp the blade? I always thought with something like a trident, you'd want a vertical quench so both the front and back hit the quenchant at the same time. Also when heat treating something like this do you treat the whole trident or do you treat just the edges of the tines with something like a rosebud torch? Trying to figure out is a vertical quench or horizontal better when doing the final quenching to get the right hardness on the tines. I'm thinking it has to be vertical, you are basically quenching three daggers at once. I just wonder what the reason is that some people advocate for horizontal. There must be some logic behind that too.
-
Hey guys, not to be rude, but you're hijacking my thread. Shouldn't these posts be in an off-topic thread somewhere. I'm getting notifications for this thread that have nothing to do with my questions/posting. Thanks, Av
-
When you are quenching something thin like blades that are wide and flat doesn't a horizontal quench tend to want to warp the blade? I always thought with something like a trident, you'd want a vertical quench so both the front and back hit the quenchant at the same time. Also when heat treating something like this do you treat the whole trident or do you treat just the edges of the tines with something like a rosebud torch?
-
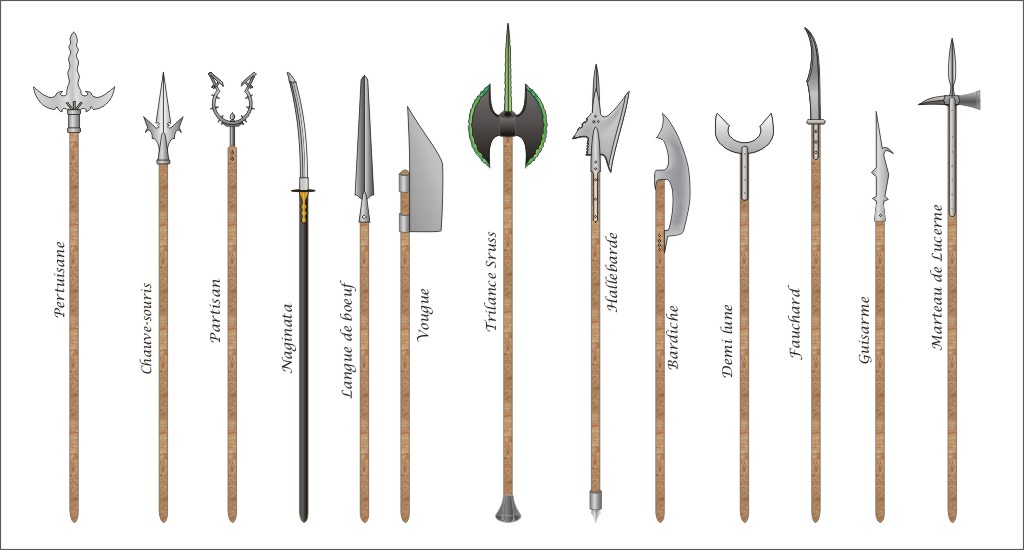
WOW That is impressive!!! Is it better to have a conical opening for the shaft or have a spline of metal between pieces of wood? Or is there just numerous ways to do this? For example on the right right the Marteau De Lucerne it has strapping that goes over the exterior of the pole? There must be an inner tang too right by which all three pieces (two outside and one inside) are all bolted together?

-
test
-
I plan on making many, many of these.. at least a dozen. yes my ' should have been a " about 3-4 feet tall is all I need. That is not a bad idea at all. I have access to a junk yard and could probably get a wide muffler. Is cooling a trident horizontally or vertically better?
-
I have a vertical ammo box but didn't know they made them this big. I can check around for one that wide. Mine is something like 10"
-
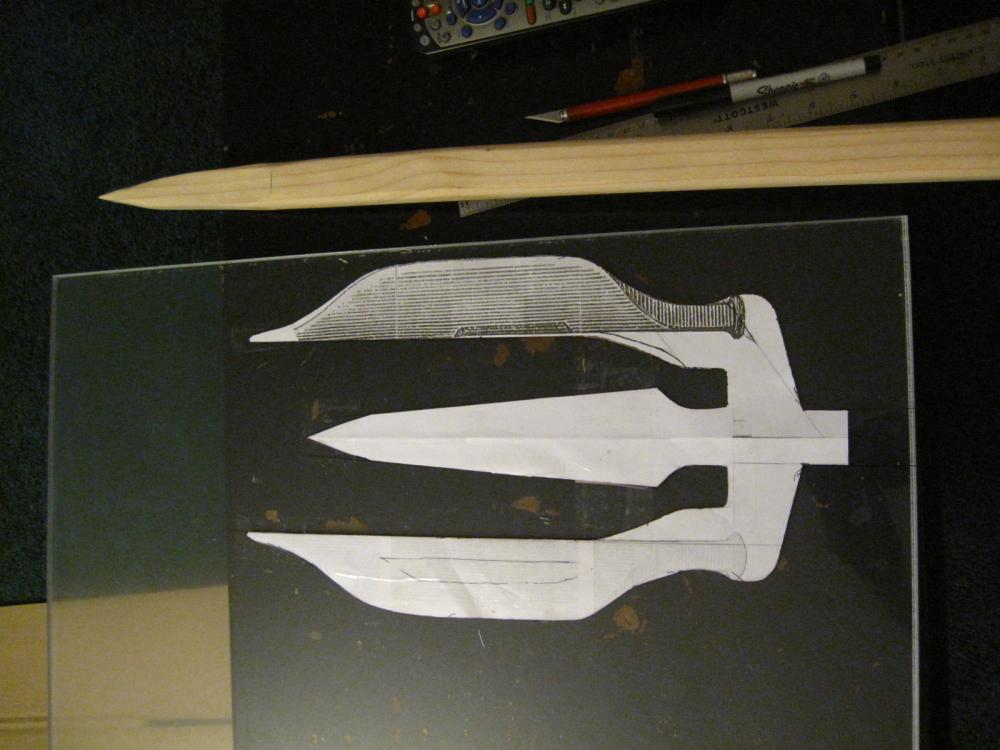
I'm trying to make a quench tank for tridents and it's posing to be a problem. The weapon is 3 tines in a flat configuration. I thought about a big round piece of pipe in the 12" to 16" but there is so much useless space of cold oil to heat up. So I moved on to trying to find a 14" x 3" piece of rectangular tubing that is 4' feet tall. In order to get that piece steel yard wants me to buy a 20' long piece for massive $$$ amount of money. I may have to weld the tank up from angle iron and flat plate, which is a huge project obviously. I looked at some wide U-channel that was 15" wide and the height was 3.5" so if I welded it together I'd get at 15" wide by 7" tall tank.. TOO BIG! So my question is should I just weld up a custom tank and is 3" wide enough or is it too wide for a trident. I'd be at 168sq inches of volume. Previous user told me I should be around 5 gallons in my quench. Is that right? There are 231 cubic inches in a gallon so does that mean this tank is not even a gallon or is my math way off. If anyone can help steer me to the perfect tank for this application that would be helpful. Also since I'm probably going to have to scratch build this is it more advantageous to use stainless or aluminum than steel? this image is what the proportions roughly look like.

-
Okay thanks PM coming.
-
This is a pretty good overview http://www.dakeng.com/CNCconvert.html
-
Is it just that CNC-ing Aluminum requires machines that are more in the 50-100K range? Is it better to just get a high quality end mill and do everything manually if you have under 10K to spend?
-
I want to get a very high end drill press in the range of $2500 but the other part of me wonders if some kind of CNC wouldn't be better. I mostly want to drill and mill aluminum parts for robotics. I saw grizzly has really nice end mills and drill presses but they don't seem to have computers attached to them? Can you make any mill into a CNC? I'm not even sure where to start with CNC as i'm totally newb to it. Can you even get into a decent CNC under 10K? Seems like all the CNC stuff I've seen that was less expensive cut wood or plastics but wasn't powerful enough to cut non-ferrous material. Penny for your thoughts. Thanks, Av
-
Casting vs Fabrication - Small Tank Tracks
Avadon replied to Avadon's topic in Smelting, Melting, Foundry, and Casting
For anyone interested, there's a ton more stuff in small scale http://www.aliexpress.com/promotion/promotion_tire-tracks-promotion.html Our robot is near 1/5th scale. -
Casting vs Fabrication - Small Tank Tracks
Avadon replied to Avadon's topic in Smelting, Melting, Foundry, and Casting
I found this recently which gives a better show of how M60 tracks are made. http://www.safestchina.com/products_image/m60-battle-tank-shoe-9322f.jpg I think the easiest thing is instead of machining aluminum tracks and pouring rubber into them, make the whole track pad of rubber with either tubes or pins poured into them. I've seen this done with good results. It cuts down a very big step of having to either machine or cast metal and then pour rubber into it. If we are dealing with 20 tons then you definitely have to have the metal in there, but seeing as our robbie is under 200LB I think we'll be fine with just very strong truck tread shore 70-80 hardness treads. -
Casting vs Fabrication - Small Tank Tracks
Avadon replied to Avadon's topic in Smelting, Melting, Foundry, and Casting
I'm making something similar to this only magnitudes way more advanced. It's kind of out of topic for the thread, but I'm making a deep learning android w/ strong AI. It looks not so similar to this but you'll get the idea. Yes I'm starting to believe you're right. Machining a 1-off copy is most likely way cheaper than getting involved in my own foundry which sort of takes me away from the direction of robotics and into the field of learning metal casting. I'm thinking someone locally can probably CNC my track pad parts for cheaper than my investment in setting up all the necessary equipment to pour these pads in a manner that will produce impressive results. And of course no pop cans. I was only thinking of the best possible aluminum scrap. That's a good question. I thought of doing them in steel but the machining will be far more difficult and the weight will be dramatically increased. I think aluminum is really the best bet. I'm not going to be climbing any mountains with the robot so I think the aluminum should be more than durable.