

Blister Fingers
-
Posts
15 -
Joined
-
Last visited
Content Type
Profiles
Forums
Articles
Gallery
Downloads
Events
Everything posted by Blister Fingers
-

Treadle hammer mechanics?
Blister Fingers replied to Blister Fingers's topic in Power Hammers, Treadle Hammers, Olivers
I've read each reply multiple times. Thanks again for all of the help and information. Sorry for the question about homemade spade bits. That's a dumb idea for metal drilling. Especially as a beginner, if I get the heat treating wrong and connect it to a motor, they could shatter and seriously injure myself or others. I don't know anything about the grass hopper design, or what a watt linkage even is. It was hard to find information on a year ago, let me do some more research. I have seen photos of the treadle hammers and power hammers that utilize one leaf spring pack at the very top, with a center pivot. Sometimes they have a guided hammer in a sleeve. The linkage pushes the opposite side of the spring instead of pulling, like a playground teeter-totter, or see-saw. Whatever you'd like to call it. When starting this thread I thought THAT was a clay spencer TH design. It's not. I don't know who that design belongs to. It doesn't seem too bad, now that i've had a little while to think about it. The grade marx I believe had the 4 bar linkage from the frame to the hammer. Or was it 2 leaf springs? I can't remember at the moment. That design seems much, much more simple and easy to understand than many others. I do remember that simplicity being an attraction in the beginning. I remember it was based off a design from the early 1900s. I forget the name of it. It doesn't appear that the clay spencer design has as much of that spring whip you guys are talking about. I'll bet that when the hammer thuds the work or the anvil, there isn't as much spring to absorb that residual energy. Maybe that paired with the guide tube creates a hammer that doesn't rebound off the anvil very well. These are just guesses based on what you gentlemen have said and what research i've done on my own. With good rebound and finding a good rhythm with the machine, it is easy to visualize the capacity of a treadle hammer to pack a wallop. At least that's how a hammer and anvil work. The hammer bounces off the anvil or the work pretty well. It doesn't take much effort to keep hammering once you start. I tested my anvil rebound a few weeks ago and it's about 85%. Pretty good if you ask me. The bearing didn't dent the face either. (ok sorry, i'll stop it) -
Treadle hammer mechanics?
Blister Fingers replied to Blister Fingers's topic in Power Hammers, Treadle Hammers, Olivers
I'm just going to ignore a bunch of comments that have been made and say this: I didn't like working on my anvil in the condition I purchased it. I do enjoy working on my anvil after having made it a more useful tool to suit my own personal needs as a smith. I personally cringe at reading my own thread starter post and my earlier responses. I wish I would've known then what I know now. Please, disregard my first posts. Maybe I did ruin my anvil in your collective opinion, but I like it so much as is that i'm very reluctant to let people take up a hammer in my shop. The edges are NOT sharp, despite my machinist brother's protests. Milling my anvil was a favor he did for me. It took me a long time waiting, but he brought it into his work and did it for free. We help each other out in that regard. As a machinist, he wanted the edges sharp. As a blacksmith, even as a beginner, I knew better. When I said "crisp" I meant "generally blemish free". I love my anvil. I love working on my anvil. I'm proud of the work I put into it. I love the result I got from having my brother's help with it. He's pressed for time so i'm on here looking for the advice and skillset I should be getting from him. My shop skills pale in comparison to his, but he has little to no interest in blacksmithing. All the information is in the plans by clay spencer, but very few tips on where to begin. Here's a question: since I have a bunch of spring steel, how's the likelihood that I can forge and grind my own spade drill bits and Chuck them in a drill press? Maybe if i'm really lazy I can just forge one at the largest size called for and grind down the sides until i'm done drilling. Or I can forge out my own whole set of spade bits. Scrap steel in the yard costs the same per lb regardless of what grade of steel it is. The scary thing about a spade bit is its higher probability to catch. if it wasn't ground or heat treated properly that could lead to a minor disaster. I have also thought about punching the holes, but do not know how the deformation in the hollow pieces would affect the strength and performance of those parts and the machine as a whole. I think it would also be difficult to keep the holes straight through a hollow piece, whether it be drilled or punched. Punched holes certainly look a lot better in my opinion. Frosty, in that last post you remind me of the people I grew up with. I would like to share this link with you. It appears to be published by Miller and they explain very simply the common grades of welding rod and their uses. 7018 is in there. https://www.millerwelds.com/resources/article-library/stuck-on-stick-easy-answers-to-not-so-simple-questions-about-common-electrodes That's the kind of teaching that makes sense to me as I sometimes have a hard time figuring things out by myself. This treadle hammer project is a good opportunity for me to practice my shop skills. Since it's human powered, there is a limit to how catastrophic a failure can be. I'm aware that this project is over my head. That's how I'll get better. I'll never improve if I don't challenge myself and humble myself in the process. I may end up with a crappy piece of shop machinery, but I will be better at making shop machinery than I was before I started. If that isn't enough, i'm in blacksmithing for the wrong reasons. There certainly isn't any easy money to made from blacksmithing. -
Treadle hammer mechanics?
Blister Fingers replied to Blister Fingers's topic in Power Hammers, Treadle Hammers, Olivers
Thanks very much for the feedback and information. I understand that given what i've said, it's very easy to assume that I've removed huge amounts of material and completely removed the hardened top plate. That's where you're wrong in assuming I had no knowledge whatsoever before I started. I didn't blindly and cluelessly plow through dozens of flap discs to get it flat. I didn't have inches milled off the top of anvil. Things took the amount of time they did because I was very aware of preserving the top plate. I removed as little material as possible and spent more time checking my work than grinding, as it should be. I was aware that the edges needed a radius. I never took them to 0. I worked in thousandths of an inch, not by tape measure. . If anybody is attacking in this thread, it's you. This is a topic about a treadle hammer build. Not the condition of my anvil. I'm not asking for advice on how to fix an anvil. Nor am I asking for your input on the work I've done to an anvil that I own. If i do, it won't be in this thread. I've done it, i'm happy with it, and my anvil is a joy to work on for my preferences. Now if you have any advice or input on building or using a treadle hammer, i'll be glad to hear it. -
Treadle hammer mechanics?
Blister Fingers replied to Blister Fingers's topic in Power Hammers, Treadle Hammers, Olivers
Oh yeah. And you're brilliant for wanting an anvil face over 65 rockwell hardness that'll skate a file and send a chip flying right into you. -
Treadle hammer mechanics?
Blister Fingers replied to Blister Fingers's topic in Power Hammers, Treadle Hammers, Olivers
All true, except someone had already gone through all that trouble before I bought it. Not sure if I mentioned it before, but it's a newer 155# Trenton with the arc welded waist. It has a 7/8ths hardie and 2 pritchels. All have seen some use. I believe it was repaired because it didn't have a swayed back, but the whole face was crowned longways like a railroad track. The sides looked like they had been welded and ground back square, with little chamfer on the edges. It was hard for me to divide material on the corners with any accuracy and It was just impossible to straighten a knife blade on it. (yes, unfortunately I started out by making Railroad spike knives). The face seemed to have a radius that the edges should have gotten. Would have been great to use as a horizontal shop cone in the condition I bought it. I don't regret having my anvil milled to suit my purposes. I did radius the edges by hand after milling. I used sandpaper and a block, Just as I had done with the face. After working on it for about a year I decided to radius the edges more by using a hand file. I feel that a flap disc is too fast and aggressive for that task. One slip and that huge investment of time and money has a giant flaw in it. Probably a nice metaphor for a power hammer vs. hand hammering, or missing with a wild, uncontrolled hand hammer blow. Sure a hand file takes more time, but you have much more opportunity to check the quality of your work, and adjust little mistakes before they turn into big mistakes. I am a competent welder, and spent 3 years in highschool passing one bead after another with a SMAW (shielded metal arc weld) machine. It was a way to avoid doing real work and nobody wants to bother you when you're welding. When I decide it's time to fix up my anvil again I will pre-heat it by setting it in a fire pit and building a wood fire up all around it. O/A tanks cost a lot to buy and fill. Then after a few hours I can do the 'ol buzz buzz with a mountain of 7018 rod and a 225 amp arc welder. Easy, but not cheap. Grinding the mess off is the hard part, because everything has to stay FLAT! I spent weeks on my anvil with flap discs before I even took it to the mill, grinding a little, checking with a square. Grinding a little, checking with a square. Or you can make friends with the owner of a surface grinder or milling machine. I don't know the owner of a surface grinder, but I DO know the owner of a milling machine. However that is wear and tear on his tools and I know i'll need to compensate him somehow for that. I am writing this paragraph while I take breaks from hand filing a junkyard 4lb hand sledge into a rounding hammer. I have been at it for 3 hours and the whole hammer is at my body's temperature now. Another task I'm taking on to avoid doing any "real" work at the anvil or with cutting and fitting for this treadle hammer. :Edit: I left the desk for a while and have since finished up the round face of my 4lb sledge. I think all this writing about fixing an anvil is plenty to convince any intermediate smith to consider using a treadle hammer over the alternative of someone with cheeto dust on his hands and not even the first idea of what it took you (me) to build your (my) shop from a coffee can full of bbq brickettes and a rusted piece of railroad tie plate without any help or support from anybody. Does this post qualify me for a "Jr. Curmudgeon in training" title or should I keep ranting about my deep seated frustrations towards disrespectful shop help who don't care about the welfare of your equipment? Uh... Long story short gentlemen, I think I would personally rather have a Treadle hammer than a striker. Most people I know can't be bothered to come out on a regular basis and learn the skills, even if the only skill is hitting the same spot every time. Which reminds me, A beginner striker will almost ALWAYS try to hit the metal where they hit it last, assuming that you moved the piece for no reason. With a striker you also have to train another person to read colors and watch for cold shuts, bad tool angles, bad work positioning on the anvil, pauses for tong readjustment, tool readjustment, ETC. All of this is assuming your striker is capable of hitting their mark without the hammer landing at an angle; which is tremendously dangerous. I have noticed a really bad trend in this thread: The assumption of a capable striker who is available whenever you are, for whatever tasks you need and nothing more or less. Maybe for past generations that was a realistic possibility, but not in mine. I'm about as likely to run a machine shop with nothing but windmill power. How fickle of a resource that is. -
Treadle hammer mechanics?
Blister Fingers replied to Blister Fingers's topic in Power Hammers, Treadle Hammers, Olivers
Hey all, just wanted to revive this thread and use it as something of an update log. There is a lot of good info you guys have shared with me about this project and I read back on it sometimes when I think about actually getting this thing built. I have bought Clay Spencer's treadle hammer plans from ABANA and my biggest regret is not buying them sooner. I took the plans to the scrap yard (technically yesterday) during a good sale, and bought some of the heavier pieces that will help me get this build started. (and too many springs, because they have too many uses). A few things I would like to write down for readers who are at the experience level I was when I started this thread: This thing seems as simple as pie until you sit down with a set of REAL plans that show in detail the amount of machining you're in for. Be prepared to fit big pieces in the shop for drilling and assemble them to weld flat, square, level and plumb. Be prepared to drill a lot of holes. I don't have the bits, or the money to buy them. luckily I have machinist friends who are happy to do this for me. These plans do call for some simple forging. When I got the idea of building a treadle hammer I had the mentality that it could replace the need to develop good technique and hand hammering skills. I was a regular bicycle rider and figured I could use my leg muscles to replace my arm muscles; thinking that it would be a significant advantage. Whether or not the second part is true, I do not yet know. As said by others I will repeat this: I don't think there is any replacement for good hand skills at the anvil. Brian Brazeal is a good teacher for this. Brent Bailey also explains some things well. But I have some issues with my back, and sometimes find it more ergonomic to stand with my feet together facing my work piece. That tangent leads me to a point about building this treadle hammer: Most guys I went to school with and am friends with can't swing a hammer properly. After I got better I had my anvil face milled off and hand sanded it for weeks to get it smooth and flat; free of milling marks. I got the edges beautifully crisp. Now I've got it covered with dings and a few chips from letting newbies swing a hammer in my shop. A treadle hammer won't abuse your anvil the way a striker can. It doesn't miss it's mark. Only you do. Now for my own curiosity; I never see anyone using a treadle hammer to assist in punching or drifting axe or hammer eyes. Is there a reason for this aside from the fact that it's easier in a power hammer than a treadle hammer? Is it easier by hand than in a treadle hammer? even now there is fairly limited info on what treadle hammers work well for and don't work well for. Most vids on youtube show quick demos, but not a lot of footage of a day in the life of a treadle hammer, as there is with power hammers. I have done some scouring and will be happy to share links if anyone is interested in what I've found for info so far. -
May I interject- off topic of tongs a bit, that I recently had to do a 4 sided double taper on 1" square bar, recreating a hold-down hardie. I found that the size and mass was so tiring to hold any way but to rest it flat on the anvil. Hearing and feeling it clunk flat on the anvil was excellent training for me to keep it flat. The mass of the bar also shielded my arm from the shock of a miss, much more than it does on thinner stock. That brings me back to the tongs discussion. On other threads, guys talk about lighter tongs being better later on. I think this is absolutely true, after a smith develops good accuracy and control with both hammer and tongs. A friend let me use some really heavy hammer eye tongs, and I had a total newbie want to forge a viking bearded axe. We grabbed a discarded head of a ball pein hammer and went to work. It was then I learned the same thing I discovered with the 1" bar. Heavy tongs don't jump as much when you miss. They don't shock the hand as much. They also don't jump open as easily as smaller, lighter tongs. maybe I should have started my own thread for this observation but thanks for letting me share anyway.
-
I think it looks fine. I would have drawn out the handle and forged it into an octagon shape or even round. It's an eating utensil, not a fighting tool. The tines look nice and even, straight and all. Behind them looks really good and even, too. Good symmetry there. I can't think of a reason not to forge them to diameter, cut them to length and file them off if desired. You should check out Brian Brazeal's videos on forging leaves and mushrooms. Use it as a reference to get the handle drawn down and spoon portion nicely made before you flatten it. Clean forging doesn't just look nice, it's easier and saves you time. Sometimes I'll fiddle around with getting a part situated in the tongs and on the anvil for 90% of a heat just to get one good accurate strike. Every hammer blow counts, and every miss creates more work for you later.
-
What to save from a truck for smithing
Blister Fingers replied to kunkle's topic in Blacksmithing, General Discussion
What about the sway bar? That's a nice long hunk of thick round bar with a big hole punched in each end. -
Life lessons in the smithy. Share yours
Blister Fingers replied to David Kailey's topic in Blacksmithing, General Discussion
This is specifically what I love about blacksmithing. It's a chance for me to think about life and process everything through the lens of forging. Here are some gems I keep with me. This is good advice when applied to the shop, but they are all metaphors to dealing with things and people in your life. *The metal will never get hotter than your fire. Things don't tend to surpass their environment. *Forging metal too cold (under the wrong circumstances) is possible, but expends much more time and energy. You're also always at risk of breaking something. *Metal is like a person. If it's cold, it won't move for you. Warm it up and treat it right. You'll get what you need out of it. *Every time you swing the hammer into the steel, it has a consequence. Be mindful of your words and actions. *If the steel isn't moving how you want it to, you're doing something wrong. See the hint above. *Never swing the hammer harder than you can control it, and never use a hammer too heavy for comfort. Know your limits or face the consequences. *Doing it right the first time is infinitely faster than going back and fixing mistakes. *Proper sequence is important. Don't get ahead of yourself. *Most mistakes can be fixed, but sometimes it's best to move on. *Never show off or pretend to know things you don't. You'll make yourself a target for all kinds of malicious behavior. *Hot steel is only dangerous if you're ignorant or careless. Keep your wits about you. That's all I feel like writing for now. Thanks for starting this thread. I hope you all like reading what I have to say. -
Treadle hammer mechanics?
Blister Fingers replied to Blister Fingers's topic in Power Hammers, Treadle Hammers, Olivers
So I built a little "proof of concept" prototype out of wood, just to get a feel for how the machine would work and to find the weak points to beef up. I tried to upload a couple pictures but they failed. The project has been on a long hiatus while i have been doing other things blacksmithing and non-blacksmithing related. Some things I learned: AKA basic tips for other beginners thinking about embarking on making a treadle hammer: The attachment points on the linkage between the treadle and the hammer are under a huge amount of stress. Make them strong. Especially if your treadle doesn't bottom out before the hammer to the anvil. If your hammer hits the anvil before your treadle bottoms out, the pivot point of the treadle arm will also be under huge amounts of stress. Make that strong, too. The height of your anvil has a huge amount to do with the direction of force in a swing-arm design. Seriously consider those possible advantages and drawbacks. Any sloppiness in your build causing sideways movement will make things inaccurate, inefficient, and kinda scary to use. On the other hand, making things too tight will TIRE YOU OUT LIKE YOU WOULDN'T BELIEVE!!! This leads me to believe that greased bearings or bushings will be your best friends for any moving part. Reading all of your replies again revealed to me how much I didn't understand the first time around. Hindsight is 20/20, huh? Anyway, that's what I've learned so far. Hope someone gets useful knowledge out of this. -
Treadle hammer mechanics?
Blister Fingers replied to Blister Fingers's topic in Power Hammers, Treadle Hammers, Olivers
Thank you, Alan for the photos and the drawing. I think I already have all the materials needed to build something very similar to that design. If you would have just explained it in words, I don't think I would have understood at all. I don't expect any of you guys have spent much time making chain maille? The first step of that process is essentially just making a spring. Change the diameter of the rod and the wire, and you have whatever size spring you want. It wouldn't be as durable as something made of a high quality steel, hardened and tempered properly. It would, however, work for what I need it for temporarily. -
After reading this thread I now realize i'm probably going to die young and blind. Know what I do with paint? Scuff it with a file for the arc to grab and weld right over the top of it. Sometimes I flap disc or wire wheel it off. If it's a piece i'm gonna forge I just throw it in there when i start the fire. Won't get up to temp for 30 minutes anyway...
-
Treadle hammer mechanics?
Blister Fingers replied to Blister Fingers's topic in Power Hammers, Treadle Hammers, Olivers
Thanks so much for all the feedback, guys. It's a shame I can't have my cake and eat it, too. I think I will build a sort of treadle hammer for tooling. I have 2 pickaroons made out of railroad spikes, the punches and chisels to cut the holes, and no striker to help me muscle through that steel accurately and effectively. (I know, I know, I didn't punch the holes first, but I just didn't want to at the time!) Another advantage i'm thinking A treadle hammer would provide is giving my right arm relief from all the heavy metal movin' activities. I've spent a good 10 hours a day hammering on multiple projects at a time... could barely close my hand after all that. Surely it's advantageous in that regard? I mean, I DO have 2 legs... I found that I goofed up more projects trying to swing the hammer with my left hand. While i may be laughing, I am completely serious about that. I think i'll take your advice and build a simple one to play with, that way I won't be weeks into fabrication alone on a huge project without knowing my preferences and needs as a smith. It would be a shame to spend months collecting junkyard scrap (i'm a recycler) and building a full scale treadle hammer with, for example, a really short throw on the foot lever to find that it wasn't what i really wanted. I think a simple, quick and easy treadle hammer will allow me to play with the pivot points and where the linkages connect. Also i'll be able to experiment with different return mechanisms and really prepare me for when i'm ready to build the full strength model. Alan, I thought you were messing with me about the saw setters hammer and the cheese fuller, until I looked it up. That's an aggressive way to draw out steel! I'd bet it works like a charm. I have a 165# Trenton anvil. It's pretty soft on the surface, I don't know if I want to sacrifice a working edge for all that heavy hitting. Some guys say to draw out on the horn, but it's hard to keep it square, and tends to lack rebound. Also it shocks the crap out of your hand if you miss. Frosty, that stuff about the air compressor is interesting stuff. It reminds me of a bicycle builder in Portland (not suprisingly) would used a little antique brass canister and a piston to compress air while he rode his bike. Then after the tank was full, he was able to use that stored energy to power his bike for him so he was able to rest. Fascinating stuff. It makes me wonder about using belts and a flywheel to create a treadle hammer that operates the same as a power hammer, but also moves a piston to compress air. I have seen the former done, and even have a couple old flywheels and manual transmissions laying around. While electricity is great, anything achieved without it cuts overhead costs. And if you're a doomsday theorist, you'll be relieved to know that your shop will be unaffected by a power outage. That's why I stray from electricity, anyway. We get power outages out here. Sometimes for a couple days at a time. As far as my shop skills go, I am okay, I guess. I live with my parents on our small farm and help maintain the property. In exchange I get to use all of dad's great shop tools. We have a great mig welder. I can make a weld rock solid without co2, weld stainless to mild steel, burn through the zinc or the paint on metals I was too lazy to do proper edge prep on, weld up a hole on a weelbarrow, etc. I didn't have the money to buy a post vise for my shop, so I welded one up out of scraps. Works just fine. Anyway, this is getting WAY off topic. Here's a photo of the 12# sledge i'll use and a bit of railroad for the anvil. It will be a good test model. I think this one will get a wooden frame. I have some scraps... i'm also not sure exactly how i'm gonna build it yet. Trial and error, I guess. Also pictured: a wooden shield I made years ago, some lawnmower blades, window weights, and a bucket of railroad spikes (which DO make good knives if you harden them and don't temper them!) ::edit for another side note:: that's my anvil with a wooden cover on it to keep my nephew from peening the edges for me. Also a lawnmower blade sword in progress. I'll upload pics of my hovel in the "show us your shop" thread.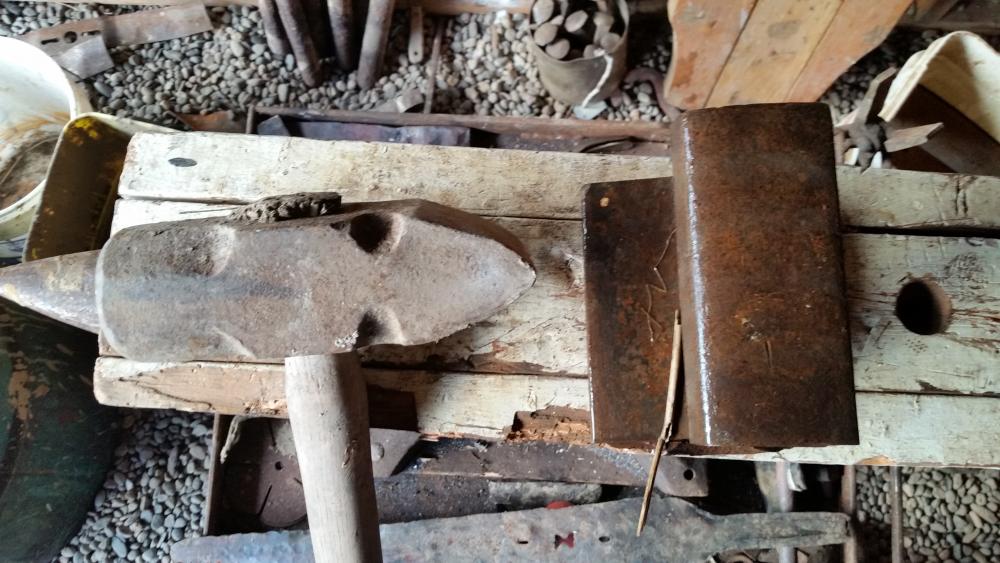
-
Hey everyone, since this is my first post let me introduce myself. My name is Daniel and I live in the Willamette valley in Oregon (in case anyone needs a shop hand). I made this account when I was still a complete novice and trying to make tongs out of railroad spikes and using channel locks as my main tongs. Also when I was collecting cast iron window weights thinking that I was going to forge them into something. lol anyway let me get into the meat and potatoes of this post... I've been searching all over the web looking for different designs of treadle hammers because I want to build one to suit my needs. Compared to almost everything else blacksmithing, there is very little data on the good 'ol human powered beast. However the discussion is always centered around one existing design vs. another (Grade-Marx vs. Clay Spencer's design, the fabled Grasshopper, etc. Swing arm vs in-line etc.) Nobody really talks specifically about WHY these designs are good or bad beyond the basics: Anvil, hammer and spring weight, materials, build complexity... But one thing is ALWAYS ignored... GEAR RATIO!! First let me mention that I have never used a power hammer OR a treadle hammer. In videos, though, I am not at all impressed with the power of Clay Spencer's design. It's a 1-1 gear ratio with the pivot in the very center of the bar, and the drive linkage at the very end of the bar. It appears it hits NO harder than your foot can stamp the lever. The older gentleman with the Grade-Marx hammer, however, had some oomph behind it. I'm sure you've noticed how far back on the spring his linkage is set up. However I did notice when he went to faster hits, it seemed to lose a lot of power. The Clay Spencer seemed to really shine for repetitive hits. I'm also thinking a lot about drive systems. Levers and springs? Pulleys and springs? Counterweights? (I've read people don't like counterweight THs much though) I could make a treadle hammer with tons of pulleys, heavy duty rope, and a coil spring from a car, and it would be a wonderfully adventurous press. The foot pedal would have to travel so far that I'd need to climb a ladder and ride it down in order for the hammer to move a few inches with a tremendous amount of force. 9-1 ratio = 100 lbs on the foot pedal with 9X the travel distance = 9x the force on the hammer end with 1/9th the travel distance. And I also understand that Force is = to mass (weight) x acceleration. (I'm not actually this smart, my dad is a mathematician and i'm always bothering him with questions) So with this concept in mind I'm thinking I want the hammer to travel really far and the foot pedal to be very hard to press. But then there's a balance I need to find because I'm a hermit without power in my shop and really want to use this thing to draw bigger stock into smaller stock. (eyes the sway bar and coil springs on a junkyard truck) That being said, I also like doing decorative work and do love the idea of controllability while using tools. What are your thoughts? I really want to build this thing and I want it to be exactly what I need. Please help
