

PaperPatched
-
Posts
64 -
Joined
-
Last visited
Content Type
Profiles
Forums
Articles
Gallery
Downloads
Events
Posts posted by PaperPatched
-
-
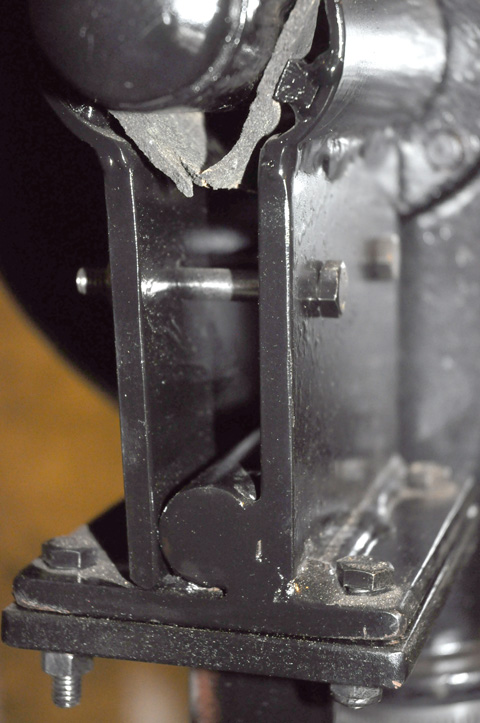
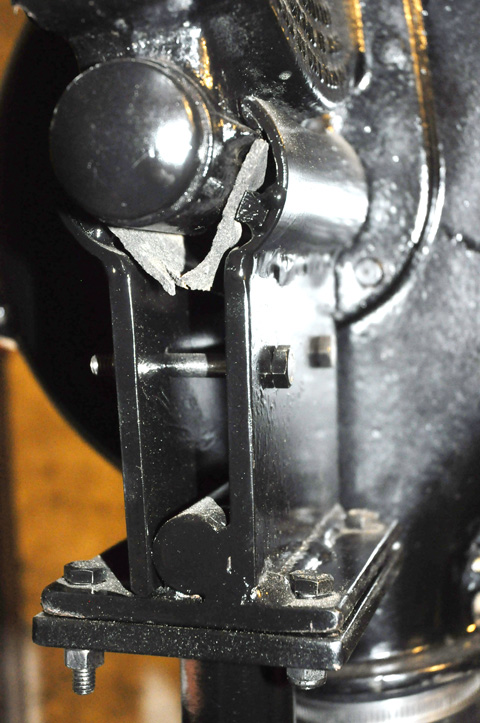
Here are a couple of photos showing the improvised bracket. The round rod shown is welded to the base plate and the jaw to the right and serves as a pivot point for the movable jaw to the left. Each jaw (cut from a segment of heavy wall tubing) has a rib (cut from the same tubing) on the inside. There is a sheet of thick cork gasket between the blower and clamp, and the two bolts draw the clamp together.
-
It will go faster if you physically remove as much grease as possible before you start with the solvent. I use cotton rags and something like a paint stirring paddle. For solvent I use undiluted orange oil cleaner, but kerosene or mineral spirits (paraffin or white spirits) will do the job although be less pleasant to work with.
From what I've read you should not put grease back in there. It's too thick and will make the blower hard to crank. Oil is the preferred lube. Be very gentle with the fan its delicate. And watch for loose ball bearings! There are some comprehensive guides to a restoring Champion 400 available if you search. There are some YouTube videos also. If yours did not come with a stand feel free to contact me and I'll let you know how I built the bracket to hold the blower.
Alan
-
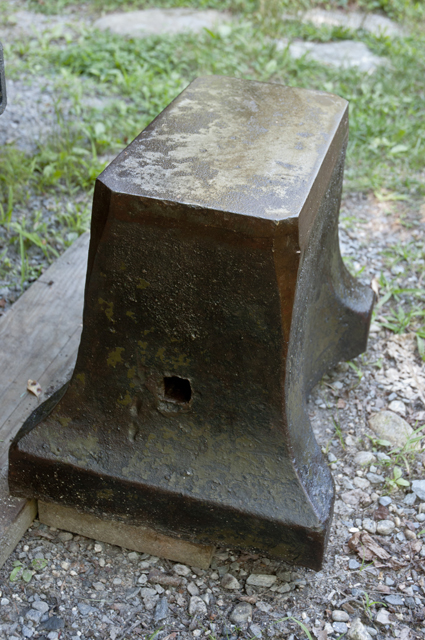
I have one similar to yours. The dimensions of mine are 6-5/16" x 12-1/2 inches on the top, and 12-1/2 x 16-1/2 inches on the bottom. I had posted pictures in Show Me Your Anvils, but they were lost courtesy of Photo Pail, so I'll repost one here. This anvil was weighed in the back of my truck on a drive on scale at a local scrap yard and was 383 pounds:
-
Thomas, you left out "Vintage". It's very popular in listings here in New England.
-
I have both the HF portable and the generic 4x6 saw. I use the portable to reduce the size of stock to get it ready for the 4x6 and to sometimes cut off a piece that wont quite fit the 4x6. The 4x6 may need some tweaking to perform to its potential (there is a lot of info on the web, including a 4x6 specific group.), but once set up and then equipped with a quality blade (I use variable pitch Olsen blades, Starretts have a good reputation too.) you will be able to clamp in thick, heavy, and bulky sections that would test your stamina with the portable. Then there is the issue of grinding time. I think I have reasonably good hand-eye control, but I can't get straight enough cuts to suit me with the portable and so I then often get to spend some quality time with one of my grinders. I'd rather spend that time drilling, tapping, filing, welding, etc. while the 4x6 purs away in the background (best to not leave the 4x6 unattended as a jam can lead to a burnt out Chinese motor at best. I've only had one jam when I was too lazy to change to a coarser blade when cutting some 1/4" thick copper plate.).
Also, consider the order of things. You have approval to get a band saw. Spend the money for the 4x6 now, enjoy its use, put away a little now and the for the portable. If you get the portable first it will be a harder sell to get the 4x6.
If you get the 4x6 go investigate the information online. There is a lot out there on performance tweaks, and on the construction of various attachments and jigs to solve cutting problems. As you can probably tell I love my 4x6. It has saved more time and physical effort that any other tool I own with the exception of my woodworking table saw.
-
4 hours ago, Irondragon Forge & Clay said:
some sort of rake head and a king pin.
Looks like a de-thatching rake used on lawns.
-
Some clog-resistant long life sandpapers have a stearate wax coat on the paper. Did you use something new/different to do the post hardening sanding?
-
I guess you would flock together!
-
You guys seem kind of flighty. Are you all full fledged members?
-
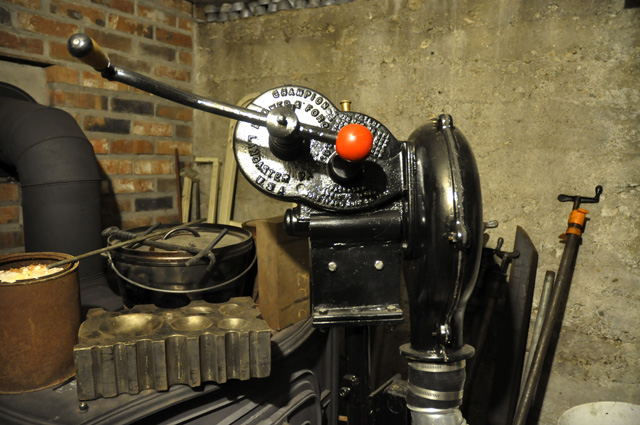
This is certainly a small power hammer. The builder has it for sale, but claims it needs a larger drill to power it. I guess necessity really is the mother of invention.

-
I've used 3M "Safest Stripper" to remove 3 coats of old 1950's oil based enamel from furniture. I brushed on a thick coat and let it sit over night. In the morning I brushed a little more on areas that had started to dry, went and ate breakfast, came back and scraped off the three layers. As the stripper is water based I used hot water and a scrub brush to remove the last stubborn bits. Check with your local regulations on disposal. Here we have to let the scrapped off goo dry and then wrap in a couple of layers of 4 mil poly and it can go in the weekly trash pickup.
-
He also said that in the cause of mutual trust and respect he would abide by the forum rules. If we start banning people for what they think there might not be nearly as many folks here as there are now. It's actions that we will see that should govern our response.
-
That looks like plenty of adjustment. Please check the three fixed pulleys for alignment with a large framing square and straight edges. A straight edge laid across the flat side of any two of the three pulleys (if they are the same thickness) should any misalignment.
-
It looks like you have the essentials. But could you show us a closer picture of the tracking wheel and how it adjusts (without the belt on the machine). My guess is that you just need to make the tracking wheel have a larger degree of adjustment. Also, the second picture makes it look like the drive pulley is not aligned with the platen pulley. If that is indeed the case fix that first.
-
Your local Benjamin Moore dealer will have access to Insul-X LFR-110 fire retardant latex paint. Most paint dealers order once or twice a week this time of year. Price will vary from approx. $ 75.00 to $110.00 or so. So, I'd call more than one dealer and see what they will do for you.
-
10 hours ago, Marc1 said:
Yep ... and you will find plenty who believe pencil have led in them or used to, including my rather ignorant primary school teacher who also told me in no uncertain terms that in the year 2000 all cars would fly.
Just to clarify, pure graphite is an excellent lubricant and rather expensive. Plumbago is it's poor cousin. The modern version of Graphite as lubricant is molybdene disulfite
It may be the continental difference, but stateside it's Molybdenum disulfide for anyone trying to look it up
") .
.
-
15 hours ago, jlpservicesinc said:
what did the drill press go for?
That was a lot of fun.. I was glad I went..
The fair grounds was very nice and the layout was perfect.. Green coal was fun and interesting and was just a great get together..
You did a great job helping out the two boys who were trying to make a chain Damascus billet at the green coal area. I learned a lot watching. I think you would make a great presenter/teacher should you ever choose to do so.
-
You have to use Red Maple!
-
I was given a binocular dissecting microscope discarded from a trade school . It and my dissecting kit from school are my splinter removal tools (along with a super magnet). The microscope was used to tune up a few different types of tweezers. Most tweezers look pretty bad under magnification: the ends typically don't align well, and they often do not close at the tip. A tune up involves getting the tip lengths to match, align, and close at the very tip. Many tweezers are useless as bought. a tune up and slim down make them into something useful.
-
Get the things you either can't find elsewhere, or that go for collector prices on Ebay. Tell the smith what you want to do. Ask his advice on what will be most useful to you.
I'd skip the belt grinder as you can build one that is the equal of a $3000.00 machine if either you or your buddy have a little mechanical ability and can weld, and can drill and tap a hole. True it may end up costing you $500 to $700 depending of scrounging abilities, but you can space out the required purchases of time so as to not strain the budget too much at one time. Skipping the 3-phase motor and VFD at first and using step pulleys will keep your cost way down. Check YouTube. Get a notebook and make a list of all the best features of the different builds that you see and use those in your build. Build something that has work platforms that interchange separately from the wheel/platen assembly for greater versatility.
-
How about some loose leaf binders in addition to the board displays? They could be organized in sections perhaps by which wall the tool was displayed on. Use vinyl covered binders for durability/clean ability, and clear vinyl page protectors. Save your computer files and it will be easy to print a replacement page when one gets too worn. Put it on a tilt top pedestal stand.
-
It looks like a good start to a patch knife for a muzzle loader.
-
On February 1, 2017 at 0:45 AM, gote said:
That is what I would do but
#1: A guy can be short of funds but have a lot of time and be able to scroung stuff.
#2: You cannot buy a post vise or a whatnot everywhere. A new postvise of the type where both jaws go down to the ground has probably not been on the market for the last 400 years.
#3: There is satisfaction in making your own tool.
Re; #2, See here: Link removed as there are several new post vises being sold today.
There is another, but I can't find the link.
-
You could also sink the existing steel wedge a bit with a small punch, as it looks a bit "proud" (raised above) of the surface of the wood.
Hex Forge - idea for your review
in Gas Forges
Posted
If you want to keep something off the floor of the forge there are all sorts of "kiln furniture" items available. such things as small cubes, triangles, short cylinders, as well as kiln shelves that are as small as 4" x 6". All of these would be low profile, and would be removable and re-position able.
Alan