
Dan C
-
Posts
810 -
Joined
-
Last visited
Content Type
Profiles
Forums
Articles
Gallery
Downloads
Events
Everything posted by Dan C
-
I know them as anchors and yes, I believe that's how they're used on the track. This link should give more clarity and a picture, though DanielC's links to his initial posting that shows a pic as well. http://harmersteel.com/catalog/track-tools-accessories/rail-anchors-tie-plates/ FYI, I was able to easily cut the jackhammer bit with a 4" grinder. This post http://www.iforgeiron.com/topic/30141-forging-a-cut-off-hardy-out-of-a-jackhammer-bit/?hl=jackhammer has excellent info on making hardies.
-
What "PULLS" the smoke up a chimney? (updraft?)
Dan C replied to scjohnson243's topic in Chimneys, Hoods, and Stacks
I have an 11" brakedrum forge on a rectangular stand which I roll 4-6' out of my garage. My problem is even with the forge 4-6' outside of the garage, depending on wind & temperature some smoke still goes back in the garage (according to my upset wife she then can smell it in the house). Also sometimes it's necessary to squat down while heating to avoid breathing the smoke. For those reasons I'd been thinking about making a forge hood similar to yours with the pipe ending at least over my head. Another plus would be it'd shield the forge in the daytime and maybe prevent the wind from disturbing the coals. As I did more reading though I became concerned about the problem people have had to getting them to draft. I'm very interested in how this turns out for you. I don't have any plans for moving the forge indoors. Are you also increasing the length of the 6" tube, as well as going from the 6" diameter to a 10" diameter for the venturi effect? -
Where I live there used to be places you could go to to get industrial scrap steel. Unfortunately due to liability reasons they no longer allow the public to scavenge anymore. Other than a junkyard, which wants a premium for usable parts, any suggestions where you can still get tool steel, or even spring steel? I guess finding a small shop that repairs farm or industrial equipment would be very useful. I did make some connections at a local railyard by taking them a forged bottle opener and an iced down six pack for exchange of being able to look around the yard for useable material. Then I learned that the railroad anchors are spring steel and they let me have a few of those. I haven't had a chance yet to try forging them.
-
Just picked up a worn jackhammer bit from the rental area at Home Depot. They had a 5 gallon bucket full of worn bits for $5 each. I only bought one that looks to be a good candidate for a cutting hardy. I don't have a powerhammer or a OA torch. I'm not sure what I'll be able to do with it considering all I have is the forge, anvil, 4 1/2" grinder and 14" chop saw. I had questions on forging the hardy, but then found this posting which answered all my questions. http://www.iforgeiron.com/topic/30141-forging-a-cut-off-hardy-out-of-a-jackhammer-bit/?hl=jackhammer
-
hypothetical RR track question
Dan C replied to Dogbyte's topic in Anvils, Swage Blocks, and Mandrels
I found the picture of the bookends I was thinking of. Simple, but nice. -
hypothetical RR track question
Dan C replied to Dogbyte's topic in Anvils, Swage Blocks, and Mandrels
I've seen where someone sliced off small sections of the rail and then sold them as bookends. That one also had a spike incorporated into it, I couldn't find a picture of that one. The spare track I have is going to become hardy tools though. Like you I never say no to free materials, I always can come up w/ something. -
Here is a gardening trowel and weed popper that I made from HC railroad spikes. I've only made 2 sets so far, but the buyers love them and I plan on making more. I do harden w/ water & temper them in the oven.
-
When making hardies out of RR track what have you been quenching in? Figured water might be pushing it. Love the fuller made from the bottom part of the track. I need one of those as well as a cut-off. And as my anvil's edges are pretty worn an edge hardy is on my to-do list.
-
Paid $250 for this 200 lb Peter Wright found on the Pittsburgh Craig's list last November and a friend 2 weeks ago brought it down to Texas when he was moving his house. I forged a knife from a rr spike for the owner to show my appreciation for holding the anvil until I could move it. Built the stand this weekend out of cutoffs from the steel yard. In the background you can see the piece of railroad track that I've been using and will continue to use when I need a sharp edge. I plan on using the eyebolts on either side for a spring loaded hold down tool. http://www.anvilfire.com/iForge/tutor.php?lesson=jd_holddowns/demo
-
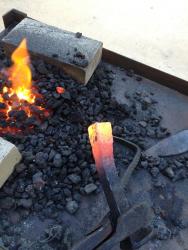
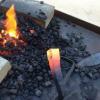
Congrats on getting an anvil and what sounds like a fine assortment of forging material. For the forge itself all you need is a brake drum, 2" pipe, some scrap angle iron and someone who can weld. Here's my forge before I put a metal top on it & lined the drum. Ugly as can be, the angle iron came from a trashed firepit, but works fantastic! The cost was under $20 (main expense was the refractory cement, plumber's pipe & fittings) For right now I use my air compressor as a blower, it was the easiest and cheapest solution I could come up with.
-
hypothetical RR track question
Dan C replied to Dogbyte's topic in Anvils, Swage Blocks, and Mandrels
Thanks. The spike is useful for fullering, though after discovering and making one of these for the hardy hole (which fits a RR spike as the steel top was one of those plates that sits under the track) my ability to fuller things like knives and trowels was tremendously improved. Taking a forged beer opener and a cold six pack to the local railyard was one of the best connections I've made. The guys who work there have been extremely friendly and helpful. -
I work in Austin, live in Round Rock. It likely is my ads you've seen though word of mouth has been far more successful. The bottle openers have been very popular and how I paid for the anvil. Lately I started making gardening tools as I know a lot of gardeners who all say regardless of the tool they buy it eventually breaks. Funny, I showed up grungy to pickup my son from scouts, question came up what I'd been up to and sold 2 knives and 3 openers without trying. I have gotten into the habit of always keeping some of my work with me. How did the auction go? Any luck? If I could've gotten a forge at a reasonable price I would've. Instead mine is a brake drum coal burner that I pieced together from scrap. The most expensive part was the refractory cement used to line the drum. Here's a trowel and weed popper I sold as a set.
-
I'm near Austin, TX. My experience here hunting for an anvil didn't yield good results. Most used ones were going for $3 a pound which was out of my price range. Luckily I had a friend from Pennsylvania who needed to still move his house down to here and offered to transport one for me if I could find one. I started watching Craig's list for any cities that would be along his route. I found one in November in Pittsburgh w/ the seller gracious enough to hold it for me until we could arrange it to be brought down. Didn't get it down here until 2 weeks ago. Risky yes, as I didn't get to physically look it over and my friend didn't know anything about anvils. I asked for lots of pictures and then listened to the ring over the phone. Guess I got lucky as I'm very pleased w/ it. If you're fortunate enough to have friends in steel country this might work for you. I ended up paying $250 for a 200 lb Peter Wright in what I consider pretty good shape. What worked prior to getting the anvil was visiting a local railyard and asking if they had a piece of RR track I could have to use as an anvil. That held me over until I could get mine. Later I forged some bottle openers out of RR spikes and took them one with an iced down 6-pack of beer to say thanks. Dan
-
Follow up on my Peter Wright Anvil repair
Dan C replied to Fe-Wood's topic in Anvils, Swage Blocks, and Mandrels
Thanks Fe-Wood for the update and suggestions. I actually thought the repairs might take longer than a day and would need to be broken down in sections over time. Did you do any repairs to your step or table? If you had needed to what would you have used? Seems like in your pictures, it was in pretty good shape. FYI, in my forge I burn blacksmith coke. While small, I have been able to repair larger tools such as rock bar as it's built to support whatever isn't being directly heated. And it does get hot enough as I've burned up a knife I had almost completed. My thinking was to weld two long steel bars in such a way that two people could pick up the anvil and lay it upside down on the forge table so the horn extends over the forge. Once it's heated, quickly put it back on the stand to be worked into shape. -
Follow up on my Peter Wright Anvil repair
Dan C replied to Fe-Wood's topic in Anvils, Swage Blocks, and Mandrels
I didn't see it that way at all, I have the same concerns about my anvil as well. I wouldn't want to remove all the character from her 150+ yrs of service. The mushroomed edges, I see as a larger radius, though towards the heel I'd like to dress those edges up and fill in the gouges. The table or step was already welded on, which extended to the horn. I ground and smoothed the excess when I got it. Then hit it with a wire brush and applied linseed oil. Here is what it originally looked like when I got it. The streaks on the sides was some tarlike substance. Based on everything I've read, if I do any restoration on the step or table I would preheat the entire anvil, use a 7018AC and peen the welds, post heat as described in this forum and let it slowly cool overnight wrapped in vermiculite. I'd probably do some reshaping of the horn at that time. -
hypothetical RR track question
Dan C replied to Dogbyte's topic in Anvils, Swage Blocks, and Mandrels
I'm a newbie, but I've been using the piece of track seen in the background for the last 4 months and have been very pleased with the results. Initially I did try using it horizontally. The only thing I'd do differently is anchor the stand into the concrete, but I held off on doing that as my goal was to make enough money selling what I've made to buy the anvil in the foreground (which I finally did) I cut and welded another piece of steel to use as a hardy hole and then pounded it onto a 4x6 post. I also welded steel tubing onto the edges to use with rebar as a hold down. To give you an idea of the height (or length) as it sits on the wooden base the top of the track reaches the knuckles of my closed fist when standing next to it. So in my case I went for more mass which also helped get the height of my surface where I wanted it, as well as more mass under my hammer. Dan -
Follow up on my Peter Wright Anvil repair
Dan C replied to Fe-Wood's topic in Anvils, Swage Blocks, and Mandrels
Thanks Mark. I'm new to blacksmithing, but have read enough to know that for now I'll just use it as is, learn my way around the anvil and use the track anvil if a sharp edge is needed. As hard as it was to get this anvil and as long as I had to wait I don't want to mess it up, I'm just considering my options for the future. I don't plan on making the horn dangerously sharp, but it seems odd that many are blunted like safety scissors when the nature of the work, working a forge, holding and pounding on red hot steel, it'd be the least of your worries. I'm very safety conscious when working, having everything in a certain place, water, fire extinquishers nearby, keeping the floor swept so it doesn't get slippery from dust & scale. From what I can tell the top plate is in good condition, some dimples and a depression near the step that would appear to be useful if shaping a spoon. I can tell that someone did a welding repair in the center of the face, but it doesn't seem to have lost any hardness in that area. Dan -
Follow up on my Peter Wright Anvil repair
Dan C replied to Fe-Wood's topic in Anvils, Swage Blocks, and Mandrels
Job well done, that looks fantastic! How has it held up the last 3 yrs? When you were planishing how hard did you strike the anvil? I read all I could find on the iforgeiron forum regarding anvil restoration, but haven't found many details on restoring the horn or table, other than what's in Gunther's article on Anvil Restoration. I would guess that if you are doing the horn or table you would still pre/post heat to prevent any cracking even if you are just forging the tip of the horn? I attached some pictures of the 200 lb PW I recently bought. For the time being I just plan on using it as is and researching how to do an anvil restoration. As you can see the edges have mushroomed, but I do have a railroad track anvil that works fine for now as an edge. As the heel is gouged from a torch and has very little rebound in that area, any resurfacing attempts would start in that area. The rest of the face rebound is ~80%. It looks like my horn has been blunted which I'd like to forge it into original shape as much as possible vs. grinding. The table is pretty worn, I thought to use 7018AC or 6011 rods w/ a Lincoln 225 AC tombstone and peen the beads to build it up unless others on this forum would recommend otherwise.