picker
-
Posts
68 -
Joined
-
Last visited
Content Type
Profiles
Forums
Articles
Gallery
Downloads
Events
Everything posted by picker
-

What did you do in the shop today?
picker replied to Mark Ling's topic in Blacksmithing, General Discussion

-
What did you do in the shop today?
picker replied to Mark Ling's topic in Blacksmithing, General Discussion
.thumb.jpg.d6f173e26511a525877dfd75d90b6252.jpg)
-
Tossed in the recycle vat.
-
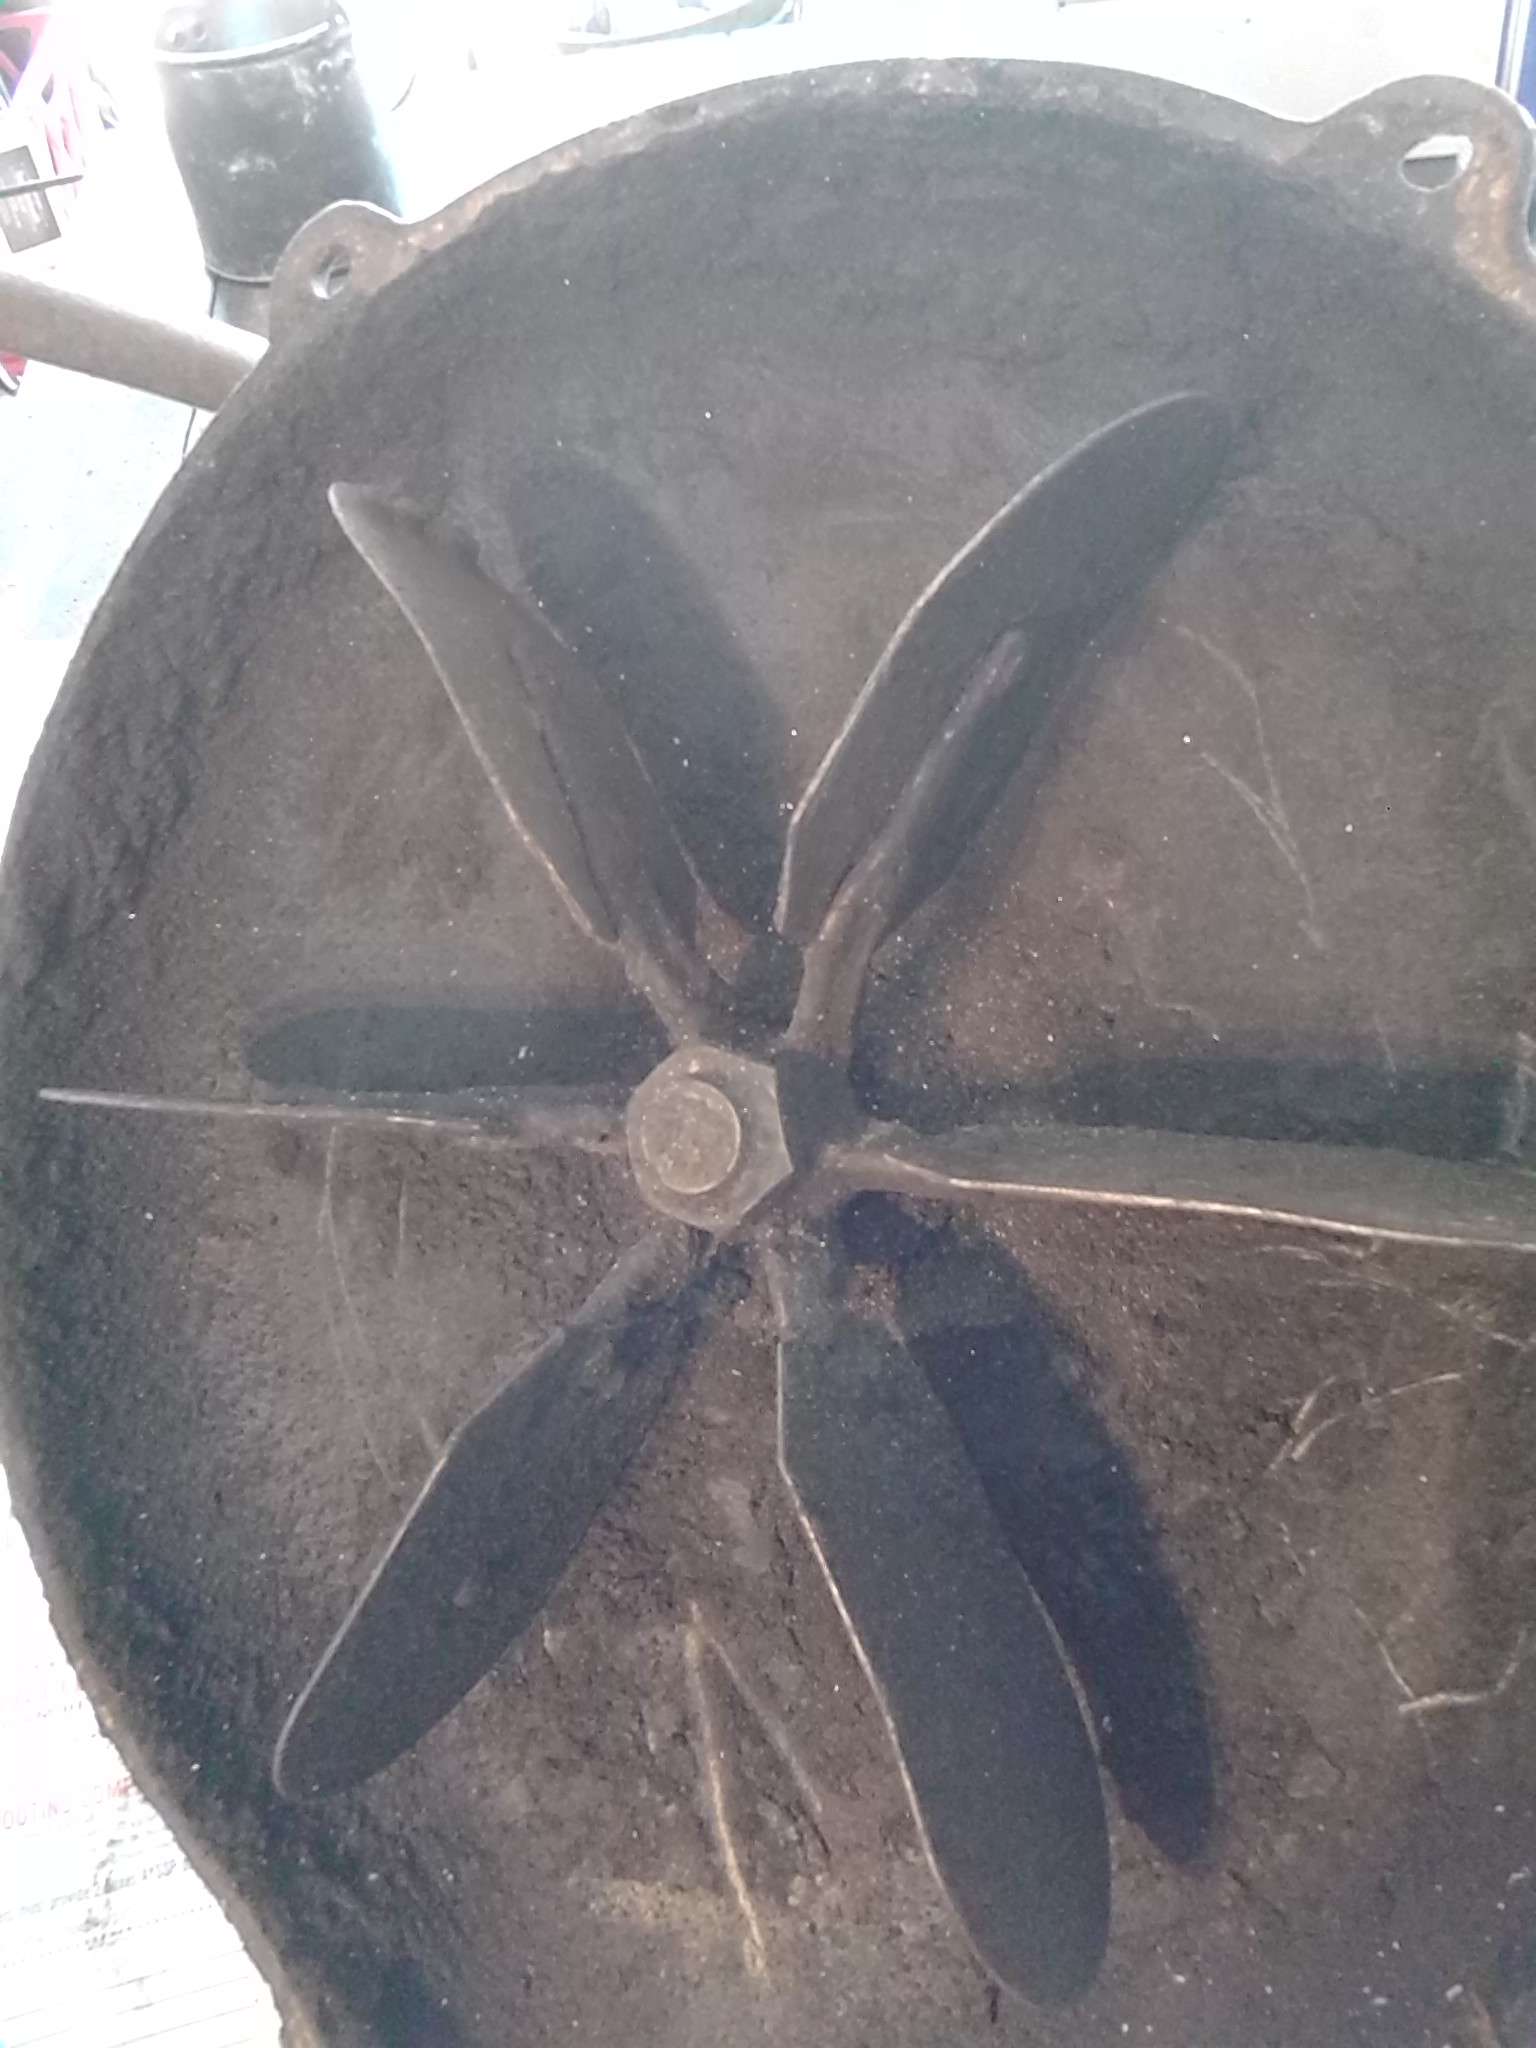
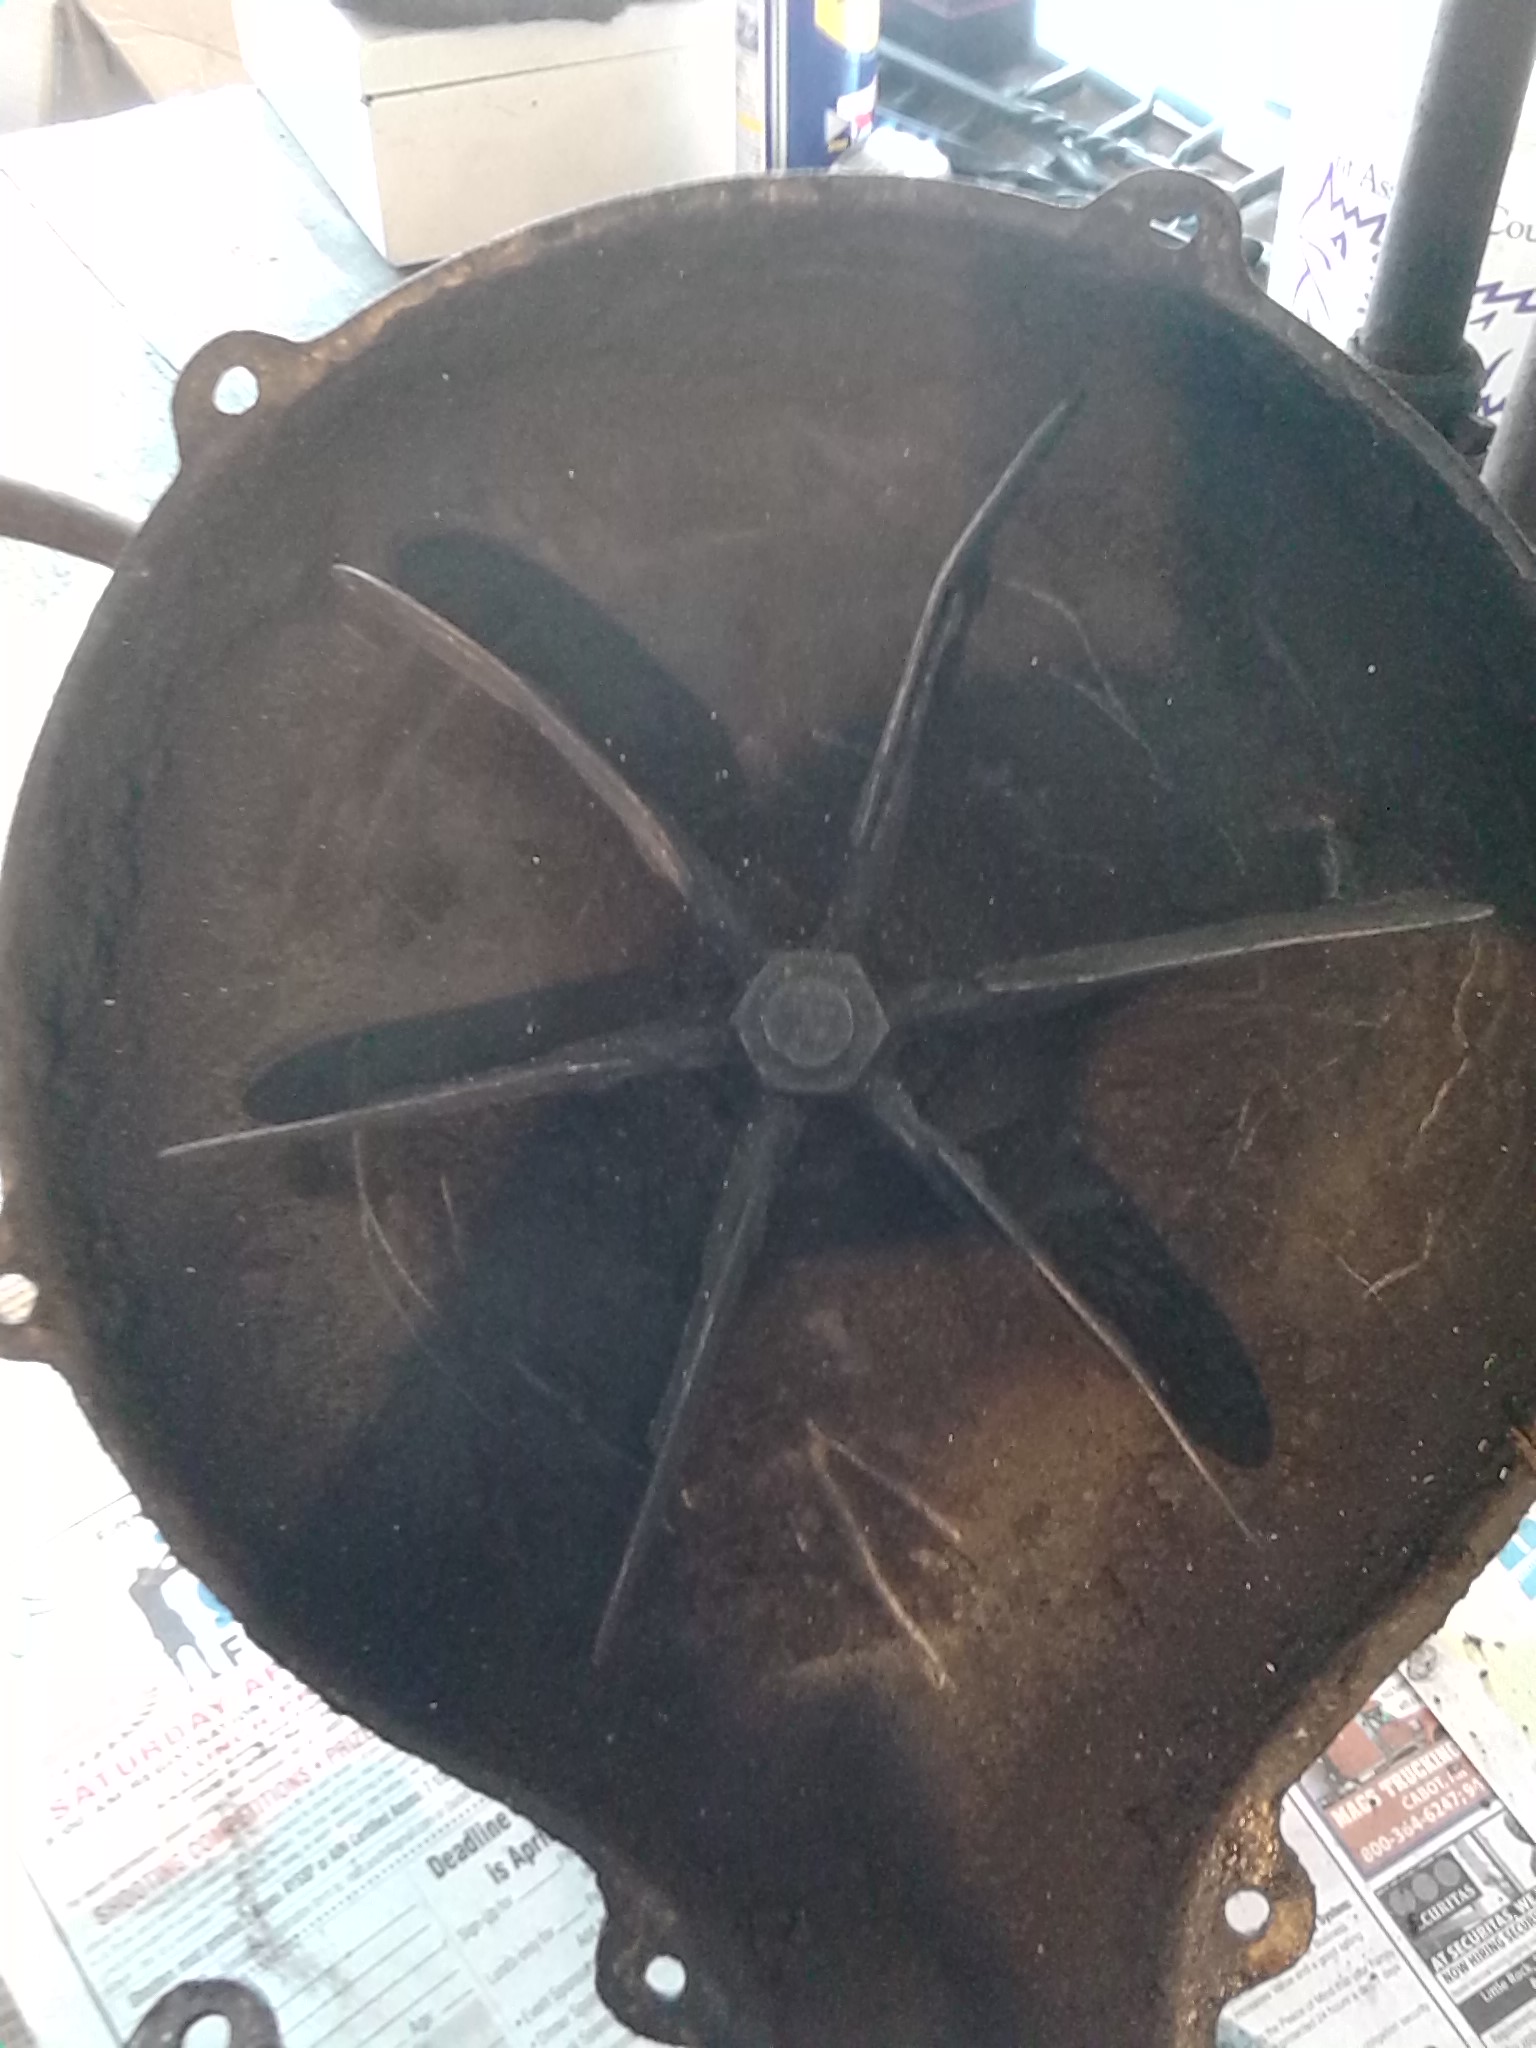
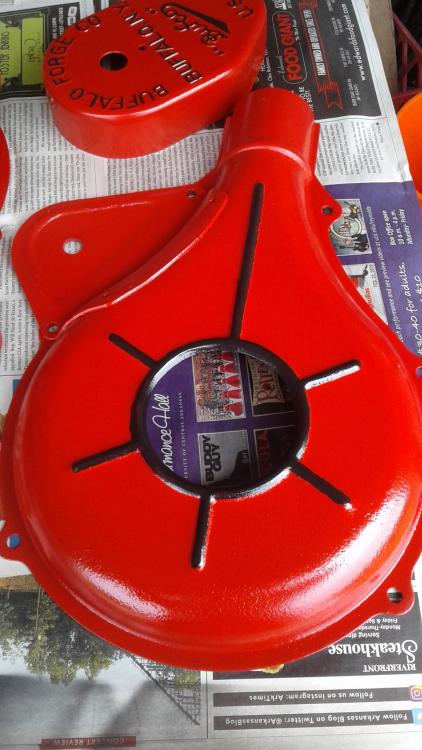
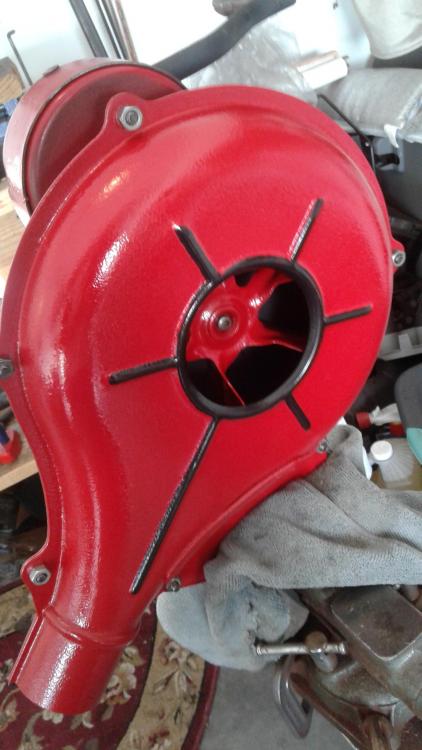
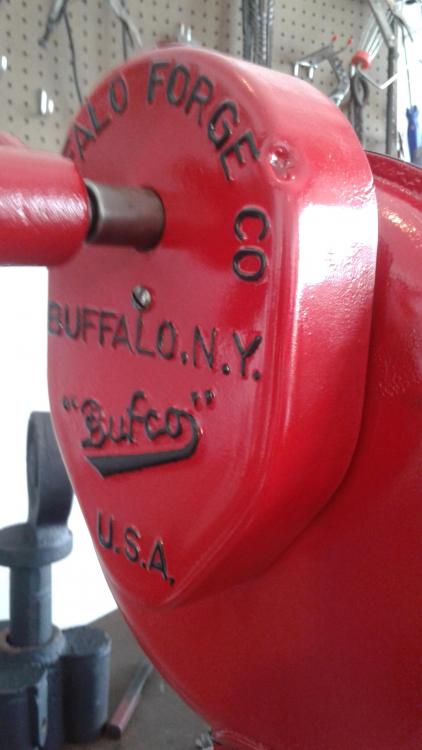
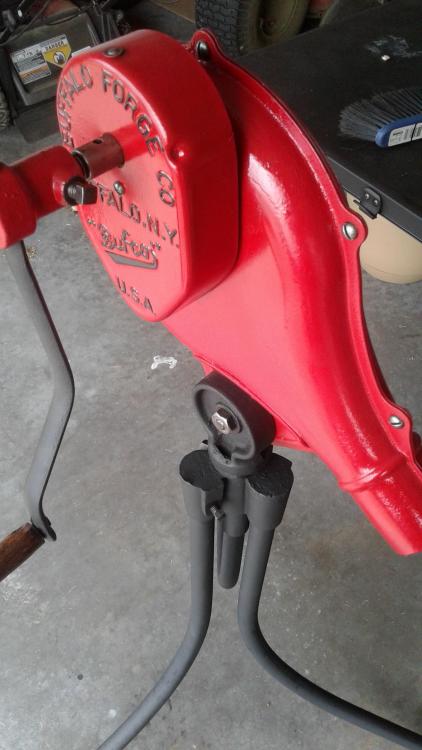
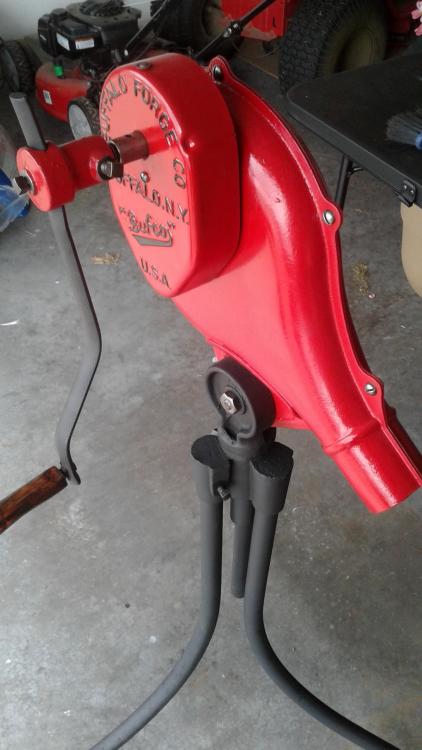
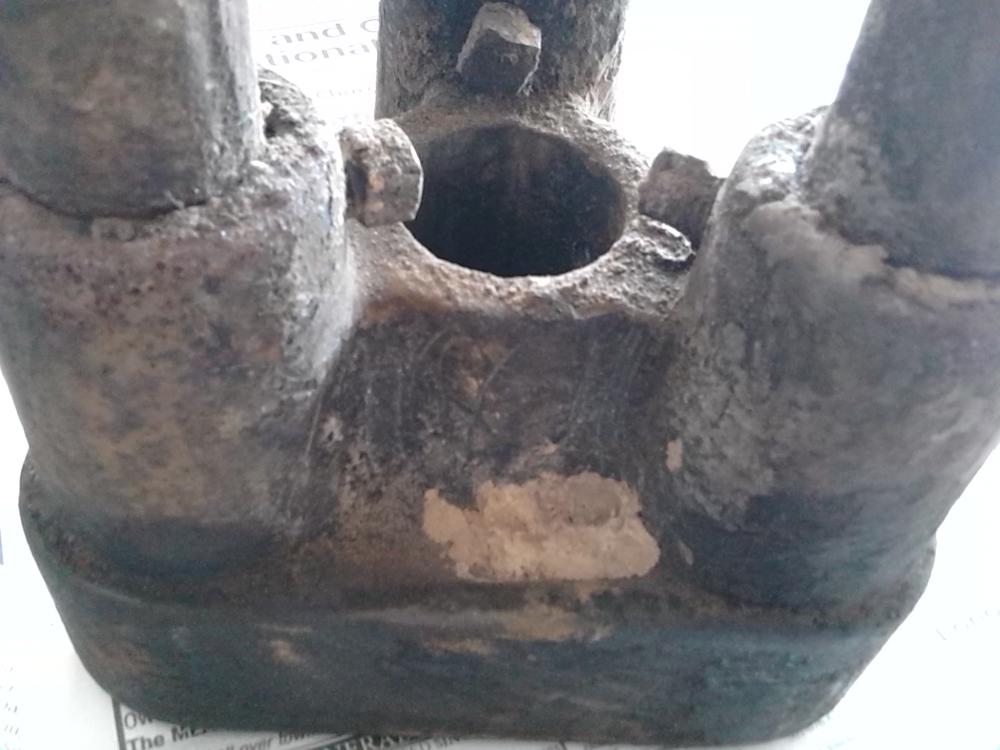
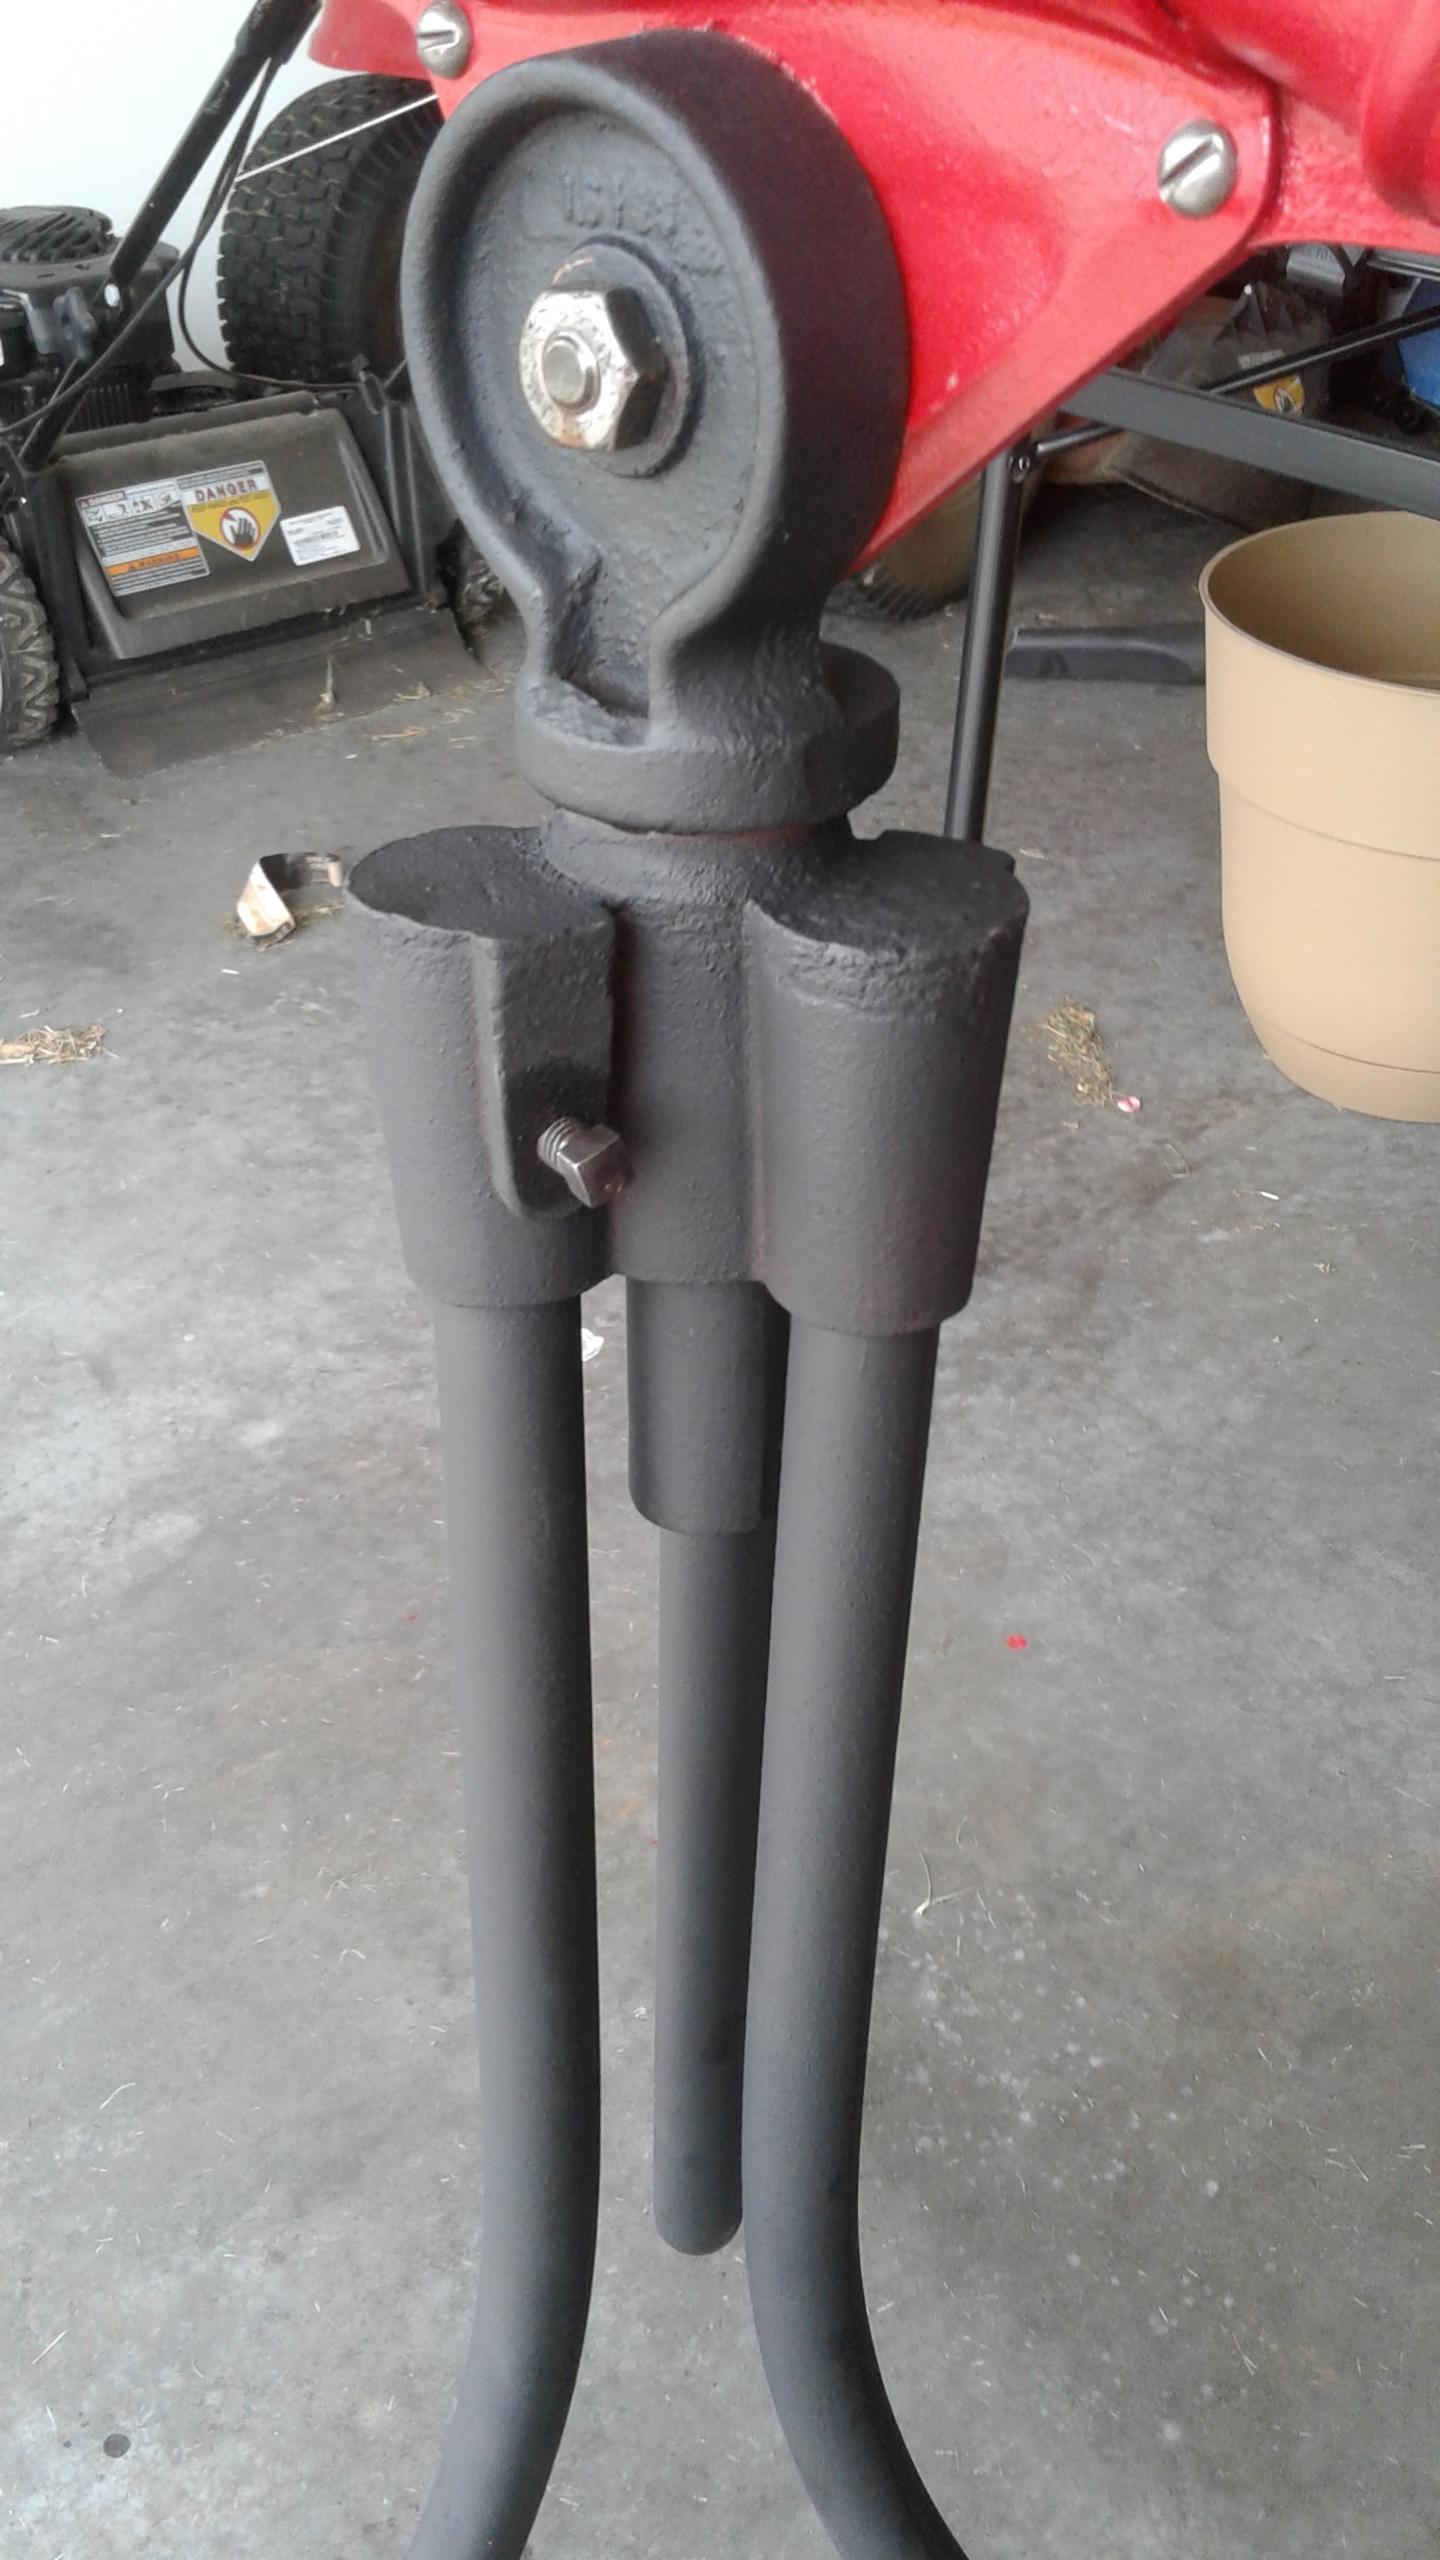
This is the stand alone tripod blower that need some TLC. Not as bad off as the first one. Cleaned polished and added some new shims. She is a 1/47 ratio. Gave her a racy paint job just for the xxxx of it.
.thumb.jpg.1d93d7370efb9ec0601e345199f23284.jpg)
.thumb.jpg.4255cfd11a296829341f8e2c23e143a3.jpg)
.thumb.jpg.4b88a23b83e494d7a2e02e3e05637a10.jpg)
.thumb.jpg.89abfae79a679a13827ecfe46bac46e8.jpg)
.thumb.jpg.e9d09bc47fa1c0fe6fce65adf7b2435c.jpg)
.thumb.jpg.1ec5763eca11c971808bb98ea015d157.jpg)


-
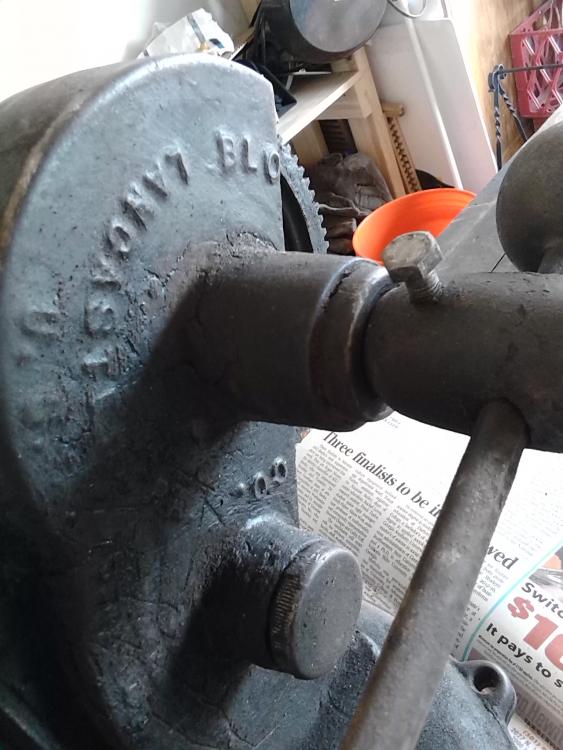
I just overhauled one of these little guys - he was filled with grease. He cleaned up rather nice.
.thumb.jpg.2a03070ae7e8439818d29ab29bb88bed.jpg)

.thumb.jpg.4f5c63db03d73a82eeddf97c81bc7948.jpg)
-
This is the result of my latest find and overhaul. Remember, light oil. A sparingly few drops.


-
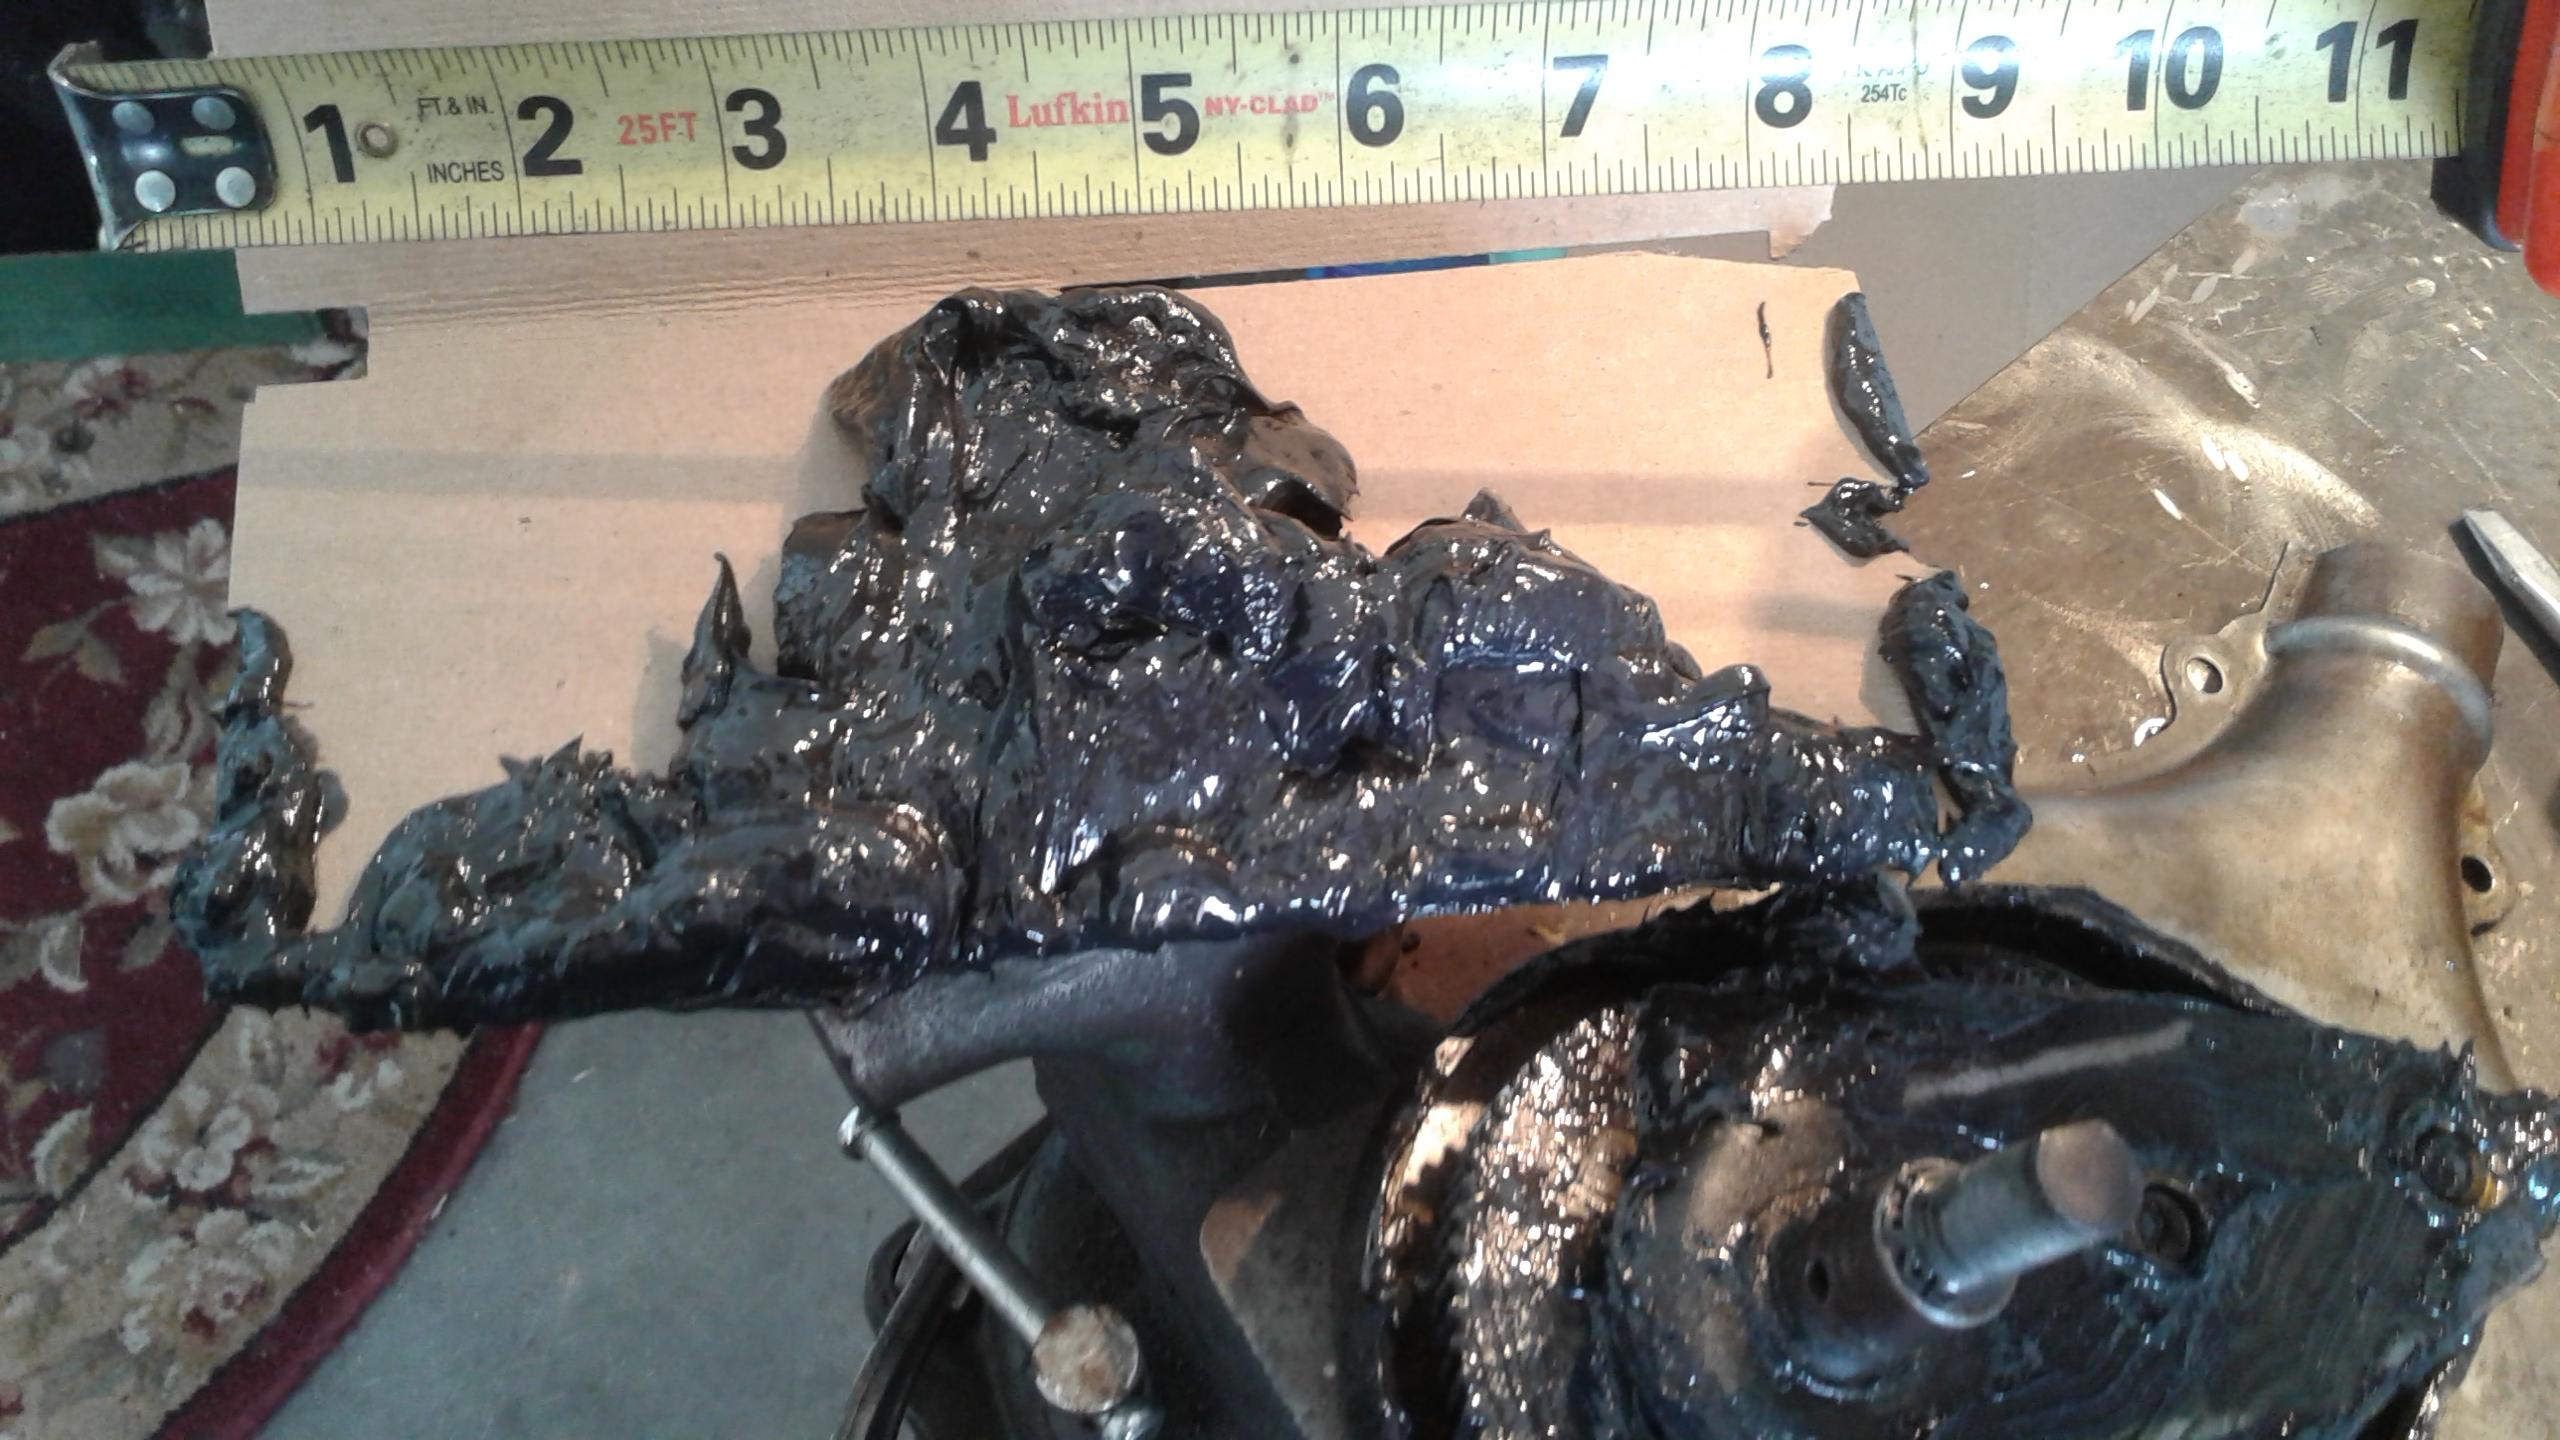
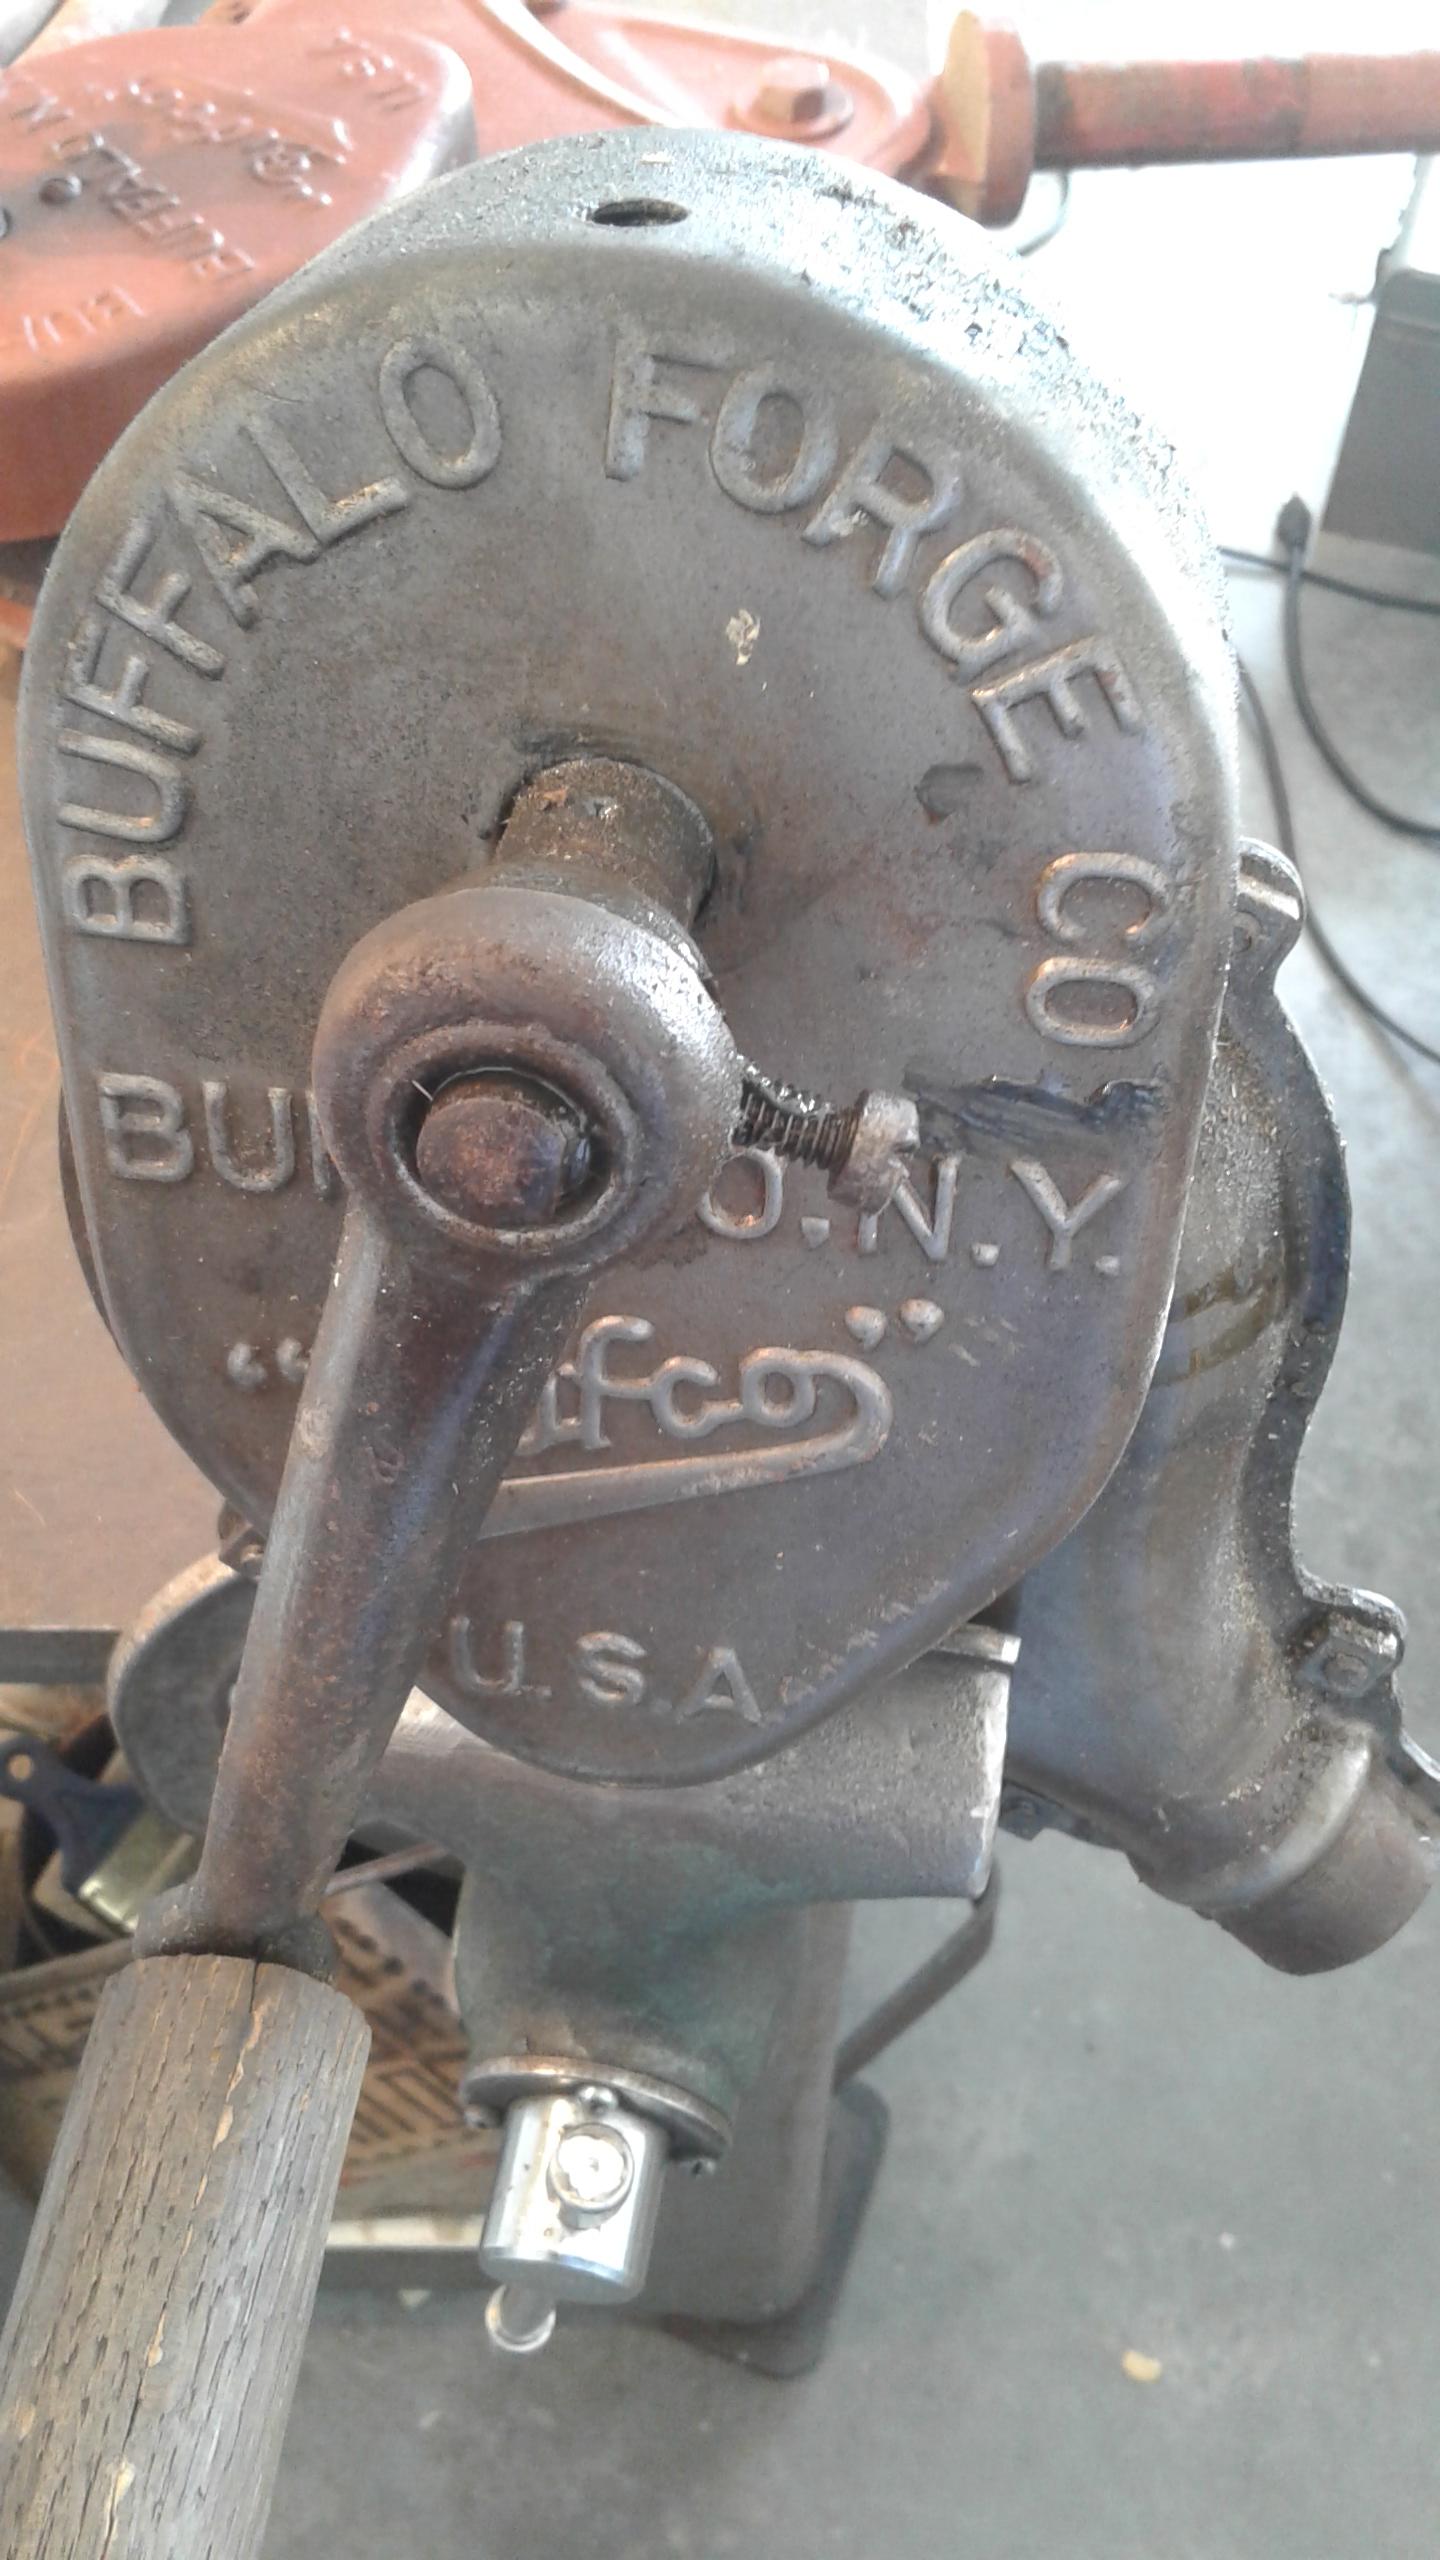
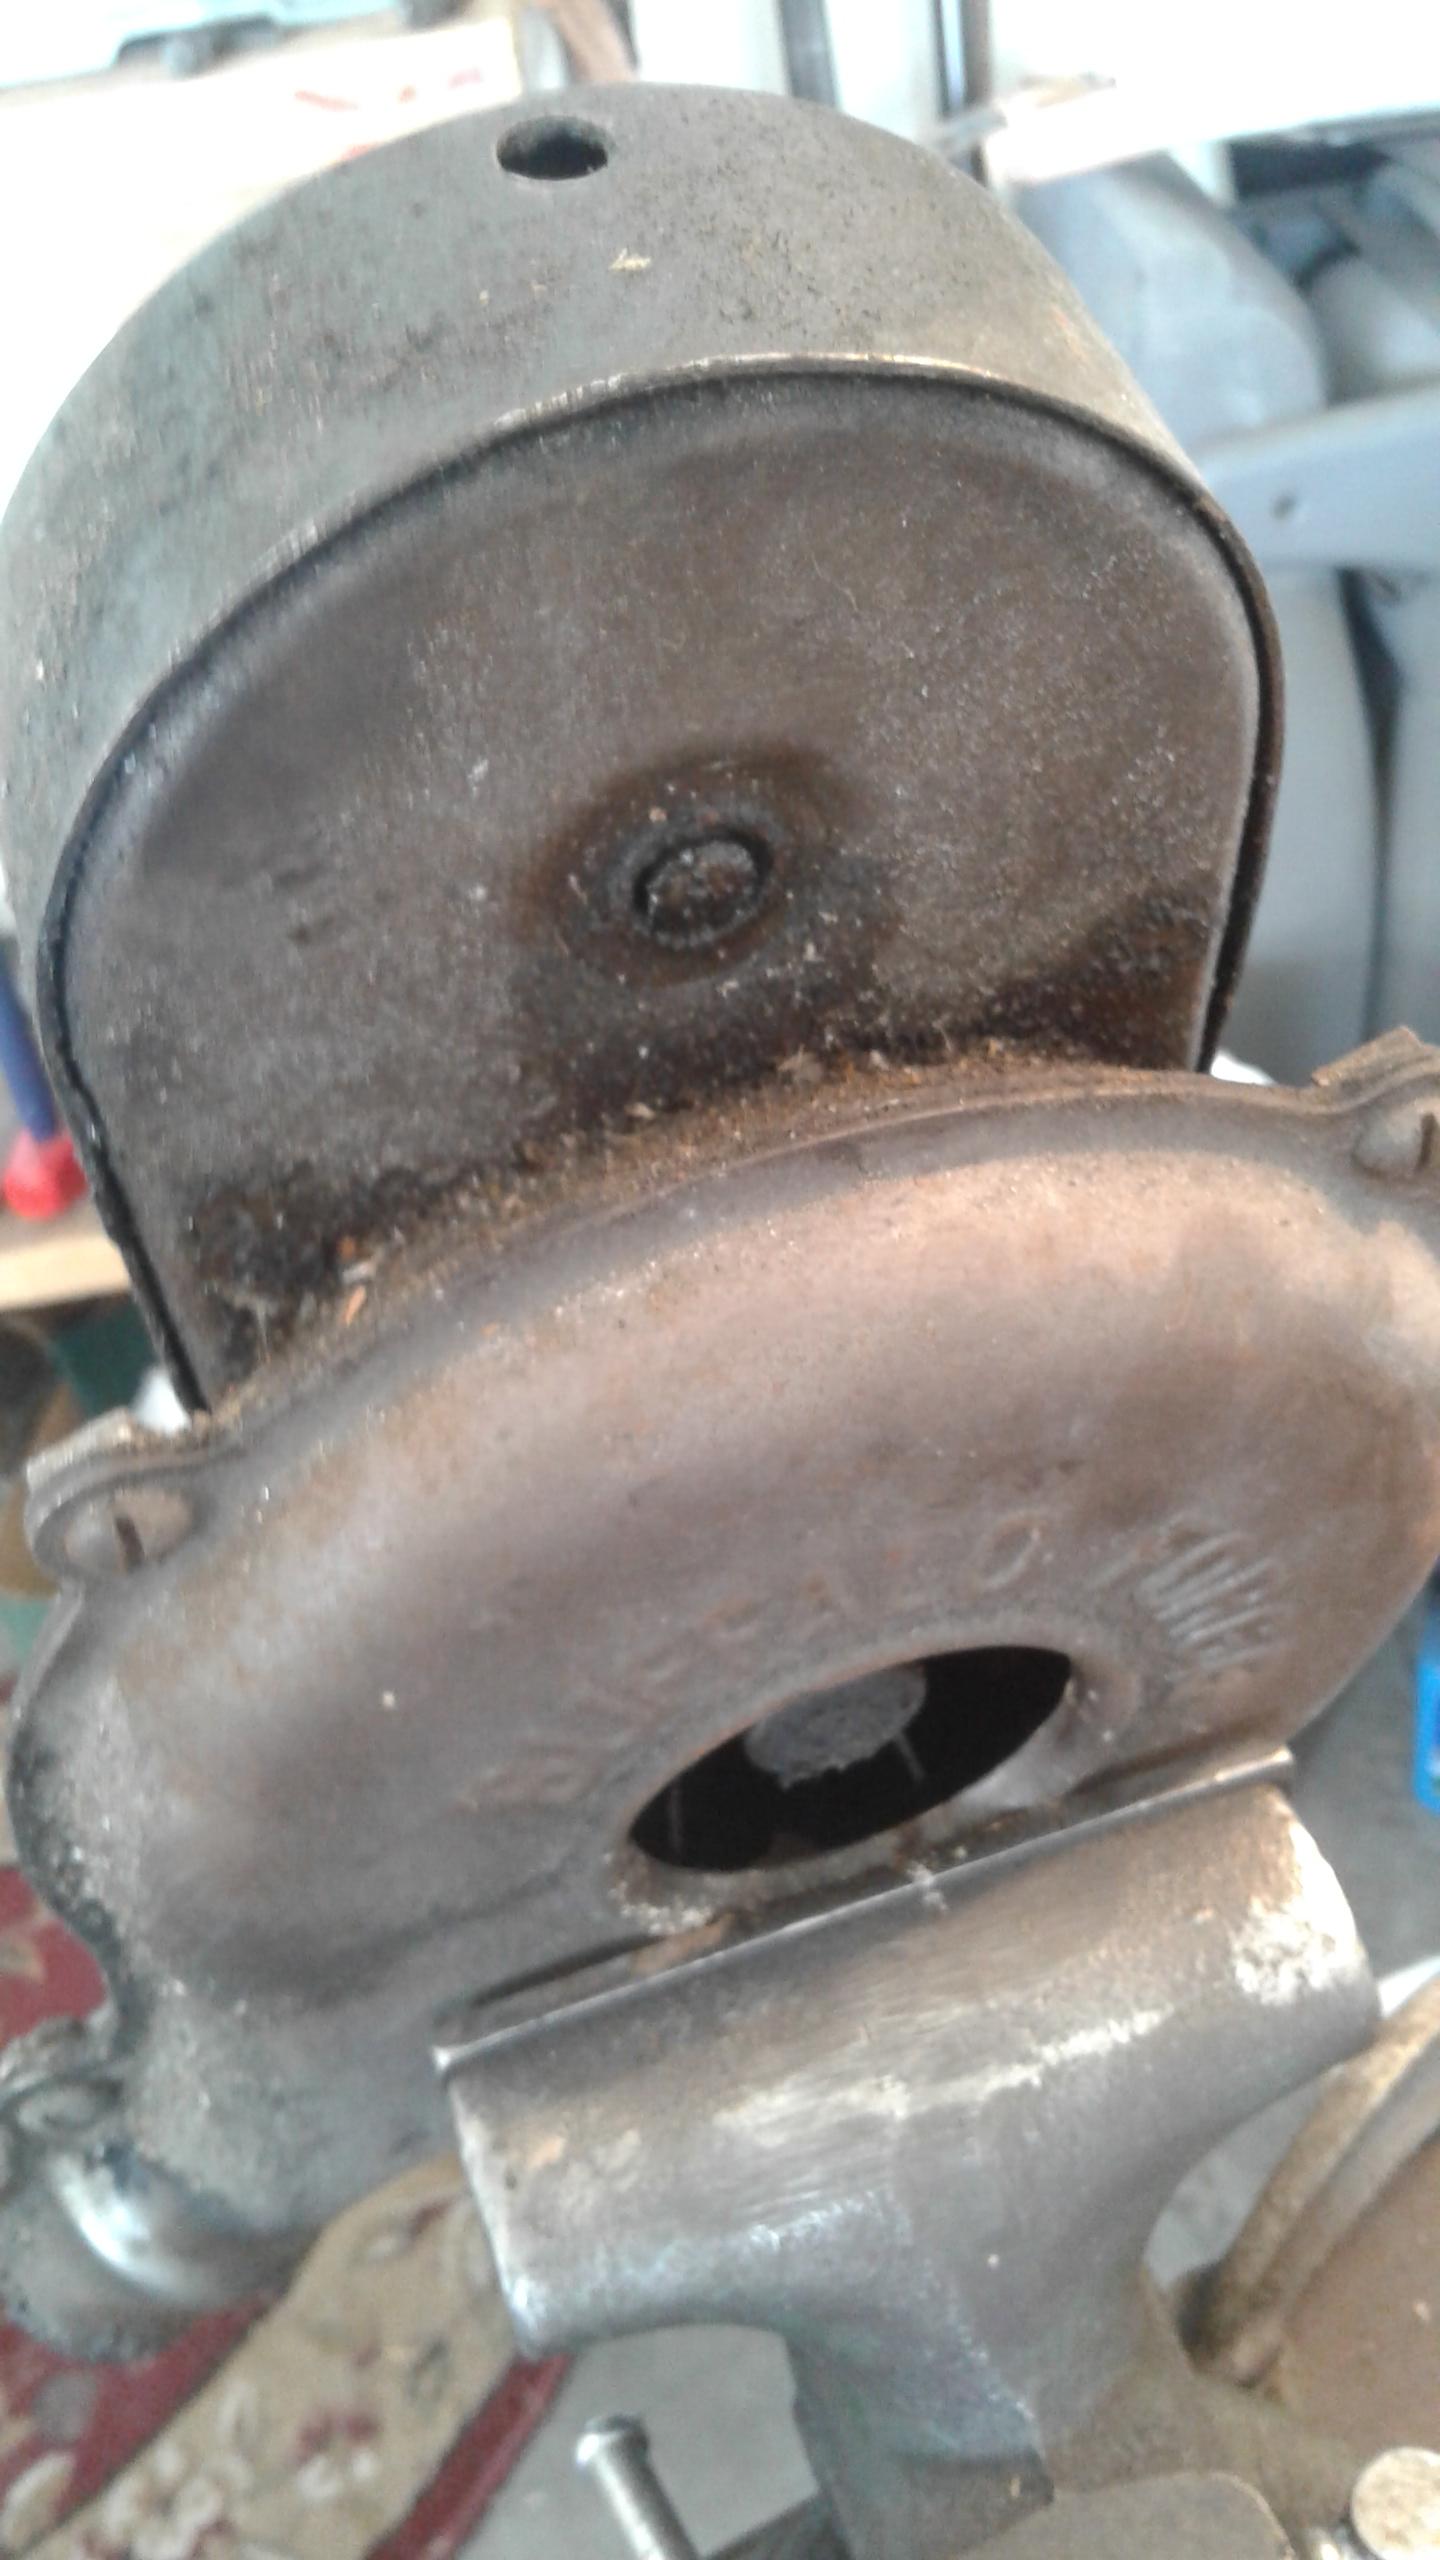
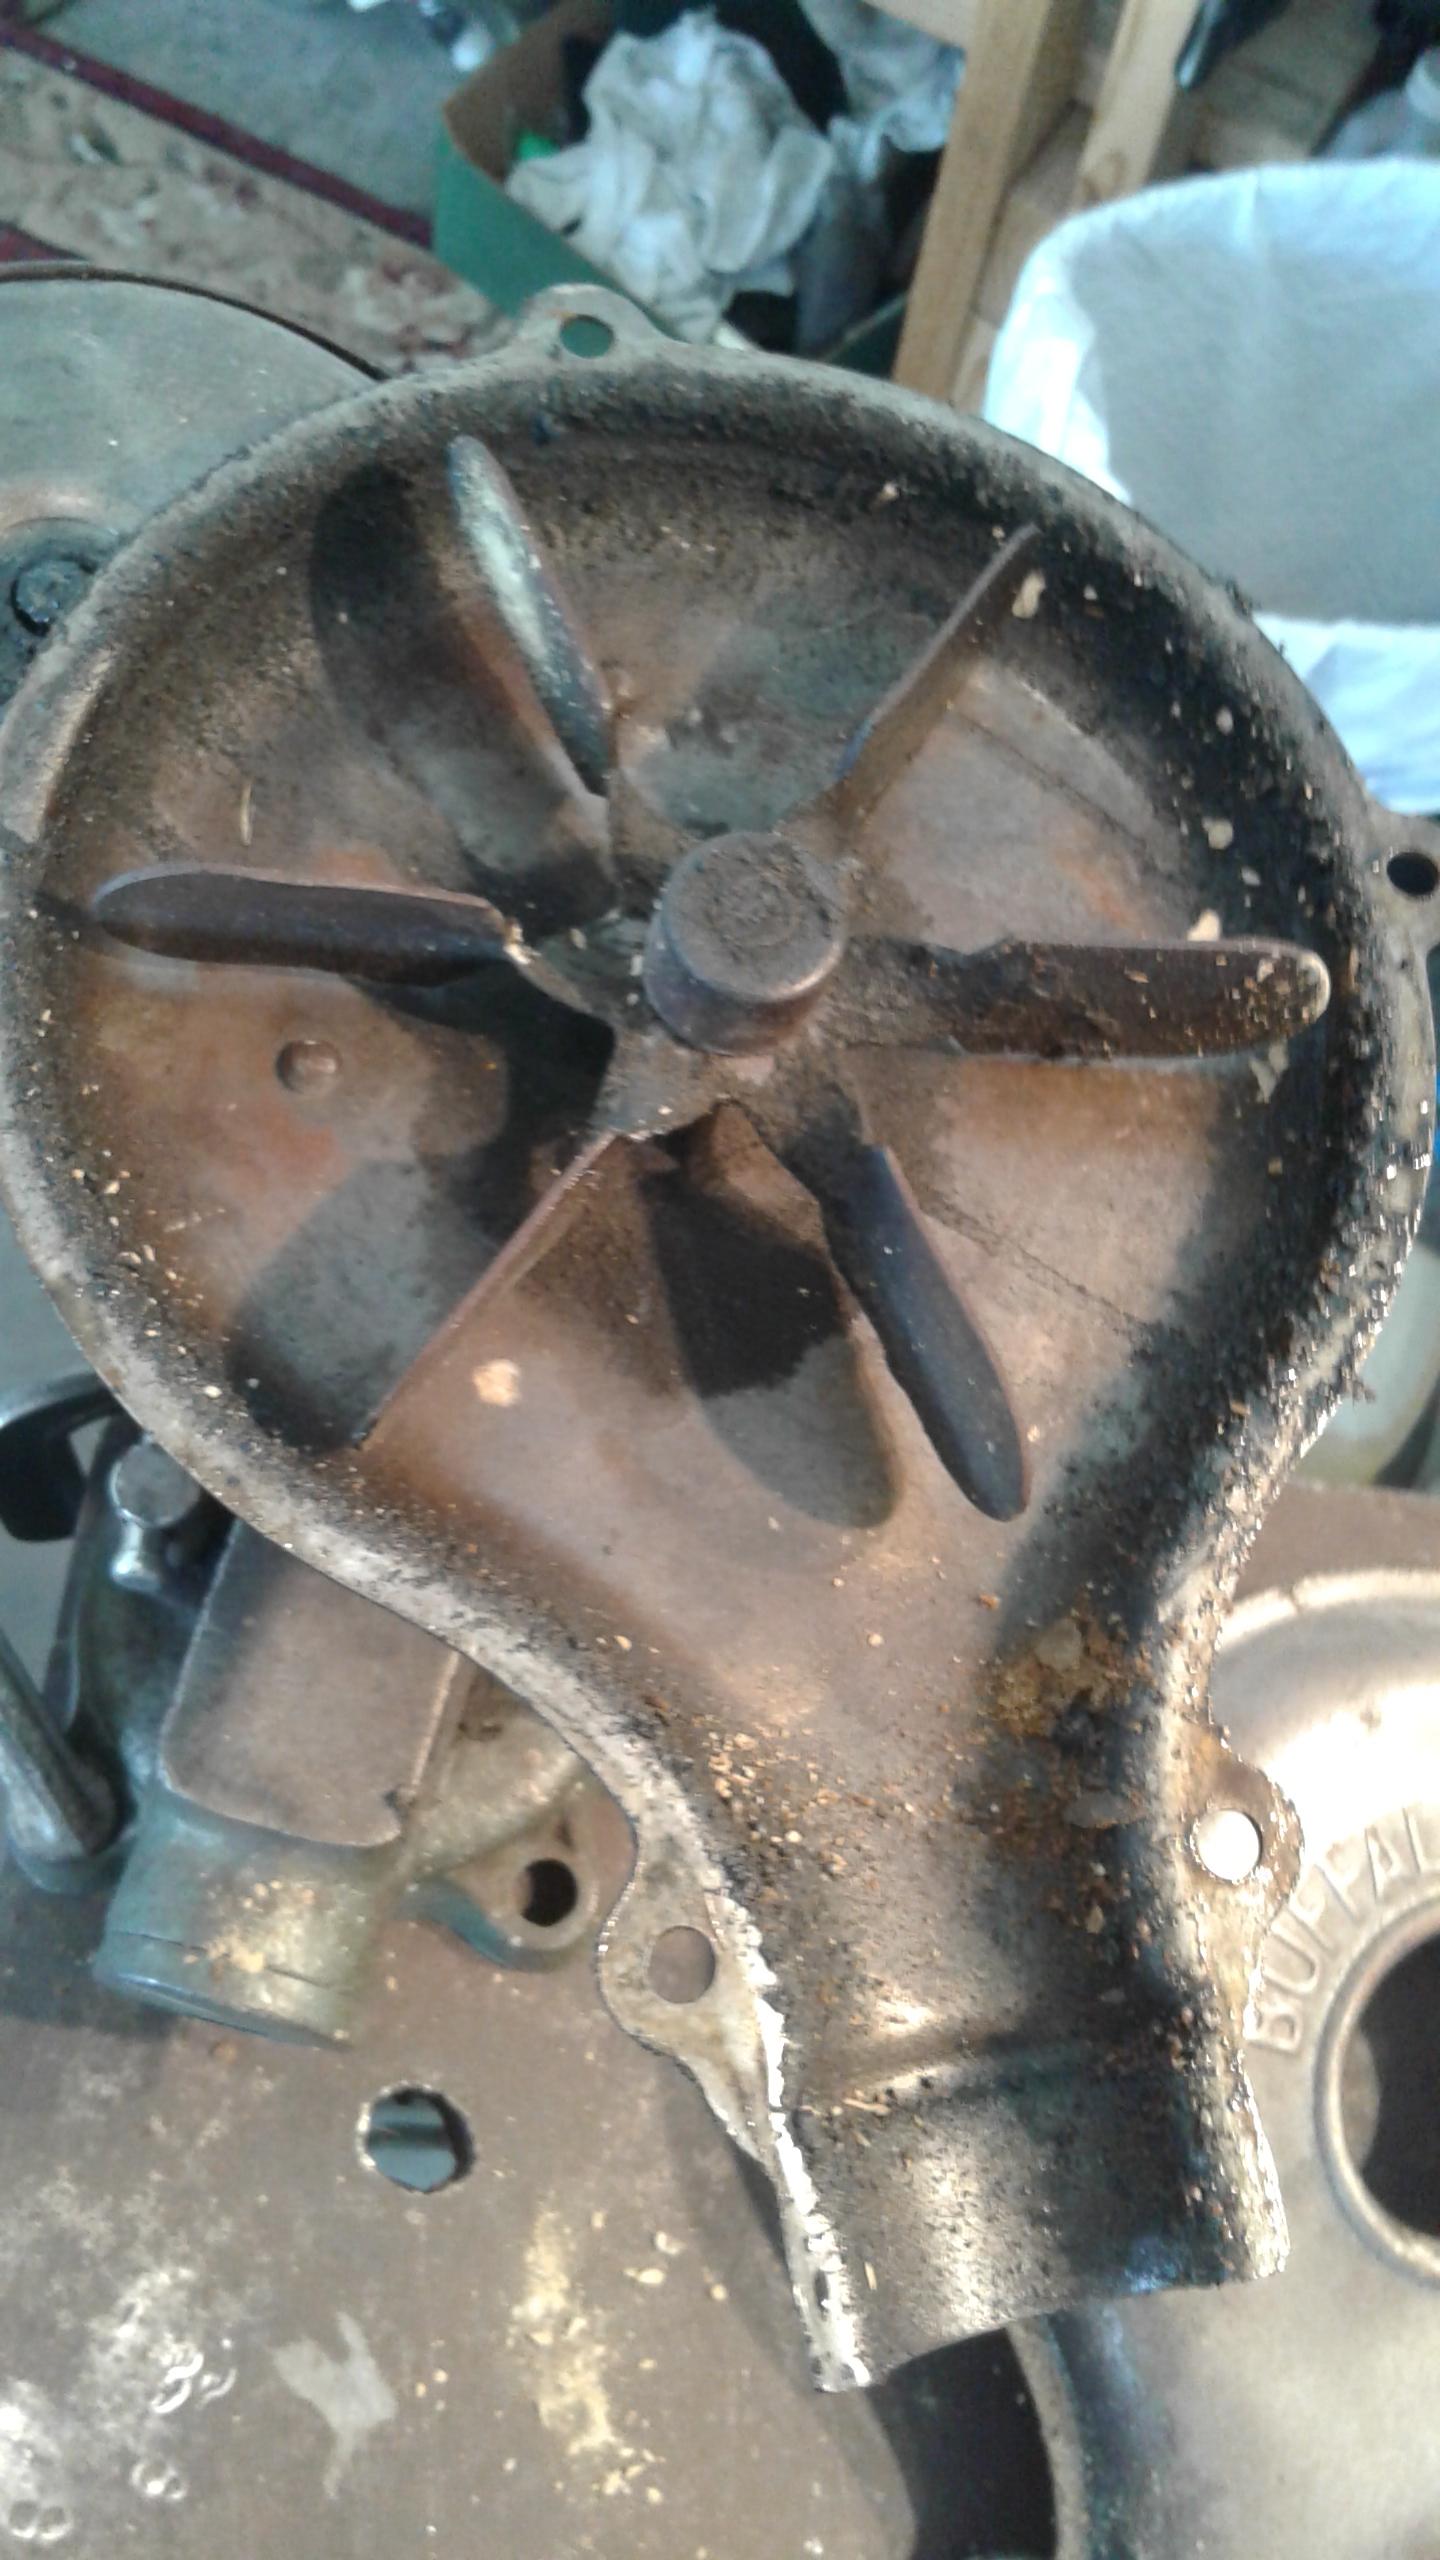
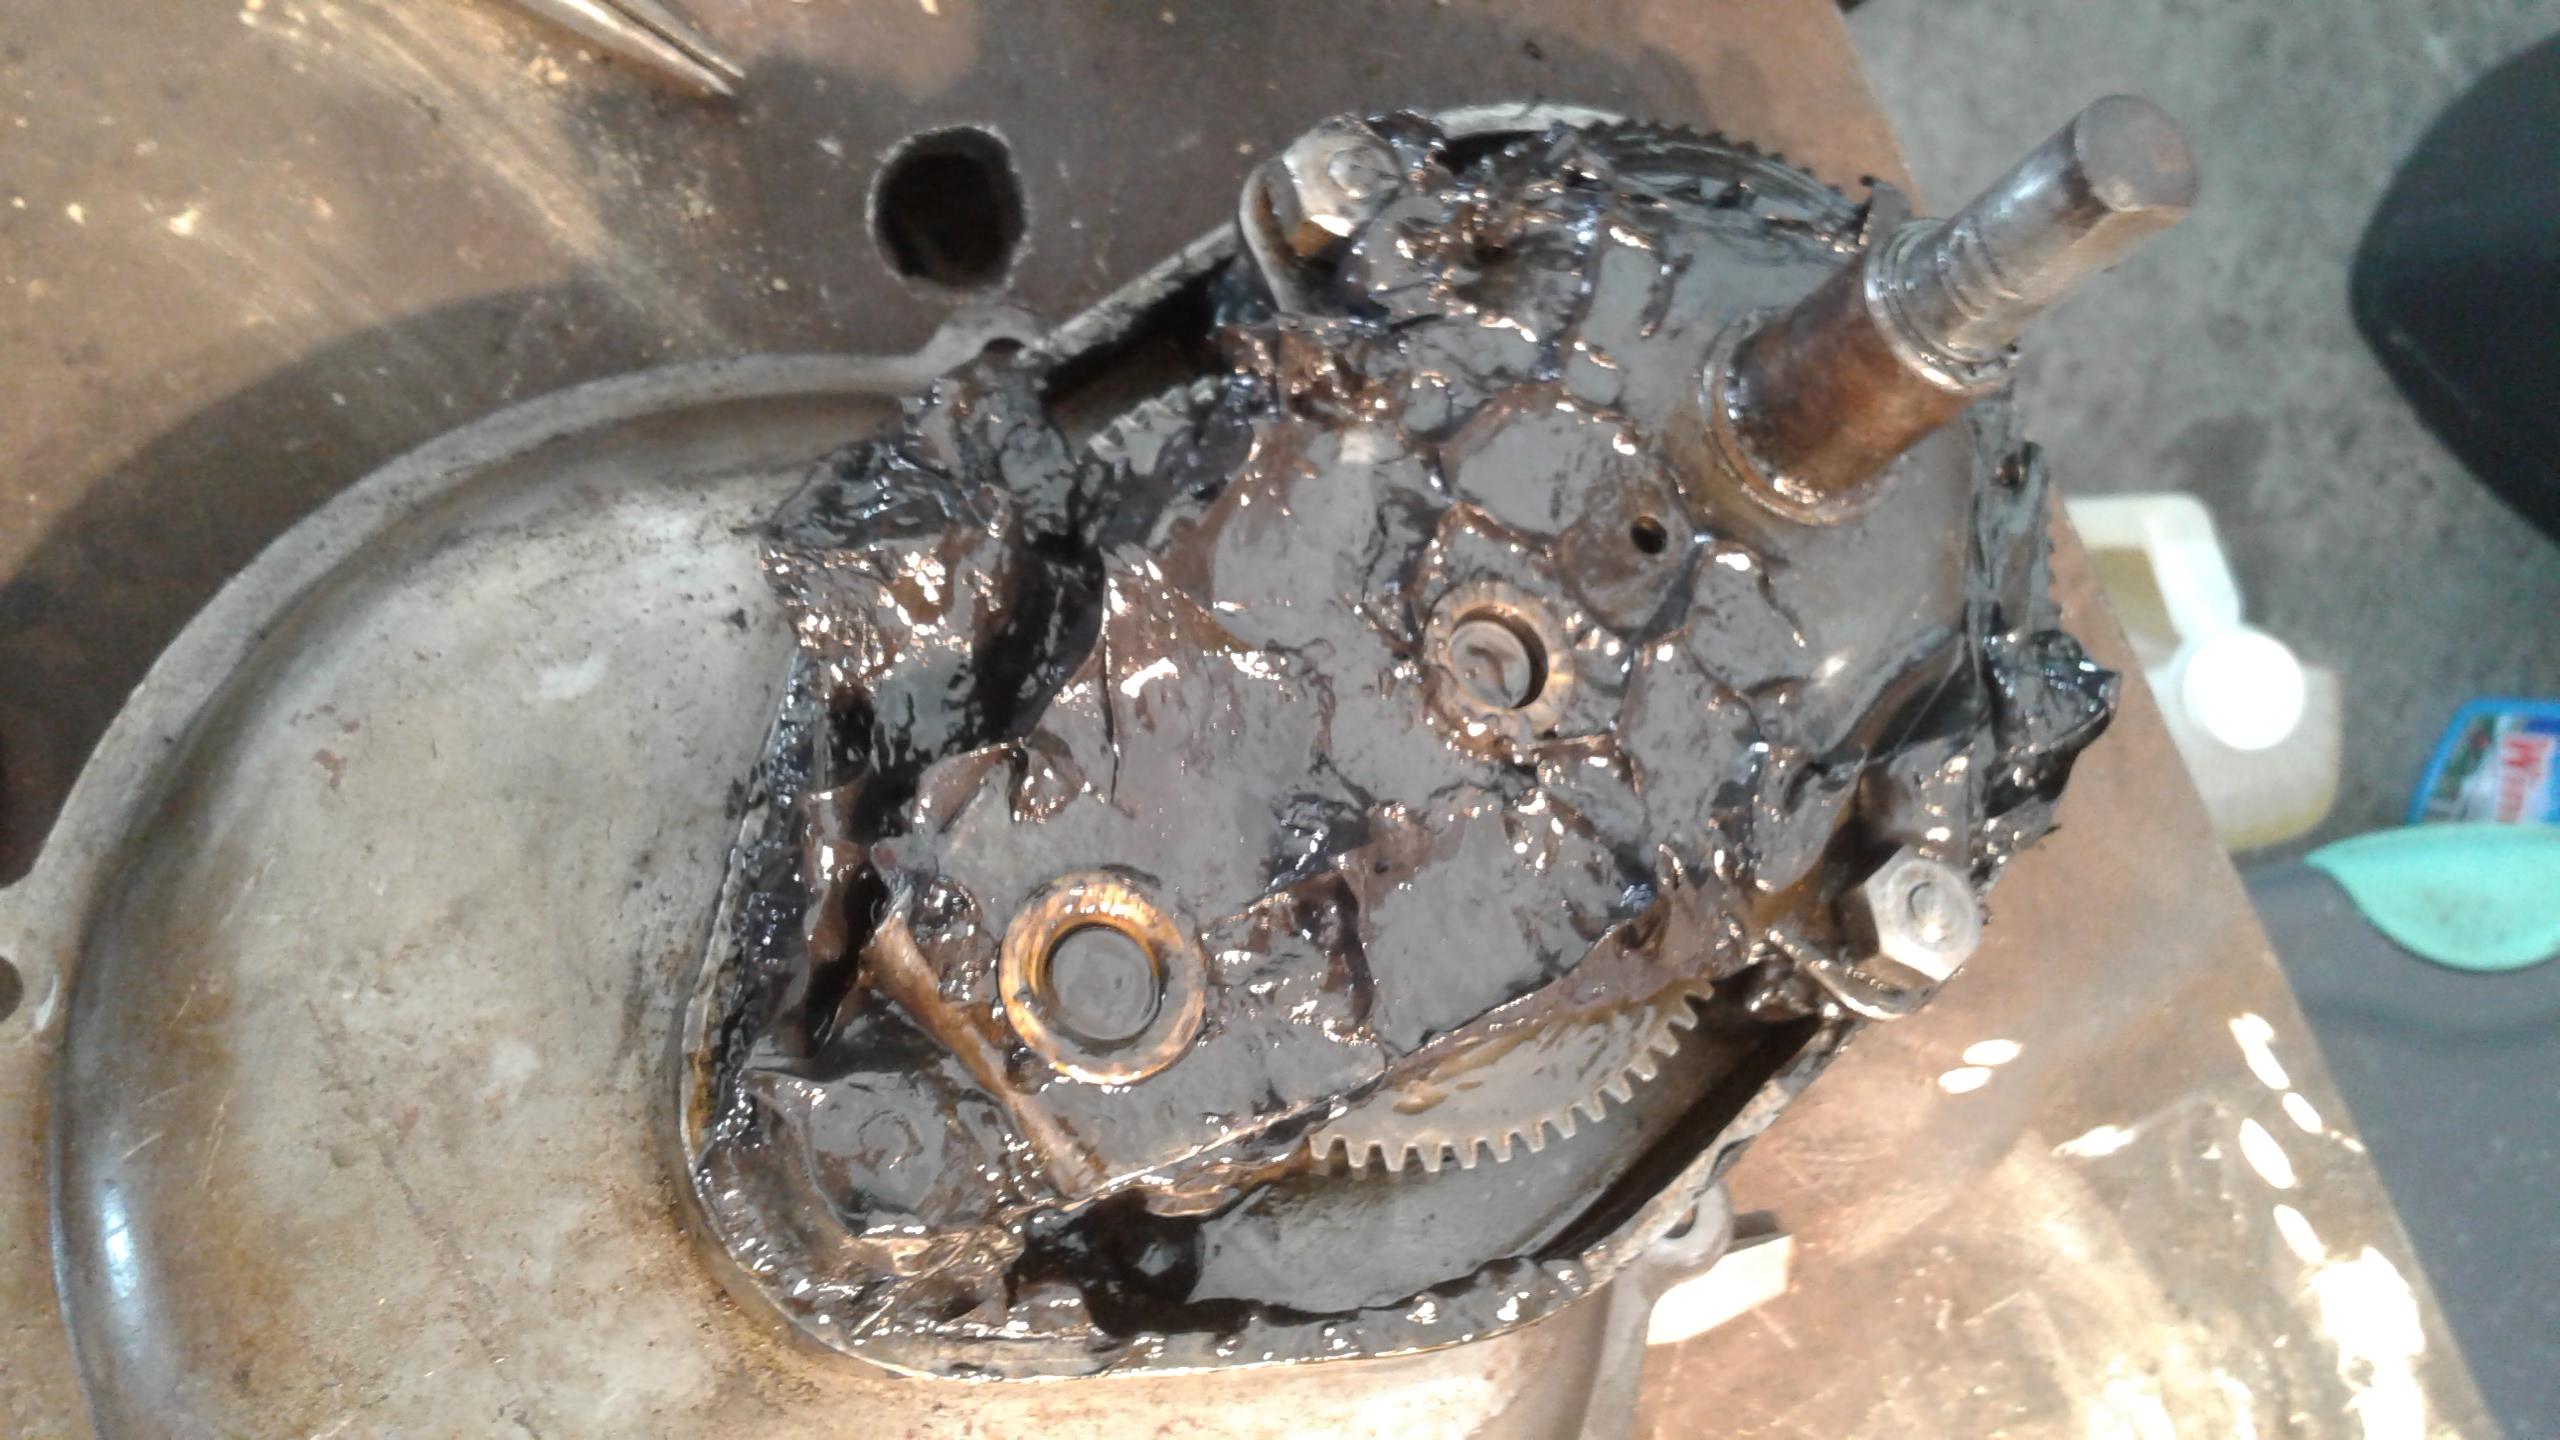
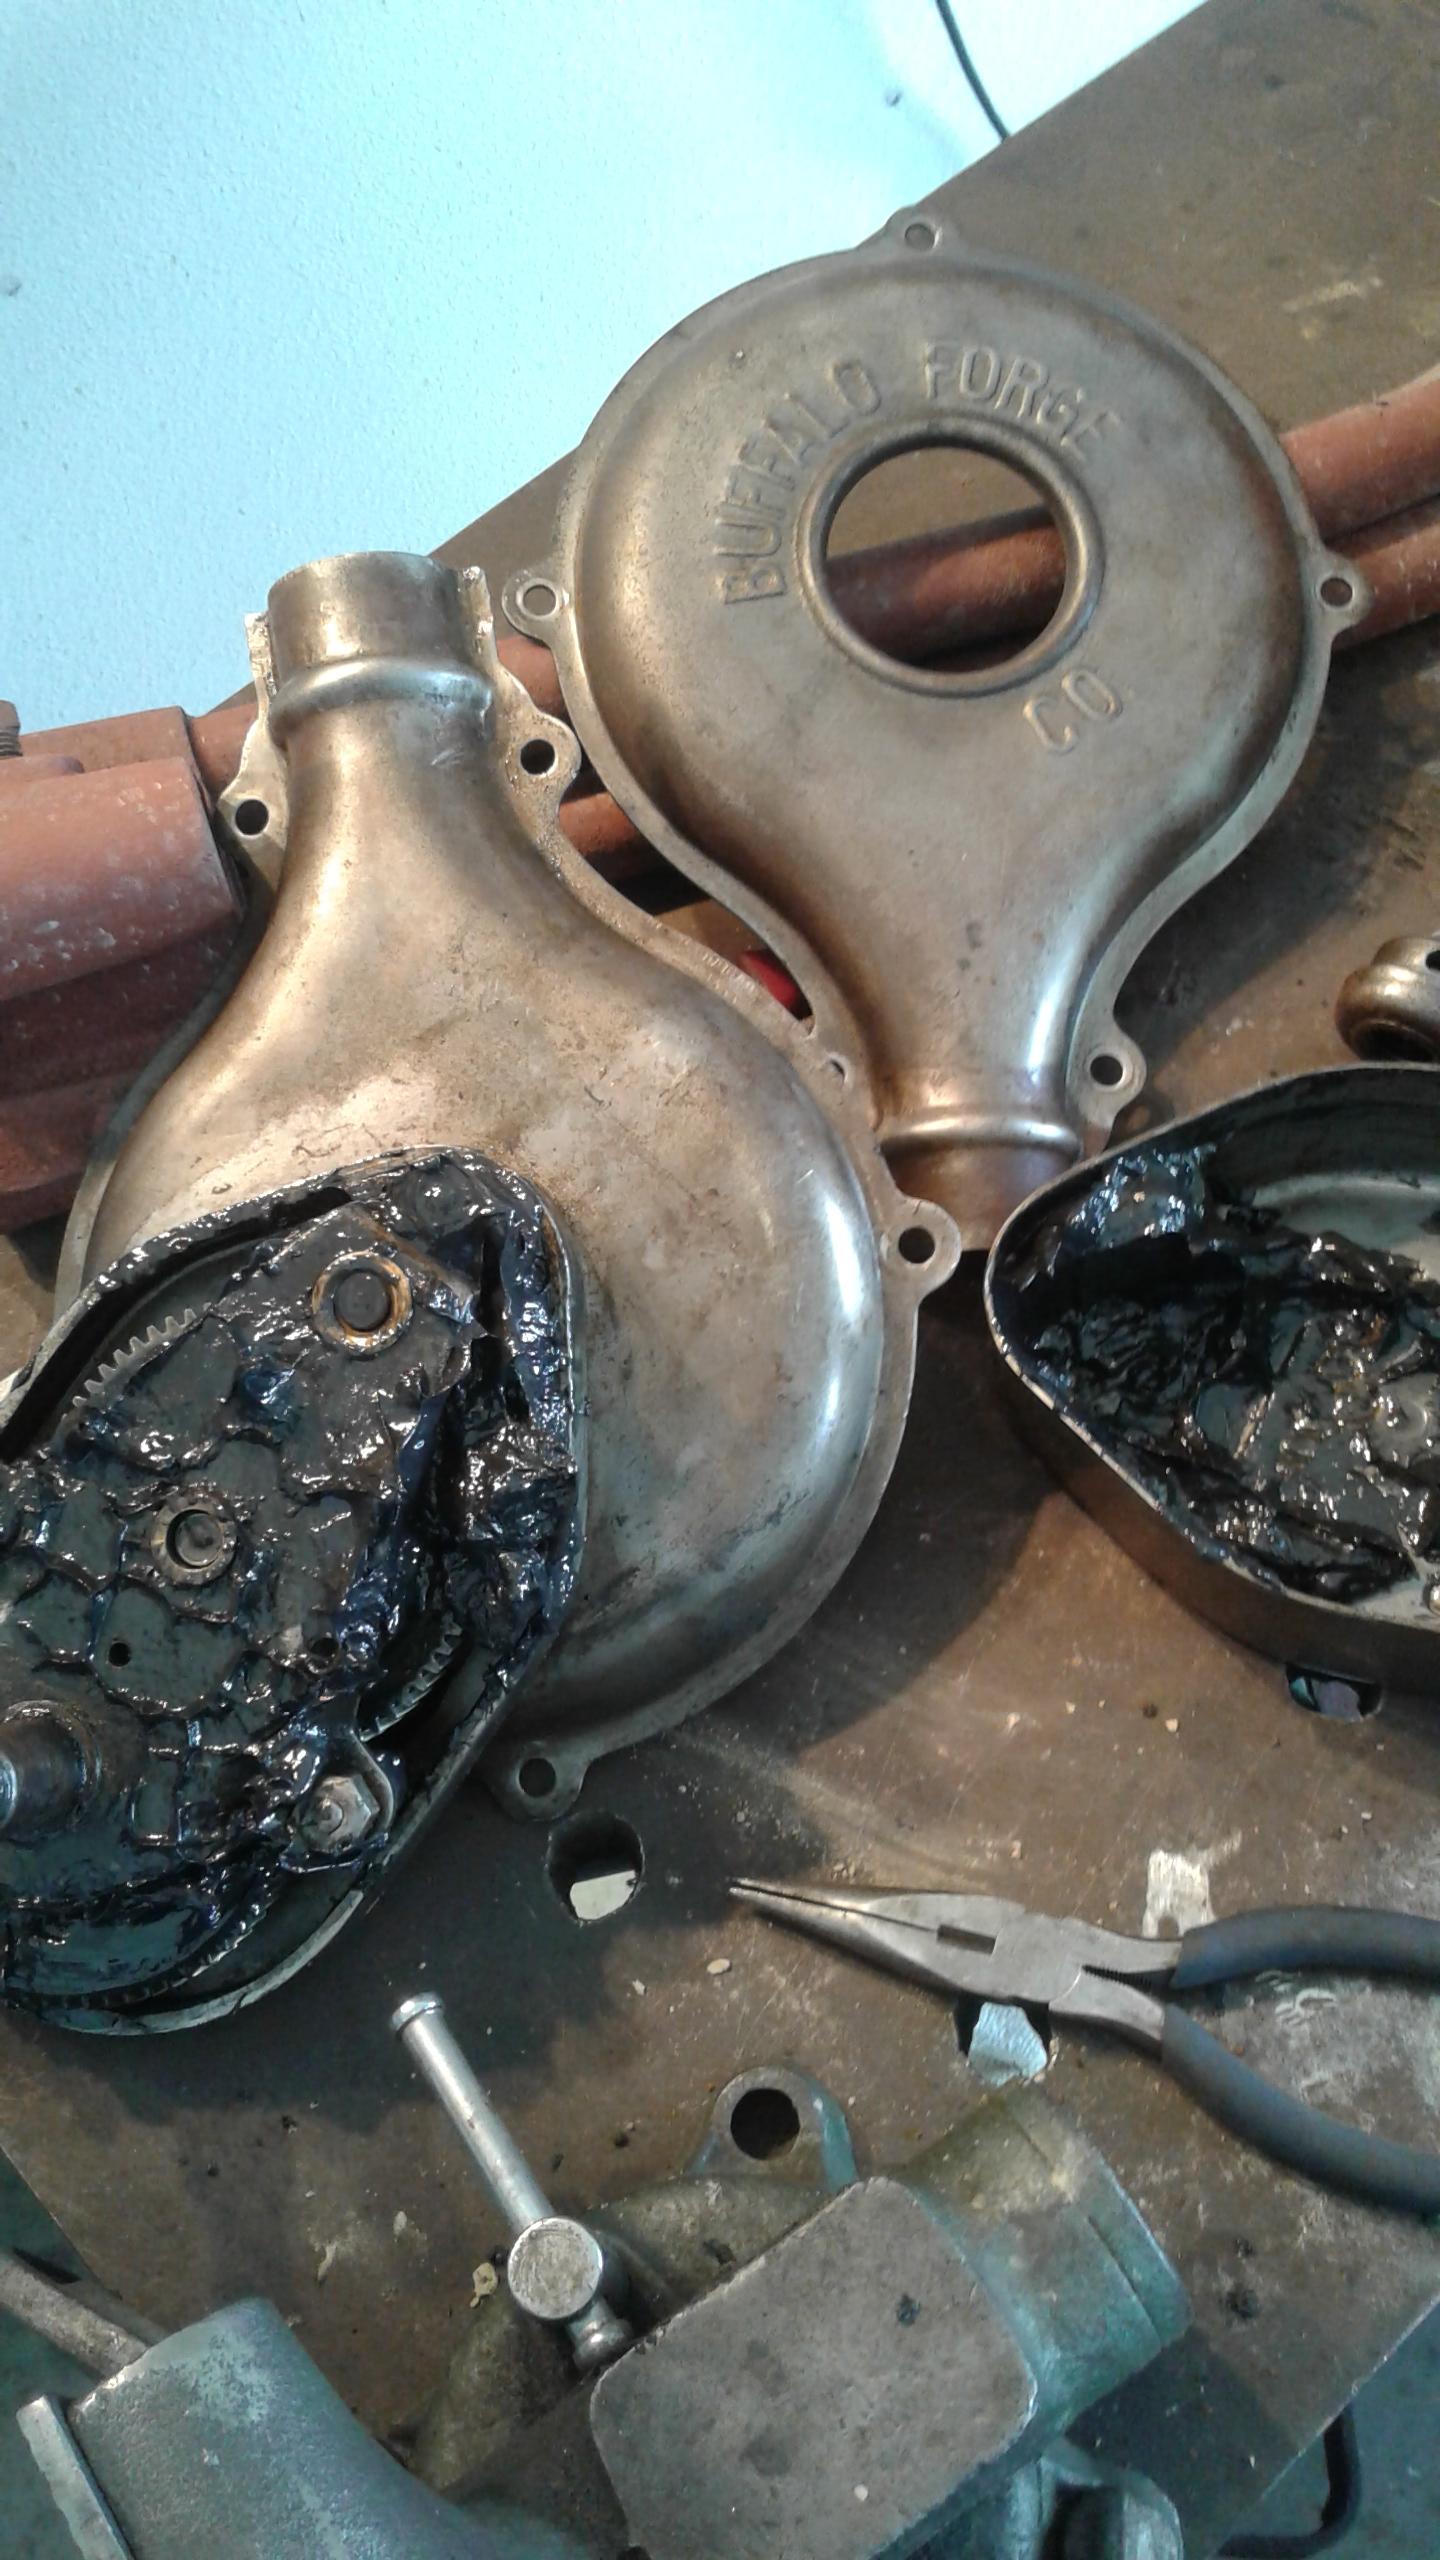
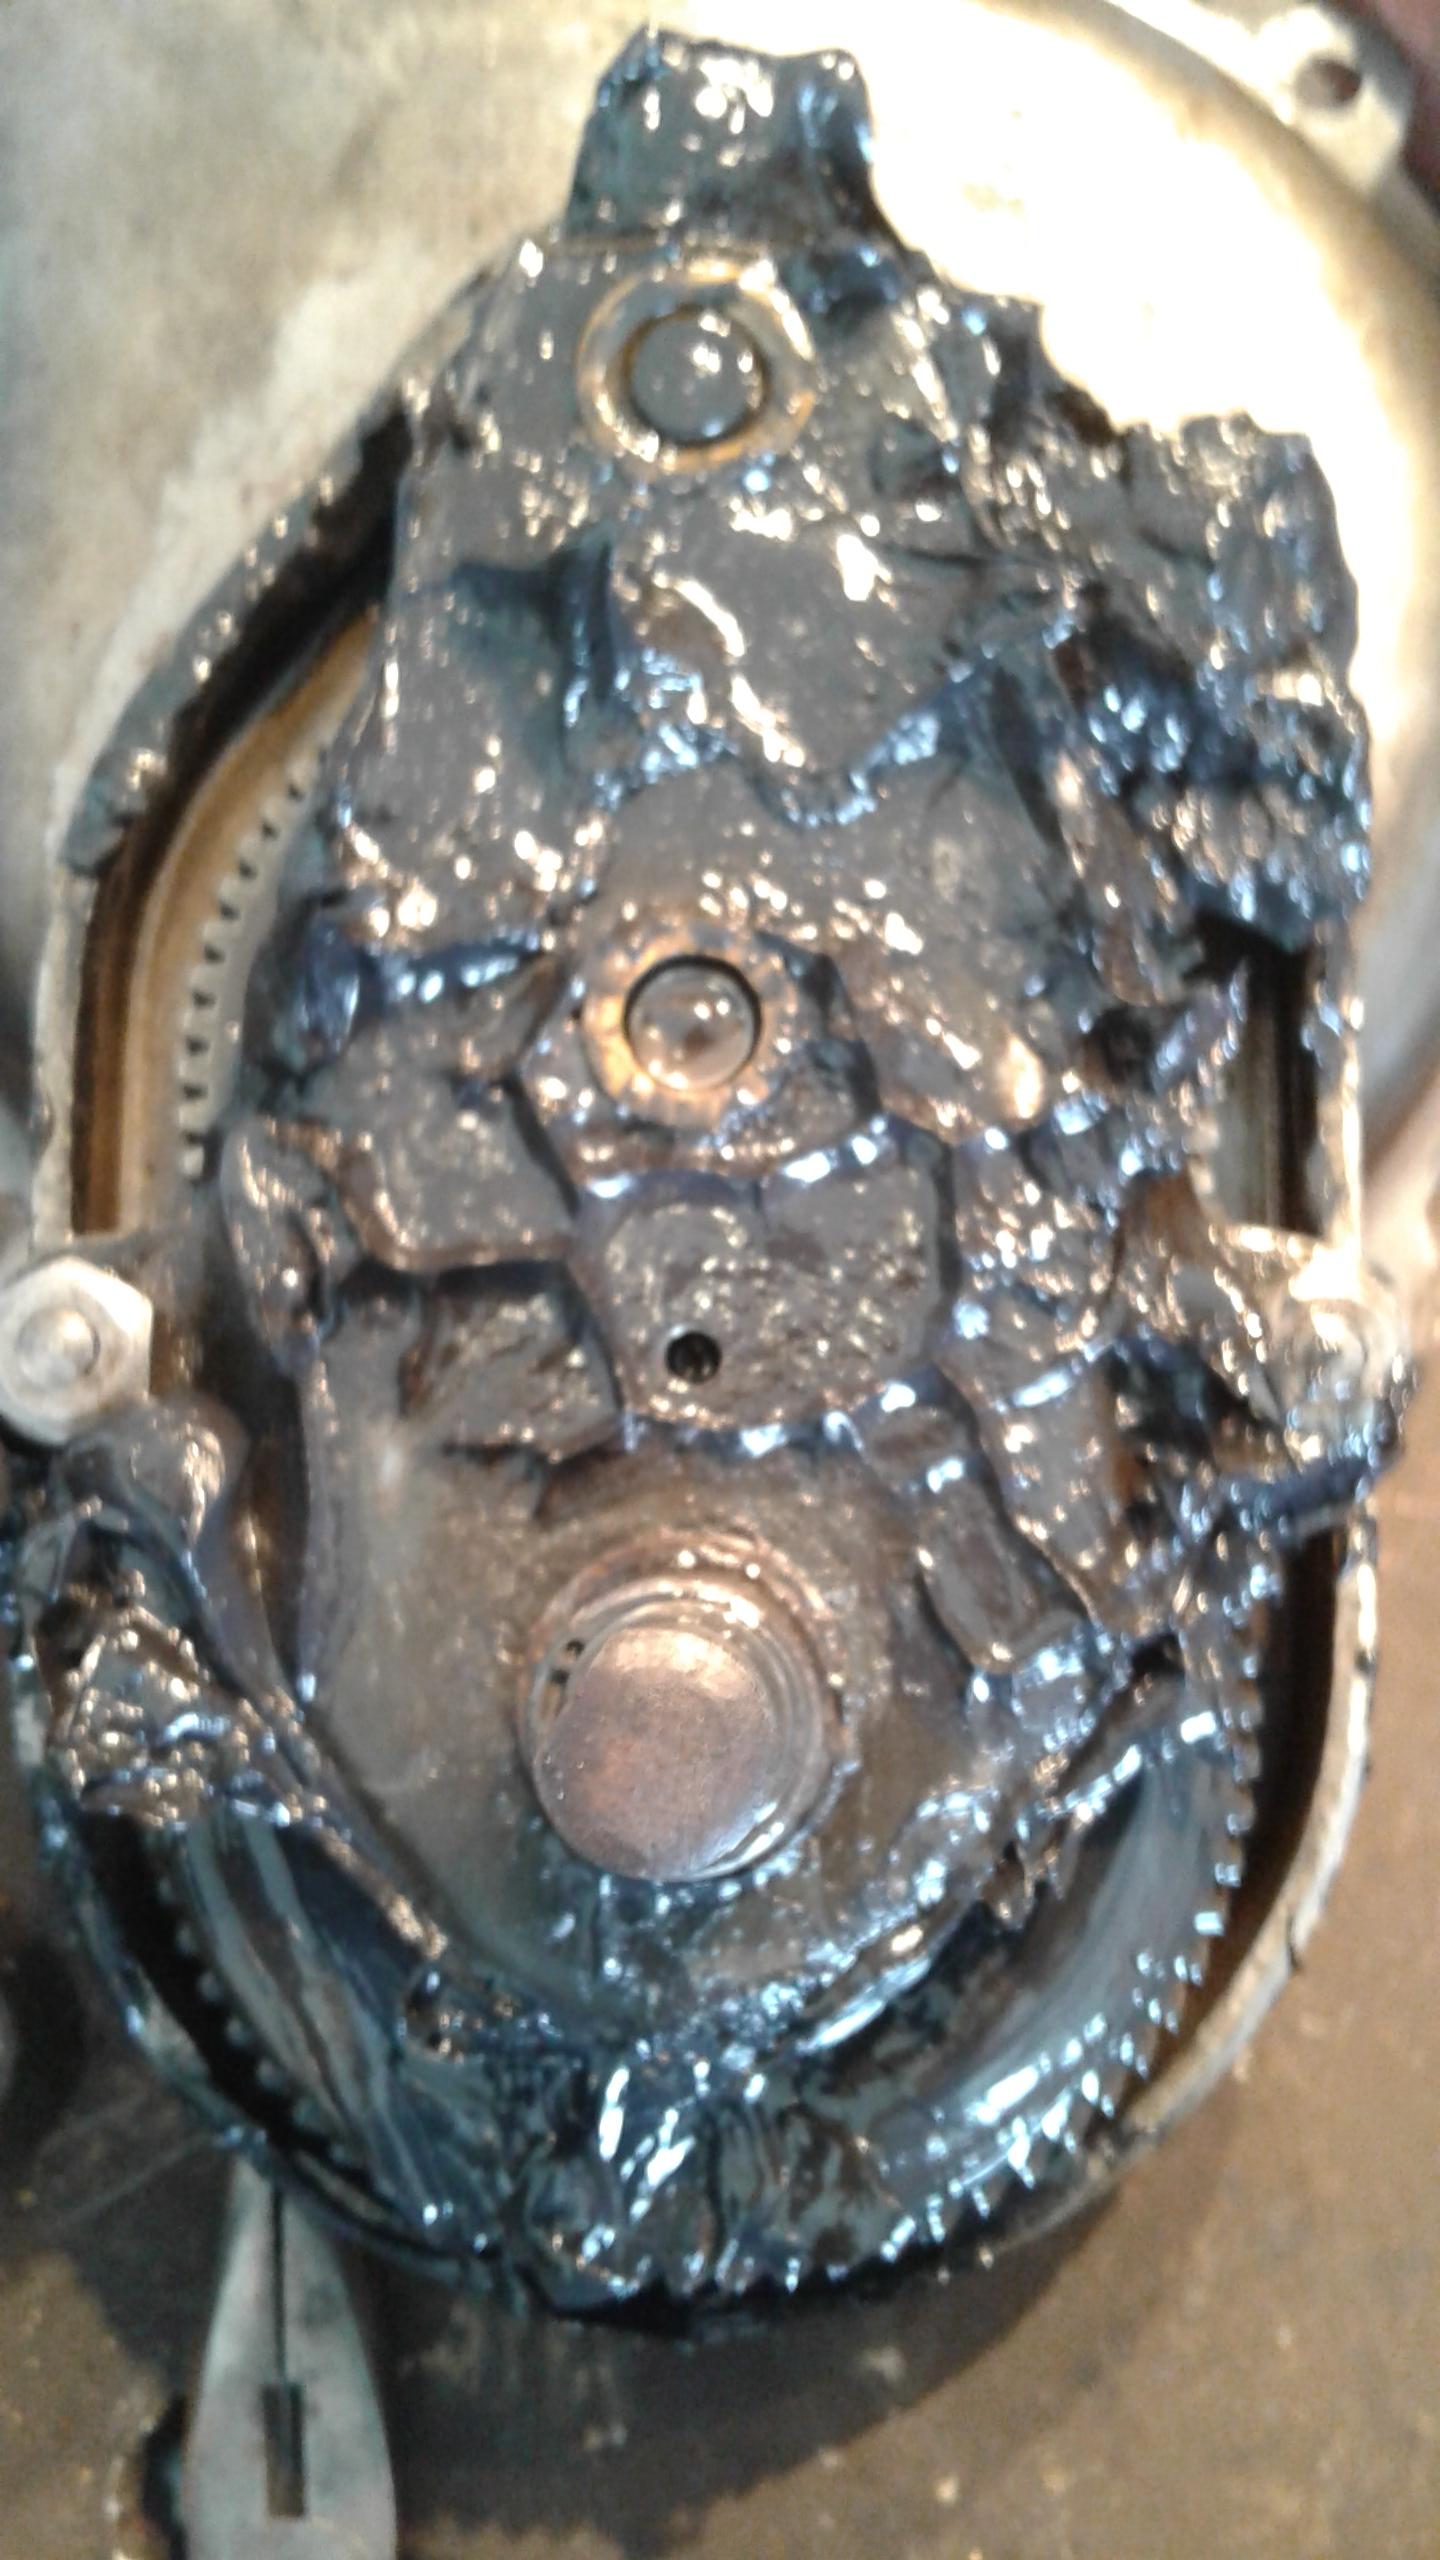
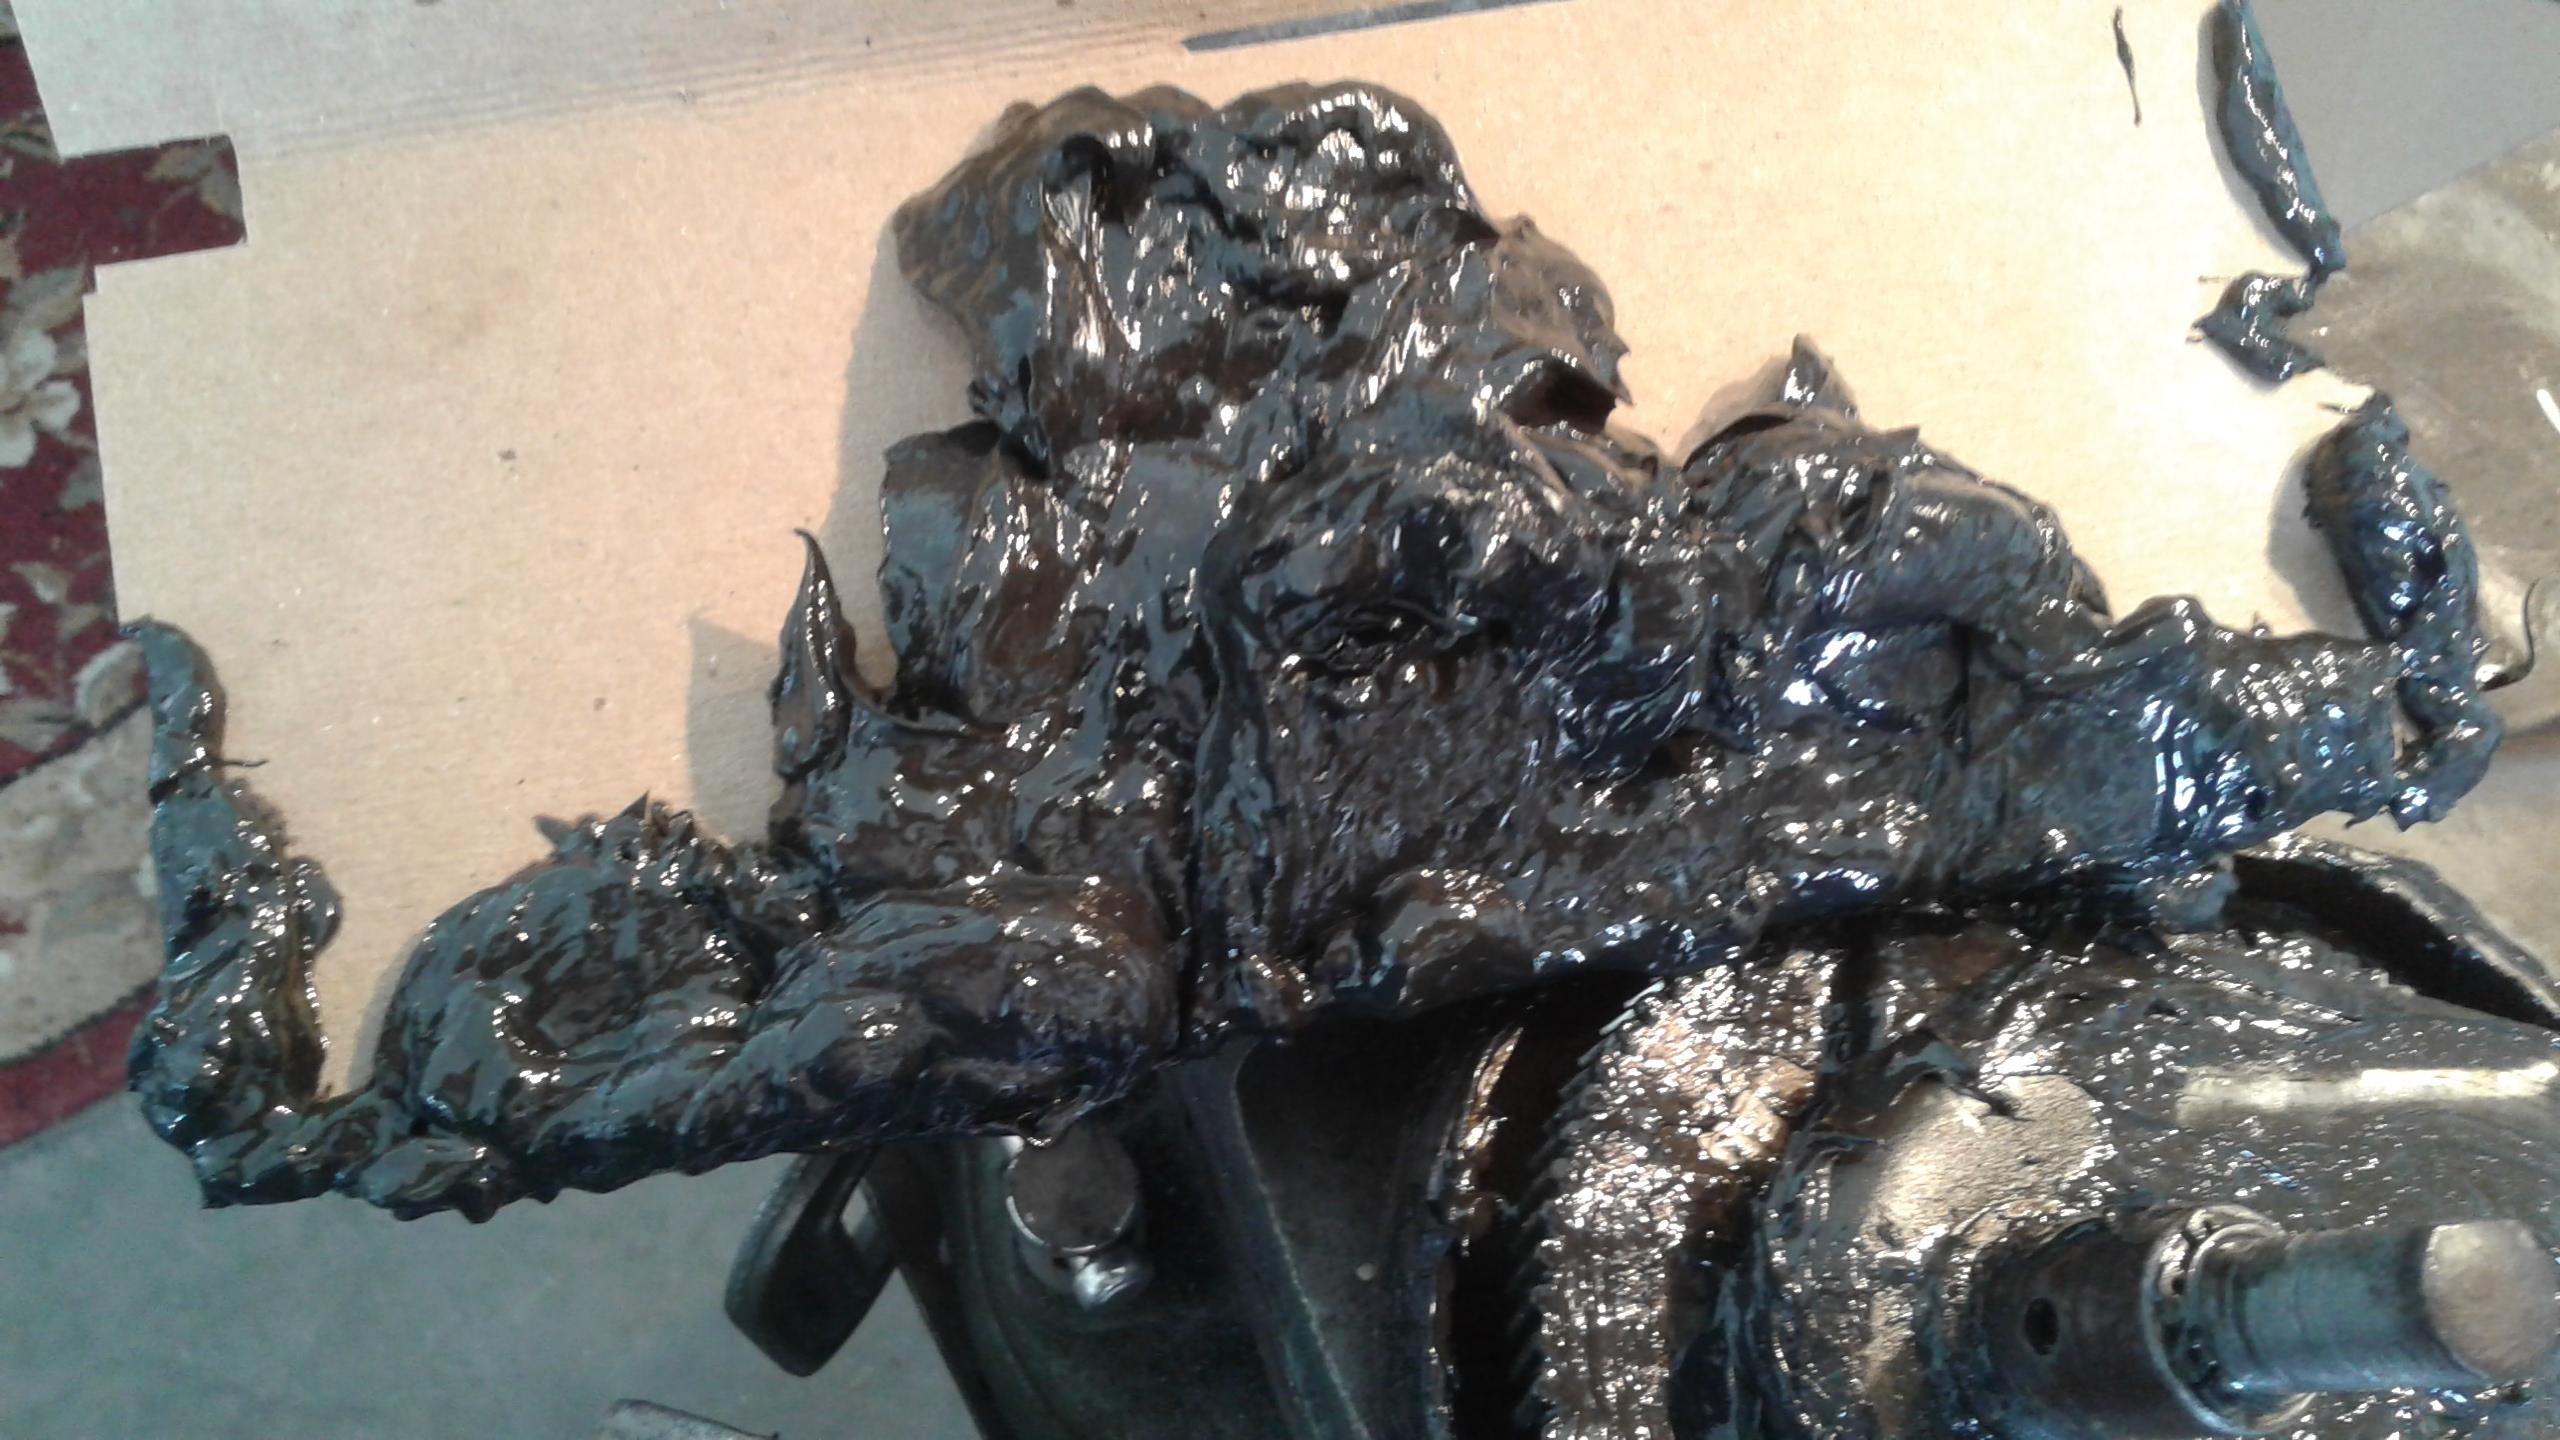
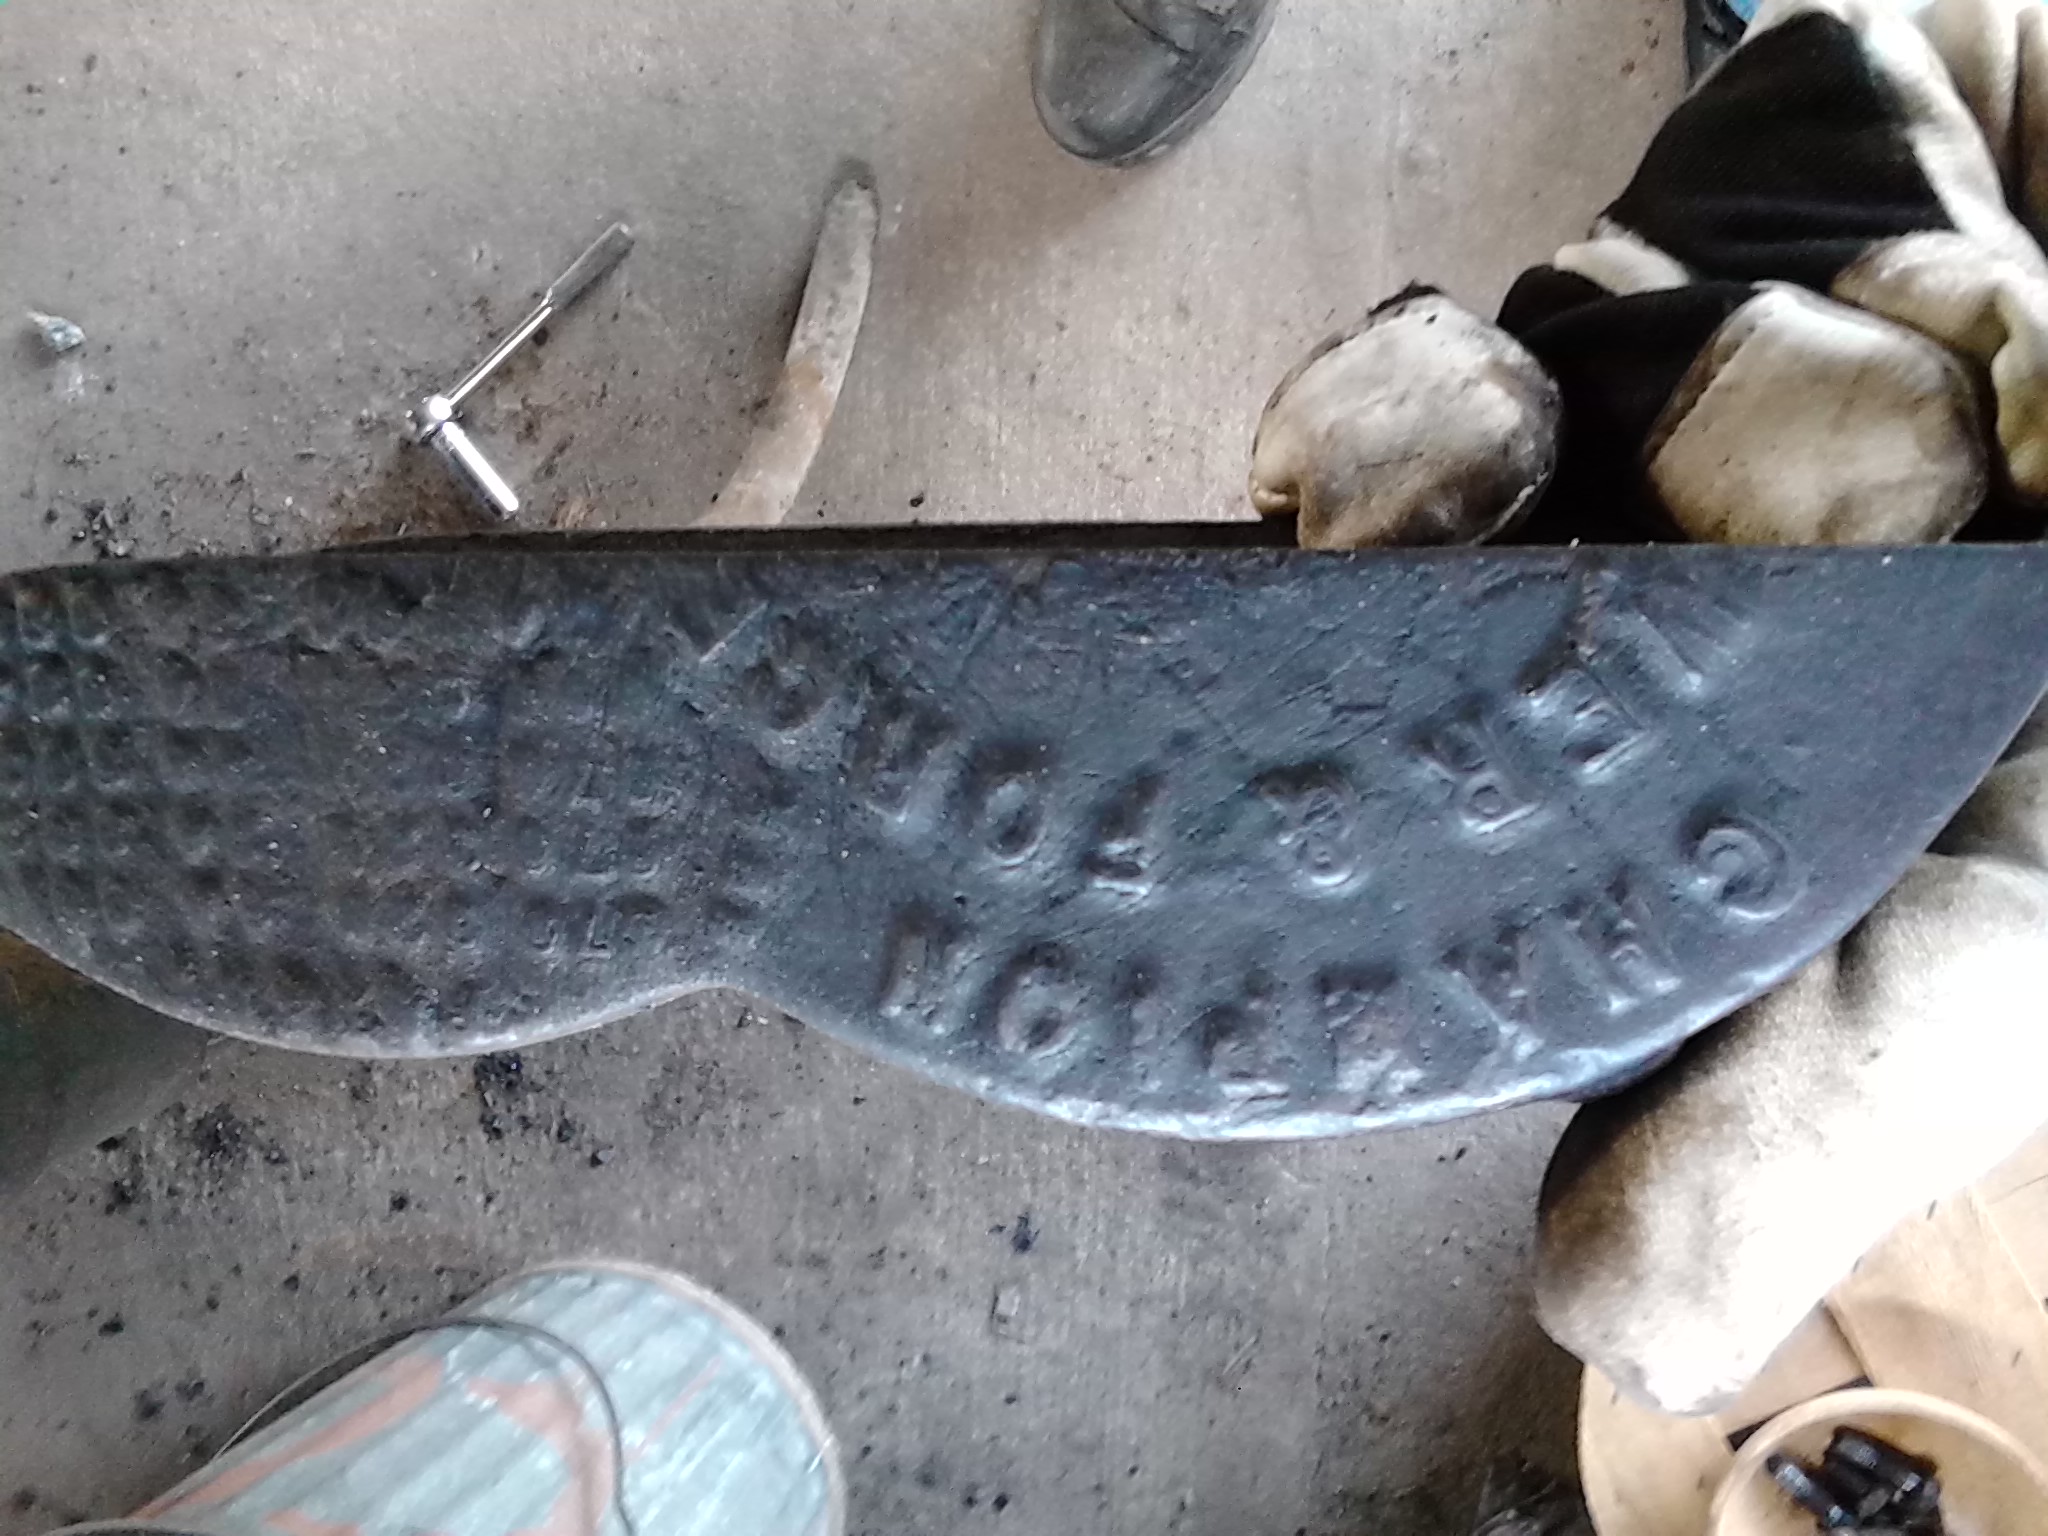
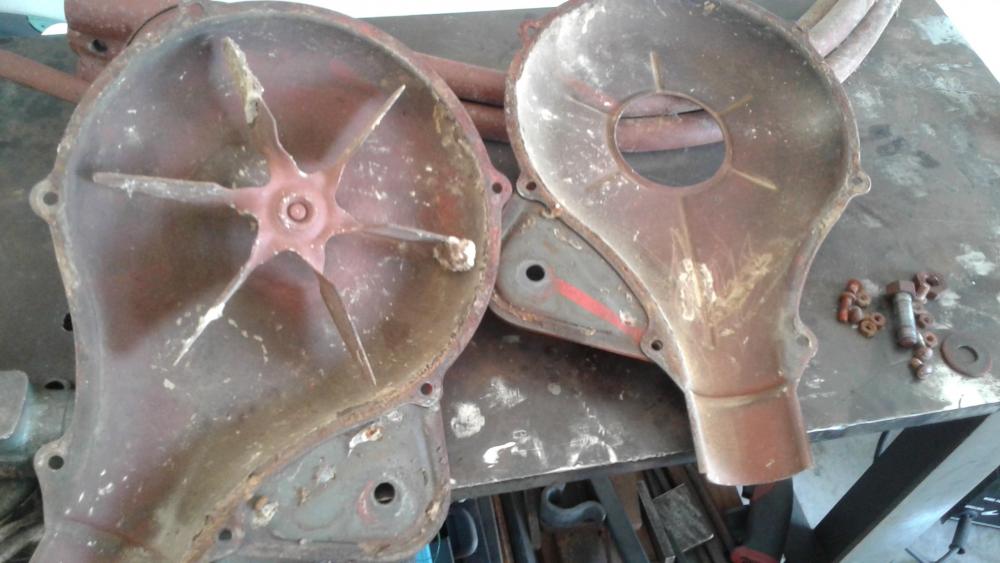
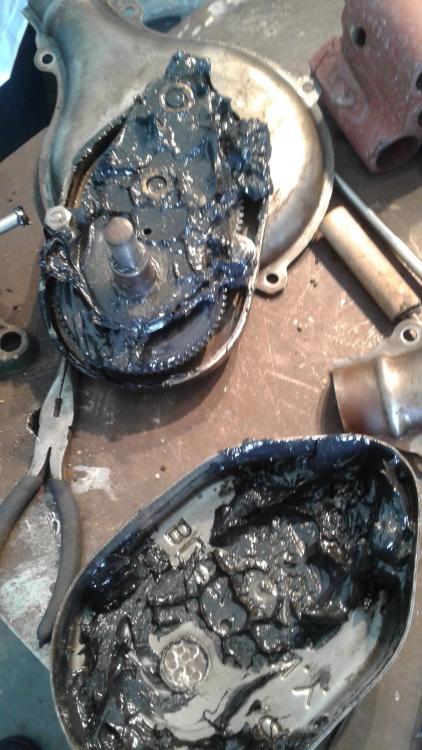
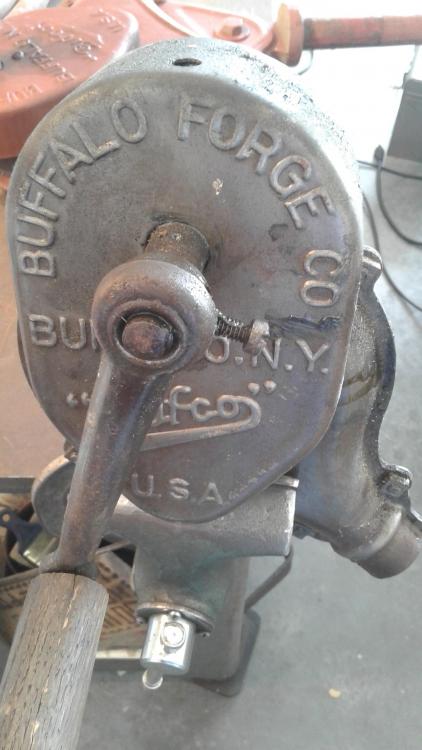
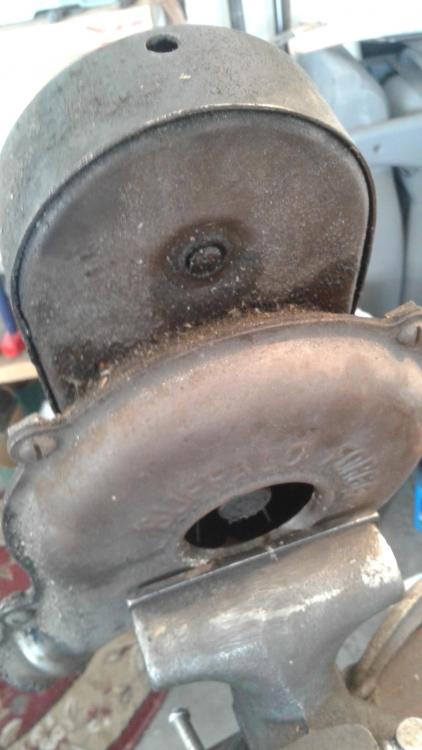
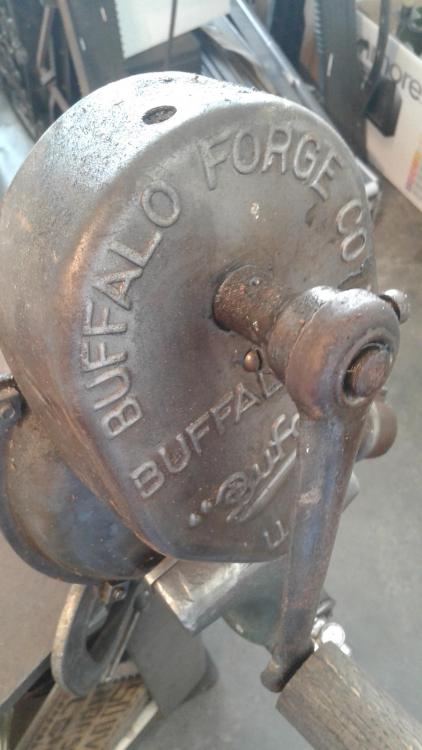
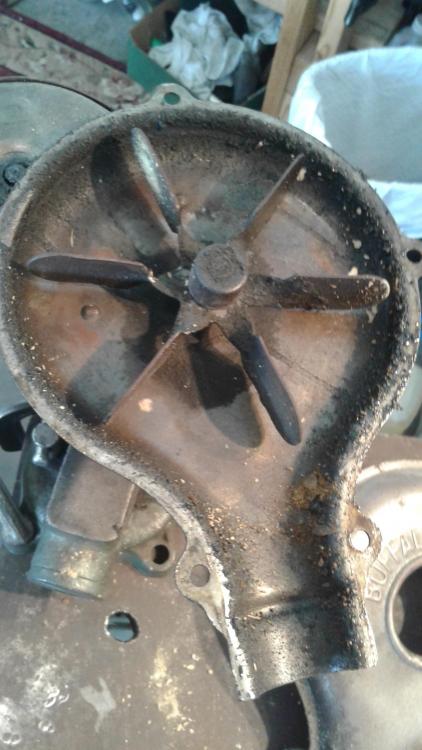
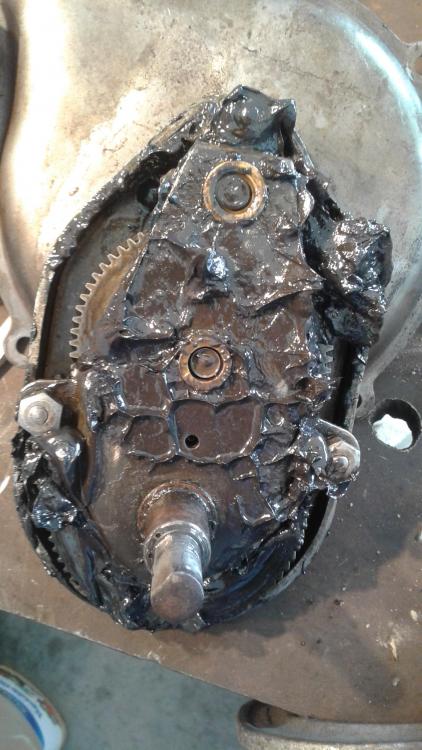
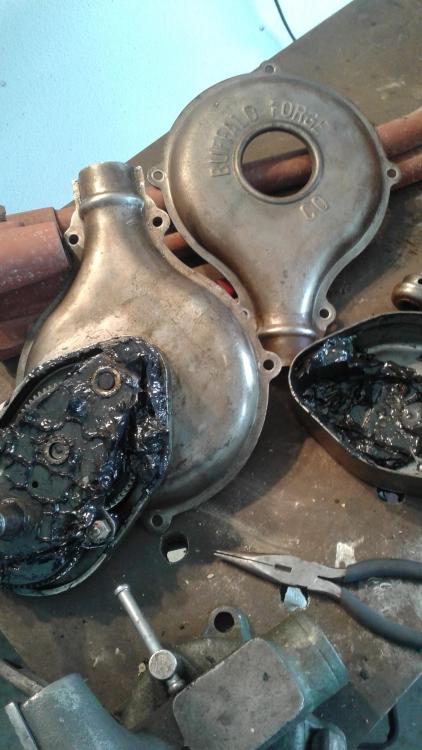
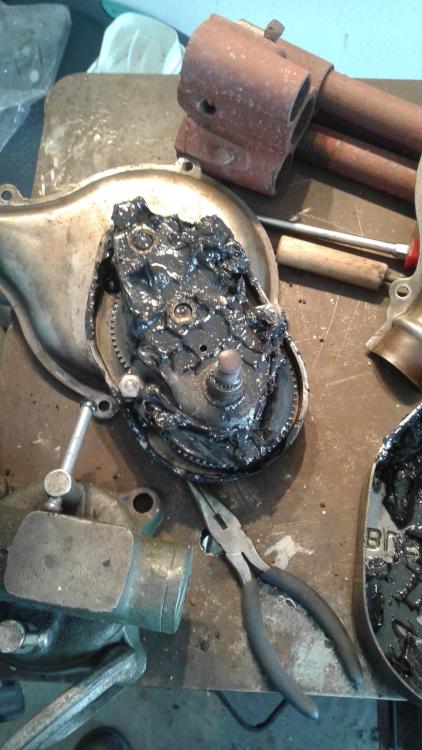
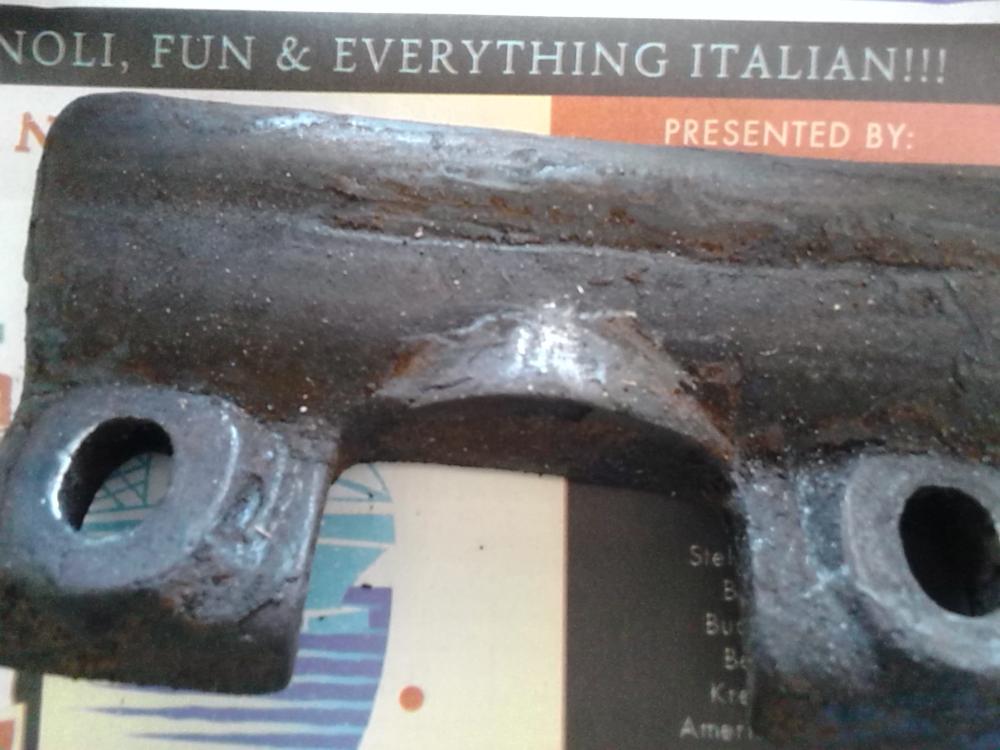
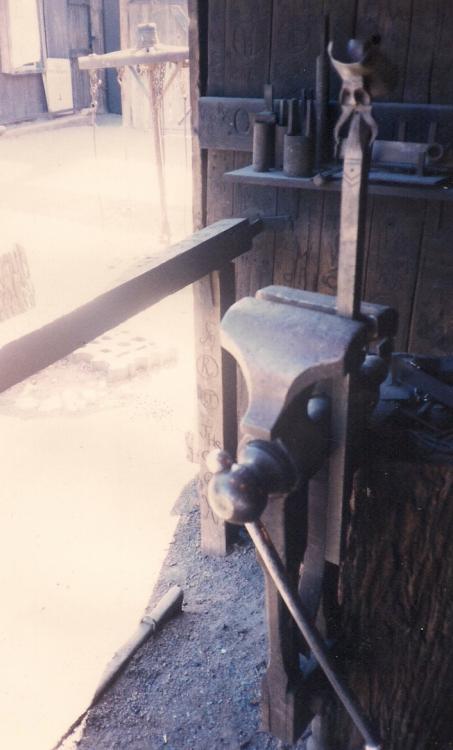
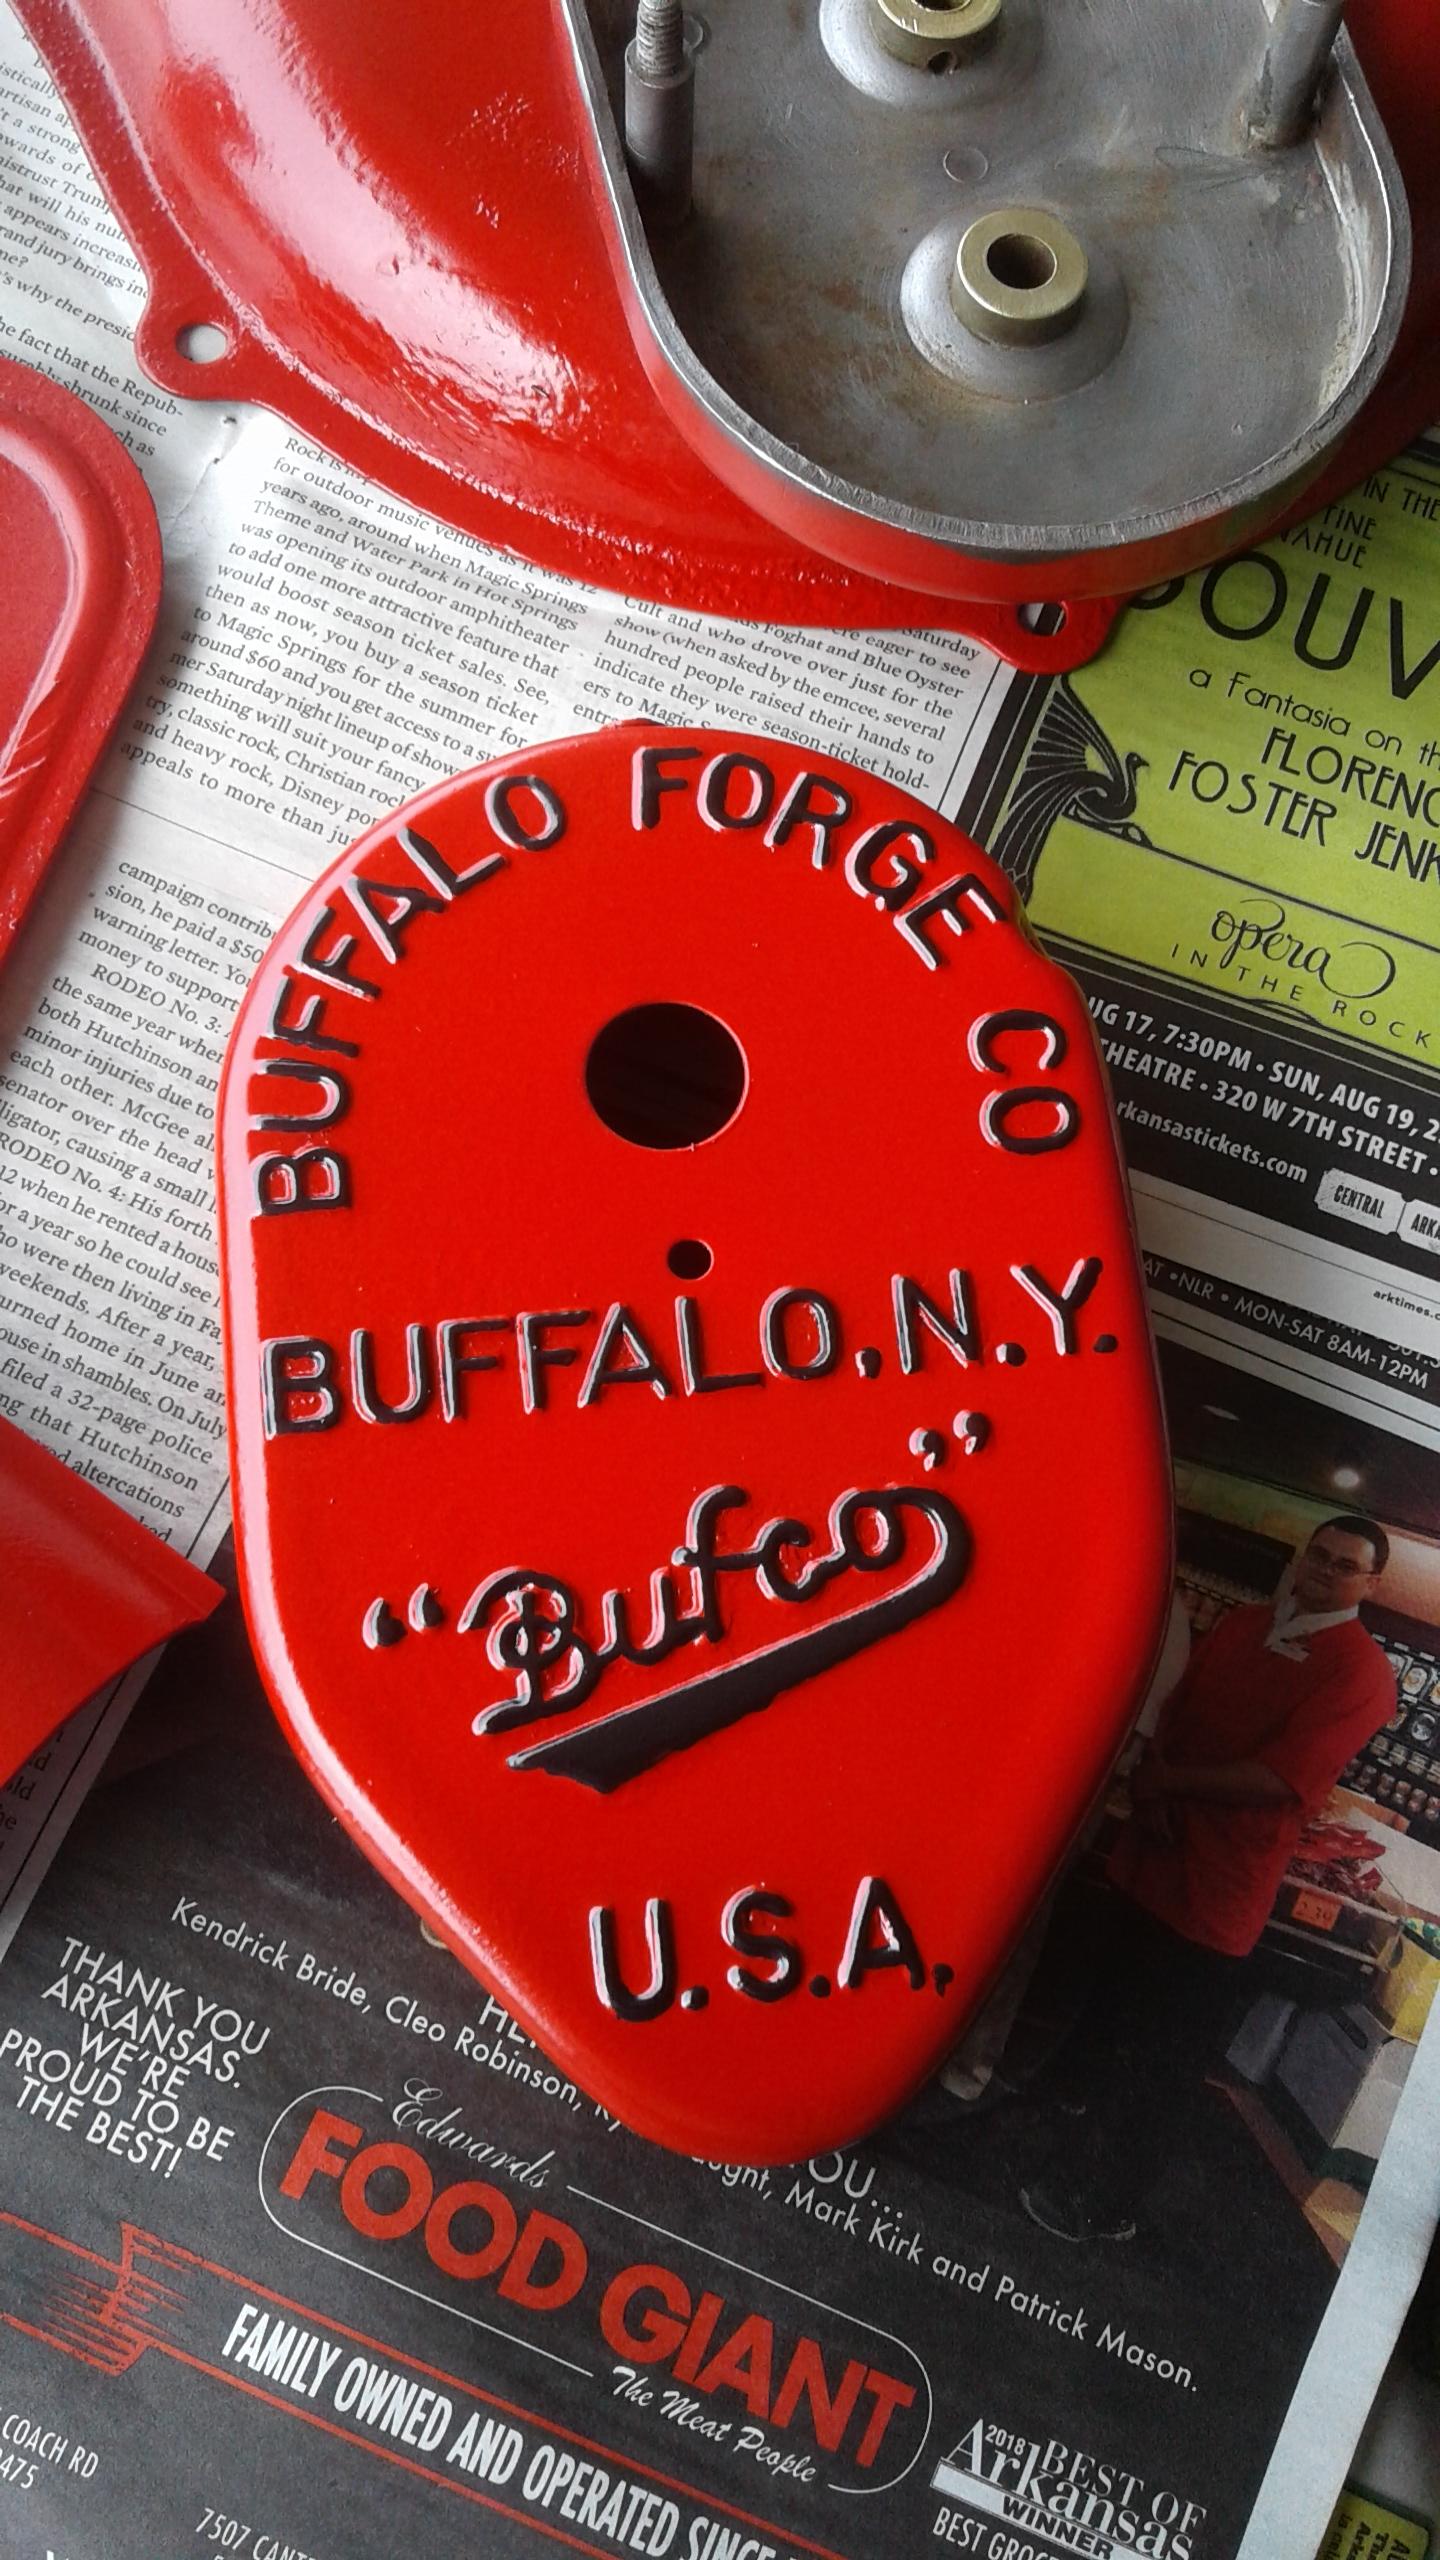
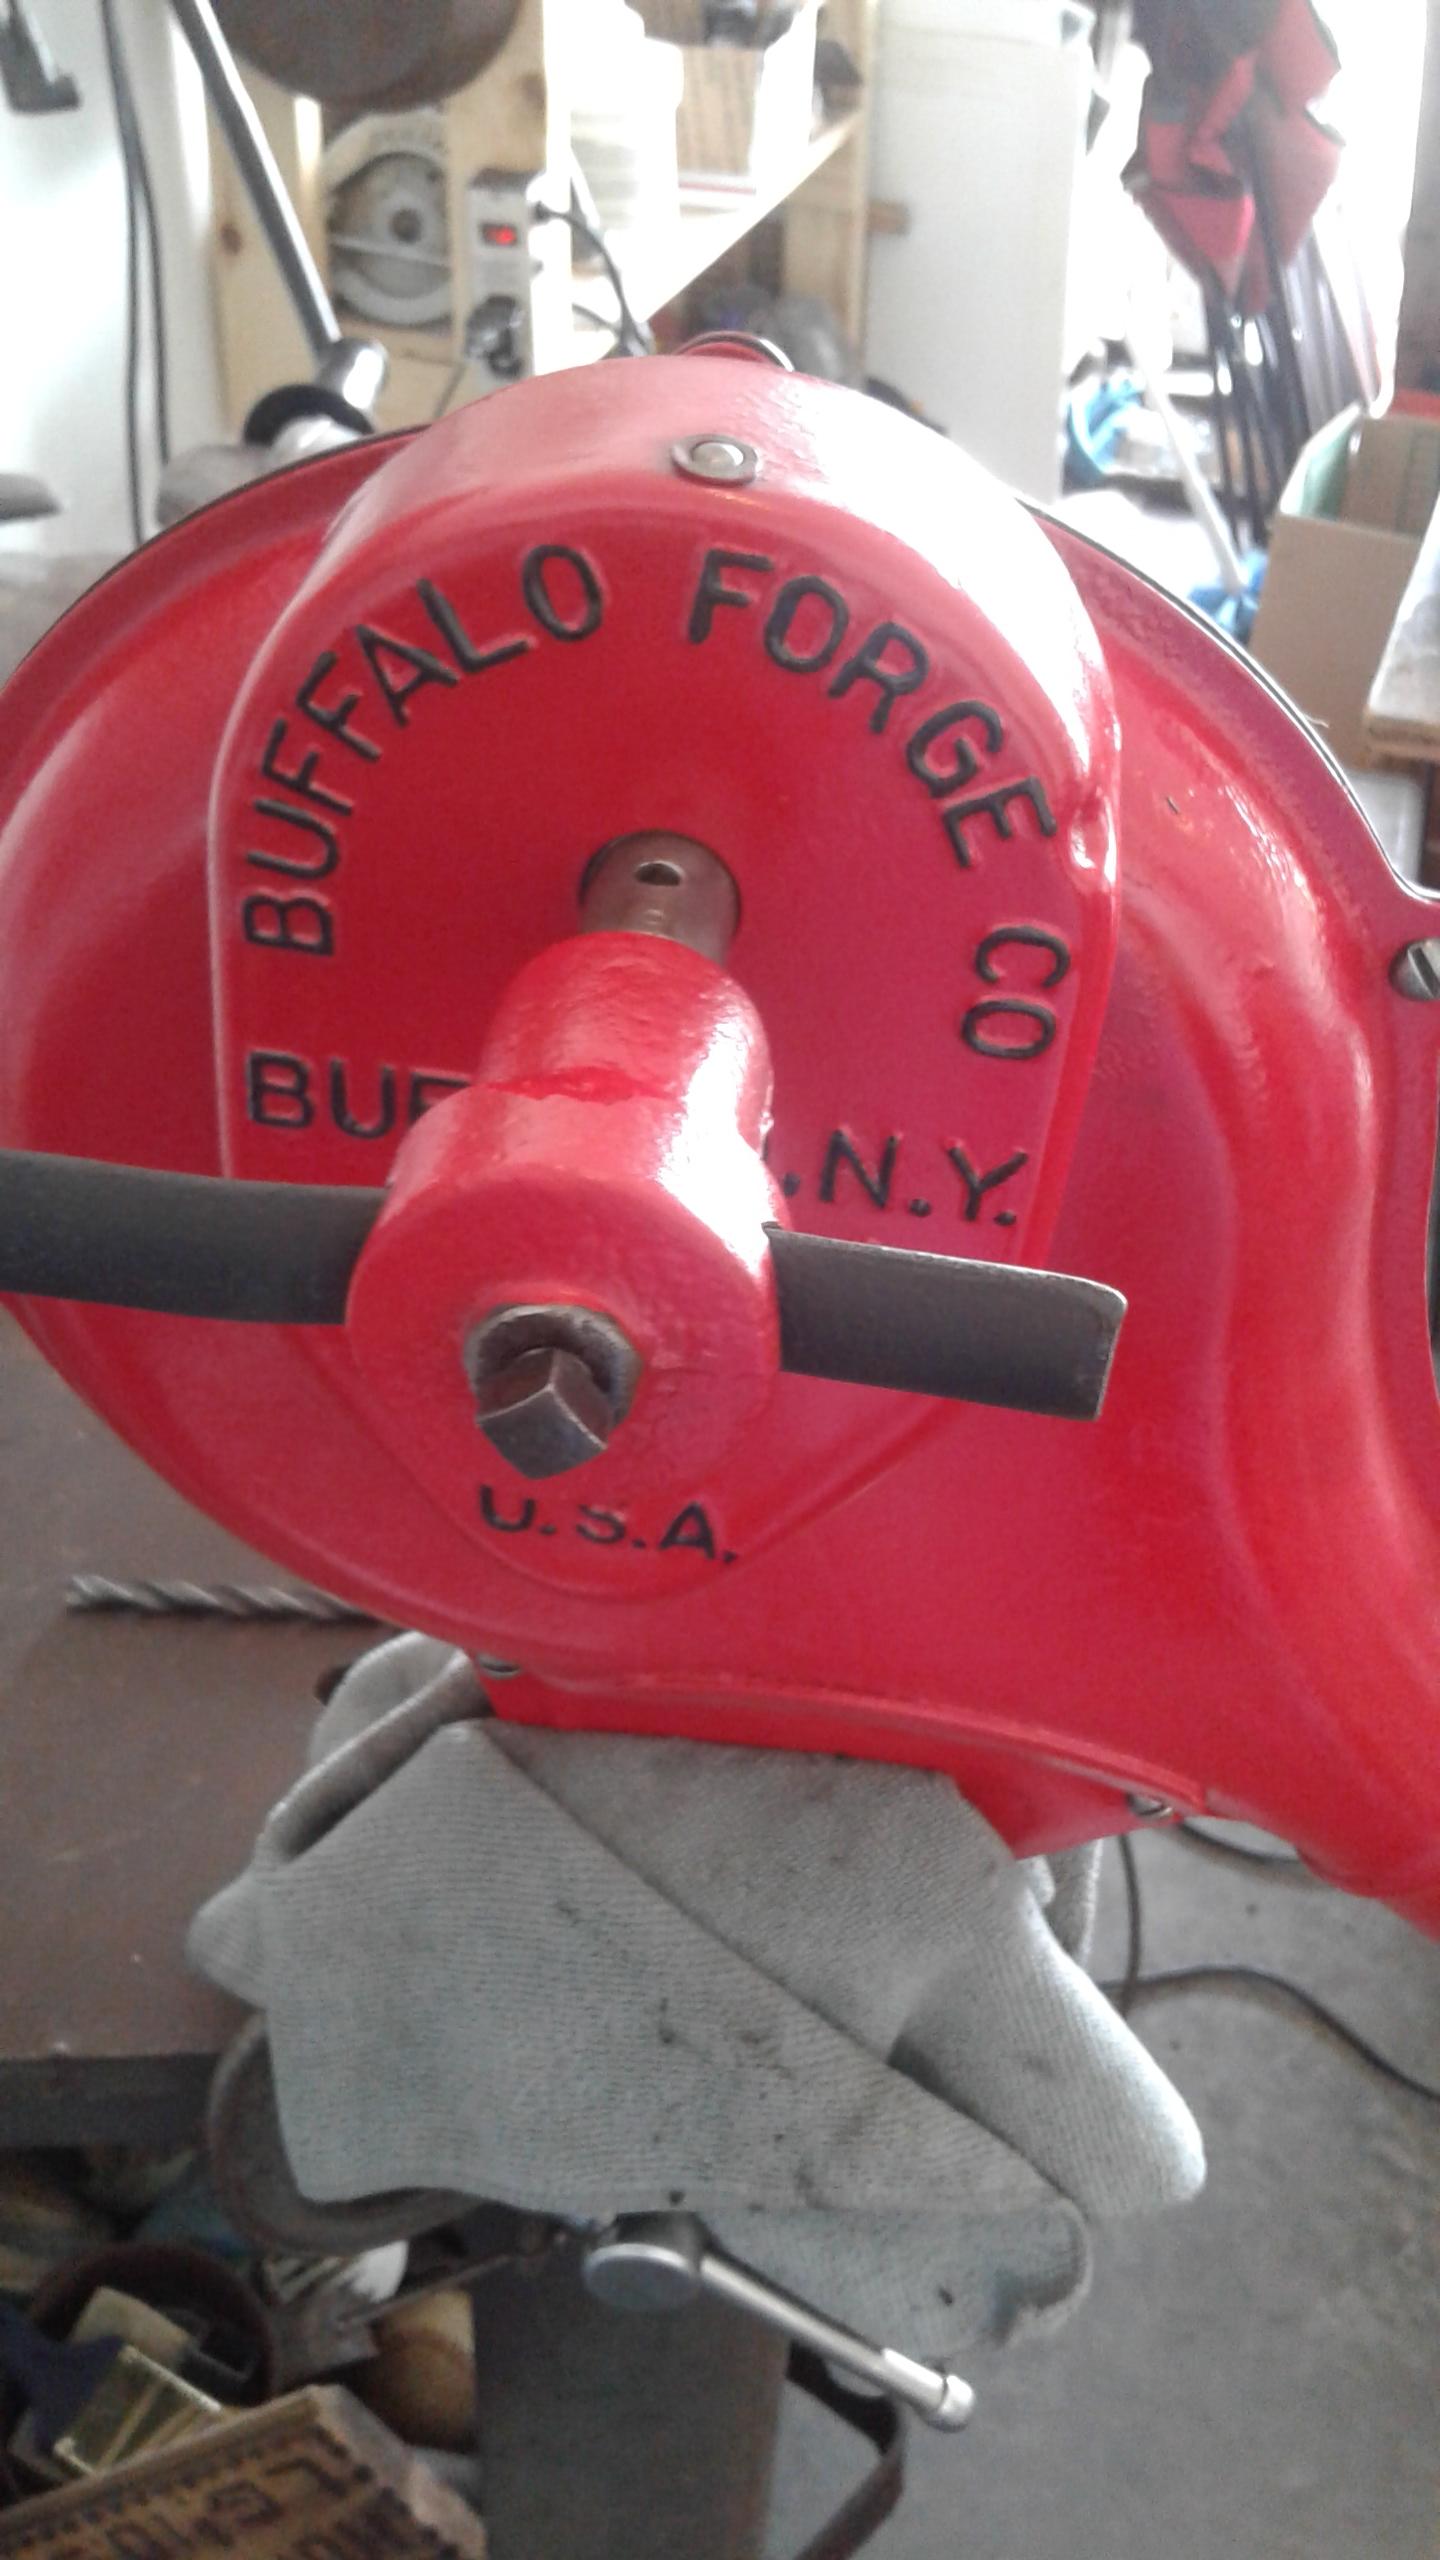
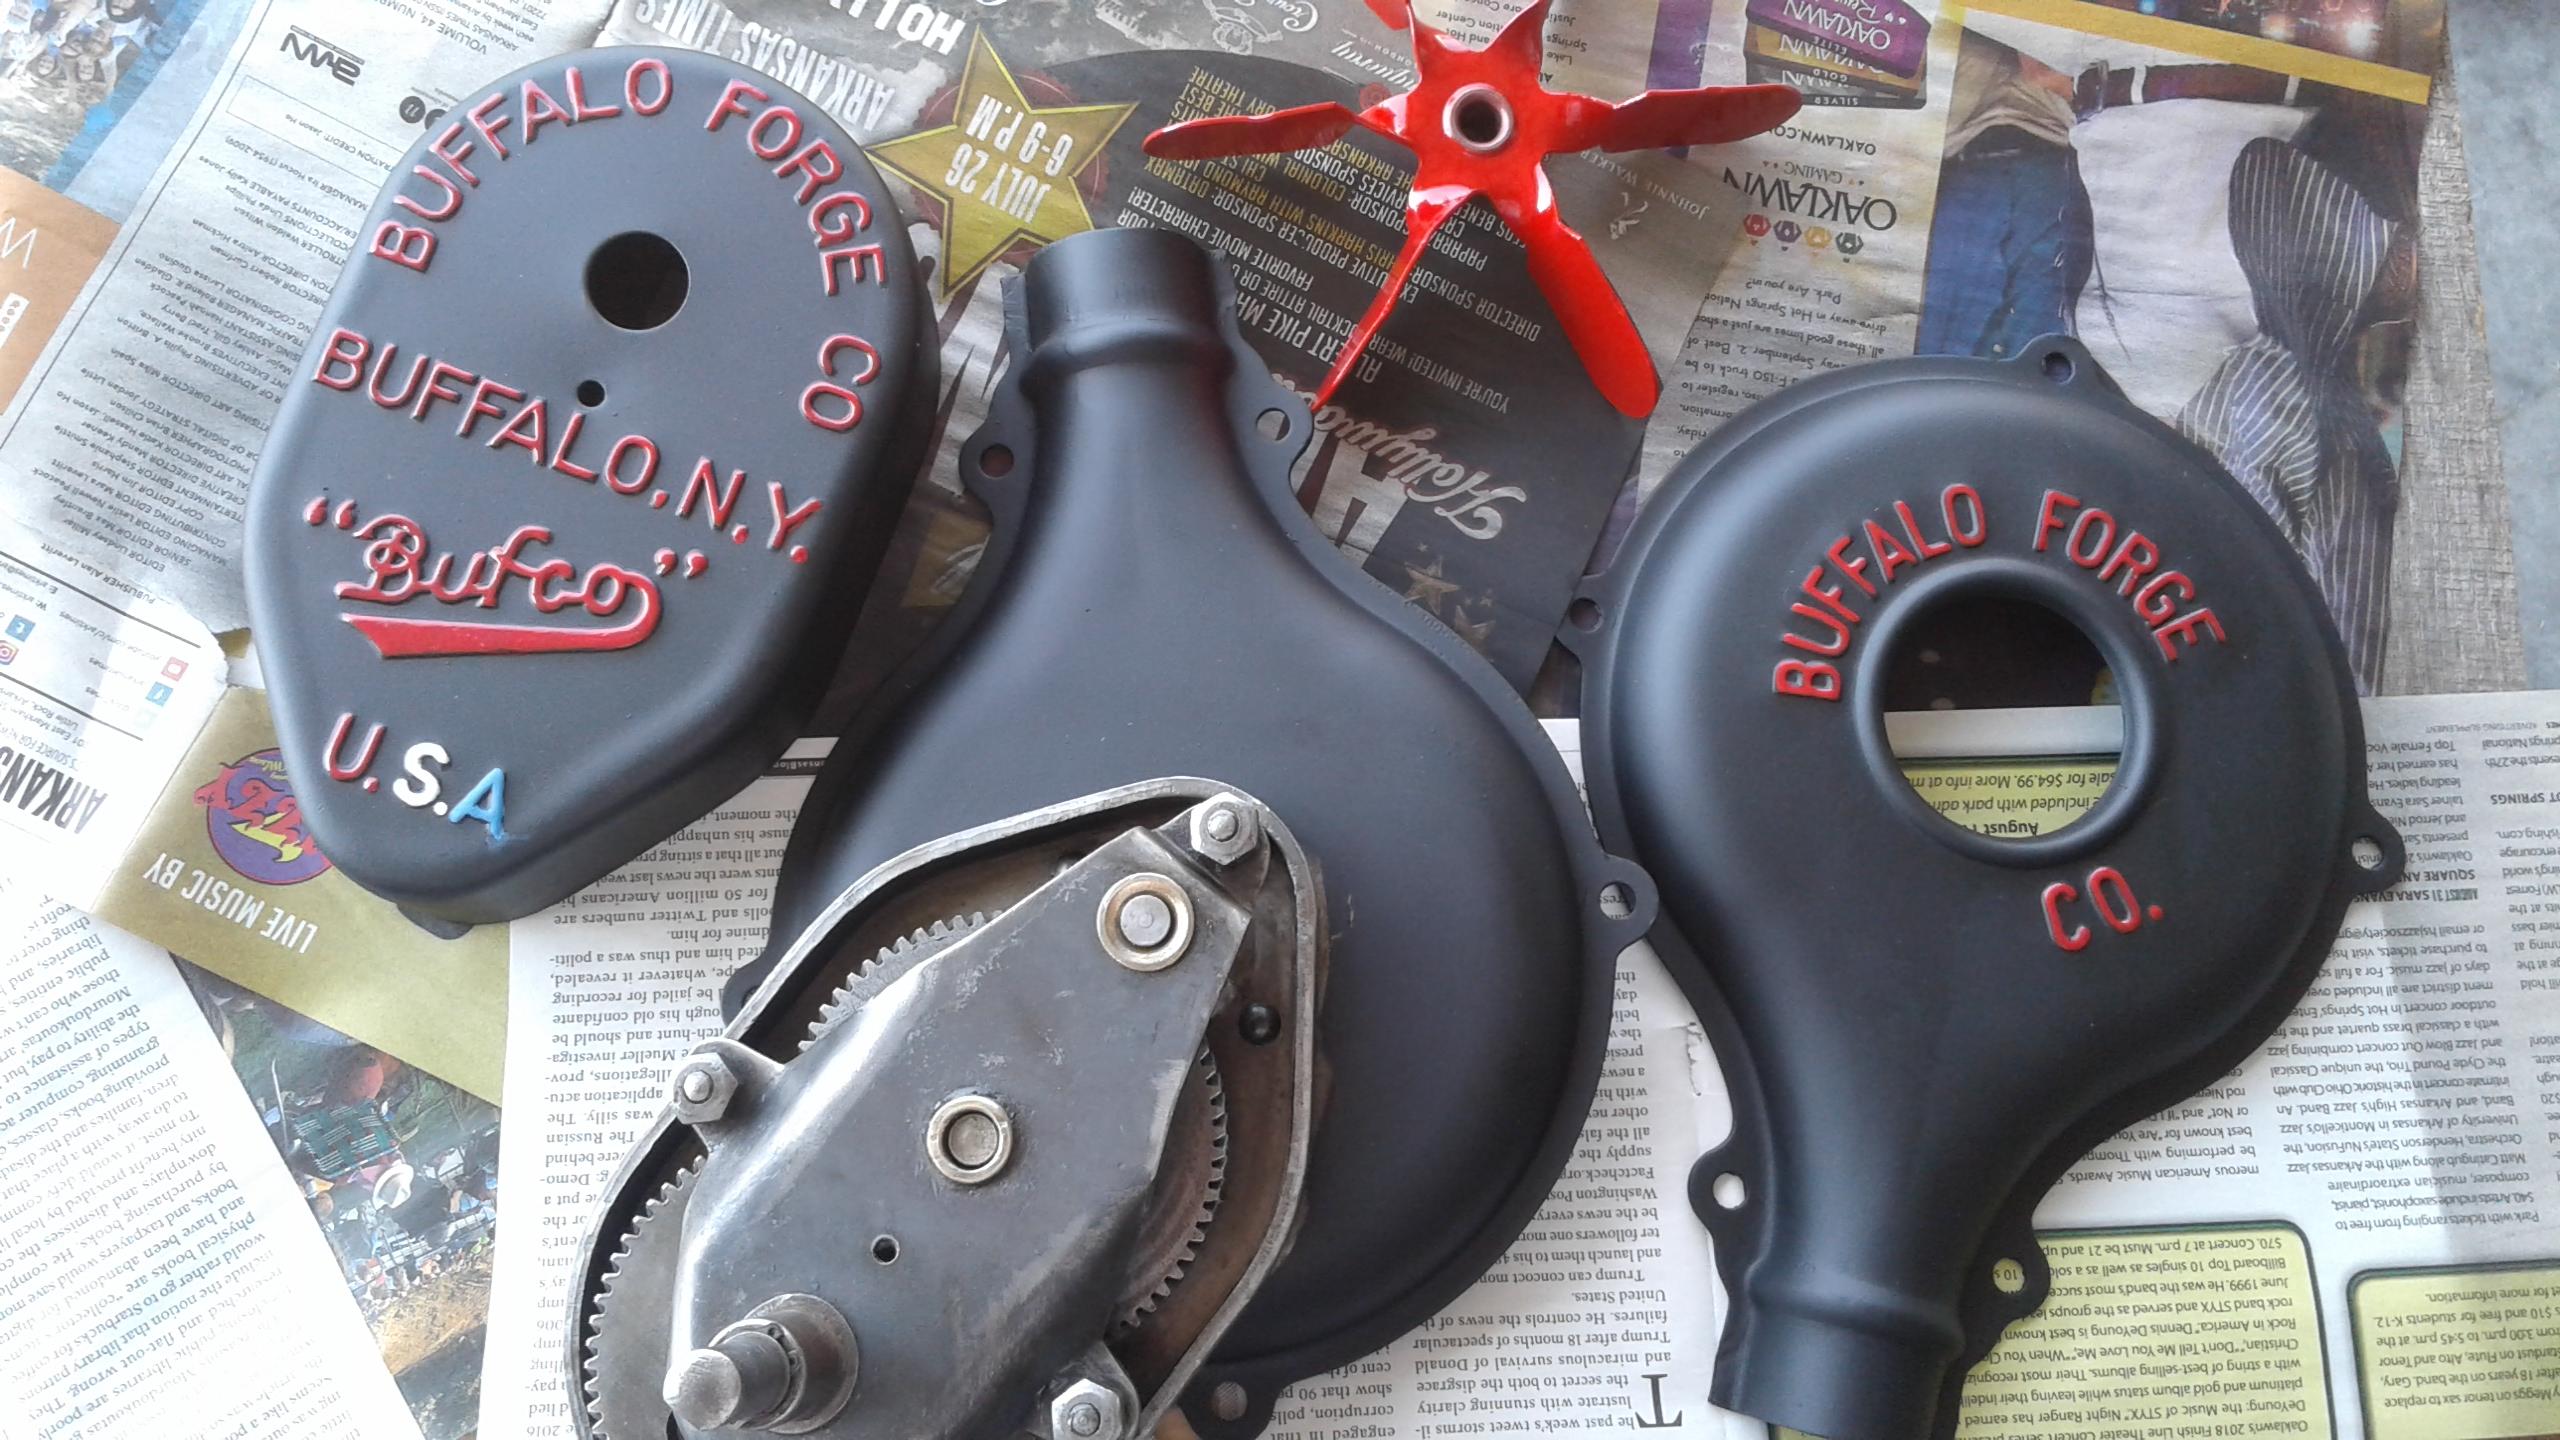
So, I am helping a Pioneer Village get their blacksmith shop up to speed so some enterprising young guys can work and makes heads and tails with the space. First order is a clean up date next month. But, in the meantime I need to overhaul the blowers (3) for the individual rivet forges available. So, I bring a couple home. They are seized up. Full of dirt dobber's and some wasps have been living in them. No problem... I slip off the cover of the little Buffco and I actually chuckled out loud... See for yourself... I managed to soak most of the gunk out, and then pressure washed the rest. She is polished out and works just fine now. She's getting a new paint job and I'll post them in a day or so.


-
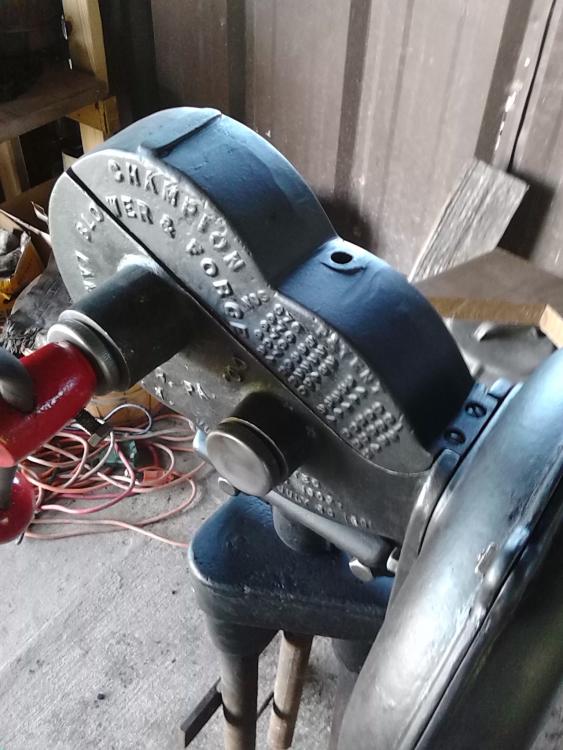
Yeah, I know. I have a buddy who is going to fabricate the correct piping for me. Champion was smart with their custom piping set up. I'm sure they sold lots of custom units.
-
Yes, she cleaned up really good. She's snug, but not tight. Has the identifying whirrrrrr sound. No grease was used. I used a few drops of lite oil. For my next magic trick, fitting some correct pipes.
-
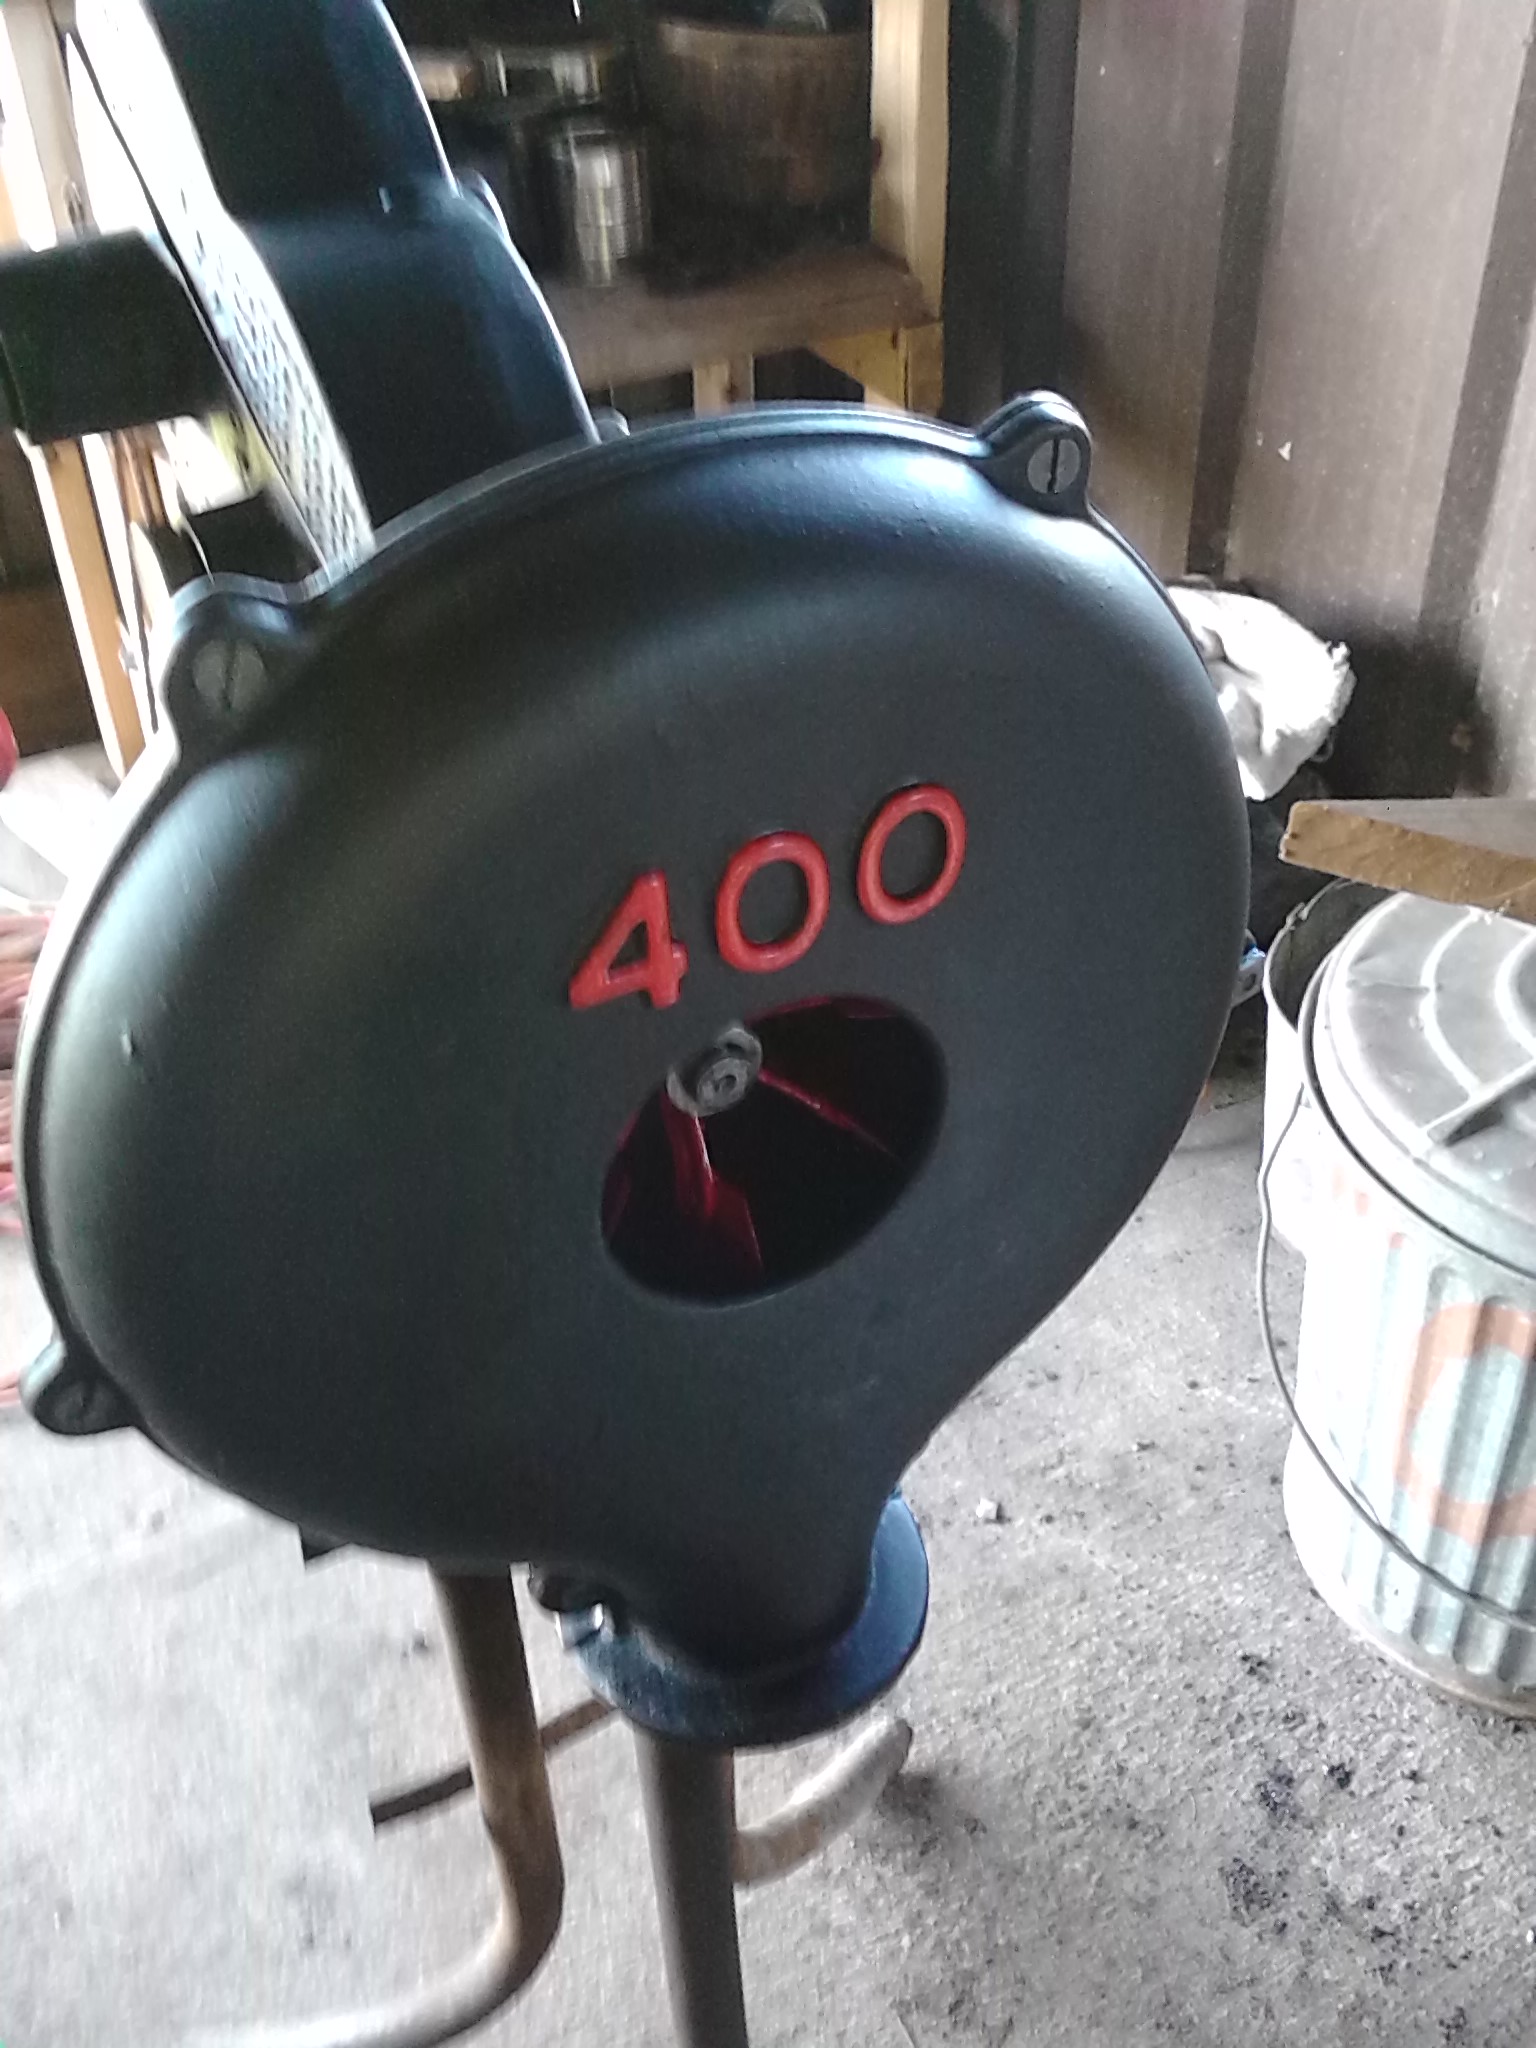
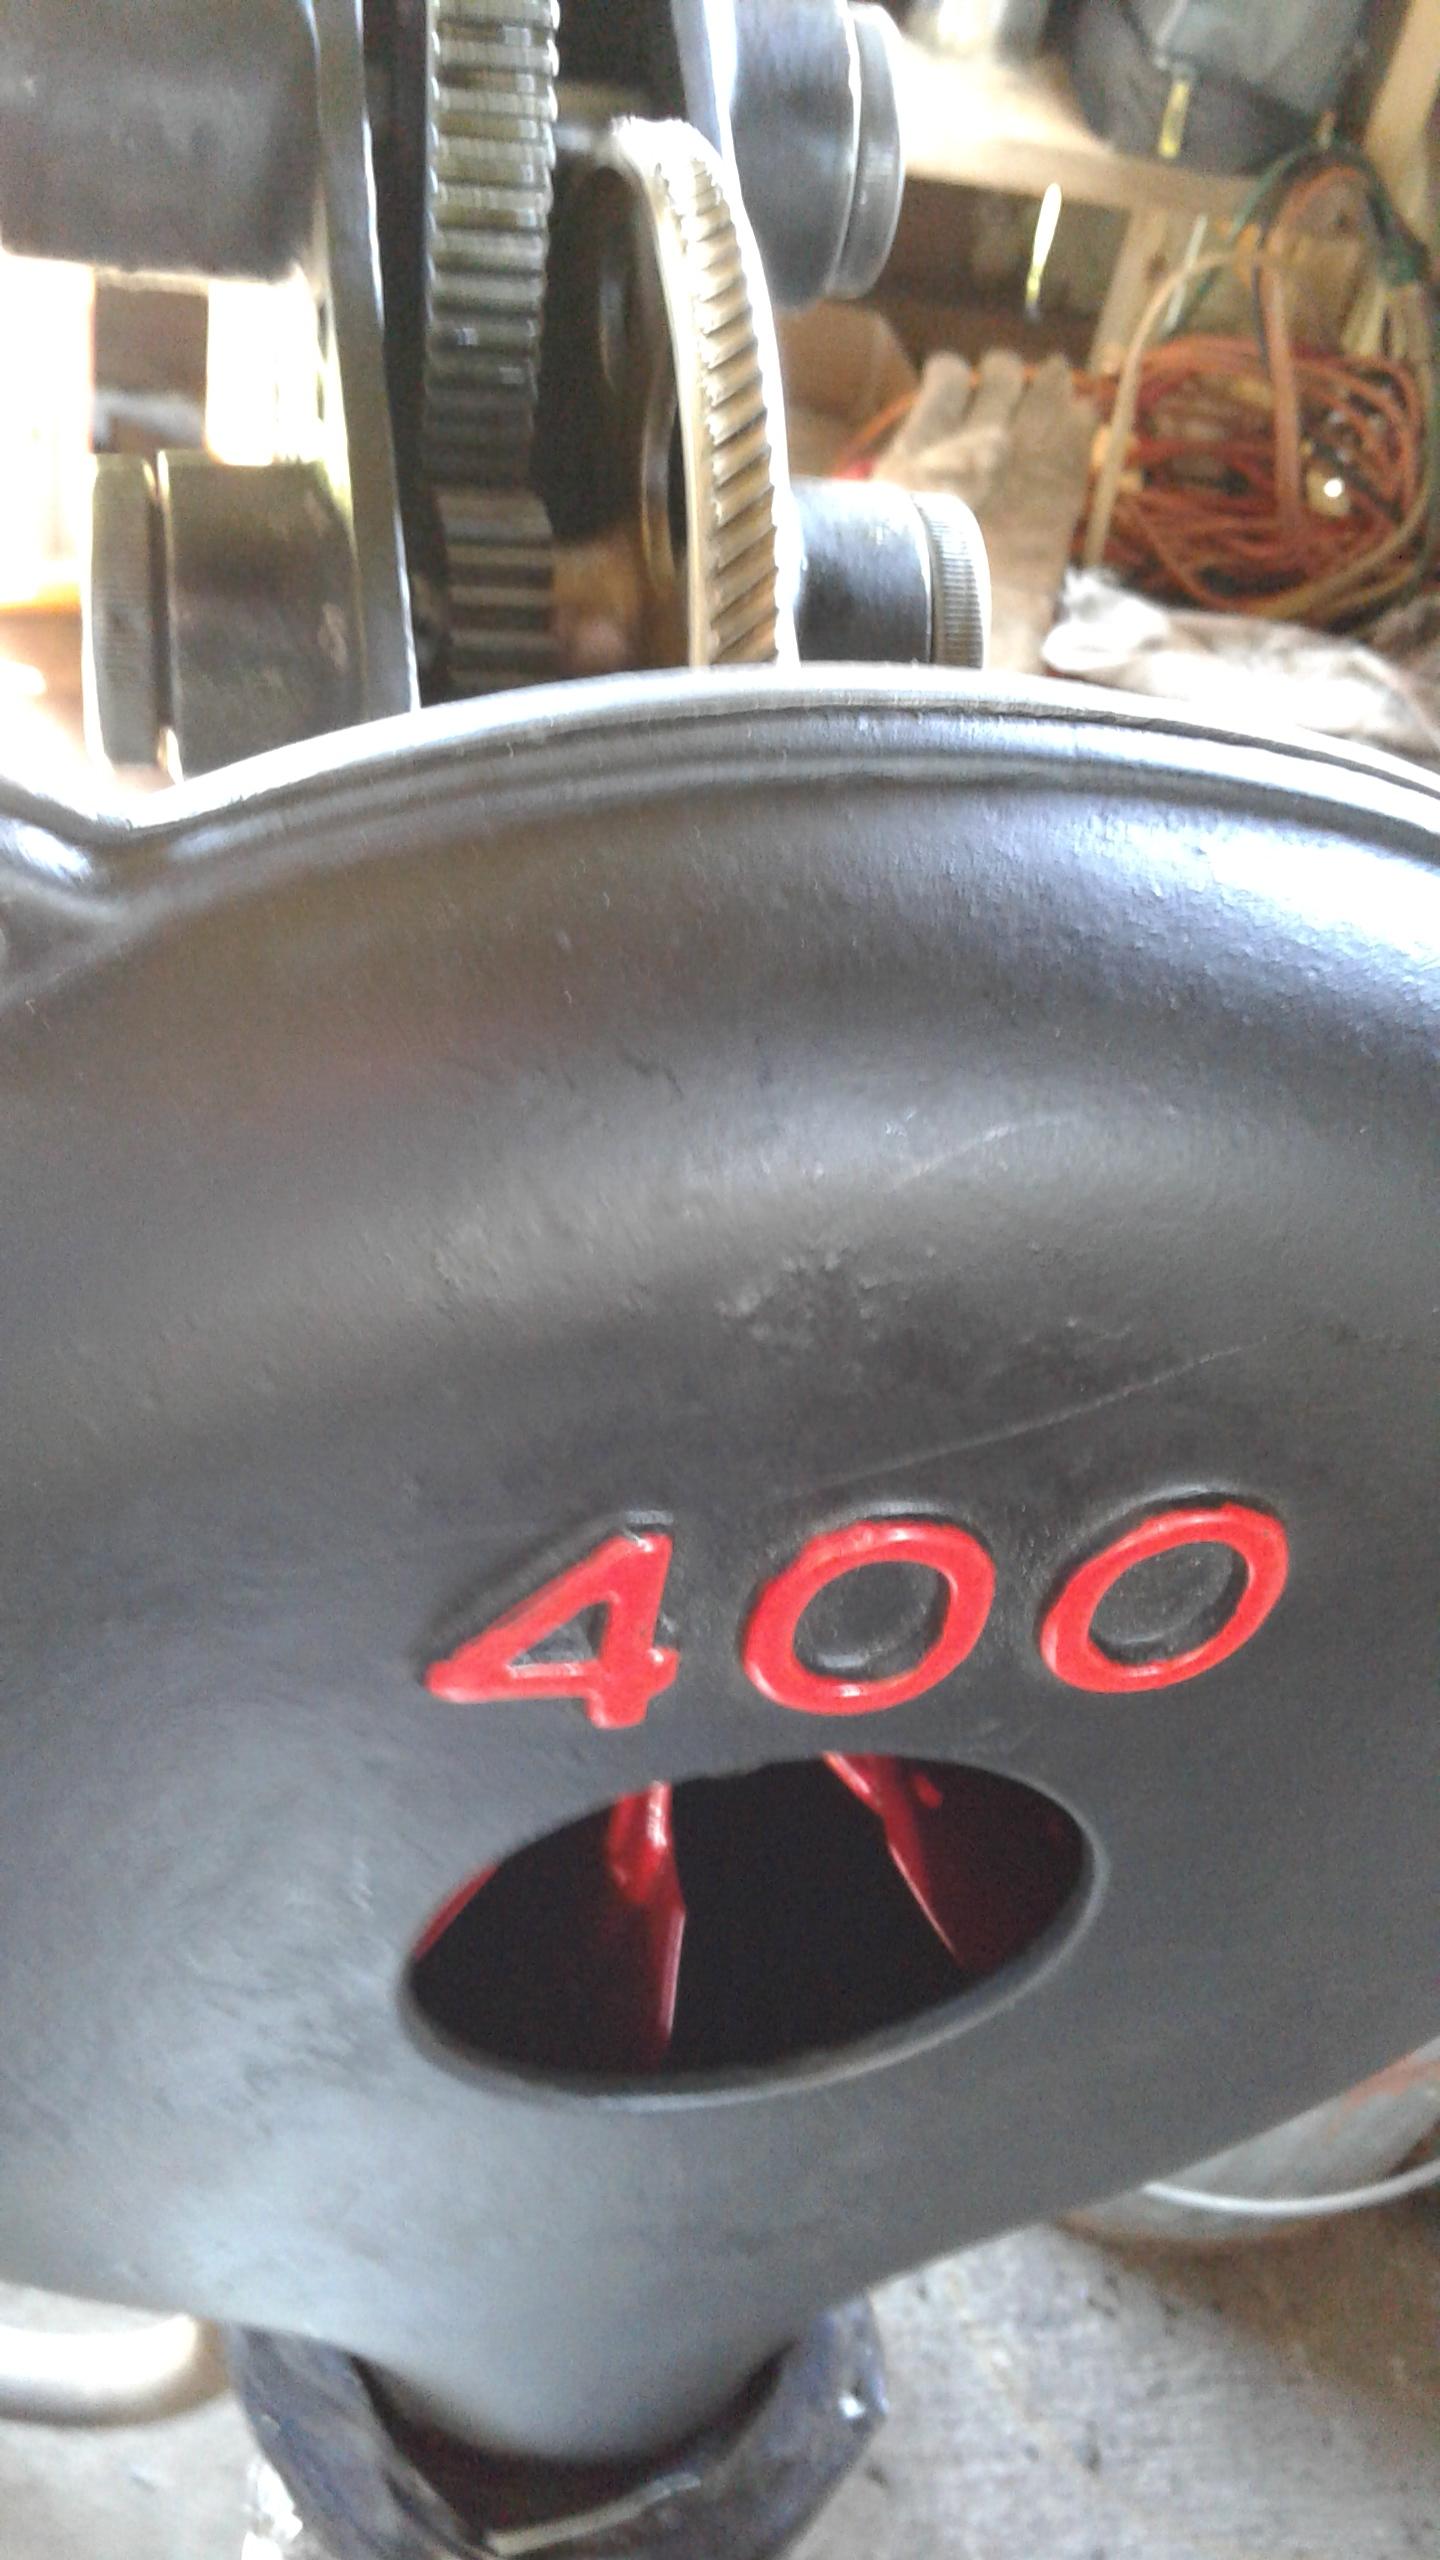
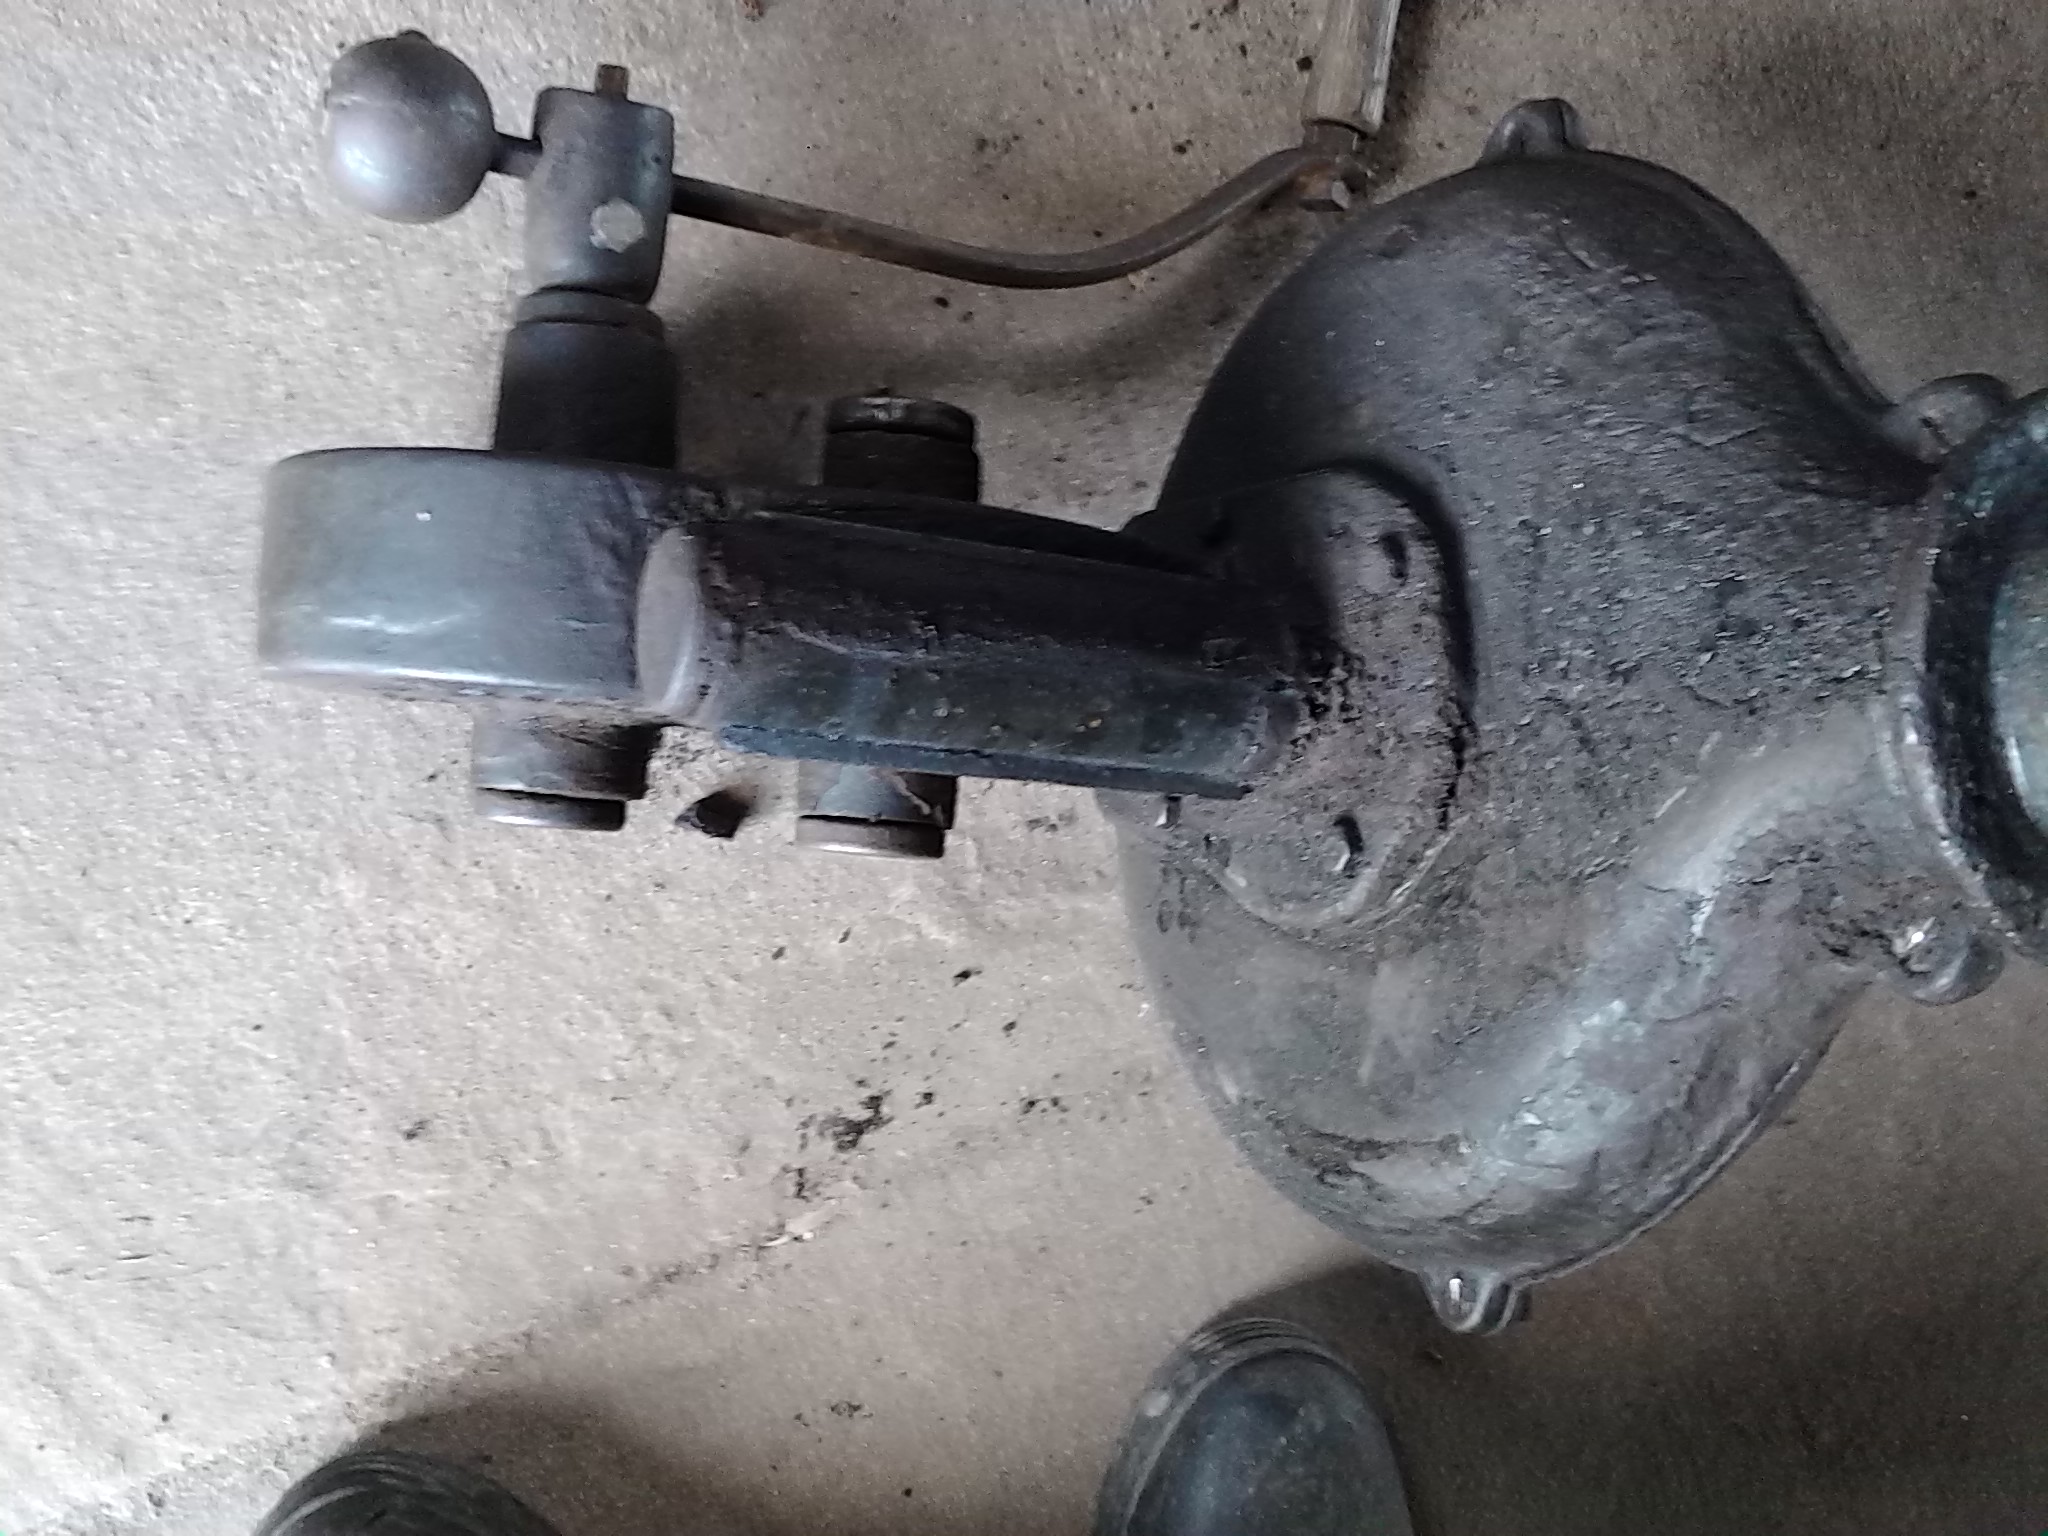
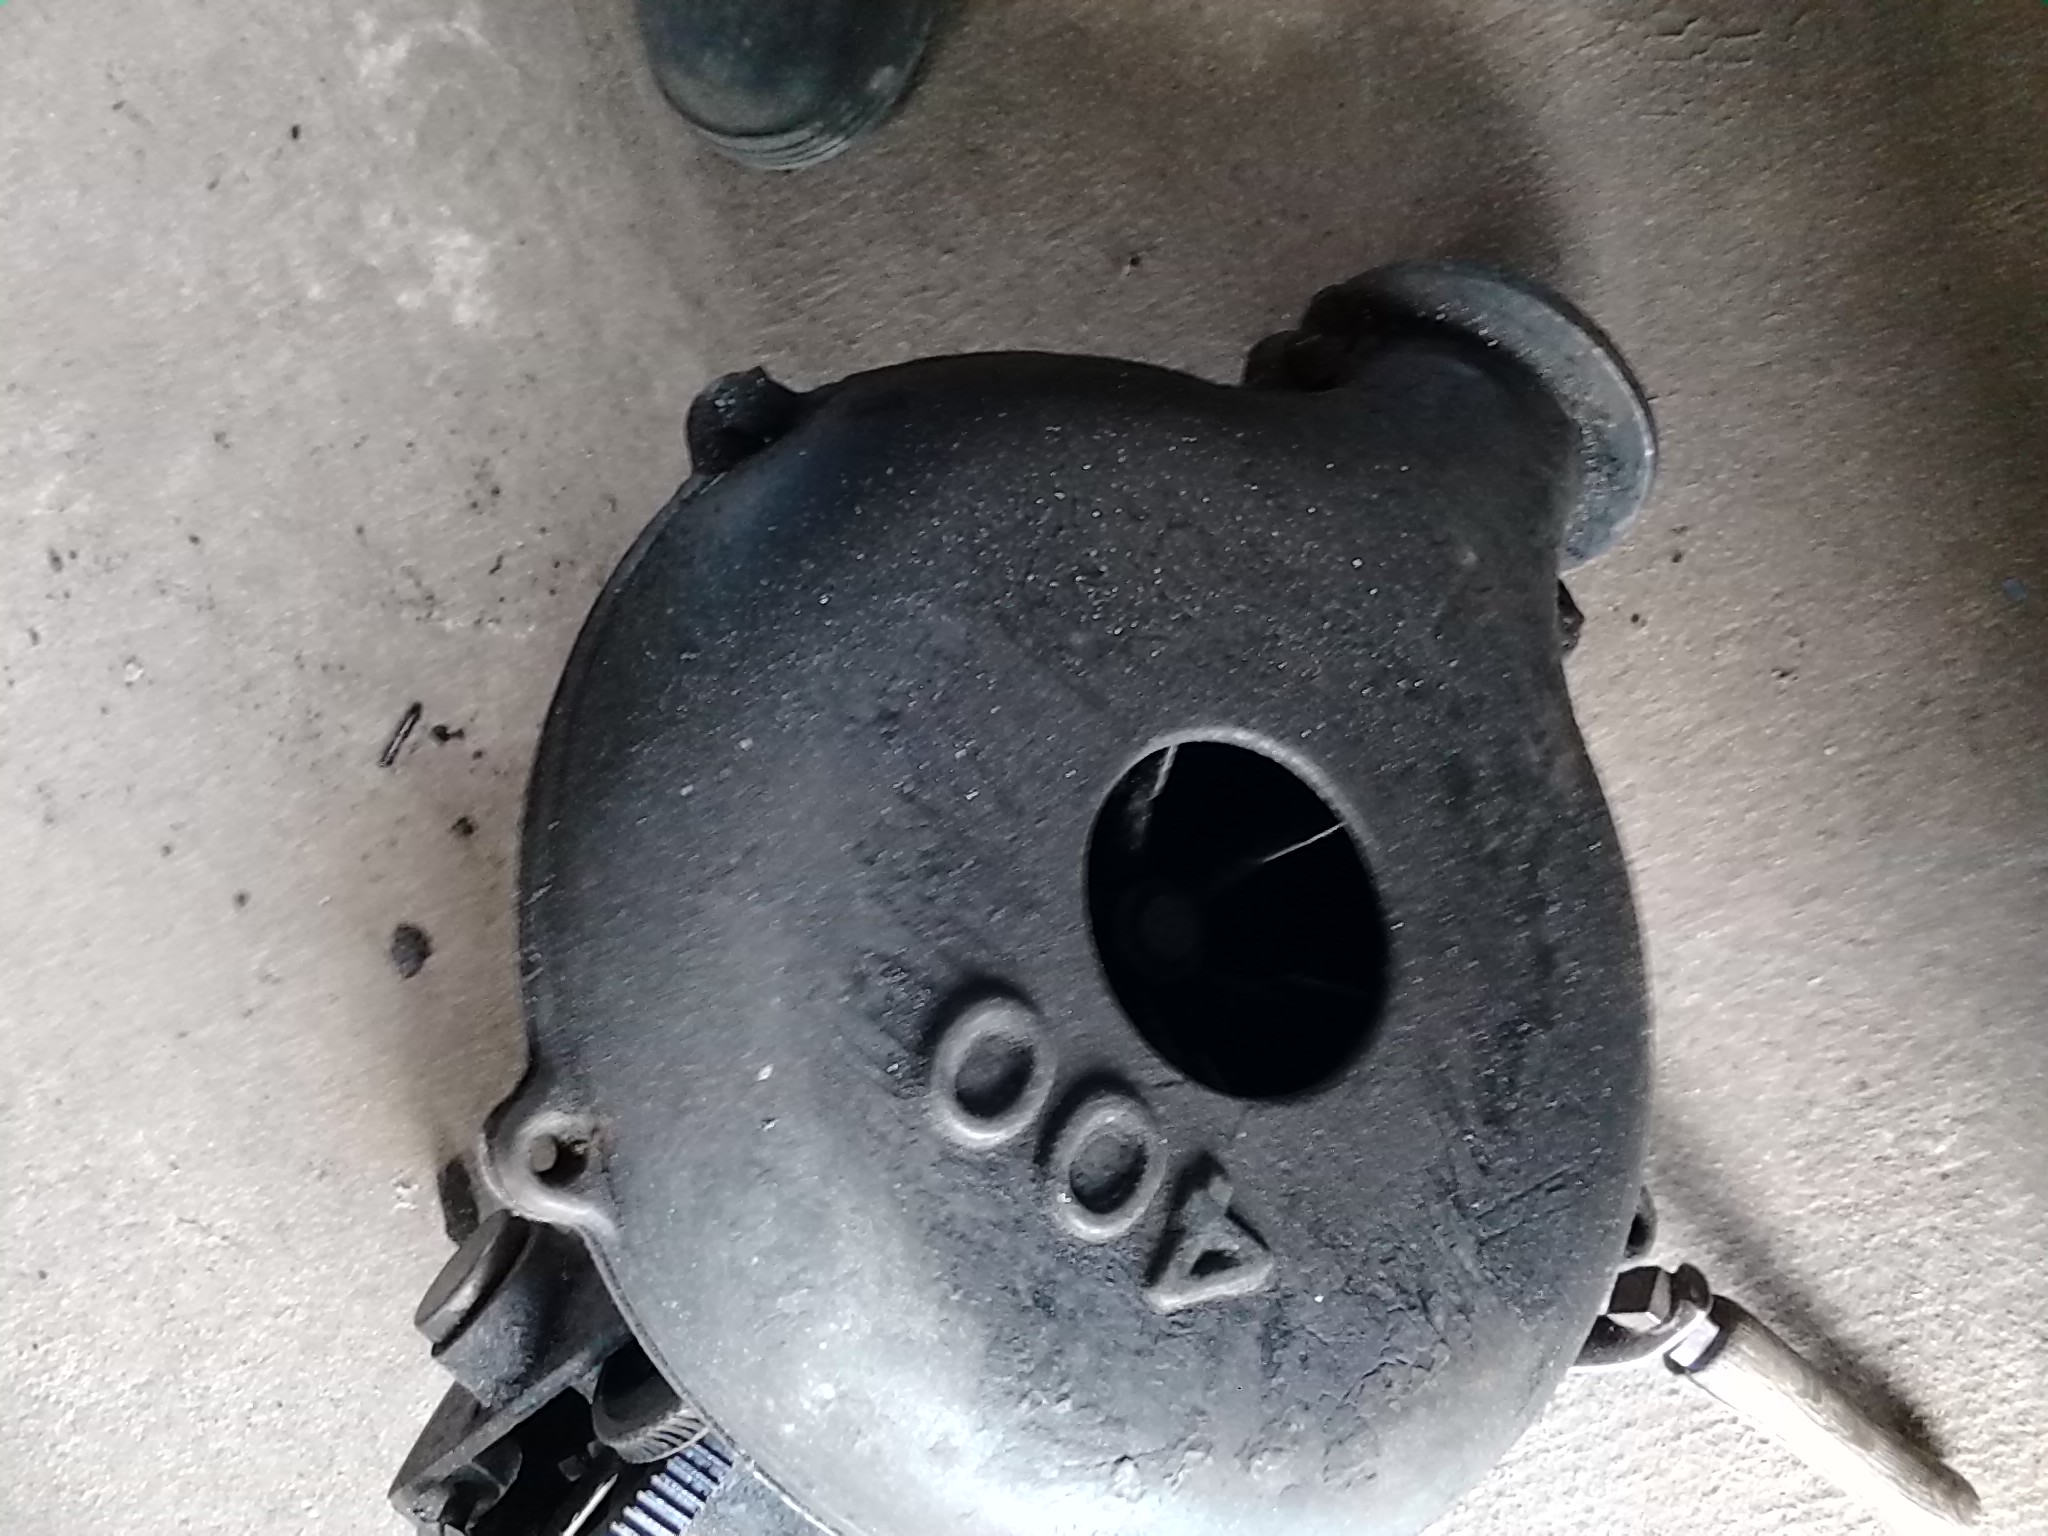
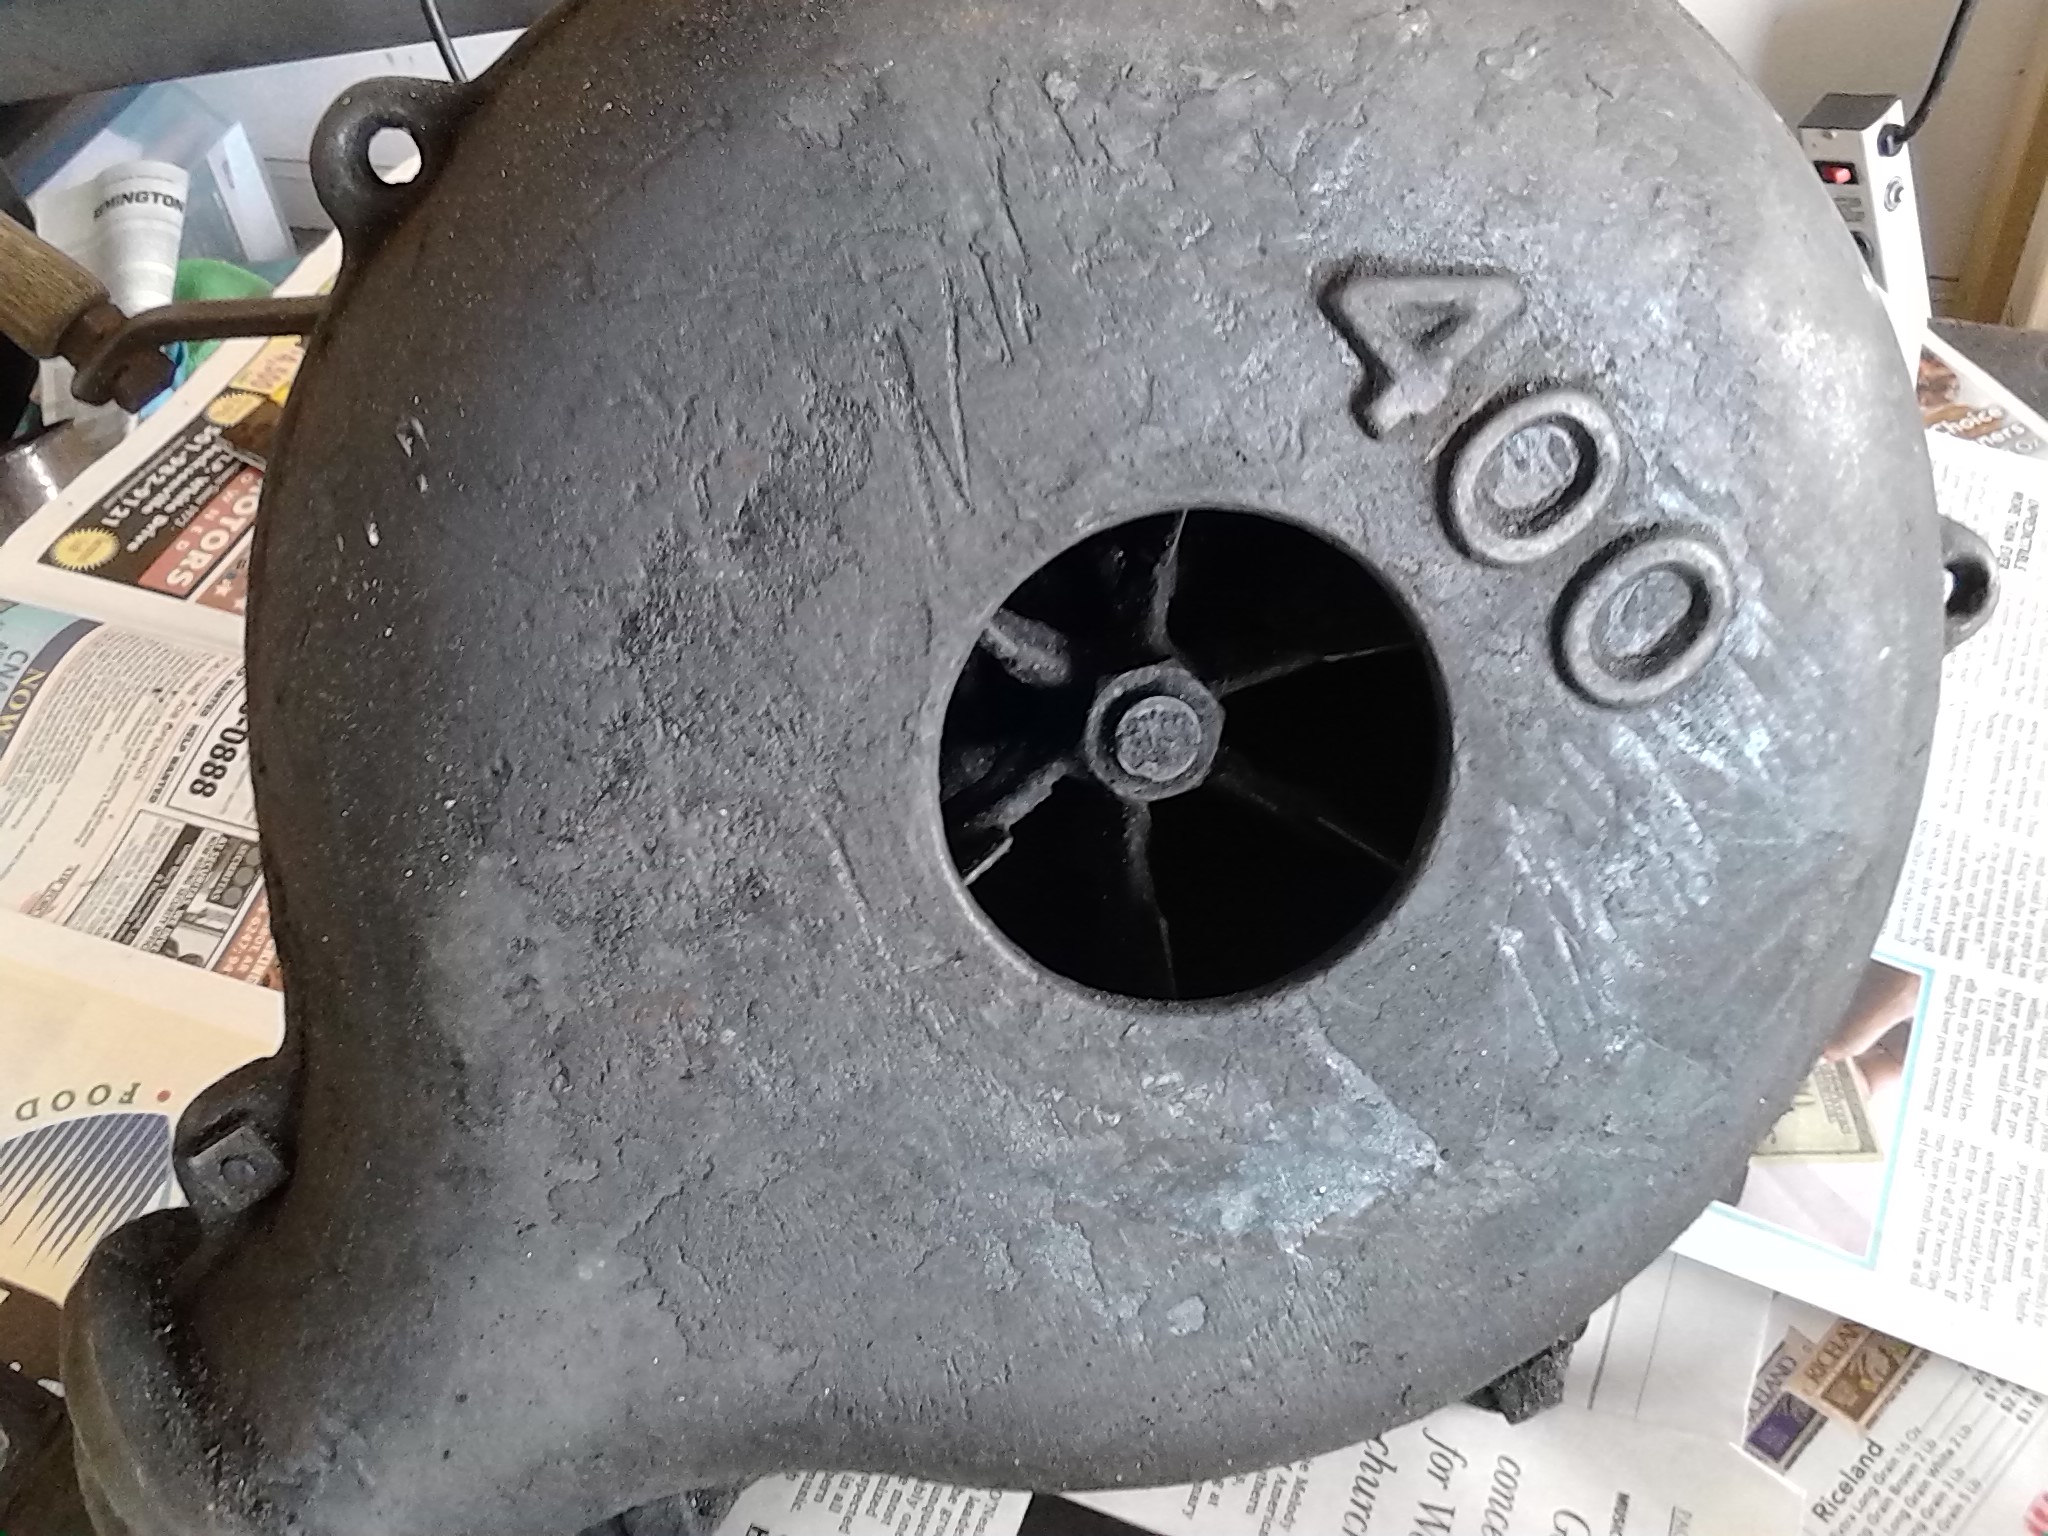
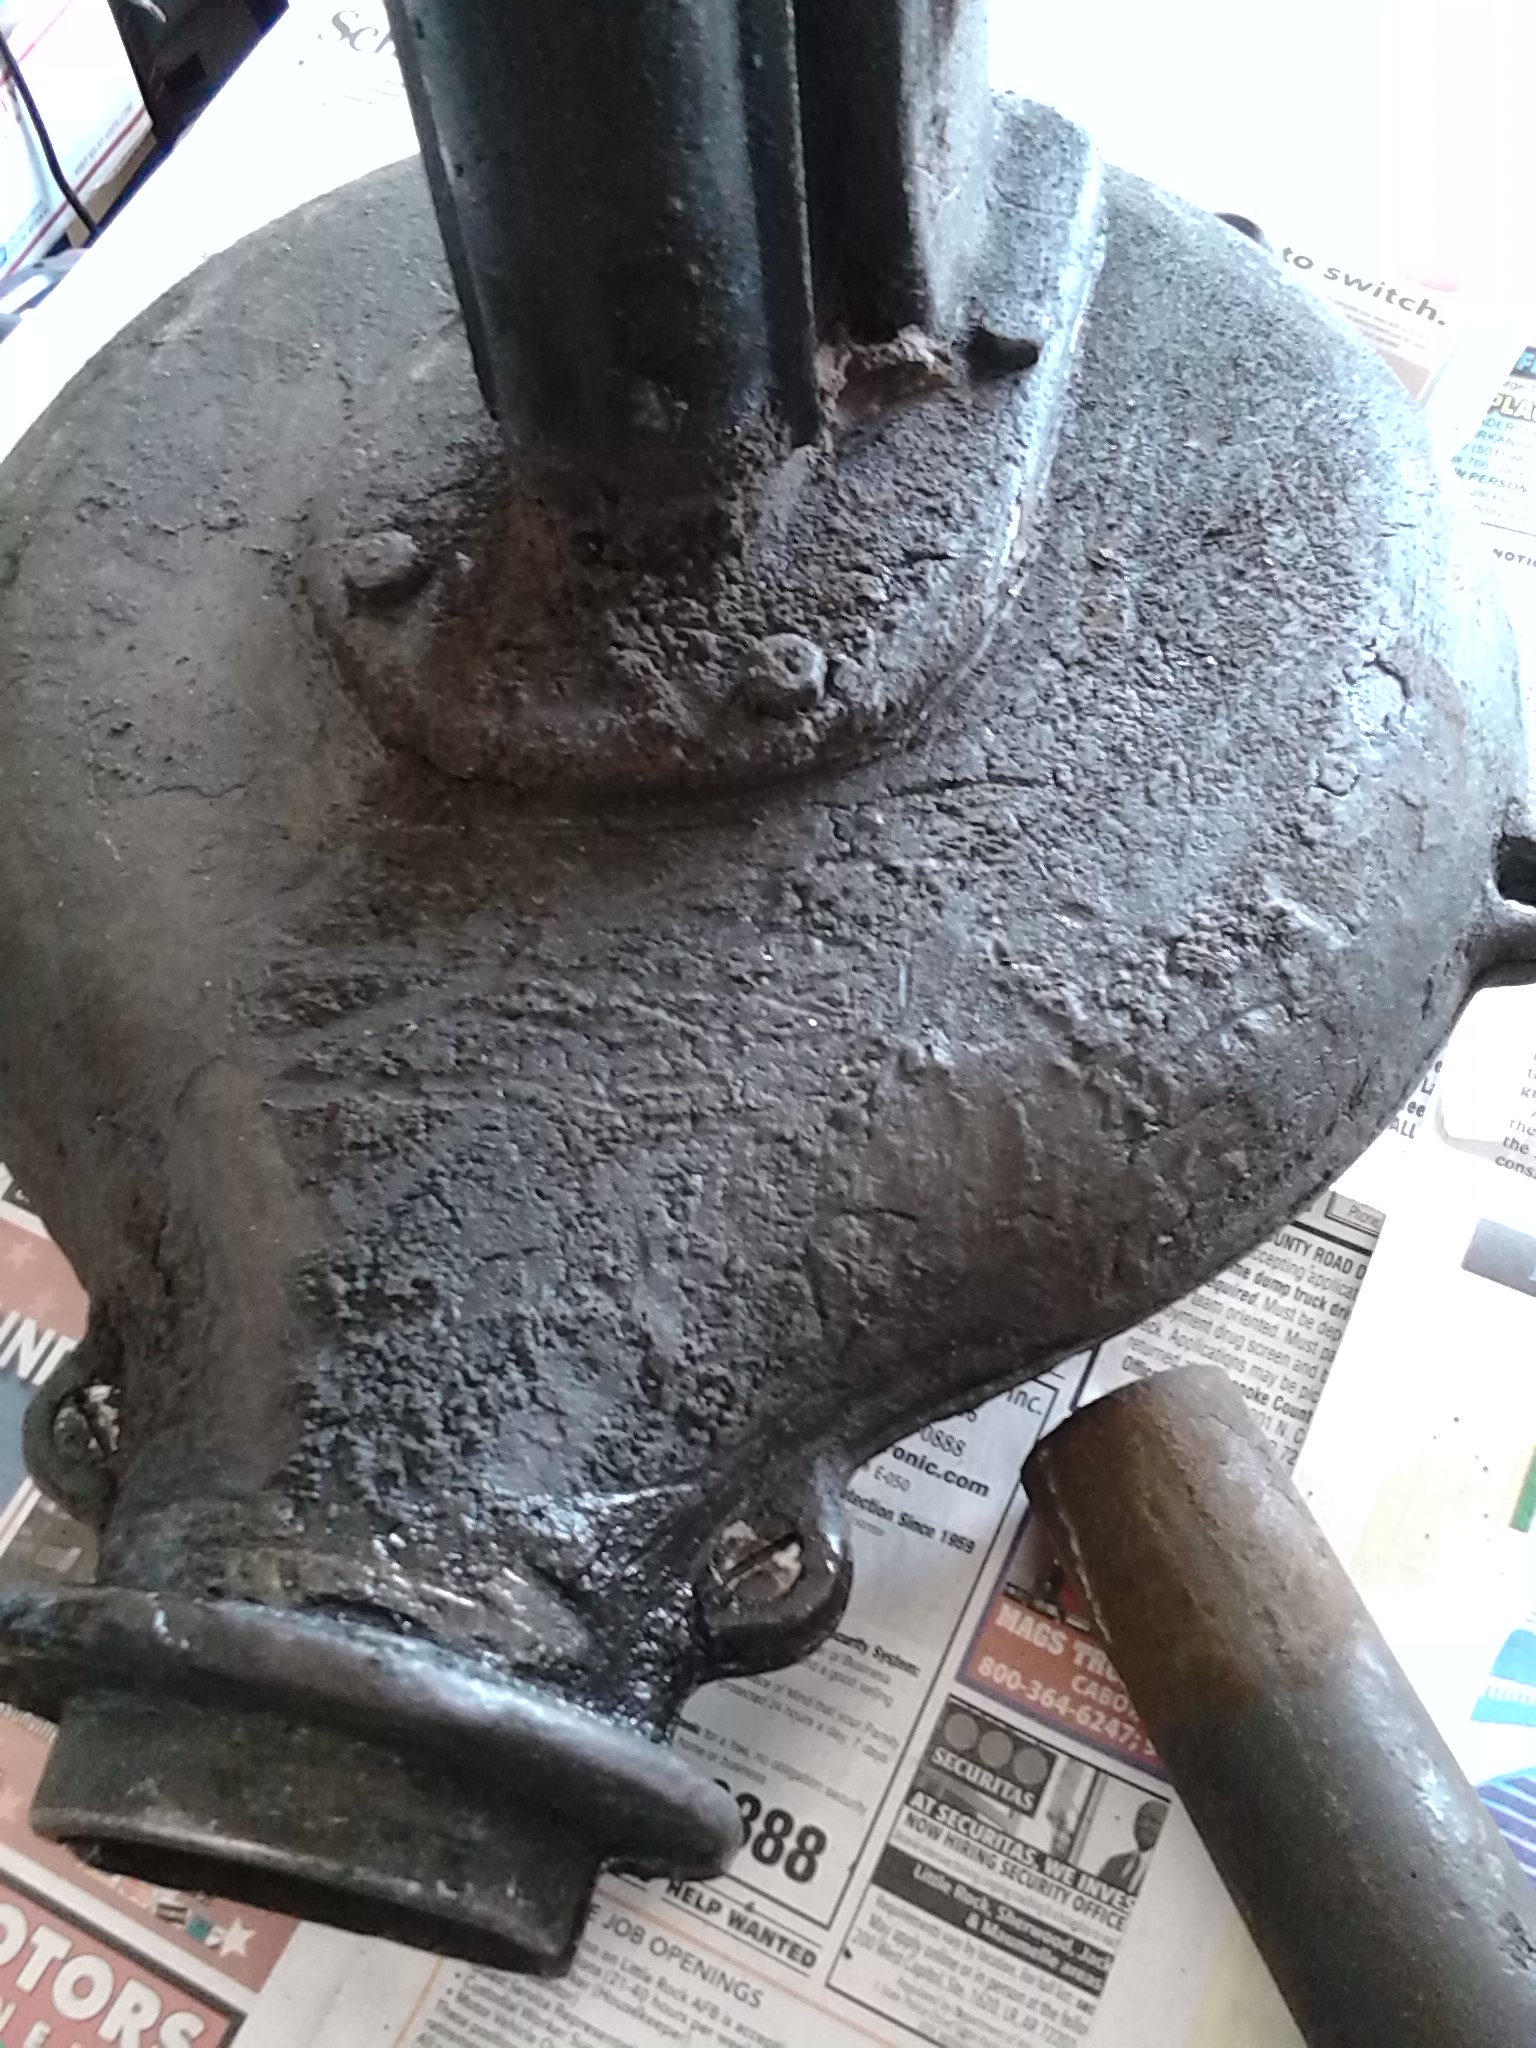
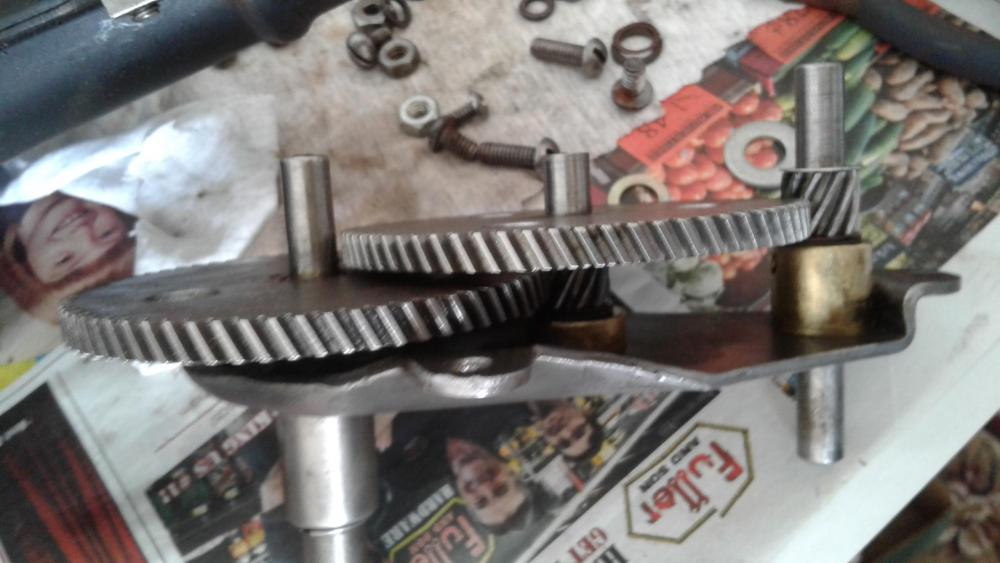
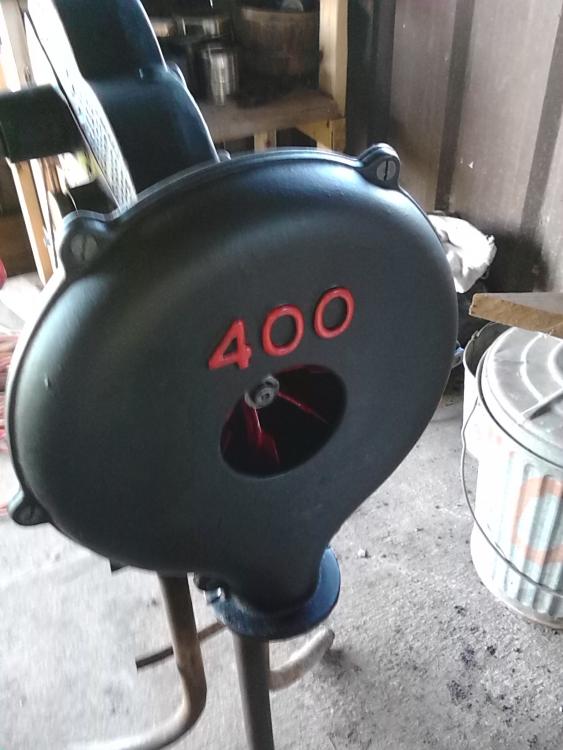
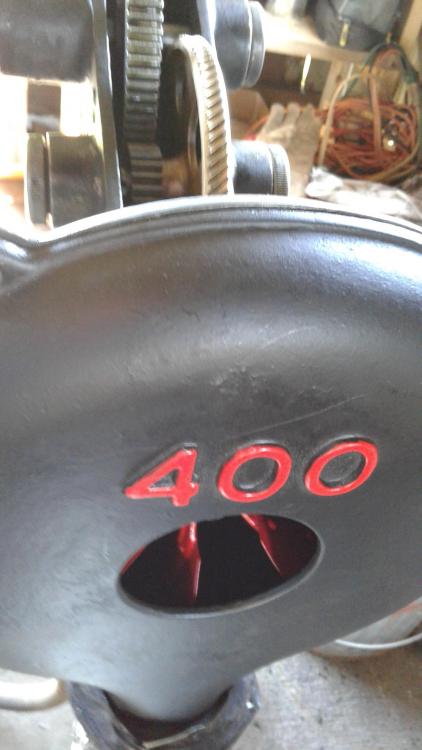
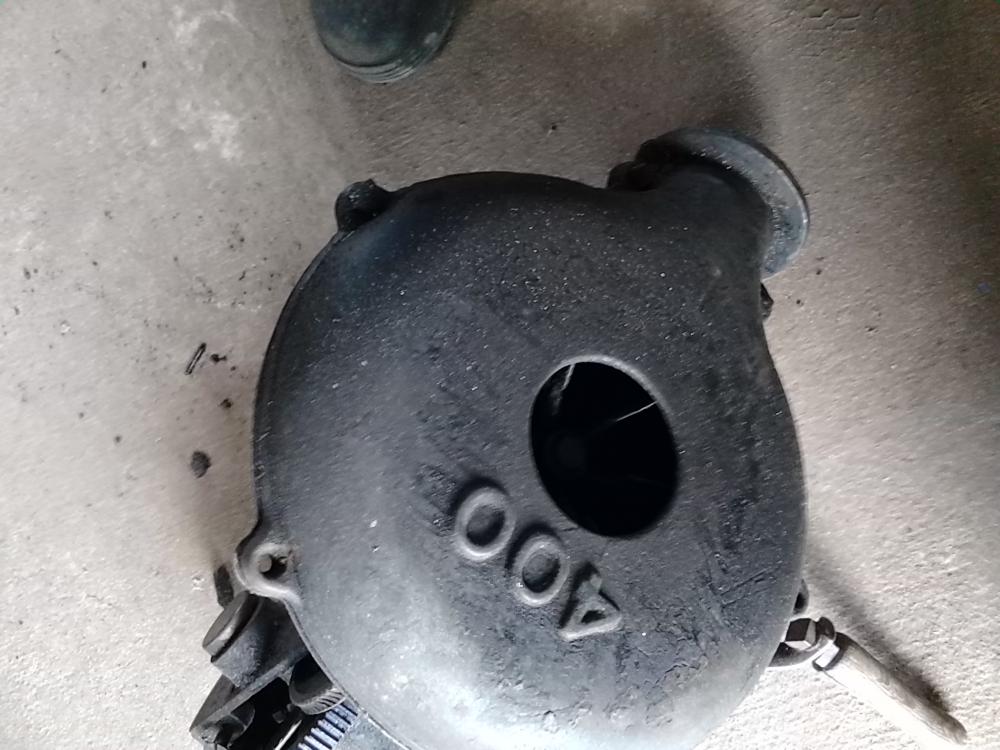
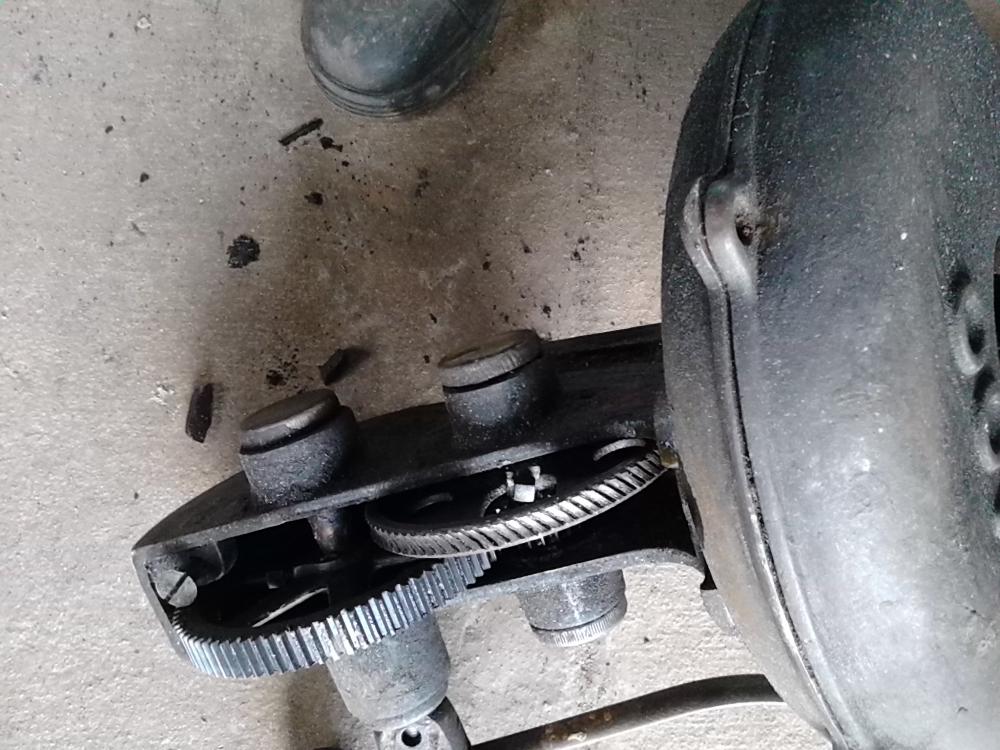
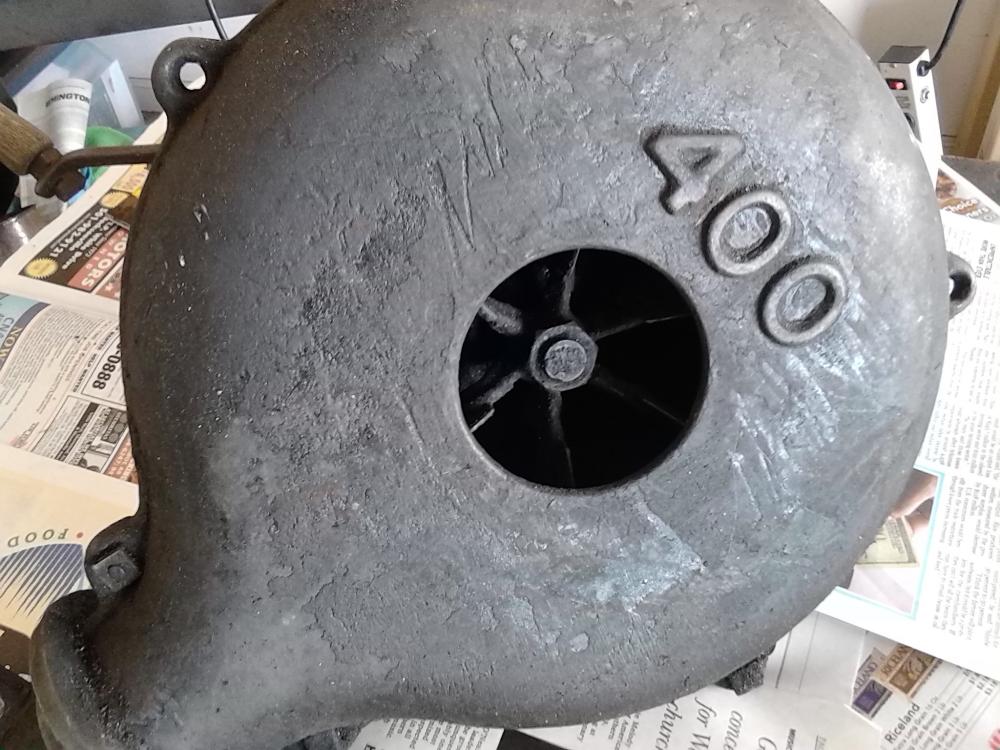
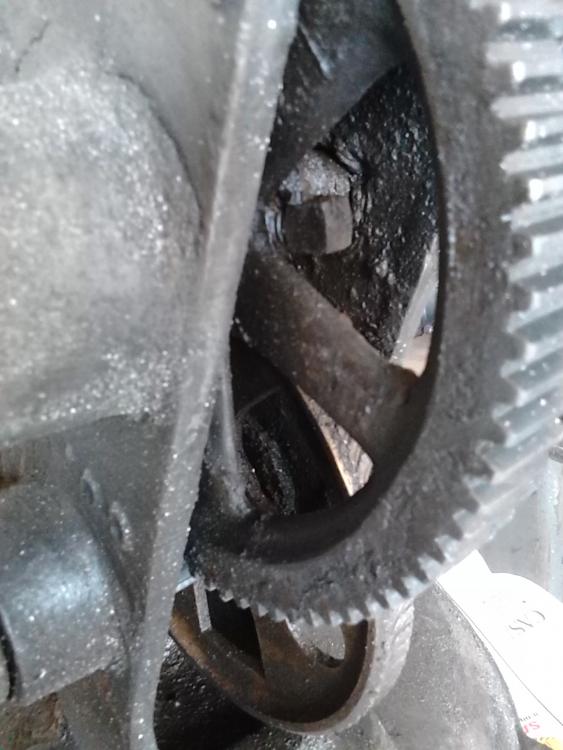
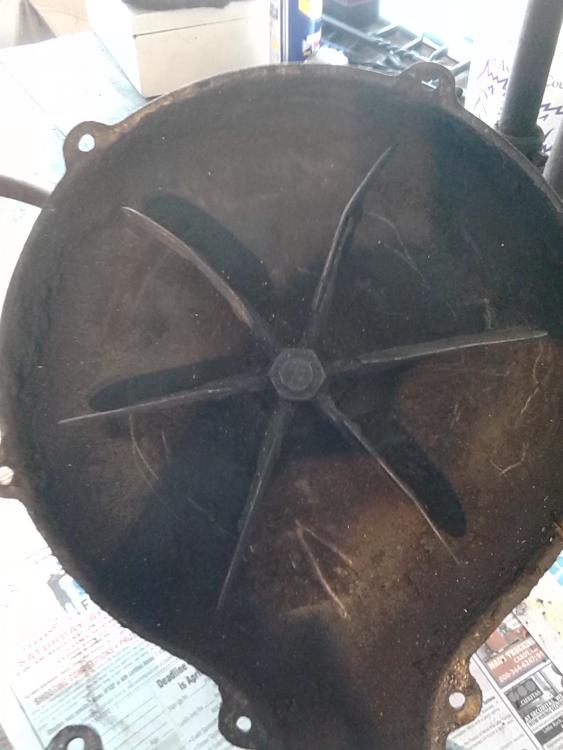
Finished putting the 400 back in service today. It was a real pleasure to work on. Every part and piece was inspected, cleaned and polished. In my haste I didn't think to open the top and photograph the gears and innards. Will post that tomorrow. I was just happy that it worked almost like new.
-
Finished putting the 400 back in service today. It was a real pleasure to work on. Every part and piece was inspected, cleaned and polished. In my haste I didn't think to open the top and photograph the gears and innards. Will post that tomorrow. I was just happy that it worked almost like new.
-
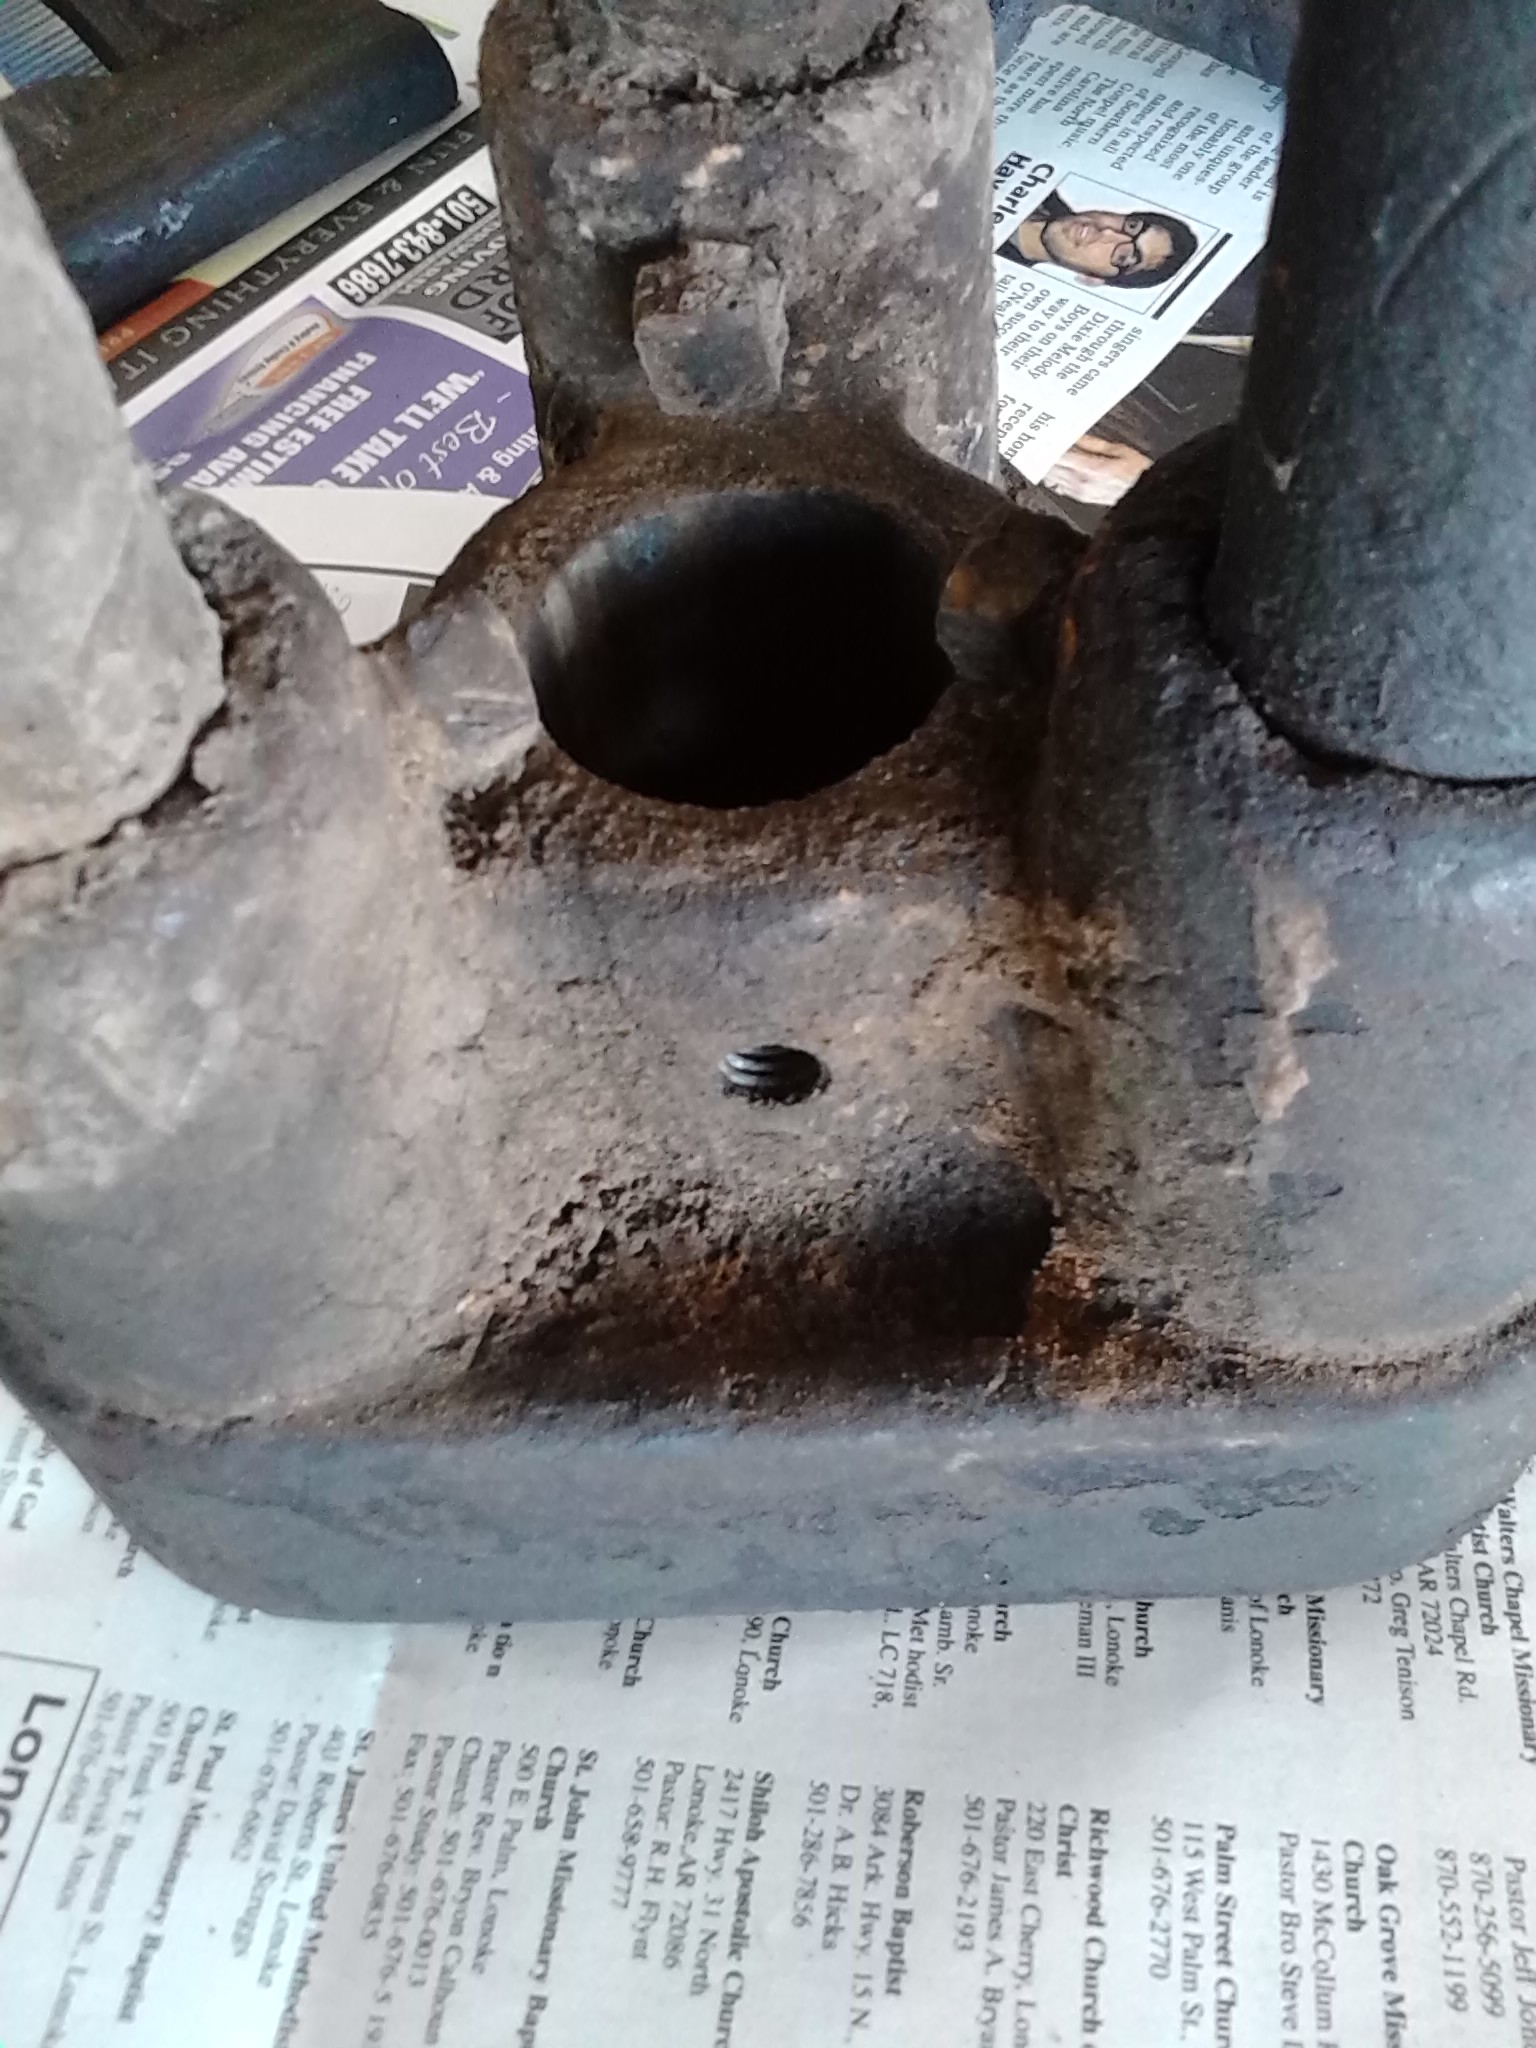
Yes, the caps were full of coagulated grease. Will do on the bar oil and STP. Thnx for the tip.
-
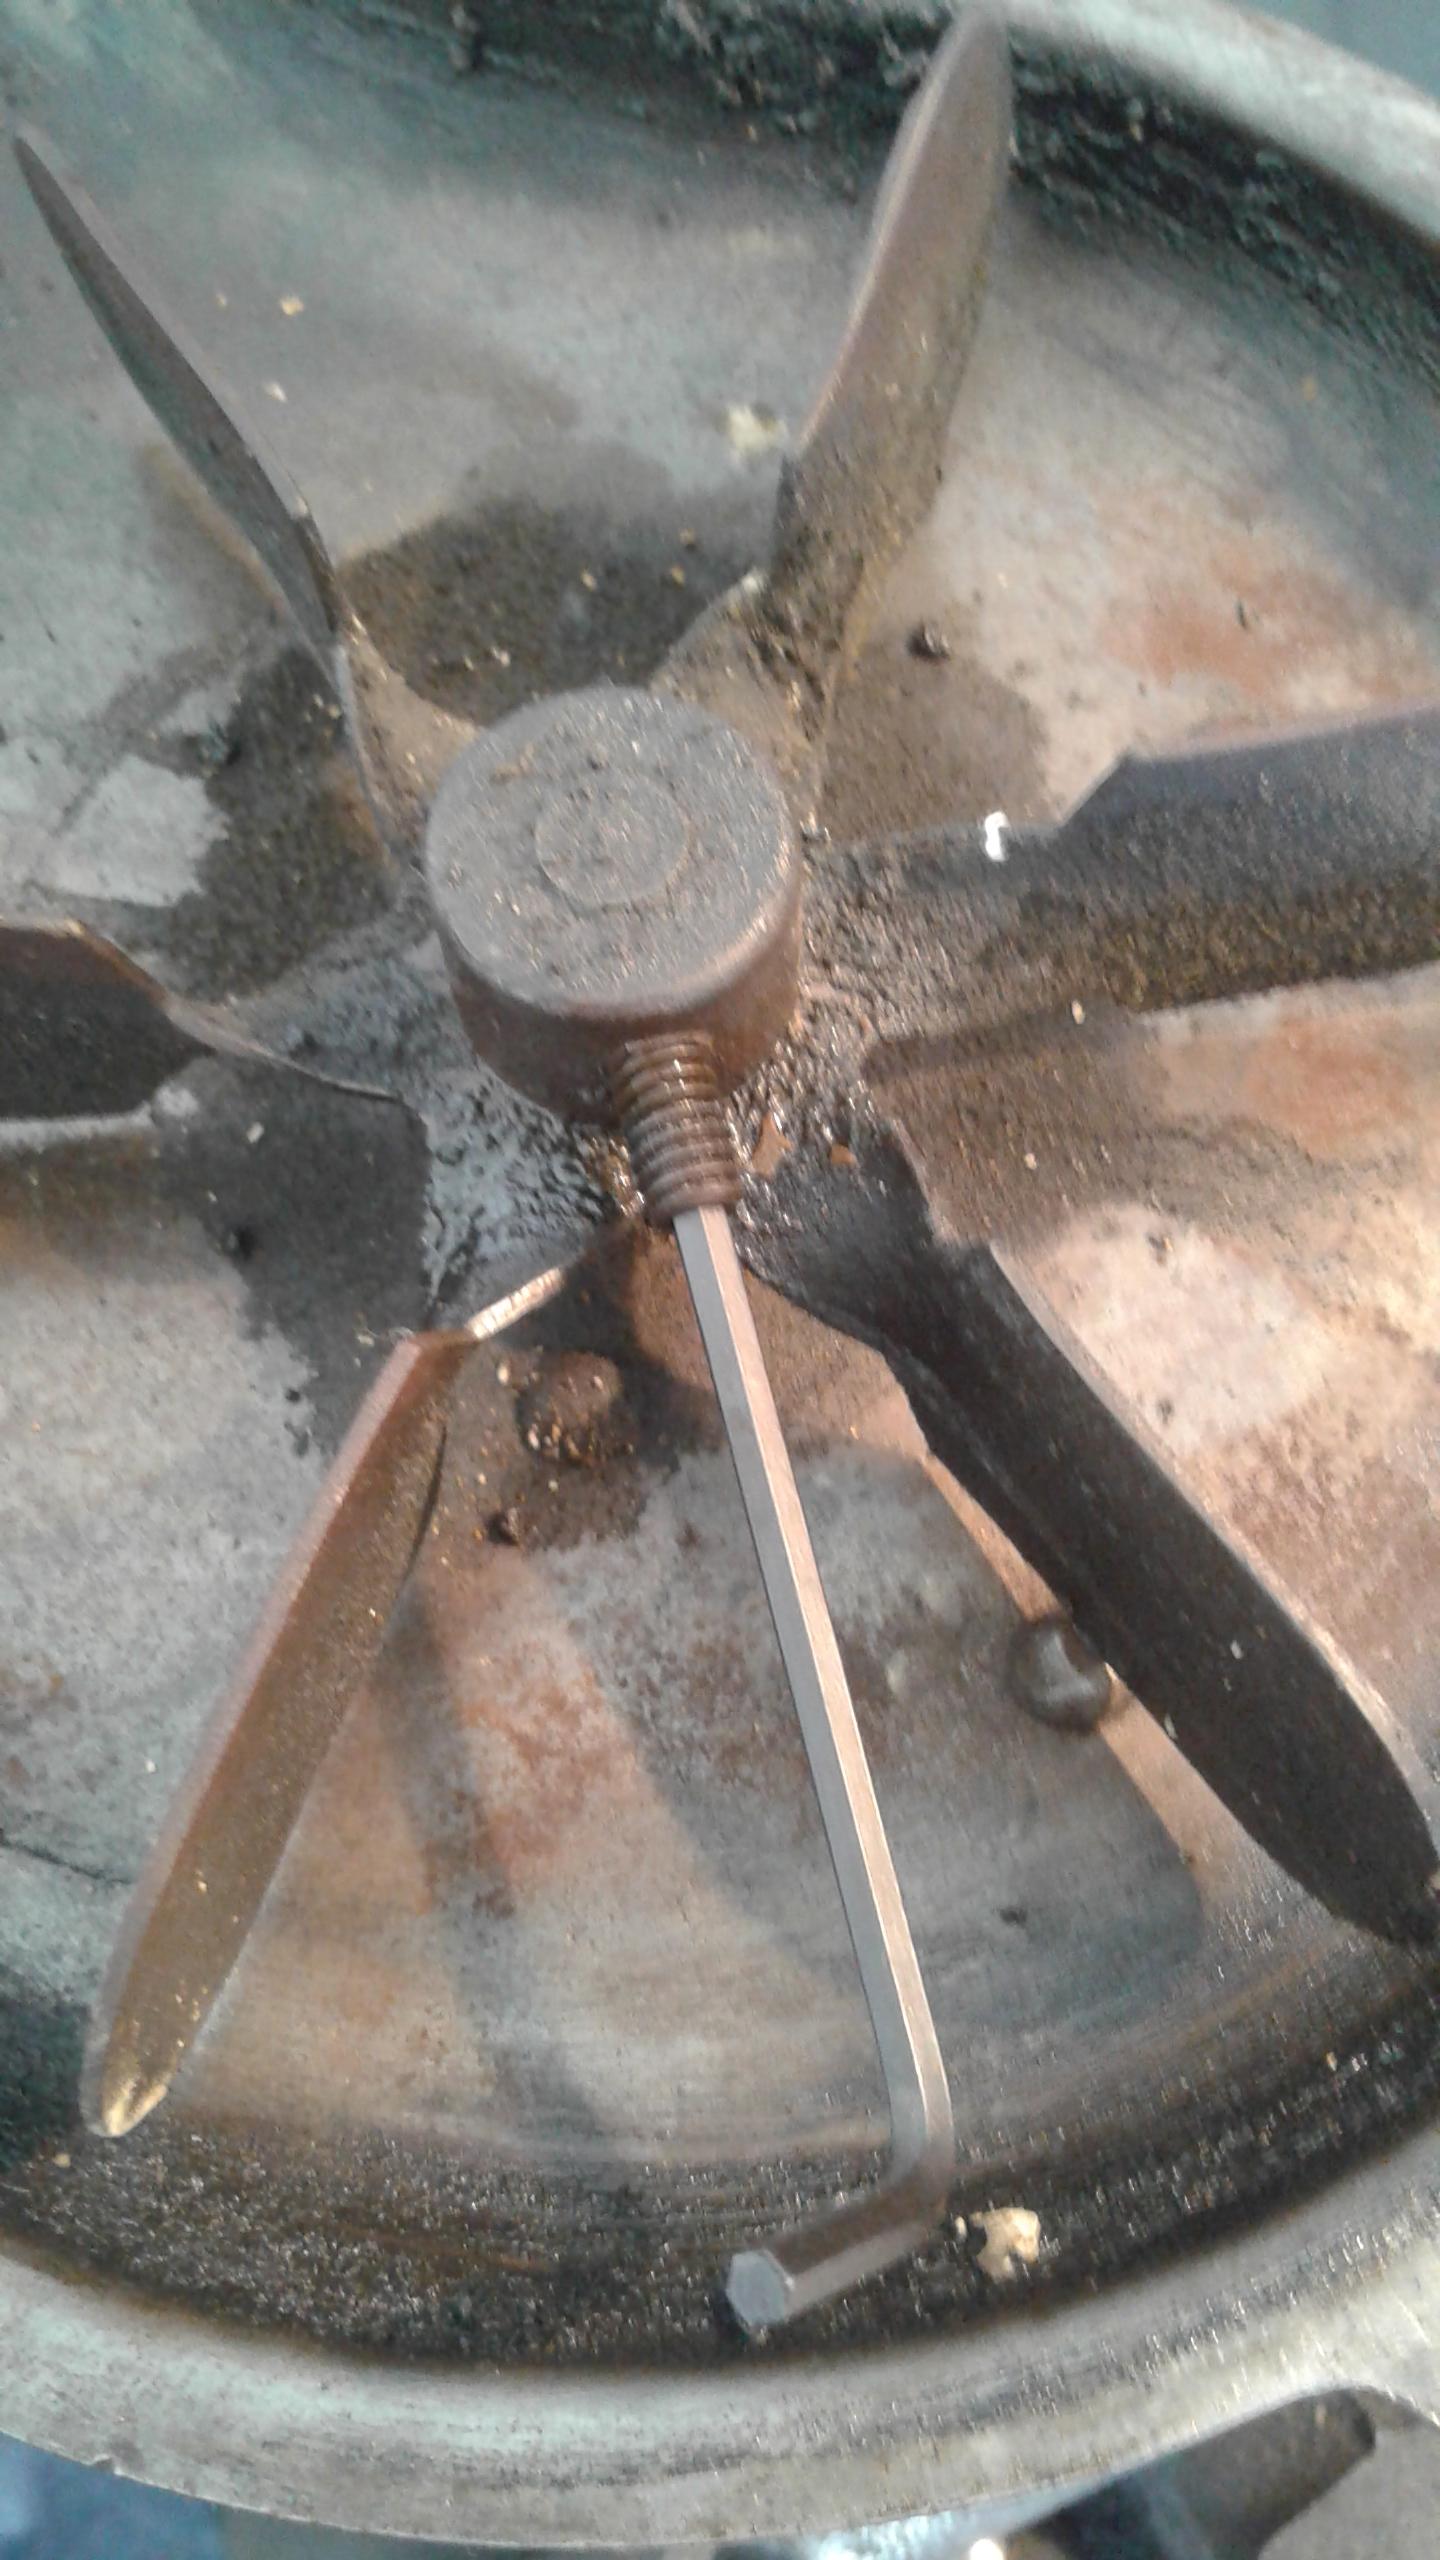
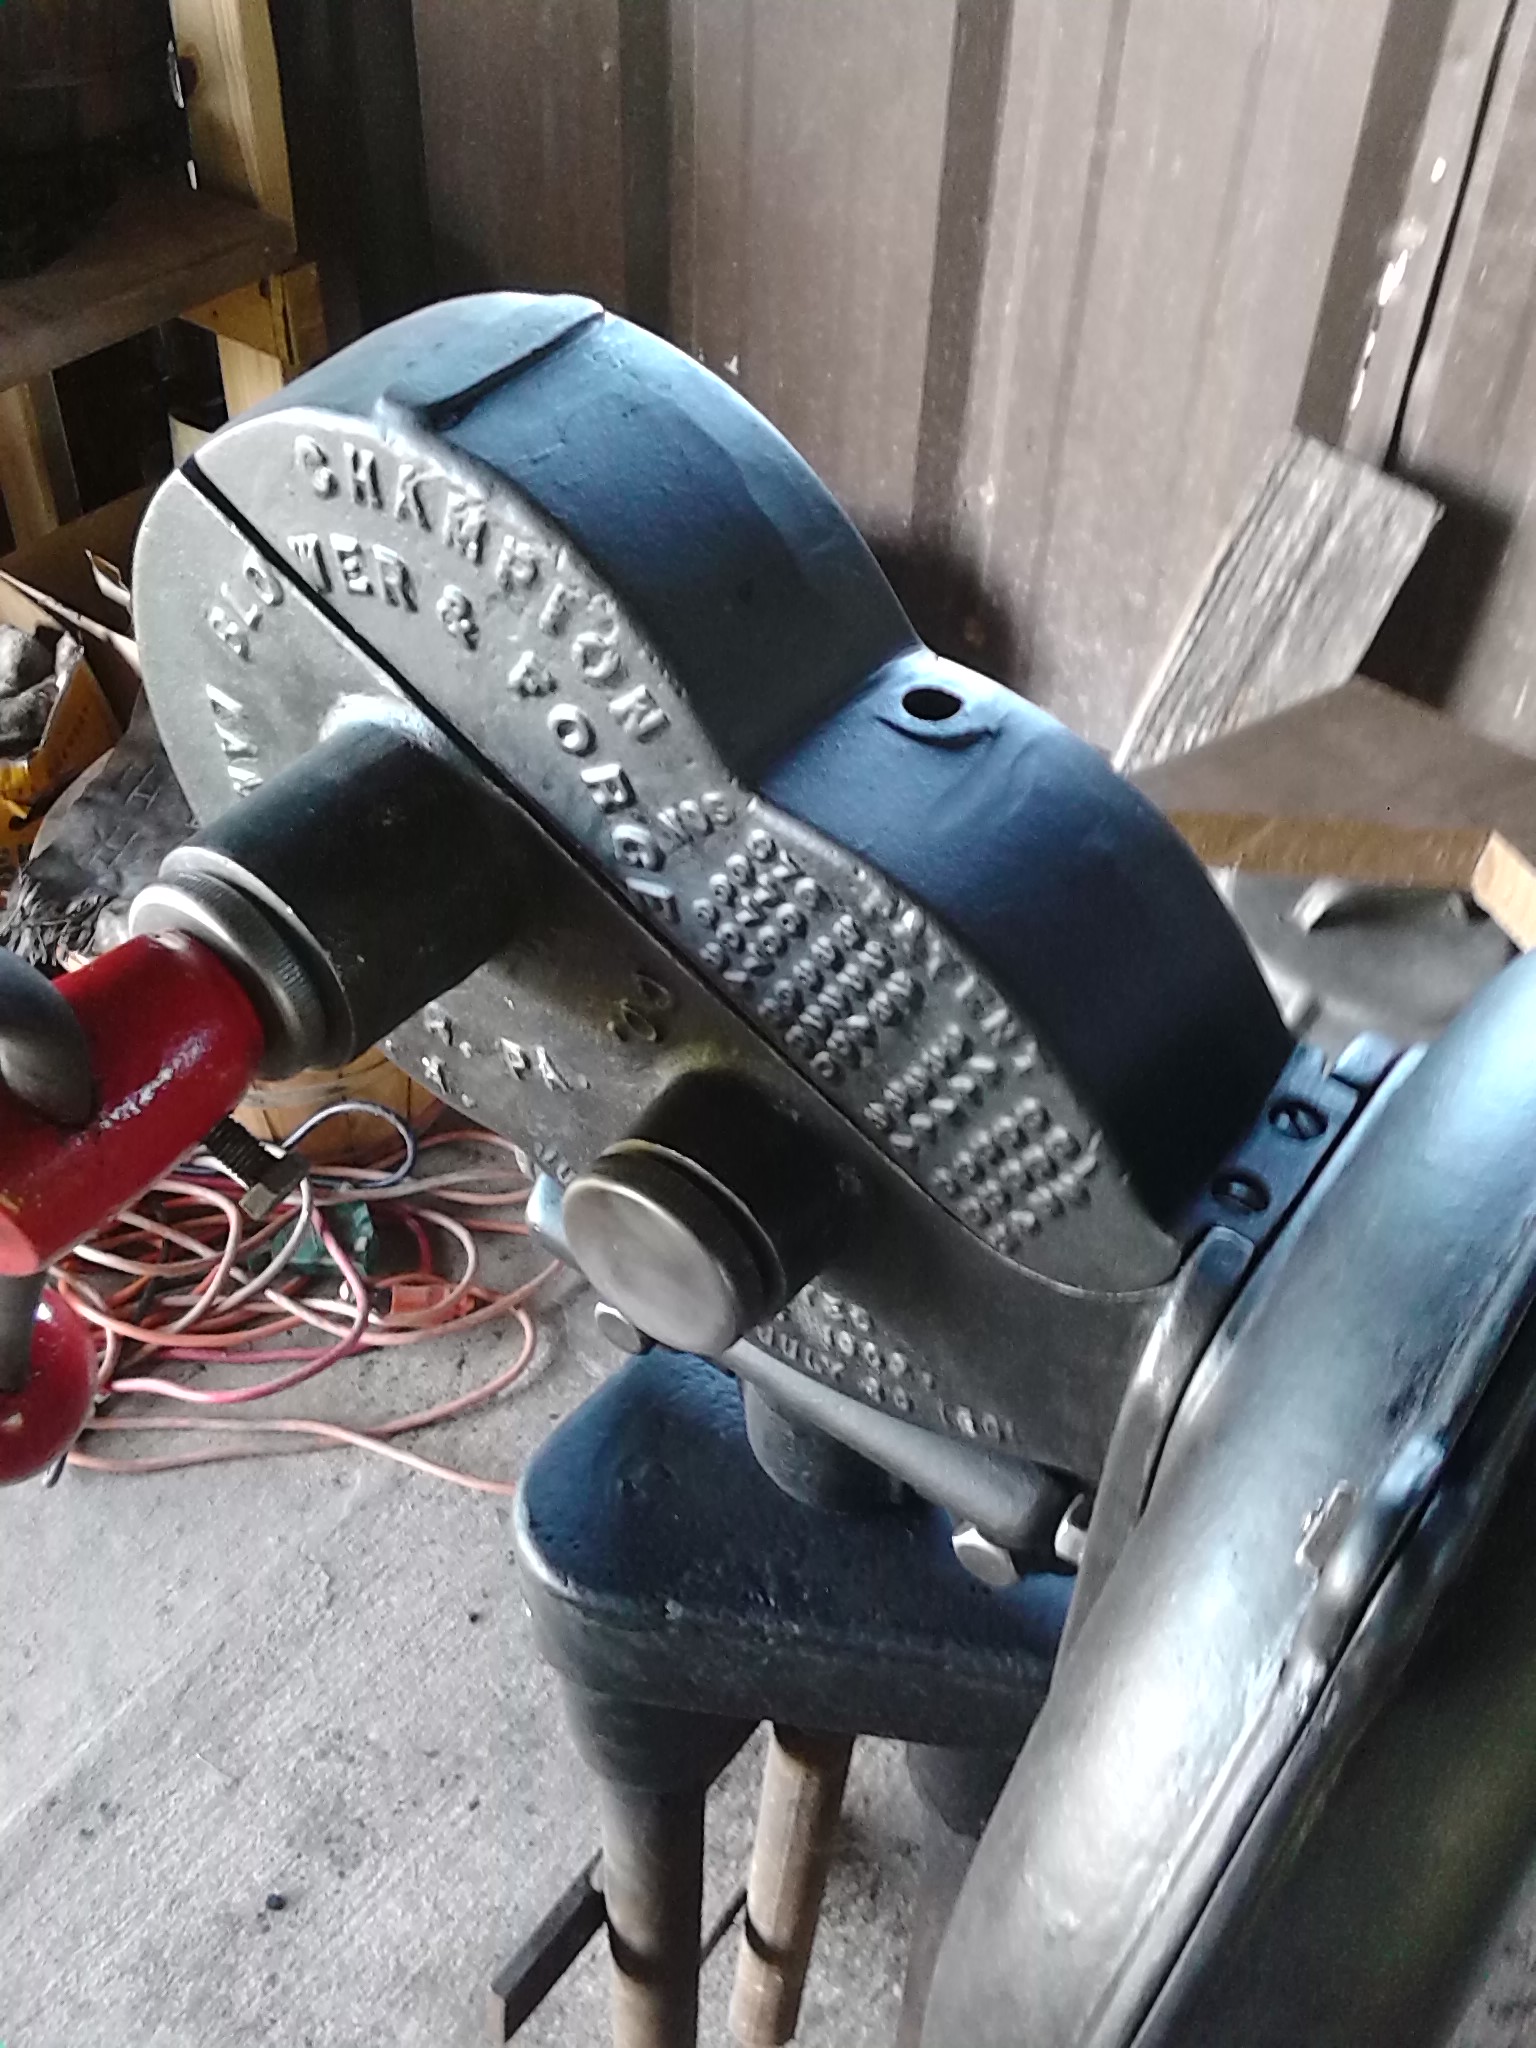
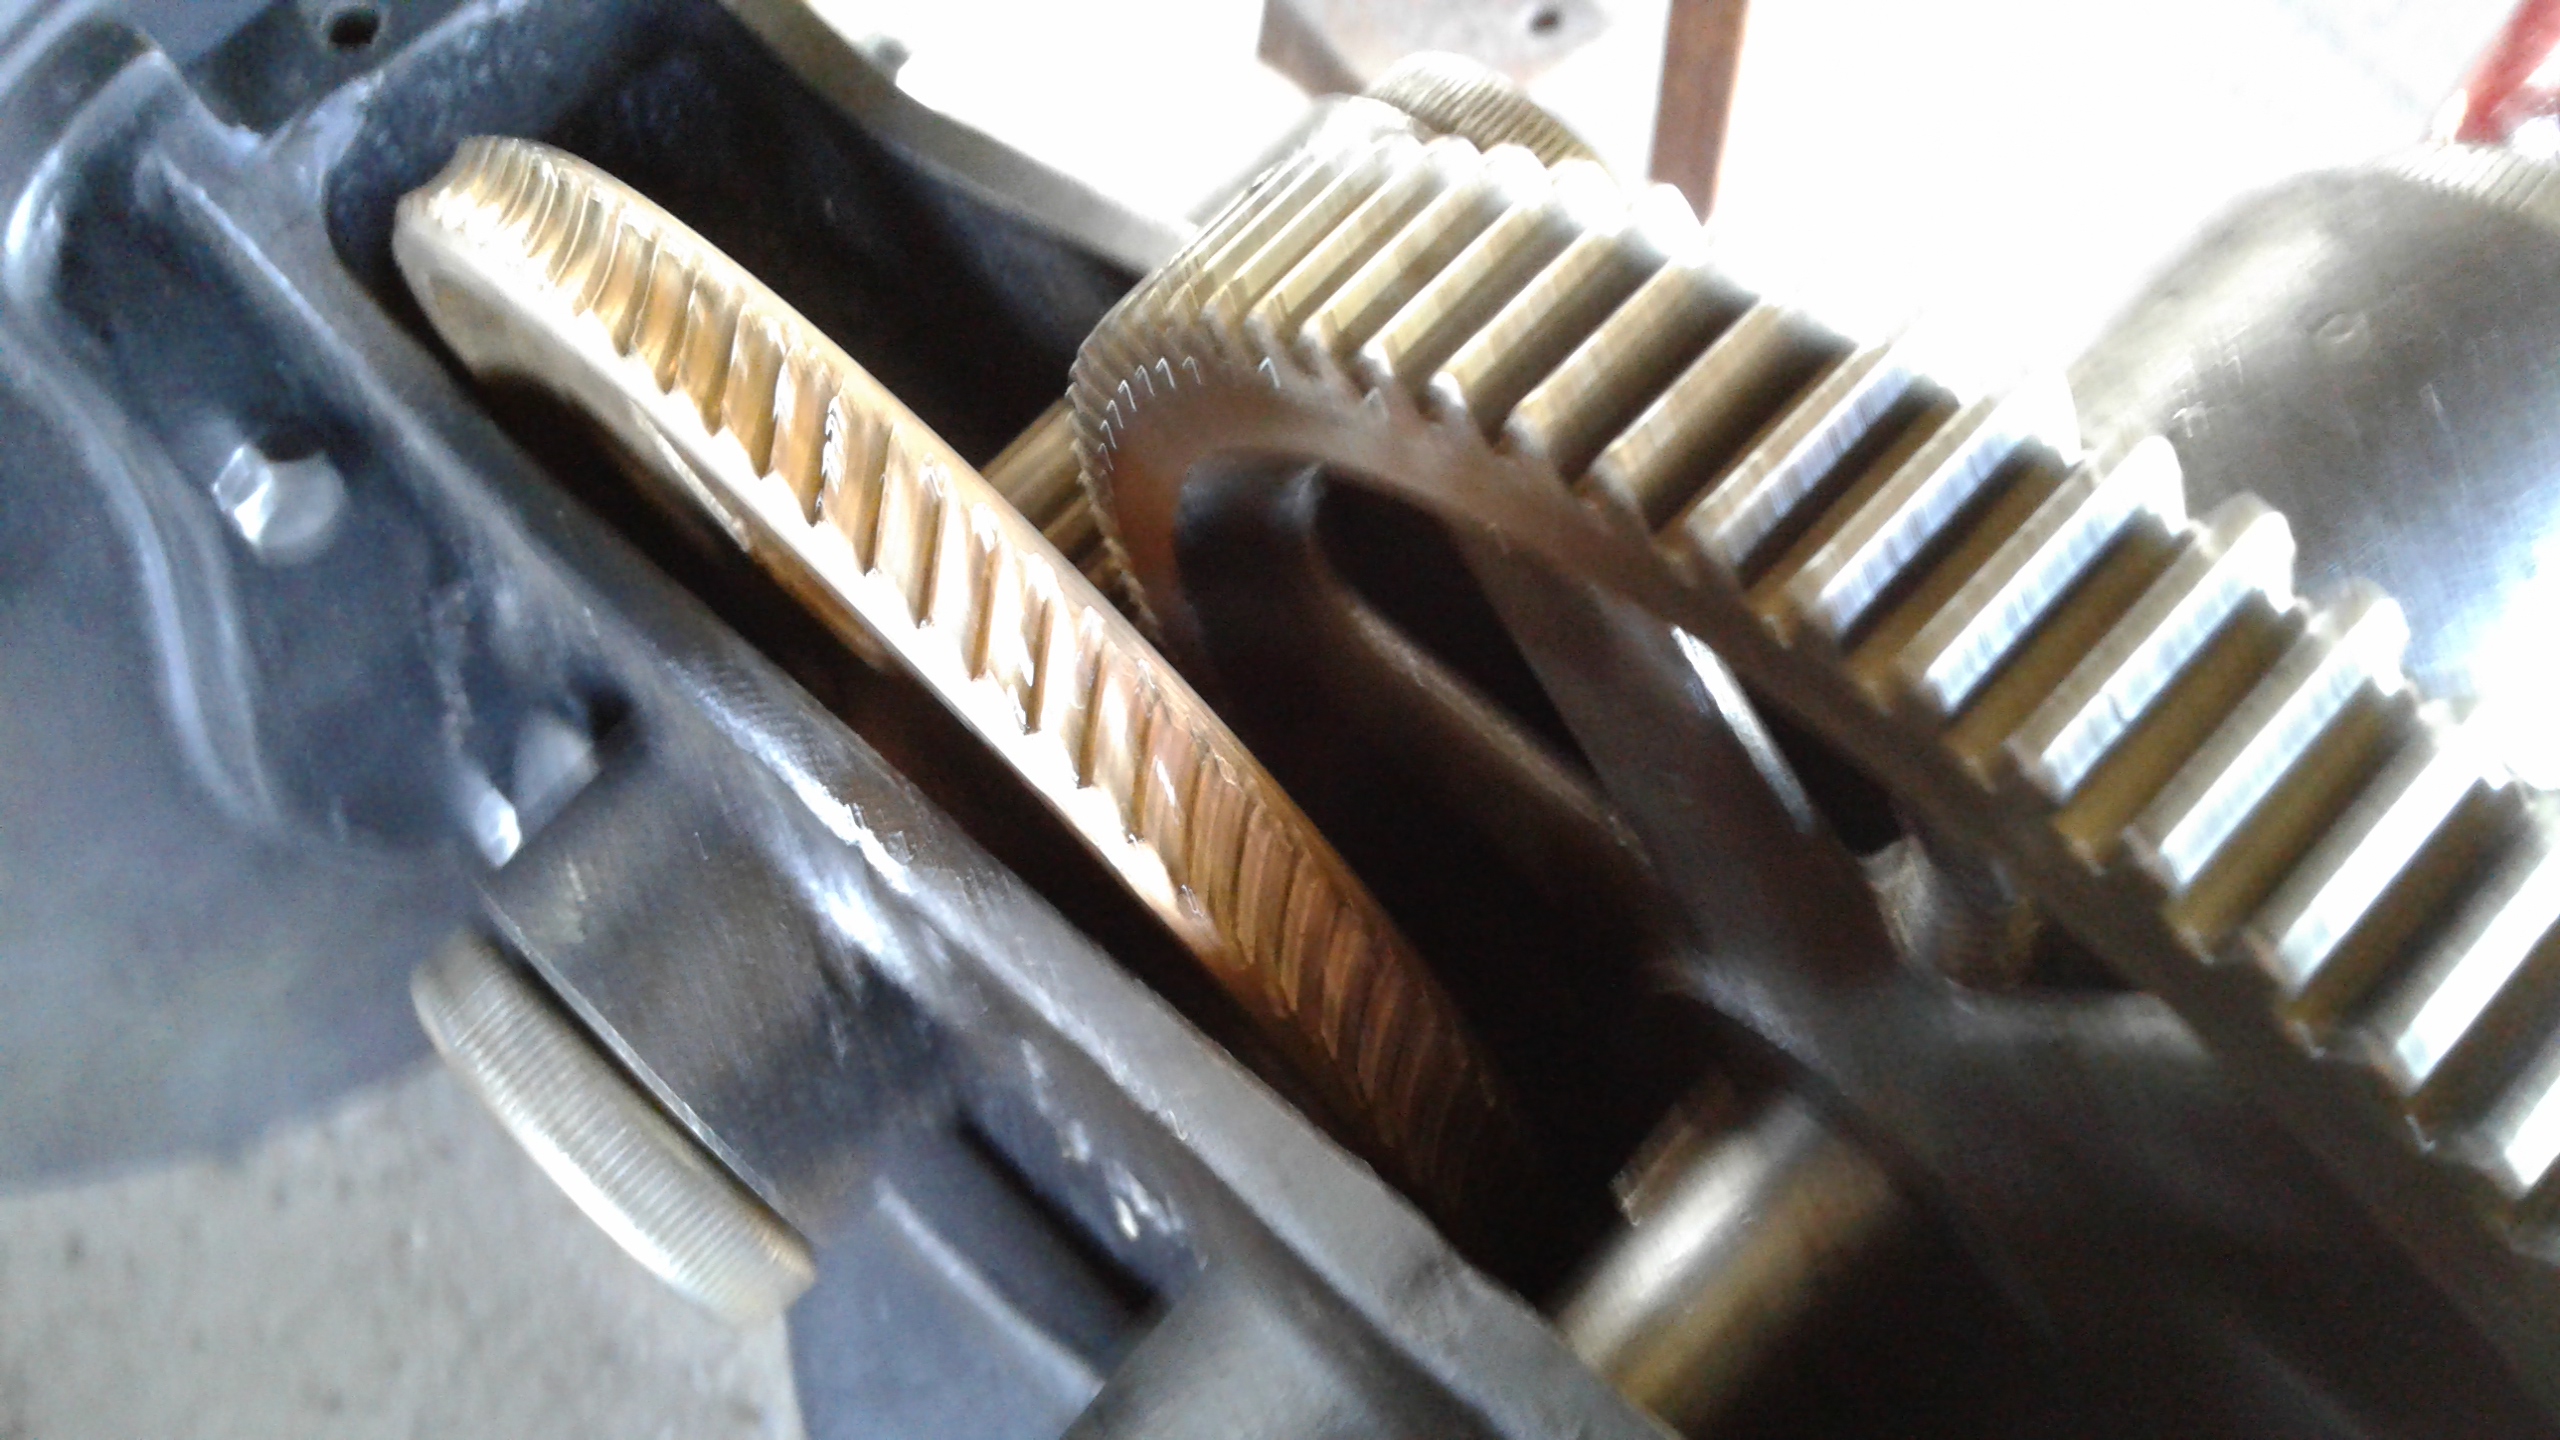
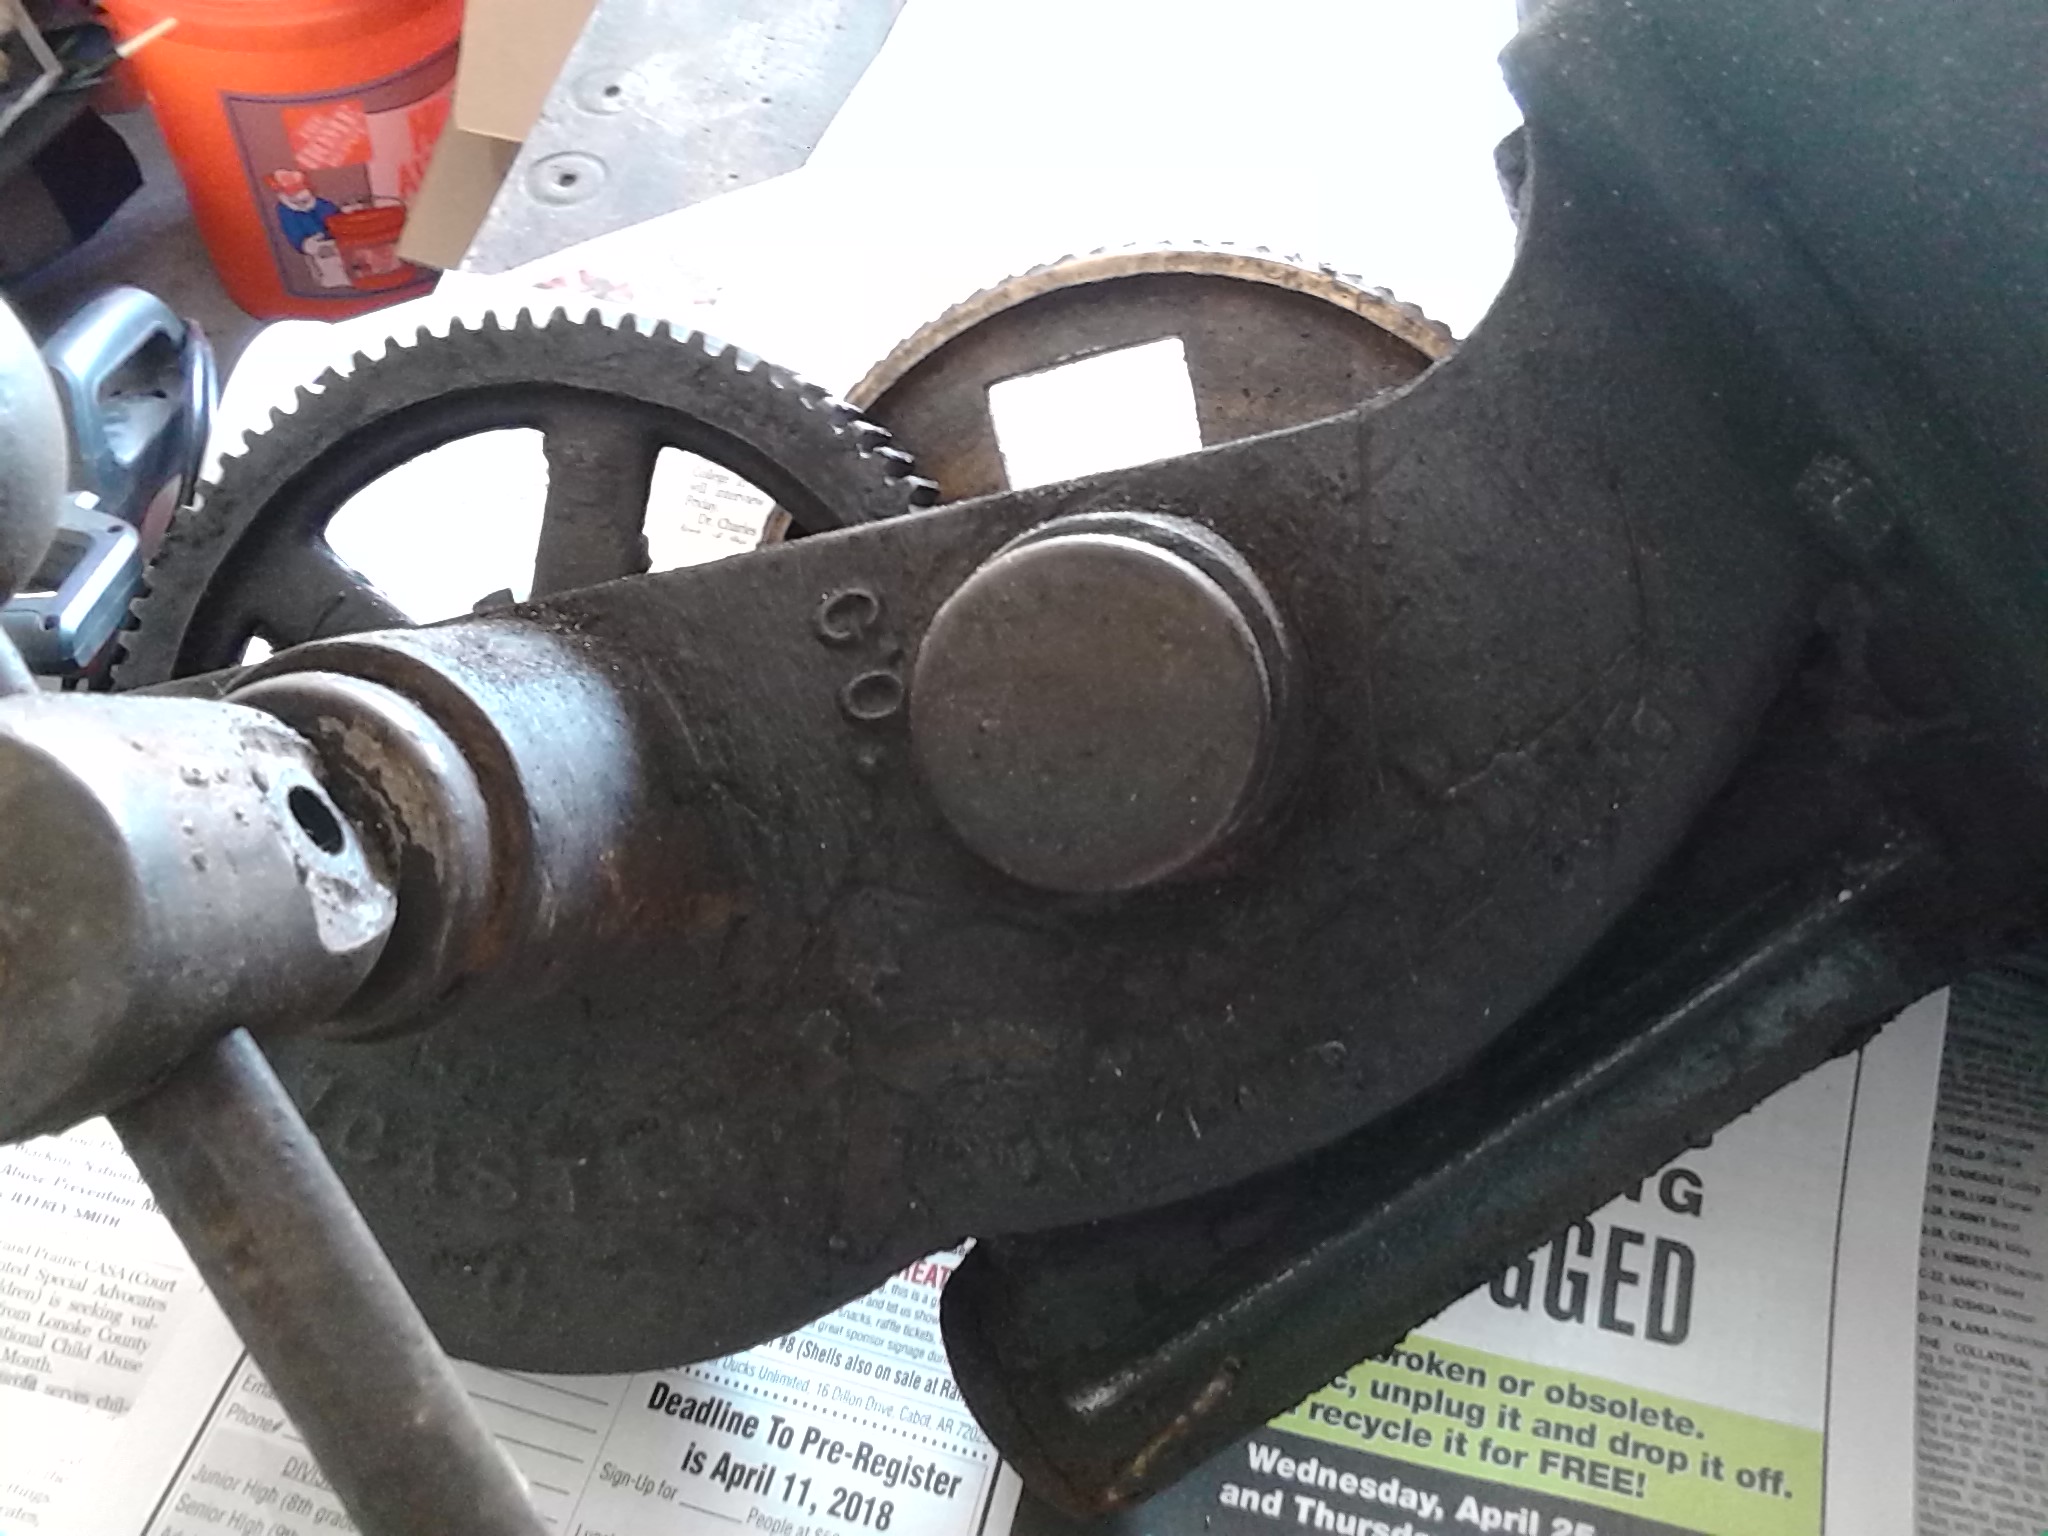
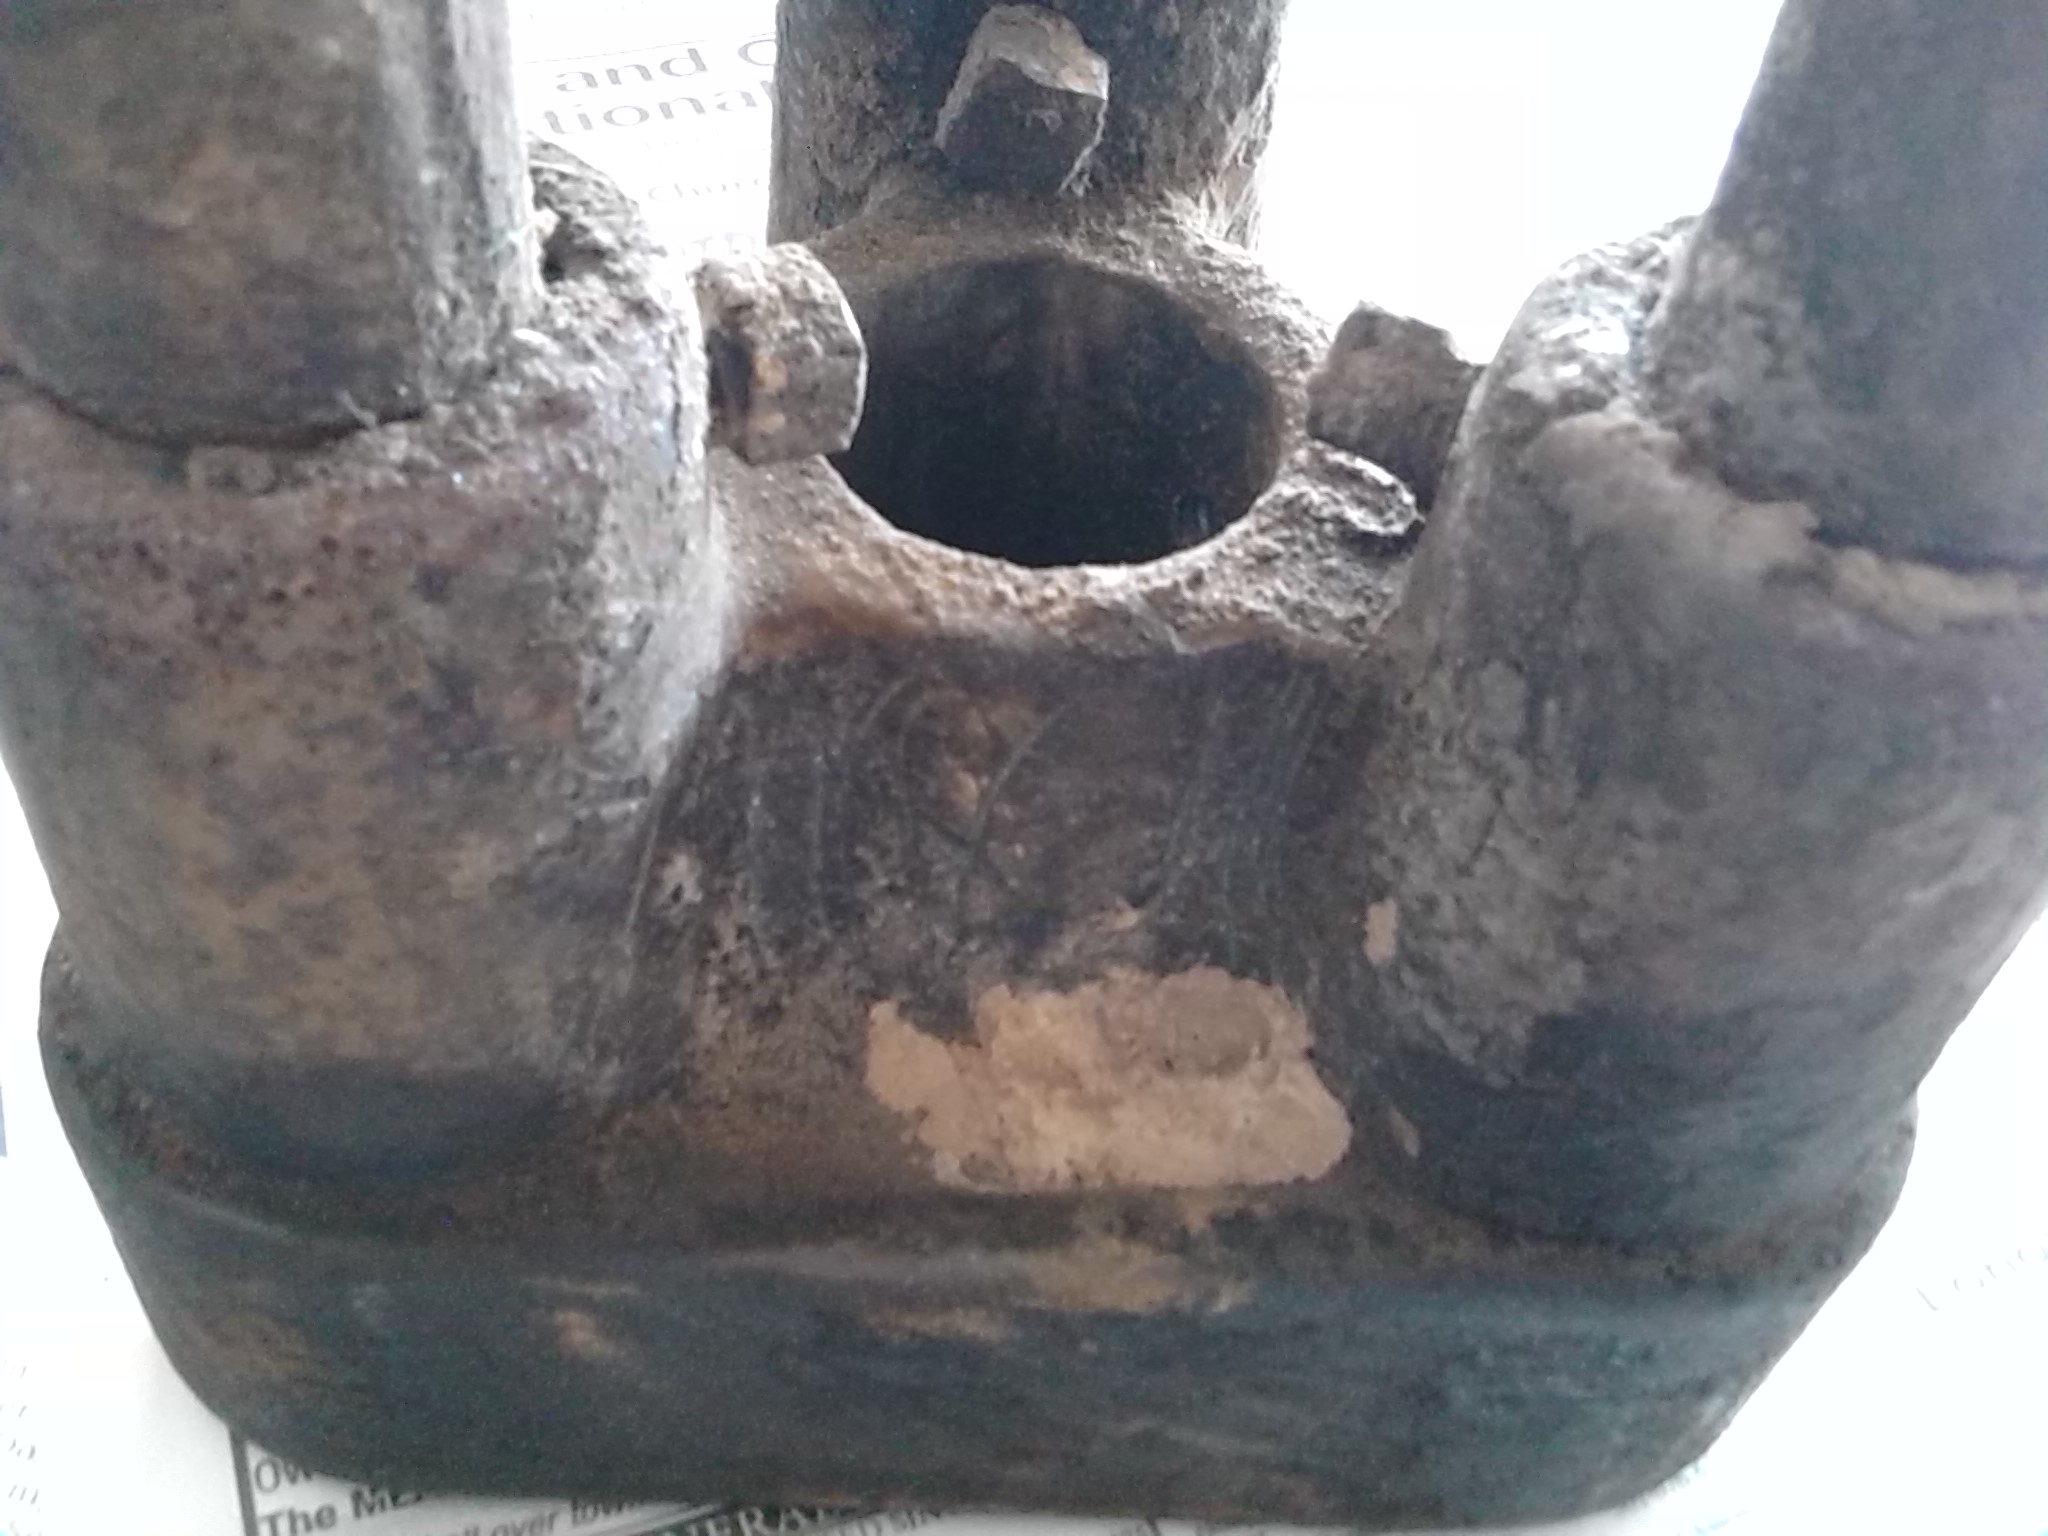
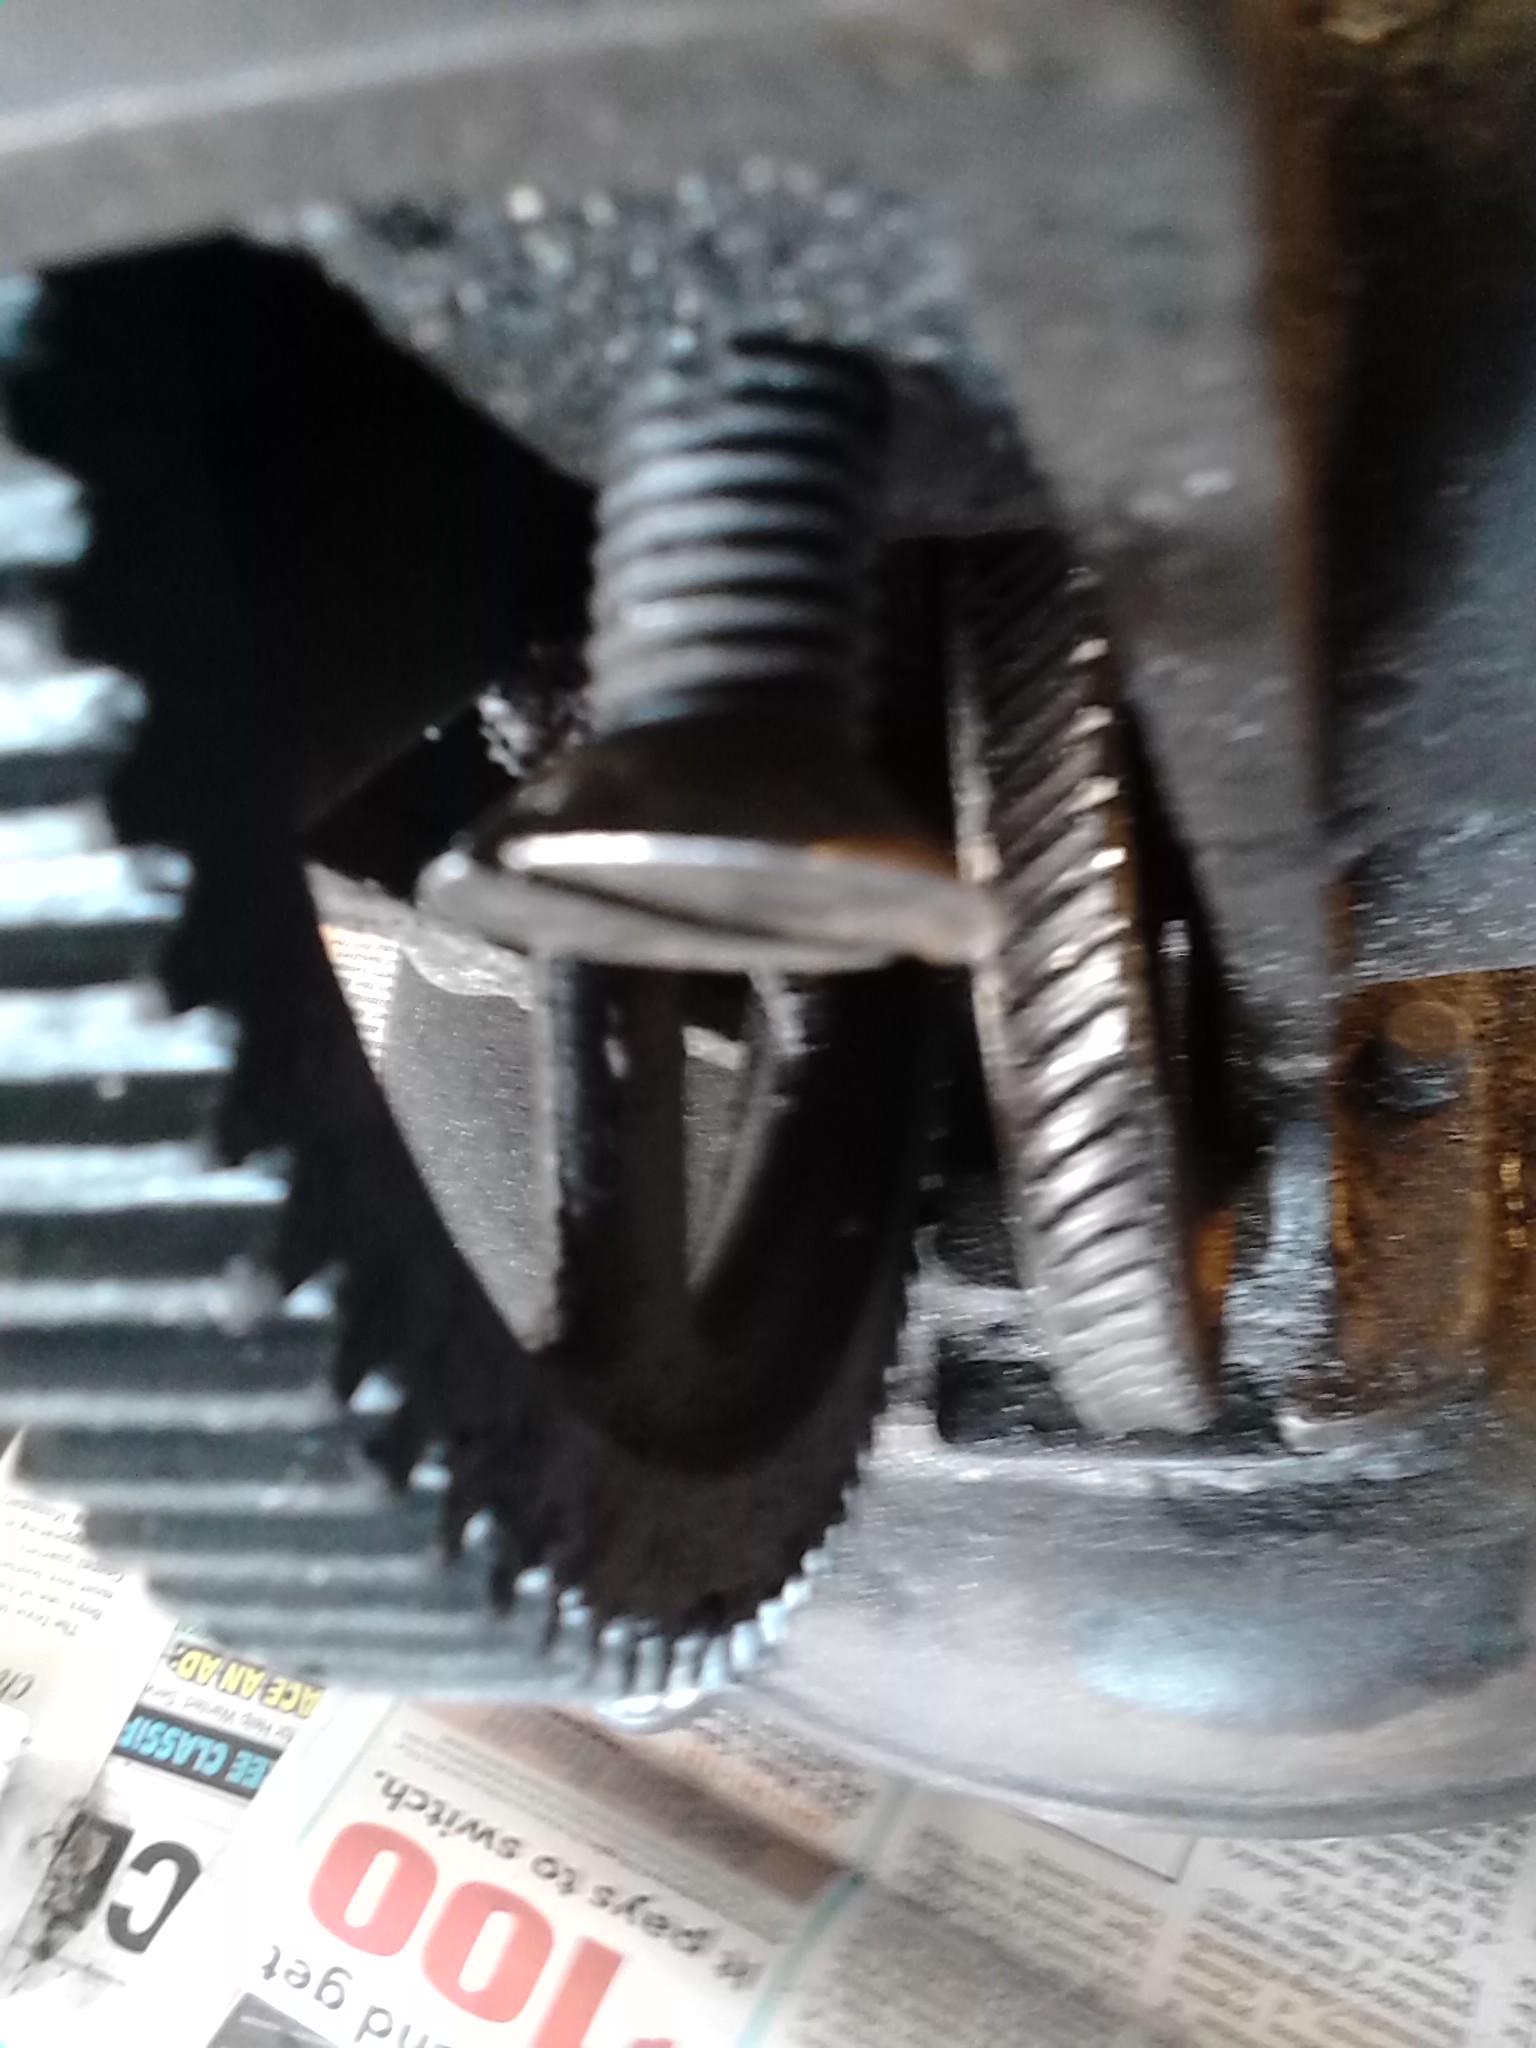
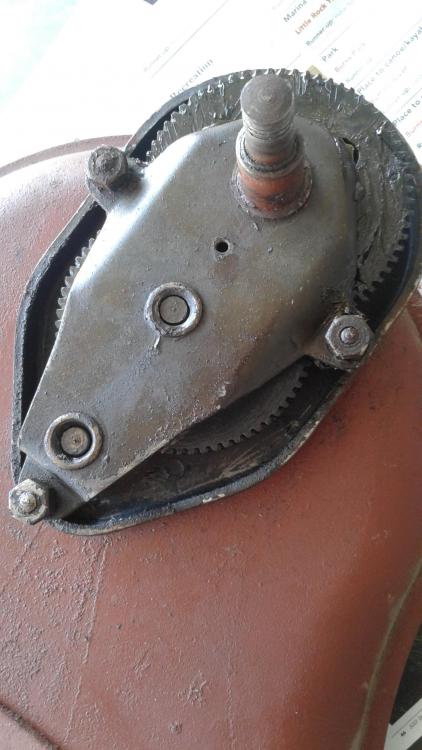
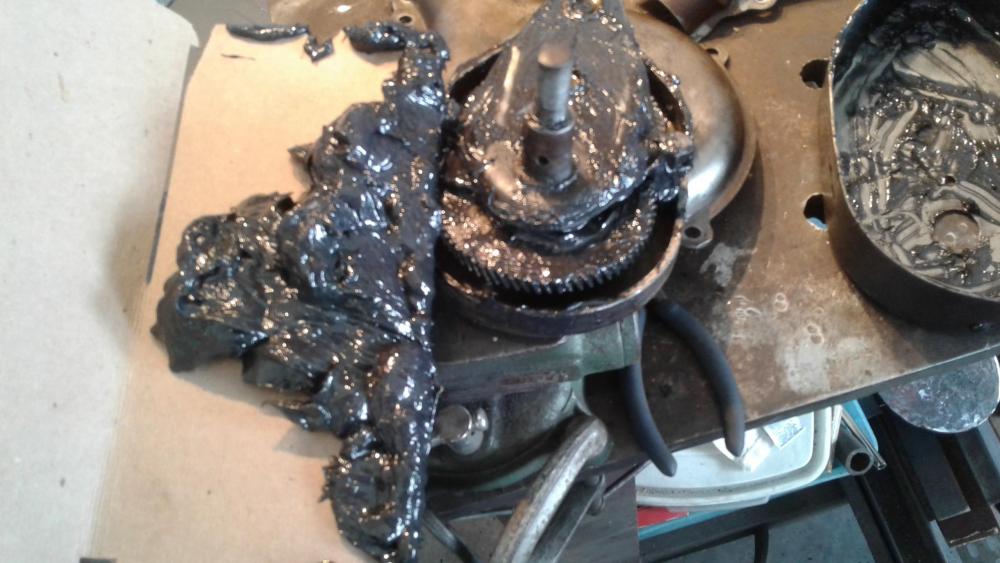
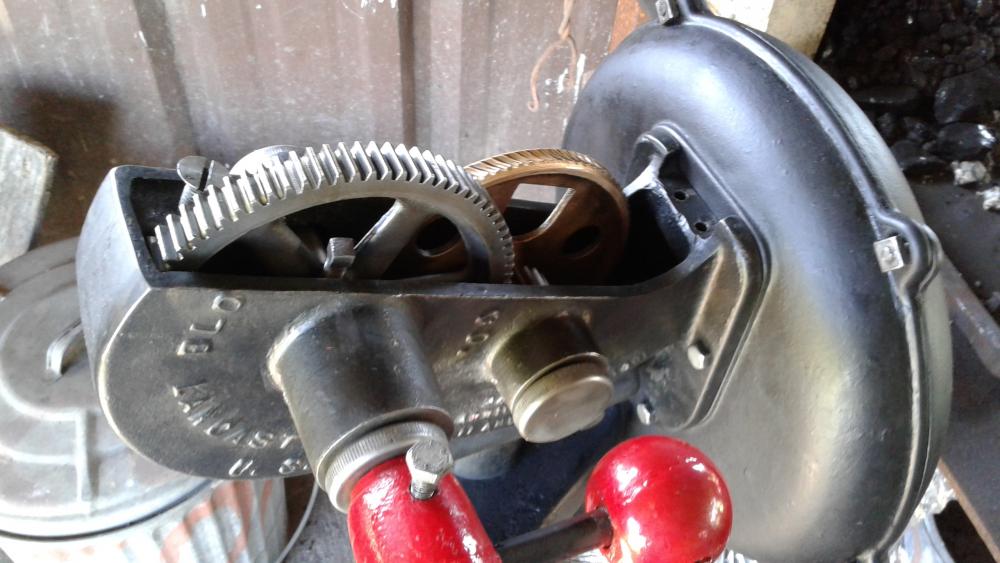
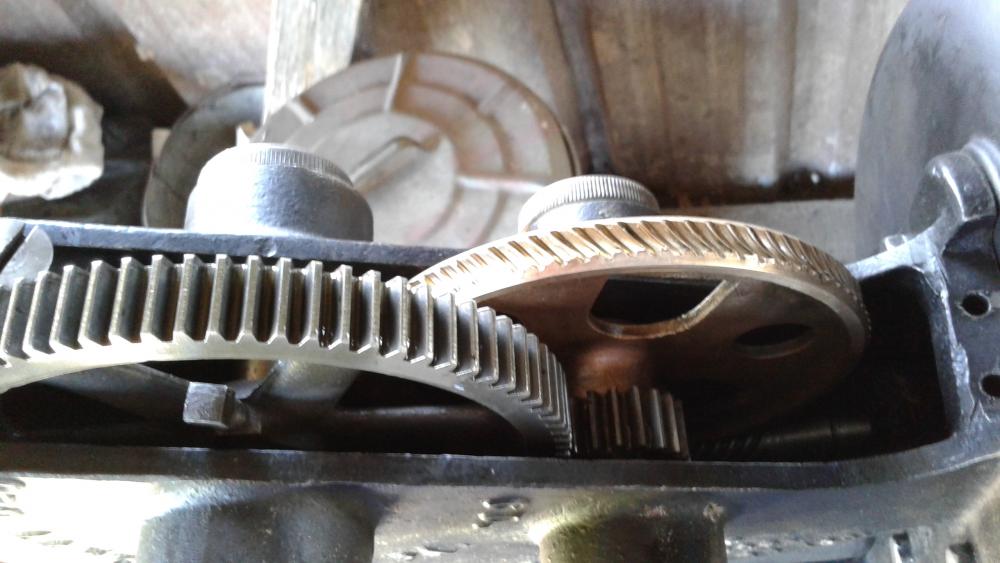
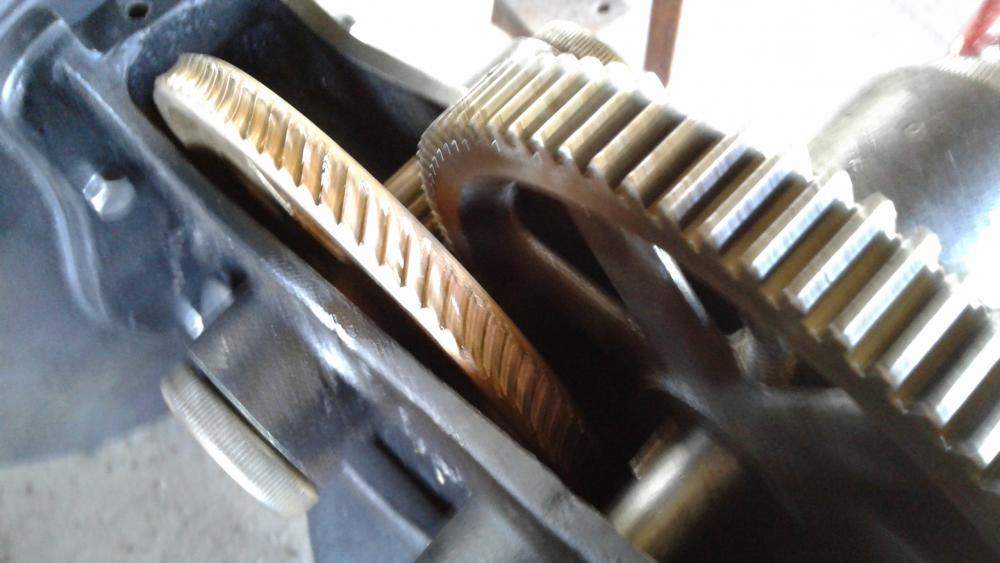
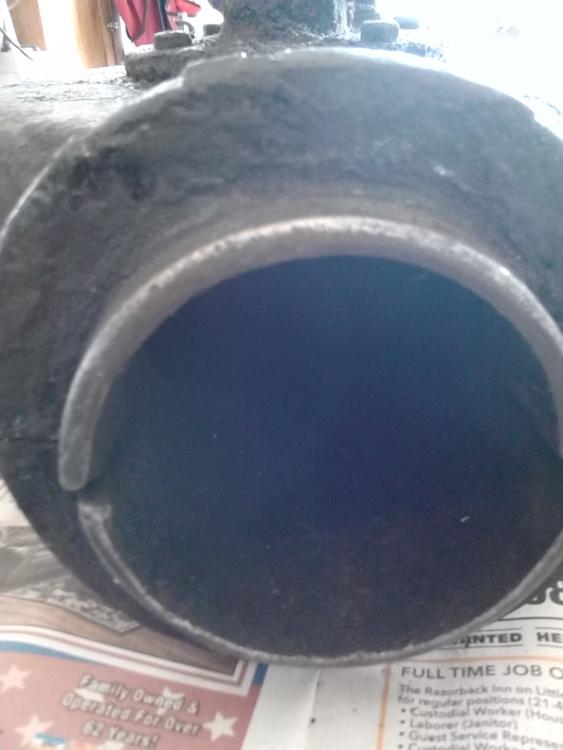
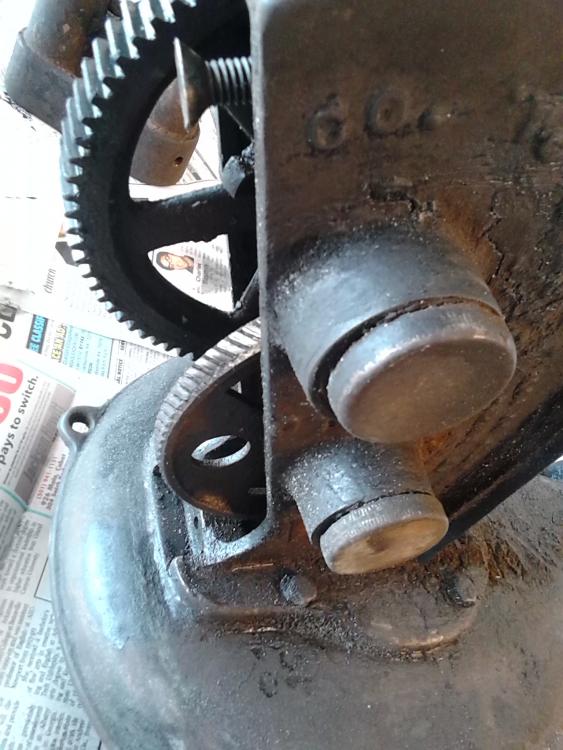
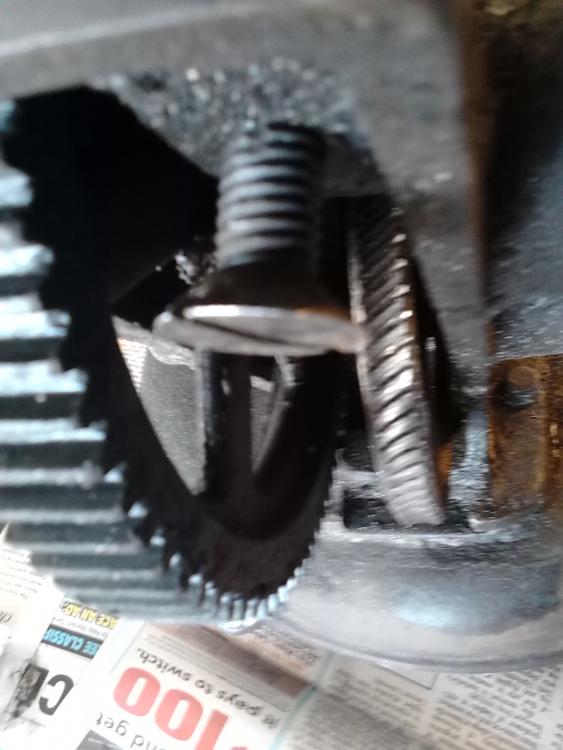
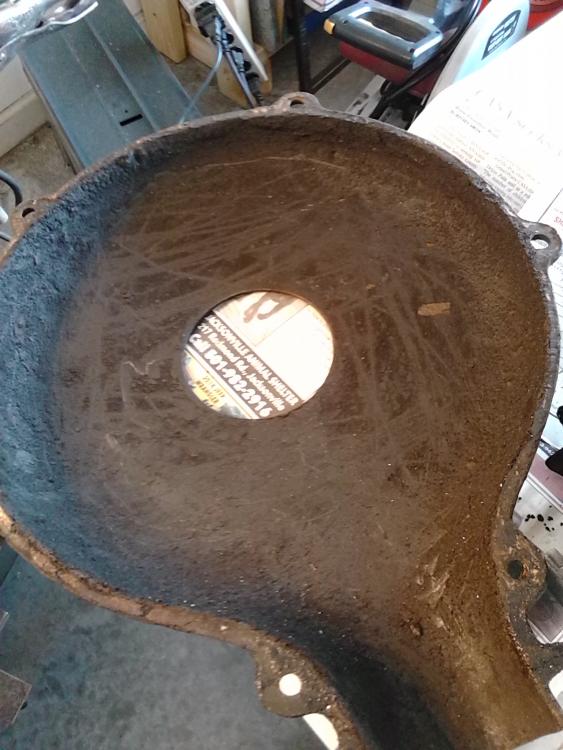
Here is the update on the 400 I'm overhauling...She hasn't lived a charmed life. She looks rough. The bronze gear looks pretty worn down. But, it seems all the parts are there down to the correct nuts and bolts. I thought the bushings on the bronze gear were going to be a tough nut, but they came out for the first time in over a hundred years. I'll replace the bearings, and clean her up good (big job), regrease her, and give her a nice coat of paint.


-
Hey thanks, I watched this yesterday. Gives me a bit of confidence. I think I tracked the problem as I was peeking into the works today. The worm gear isn't tight against the bronze gear, thus the grinding. I will overhaul it next week and provide an update. I'm hoping the bronze gear has enough life, and teeth to keep on working. Everything on outside of the unit looks okay. Brass caps are still in place, the housing isn't cracked and the impellers look fine, no bends or warps. I'm in central Arkansas, outside of Cabot near the Air force base.
-
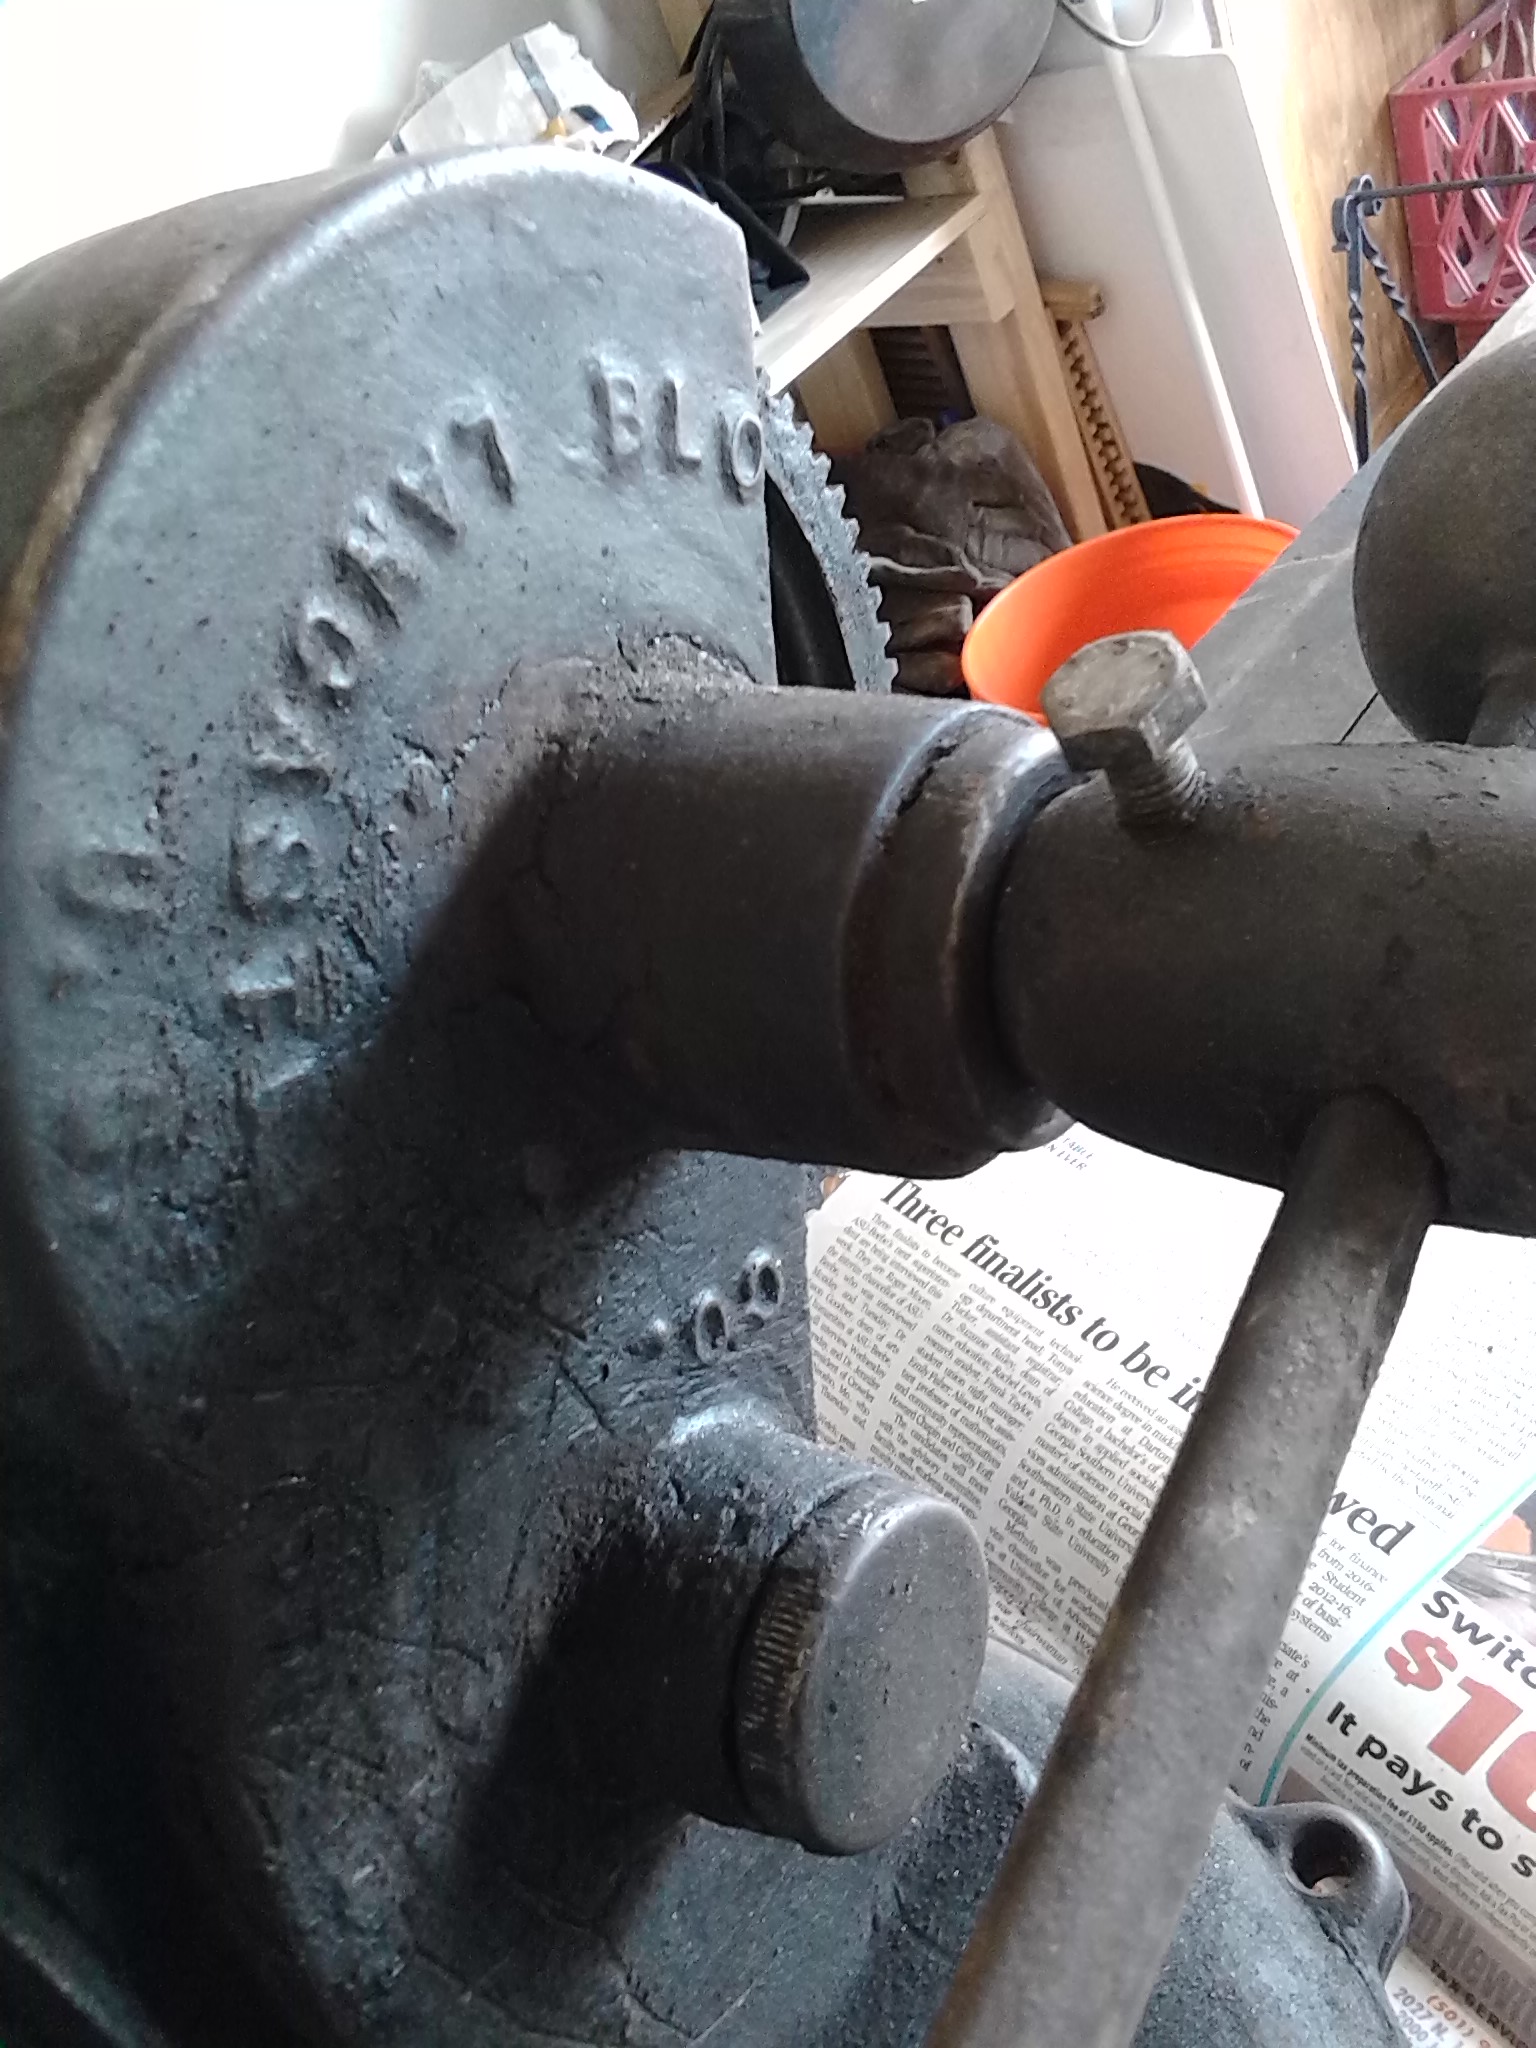
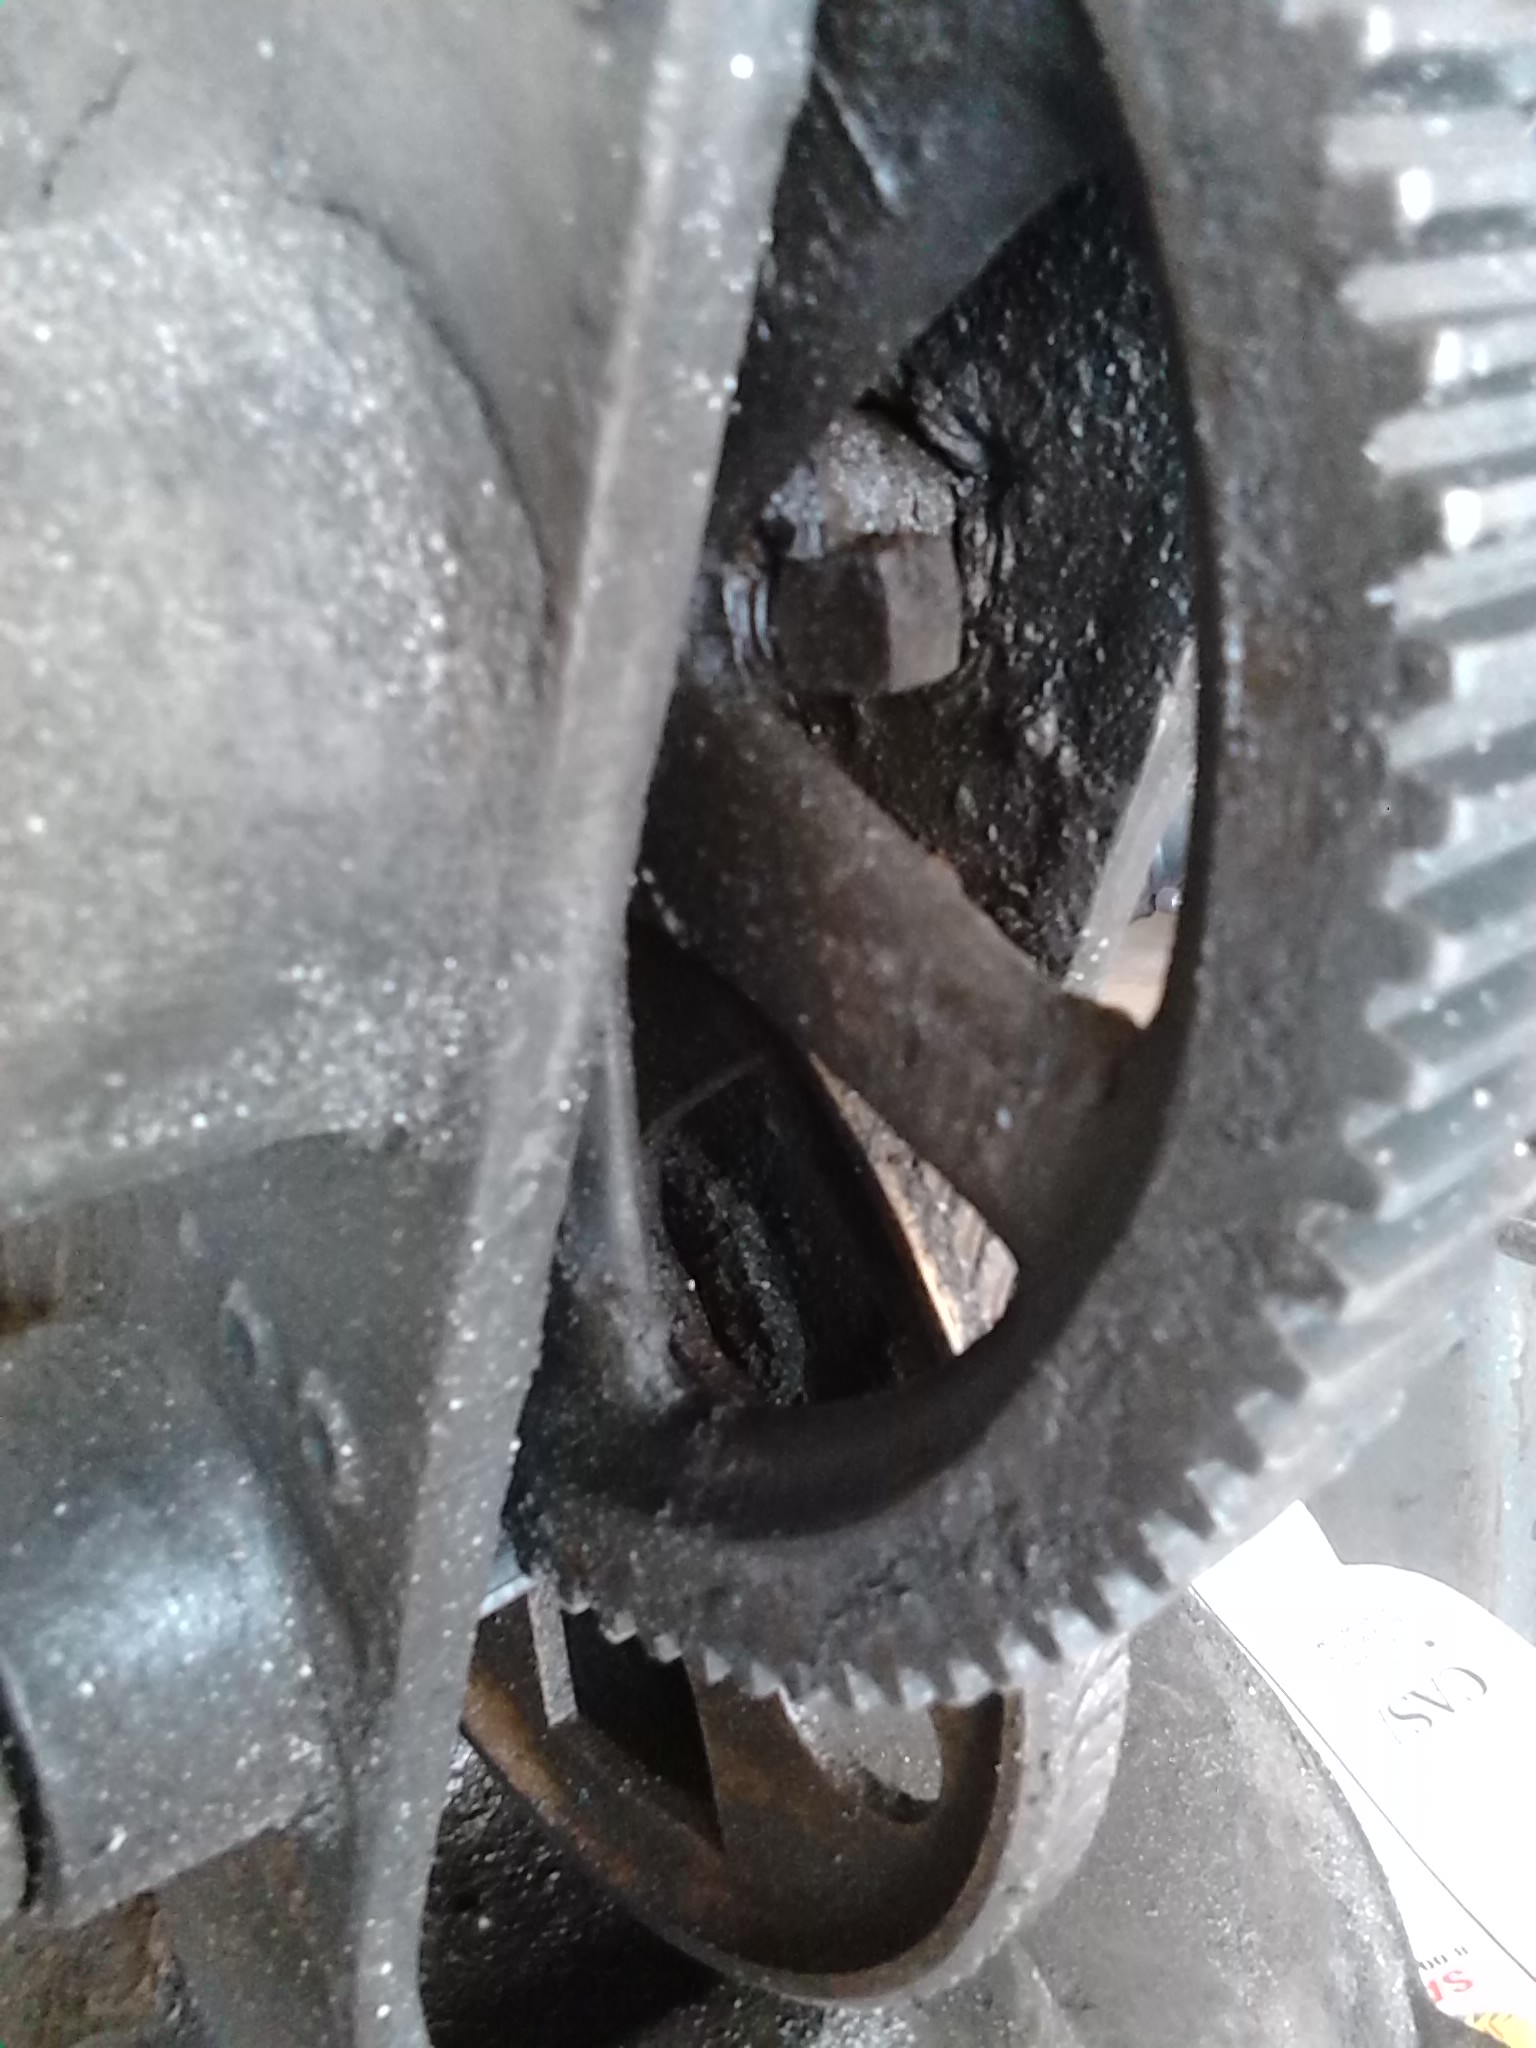
The shop I'm helping restore is an historic blacksmith shop circa 1920. It is located at a settlement park. There is a nice forge and plenty of good space. The shop is part of a relocation and restoration venue of old buildings - a church, dog trot homes, one room school house, train depot, and vintage homes that have been taken apart and restored. The Champion 400 blower has some grinding, and slipping gears. I haven't taken one apart in 20 years. I'll be sure to make a video so I won't end up with extra pieces... I opened her up and took a good look - it's pretty clean, but the bronze gear teeth look a bit worn and thin. I'll replace the bearings and tighten up as much as possible. My questions: regarding tolerances and timing with the worm gear, are there any bushings on this gear? Also, the small queen gear seems to have a timing problem and isn't quite lining up with the larger gear, thus grinding. I tightened the internal screw and the nut, it seems to help the timing, but becomes too tight to crank freely. Any tips on this guy before I commit to it would be appreciated. Thnx.
-
Blacksmith Organization of Arkansas Sept. 2017
picker replied to arkie's topic in Blacksmith Organization of Arkansas
I've relocated to central Arkansas from NW Arkansas. I think my subscription ran out. Can you update the next get together in central Arkansas for me? The website does not seem to be current. Thnx. cb -
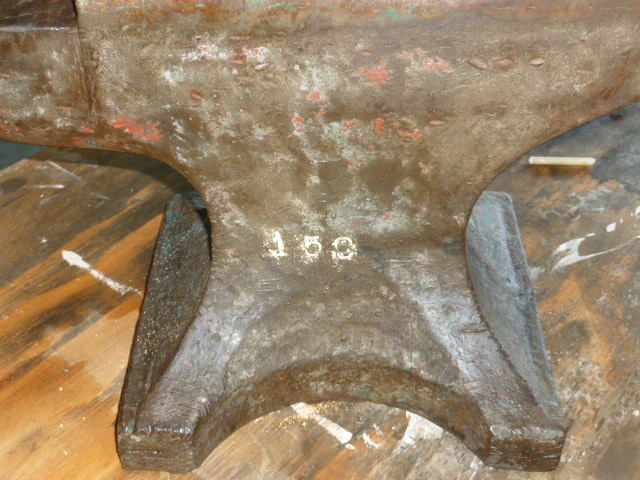
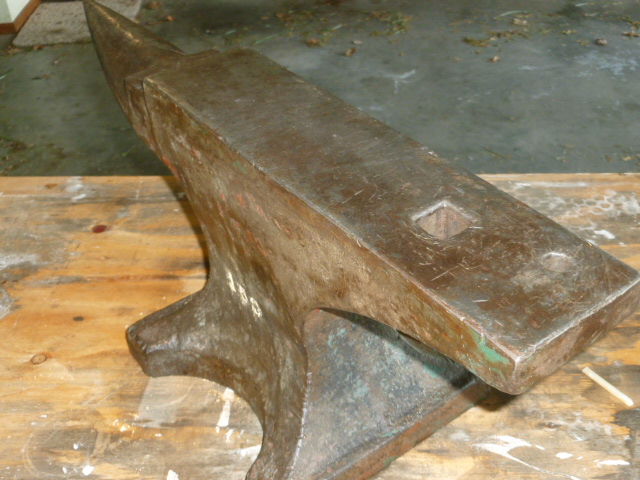
I wonder what's up with this green paint? It's under the base too.
-
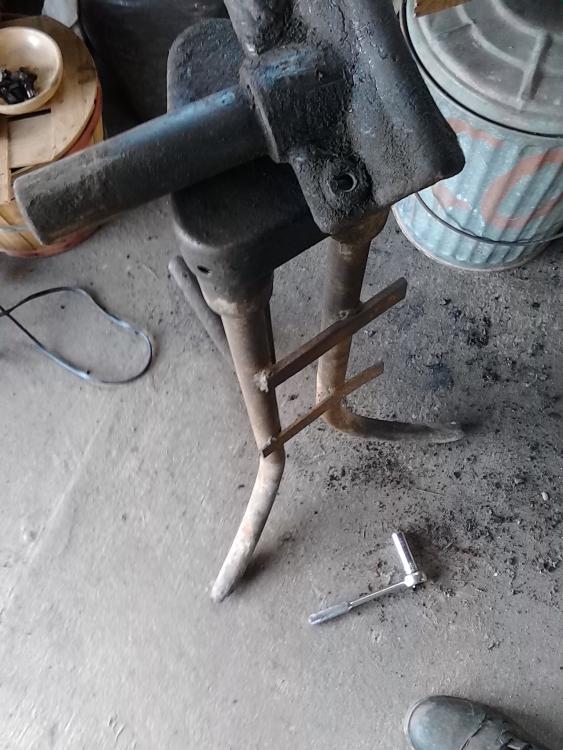
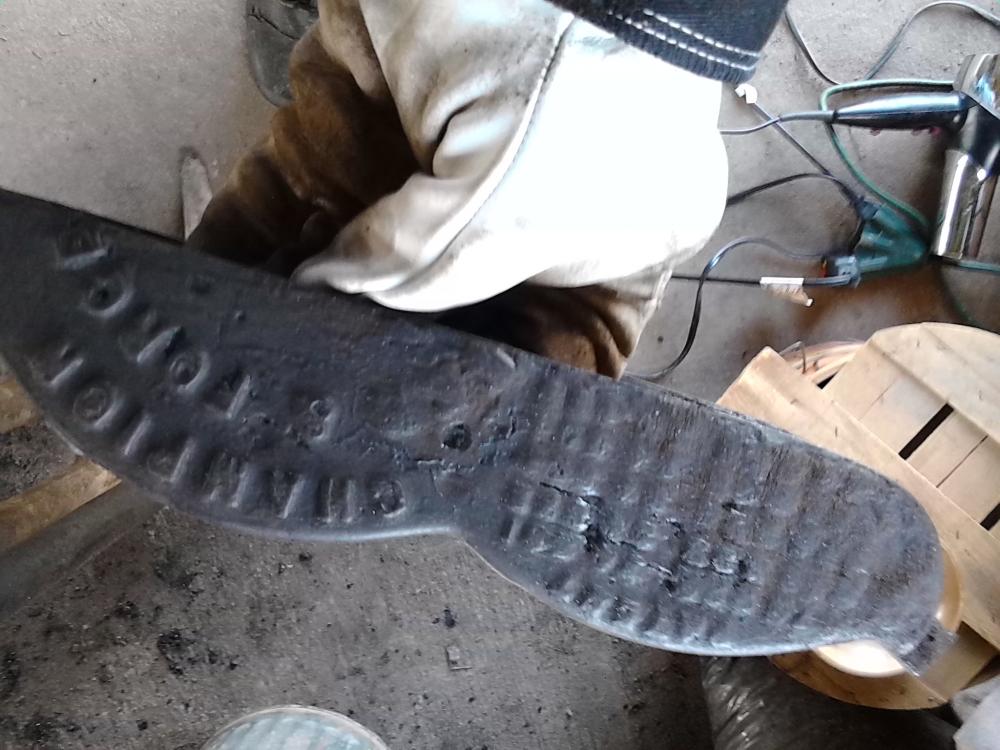
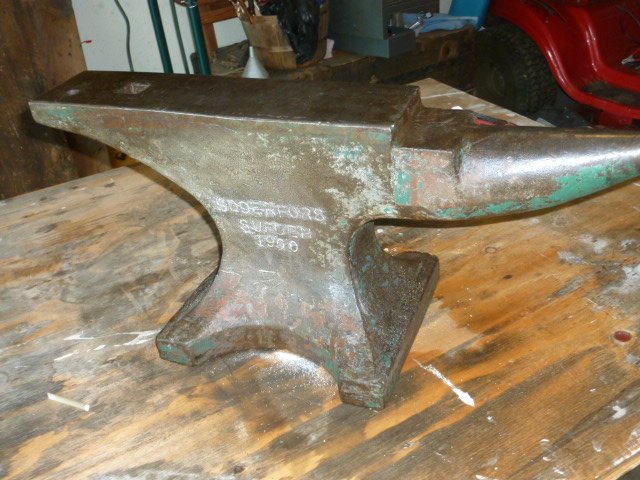
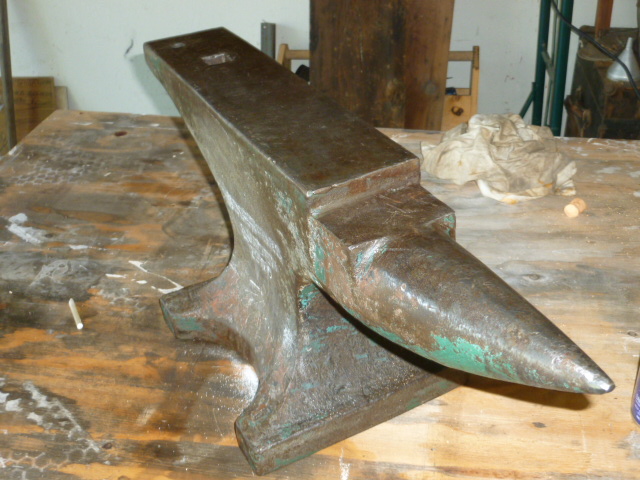
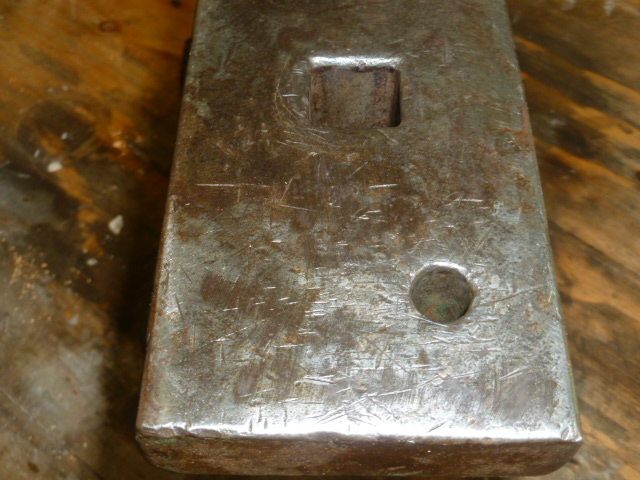
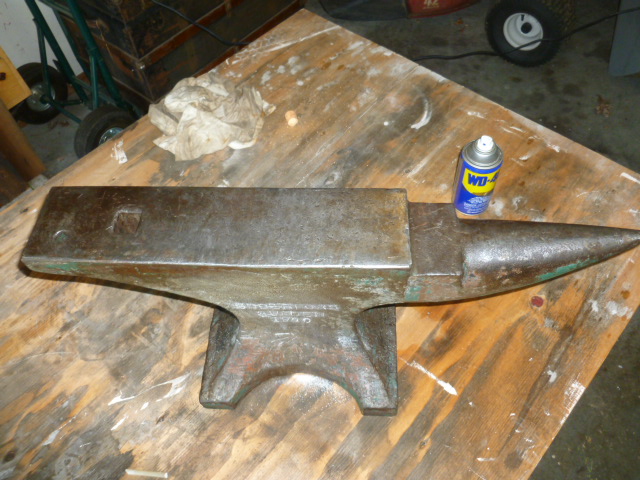
This is Ingrid. She hails from Soderfors, Sweden. She is 116 years old. She is as svelte as the day she was born/forged. Her measurements are: Height: 11 1/4" Length: 26 5/8" Base: 9 5/8"x10 5/8" Face: 4" Weight: #150. Pritchel: 1/2" Hardy: 1" - I took her out yesterday. We were married after the first date. Her rebound is 9" + - She will be performing at my reconstituted shop: Rawhide Blacksmith in the near future.


-
I just got home with my #145 Soderfors - circa 1900. She is a beauty. Near mint. Will post pics in a day or so. I want to baby her a bit before I let the world have a look at her.
-
My 8" - stamped 1896. I need another 8"- anyone have one for sale?
-
I was spoiled working on this guy for 15 years. I need another 8" er. Have you got a spare 8" lying around you'd part with?

-
Anvil Restoration Tips
picker replied to Garagedweller's topic in Anvils, Swage Blocks, and Mandrels
Looks fine to me. I could build a bridge with that anvil -
Restoration woes on an unknown forge and Champion 400 blower
picker replied to twodogzz's topic in Solid Fuel Forges
The forge looks to be a Buffalo perhaps. Just buy a replacement pot. That one looks pretty used up. Weld some new legs in place. Don't get fixated on trying to extract the scrap out of the receivers - could end being an all day project and you have better things to do. Just plate over the receivers and weld some new pipe legs. -
The kid sounded like a dweeb engrossed in the video game culture. Push a button and live vicariously through someone else. I did it because of a thousand reasons which you all have made a nice summary.
-
You can also regulate the airflow by installing a rheostat to your blower.
.jpg.a6553a616098a8a9fb0fc8c389bb5d28.jpg)

.jpg.d50c72f1e58d649bb428faa15b96625e.jpg)
.jpg.56a9ec1ea7acc414f0cfcbaffea51558.jpg)
.jpg.a3c0a6afd6fc25e051242f8152731c13.jpg)
.jpg.9f00f901bfe8cca94416541cb01fd890.jpg)
.jpg.479fd97c901a3a33f1c776c8fd2cf5ca.jpg)


.jpg.912bfa788714832b878b9758a1e27415.jpg)


.jpg.f45b134c1e6a2aacb99d0f00cb1eeb36.jpg)
.jpg.82a54d972c2efea29d3d791e2f5b9f29.jpg)