
Razzputin
-
Posts
161 -
Joined
-
Last visited
Content Type
Profiles
Forums
Articles
Gallery
Downloads
Events
Posts posted by Razzputin
-
-
Castors, heaps in scrapyards.....wow on the vices though, never seen one in a Sa yard , "en ek boer in hulle" (I spend a lot of time in the ) great find.
I found my vice in a scrapyard in Hartebeesport.


-
Cancel i will upload photos, this is my very first post so i need to figure out how to upload.... hmmm
I upload them onto my blog and google+ pages then use the generated url link from those pages to put it in here.
-
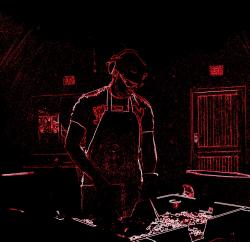
Here is some of the work I did today under my new roof.
The candle holders are an anniversary present for my parents, the lily is for a friend and the hooks are part of a kitchen upgrade.

-
Yup you got it spot on there. its in the Hennopsriver area
-
looks like a good place to put up a smoke stack!!
Smoke stack?
-
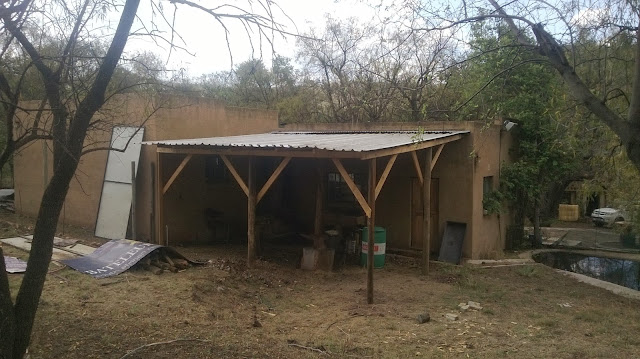
Well guys I've finally finished the roof over my smithy, check it out.
http://artofmaille.blogspot.com/2013/10/long-long-time-wow-but-it-is-finally.html
Let me know what you think.
-
The beauty of this little guy is it is movable between my forge and anvil, If I need to make a bigger one in future I will use slightly thicker diameter bar. But your idea is a good one and I considered it before I made this one. I had seen the design you are talking about in a video on youtube a while back.
-
Hmm seems like odd things like to invade spaces they don't belong. I almost threw over my forge when this guy ran up my hand. He obviously did not like the heat.
-
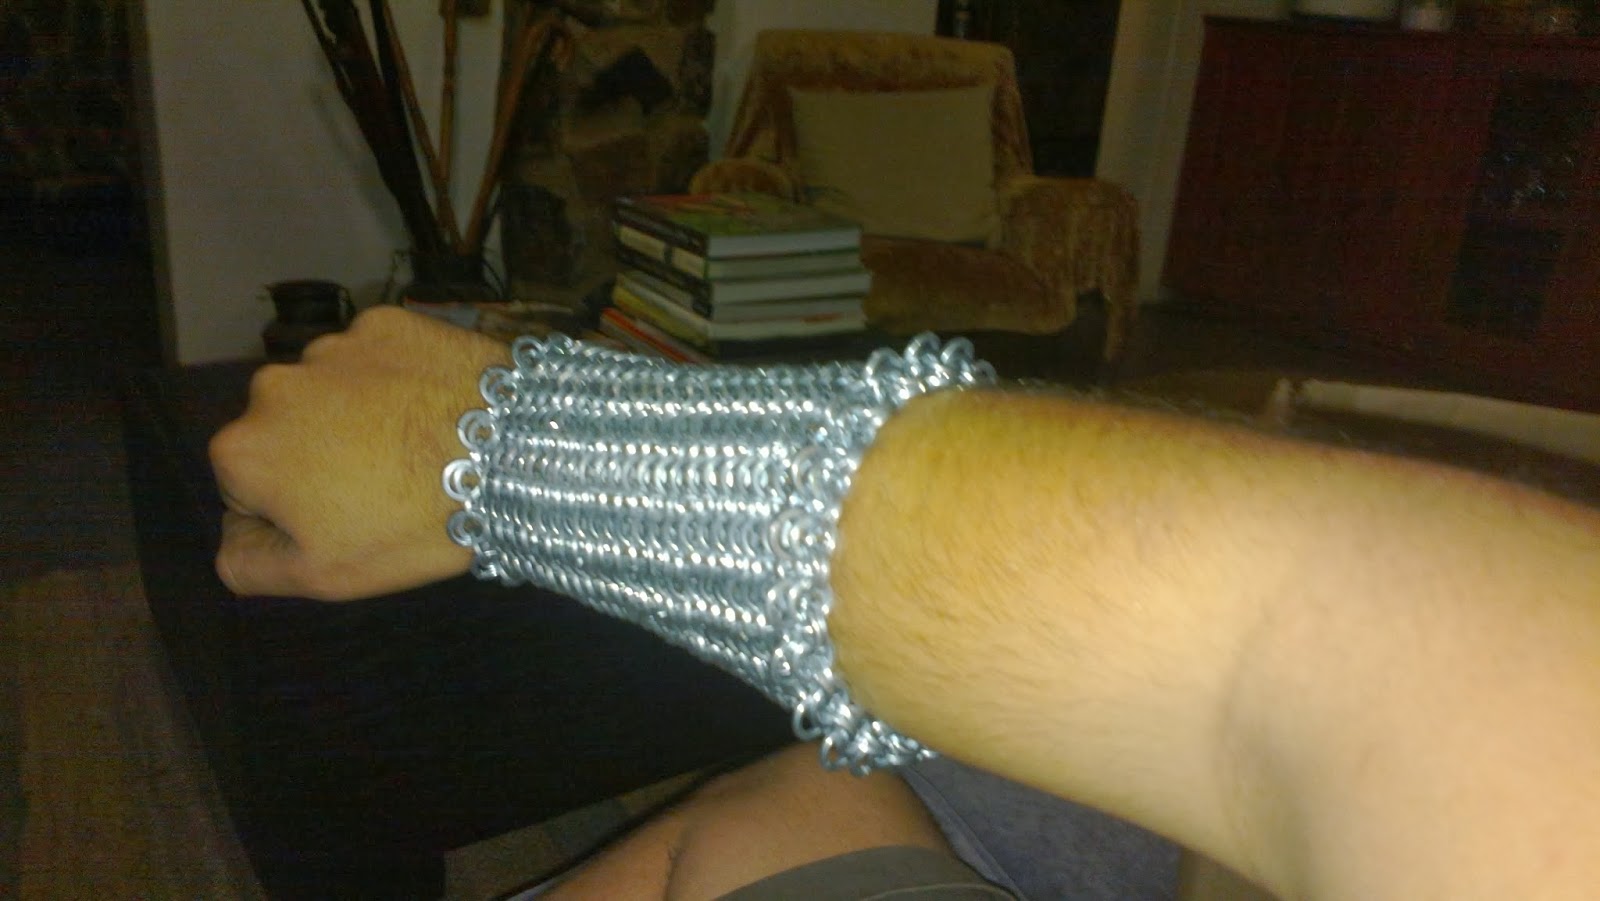
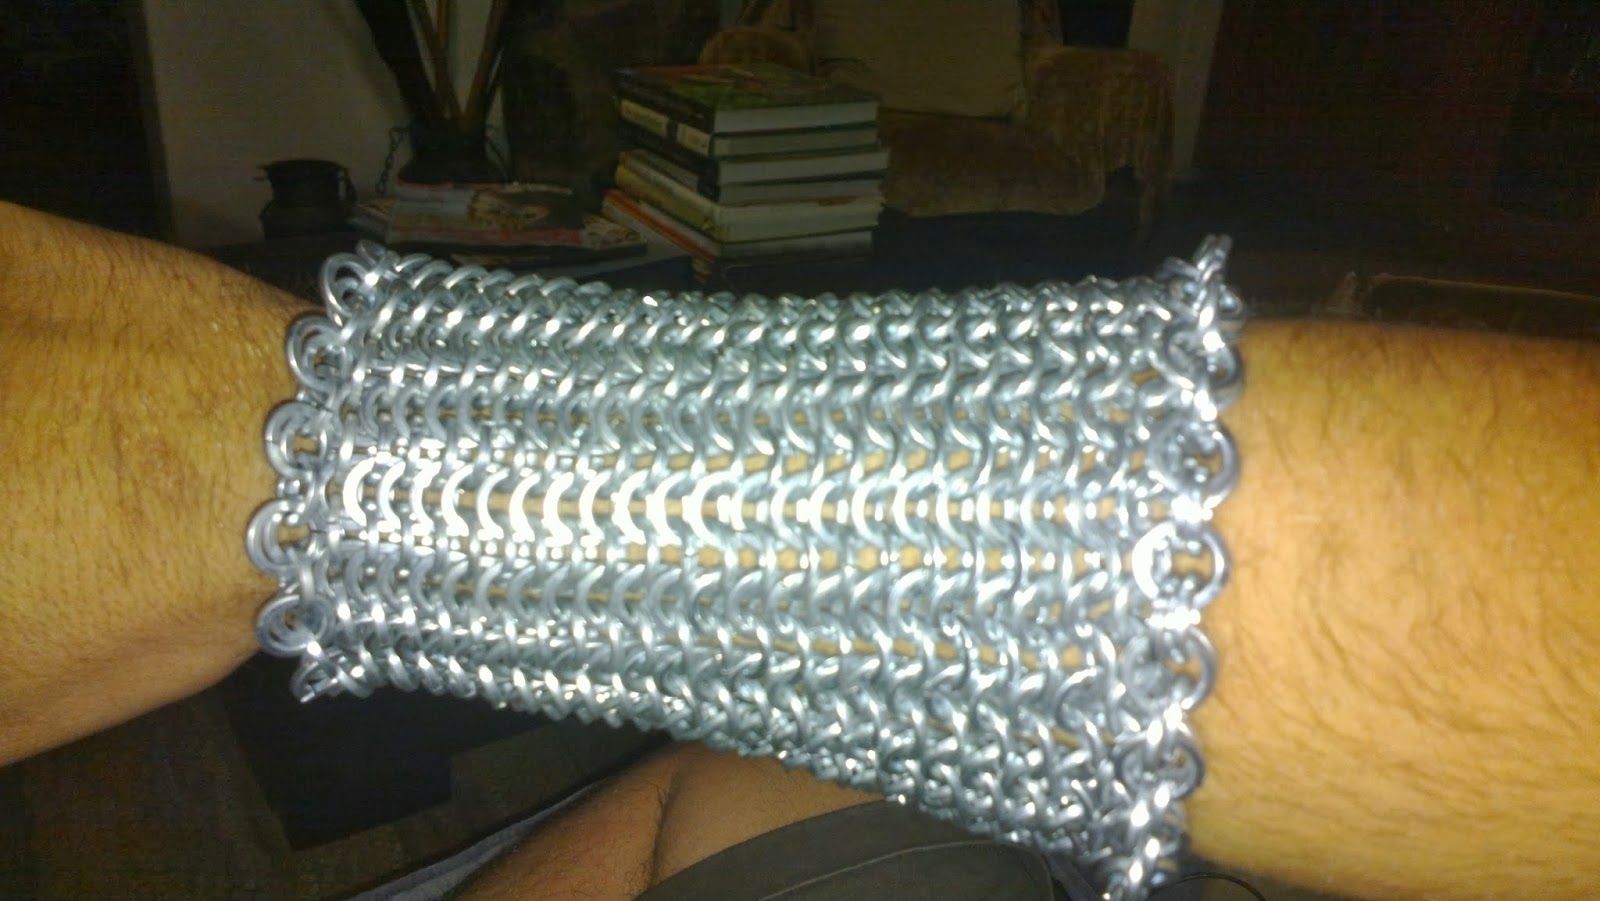
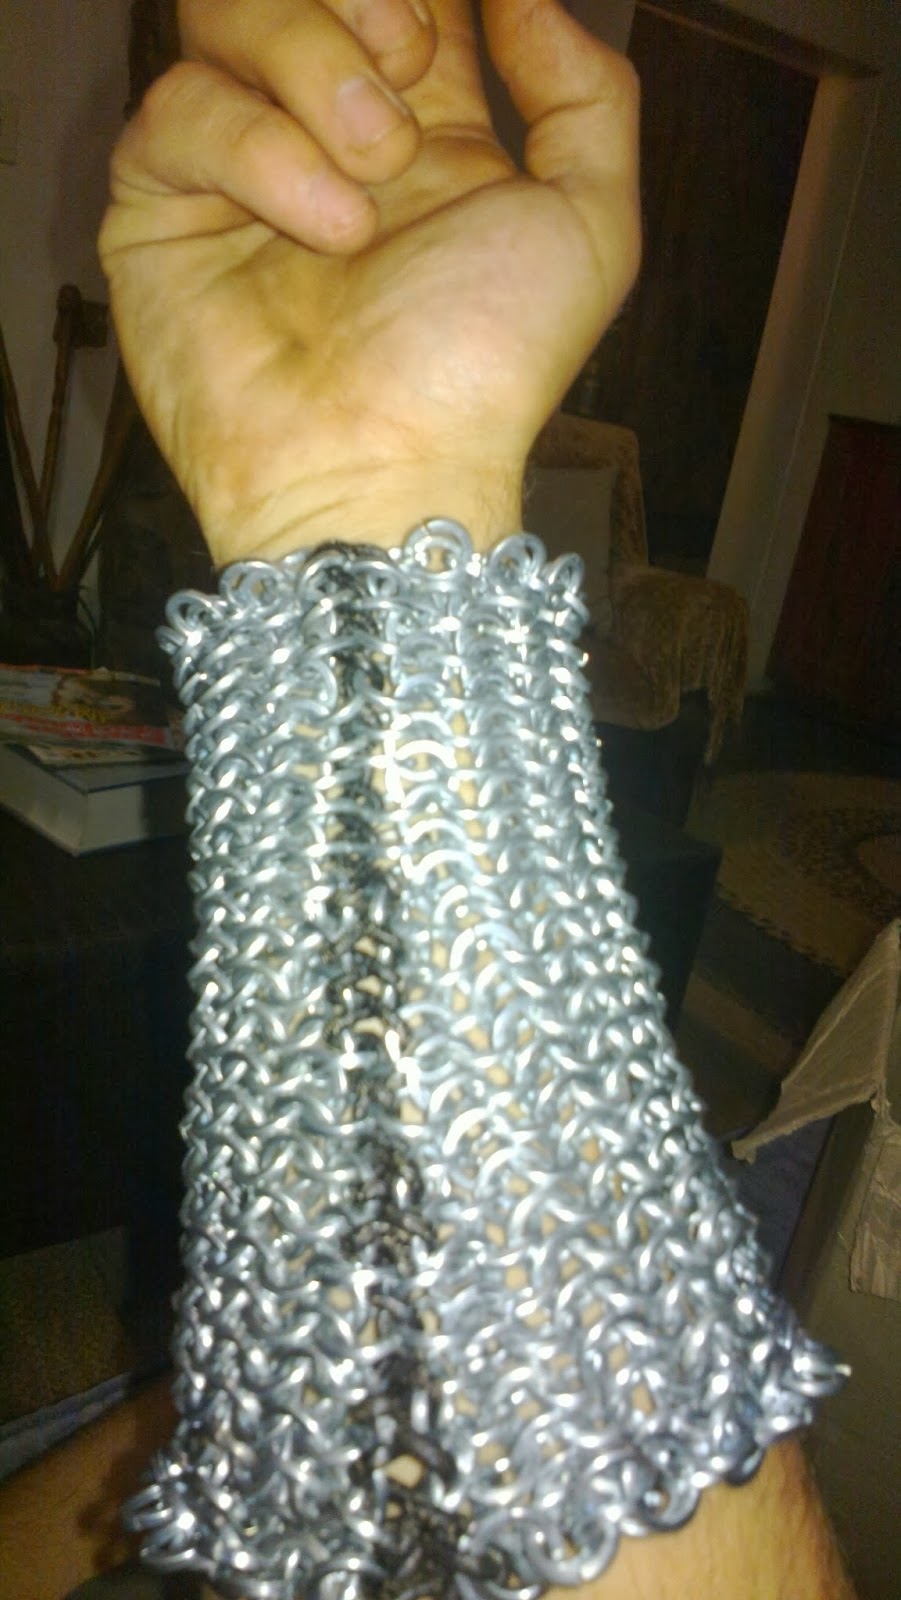
Here is my final outfit, you can see the bracer with its glove on my right hand. It has leather underneath it which prevents it from sliding up and down my arm, and it is fastened with a leather string that is woven into the two loose sides.

-
Yesterday I got to the bottom of my bag of anthracite and apart from the fact I found out all that dust down there makes MASSIVE clinkers pop up really quickly, I found this critter amongst the peas at the bottom.
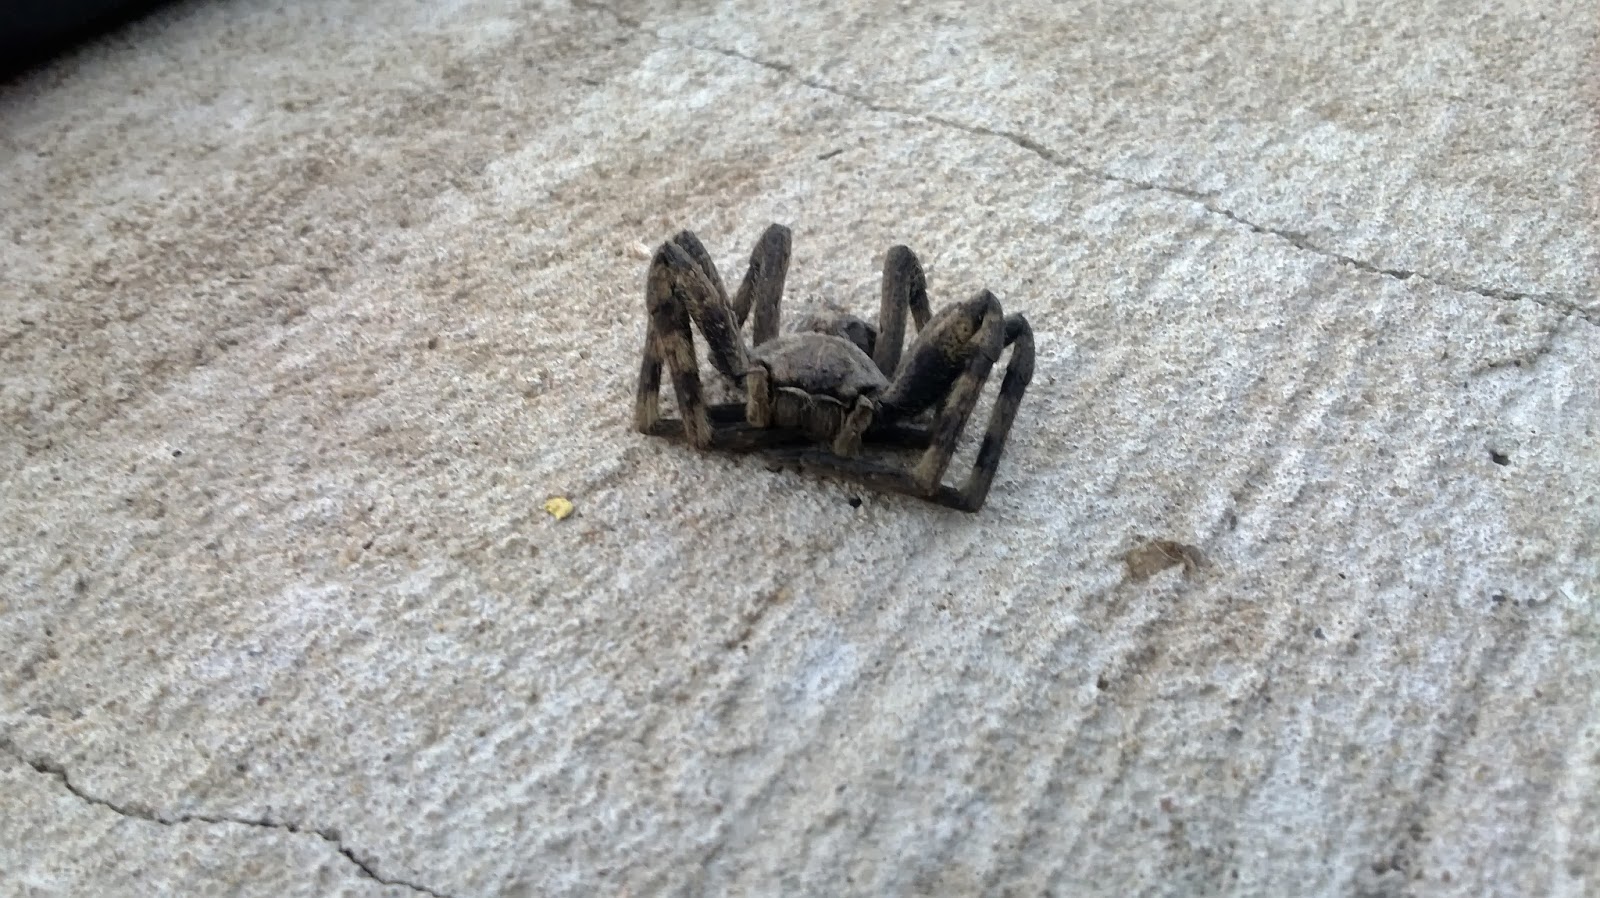
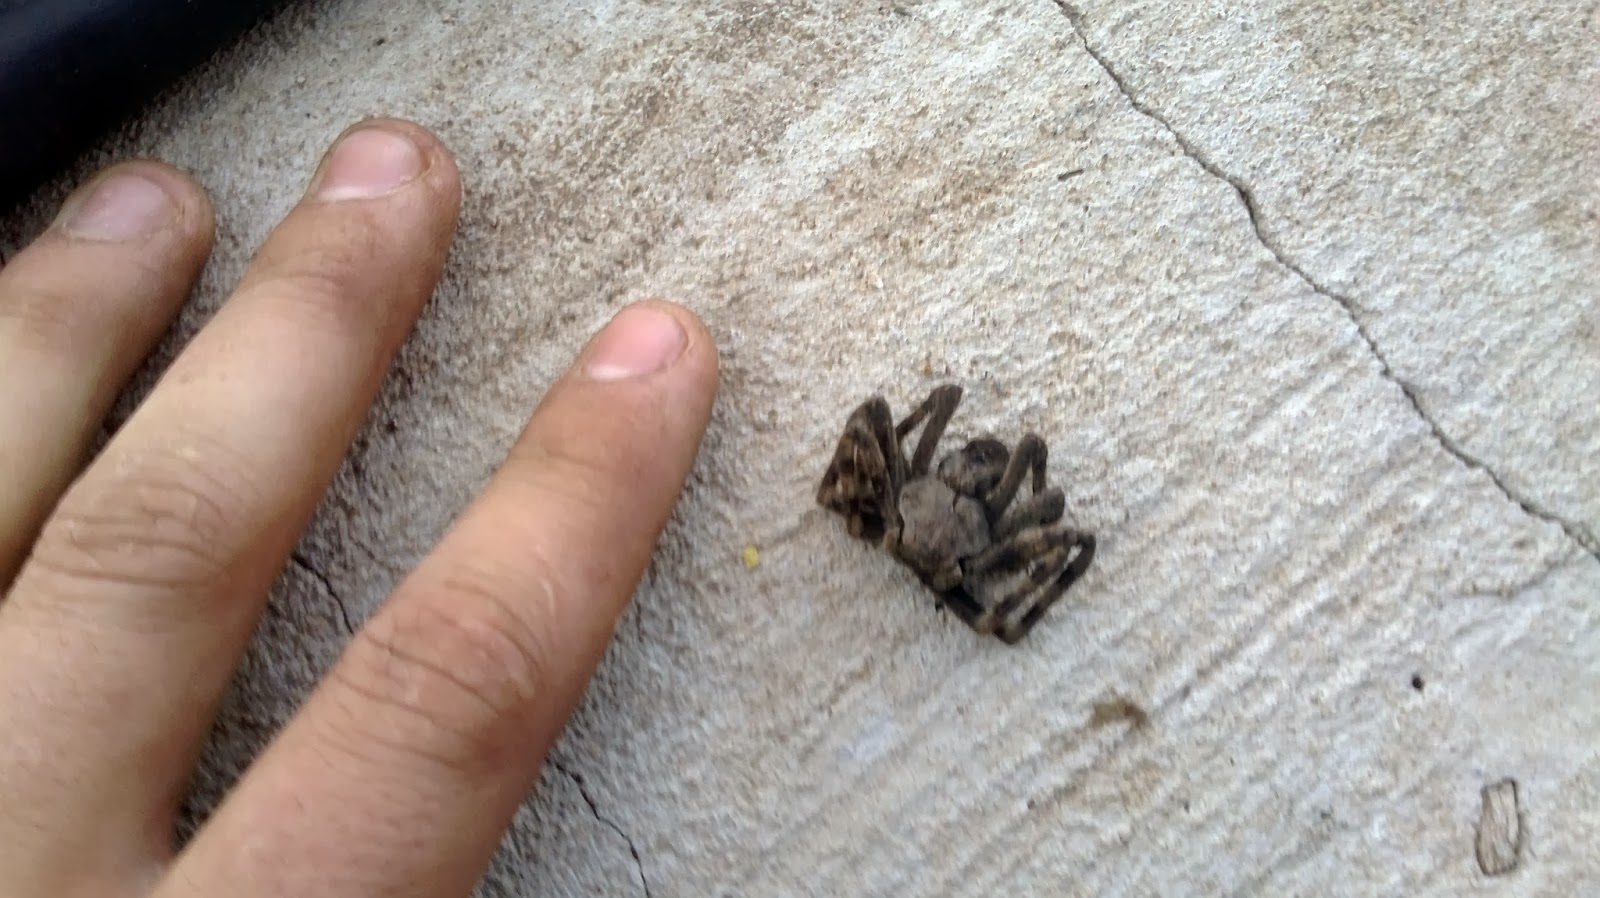
What odd things have you guys found in your bags??
-
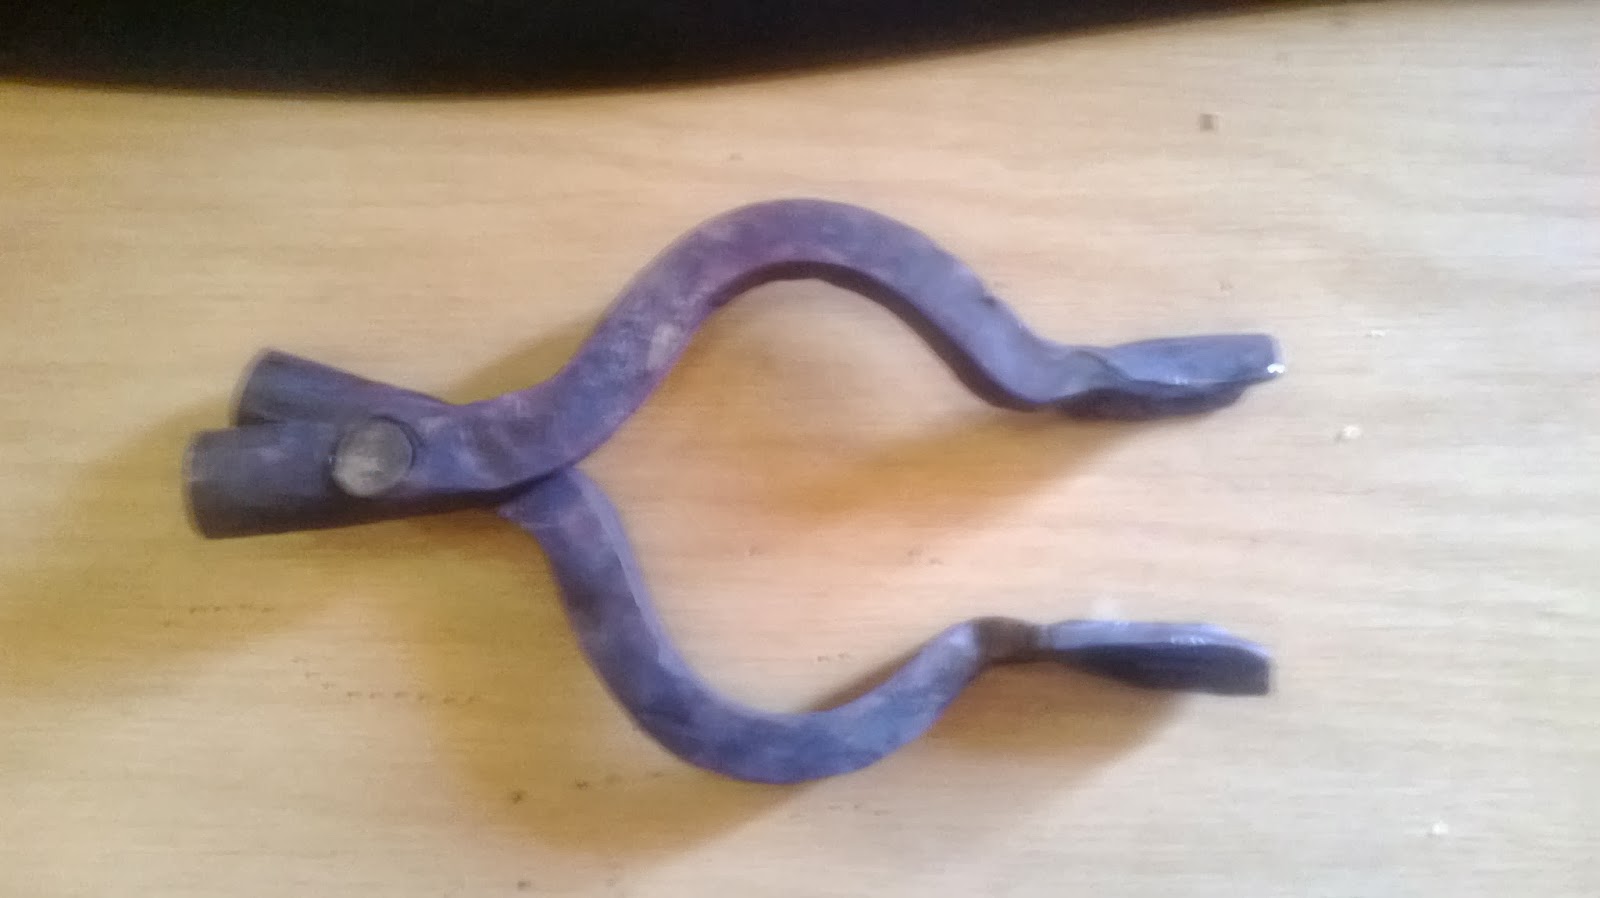
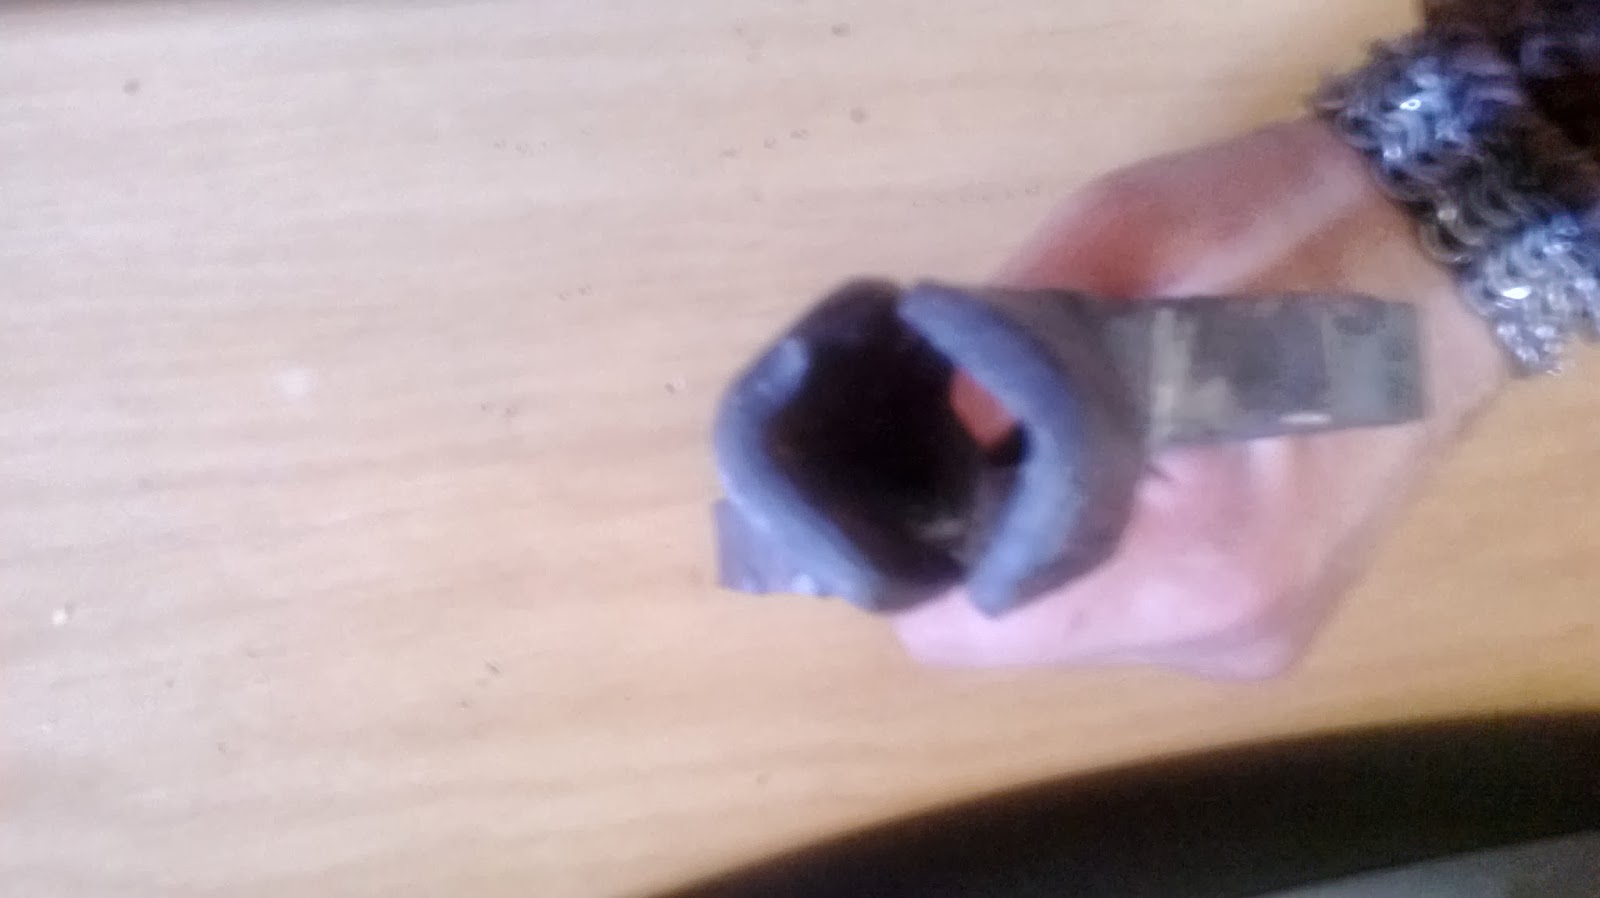
Well guys here are a few other tools I made this weekend. Two of them I have no clue what they are called so I call the first one an anvil ruler, also in the top right corner of the step you can see the pritchel hole I drilled out. My anvil lost its butt before I came across it and thus no hardy or pritchel. I use my vice as my hardy and tried it for the pritchel but the jaws are not level so the stock warps.
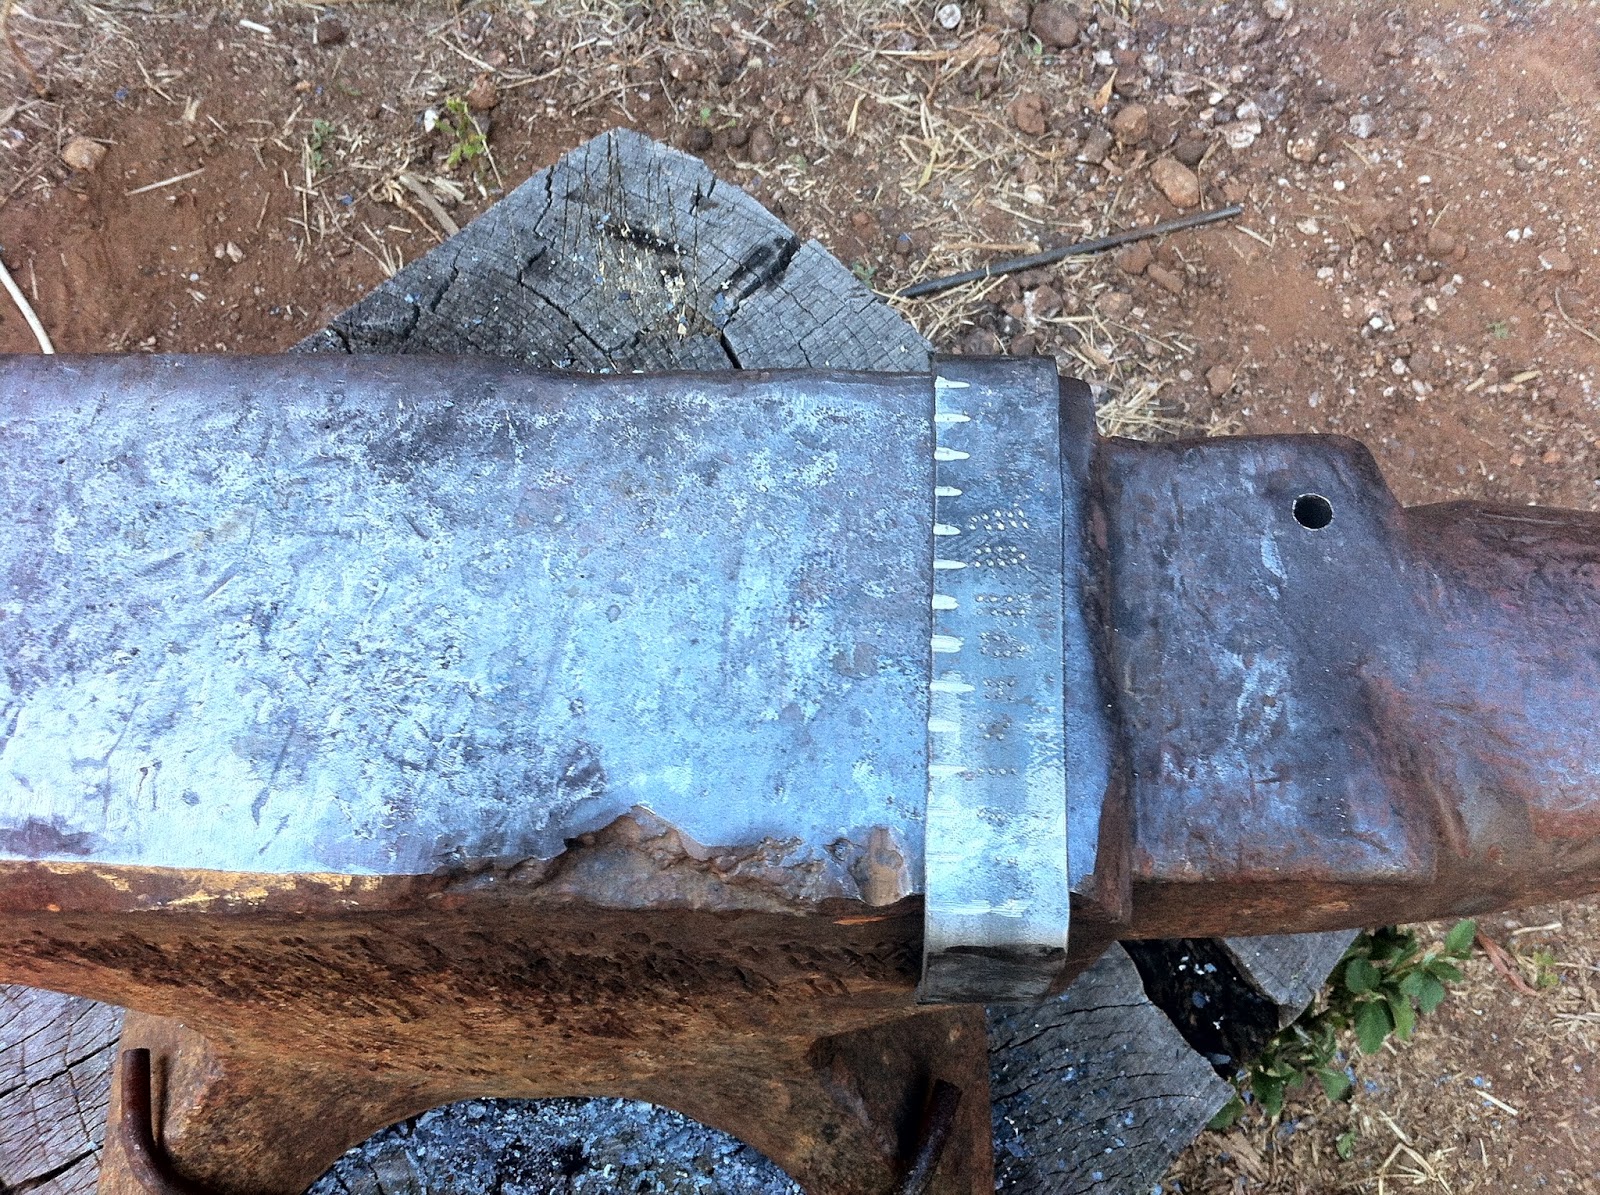
The next tool I call a long stock extension for my forge, its basically a 8mm round bar cut at the top and flattened to a T shape with lips on either side to keep the stock from rolling off and a tapered end to be able to drive it into the ground, It worked great on my Bolt head tong build as the 20mm bar was too long to balance in my forge.
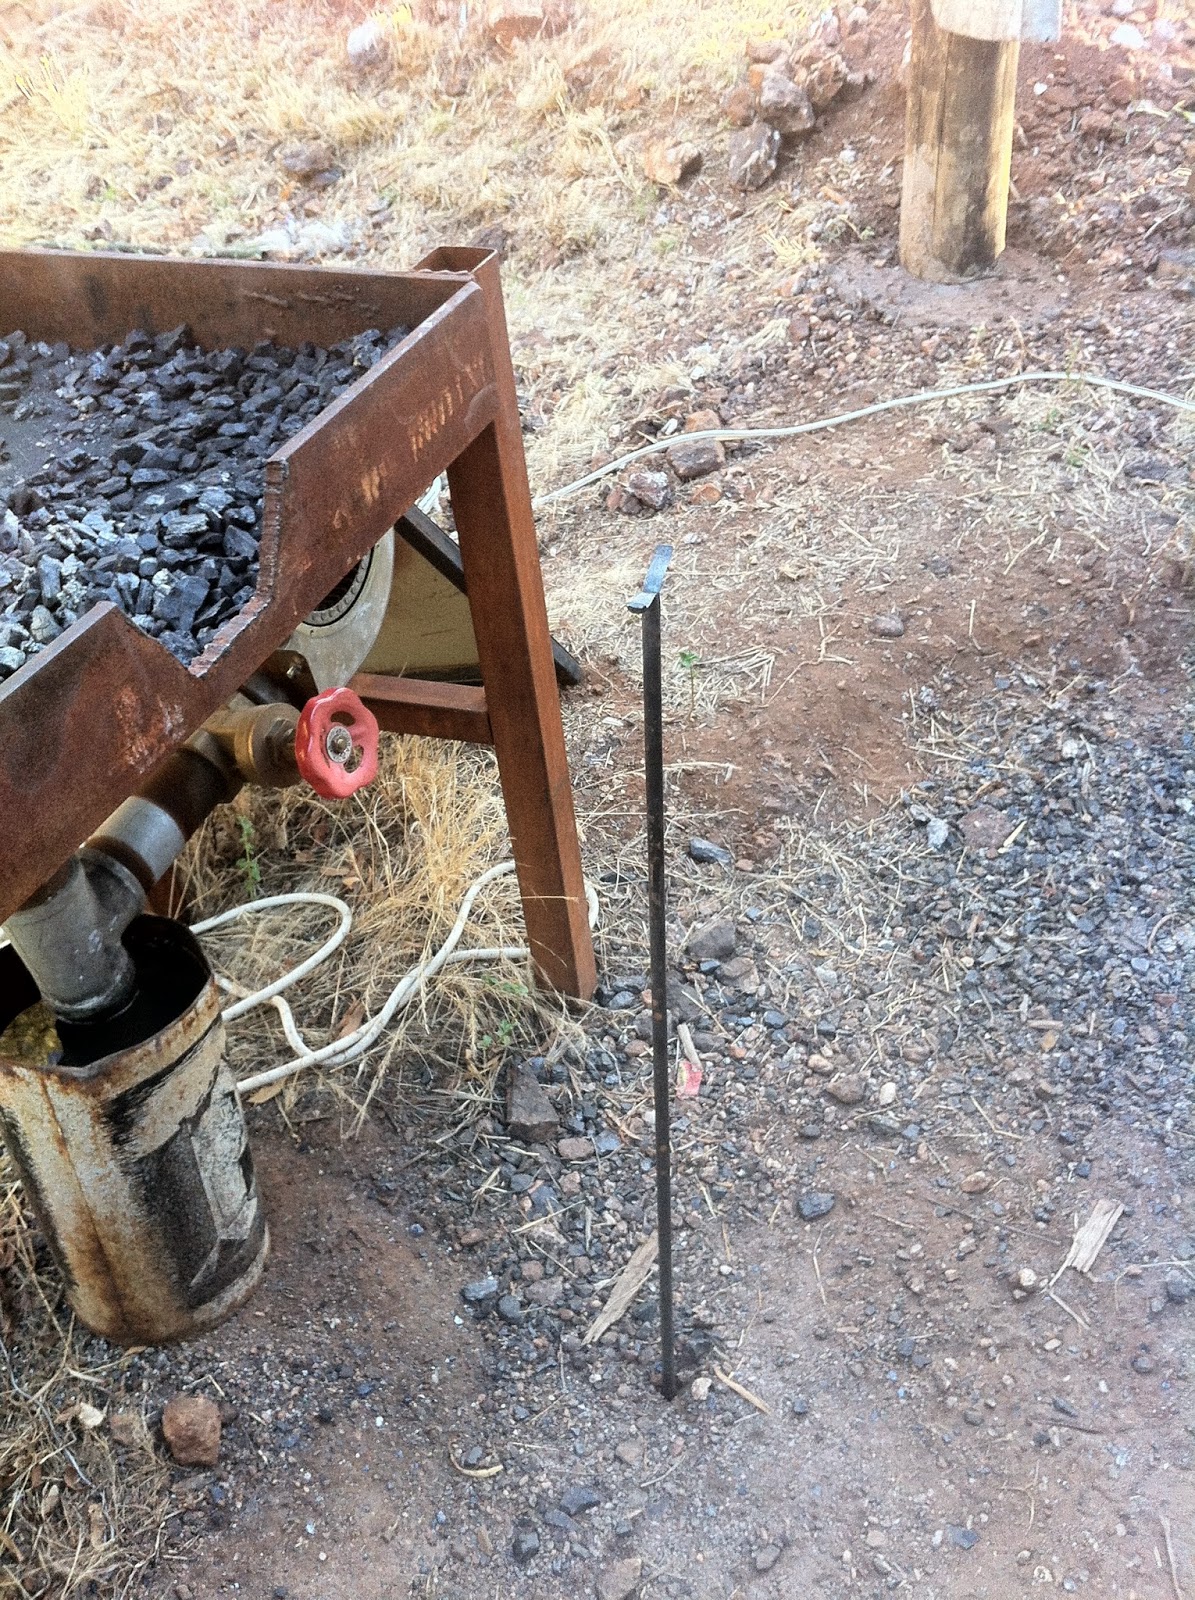
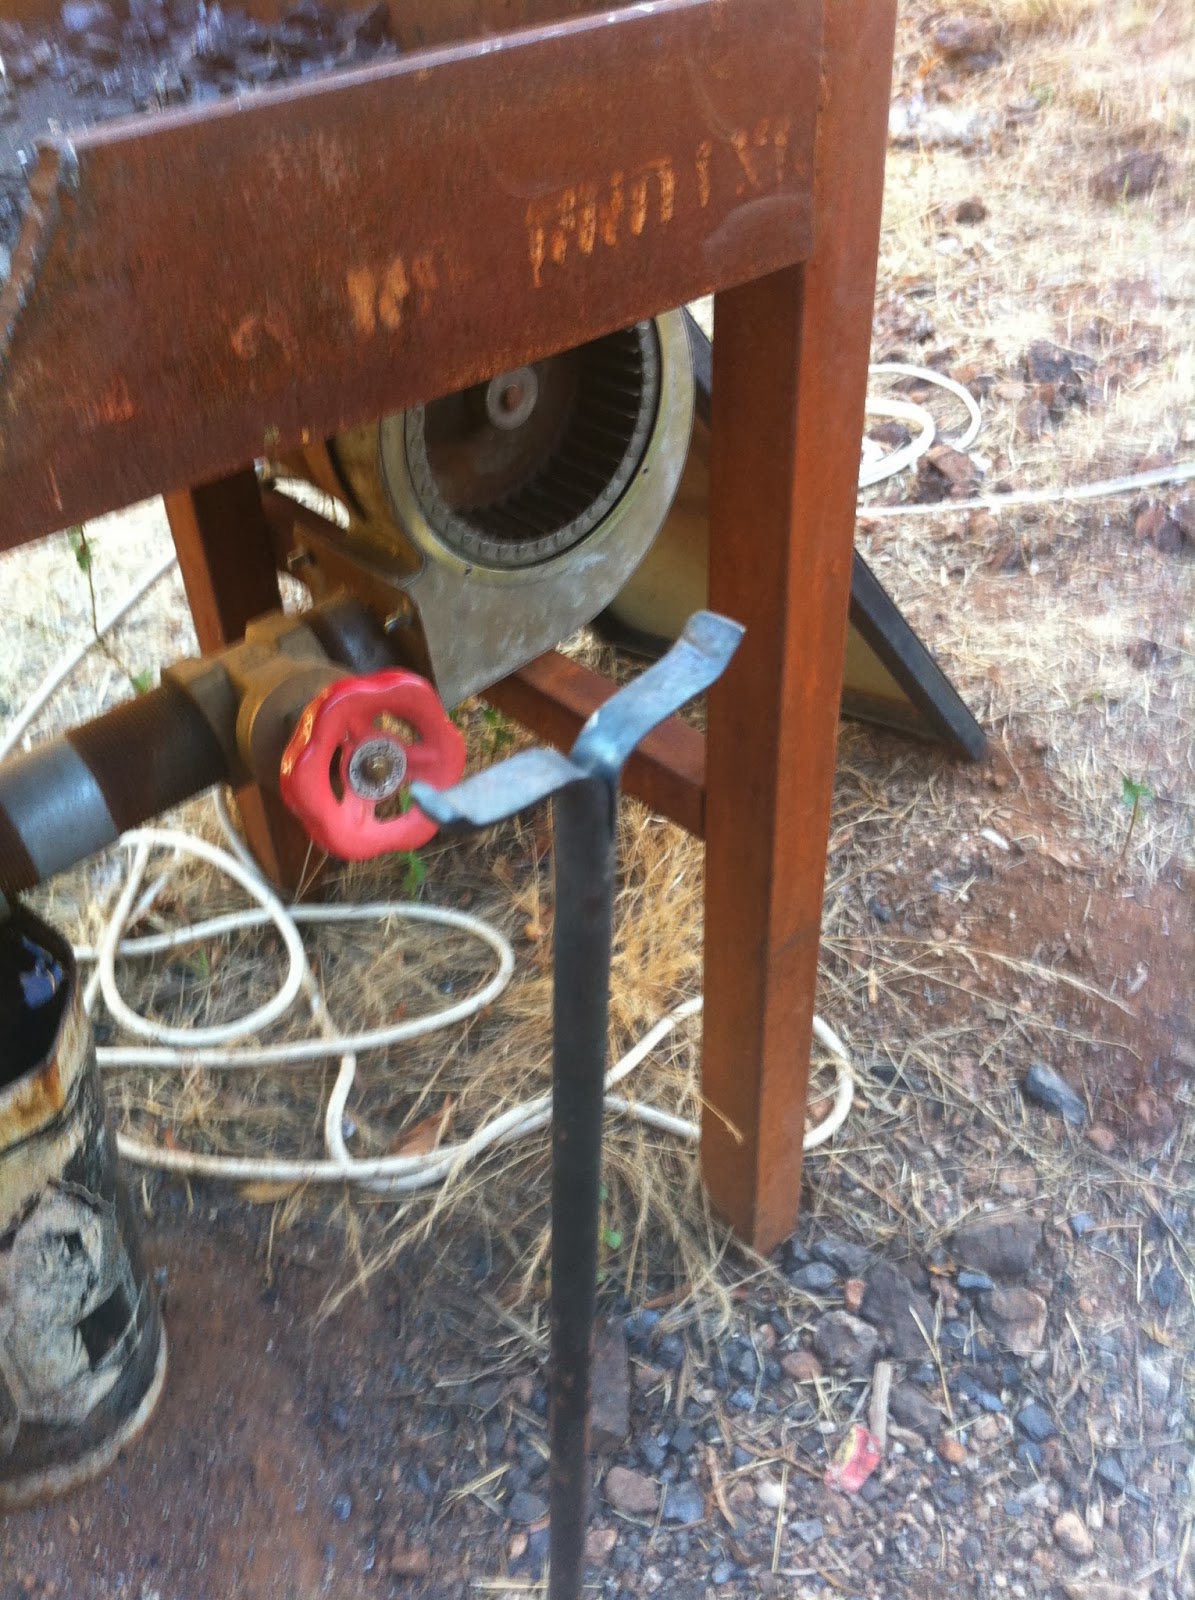
And lastly a very simple (Not a tool) S hook, to be able to hang up my apron at the end of the day.
The poles you see in the pic are the beginnings of my roof! YAY. Seeing as our rainy season is upon us I reckoned it would be a good investment.
What do you guys think? And if anyone could give me the proper names of those first two items I would really appreciate it.
-
Well here is my first attempt at bolt head tongs, it went rather well, As you can see it is still a WIP as I have to draw out the reigns and also weld longer ones on. These originated as 20mm diameter round bar and were a good challenge to reduce to 10mm square bar.
I am ver happy with the symmetry of them seeing as they are my first ones.
I nearly got the jaws perfect this time.
Compared to the first pair of tongs I ever made Id say these are a vast improvement.

What do you think?
-
These are spring washers bought from a hardware store and are definitely spring steel and not Alu, it weighs 2.2 lb. I made a shirt from the same material which weighs in at 14 kg which ill create a new post on later on today as well as the coif I made also from the same material which is 4 kg.
-
Well I used Galvanized spring steel and I have lined it with a piece of leather. It goes together with a leather glove I made a while back. Ill fiddle with it a bit and post a pic of the finished piece. What do you mean by closure?
-
I did do the fold and weld method yes, I used beach sand as flux which is actually quite nice to use. The eyes I used the only available punch at the time which was very small and not suited to the job. I am in the process of making a punch specifically for the task of making eyes. Base is not hollow but as you can see I have left more than enough to play with. I will probably end up putting this back in the forge and making the base hollow as you suggest so as to affix it much like an arrohead/spearhead. Or I am also considering using the burn in tang method. Which would you recommend? Thanks for all the comments guys.
-
Well guys I got some time in this morning at the forge. Here is the fruit of my labours, my first ever Rams Head cane topper. This little beauty took me about 2 hours to make seeing as it was my first and I was being very cautious so as not to burn the horns off and make it a unicorn. It was also my first time ever twisting any metal it didn't come out so well but Iv learnt a lot about it in just this one session.
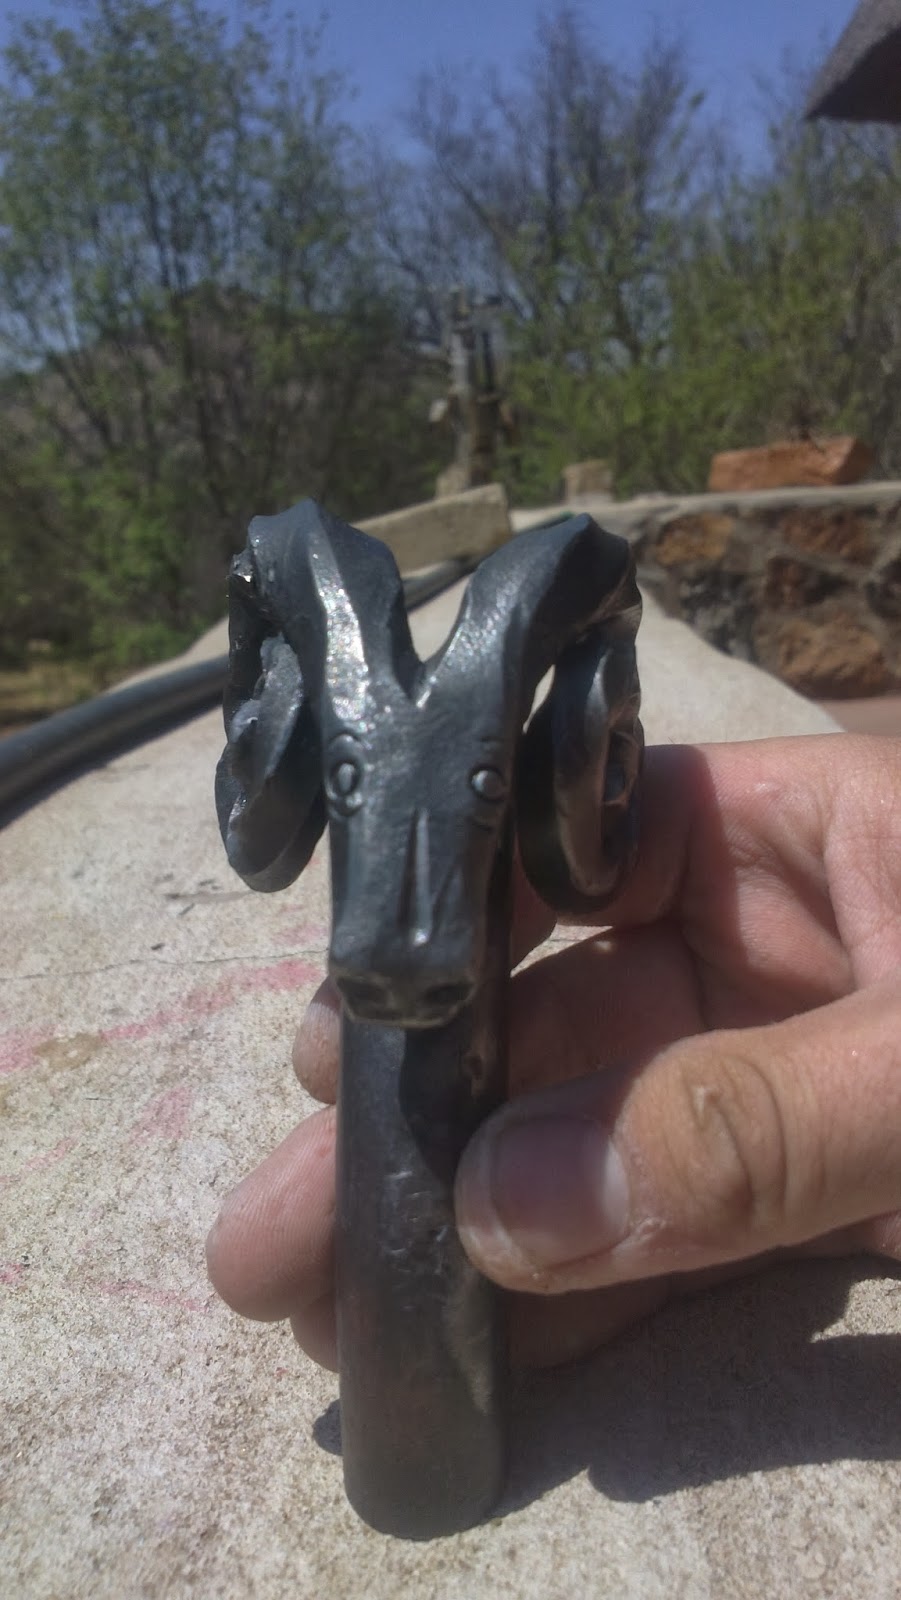
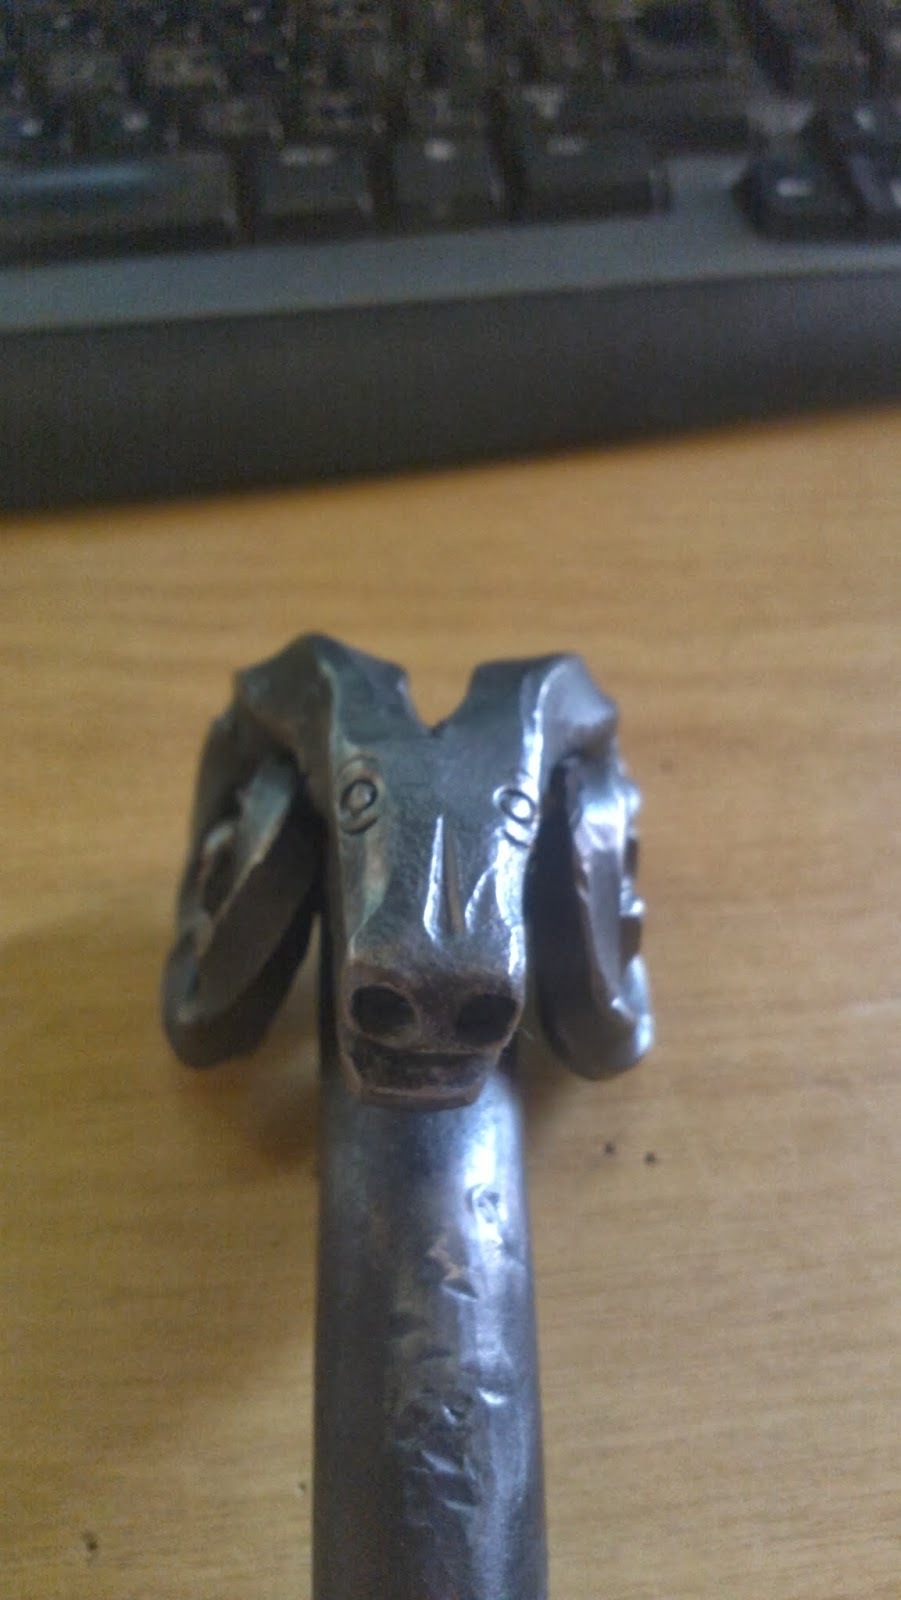
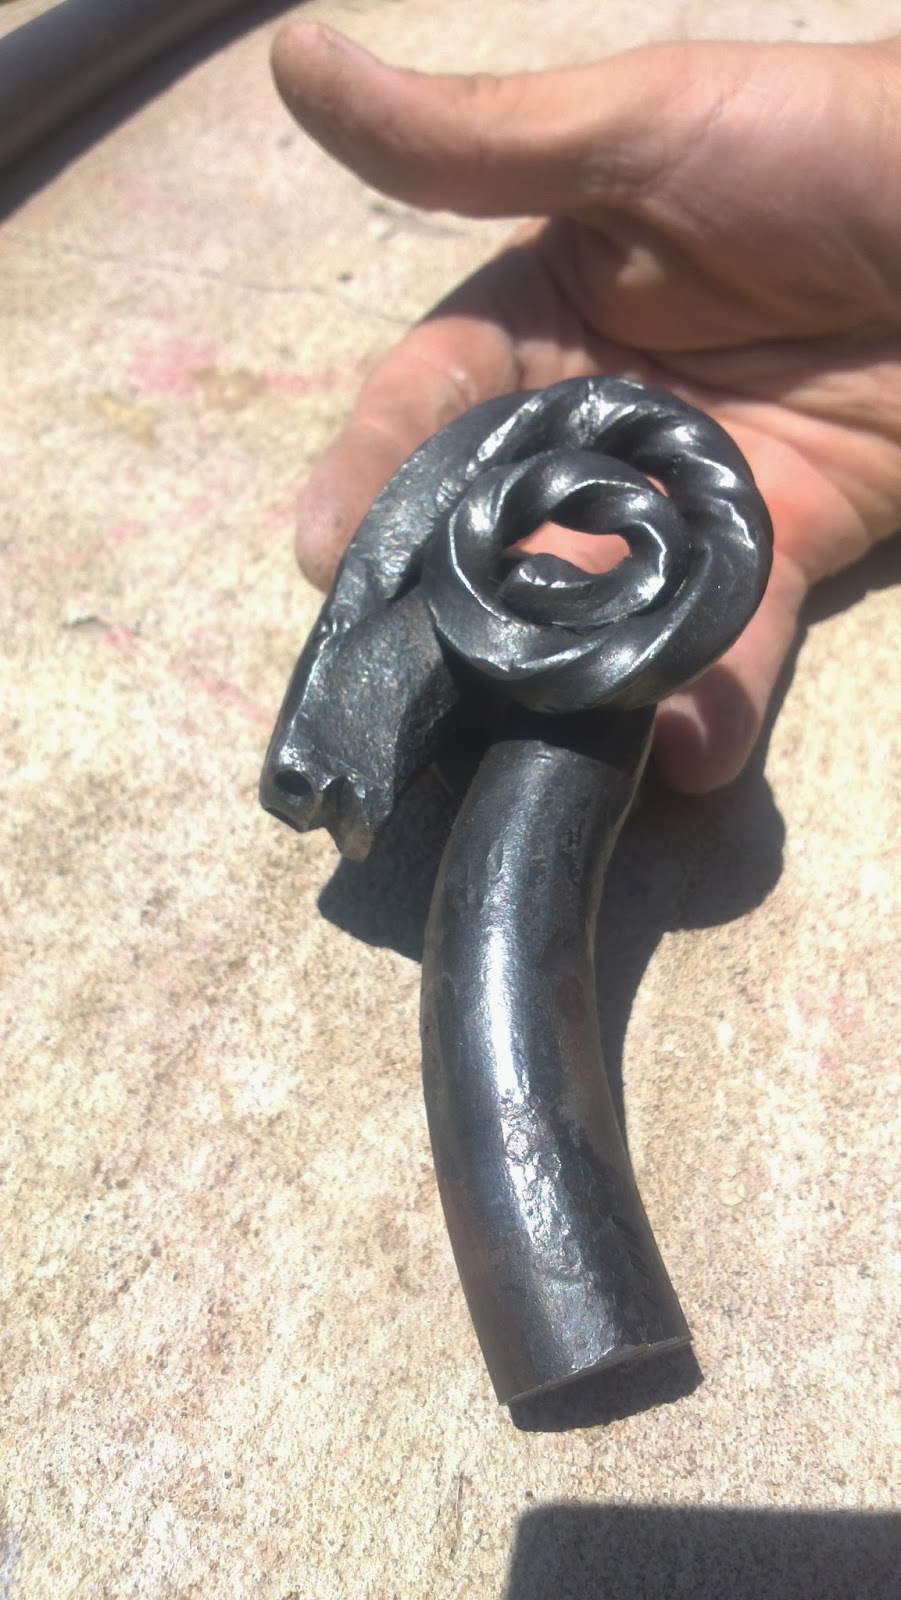
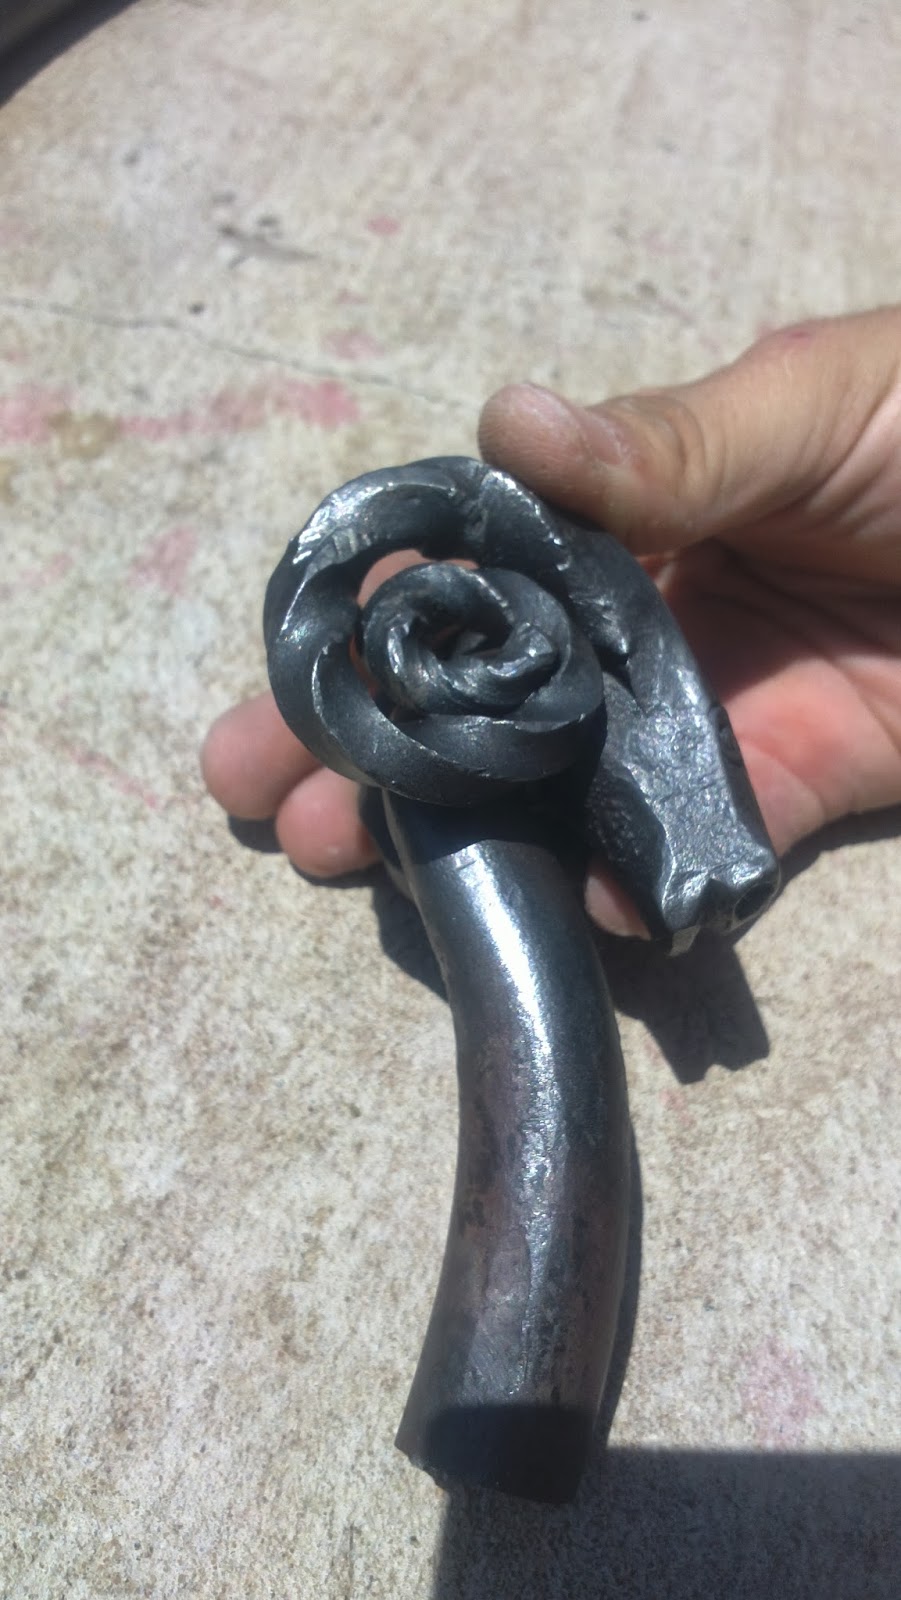
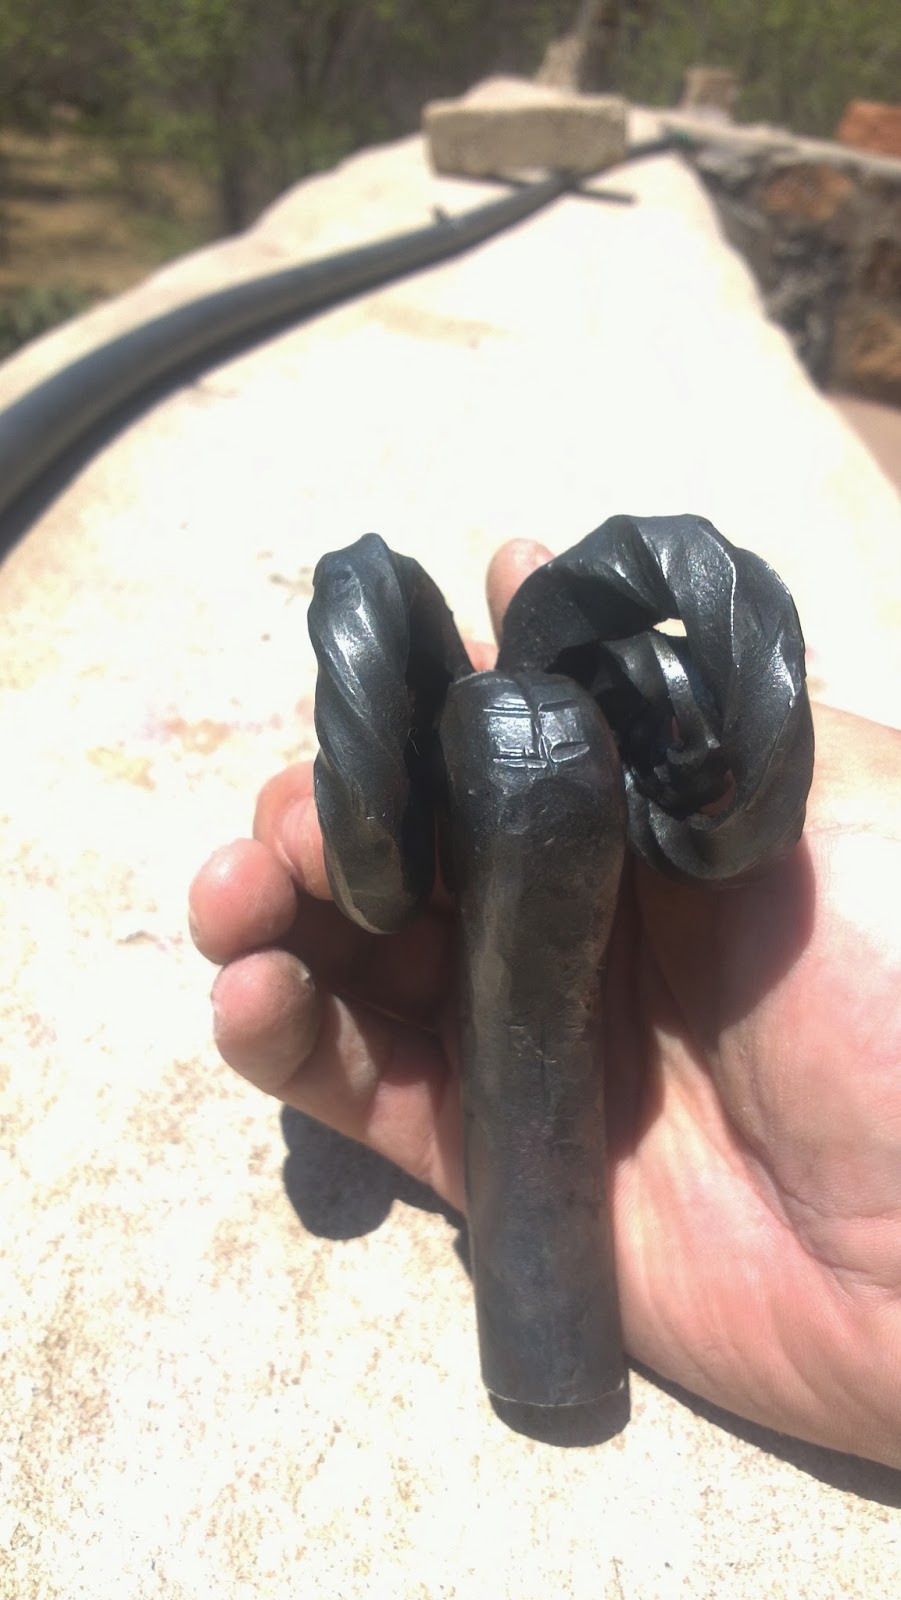
What do you guys think of my first attempt? Comments welcome. -
Heys guys last update on my Knife WIP.
Quenchant - Raw linseed oil
Handle - Wrapped leather
Sheath - Wrapped leather and spring washers
Let it do the three one hour soak sessions in the oven at 250 Deg Cel with a normalising cool between each soak to temper it.
It is amazingly sharp for my first knife and glides through tomatoes, wood and paper.
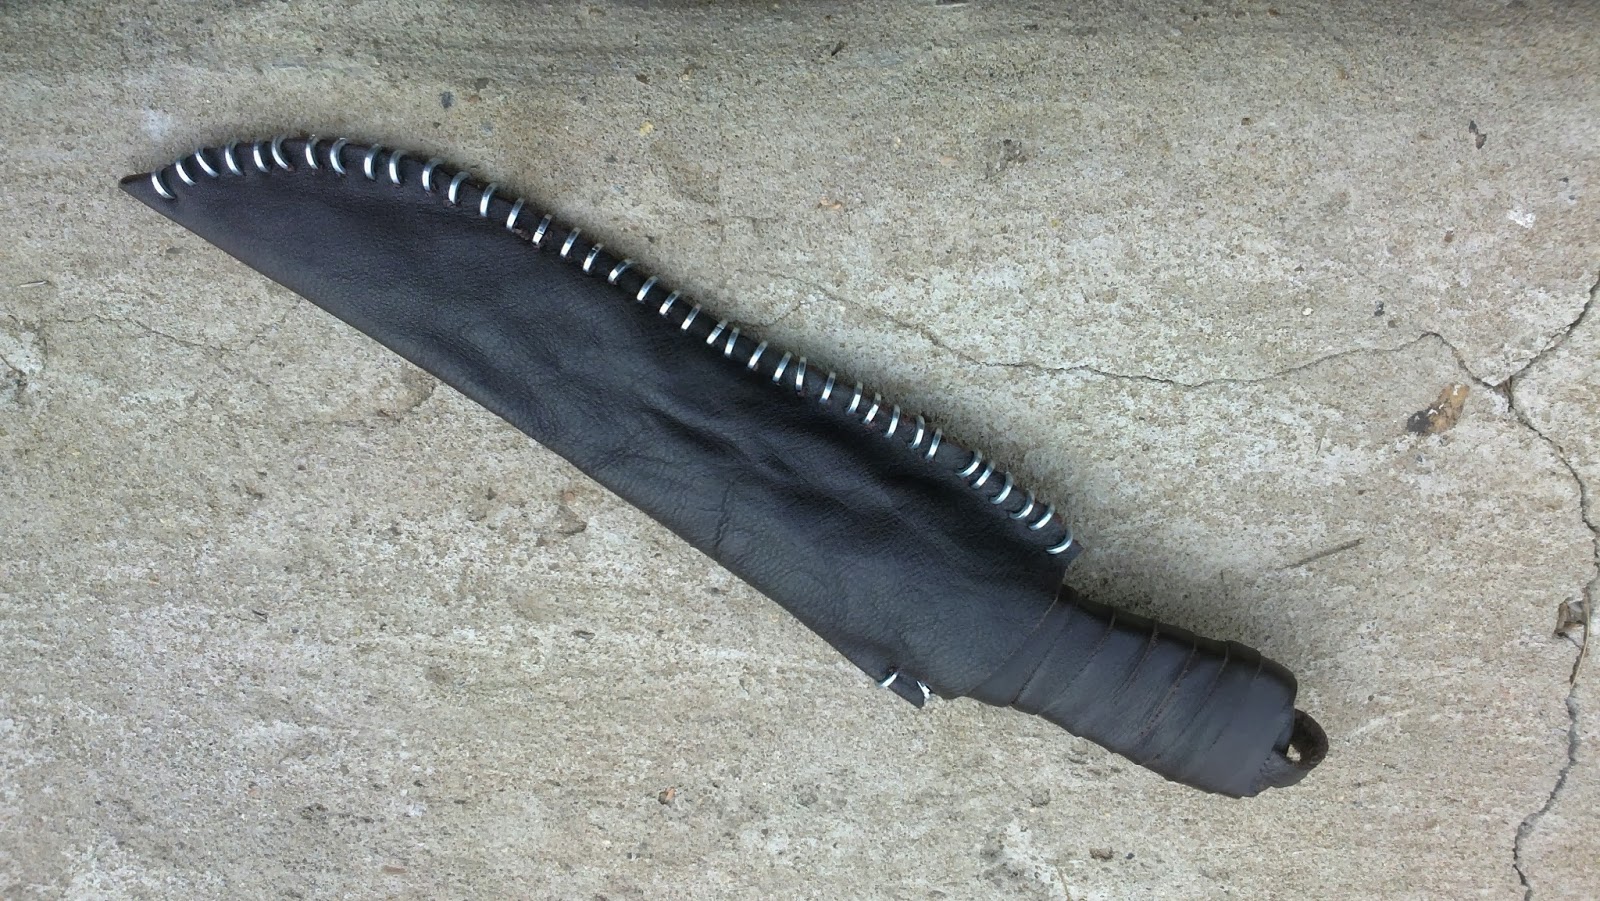
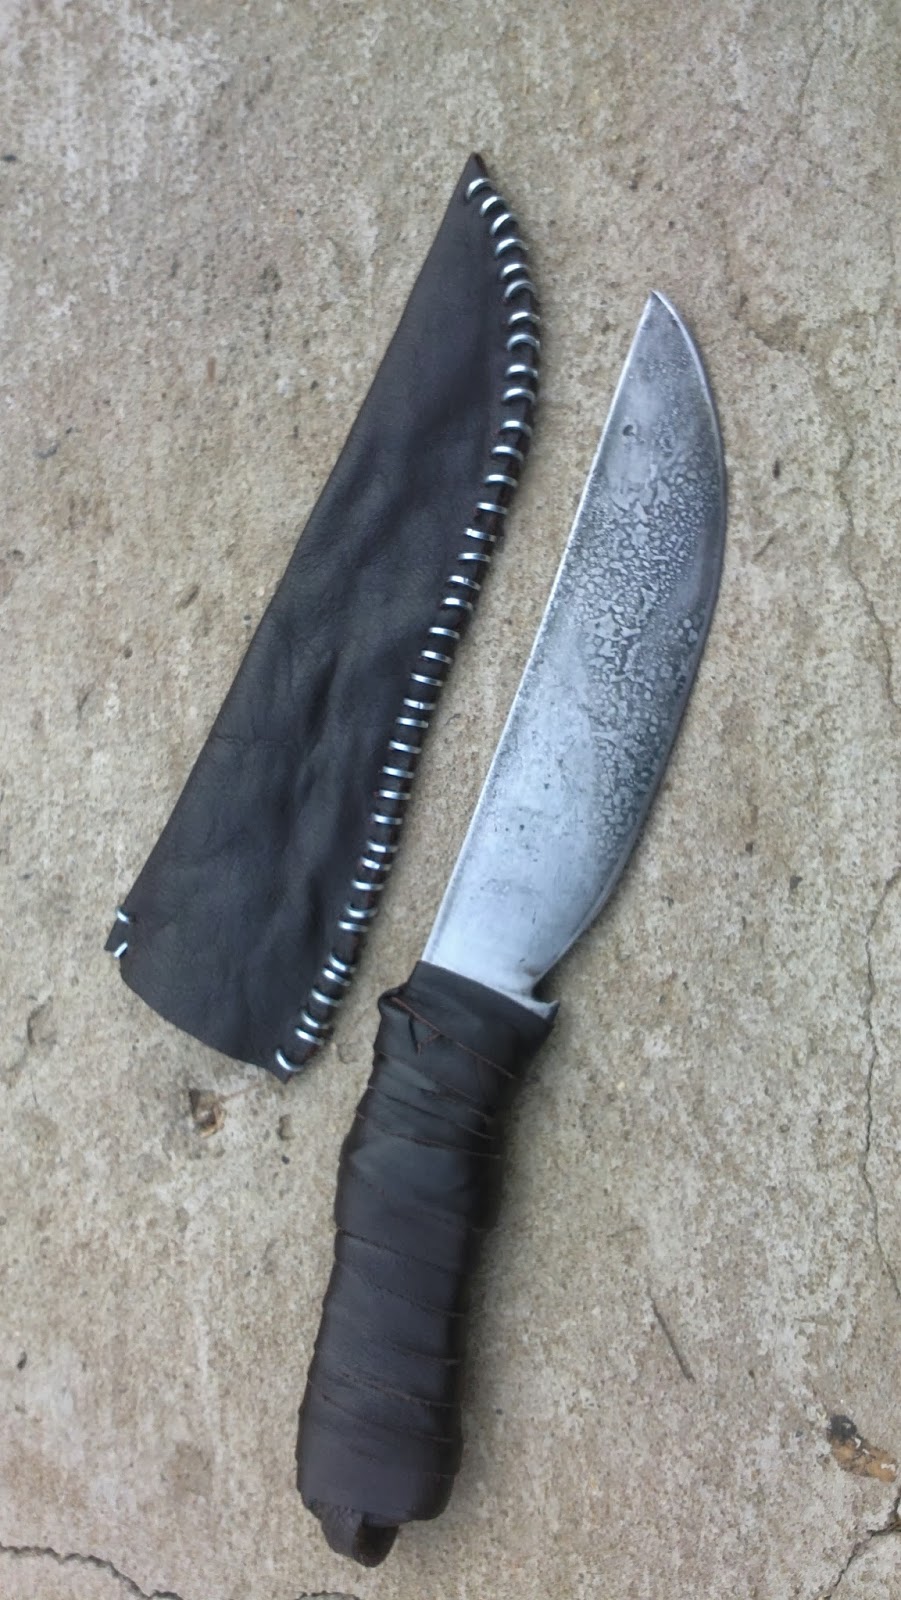

What do you think guys?
-
What type of clay should I use for this?
-
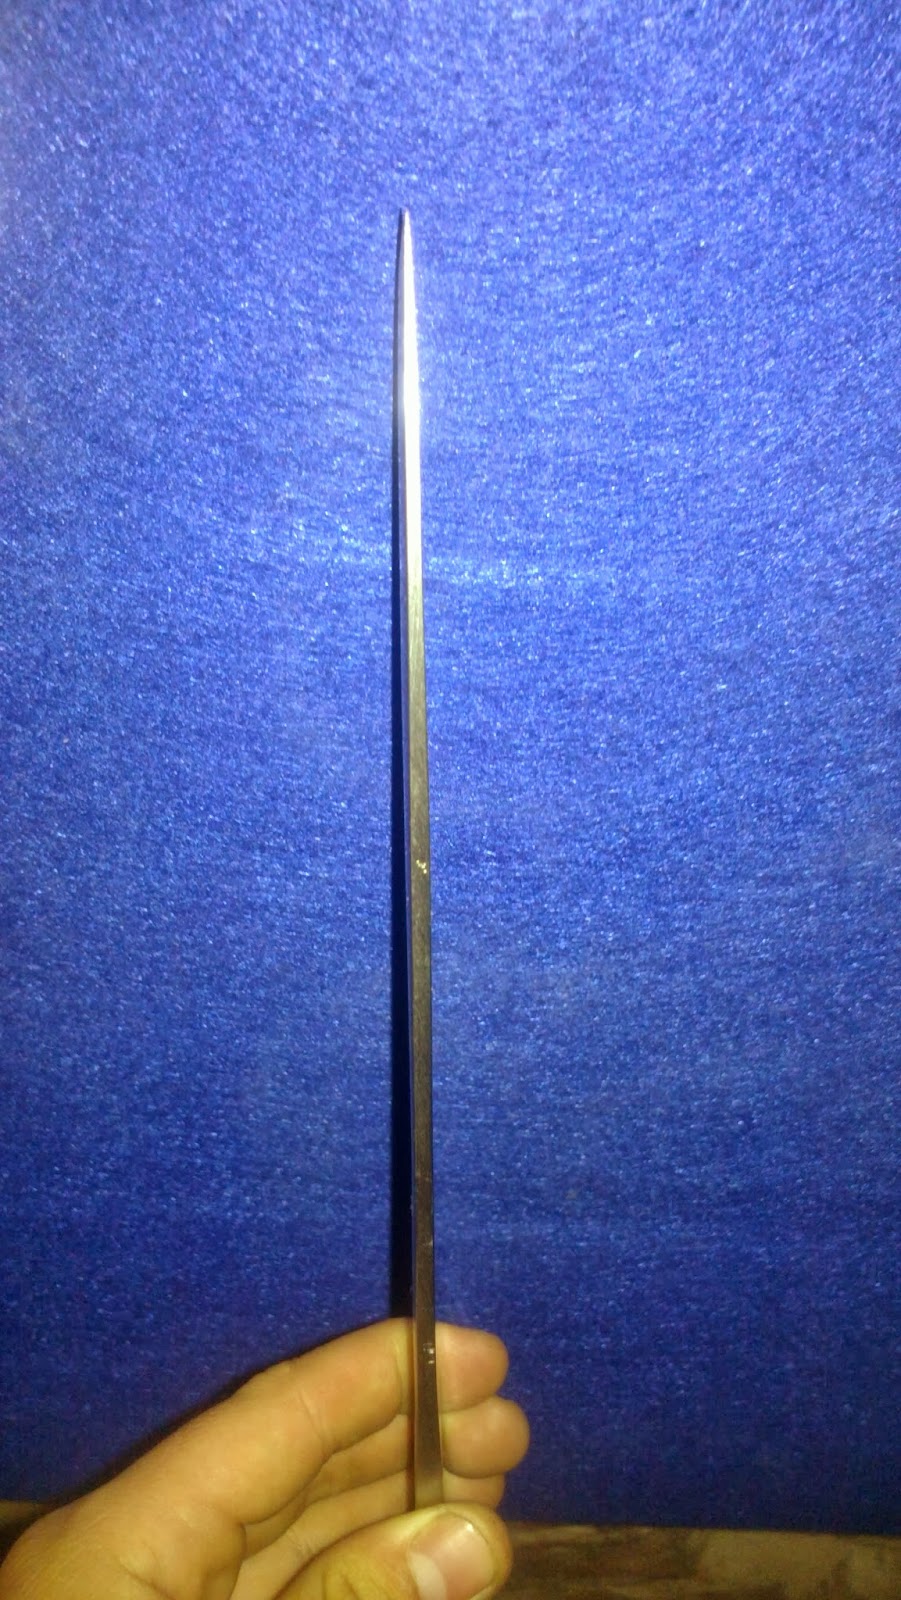
What do you guys think? The spike aspect is something I made up myself, I haven't seen it around elsewhere. If any of you have please post some examples?
-
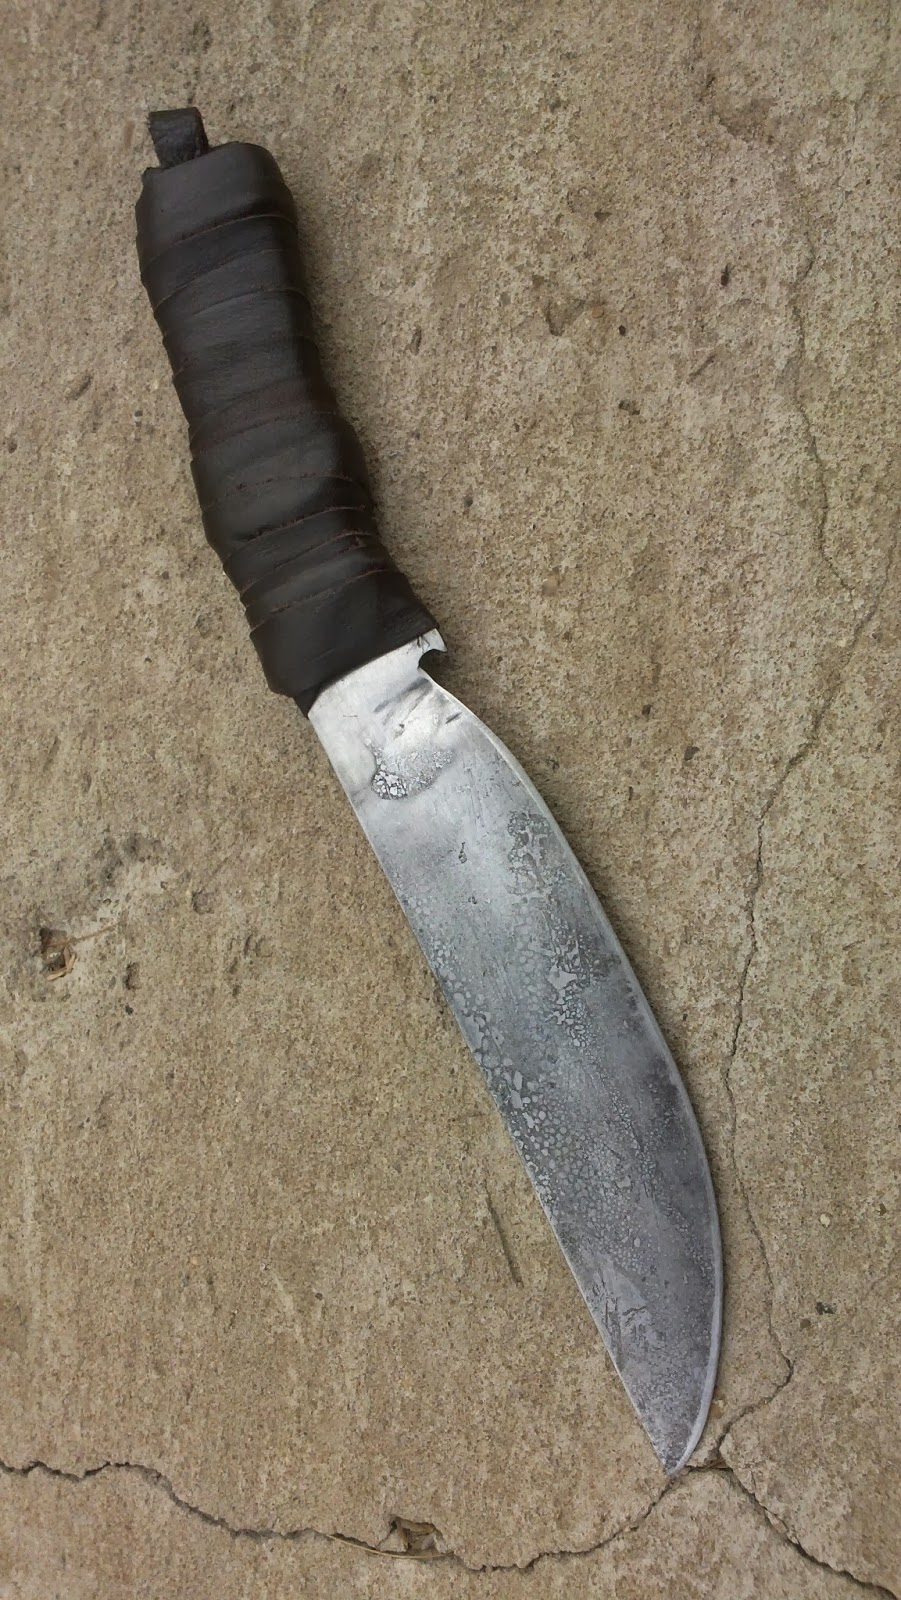
Here is an update, I just wanted to show the spine off.
-
Well look at my new acquisition from the weekend, It fairly jumped into my hands and for R400 bucks it was a good steal. It was a part of a whole set of stuff that the bloke had from a deceased smith (rest his soul) and was just what I was looking for to start my portable outfit. All I need to do now is find another washingmachine motor for my other blower and ill be set!
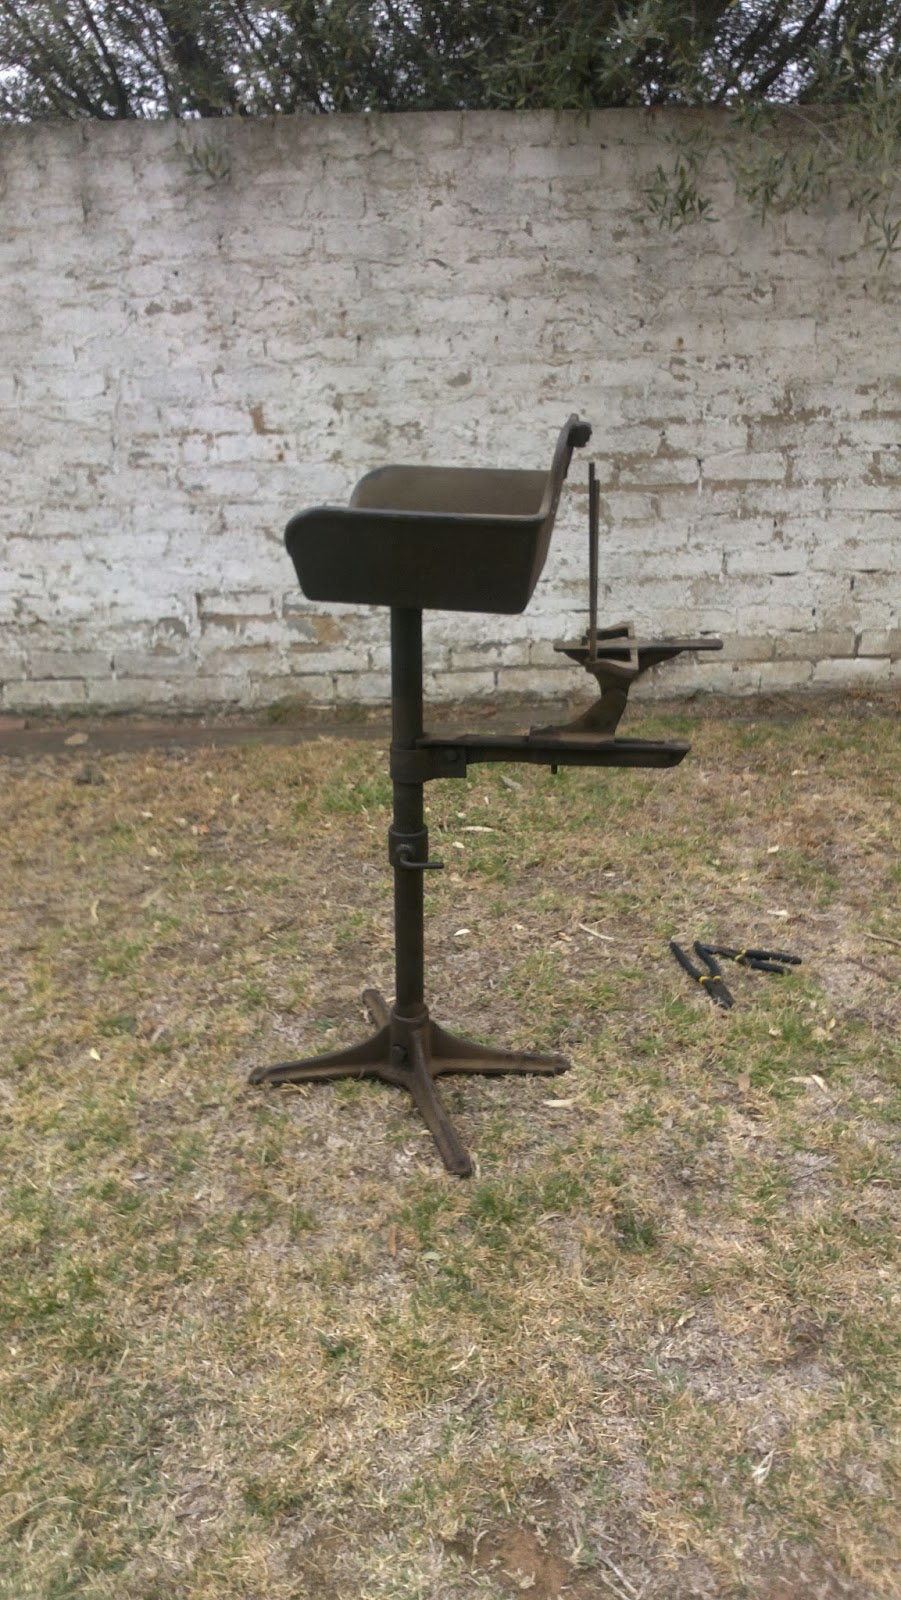
This thing weighs in at 30kg so its quite light compared to my 60kg brute I use normaly.
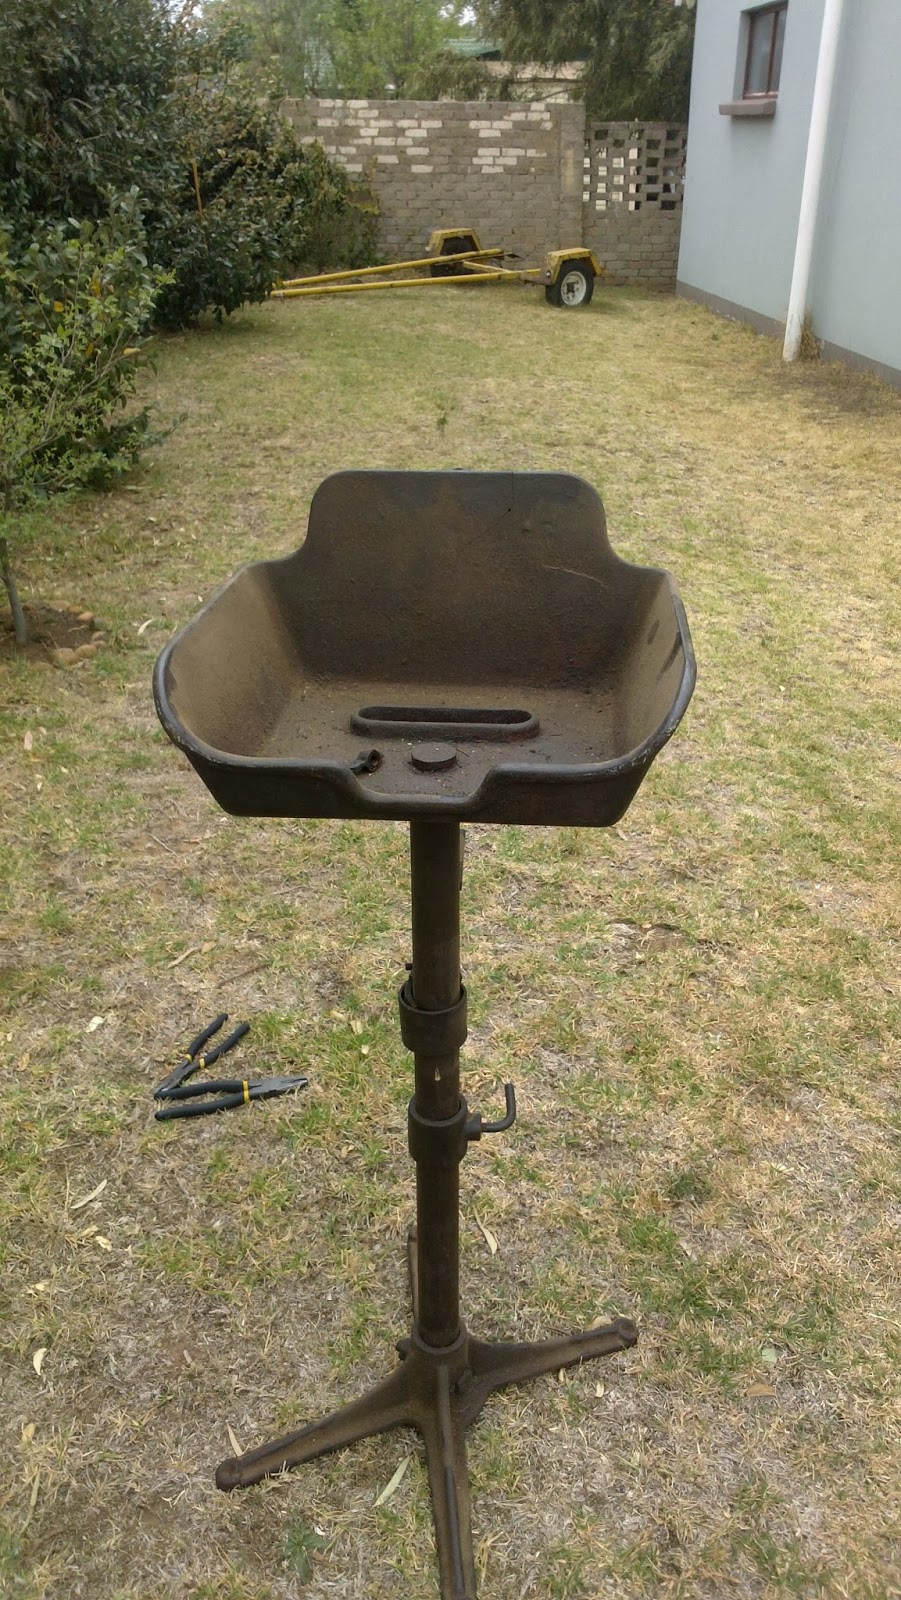
Here you can see the brand on the forge bowl is millenium.
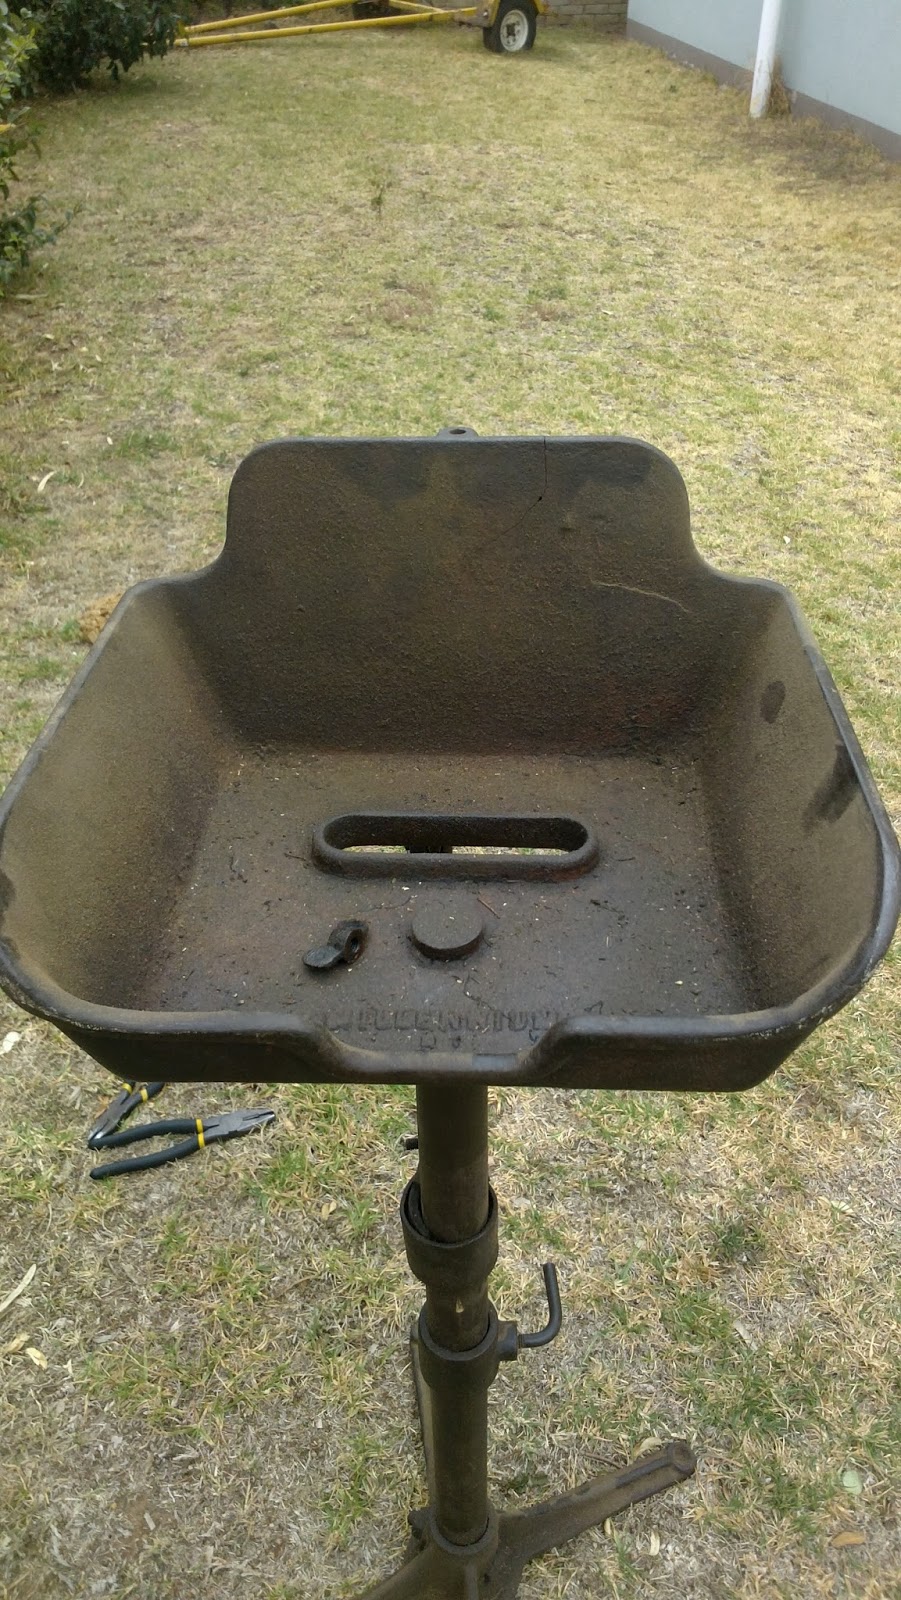
This is where the blower will be mounted and the nice part about it is its adjustable so I can make anything fit in there.
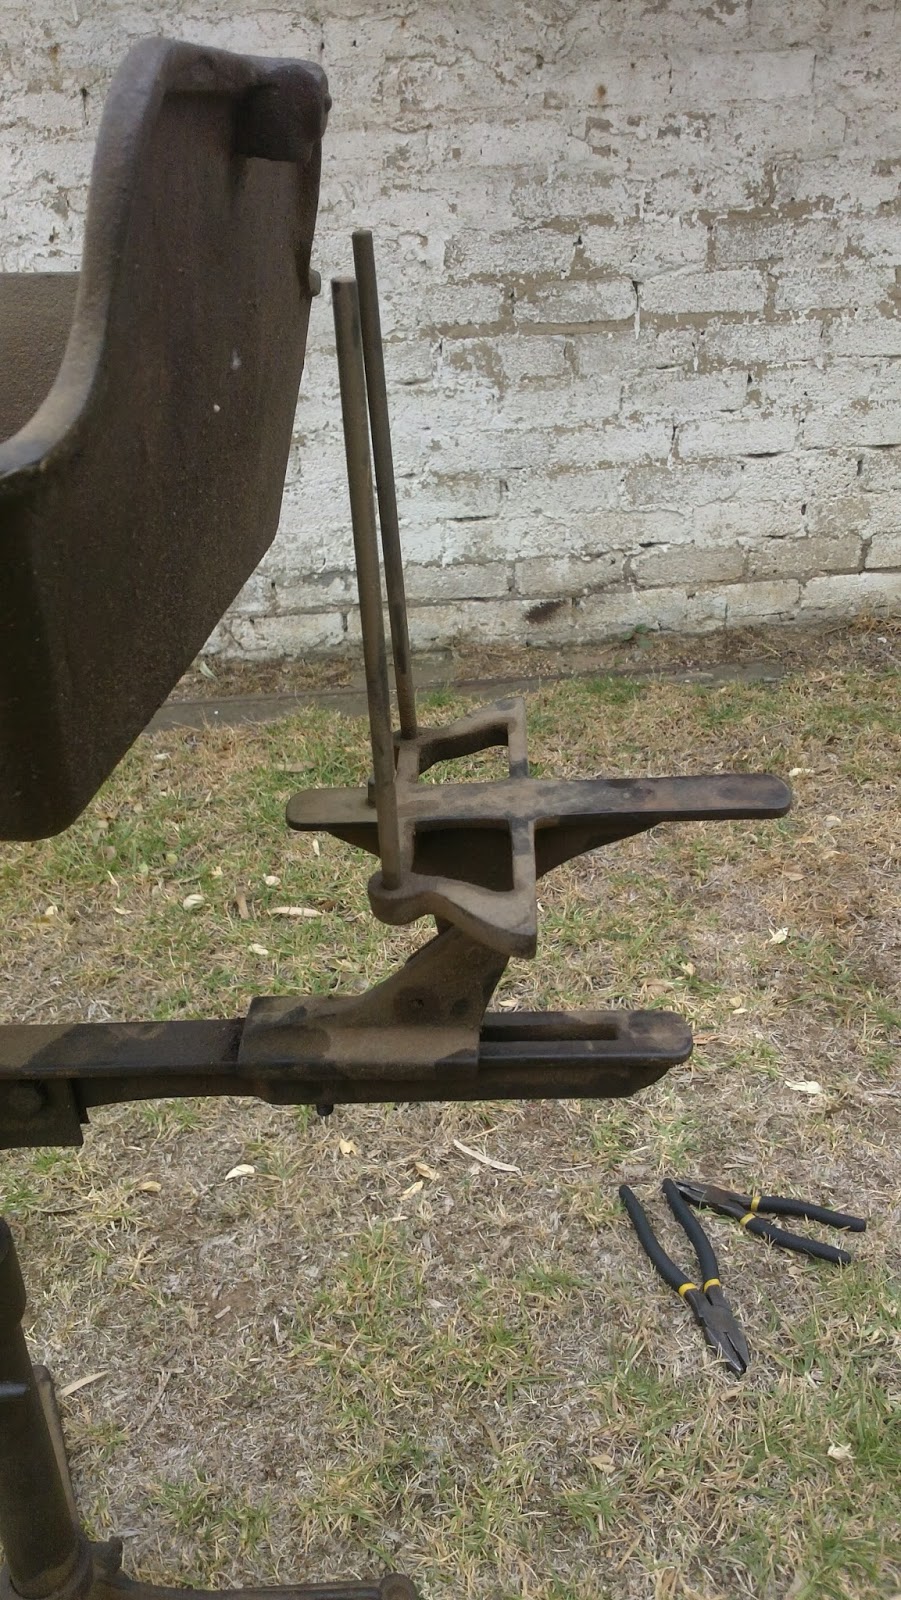
I had to dismantle the poor guy to get it home.
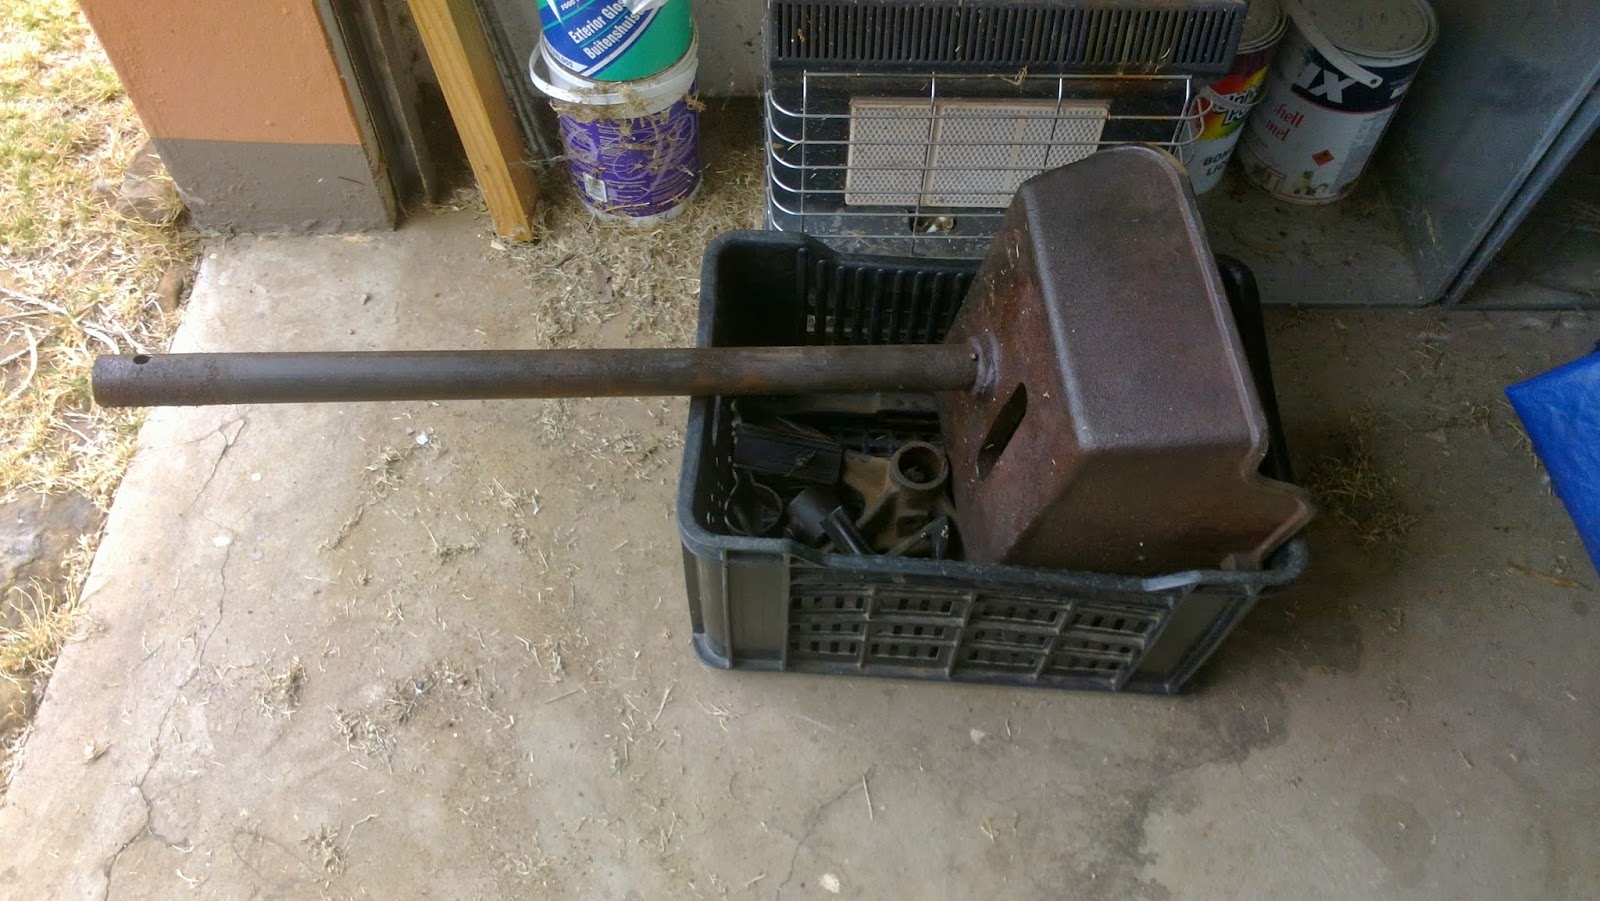
All the little bits and pieces, thankfully the whole thing was covered in grease which kept almost everything mobile and loosenable.
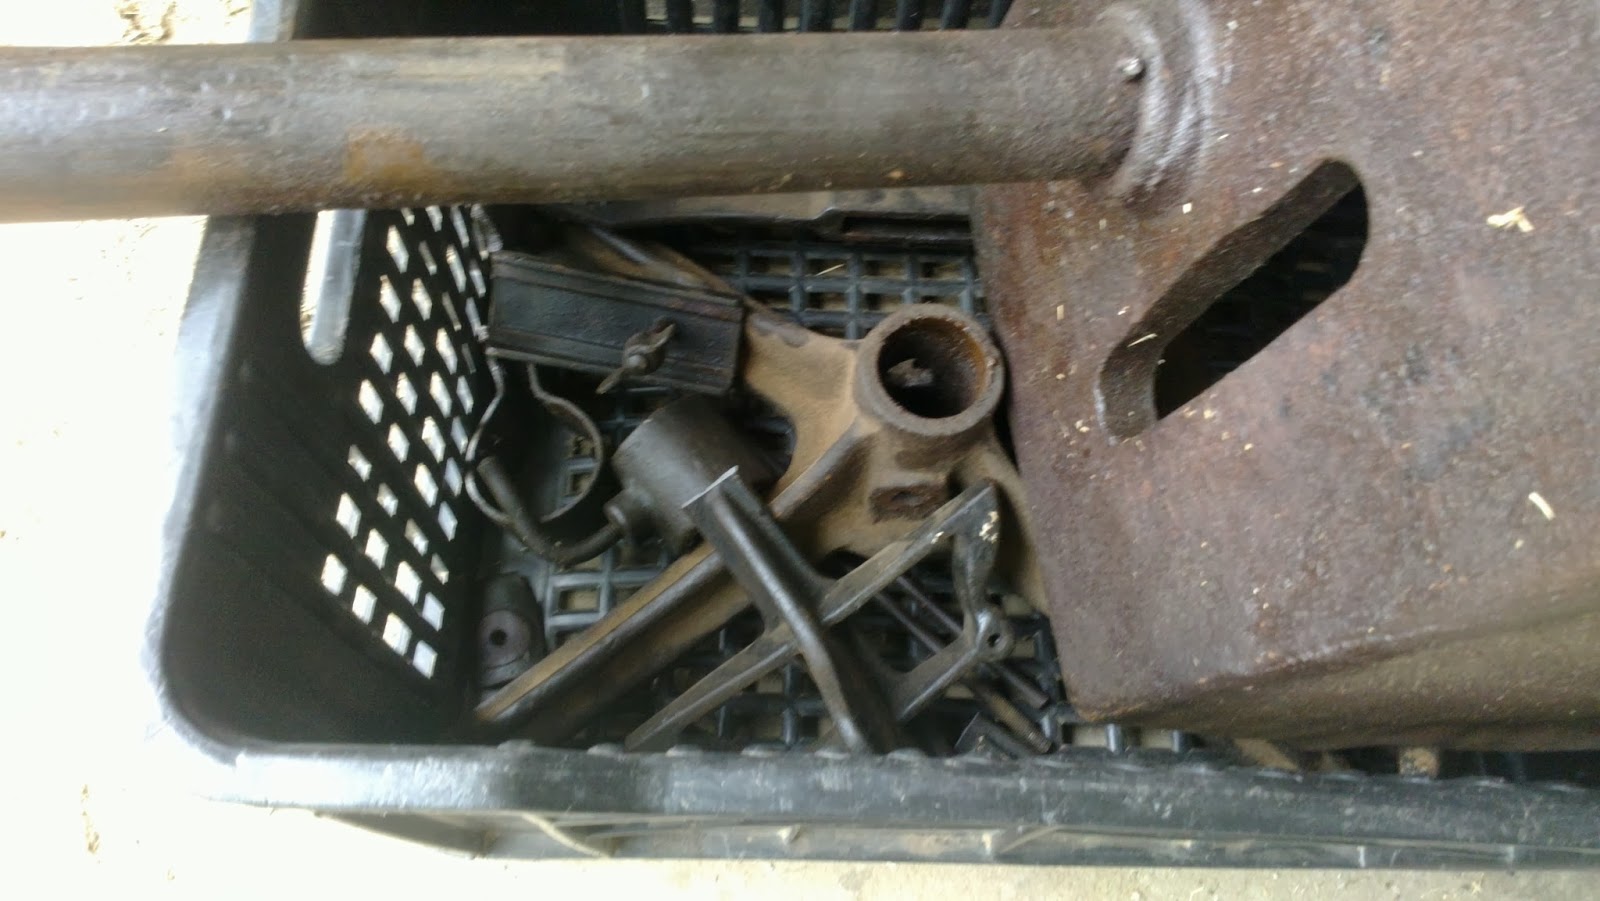
I say almost everything because this little fiend was holding the 4 toed foot at the base and the nut had rusted shut, if you can look closely you can see the bulge around the intersection between the nut and the bolt. There was thankfully just enough space to wedge a hacksaw blade in and start sawing, but woe to me the only blade I could find was from my neighbor and it was almost entirely flat. I counted 20 teeth along the whole length of it, so as you can imagine I stood there for quite a while.
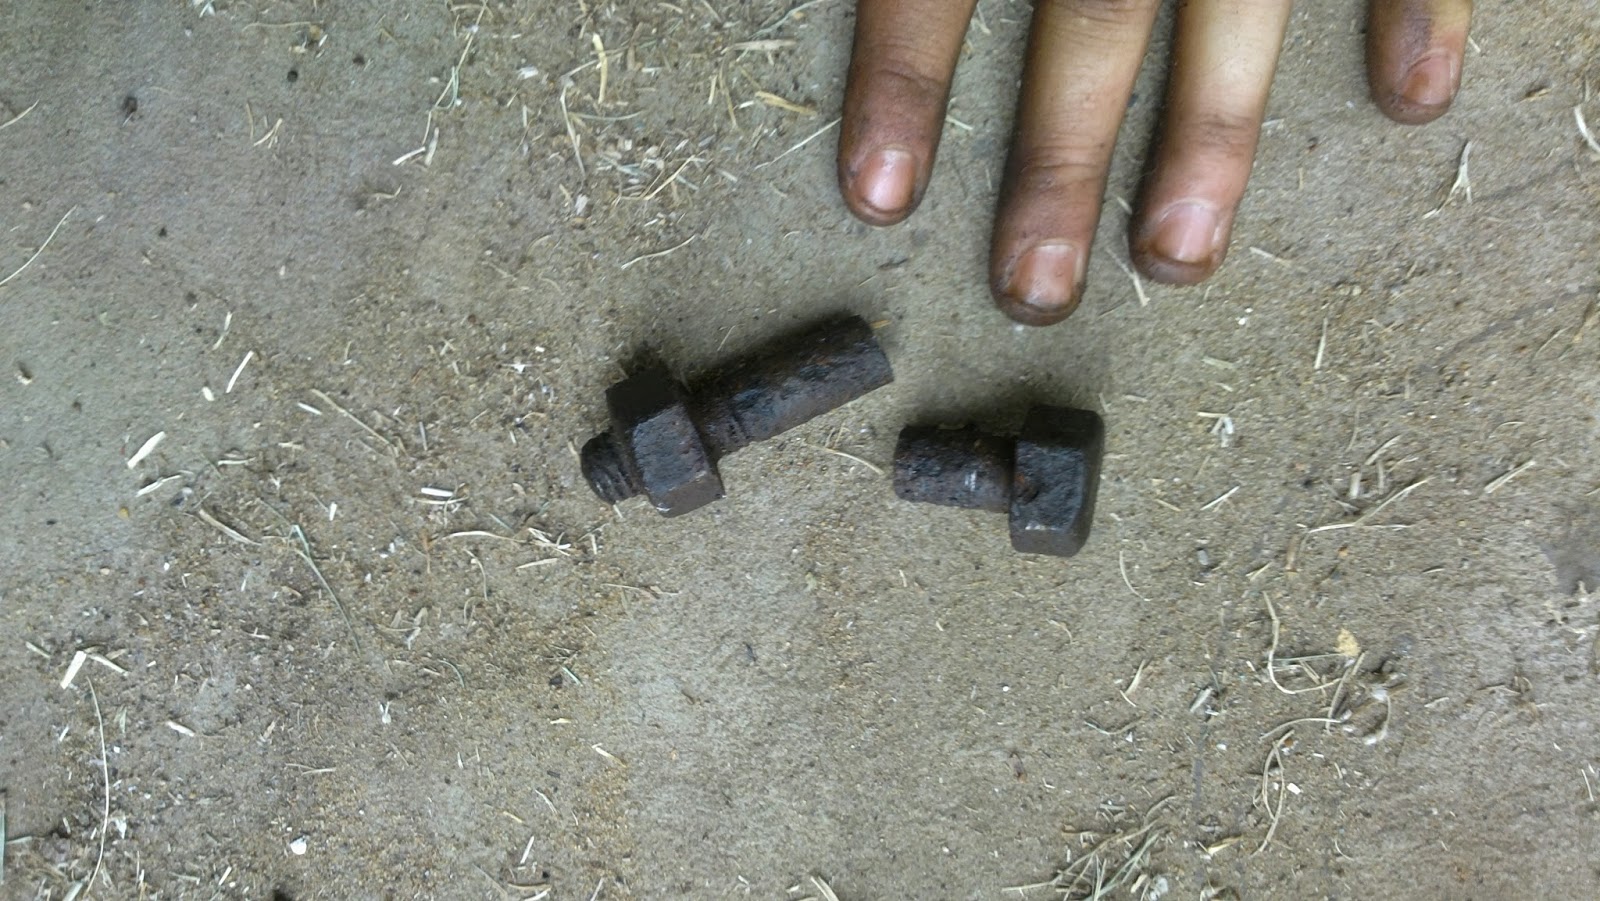
What you guys think?
-
I know a guy by the name of Riaan Bredenkamp who is friends with Coenraad Botha, the two of them are my knowledge base at the moment but I'm happy to make as many friends as I can. The blade and tang have been annealed and I normalized 3 times. I have yet to temper and heat treat it. I doubt I'll be drilling holes in this one. Do you know of any smiths in Pretoria who I can start an apprenticeship with?
-
Hey guys, here are some pics of my first knife made from a section of an old leaf spring from my moms bakkie. It still has to be tempered and heat treated and have a handle put on but Ill do all that next weekend hopefully. The blade is 17.5 cm (6.8 ") long and the whole thing is 32 cm (12.5 ") long. Tell me what you think?
The original piece of stock.
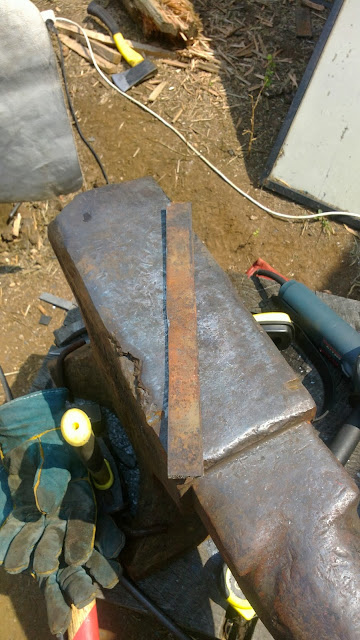
The rough forged blade.

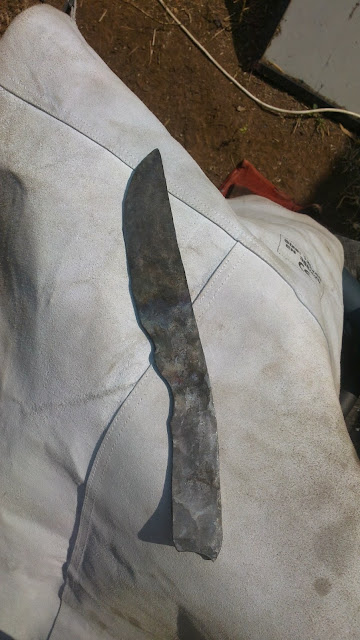
The final shaping and cleaning.
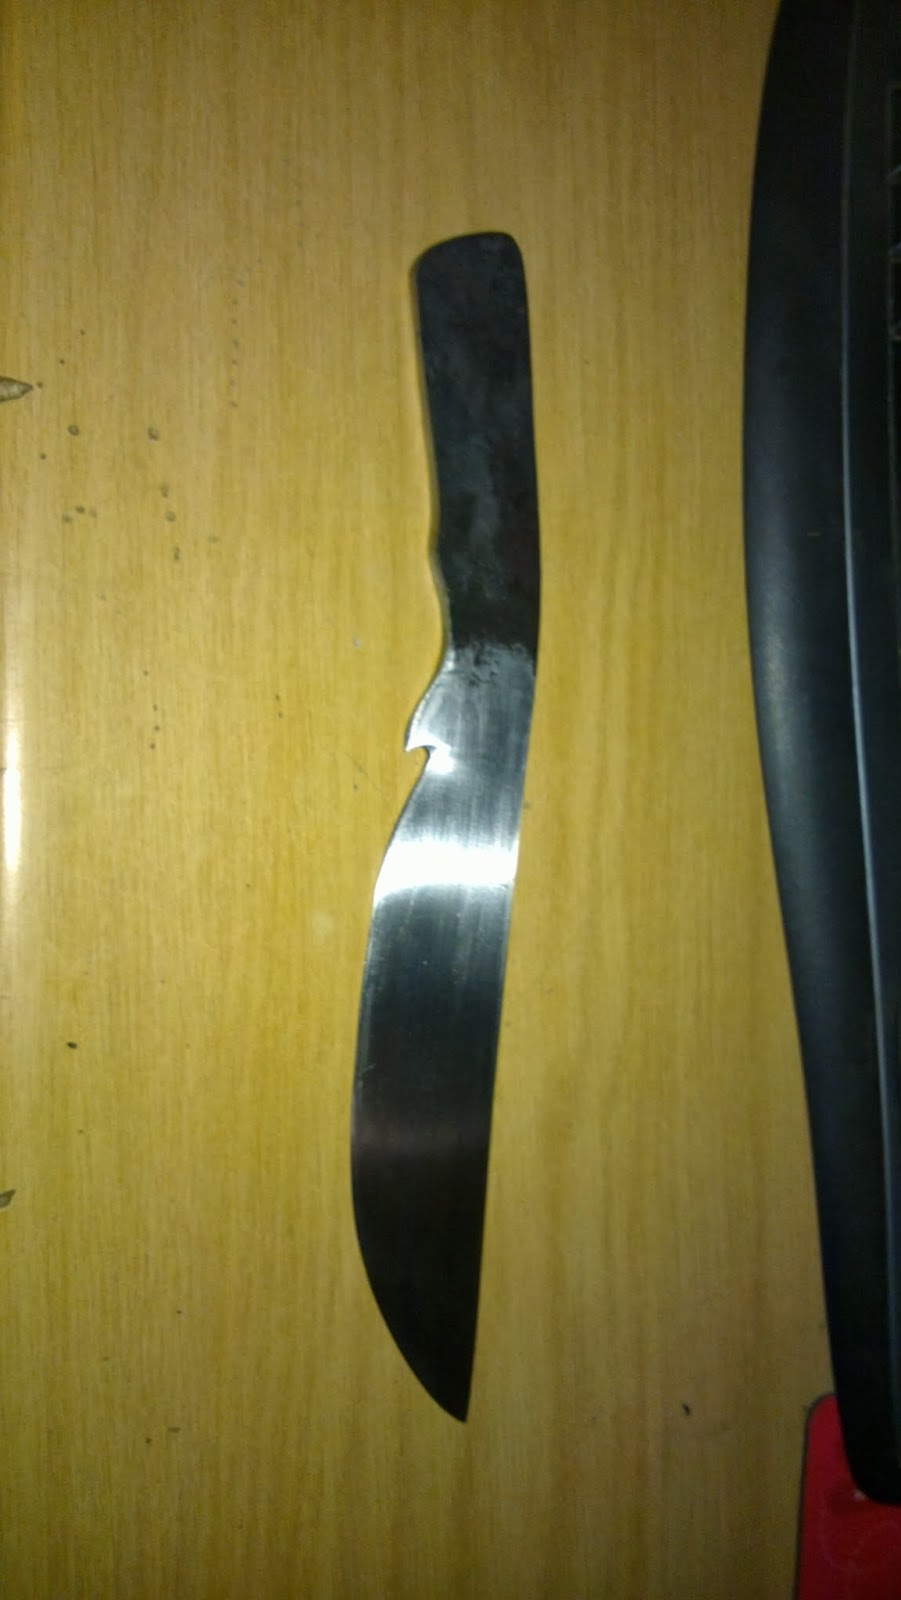
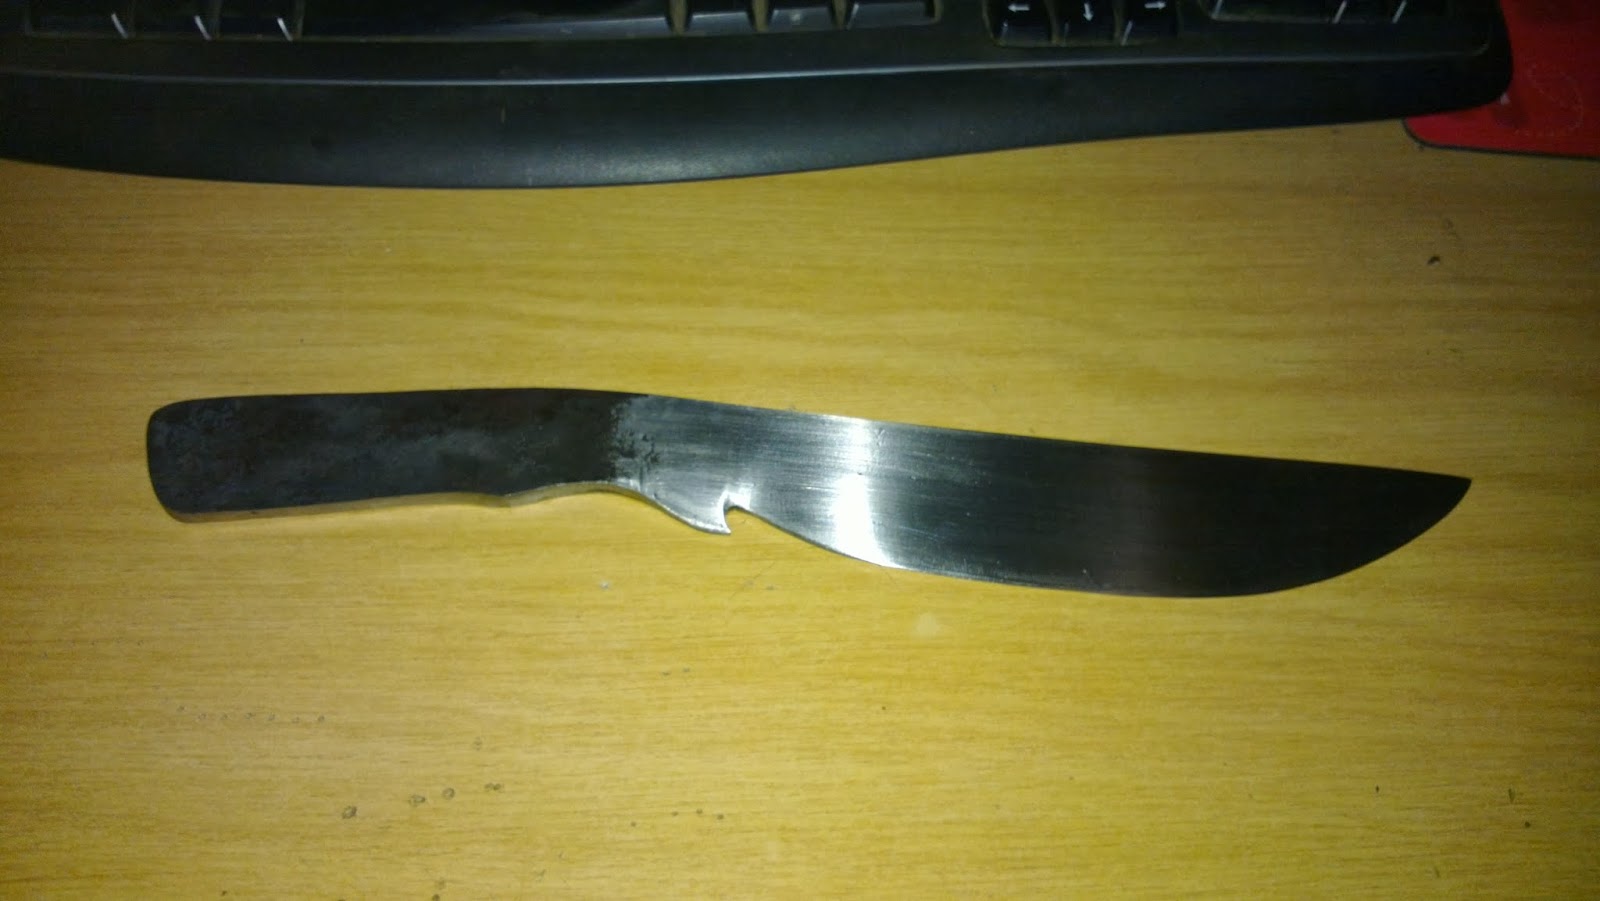
This is the first one I have made and Im quite happy with it considering the size and outcome so far. I will see if my forging methods are correct in the tempering stage, bends, buckles, cracks and snapping could all await me. But I am confident in my technique and am sure it will come out perfectly.
-
Well here is the final product, the handle is varnished and the blade is engraved with the clients name. I wrapped the join with some leather to soften the tansition a bit and all in all it was a great success. Ill be meeting the client in two weeks to give it to him as it is for his fathers birthday.


Frostmourne Replica
in Swordsmithing
Posted
Hi Guys, Shortly after I posted this I got a Job up in a game farm as a Ranger and now have absolutely no time to forge anything let alone post on IFI. Sorry about that. I am still definitely going to do this in the future though.