intrex
-
Posts
166 -
Joined
-
Last visited
Content Type
Profiles
Forums
Articles
Gallery
Downloads
Events
Everything posted by intrex
-
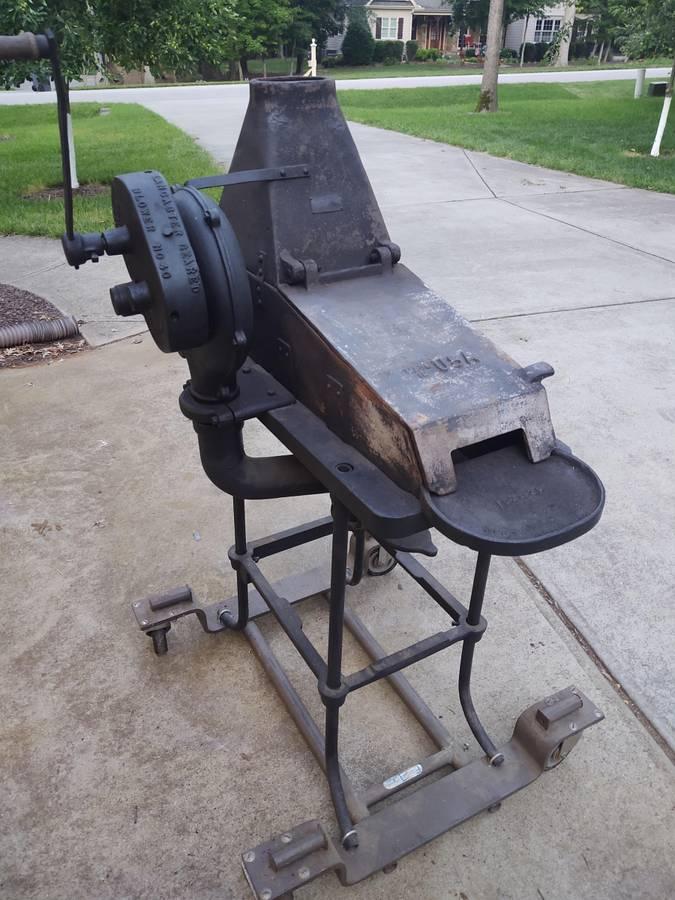
Hey Everyone, Very long time no post here. I have moved into a new property and finally have a space for a proper workshop. The house came with a 40 x 50 pole barn. No walls or electricity but we will get to that. I have a fire pot and blower I was planning to use to build a new coal/coke forge but also ran into this recently. Have any of you guys seen one of these before? Seems like a specific kind of hearth forge? Not having side entry would be a deal breaker for me but seems like it would be easy enough to cut a hole in either side for heating the center of long stock. Maybe that is a bad idea as the fire will end up being horizontal?

-
I had a rivet for as my main forge for several years. From my experience they are pretty prone to cracking from heat expansion if you don't line them with refractory cement. Others may have had better luck using them as is but I wouldn't start forging in one again without doing this first. If you ever wanted to sell it as a collector piece you can easily chip out the cement.
-
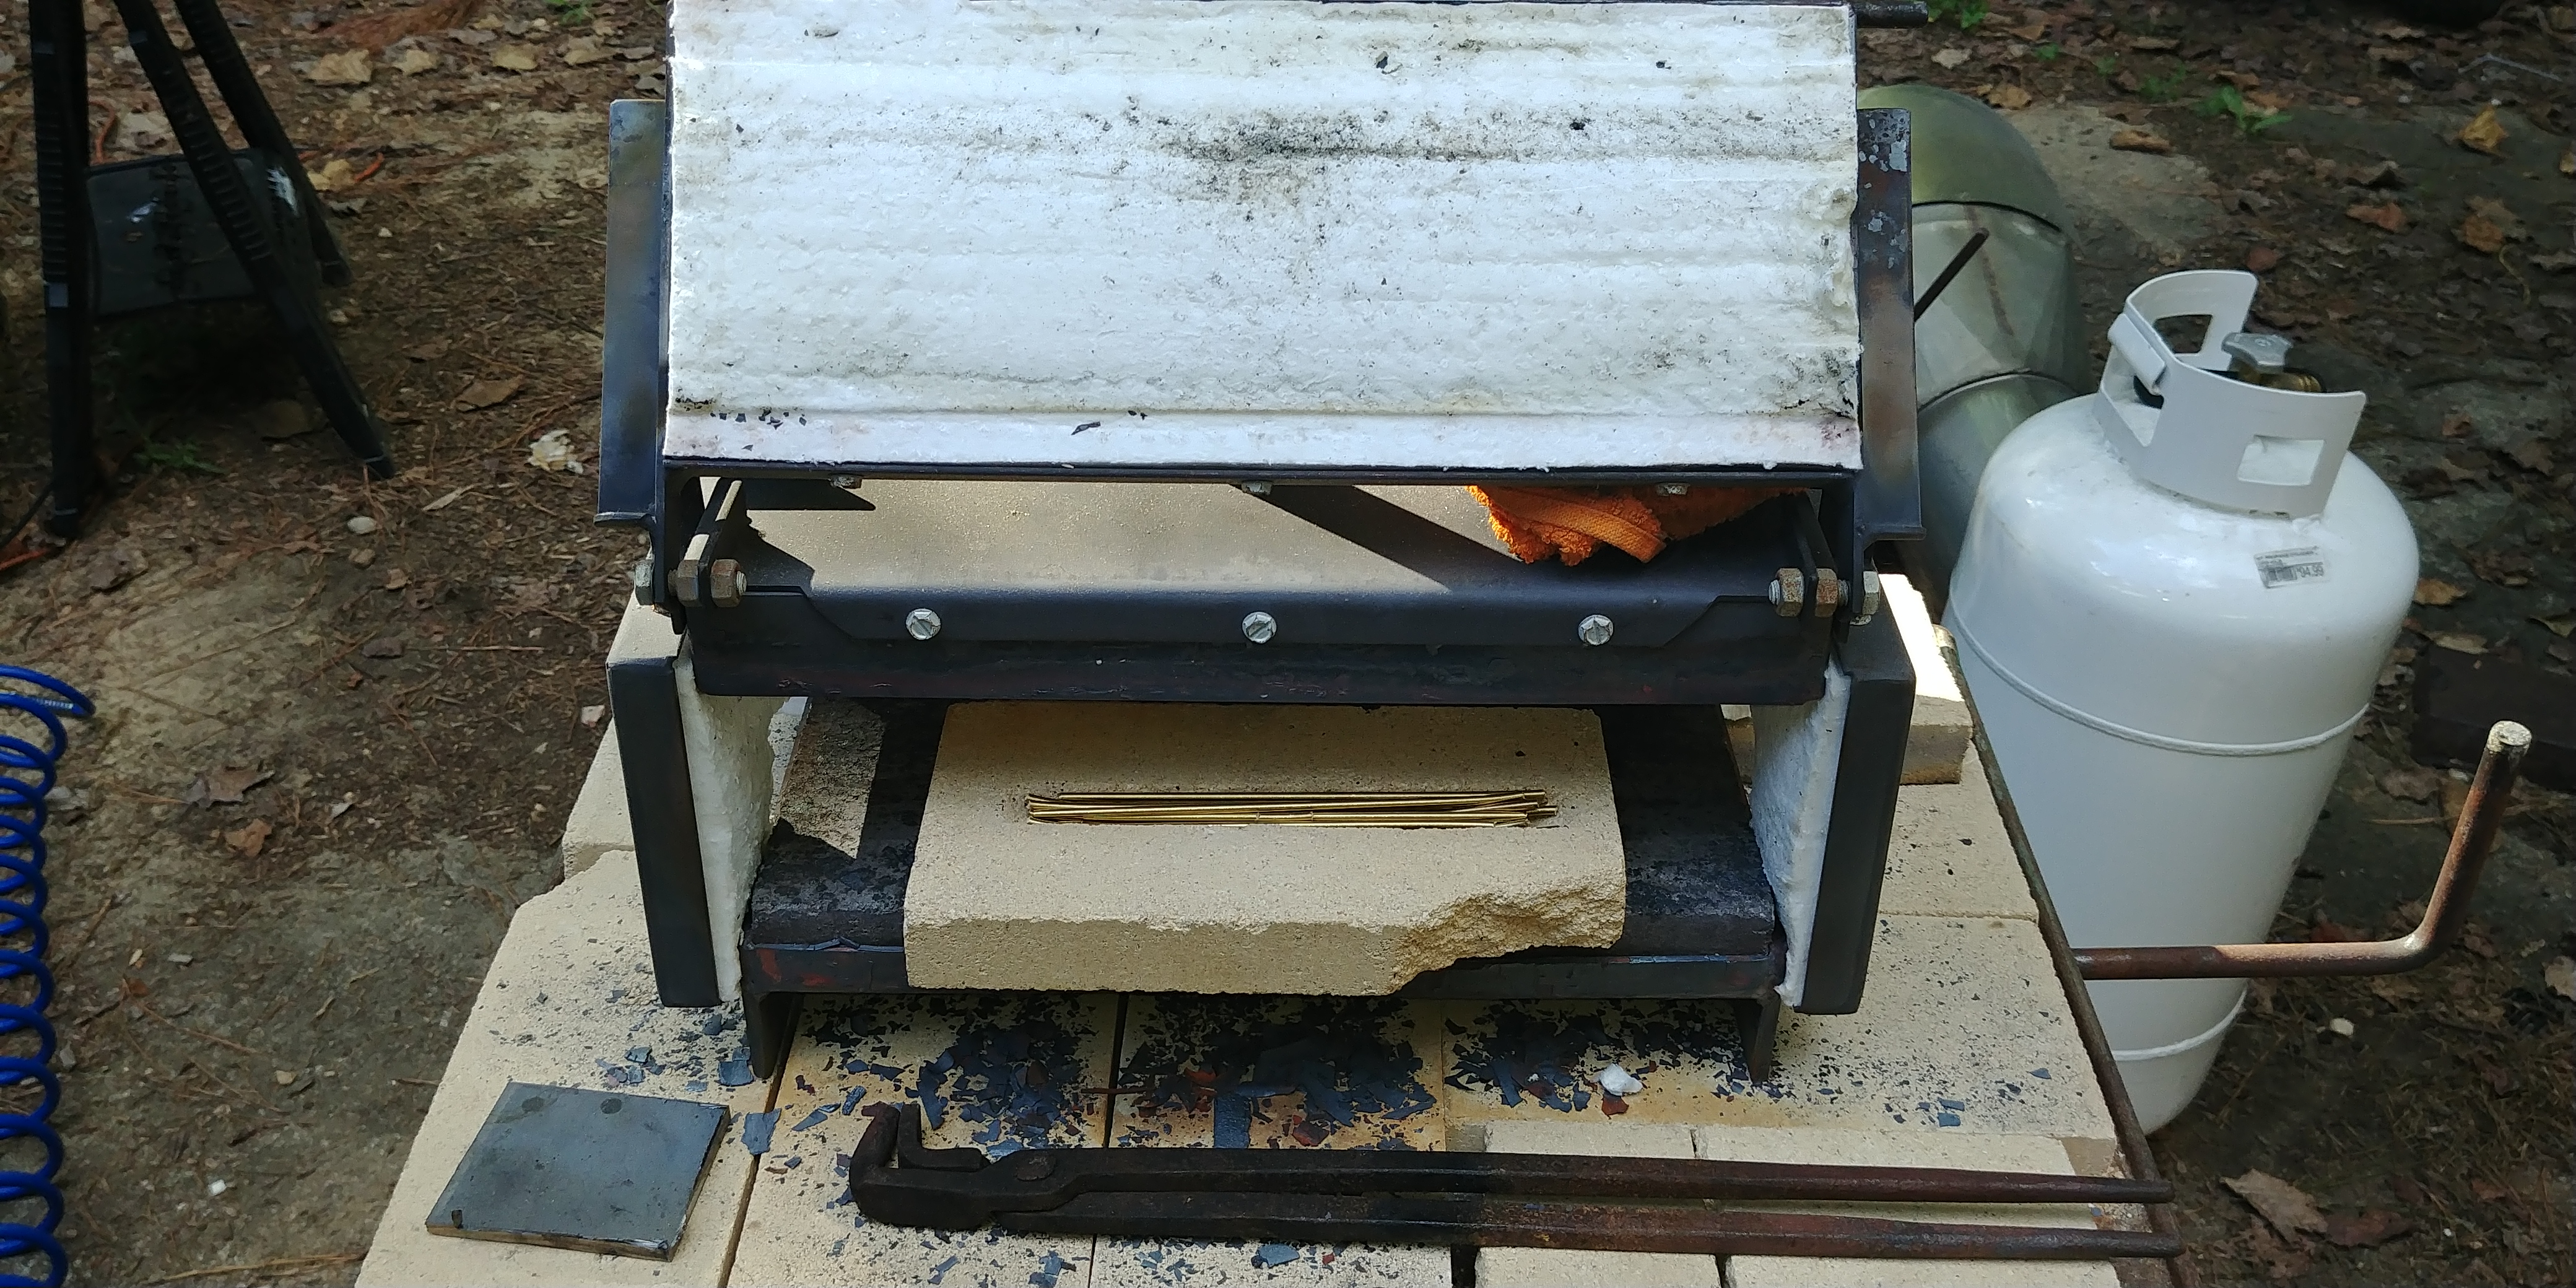
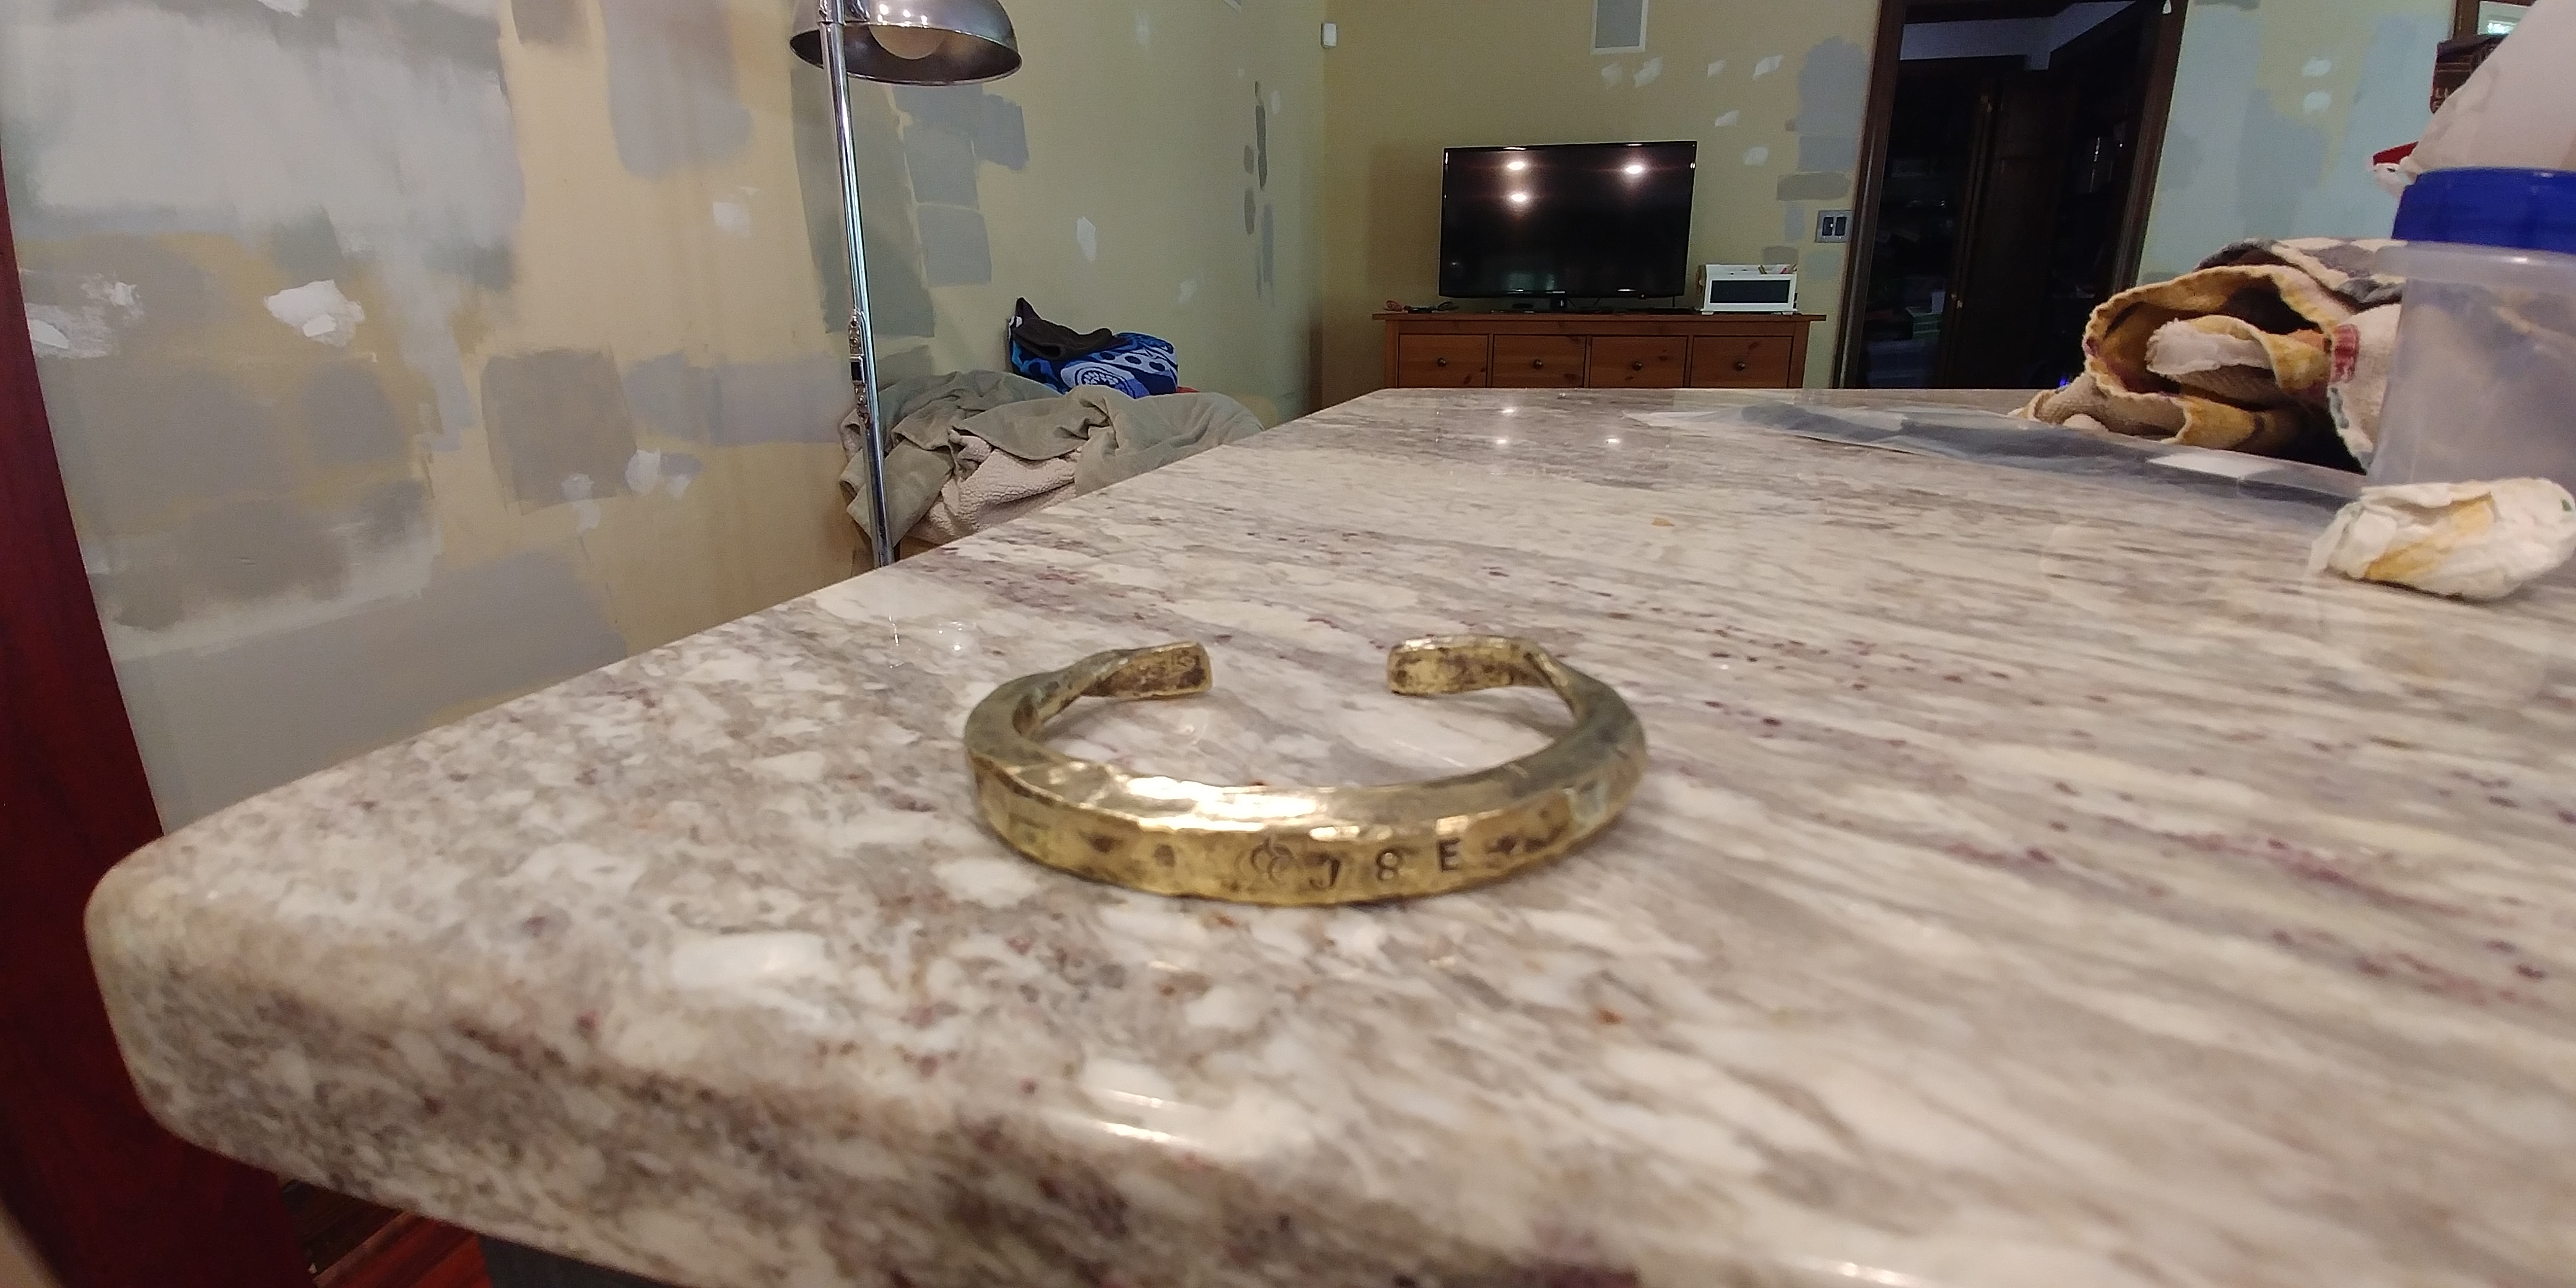
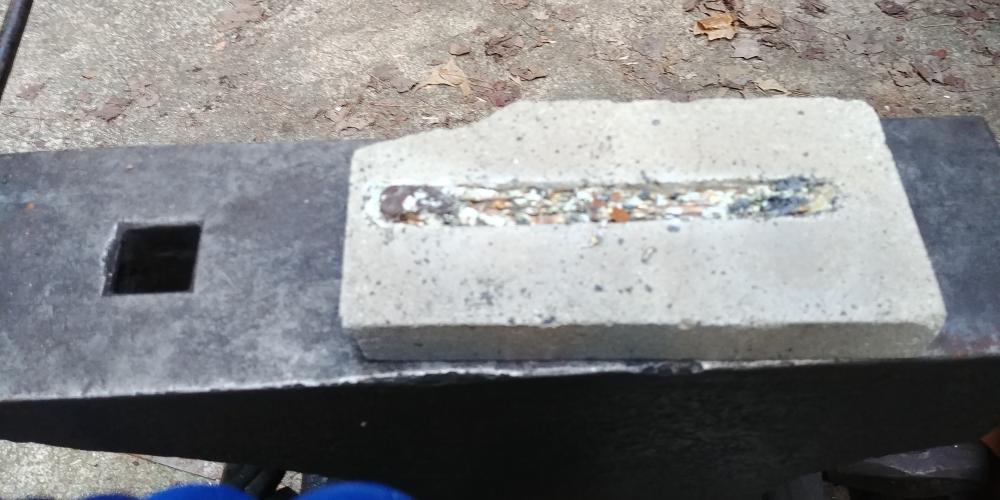
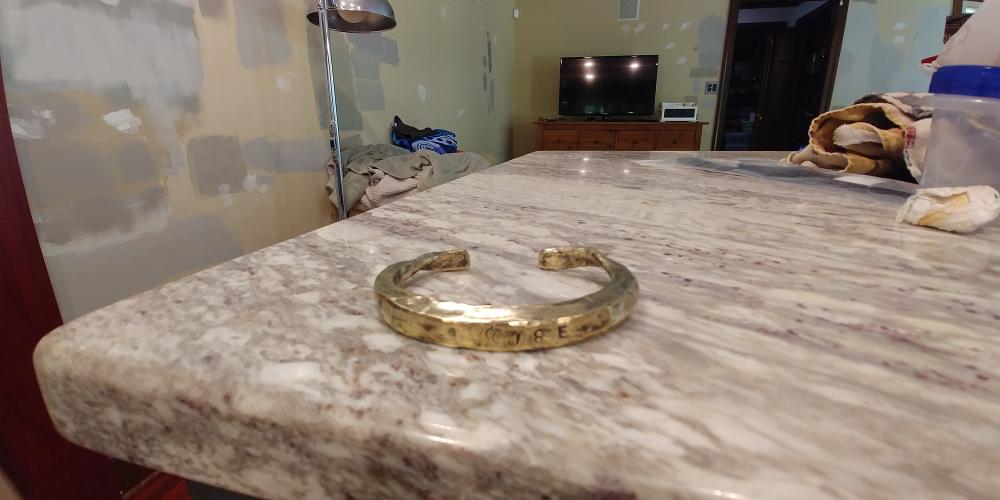
Hey Everyone, Thanks for all of the pointers. This worked out fine and we completely smelted and forged the bracelet in one night which I thought was pretty impressive considering we started at 6pm and took a break for dinner. The first try without borax was a complete failure for smelting. The picture below will show all of the crud. After adding borax and putting it back in the forge everything melted like butter. Forging bronze without overheating it is pretty tricky. I ruined the first run. Thankfully I smelted enough bronze for two tries and the second one turned out just fine.

-
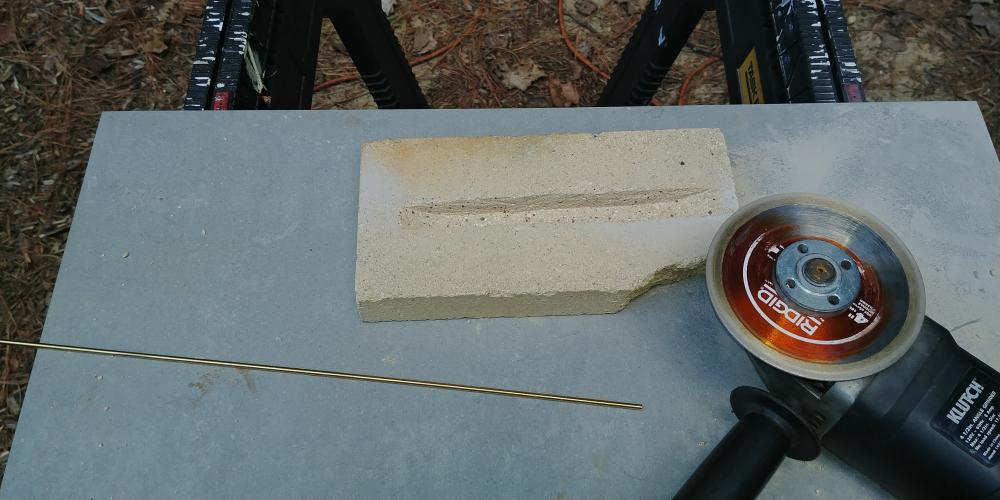
Thanks for all of the info frosty. I am going to be doing this outside and wearing a respirator. We are going to be super careful about moisture as well. After all of the feedback and thinking about this in detail the plan is going to be to carve out the shape I want in fire brick. Cut the rods up and place them in the mold and throw the whole thing in the forge. Then I can just turn on the forge until they melt and let it cool hard in the forge before moving. That way I avoid having to deal with molten metal with improper tools and lack of a real crucible. I will be also be purchasing a crucible this weekend in case I run into this situation again My bro will take pictures so you guy scan see how this goes.
-
Yeah, I could sacrifice a firebrick to make the mold as well.
-
Thanks Hotshoein4, My main concern was how to get the bronze out of the metal mold since it sticks to steel in the right conditions. If worst comes to worst I would just cut it out on the band saw.
-
Hey Everyone, My brother wants me to forge a bronze bracelet for his 10 year anniversary. Unfortunately he told me this today and his anniversary is Monday. After checking with all local suppliers and hardware stores the only way I find any silicon bronze is by using pure bronze brazing/welding rods. The problem is that they are only 3/32 in diameter and I really need about 1/4 square bar to forge what he wants. I know that I could try to wrap the rods together and forge fuse them together but I am worried that this is going to be a tricky process. I have done something similar to this with silver wire before. The other option I can think of is to weld up a mild steel box that is roughly the volume of the stock size I want. Put the box into the forge to heat it up to red then start slowly adding in the rods. I may end up doing the heating with the oxy torch while adding the rods. Has anyone on here attempted to do something like this? I obviously don't have a proper foundry setup in the shop.
-
Hey Kutanra, I have had an old anvil and pole vise that I couldn't find any markings on at first. After cleaning them both with a wirebrush on an angle grinder I was able to find markings on both of them. Doing this will knock off the years of crust on the anvil. Don't do this if you are planning to sell this as an antique as it may devalue the anvil. I use all of my antiques for forging so I wasn't worried about it :).
-
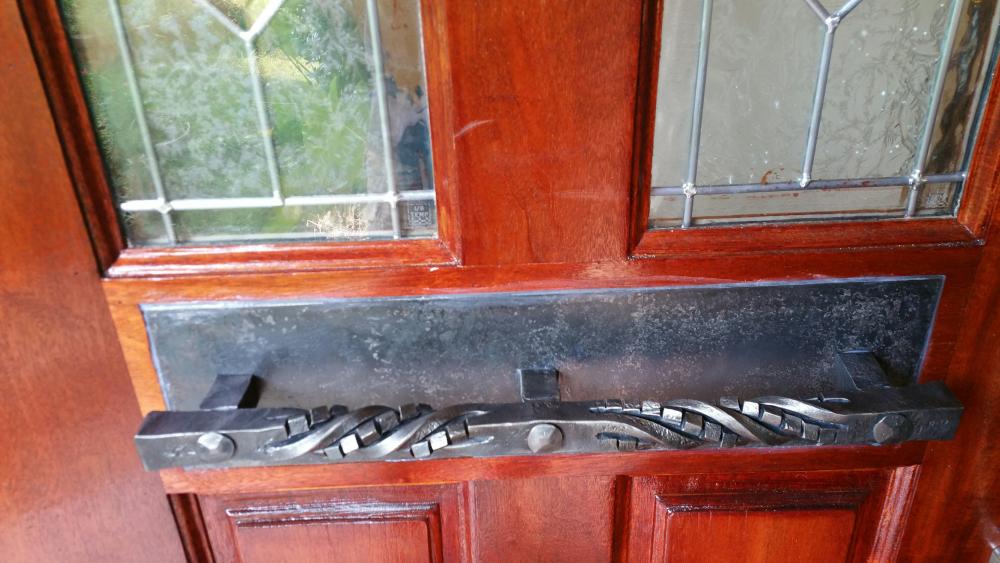
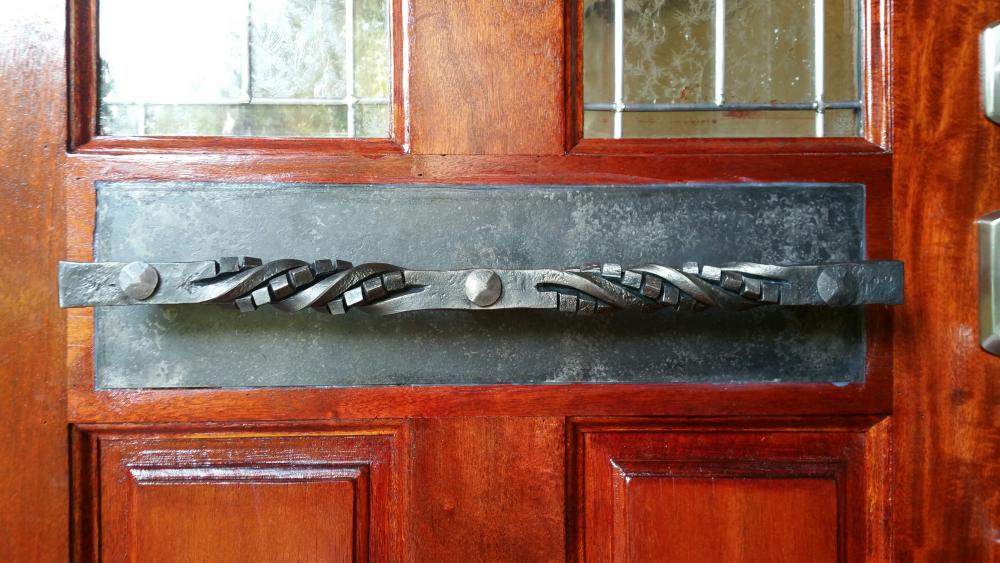
In my coal rivet forge this wouldn't have been possible to do at all because it just can't heat a long enough section of steel. I had to use my 2 burner gas forge that can heat a 1.5 foot length of steel. For the twists I heated up a large section and then dipped each end into the quench tank to cool everything outside of the twist area. Figuring out how to hold and work with something that large all on my own was the main problem. I ended up using a chain hold down over the heel and a spring hold down in the hardie of the anvil.
-
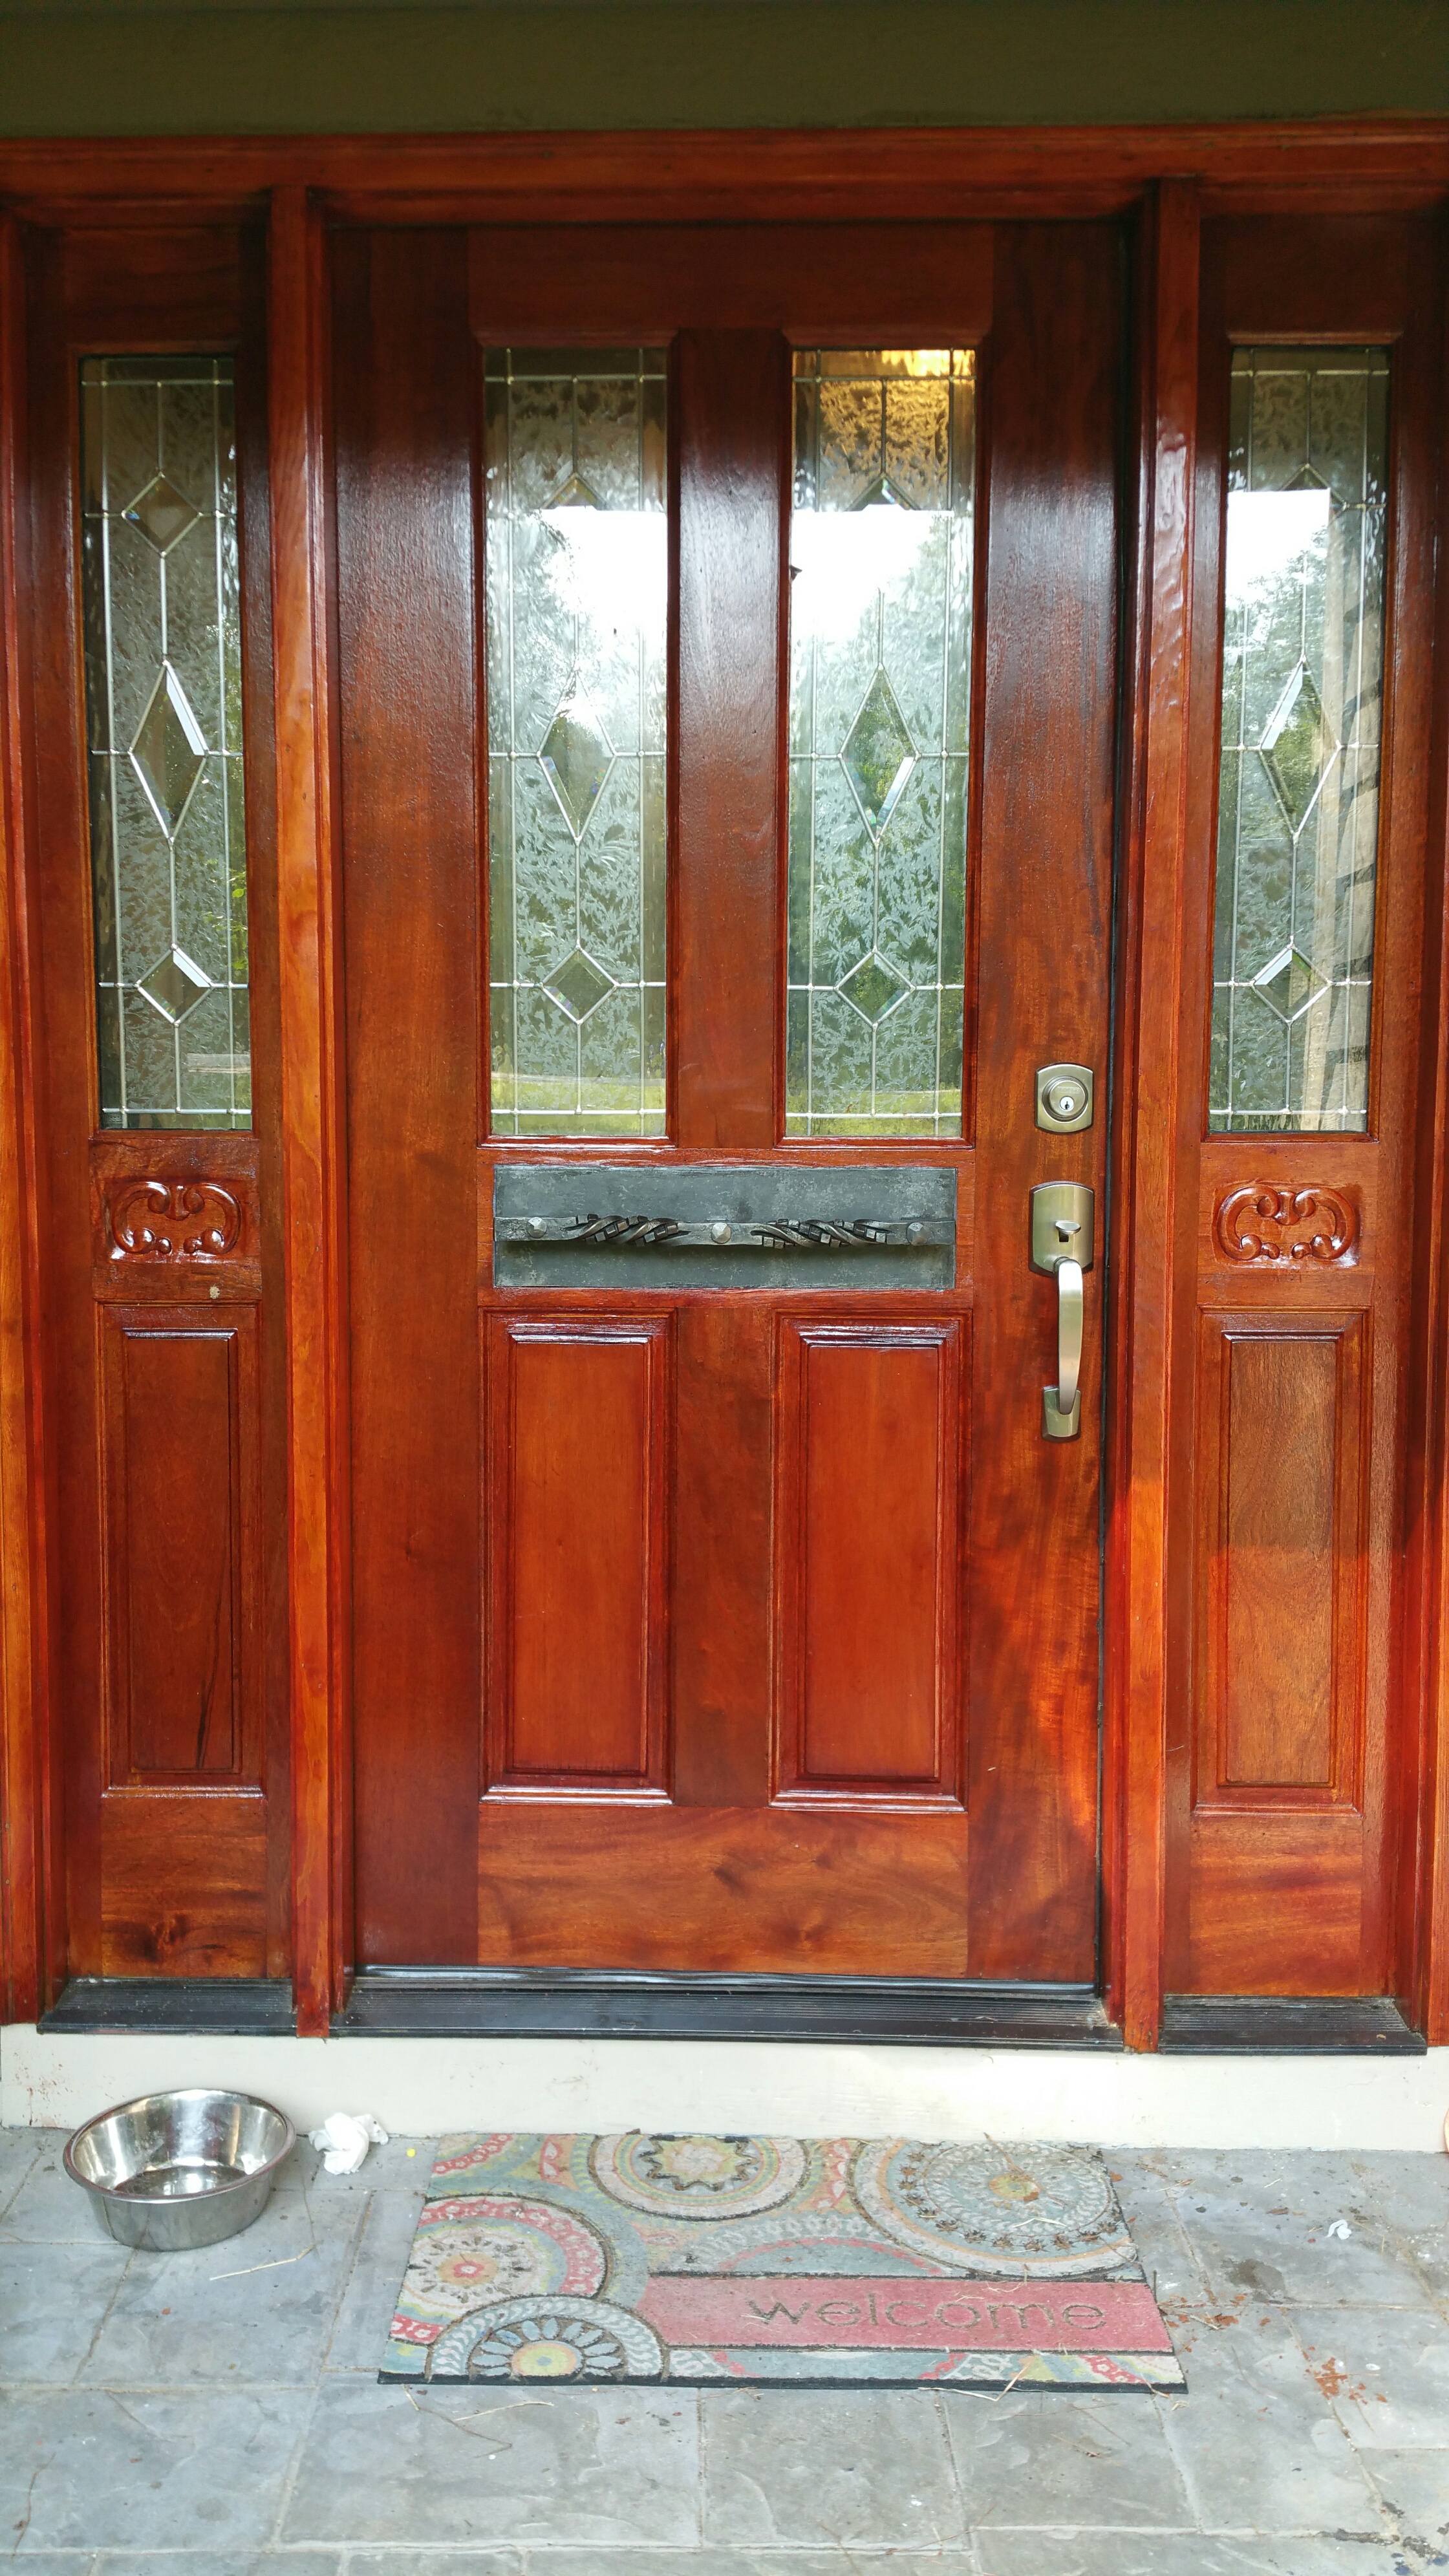
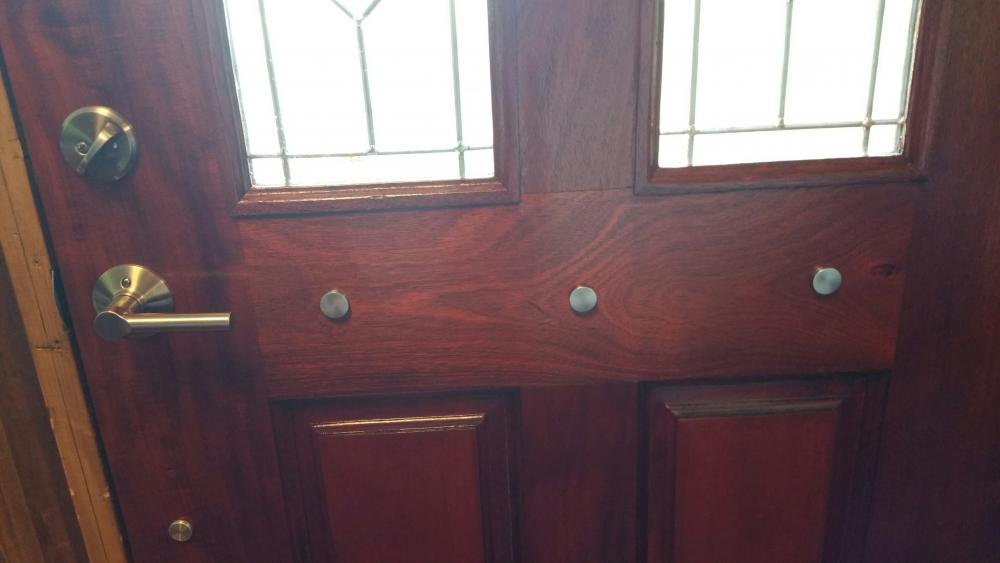
Hey ColdironKilz, The color in the pictures is off for some reason. The hardware is actually all nickel and the forged piece isn't nearly as dark as what the picture looks like. I may end up forging hardware for the door as well but I need to have the door intact and working for at least a few months before starting another project on it to keep the wife happy :).
-
Hey Guys, I wanted to show off and get critiques from my first installed architecture piece. This started as a 1" square bar. it has 3 drifted holes, two rubix twists, two tenons, upset ends and a mounting plate. I routed out the door to the same depth as the steel plate so the plate sinks into the door flush. There are holes through the plate, the door and the tenon feet. The holes in the tenon feet are taped with 1/4 threads so I was able to use counter sunk bolts to attach everything together. I also laid a bed of silicone under the plate so no moisture can get in. All of the pieces are sealed with trees wax at a low black heat. The plate was put into the forge and cooled several times just to get some scale on it so that it has a forged look. I am kind of shocked at how long this whole project took. I didn't keep track of my hours but I have been slowly working away at it on and off for more than a month now. I did fail at the first 2 tenons I tried at the anvil and failed at trying to drift a large monkey tool out of an axle. Maybe I could do it all in under a day if I were to do it again but seems like it might be close. This process shedded light on what I would need to charge for a project like this to be profitable if I were to give this a go as a business. Of course having a power hammer would be a game changer when working with 1" square. I really need to get me one of those. Thanks for any feedback,


-
Hey Frosty I do have a drill press and decent shop skills. What I don't have is a lot of is free time. After rebuilding a few pole vices, belt sanders, anvil stands, drill press, torches, coal forge, and making more tooling than I can keep track of I am starting to see the value in purchasing some things for the shop. It seems like I have spent more time making things to make things than actually making things if that makes sense. We will see how much shop time I can get in this weekend and if I can get around to messing with these designs. Thanks for all of the guidance
-
Hey Guys, Thanks for the feedback and suggestions. I only wish Frosty had some passion about burners and forges :). It looks like the two brick forge with a purchased burner is the way to go to get my mini forge setup and running quickly.
-
Hey Everyone, I have a coal burning rivet forge and a clam shell (with hinged walls) 2 burner gas forge. I am not sure how many hours I get out of a 40lb tank but it can't be more than 8 hours at the most. After filling up my 40lb tank and a regular 20lb tanks I was thinking that I would use propane much more often if my forge was more efficient. Over the last few years the majority of the forging that I do is on regular shaped stock 1" or under in thickness stock. For the vast majority of what I do a small single burner forge would be fine and I have the 2 burner if I need it. I am looking at getting something like this http://www.ebay.com/itm/Atlas-Mini-Forge-propane-knifemaking-forge-w-30K-BTU-burner-and-regulator-/112007645631?_trksid=p2352135.m2548.l4275 size to be my new primary propane forge. Do you all have any recommendations for mini forges of this size? If possible I would want one that I could easily replace the fire brick in. I also don't want something with wool in it that is going to require a lot of maintenance. I am decent with a Mig and could build one myself but am inclined to buy one at the 100-200 price range. Thanks for any suggestions,
-
Hey David, Sorry for the delay in response. I can't find my receipt but I am pretty sure this one was specifically made for propane and it was about $130 if I remember correctly. I was pretty meticulous about making sure all components were specifically for propane or rated for both. I have a friend who spent several months in the hospital from 3rd degree burns due an acetylene tank accident and it isn't something I was willing to take any chances with.
-
Back in December I tore some tendons in my right fore arm from too much table tennis (ping pong to most people). After the injury I couldn't swing a hammer at all without immense pain in my fore arm and elbow. After a few months of physical therapy and taking it easy I started to try to smith again. I had always read about proper hammer technique and the importance of being relaxed but I can now tell that I have always been too tight on the hammer. The only way I can forge for any extended period of time now is to be completely relaxed with the lightest grip on the hammer possible without it falling out of my hand. As soon as I start to tense up on the handle my fore arm immediately lets me know I am doing it wrong. The funny thing is that forging this way I can forge longer and more productively that I ever did before while trying to muscle through things. When I was just starting out and reading everything I could about hammer technique I knew all of this but it just didn't properly sink in. I am writing this in the hopes that someone just starting out reads this and takes to heart how important it is to be loose while forging. If you are tensing up on the hammer at all you are putting extra shock on your body that is either going to wear you out more quickly or lead to injury.
-
Hey Creo, My UDS has three air inputs (yeah, I know its overkill) each 120 degrees apart with black iron pipes and valves that run up to the top of the barrel. They insure that the fireball stays uniform since the air is more or less coming in from all sides evenly. I am going to upgrade the smoker to a temperature controlled fan system so I don't have any more sleepless nights readjusting the air inputs on long smokes. The kit that I am going to buy only comes with one blower. I could very easily just hook it up to one of the air intakes and block the other 2 but whats the fun in that? To make use of my existing intakes I am trying to join them all together and then hook the fan to the joined unit. All of the pipe came in today so it is going to be pipe forging for the weekend.
-
I am using black iron pipe because the rest of the smoker is already black iron and this circular piece is going to connect to the existing piping. What I am hoping to accomplish is really hard to explain without drawings and it is all just in my head right now. The circle is actually going to be six separate pieces that will all be connected with 3 interconnects and 3 T pieces. Each of the six pieces is 1 foot long and will have a 60 degree radius on them (hopefully). The circle needs to be slightly larger than the full diameter of a 55 gallon barrel. I am planning to form a jig with flat bar using the radius of a scrap barel that I have. Then put the Jig in my pole vice and use a torch to heat up and bend each of the pipes. I will probably end up having to hot fit some of the pieces together while screwing them into the interconnects. It is going to be tricky but I think doable. Hopefully it doesn't turn into $100 of black pipe scrap. Thanks for the quenching warning. I wasn't planning to quench them at all but I am sure that has gotten more than 1 person in the past.
-
Thanks for all of the feedback. I ordered everything last night. Man they sure are proud of that pipe, its pricey. I will use the fine gravel trick for sure. The pipe supplies the air flow to the smoker so I need to make sure it stays as open as possible. This is going to be pretty tricky because I am trying to essentially form a circle of pipe that joins 3 intake pipes into one. I have a good plan of attack for the project and and will post pictures if it is successful.
-
Hello Everyone, I am thinking of doing some modifications to my Ugly Drum Smoker. I am going to need to heat (in my gas forge) and bend 3 sections of black iron pipe. I am always a little worried about heating up unknown steels (especially when they have an exterior coating). From what I have read black iron pipe is usually some type of mild steel. It usually looks like it is painted black but it is some type of weather resistant paint/varnish. I believe it will burn off in the forge fairly quickly. Has anyone forged black pipe before? Did you soak it in some type of solvent to remove the coating first?
-
Hey Swamp Yankee, That is a really nice looking first forge. I can't help you with any of the questons you posted :). The one thing I would do if it was me is put a layer of refractory cement around the pan at least were the fire pot is. I had an older rivet forge that I cracked after the first 2 fires. I put a layer of refractory cement in it after that hand haven't had any problems but I wish I would have done it before I fired it up.
-
Green metal after forging and quench?
intrex replied to intrex's topic in Blacksmithing, General Discussion
Nope, I have quenched copper in it a few times. It also got an organic mosquito killer disc in it. I am not sure what was in that stuff but I can find out :). Other than that nothing out of the ordinary. -
Green metal after forging and quench?
intrex replied to intrex's topic in Blacksmithing, General Discussion
Yeah, The piece to the left is one of the 7 almost finished legs and the piece to the right is what it looked like after pulling the stock out of the forge and quenching. I thought they looked pretty neat as is but the wife wants it to be more gnarly so I am going to put a few slight twists in sections. -
Green metal after forging and quench?
intrex replied to intrex's topic in Blacksmithing, General Discussion
Hey Steve, Dodge is correct. I was just trying to cool the pieces down quickly before the next stage (twisting some heat isolated sections on the bars). These are going to be pieces of a table that I am texturing to look like tree bark. Not everyone makes pointy objects all day :). Love the book by the way. The bars are as magnetic as mild steel.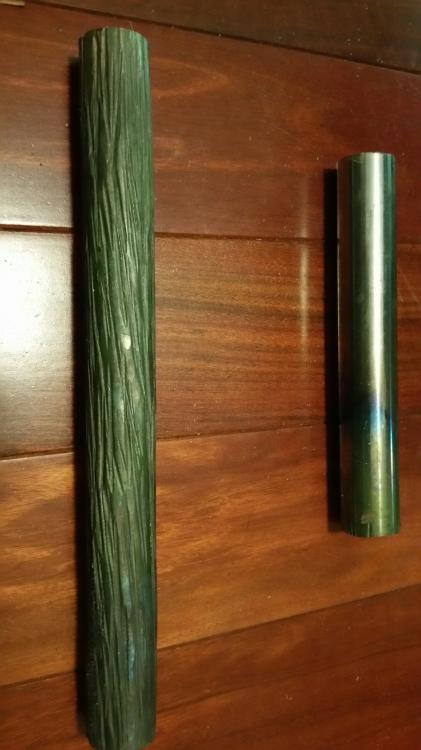
-
Green metal after forging and quench?
intrex replied to intrex's topic in Blacksmithing, General Discussion
Hey Thomas, The second I saw your response I started feeling kind of dumb. Those bars are probably some type of Stainless. As soon as I get back to the shop tonight I will put a magnet to them and report back.