Candidquality
-
Posts
386 -
Joined
-
Last visited
Content Type
Profiles
Forums
Articles
Gallery
Downloads
Events
Everything posted by Candidquality
-

Toaster Oven/ HT Oven, with PID!
Candidquality replied to seagiant's topic in Heat Treating, general discussion
Looks a treat. Might be worth building my own. Have a old knife I made out of A2, that I guess I ought to heat treat after 20 years... -
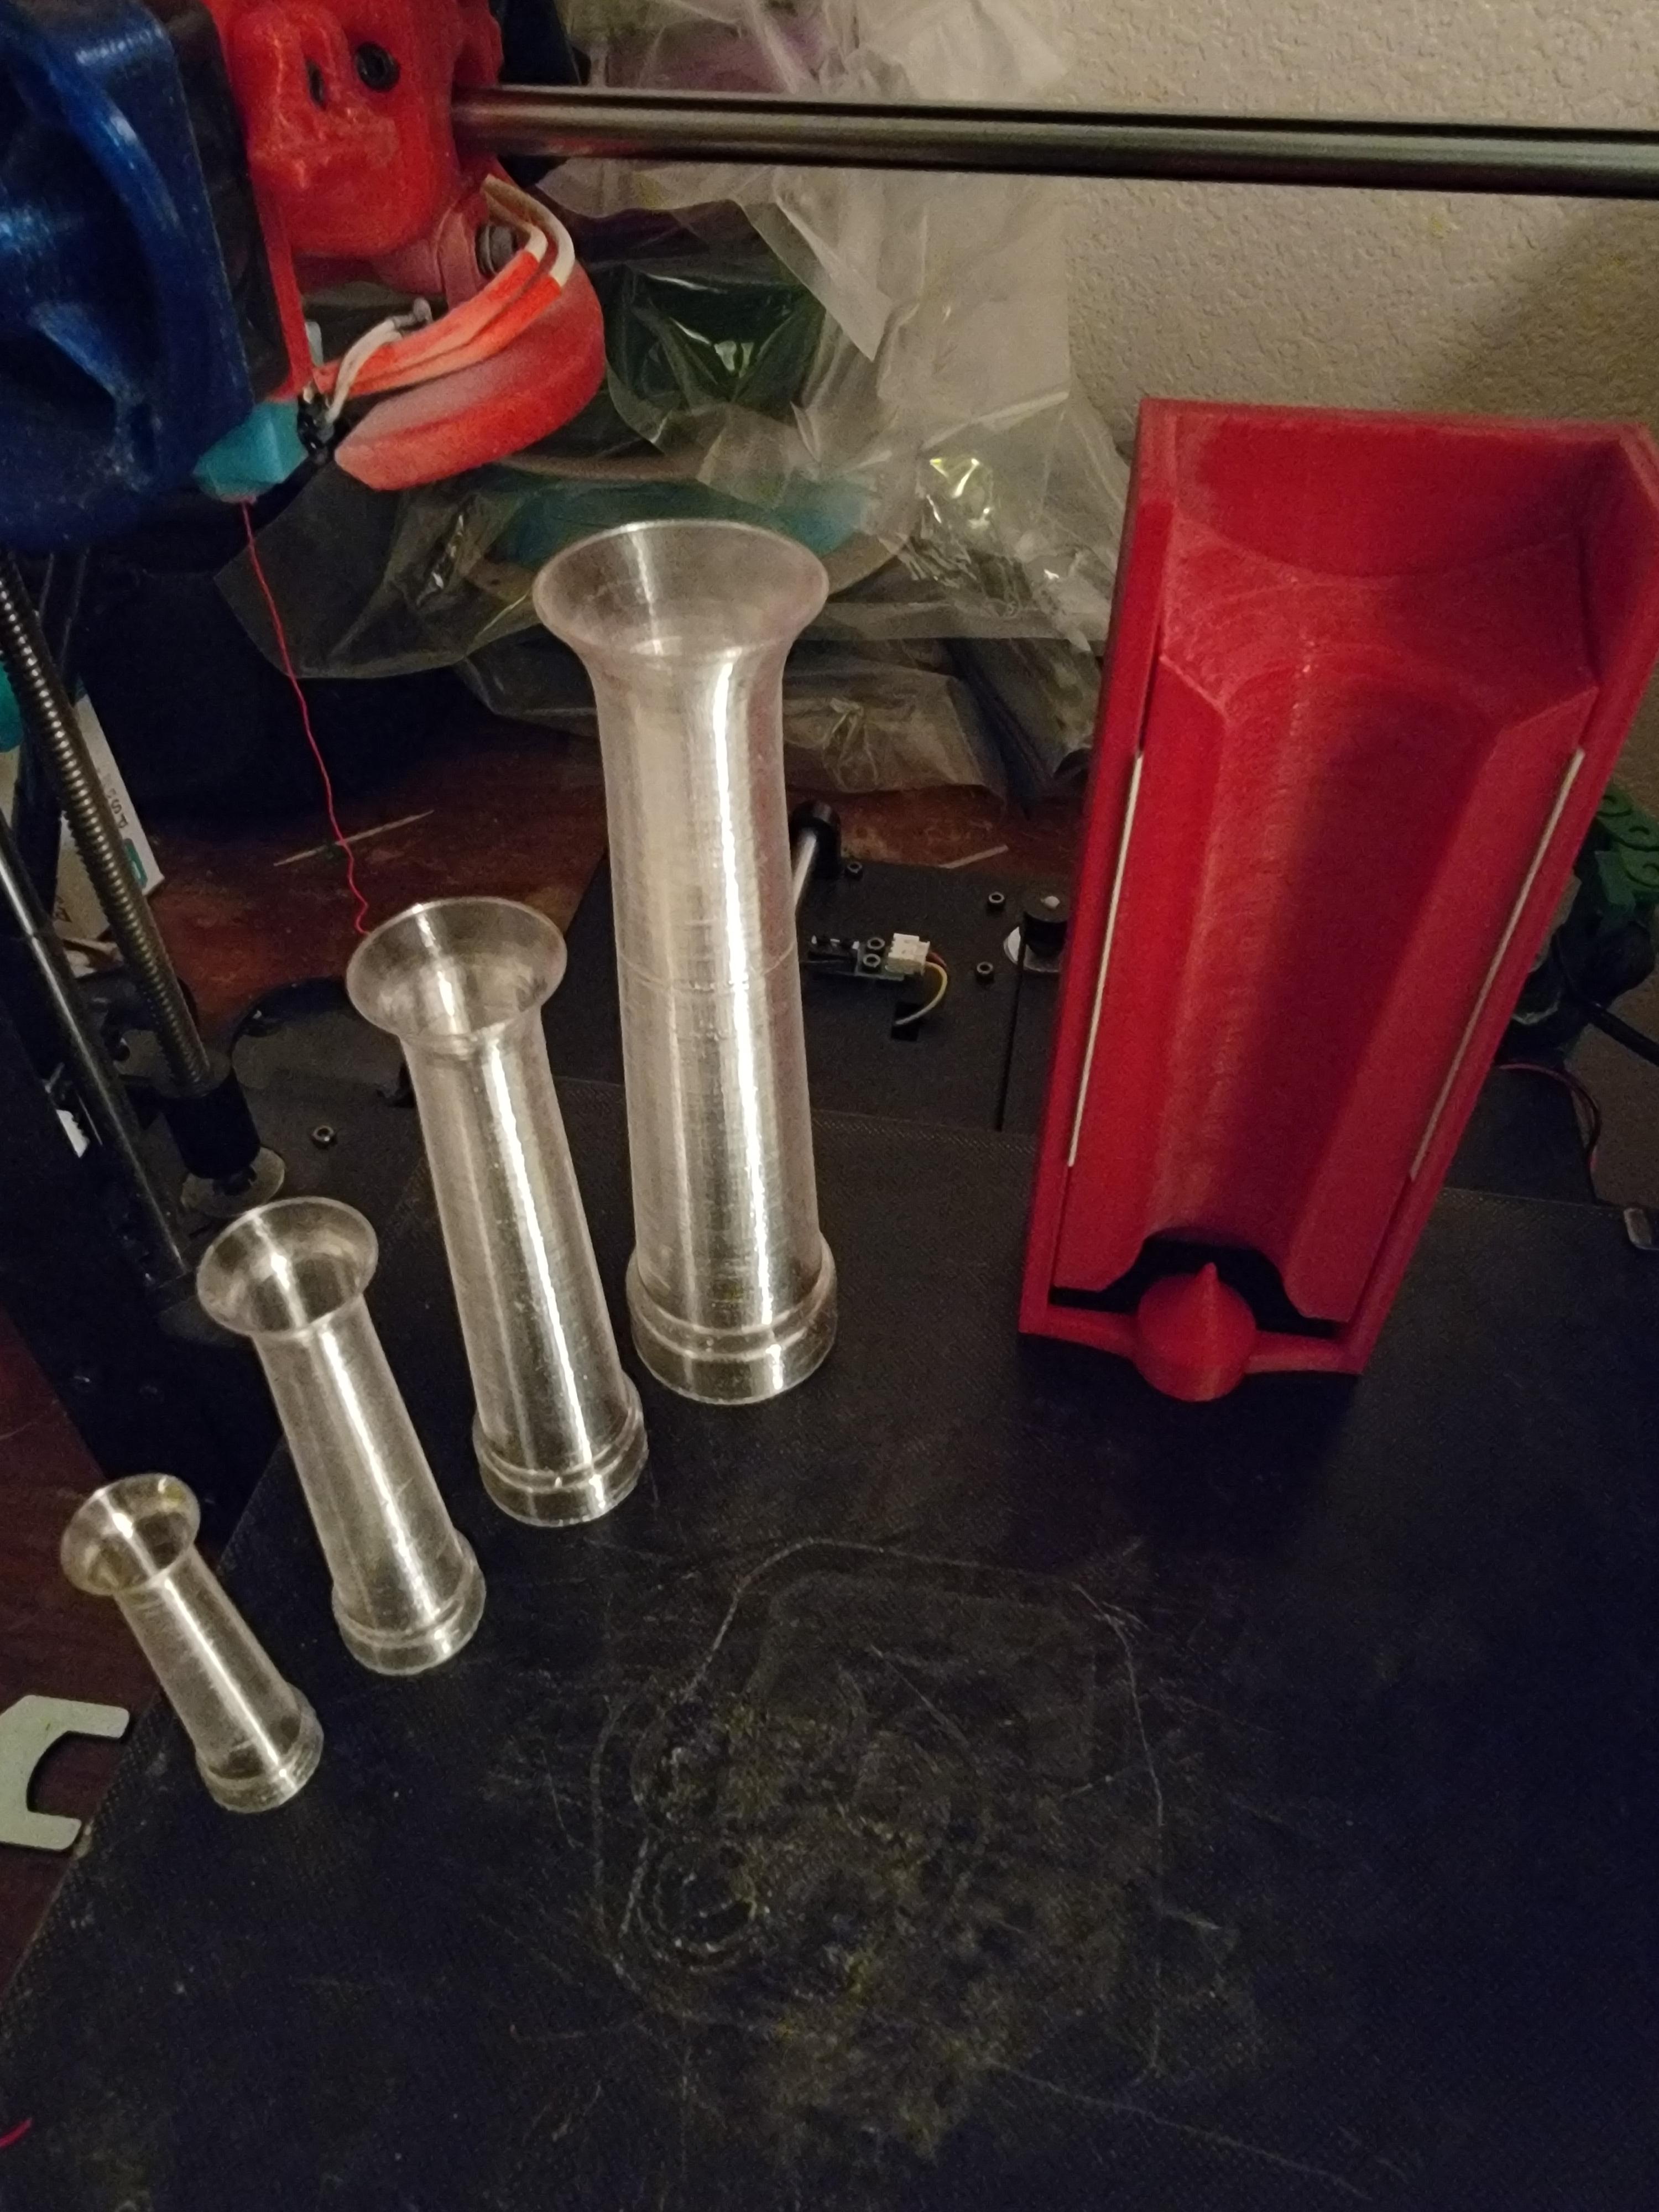
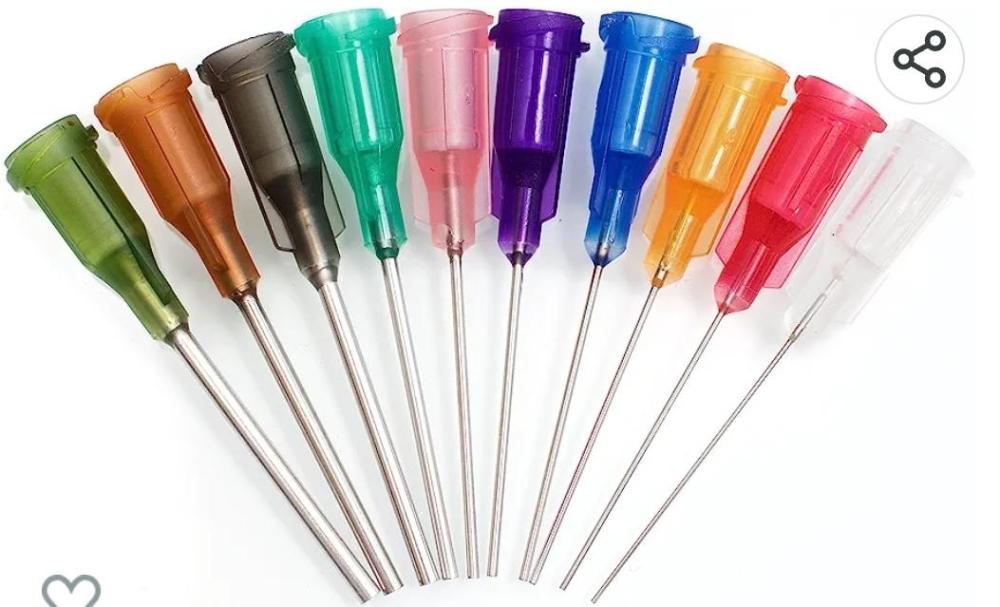
Have a set of punches on the way to be here Wednesday. Going to play with my paper and plistex 900 to really see what nozzles I can have fun with before converting to the hard refractory. Can just roll a tube and tape in place for tests. Have 30+ punch designs on the way, so if anyone comes up with a fun design to test, will be happy to play and toss it into the front of the burner. Printed nozzles down to 1/4. They are so cute. Used the id of the nominal schedule 40 black pipe for easier comparison, but no real reason to limit there. I don't think I mentioned these will be dispenser nozzles. So many fun sizes to play with. Grabbed some 19 gage stainless as those are one of the common sizes used, but also grabbed a 10 pack assortment from 14 to 27 gage . Have oodles of others to test, and only takes seconds to switch out.


-
hijack away my friend. Love to hear anything entertaining. Man after my own heart. Love anything live 1000x more than recorded. Just watched the gael with the air force on the last of the mohicans. Watching with yo yo ma now...just unvelieveble. Thank you for making my week better Frosty.
-
Thank you Thom for swapping that over to youtube, so those without facebook could see. Yes I did rewind and watched. Very moving. Thanks again.
-
Quad state September 22-24, 2023
Candidquality replied to BillyBones's topic in Events, Hammer ins, Where to meet
Thanks, yes no details on the website yet other than a countdown. Guess it's popular enough they are not worried about details yet. Appreciate you typing in what you know. -
My Ghetto Vert. Disk Grinder Build!
Candidquality replied to seagiant's topic in Grinders, Sanders, etc
Yep, I get the danger for sure. Last time I played with something that light/thin on that monster. -
Quad state September 22-24, 2023
Candidquality replied to BillyBones's topic in Events, Hammer ins, Where to meet
Thanks for the heads up Billy, For those of us not on the mailing list, do you mind putting in the details, time, place, costs, etc. I was trying to look for information last week, and was not able to get anything for 2023. -
JLP Blacksmith Teaching Center.
Candidquality replied to jlpservicesinc's topic in Building, Designing a Shop
Just finished playing catch-up on three years of a wild ride. Absolutely loving the shop and the old equipment. I don't know how you are getting out of your stage fright and doing videos, but they have been amazing to watch. Congratulation on getting your workshop completely filled as well, would be fun to be a fly on the wall watching that. Just a bit of a drive from Texas. Something I didn't hear you mention in all of your restoration was running a current through it and converting the rust back to steel. I keep an old battery charger around just for that purpose. You can just fold up a tarp big enough to surround it in liquid, add a bit of contaminant like salt or copper sulfate or borax, baking soda, etc. ( since you learned water is a bad conductor), and let it run for a day or two or week or two. Come back to a surface that will flash rust the instant it is pulled out, but that's easy to deal with on a teardown now that the parts separate to easily. Just converting the rust back, reduces the pressure (as rust swells away from the surface blocking pathways for oil to penetrate). Works best line of site to the rust, so surrounding it with multiple rods around the part, but not touching for a direct short work best. I personally ran across a box of theatre carbon arc rods that I use as sacrificial, and they deposit nothing but carbon dust on the part. Positive side goes to the donor bars in the tank, negative on the part you want to keep whole and remove rust from. You will wonder why you never tried it sooner. unless you already are, and didn' t cover it in the other 1000 things you are so accomplished at. I keep the copper sulfate for preventing fungus in my garden. Grab a bottle of "root kill" and check the ingredients, typically nothing but copper sulfate crystals. Toss a handful into a sock and drop it in a widemouth mason jar. It will saturate the solution and you now have a concentrate you can spray with a miracle grow style sprayer and keep fungus off your cucumbers, watermelons, etc. You could also use it to copper plate parts if you were feeling so inclined. Truly in awe. -
My Ghetto Vert. Disk Grinder Build!
Candidquality replied to seagiant's topic in Grinders, Sanders, etc
They will definitly move some metal. Had access to a larger one at a previous company, and used it to grind my diagonal peen. Did not take long on a 20" model. Not the one i used, but similar. Had it suck in a knife once....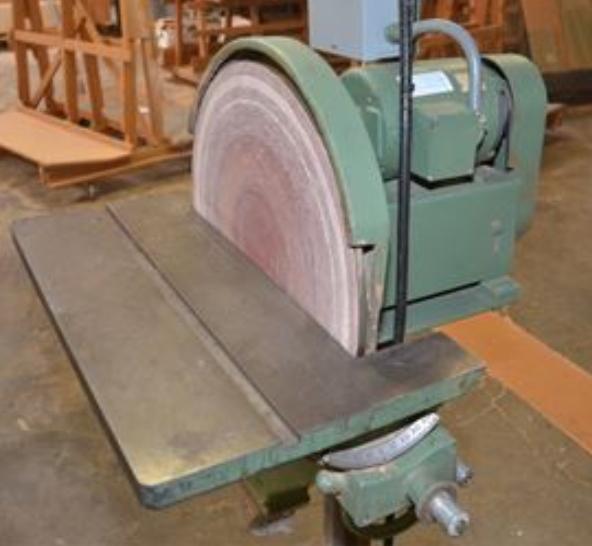
-
Not trying to stir the pot, 100% with buying the proper size tank, and more importantly, buying the right size burner. Just had a passing thought. Appreciate the confirmation it would not make any real difference tipping the tank (excluding the danger). One more way we know it would not help.
-
Would be interested if you run across it. No rush.
-
Video promotions or youtube setups
Candidquality replied to Candidquality's topic in The Business Side of Blacksmithing
Yep, watched a video for an ai company, pay about $20 a month and one of the features is removing background nois(but subscriptions erk me to no end). One of the reasons I was asking after watching yet another demo and could barely hear the speaker. Why I am interested in ribbon burners right now. halfway bearable sound. Old trick was to isolate the audio for the background and add an inverted track of the same noise. Works similar to active noise canceling headphones. Not perfect, but at least bearable. Would like to find a good cheap way to handle it without post processing.. -
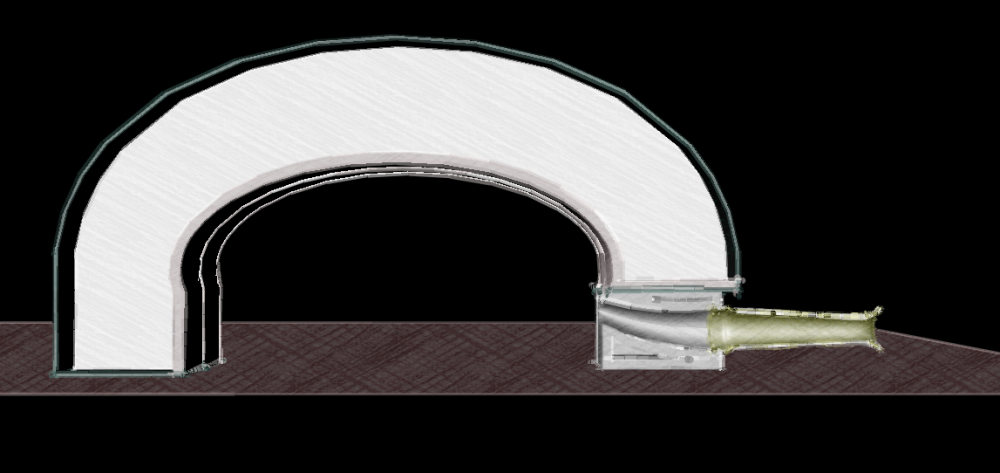
Actually that area inside the block has the same area for the entrance and exit. It is not a flare, and not intended to hold the flame inside the brick. Simply flattened to make use of the area available in a 3" wall height. Hopefully all the flame stays inside the forge away from my burner. I am sure I can angle it more since nothing is stopping me from having a larger burner entrance block. Was also considering ribbon burner with the jets at an angle from the surface of 45 degrees or more. I can play with those rather quickly as well. I have a decent supply of 1/16th inch thick paper good to 2350F, so a quick splash of plistex and I could test for a few hours if needed. Just need to buy a set of leather punches to pop in the holes. I get the better angle idea, this was a rough draft first time I have put my thoughts into paper. And as to the paper, this is actually output from my software. Reminded me of the old blueprints we used to have. Can make oodles more as they really do convey the idea without worry about dimensions.
-
Yes Mikey, Adjusting for altitude. Been reading too many t- burner posts and it's stuck in my head. Will have to see how it goes after the design is finished. Test burner designs cost almost a whole quarter to print. Mostly my design time in cad. Frosty, Good to know a rain storm is nothing to worry about. Just have to keep my eyes peeled for tornados....
-
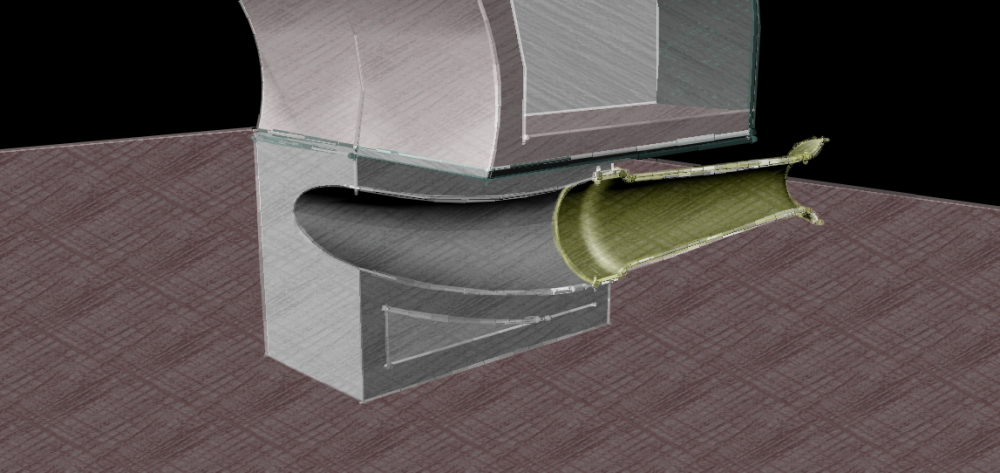
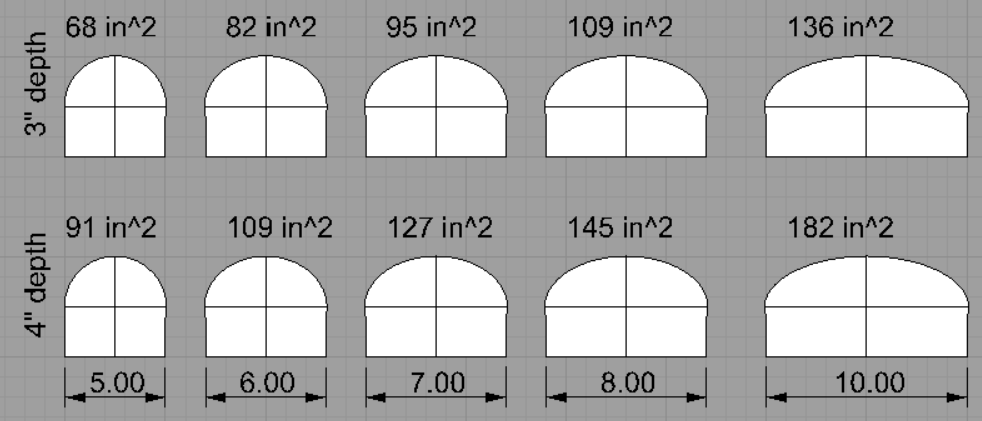
Here is an example for 10 inch wide by 3 inches deep. 5 inch high at the peak. Gives 136 cubic inches. the doors can be closer to the openings, which would keep in more heat, but by being wider, would allow for more ventilation to keep from stopping the NA burner. At least that's part of the thought. This is with a half inch burner, so should get to welding heat?
-
Since we only work a few inches at a time, I am looking at designing wide body, but narrow depth forges. We see similar in the ferrier forges with the wide side opening, but rarely are those side doors ever used by other designs. When they are used, they do not block off the unused opening area to get that reflectance back to the forge. So thought about the following smaller forge designs to keep from getting heat where it is not needed, without loosing all that reflected energy. Just a few volumes I'm considering, and will be building multiple shells for a table top adjustable forge. I'll be keeping the burner entry as it's own entity as a 2" high wall with burner or ribbon angled up to swirl and keep from having that oxidizing hot spot, so could easily switch between designs based on needs at the time.
-
How about simply tilting the tank? At what point in the tilt is it safe for a properly fully filled tank to be tilted? Even at the 80% full mark(proper full fill), we should be able to tilt 45 deg Since we are concerned with the surface area. Tilting would be useful to increase the liquid surface area, as long as you don't tilt so far as to pickup liquid. Tank would need to be 45% full or less to tilt to 90 degrees. on a 20# tank: Flat gives you approx. 113in^2 Tiltilg at 45deg would give you 122in^2 up to 151in^2 at the widest spot. Then tilting to 90% when below 40%fill would give you 153in^2 for a while. Bottom of the tank the angle decreases but it would still be better at 90deg for all. Taller tanks the number would go way up the further tilted. Dangers in picking up liquid? Would it damage the regulator? Just blow out your burner? I'm sure someone here could chime in with the dangers and pitfalls. But since the safest acceptable method discussed seems to be dropping it in a bucket with a few inches of water, why not make it safely hold your tank at better angles to increase surface area?
-
Yep, working through prototypes now with 3d printed burners. Once I get something feasable, I'll print a mold for a castable refractory for the final just so I don't have to worry about heat ever again. Honestly I could make that a production rig and be very comfortable that it would be isolated enough it would remain out of harms way, but sending it to the masses would be riddled with issues. Have a testing rig for adjusting the position on the jet down the burner tube which is also printed. So once I find the sweet spot I can either lock it in place there, or decide to create an adjustable version for trimming at altitude.
-
Mighy have missed it in a search, but was wondering what type of video equipment is recommended, and any tips or tricks currently being used. Obviously not wanting to invest in a Red, I don't want to try to make money shooting videos, maybe advice on entry level, mid level, and third preferred tier after that when money makes more money. one simple tip: Just ran across a few videos and noticed the ultra-violet purple glow. Easy fix is just a simple sheet of polycarbonate like Lexan (not acrylic or plexiglass). Polycarbonate as an amazing side effect is a light filter below 400 nanometers. Almost as if it was designed for it. So a small piece of polycarbonate sheet not only protects your lens, it blocks that unnatural light purple glow you don't see in person. Works for still shots as well, just keep it out of the way of your flash. obviously no commercial links, but even recommending brands or types should be ok.
-
Forging press build-looking for advice along the way
Candidquality replied to Marinegrunt's topic in Presses
Forget where I found them, but there are places that will make custom hydraulic hose lengths with the exact connections you need, and prices are reasonable. Can be much better quality than premade and of course you are not limited to what someone feels like stocking. Check the phone book for hydraulic hose. Sometimes they will even be interested enough to want to drop them off when completed to see what you are working on. And if anything does fail they will stand by their work. -
Thanks for posting Thom. Ill get the wife to login later and see. I did get a chance to see him on the NMABA meeting you posted from last years event. Good to see him. Did he ever start work on that bloomery to turn his collected scale back into iron?
-
Where to get a cross peen hammer in Atlanta
Candidquality replied to Crustfungus's topic in Hand Hammers
Just bought a couple from amazon. You can search " KSEIBI 271075 Machinist Engineers Hammer" for a 1# and they also have a 2# for under $20. Still needs dressing, but at least wood. Still prefer swap meets, garage sales, etc. But if you are under a time constriant and don't want to wait a month. Rather be hitting steel than out shopping...most days. Unless you are waiting for a new forge to cure. Glen had some nice custom ones, but not a budget buy, as no hand forged item should be. -
Viking bottle opener
Candidquality replied to gewoon ik's topic in Blacksmithing, General Discussion
And just since we are a group who teeters on the edge of danger. You can actually crack open (unscrew the top of) those cylinders and refill with the appropriate amount of dry ice at about $2 a refill. Instead of $50 for a new one. You can also pick them up cheap at thrift sales as they "just got too expensive" Just use a kitchen scale and fill by weight. about 1100 grams or so after taring the scale on an empty bottle. And to be on topic, i liked latticino's second from left. Felt a bit dr. seussy to me which i always find entertaining -
Forging press build-looking for advice along the way
Candidquality replied to Marinegrunt's topic in Presses
Sounds about right. As far as I can picture. Once you get it in place just make sure it all stacks up the way you think before you hit the welder again. -
Forging press build-looking for advice along the way
Candidquality replied to Marinegrunt's topic in Presses
Think Frosty was writing while you were replying to me. He gives way more detail... as usual.