
EricS
-
Posts
142 -
Joined
-
Last visited
Content Type
Profiles
Forums
Articles
Gallery
Downloads
Events
Posts posted by EricS
-
-
Congrats on PH Daniel !! This should make pounding out those blades little easier.
-
DSW I did make the nails and you are correct there are 2 nails holding it in studs. I knew the application would be to hold only a shallow shelf and few light pictures so I'm not worried about it falling due to weight. The nails secured it quite we'll to the studs. Thanks for the compliments.
-
Sorry for the upside down pics. It must be my I phone.
-
-
I spent about 6 hours making four of these brackets and then making the shelves from some 8/4 hickory I have. The wife is happy she finally got her shelves for the stair case.
-
[quote name="Frosty" post="402945" timestamp="
. Your strikers wont be back again either.
Frosty The Lucky. -
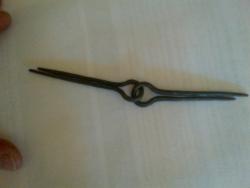
I would try forklift repair shops. We have a few places here in the Charlotte area that have a fairly large piles of scap tines behind there shops.
-
Vaughn OWWM was my original money pit I love the old Milwaukee Delta tools my shop is full with working machines that are begging for a restore. Forging has taken my interest for the last couple of years (only 1 woodworking project complete)
-
Sorry about the rotated photos ,stupid iphone
-
About 6 mo ago I bought this 250# Fisher off a guy on craigslist for $550. My uncle in New York drove down to Meadville, Pa to pick it up and I've been patiently waiting ever since. So my uncle came down to NC for Easter and brought my anvil along with some large pieces of sugar maple. I spent about a hour with the braided wire cup and some linseed oil and ended up with a like new anvil! I have even working on a 170#er and thought that was a large anvil, the mass this anvil has is beyond what I thought it would be. I don't think this thing was ever used .
Enjoy the pics


-
It would work. All you are doing is heating the wood to the point that it gives off gases. Not sure how economical it woud be. I get mine going with sticks from the woods( free).
-
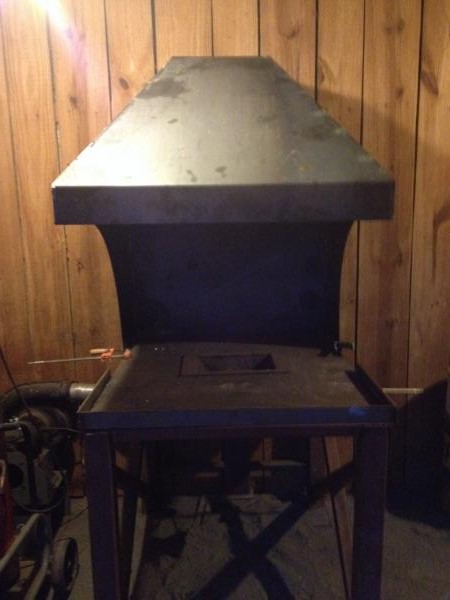
Gergely, it's 24" I have not used the hood yet. I built the forge about 1.5 years ago and was using a side draft on it. I'm changing fuels and position in the shop so it bought the hood was necessary. I going to be using a 10" spiral pipe that I use do my side draft if it doesn't pull good ill bump it up to 12"
-
So I decided to move my shop around after using it for about 1.5 years and seeing where I needed some improvements. I decided to build a full hood because I will be using my homemade pine charcoal instead of coal and I needed to shield the inside of the barn from the sparks that the charcoal generates. My son helped me get it tack welded together and set it up for a test fit. Here are a couple of pics.
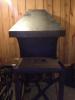
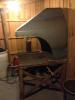
-
I ran a batch last night of really dry pine logs 2.5" dis x 14" long packed daily tight. The gassifying took a little longer but once it got going it was roaring. Here's a pic the 4" pipe was glowing red hot where it exits the retort

-
I did weld a bottom on my inner drum. If anything it will help keep the O2 out.
-
I used regular wall insulation and just sealed the top 1/2" with mud. I am finding that it takes a little more than an hour and a half. I have also been feeing the fire from the top with longer sticks this seams to get it heated up.
-
I got the first burn done. I did not get complete combustion. I should have kept the fire burning a little longer. So I did a second burn on Sunday. This time I kept the fire burning for about an hour after the initial gas flame. The yield with full gas combustion was about 75% of original volume. The quality of charcoal is excellent.
-
Daniel it looks like it will get the job done. I used the angle grinder and 240V welder to make mine also. I cut a piece of a angle iron every inch on 1 leg and and formed it to a 6 inch diameter for my flange. I wish I would have done what you did with the 1/4". Mine leaks quite a bit around the flange. I found you will have to feed the fire quite awhile after the gases start to combust the first batch of charcoal I did didn't fully gassify and I ended up with 1/2 charcoal 1/2 wood. Get her fired up!
-
I got the pipe from the scrap yard but the reducer came from a pipe supplier I think it was around $25.00.
I'll be using the same recipe as lee sauder and mark for my stack -
I fired up the retort about 1.5 hours ago. It was eating up fuel and i wasn't getting the roar Ian was speaking of. So I walk to the house for a glass of water and when I got back almost exactly 1. 5 into I could hear the roar slowly pick up. The fuel is out and she's running on gases!!!
Dan the pipe I used was sch 10 fire sprinkler steel pipe thinner wall but same OD so the sch 40 reducer worked fine.
I can't wait until the morning to see how the charcoal turned out I used pine and hickory. By the way I found a good source for clay in Charlotte ( no shipping) so as soon as the weather breaks I will have my stack built and I should be ready to have my first smelt. -
Mark said you were wanting to build one. I'm not to far away. you are welcome to check it out, just send me a PM
-
Now that we have a little snow on the ground it won't be so dry. We have had a burn ban in effect. I'll should be able to fire it up this weekend.
-
Ian I drilled the 12 above the flange and six 1" above the first 12 at 1/2" dia for a total of 18 holes
-
Finished up the retort today well almost finished . I still have to put the fire grate in the fire tube and get some caulk for the flange. Here are some pics. I'm going to try an fire it up sometime this week.


Just bought a 50# Murray
in Power Hammers, Treadle Hammers, Olivers
Posted
I've got all my material except 1 ingredient, time!