
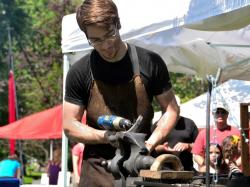
Colin Davies
-
Posts
32 -
Joined
-
Last visited
Content Type
Profiles
Forums
Articles
Gallery
Downloads
Events
Everything posted by Colin Davies
-
Suggestions on how to make this
Colin Davies replied to seth6galthie's topic in Blacksmithing, General Discussion
I got to do a workshop with Elmer Roush not long ago, making locks. He mentioned historical finds showing copper brazing, as well as other braze metals (forget specifics) and forge welding. Whatever you do, don't lock it until the key is made. You might think these look easy to pick, but even the simpler style I made was a challenge to open without the key... -
A Blacksmith by any other name.....
Colin Davies replied to SpankySmith's topic in Blacksmithing, General Discussion
Very true. Recently I saw a beautifully forged antique fire screen, some hundreds of forge welds in impossibly thin stock, a real work of art. Well, at some point it was damaged, and ended up with a god awful glob of cast iron mig welded on the top. Shameful. -
A Blacksmith by any other name.....
Colin Davies replied to SpankySmith's topic in Blacksmithing, General Discussion
I'm 3 years in, and getting comfortable with "blacksmith". I haven't gotten around to mastering everything yet, but I'm confident enough in my abilities that I no longer feel the need to prove myself or stress about what I'm called. ...except that I have a helper who refers to us as master and apprentice. I suppose I am HIS master, but I'm sure not A master by any stretch of the imagination. I'm ok with it around the shop, but I don't think it's appropriate to use those terms at public demos until I really deserve the title. -
Planning new anvil purchase, TFS, Peddinghaus...
Colin Davies replied to dntfxr's topic in Anvils, Swage Blocks, and Mandrels
As someone who bought the Peddinghaus #12 and is very happy with it, if I had it to do over I'd go with Refflinghaus. The transition from face to horn is almost useless on the Peddinghaus (can almost use as a step, but corner mars work easily). Some of the Refflinghaus patterns have everything mine does but with the addition of a feathered horn transition that is actually useful. At the time I bought mine I was determined to get a forged anvil, but I realize now that the inferiority of cast steel was more a thing of the early 20th century. Forged is still stronger than cast and is preferred for many applications, but in modern anvils I don't think there's much to choose between them. -
My anvil is set about 4" higher than knuckle height. It's a big section of wide flange beam, so not trivial to adjust it. I keep putting off taking the torch to it, so I knocked together a little platform to stand on and make up the height. This has become very convenient, as I can adjust my anvil height at a moment's notice according to the work.
-
I have one of these (don't own it; just hanging on to it for someone). I also saw one come up for sale locally a while back, so I was starting to think they might be an Ontario thing. I see you're also from these parts... a pattern emerges. Mine appears to be hardened cast steel. It strikes me as odd that the maker would obscure its own logo with the casting sprues/vents, so I wondered if someone might have used an old TFS anvil to make patterns for casting and not paid attention to the logo. It also seems strange that these would be sold with the horn flat, considering they seem like pretty good anvils otherwise. That's a lot of grinding for the end user.
-
Beginner projects aimed at honing skills?
Colin Davies replied to mperrine's topic in Blacksmithing, General Discussion
I find that just the basic blacksmith leaf is really good for developing the fundamentals. You get a very clear picture of progress/errors and it's quick to do. Controlling an upset, deep shouldering without cracking, square to round, short taper, directional spreading, edge bevels. I'm still very much in the process of refining my forging skills, and while I don't use a lot of these basic leaves in my designs, I do like to knock a few out now and then just to gauge my general progress. -
Here's my latest. I could use some help on ID, actually. The face is hard and there's no visible seam, so I'm thinking tool steel throughout. It has two square corners and two radiused, clearly forged like that on purpose. The mark appears to be PAS. I'm going to use this for preindustrial demos, even though I think it's likely a late 19th/early 20th century tool. One of these days I'll forge a proper Iron Age stake from wrought scrap...
-
Age Old Question...Does Anvil Size Matter?
Colin Davies replied to sparkymacker's topic in Anvils, Swage Blocks, and Mandrels
If you're willing to trade mobility for mass, you can somewhat make up for a lighter anvil by using a heavy stand. If the stand is massive and strong and you fasten the anvil really securely, they effectively become one big anvil. Look at power hammer bottom dies; similar idea. It's not going to help the horn and tail of say a narrow-waisted farrier's pattern much, though. If you plan heavy forging on the extremities, go for weight and a pattern like old German double horns, Nimba, etc. -
Power hammers and charcoal engines
Colin Davies replied to Glenn's topic in Power Hammers, Treadle Hammers, Olivers
Looks like a stirling engine, maybe. Some kind of external combustion cycle, anyway, with air as the working fluid. -
Hi Daniel, Here's some info you didn't ask for, but that might help at some point: When you go to reassemble, you can use a square-sectioned leather shoelace to replace the gasket (assuming the old one is toast). Also, you've clearly got one gear in there that isn't cast iron or steel. In mine it was phenolic composite (bakelite-impregnated paper, basically) and was coming apart. It's hard to see if yours is the same. Anyway, if it is and it's damaged, you may be able to repair/strengthen it by soaking in an epoxy glue thinned with a solvent like acetone (helps the epoxy penetrate deeper into the gear). It requires some creative clamping, but is pretty straightforward otherwise. Use paste wax and wax paper as release agents to keep the glue off the shafts, etc. The one I fixed this way ended up losing a tooth in the end (too much wear before I got it, didn't mesh well, eventually just popped off), but apart from that it was absolutely rock hard and incredibly tough. Good luck, Colin
-
new beast of an anvil :) (pic heavy)
Colin Davies replied to hiltsbilt's topic in Anvils, Swage Blocks, and Mandrels
Rice Lake is a terrible long drive for me, but seeing this I feel like a road trip may be in my future. -
overgripping the hammer - any solutions?
Colin Davies replied to jcornell's topic in Blacksmithing, General Discussion
I'm fairly new to this and, like you, still have to consciously focus on hammer control from time to time. The things that I've found helpful are: standing close to the anvil; keeping my back straight; raising the hammer good and high; and adjusting my grip before I start swinging (to prevent blisters, mainly). Whenever I tighten up on the hammer, it tends to be because I'm compensating for doing one of the above things wrong. -
New guy need help identifying an anvil
Colin Davies replied to simoncrk's topic in Anvils, Swage Blocks, and Mandrels
As far as determining the weight goes, you can always use a cheap bathroom scale. Anvils tend to weigh in the same range as people. -
Loneforge, are you aware of John Little in NS, and Paul Fontaine in NB? I don't know if Paul offers lessons, but John is a top-notch instructor and taught part of the course in Haliburton when I was there. I realize neither of them might necessarily qualify as “nearby", but they are options to think about. In regards to the general topic, I've had one semester of instruction and now... I consider myself an apprentice under myself. It's an awkward position, but about the best I can hope for without extensive travel outside Canada. Luckily I've had some experience working with detonable gas mixes and such hazards in the past, but my knowledge of traditional blacksmithing techniques is sorely lacking. As soon as I'm financially and professionally established, I have a long list of courses and workshops I want to take advantage of. It's sometimes difficult to know exactly what to pursue, though, as blacksmithing in Canada exists in a complete regulatory vacuum.
-
Slit and drift on the diamond
Colin Davies replied to Gayle Brooks's topic in Blacksmithing, General Discussion
As far as the support problem goes, now that you have an example of the finished product, you can make something to fit it perfectly. Weld some flat bar along the back of the support if necessary, and then cut out the clearance around the hole. Radius the cut edges and you won't have a problem marring the work as the unsupported section distorts. This worked for me doing 1" round holes in 1" square on the diamond. Came out perfect until I marked it up heading the tenons. -
When are you considered a blacksmith?
Colin Davies replied to mk74's topic in Blacksmithing, General Discussion
I call myself a blacksmith when talking to people who definitely aren't, to avoid confusion. I'll start telling other blacksmiths I'm one (instead of trying to be / learning / etc.) when I have either mastered all the traditional forged elements (scrolls, joints, welds, finials...) or my style is developed enough that someone who knows my work could look at it and say, "I know the blacksmith who forged that," or more likely some less rigorous combination of the two. -
Sounds good. As it stands, my plan is to use a xylene-thinned epoxy, roughly 1:1. I'll sandwich the gear between 1/4" plate with paste wax as a release agent and compress it using 3 c-clamps. I'll choose a slow enough epoxy that I can wait for the xylene to evaporate before pressing the gear. I assume there will be a bit of filing to do to clean excess epoxy off the teeth afterwards. Any obvious prolems with this scheme? Can anyone suggest a specific epoxy that is reasonably thin to begin with and, ideally, cures at room temperature? I don't mind tossing everything in the oven if need be, but I'd prefer to have as few things to screw up as possible.
-
Thanks for the replies. The gear is the same shape as another steel one in the train (to save on tooling, I assume), and that one is in good enough shape that I can get a copy made without much trouble. I'd guess the problem stems from the original cure process. The old patents I've found are pretty hand-wavy about how the layers get bonded after the initial lay-up and pressing. I suspect the resin was already mostly cured when they went together, or never really cured properly due to the high solvent fraction and thickness of the part. I'm going to see about consolidating it using a thinned epoxy as is done for rotten wood. There is enough fibre exposed that it should have something to latch onto, and the gear has enough give that I can press it back to its proper thickness in a vise.
-
I'm fixing up a Royal Western Chief blower, and everything's going well except for this: One of the gears is composed of some kind of pressed stack of fibrous material, and it's partially delaminated. Looking at it side-on, one half of the gear is visibly thicker, and the teeth all have circumferential cracks in them. Does anyone know what material and fixative/adhesive was used for these, and is it something I can restore by some kind of gluing/pressing operation, or will I need to have a replacement made? I should add that there isn't any material actually missing. None of the teeth are broken... yet.
-
Rob Martin of Thak does a lot of weapons and armour, and is extremely successful at it (he's also the main supplier of blacksmithing coal in Ontario). He would be a good person to emulate if you want to make a living from your interests eventually. I was in your shoes about a year ago, but I'm 27, so I have more autonomy to pursue my crazy interests. I took a weekend course in the basics with a local blacksmith, then a knifemaking workshop with Jake Powning at CanIRON VIII. Those things were a great intro, but I still knew basically nothing, had no skill at fire maintenance, hadn't done even basic scrolls and joinery methods. I wanted to work at this full time and turn a profit, so I decided to enroll in a 4-month artist blacksmith certificate program at Fleming College in Ontario. A degree or certificate in blacksmithing means nothing, except to people who don't know much about it. The important parts were the hundreds of hours working with coal and gas forges, and instruction from several accomplished blacksmiths plus short courses in drawing, design, and marketing/portfolio development for artists. That program brought me to the point where I can take on the financial risk of setting up a professional shop, without worrying that my lack of experience will cause my business to immediately fail (other factors may, of course!). I don't know of any other program in North America that is really similar - in fact there were a couple of students in my class who came up from the US for that reason. I know this is not something you can realistically take advantage of right now, but consider this an endorsement of intensive blacksmithing programs in general. Starting up a business is a huge investment if you do it all at once. I know many people start blacksmithing as a hobby in a space they already own, and accumulate the equipment for a full-size shop over many years. To get everything up and running in one shot, I've discovered, is difficult to do for much less than $10000, and that's without power hammers and some of the fancier stuff you might want. Still, this is cheap compared to many other types of business. If you start thinking about this now and begin working on a business plan, you'll have a much better chance of success when the time comes. Good luck! Colin
-
Hello everyone, After jumping in the deep end and posting in the "I have a right to know..." thread, I've gotten a little spooked about making a poor first impression with all the very knowledgeable and accomplished members on these forums. I'm what the New England School of Metalwork defines as a "seasoned beginner". Although I am making this my life's work, I've only been at it for the past year or so. I took a weekend course with a local blacksmith, attended CanIRON VIII, and then enrolled in the Artist Blacksmith program in Haliburton. Now I've rented a little 800 sqft industrial unit and I'm in the process of putting together my starter shop. I call myself a blacksmith, but I'm fully aware of how little I've done and how much I have to learn. On-the-job training is the name of the game, with myself as the teacher (though I've been gazing longingly at some of your course offerings - yes, you know who you are). I look forward to butting heads with strong personalities, only to later discover that I mostly agree with them. Colin
-
I have a right to know what you know
Colin Davies replied to ciladog's topic in Blacksmithing, General Discussion
There's a phrase that gets used in med school: "See one, do one, teach one" I think that's a pretty good strategy. Colin -
What numbers do you see?
Colin Davies replied to JimsShip's topic in Anvils, Swage Blocks, and Mandrels
I paid $250 for a 166# Peter Wright in pretty much the exact same condition as this one, sold by a professional blacksmith in New Brunswick. I think that was a fair price based on what I've seen since. As yours is a little smaller, what I can say is that to me, it would be worth somewhat less than $250. Prices seem to be going up, though. I think old anvils are becoming a viable investment product. Colin -
Blacksmithing finishes
Colin Davies replied to Farmweld's topic in Blacksmithing, General Discussion
I have no personal experience, but I'll pass on what I've been told as it hasn't been mentioned yet: There's a process called E-coating that can be used as an alternative to hot-dip galvanizing. It's conceptually similar to electroplating, and what you get is a base coat that penetrates every crevice of the treated piece and is perfectly adhered. I'm told it provides an excellent substrate for surface coats, is better for preserving detail, and resists cracking. You also don't have to worry so much about allowing for flow and drainage during the process. As I say, I have no personal experience with the stuff, but it was presented to me as being as-good-or-better than hot dip by someone who knows his stuff, so it may be worth looking into. Colin