
JGRAFF
-
Posts
94 -
Joined
-
Last visited
Content Type
Profiles
Forums
Articles
Gallery
Downloads
Events
Posts posted by JGRAFF
-
-
Thanks! The table top is a nice size (24" x 24" x .25"). it was a vibration fixture I built a couple of years ago at work. When the testing was done they let me take it home. Its been sitting in the corner collecting dust. So I cut the really short legs off and one of the four walls, built the frame under it and mounted my vise.
The table is pretty heavy and having a large footprint helps with bending. But, "hard" bending is not happening. I was thinking about anchoring down or just hanging a ton of weight on it, but that silicone trick might just work!
Any other ideas and or suggestions on getting this other vise freed up? -
I thought everyone would get some enjoyment out of these, so I’d like to share. The first is my newly mounted post vise. I love it and it is xxxxxxxxx! I just got done fixing the mount. The only problem I have is the screw is pretty striped when the jaws are opened past 5-6 inch. So it will need to be repaired soon. Also i want to add some leveling screws to the legs. My garage floor is nowhere near flat.
The second is another 5.5" jaw vise. But this thing is completely seized. I haven’t had a ton of time to fool with it. But i think some long soaking and maybe a torch and a BFH will be in its near future.
Next is a cute little thing. Not very practical for anything I do, but still nice to have.


-
Double post, Sorry.
-
Thank you very much. I just happy as hell to be forging again. :-D
-
Update.....finally I’m back up and running. And I am loving these burners. They are so easy to tune and get running properly. Thank you to all those that have assisted me in this build.
The only problem I have encountered since rebuilding the burners is when I close the front door it acts like it can’t breathe well and the burners huff and puff a little. Not bad, but I now know if I close the door I need to crack open the rear opening to allow it to breathe. I also took your advice and replaced the rubber tubing with copper tube and compression fittings. Works great and looks great. Can’t ask for any more than that.
JGRAFF


-
My avatar... 1939 257lb-er. Awesome anvils!!!!
-
I think im going to be fine. I fired it up and it ran pretty good! I might grind out the id of the open end of the of the wye. Also i can't imagine the mig tip being tapered having any affect. Mine is still .035".
-
I was just informed that the zburners made by Larry Z use 3/4" tube with a 1" wye fitting. Is this true? Can anyone confirm or deny? CRAP!!!!! I got 3/4" wyes!!! Hopefully this will still aspirate correctly.
-
Here are a few pictures of the SS burner flairs / flame holders i made. I bought a few SS pipe nipples (316/316L 1" Pipe Size X 6" Length) cut them down to 3 inches. Then i flaired the end by hammering it down over the ball of a ball-pein hammer until the opening was 1.25". :rolleyes: Hopefully this will work.
Does anyone know how far i should slip the flair onto the burner tube? Is there a scienctific method or guess and check?


-
JGRAFF,
The burners look pretty good but I think you ought to change some of the plumbing. I would consider changing that rubber hosing to copper. It's flexable enough that you can still adjust the burner tubes. I would not trust those barbed fittings and clamps. The air space above the forge gets really hot and I would expect the rubber hoses to soften.
It maybe good for a test run but not for prolonged use.
A soft hose is never a good thing..... ;- )
Good point. Thanks for the advice.
-
Update...... I am almost ready to fire it up!!!!!. I just got the SS flairs made late night but I still have to find some SS set screws to attach them to the burner tubes. So these pictures are prior to the flairs being installed but it sure does looks good!!! Plus putting it together allowed me to check for leaks up to the second ball valves. And go figure... I had a leak. So I pulled out the JB weld and laid it on thick around the joint. You can see it in the last picture right after the T-fitting. Once it all dried, it works great, at least up to around 20 psi (the highest my gauge will go). I decided to go with barbed fittings and propane rubber gas lines to feed the burners because that was available to me. At my 9-5 I work closely with the maintenance dept. and there are around 15 forklifts in operation and propane parts are readily available. Well, I still have my fingers crossed that this works. Hopefully I will fire this bad boy up tonight and give another good update soon. Thanks for
all the help thus far.JGRAFF


-
Working on my ss burner flairs right now. Should have a better update soon!!!
-
Well, I’ve made a decision........ I’m tearing the forge burner assembly apart and starting over. I want to go with a more "tried and true" burner design. I am gathering parts as we speak to put together two Zoeller Forge Z-burners. Hopefully I can get all the parts together soon, so that I can start swinging a hammer again. I also like the idea of bench tuning the individual burners. I will report back as soon as I start reassembling. Thanks to all that provided guidance.
Thanks again,
JGRAFF

-
So they came from an old furnace, was it a natural gas or propane furnace? What is the average inside diameter of the tubes as measure after the bell inlet? How long are they as measured from the orifice? Is there a flame holder on the ends inside the forge? How far into the insulation of the forge do the tubes protrude?
I wouldn't bother getting another regulator just yet. You should be able to run the forge on less than 20 PSI.
I would assume natural gas, but i don’t know. The seller just told me they were from an "old furnace".
The average ID of the burners is probably around 1 inch. After the bell portion the ID is about 3/4" and at the end it's about 1.25". The total overall measurement (from orifice to nozzle) is about 8 inches.
By "flame holder" do you mean some sort of stainless steel flared tubing? If so, no.
Also, your next question was something else i was worried about. First of all, the burner in cast iron, and as i said in the previous sentence, there is no flame holder at the end. The end of the burner is about 0.25" up inside the wool and refractory. Bad?
-
Try isolating each burner to see how they operate at different pressures. I cant tell from the pictures, is the 90' turn in the burner welded on or does it look like the burner was made that way?
It looks like the orifice might be to big. 0.45 is good for tubing 1" inside diameter... You also need to be sure the fuel stream is traveling down the center of the burner tube. The bends at the end of the tube may be causing to much back pressure with such a low fuel inlet pressure.
I definitely need to isolate the burners. That will help trouble shoot. I attached a few more pictures to try to clarify the set-up. I was told the burner tubes are off of some kind of old furnace. But I am sure the orifice is blowing down the center of the burner. What diameter orifice do you think I should have? 0.025", 0.035", maybe a few different ones and just see what works best?
My next few moves will be to get a new regulator gauge (because the one I have only goes up to 20 I think), a couple ball valves (to isolate the two burners), and make a few different diameter orifice tubes. I will definitely report back asap. In the meantime keep the suggestions coming.
Thanks,
JGRAFF


-
When you say "nozzle" do you mean the pinhole? It is .045 diameter. I tried choking the air intake and got no better results. I also checked all connections for leaks and all is good. Is there anything else I'm missing? From the pictures can anyone identify what the burners are off of?
-
Ok OK, I get it, you need more from me.
Yes, it is homemade and the burners are from some sort of furnace (i was told). It is naturally aspirated, and i know the tank is low but not empty. I was running it around 3 psi only because somthing was obviously wrong and i didnt feel like blowing the house up. And Yes, when i took all the lines apart there was rust particals and dirt and metal shavings in the tubing (i assume from the black iron fittings).
I loaded a few pics of the forge durring operation. You can see in the second and third picture the flame not traveling down but staying in the burner about 2 inches from the nozzle. Hopefully they can better clerify the set-up.


-
Hey IFI, I know it's been awhile since I've made a post here but I was hoping someone with more knowledge than me could help. I bought this forge last September. I ran it a little when I first got it but it ran poorly. So, I decided to take it apart and clean it. I got tons of shavings and dirt out of the lines. So tonight i finally finished puting it back together. So, I hooked up a tank and fired it up. But, now it runs even worse than it ever had. Its poping, cracking, buffering noises. It sounds like a double bass on a drum set. Haha Hopefully you guys have some suggestions. Help!!!!! Thanks, Jgraff
-
This will be my first QS!!!!!! Can't wait.
-
I thank you so much for all the photos and comentary you provide. This just makes me want to come down and take classes even more!!!
Brian, one of these days you will be hearing from this cincinnati suburban blacksmith. HAHA!! Hopefully sooner and not later. Good work, keep it up!!!!
P.S. Can i make a request for more videos? Its got to be more work on your part, but i'm sure we all will enjoy. -
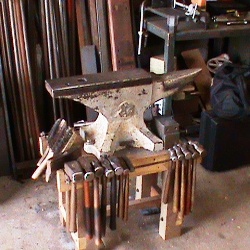
That looks great! Sometimes I wish my rack was horizontal. I always lose things behind the big stuff in my vertical rack. BTW awesome power hammer!!!
-
My job keeps me driving all around. It's a good job and I really like that every day provides me with something different.
Until today.
I just happened to be rolling past an old farmstead when I noticed a Fisher anvil sitting on a stump amidst a few wood-burning kitchen stoves. The bolt lugs were easily visible...
Keep in mind that a Fisher anvil around 200# is my dream anvil. I have literally dreamed of this anvil as I sleep, and I constantly keep an eye open for one as I run around the state doing my job.
To get this close to one is simply unheard of. From the looks of it, it had to be about 200#, but it was covered in rust. "Fisher" was clearly printed on the foot, though.
When I pulled into the driveway to introduce myself, hoping against all hope that I might have found another blacksmith if not an anvil for sale, I was met with outright hostility. How dare I pull into their driveway!?!?!
Wow. It's not like they were living well off the highway!
When I inquired as to whether or not the guy did any forging, he completely ignored my question and told me that, "That anvil isn't for public use."
What does that even mean?
Suffice it to say I didn't spend much time visiting. But I will be keeping watch for any auction signs....
I’m sorry to hear about that bad experience, VaughnT.
I’ll tell you what... if you're ever in Cincinnati, let me know and feel free to pull in my drive and use my 257lb Fisher.
I know it's been said before, but, we all have to work on getting these anvils and other tools away from people who collect and hoard!! These are TOOLS people!!! They are made to be used!!!! OK, I’m stepping down off my soapbox now. HAHA -
I would not strip the paint- you already named your baby and think of the emotional trauma associated with a name change :P .
Thanks everyone for the advice!
I don't think i will strip the paint. Like r smith said, i already named my baby, so there is that emotional attachment there. HAHA
Anyway, im on the hunt for another 110v motor. Maybe one that is reversable. That way i can tap with ease. -
Thank you, thank you. I started cleaning it up yesterday. WOW this thing is dirty!!
I'd like to take a vote. Should I strip the paint or not?
I know I need disassemble the spindles because they could use a good thorough cleaning and lubing. And I think I want to set-up a new drive config. Right now the two spindles move at the same RPM and run at the same time. I’d like to set something up so I can power only one spindle at a time. This may involve two motors and two switches. My main reason for this idea is so I can run them at two different RPM and also not have to worry about getting a sleeve caught in the spindle not in use. Thoughts?


My newly mounted vise and others
in Vises
Posted
I understand your concern but it's not a disk. Its a forged ring or collar I made to snugly fit the foot of the leg. The picture is kind of deceiving. I have some leveling feet on order now. I will take some better pictures when I get them.