Kette
-
Posts
33 -
Joined
-
Last visited
Content Type
Profiles
Forums
Articles
Gallery
Downloads
Events
Everything posted by Kette
-
Buzzkill, you've got it. I tend to cheat and straighten the blades at very low working temperatures, usually near the tip and the bolster! I thought I was getting away with it since it's 5160 and it would get normalized in the end anyways. Looks like I've got a dozen knives to heat treat again. Practice makes perfect right? And Thomas, yes I've seen that before with my big post vice. Though I didn't know exactly why, great info. Thank you gentlemen!
-
You could certainly be right, I suppose my eyeballs can't be trusted anymore. I also didn't know the temperature reached for normalizing could make a difference, typically I just heat to my normal forging heat and give it time to cool. Thanks for sharing, I'll give your method a try.
-
I don't normally check with a magnet, thought I knew the color well enough. If anything I was worried I was quenching too hot, but sounds like I'll need to check with the magnet next time. Thanks!
-
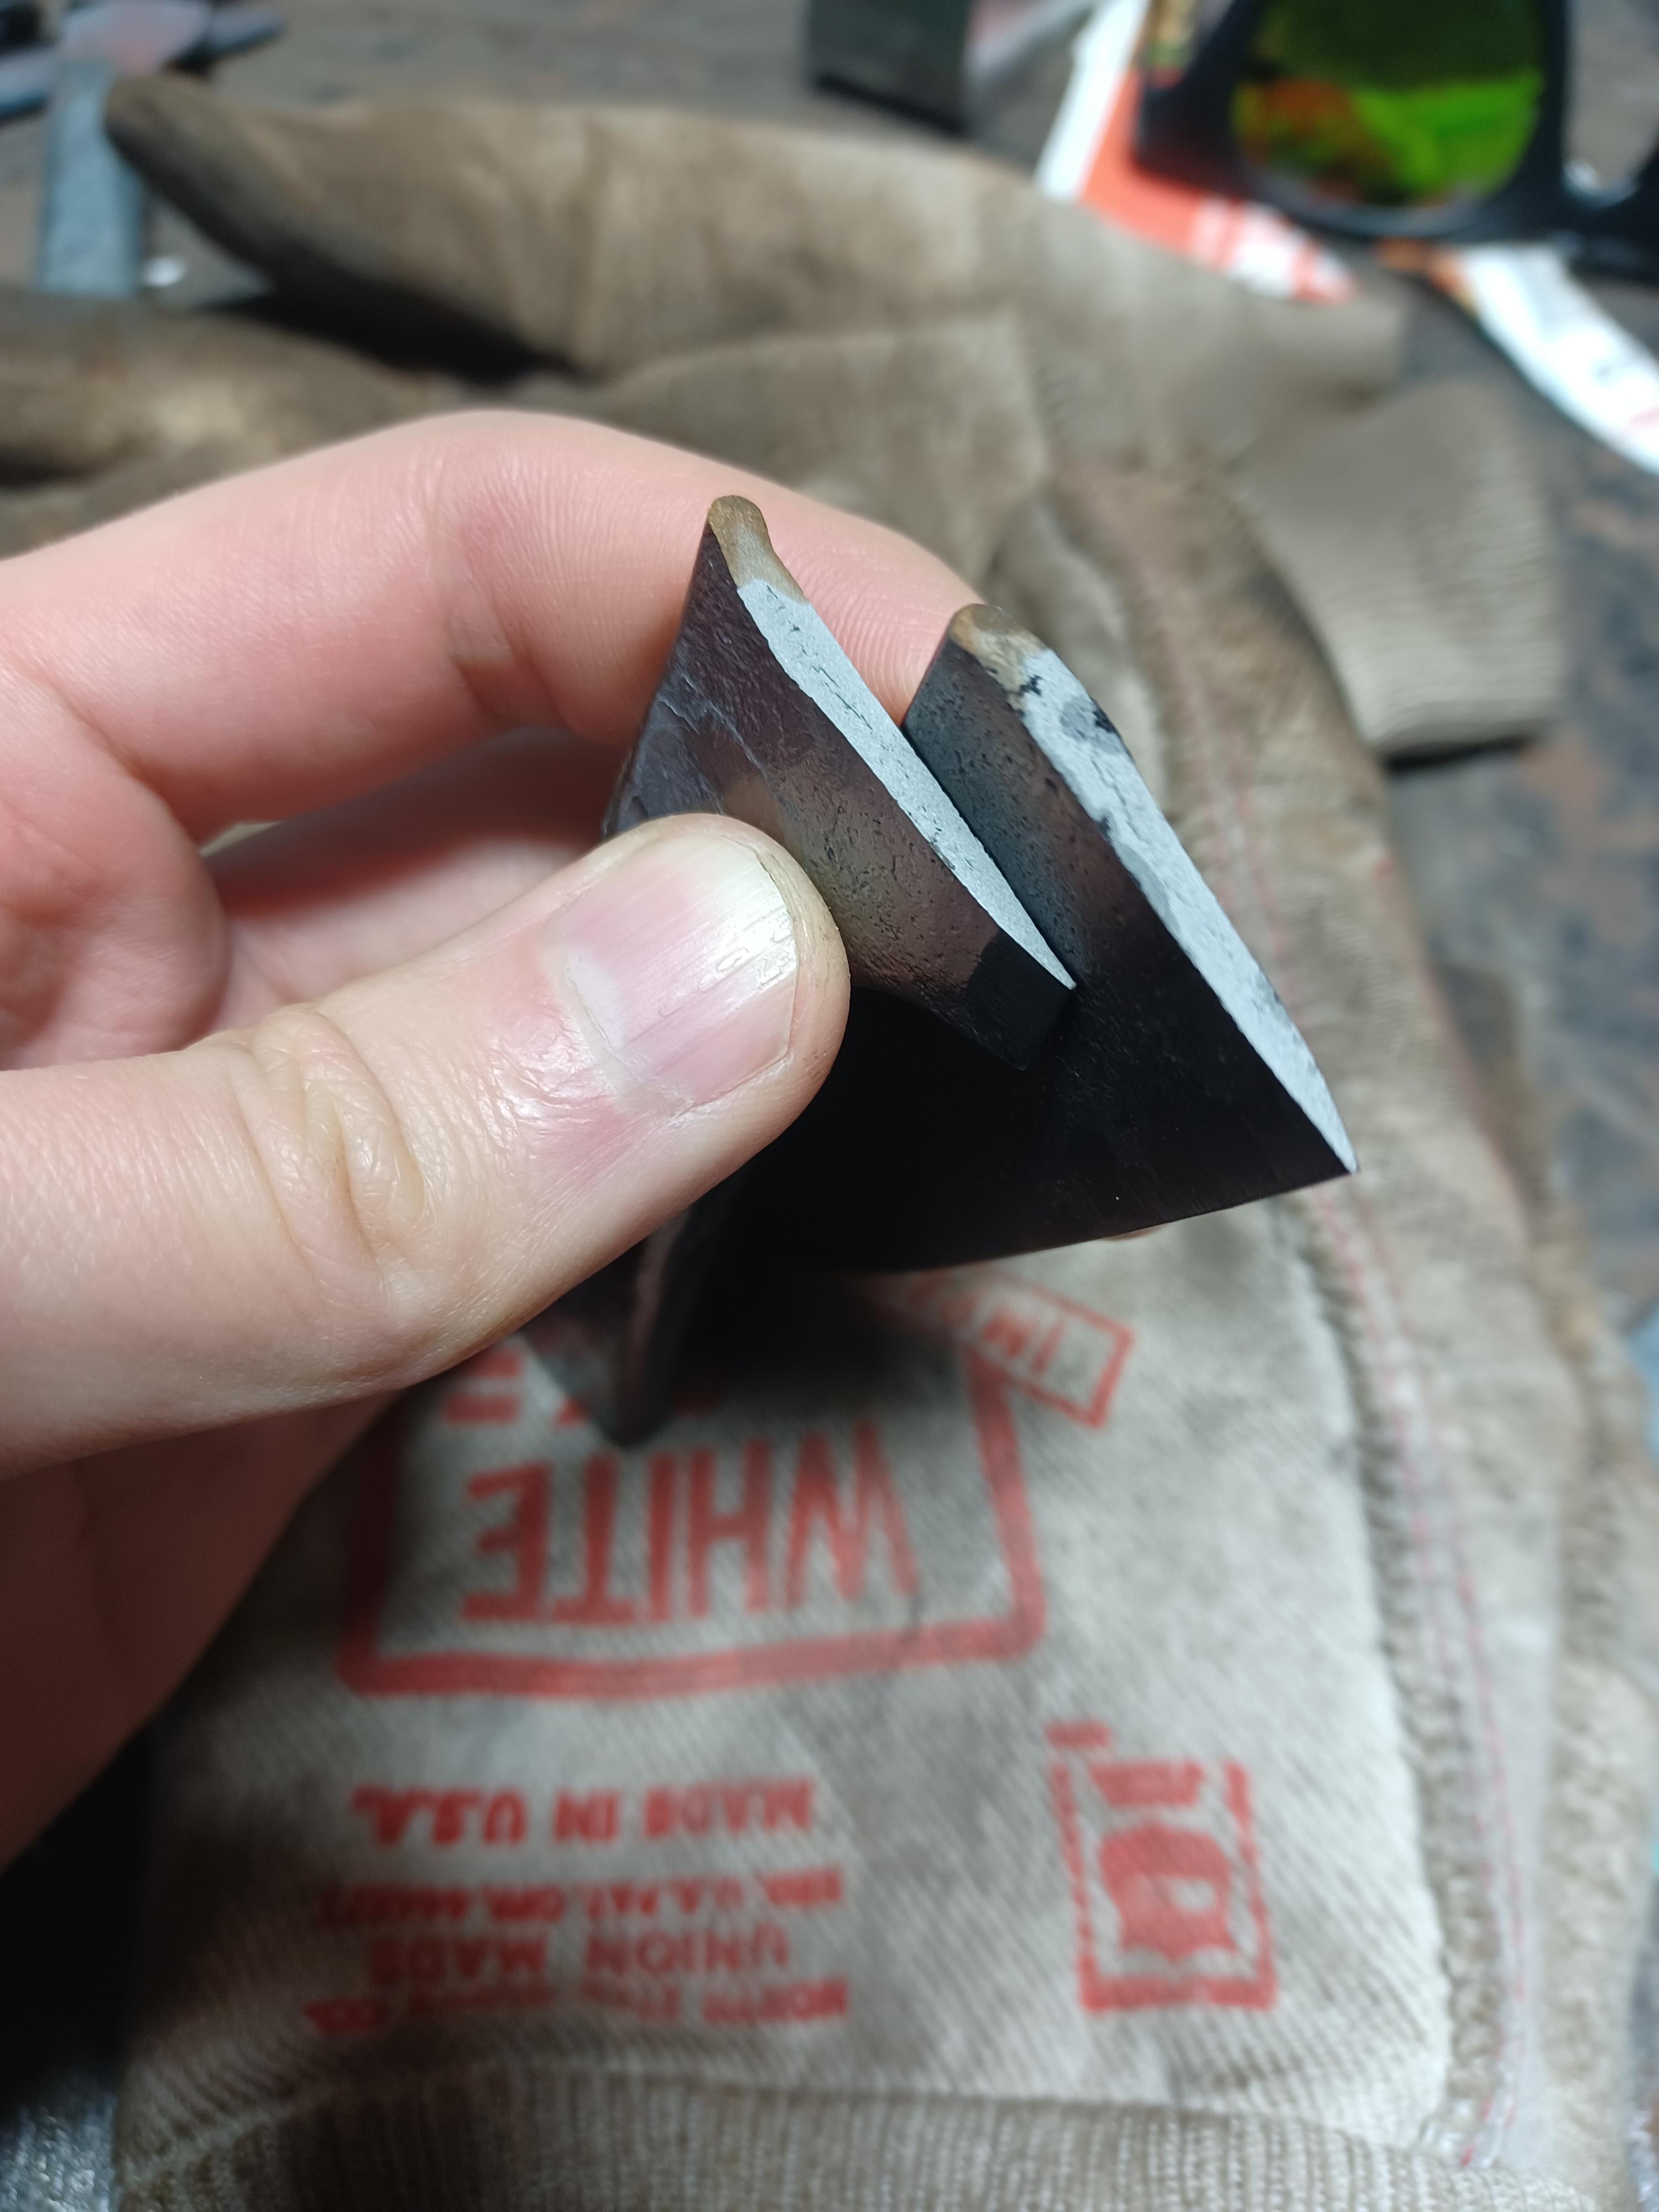
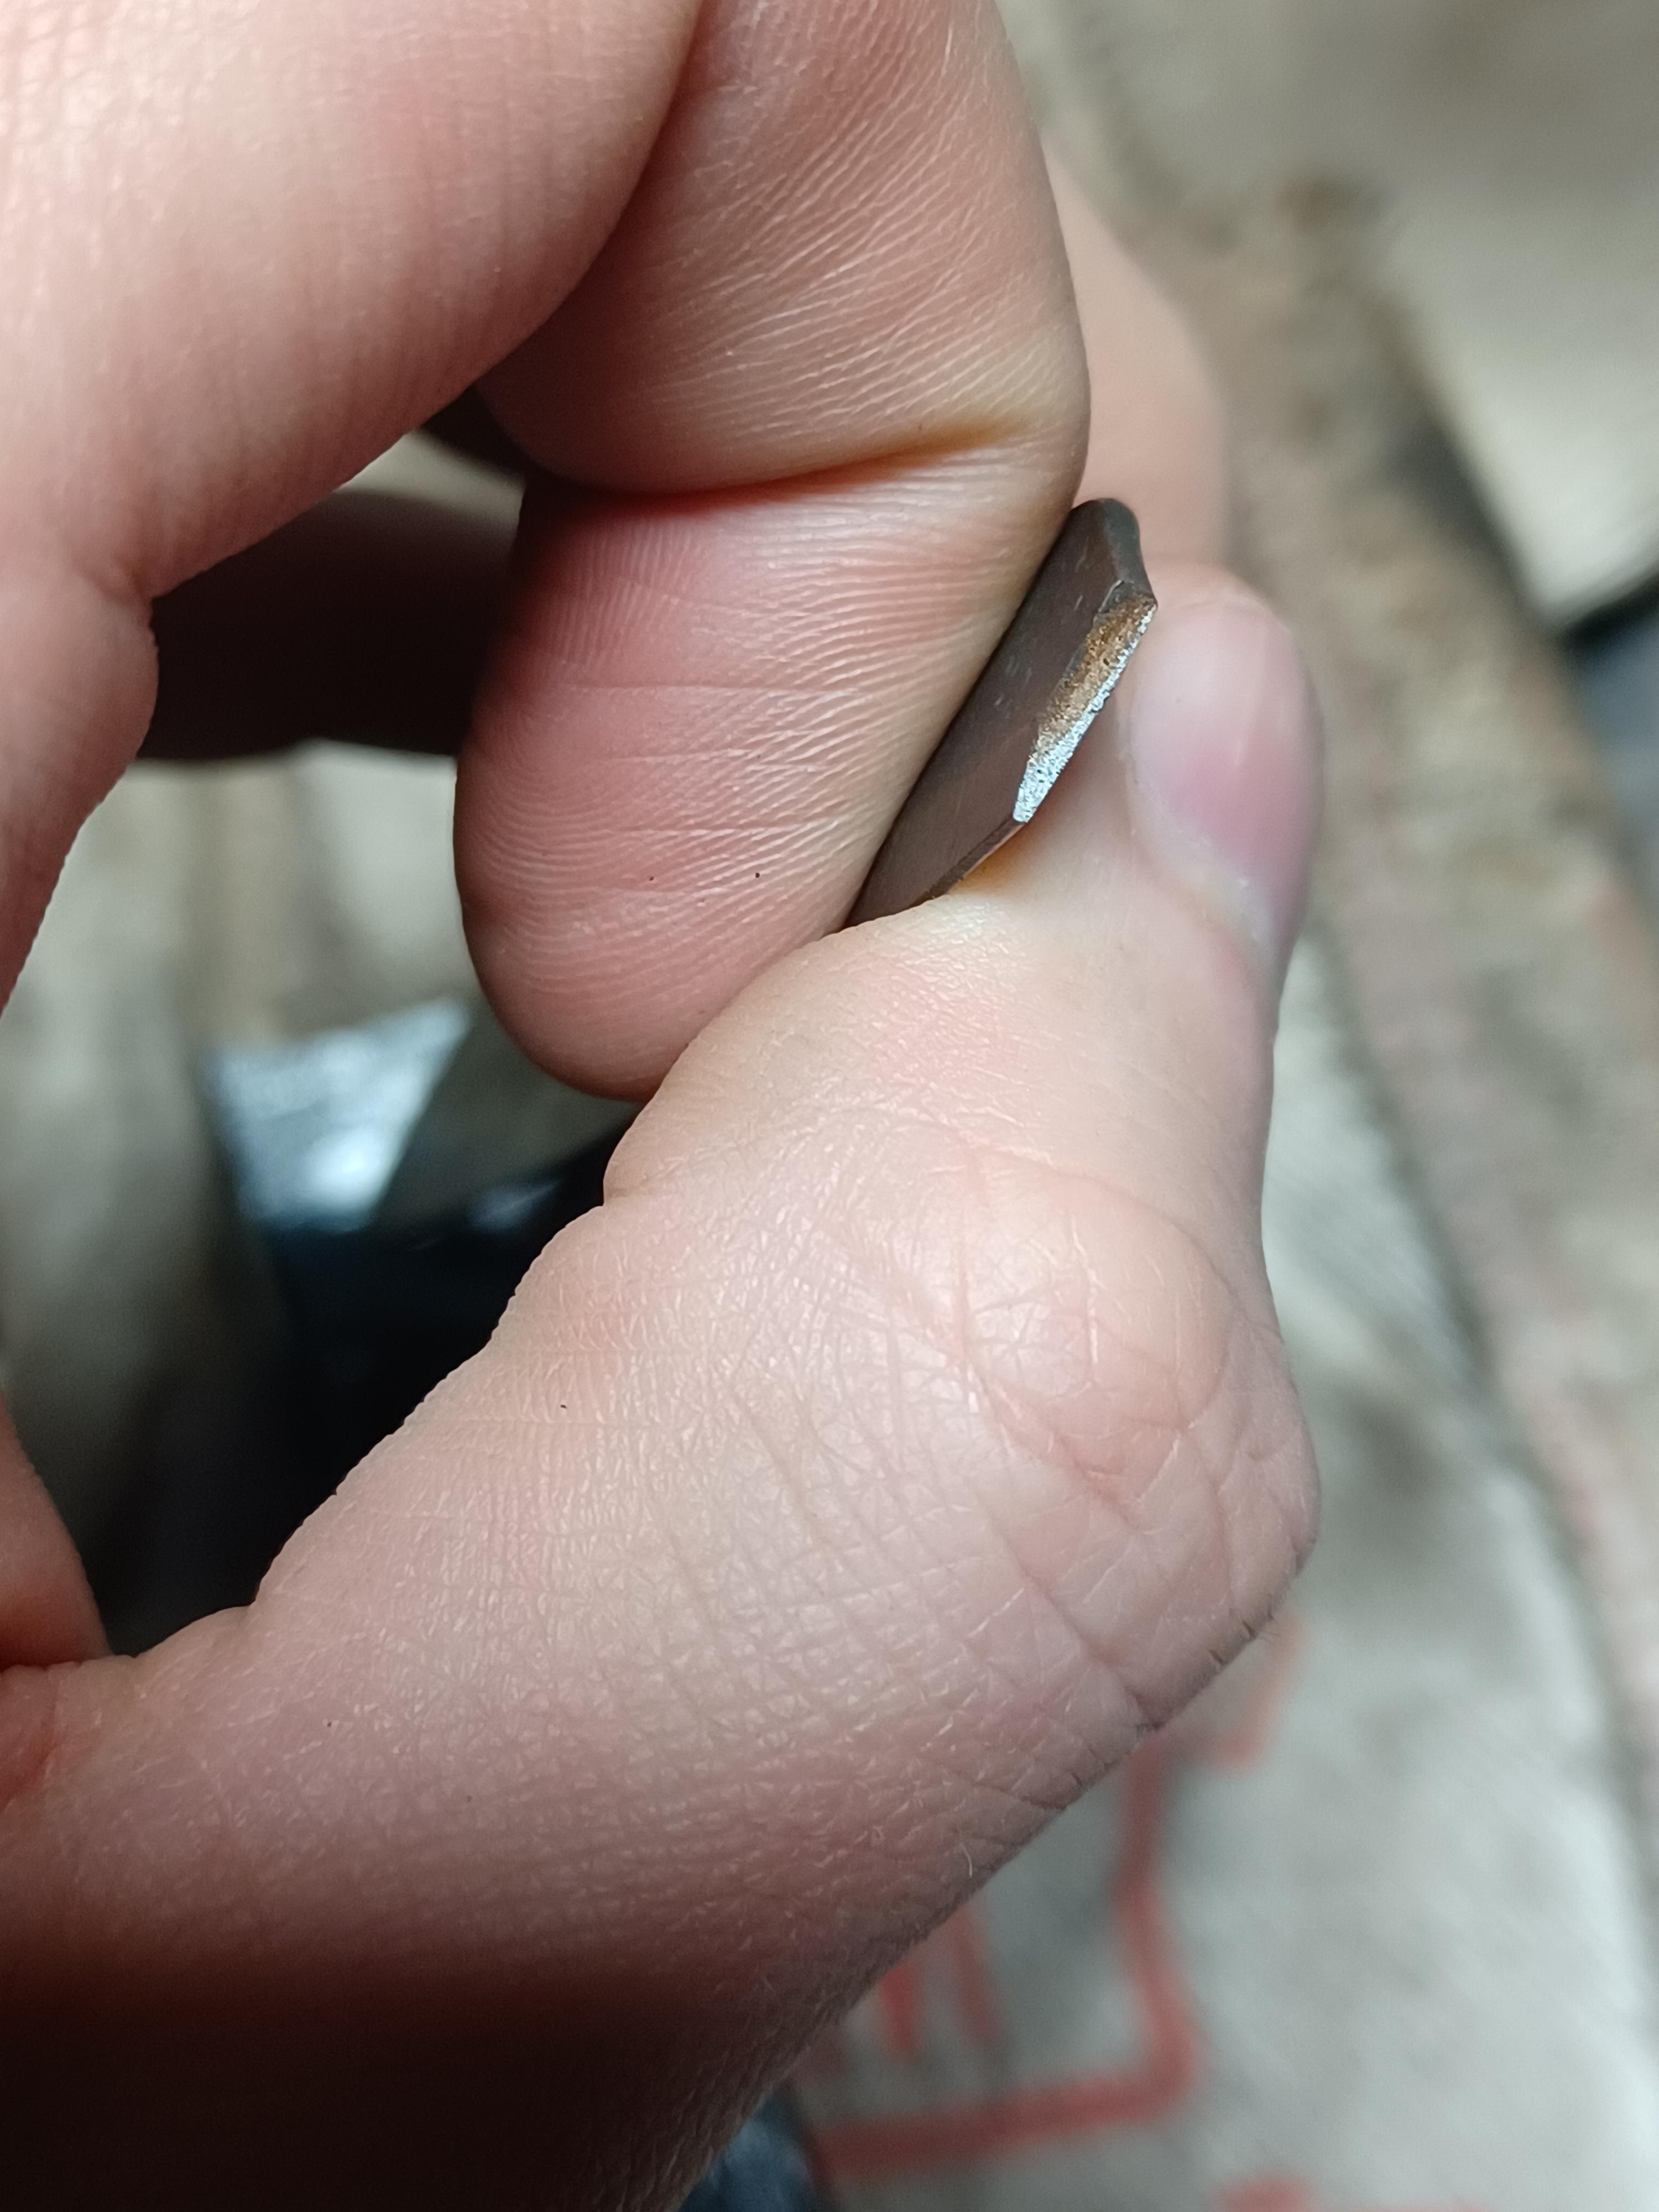
So I've got some strange behavior and discoloration that I don't understand. I'm using known steel, 5160. I forge my knives and then normalize 3 times followed by a nice and even pre-grind. I quench between red and orange (by eye, using the forge), making sure to have a really even temperature throughout the blade. I use parks 50 at room temperature for the oil. Then temper at 400 in the oven for at least an hour, two cycles. I've had great results overall but have noticed this discoloration on the few breaks I get, in this instance it happened both at the bolster, AND the tip of the blade. Any clue as to what this could be? Also while you're here, how's my grain structure? Thanks!


-
Looking to upgrade to a new hammer, need advice.
Kette replied to Kette's topic in Power Hammers, Treadle Hammers, Olivers
Thanks for the slick photo's. That's a fine looking beast even with all the franken bits. Your info on the striking heights is seriously helpful, and I think that's even more than my 50lb will realistically do. I assume the stroke height is adjusted with that odd lever sticking off the right hand side, which screws up and down along the threads on the drive rod? I've got a similar system on my old camel-back drill press, and I really like it. This is the part that blows my mind. I tuned my 50lb down quite a bit lower than the suggested speeds in the specs from LG's website. I found this was easier to control and safer. The lack of a spring system on the Bradley's makes me think they don't hit as hard if ran at a lower BPM because they lose speed on slower strokes. It's nice to have the high end BPM, but can you still get decent control at slower speeds? The brake is a bit of a selling point too, never got around to putting one on my 50lb. How does that seem to perform for your hammer? -
Hello, I've been sifting through the forums for years for information and wanted to say thank you to everyone who's sharing what they know on here. As a blacksmith relatively early in his career this place is an incredibly valuable resource. Now to the situation: I have owned and operated a 50lb little giant for 6 or so years now, and it has certainly helped me along making knives and smaller sculptures. I have the funds to invest into an upgrade for my shop, and have a few options currently on the table but can't quite figure out the best move. I certainly want a heavier hammer, I'd like a 100lb if possible just as a catch all to the kind of work I do, while not being oversized for forging thinner blades. I am eyeing a few that are up for sale at an auction next month (The Phil Cox estate auction, I hardly knew him but I enjoyed every second I got to talk to him). Almost all of the advice I've come across is to get a self contained hammer, which I am able to afford if needed. However there are two Bradley helve's of Phil's that have peaked my interest. Buying another mechanical hammer comes with the requirement that it be more affordable than a brand new air hammer by a significant margin, otherwise I could just go all out and buy a new Say-Mak or something similar. With it being an auction there is no way to really gauge the going price but I'm more wondering about performance. There is a 75lb Bradley strap, which seems properly sized and easy enough to maintain considering it's in great running order. Another Bradley that is a guided helve (with the wooden beam) that is 125#, but lacks the snappy action of the strap style from what I've read, and the overall weight is slightly too much to be handled easily by my means (but I could manage). Along side these two machines, there is a 50kg Say-Mak, which I'm sure is in great running order and technically fits the bill for everything I would need. In terms of getting the biggest and best hammer I can afford for the long run, I'm not sure if I should even consider the Bradley's. I'm familiar with mechanicals, and the Bradley's are both more powerful, and safer in my opinion than my 50lb LG with all the whizzing parts right in my face. The two biggest drawbacks I can see is that the space between the dies might be prohibitive, BUT I know they can be adjusted to change the throw and accommodate more tooling (I'd need to punch hammers, and smaller axe heads). As well as not being able to get new dies in the future should I need them (would have to get them custom made which is just more upkeep in the long run). So I pose this situation to you fellows: If I could get my hands on a Bradley for a reasonable price, would it be worth it? If so, what would YOU want to pay for one, and which one would you prefer? Would you go straight for the used Say-Mak? Or would you just buy a new self contained and be done with the whole situation? Thanks for reading, I appreciate any input! -Kyle
-
Your website is spot on! I always like seeing your stuff on instagram. I'm dealing with all the same things but am a couple years behind you, so I sympathize. It's tricky finding what pays the bills consistently. I think Latticino hit the nail on the head, and that advice rings loud in my ears. Casting a wide net seems like a good option since the craft is so versatile, yet as a business you HAVE to specialize it seems. At least that's what people tend to tell me. Then the long arduous task of finding out "What is my specialty?". If you have any new insight into that feel free to share! I hope your year has been productive.
-
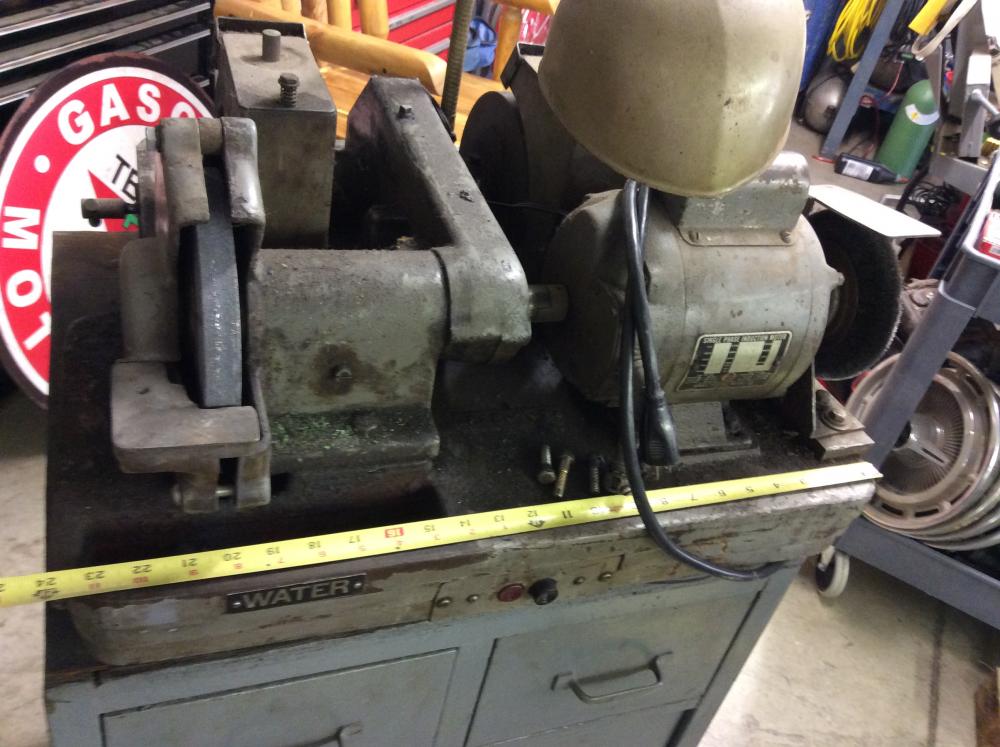
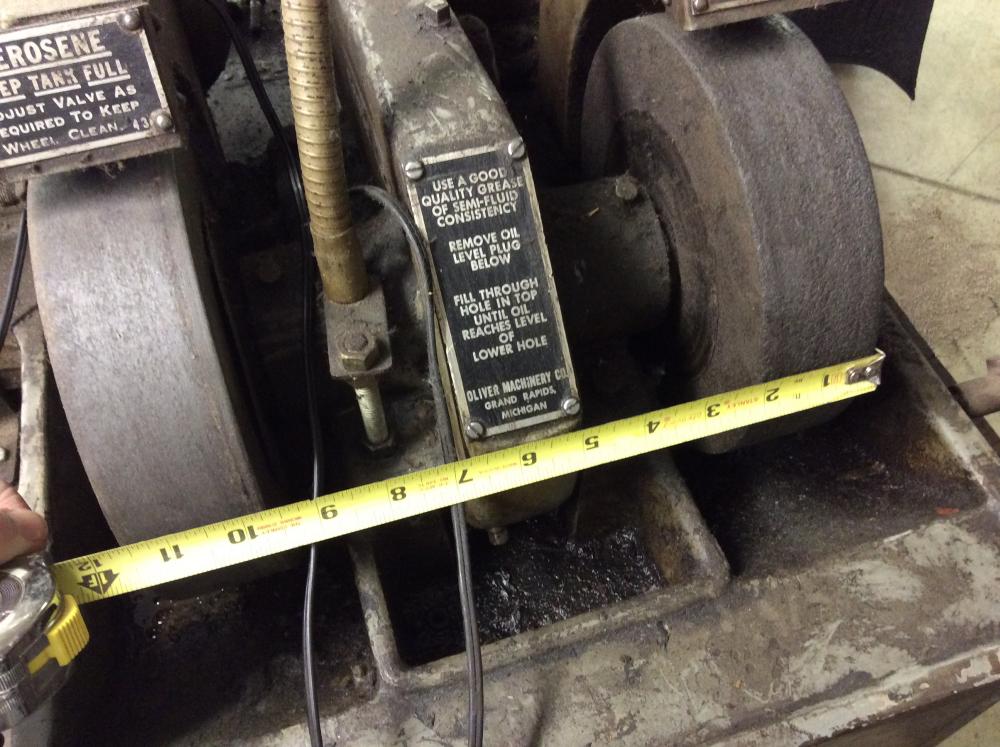
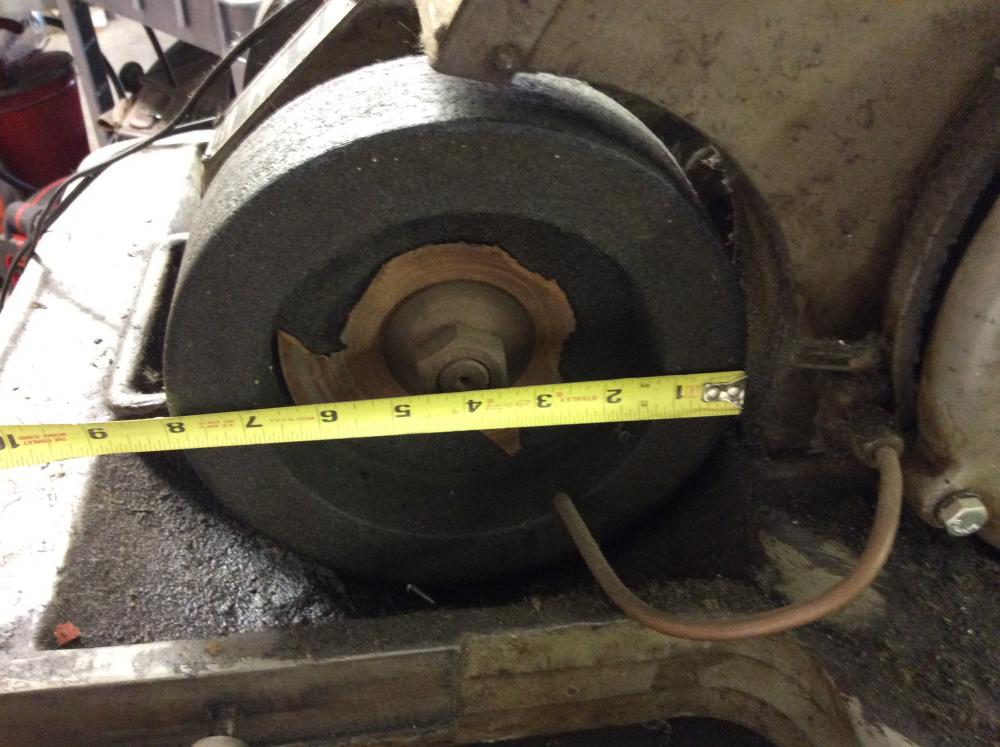
Oliver 585 combo grinder. Worth it for knife making?
Kette replied to Kette's topic in Grinders, Sanders, etc
Yeah it seems to be edging into the pricing of a lower tier belt grinder, so I might as well get something new. I couldn't even find replacement wheels with a quick google search, though if a new set costs as much as the machine I wouldn't be surprised. Thanks for your input Kozzy. Maybe I just have a thing for old shop tools! -
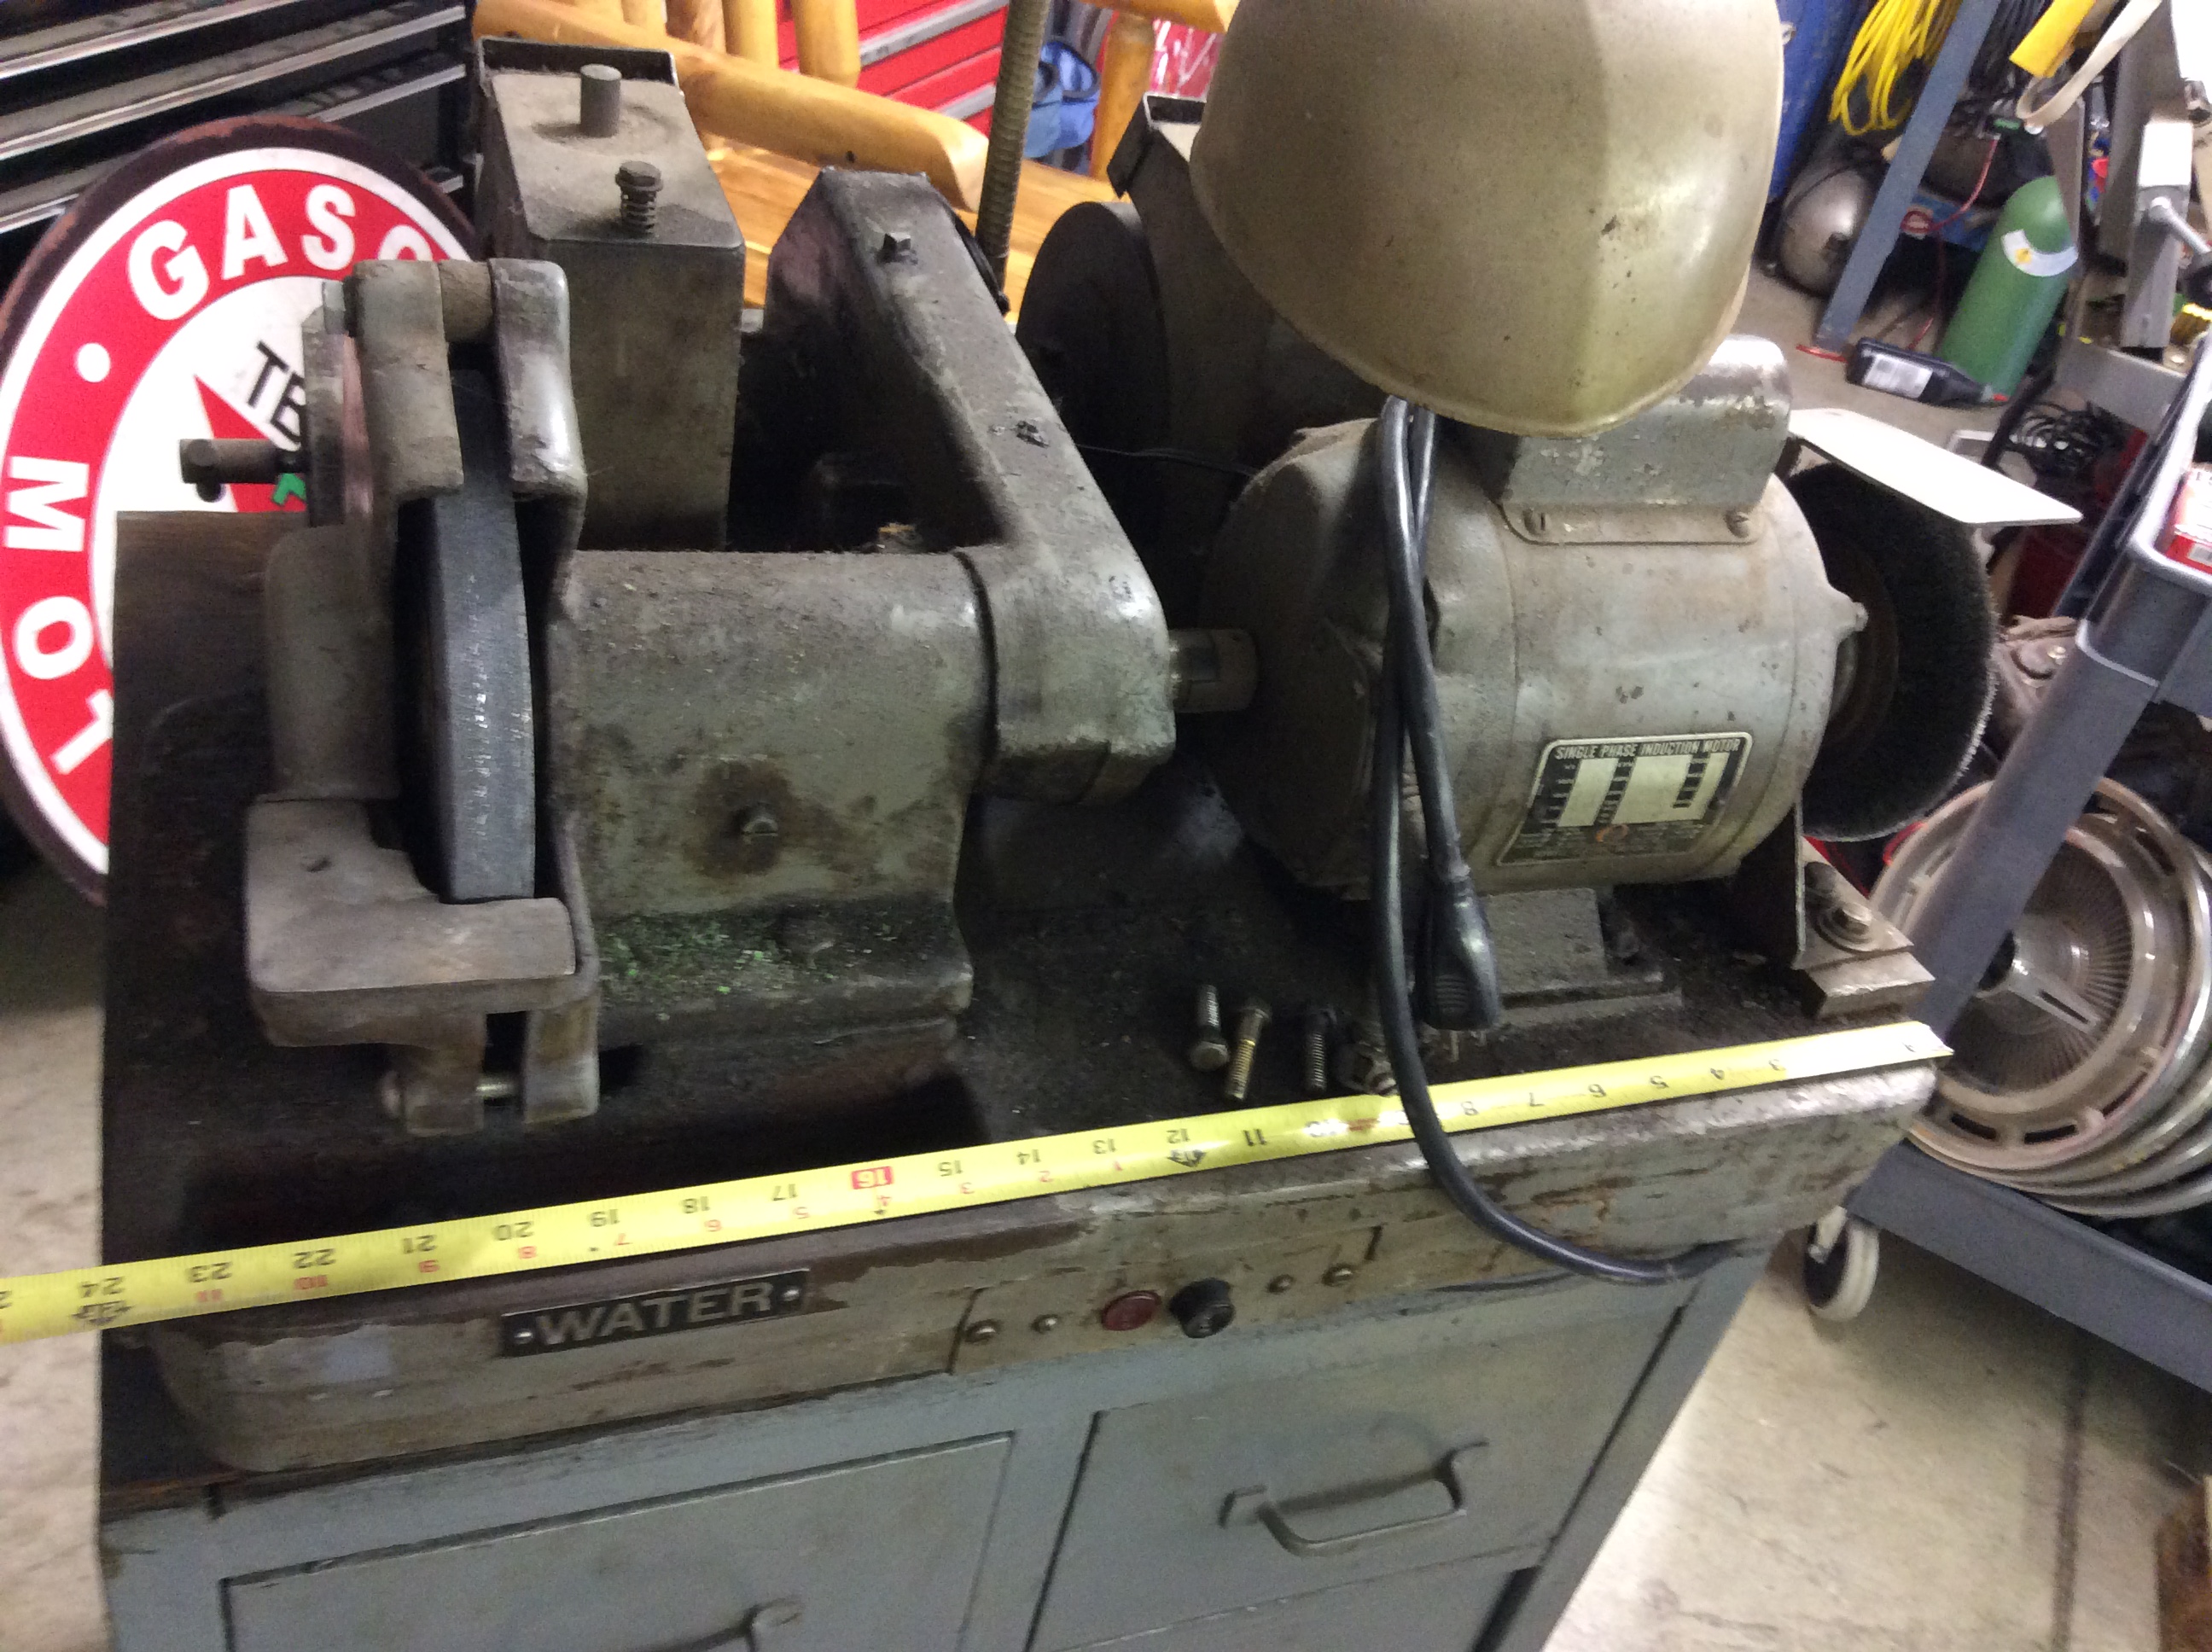
So i've found a nice old grinder in my area, and I can't decide if it's worth it for me. It's an Oliver 585 combo tool grinder. It has 3 stones ranging from regular grinding to a fine honing wheel. These were used mostly for woodworking shops to rehone hand tools. I was wondering if I could repurpose it for knife making or even swords? It would also serve general use as it's got a wire whe as well. He's asking $350 and it runs well. Any opinions would be appreciated.
-
Help with first anvil
Kette replied to Heliotropicmoth's topic in Anvils, Swage Blocks, and Mandrels
I came for the anvil pics, and left with life advice from Kozzy. lol -
The viking smiths of old would be proud of your work. Thank you for sharing.
-
I was given a Peter Wright Anvil but...
Kette replied to Worshipdrummer's topic in Anvil Reviews by brand
Don't forget that you do still have the back end of that anvil to work on, it might prove to be more stable than a RR anvil and you even have a hardie hole! You could smooth out the remaining face plate and make items to afford the rods, besides the cost of the rods the welding is relatively straightforward. -
I was given a Peter Wright Anvil but...
Kette replied to Worshipdrummer's topic in Anvil Reviews by brand
That is some catastrophic damage. That's not so much repairing an anvil as furnishing a new face. Yet it can be done, if you use the right rods. I just bought some stoody rods like is suggested here to repair mine: http://www.anvilmag.com/smith/anvilres.htm These rods can be expensive in large amounts, and you'd pay an arm and a leg to build up that entire surface. There may be a way to furnish a brand new face that is cheaper since you've got the raw body to work with, maybe someone else has experimented with this? -
Broken Anvil - Useful or no?
Kette replied to Hapiguy's topic in Repairing and Modification to Anvils
I'd buy this in a heartbeat for a good low price. Old European anvils didn't have horns or heels and looked surprisingly like this one you've found, and they were used to make everything you can think of! As a CHEAP starter anvil, you couldn't do better. -
Sounds rather bleak when you put it that way, but hey, paying the bills while doing something awesome is better than being rich and doing something boring (right?).
-
"it was good for making my bones, but $3.70 an hour is not exactly a way to support a family, but for the first few years as you’re establishing yourself and your skills, it’s fair." "I make tools, I want them to be used as much as they're admired. When I retire I'll drop down to making a few dozen knives a year at much higher prices that collectors can swap and trade, but until then I want to make a great blade at an honest price and let that be the foundation for my reputation." Thank you for sharing. Being a young guy that needs to build a reputation I agree with your pricing, but the trick is knowing WHEN to start charging more. I'm not very far into the business end but a teacher gave me some good advice on pricing that was something like "if you're selling everything, your prices aren't high enough", the goal here being to sell MOST of what you're offering, but not all, netting you a price that agrees with demand. (Mostly applies to trade shows and booths really) For 20 years of experience you should be charging WAY MORE. I sell rough prototype pieces for $10 an hour to my friends and they think i'm giving stuff away! People who know a thing or two will understand what they're paying for, and those who don't won't appreciate the work you've put into the things anyways. It seems easy to forget just how rare of a skill set any kind of smithing is when you do it so often and for so long. $60-70 an hour for (efficient) work seems like an excessive amount of money to me, but in the real world seems to be pretty normal.
-
Exactly Quarry! It was limiting since you have to constantly worry about the safety of the crowd. Even wearing hearing protection was annoying because of answering questions, but the anvil I was working on sure did ring (even quieted down). The crowd loves it, but they aren't listening to it all day long! I have tons of respect for good demonstrators, explaining what you're doing in a way that is understood is harder than it seems. We had a guest demonstrator that was from a certain corporations heritage site. Perfect parallel to your "pompous oaf" partner. Spent 20 minutes cold hammering stock to give a 'hammered' texture on a trivet, and made a WAY overdone leaf. He was great with the crowd though. I worked in Kansas City, so almost every parent who walked up with their kids said "oh look, this is where they make horse shoes!".... Got tired of that REAL fast. In their defense, it was a fake farmstead, but I got to explain to them how much more important the blacksmith was and they always left in awe. The fake fire conspiracies were the best though, so many elaborate idea's of how to fake it, when the real deal is WAY easier. J.W.S. - I can't believe how small your area is... do you have any apprentices? how do you all fit?!
-
I've done a summer at a small brand new demonstration shop a year ago. MAN that stuff is hard, like you said Frosty : I wasn't prepared for the theater and the talking, so I ended up spewing the same information and cranking out the same 6 projects (snakes, snails, lucky horseshoes, etc.) that got super boring. The random requests were the funnest and most challenging part, it was great practice. Man those little kids LOVE this stuff and soak it all up. Most had never seen or heard anything about smithing so the history really fascinated them. I'll have to try and make it to PA, that ren Faire sounds HUGE, and they have some great smiths to boot!
-
Thanks! I had a bar that was maybe 3/4" wide and 1/4" thick, with a hole at one end to start with. I figured I'd forge it out or cut that end off but the way i forged it made a perfect teardrop shaped hole. It was just a happy accident! Good points all around Charles, I'll definitely give those methods a shot. A stop on the fullering tool would help immensely, that's been the problem is keeping the fuller centered. I always seem to underestimate how much a block of wood and some sandpaper can do. Thank you.
-
Update: I decided to not repair this anvil and work with it as is. I've recently mounted it and it works like a dream! Figured I'd share. The missing heel is actually perfect for holding hammers.
-
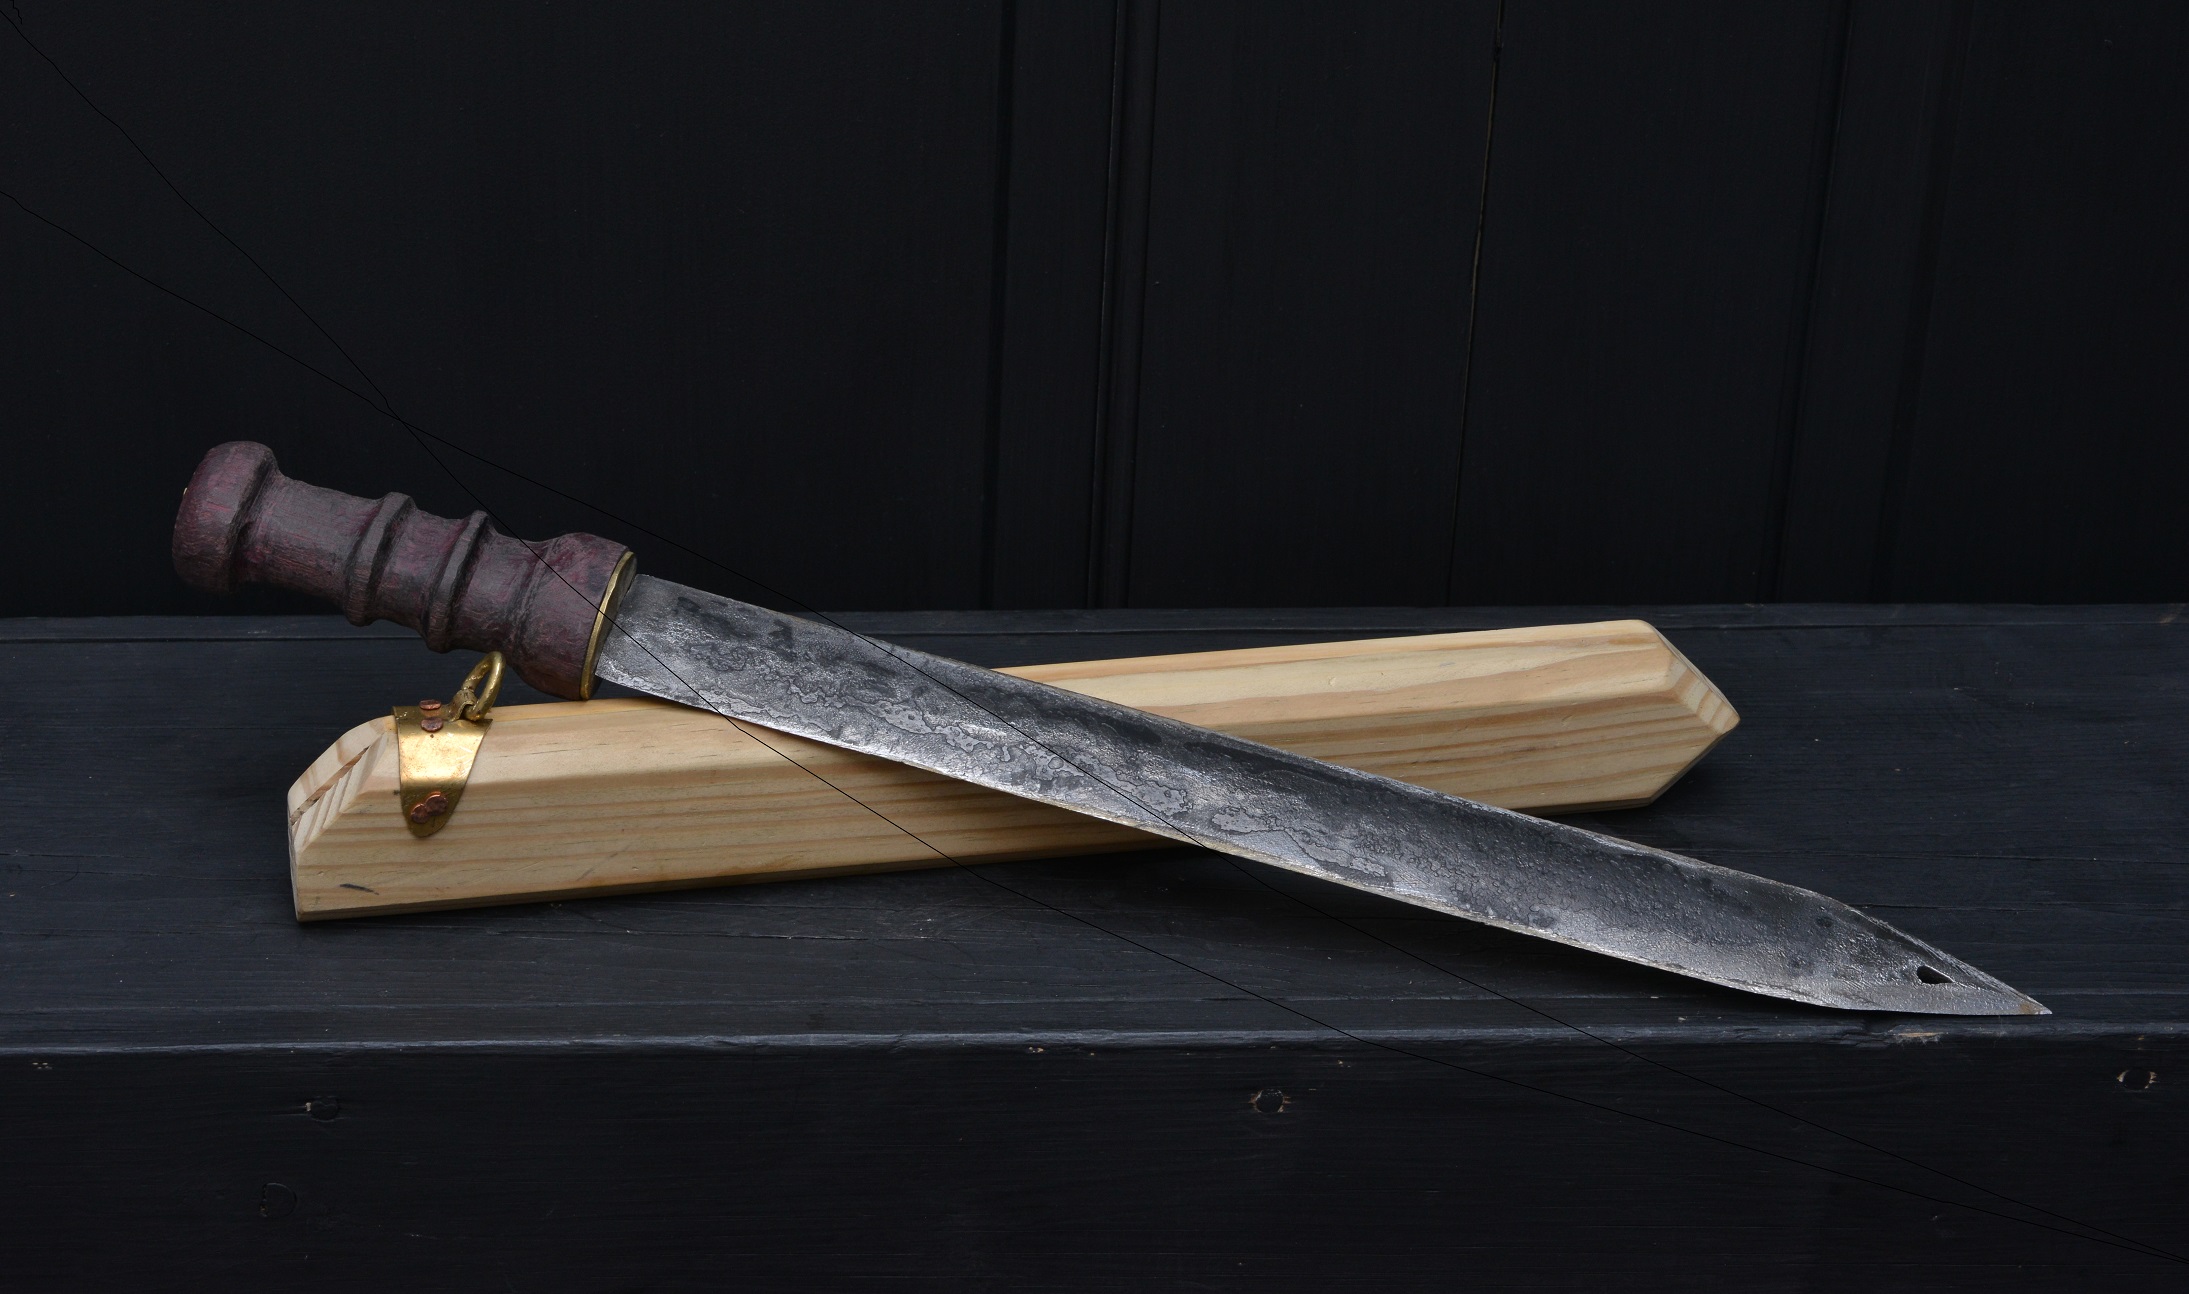
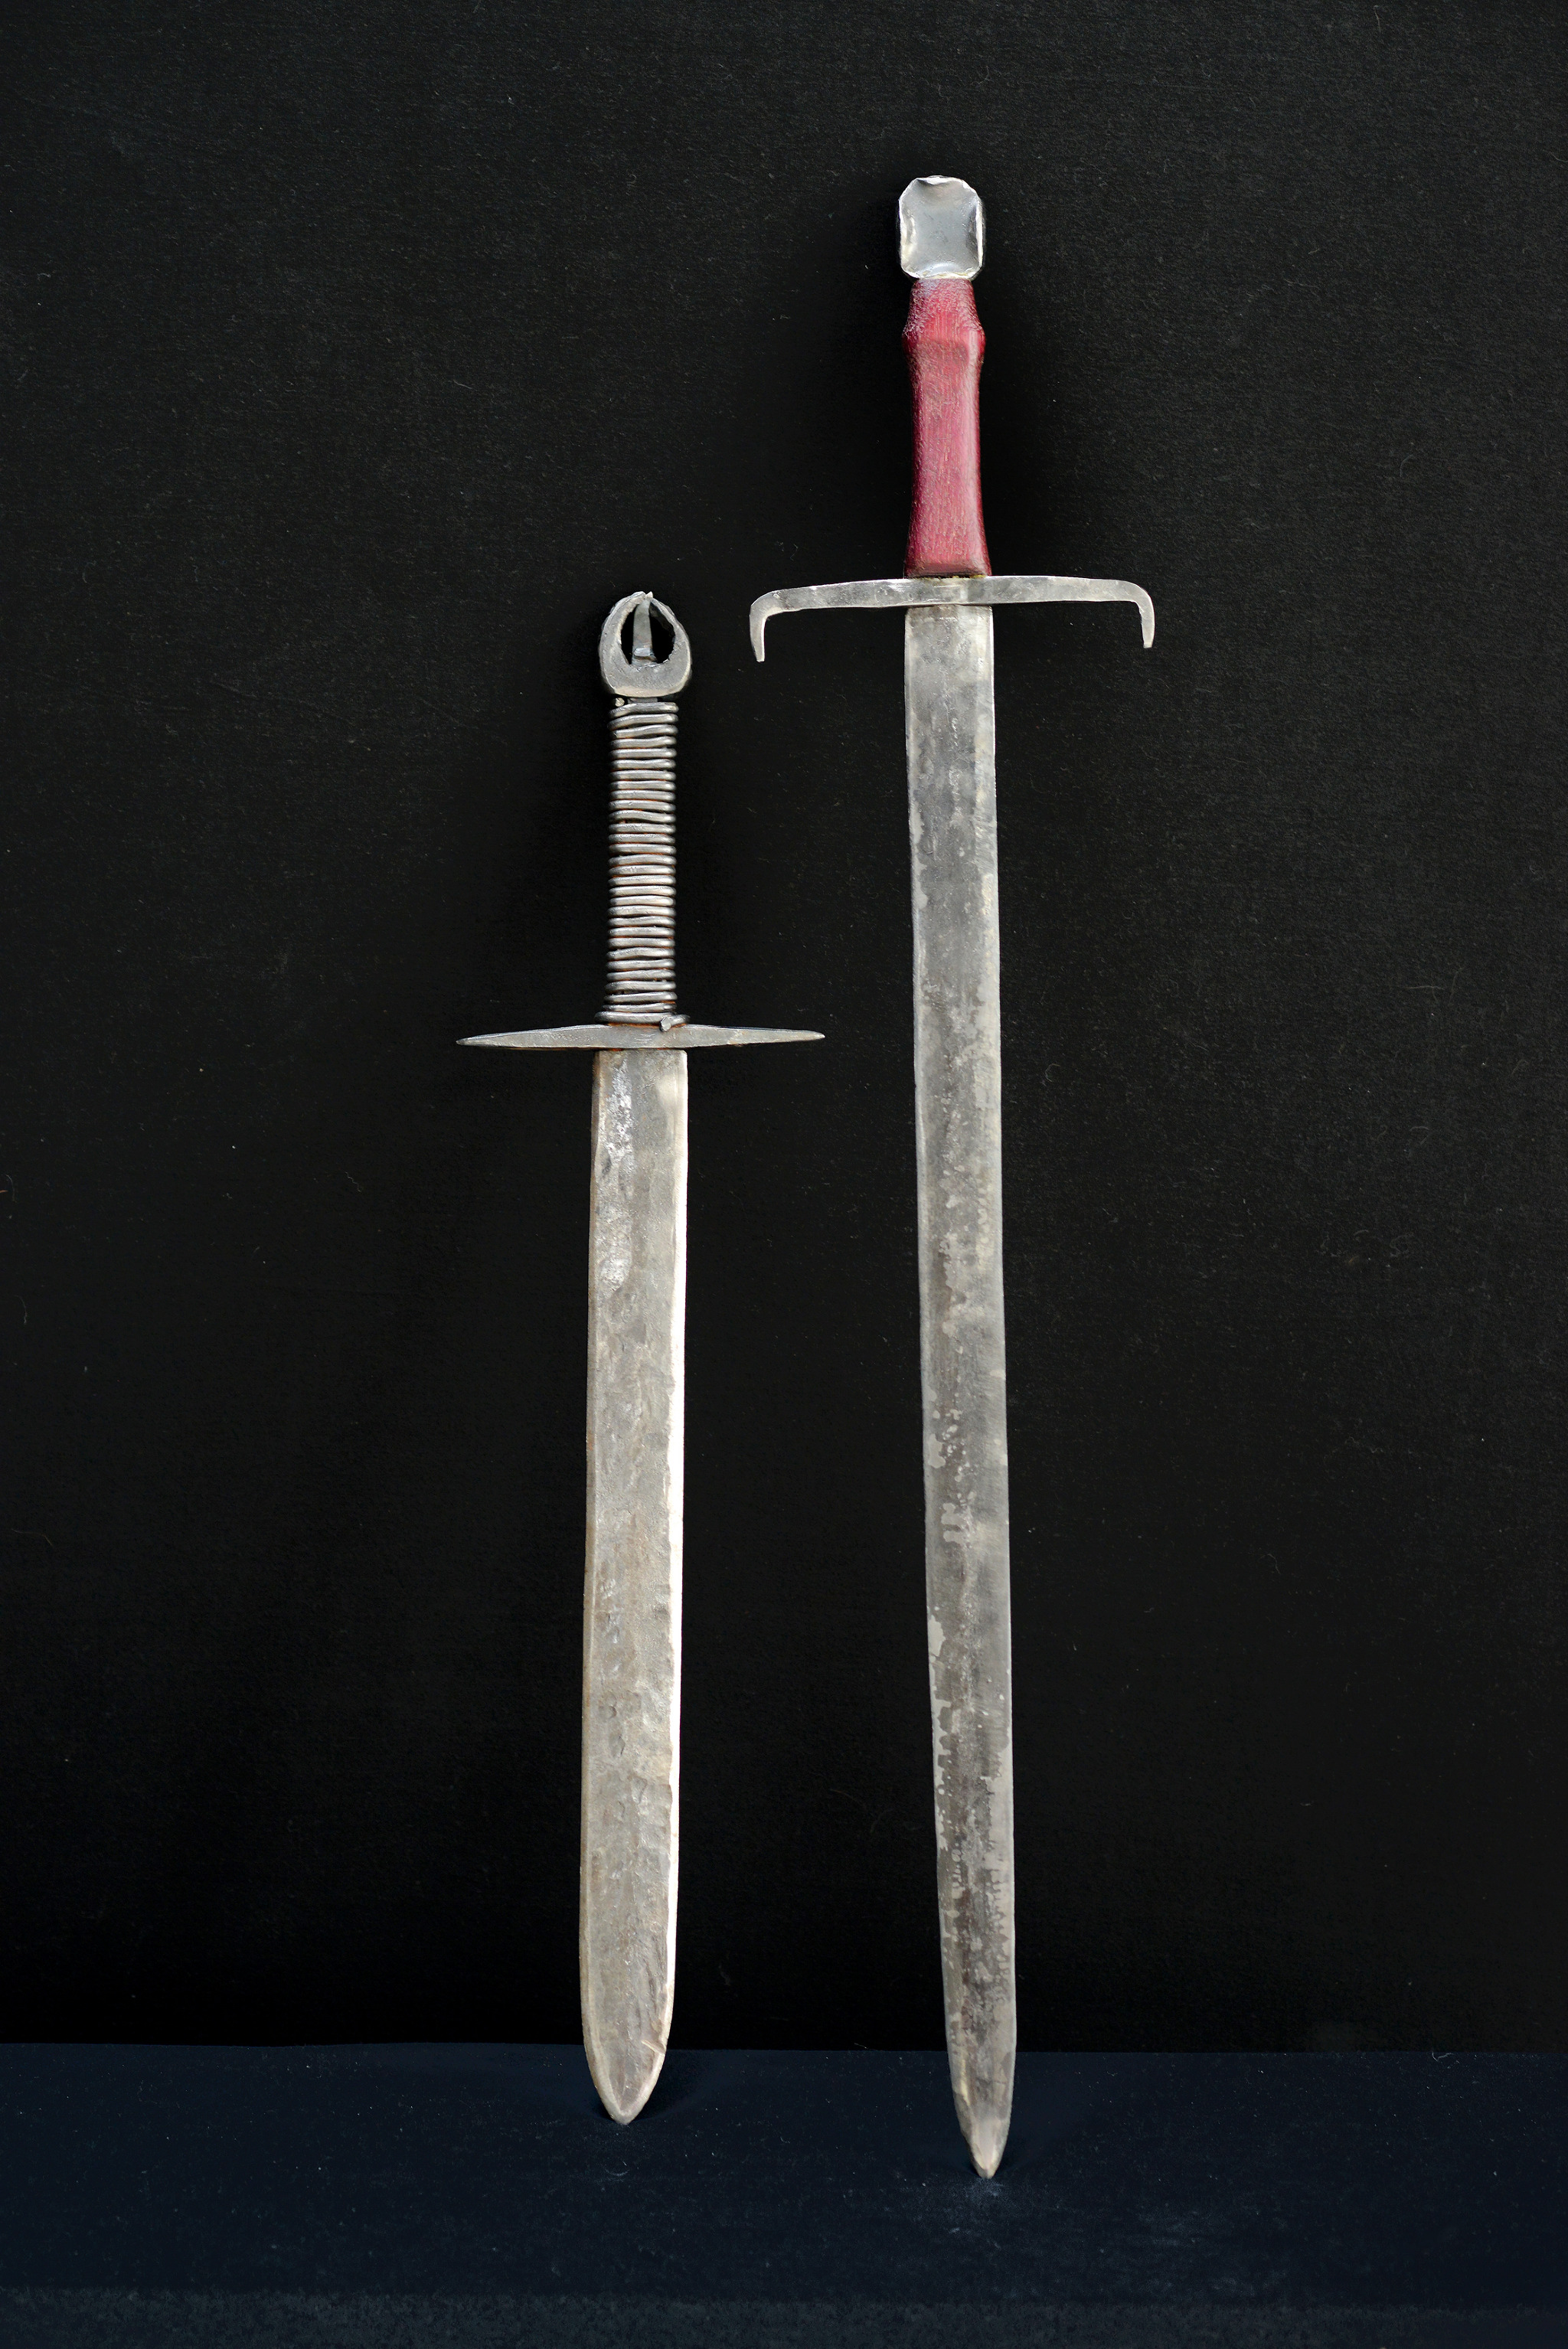
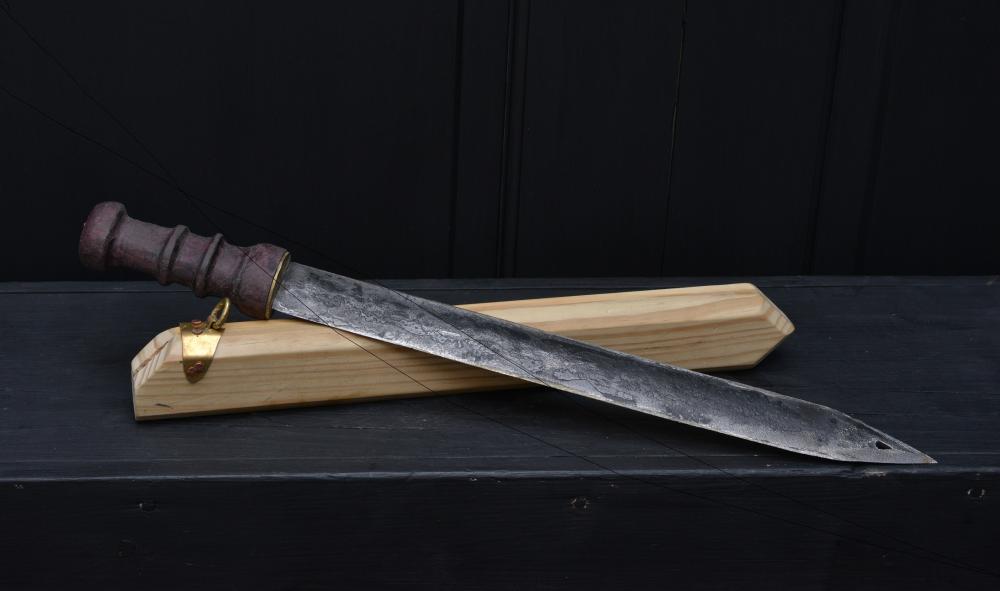
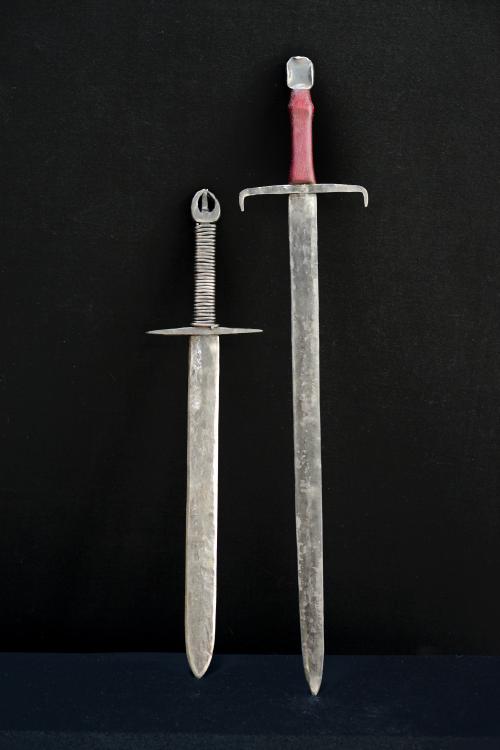
Amazing work! Figured I'd throw my first few swords into the mix and see if anyone has any pointers. I've got a long ways to go. I've only made these 3 in total and I need to make about 50 more before I can hold my own against you folks. The solid iron sword was my first, the longsword second, and the gladius the third I made. These are just iron wall hangers, but i learned so much making these, like how hard it is gonna be to harden and temper a longsword! Does anyone have a good set up for forging the blades and fullers efficiently? Maybe a custom fuller design or an angled block to forge the edges? I don't have a belt grinder so I like to forge as close to finished as possible.
-
As someone who has put a lot of work into my shop recently I'm dieing to see your set up! Please fix the links soon. Nothing is nicer than a simple well done smithing set up.
-
Hot cut hardy tool from auger tooth ready for action.
Kette commented on norrin_radd's gallery image in Tools
 I'm sure that thing will cut great! I love repurposing old pieces like that. Fair warning: the way it fits in your anvil will most likely screw up your hardie hold. Those edges aren't invincilbe and the pounding of that odd shape will chip away at them.
 -
Considering this isn't the heavy forging face i'm repairing, I may not add any hard surface rods to the mix. I just need the holes, and even IF I damage them, I'll have the rods to repair them! I've heard stories of the shrapnel, which is why I didn't want to do this unless I knew I could do it correctly. My Vulcan anvil has the far face edge collapsing which is why I elected to get another to do the heavy work on, in fear of it chipping. Thanks for all the advice!
-
Also wait, Could I use a MIG Welder for the build up and then finish the top layers with the rods? Or does using the MIG require special wire?