

depatty
-
Posts
19 -
Joined
-
Last visited
Content Type
Profiles
Forums
Articles
Gallery
Downloads
Events
Everything posted by depatty
-
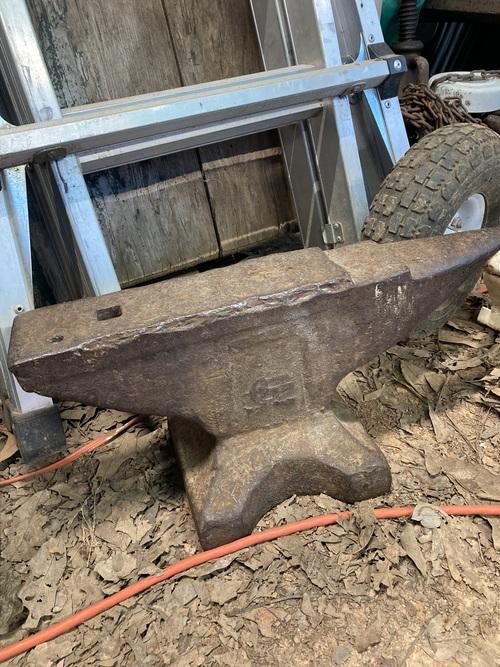
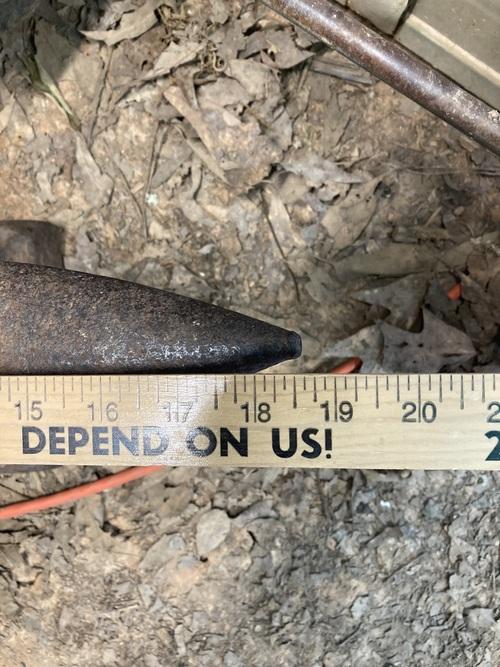
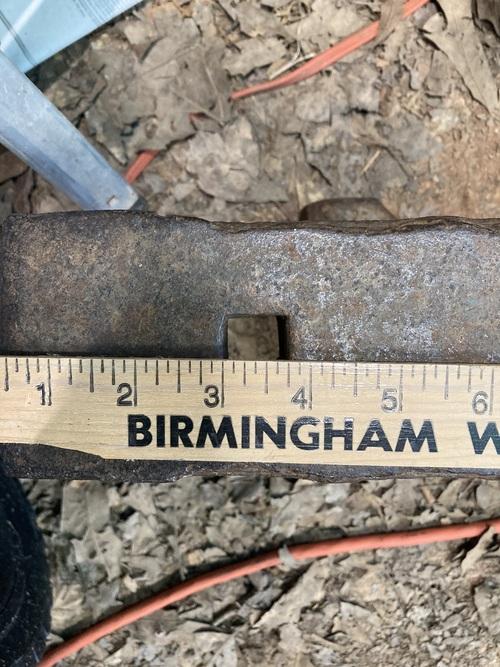
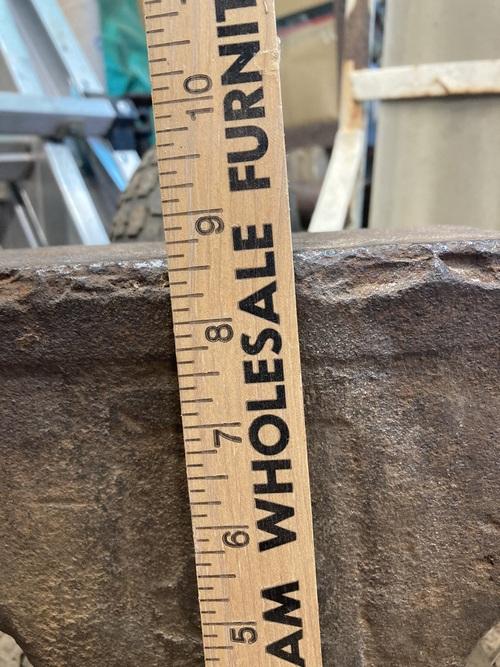
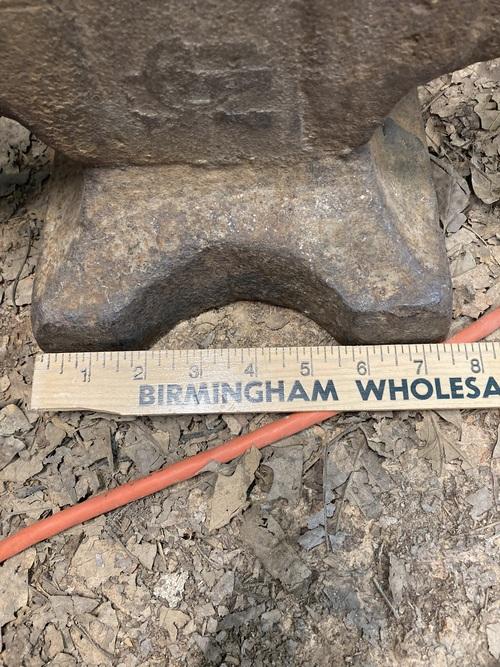
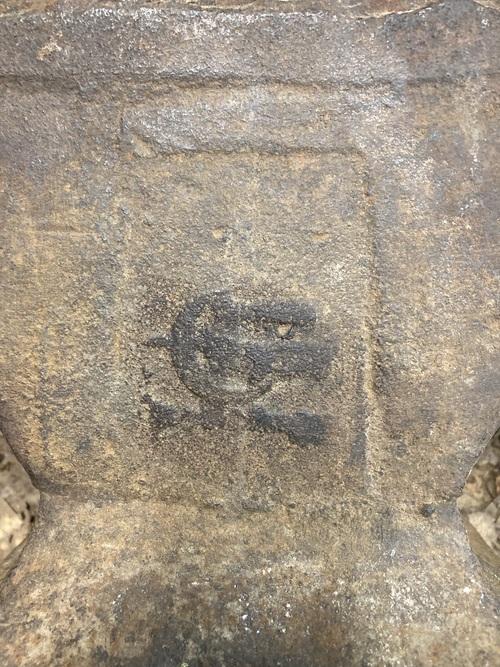
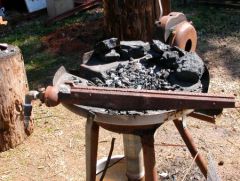
Hi all, Just got this anvil and hoping someone can help me figure out who made it. Length is 18 1/2 inches. Height 8 5/8 inches. Base is 7 1/2 inches across the front. Hardy hole is 3/4 inches square. Weight is 68 pounds. No markings that I have found except the logo on the front which is shown as best I can get it in picture Anvil6. Thanks for any info. Dave
-
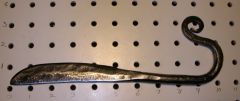
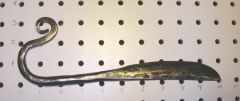
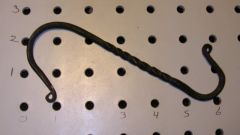 This 6 inch hook was previously part of a paint roller handle. I dug it out of a burn pile and knocked the rust off of it then heated and beat it into a 3/16 inch square rod about 2 feet long. Most of it made staples to go into my anvvil stump to hold hardies. The last bit went into this hook.
 -
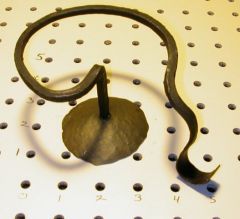 Bottom view shows the lighter brass color on the underside of the cup. Also gives a better idea of the twists the frame has in it.
 -
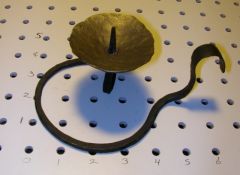 Made from an old 1/4 inch round electric fence post and a 2 inch disk of steel 1/8 of an inch thick. Round rod beat square, shaped, tapered, flattened and bent. Disk flattened, beat into a bowl shape, punched in the center. Frame heated to just red and let cool to black then dipped into beeswax and when cool enough rubbed with a rag to remove the excess. Candle cup was heated to just red and brushed with small brass brush. Top was brushed then the cup reheated, bottom brushed then top brushed again. Dipped into beeswax and wiped when cool enough to handle. Cup put onto cancle spike, seated and set with monkey tool.
 -
 Not too polished but a functional tool.
 -
 Coil spring. Started with 12 inches of 1/2 inch coil spring, ended with 10 inches of knife.
 -
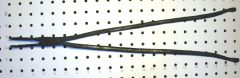
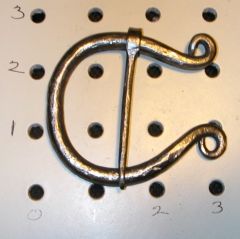 Main part was made from a piece of 1/4 inch electric fence post. Pin was a 16 penny nail, head used in ladle project. New tongs make this so much easier.
 -
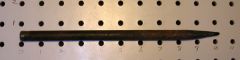 Just a punch. Hard piece of shaft of some kind. Had it kicking around for years. Needed a punch this morning and this is what I ended up with. 3/16 to 1/2 inch. Cob rough but serviceable. Will polish it the next rainy day.
 -
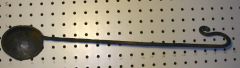 Bowl made of piece of heavy wall exhaust pipe, shaped hot into a piece of wood, burning it's way in. Got a nice depression for more shaping now. Handle is a piece of 1/4 inch round rod from an old electric fence post. Rivets are 16 penny nails cut off about a 1/4 inch long and hot bradded in. Holes in bowl and handle made with the punch I made earlier.
 -
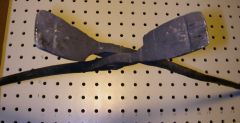 First tongs showing the open jaws. They grip so much better than a pair of pliers.
 -
 My first set of tongs. Started in my old forge but finished today in the new one. Started out with a piece of steel 3/8 x 3/4 x 24. Built using the Dempsey Twist tutorial. Finished tongs 21 inches long with jaws 2 1/4 long x 1 1/8 wide.
 -
-
-
From the album: New forge
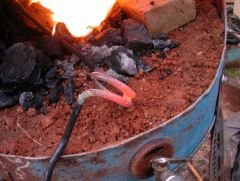
A spring I am straightening after a few minutes in the fire. As the clay is still wet at this point the heat isn't what it will be after everything is dry but I am well satisfied that this is a workable design compressed air venturi blower for solid fuels. Will experiment more and see just what volume of air is required to do a days worth of work. -
From the album: New forge
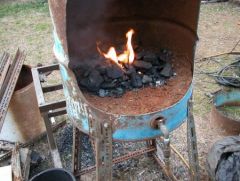
Added the clay and packed it down. Covered all but 2 sections of holes (total of 5 available with this venturi assembly) with pieces of steel and then a bit more clay. Hooked the air up and started the fire. Used a couple of pieces of heart pine to fire the coal off. Just lit it on fire added coal then turned on the valve just a bit. Took less than 10 minutes to get to this point. Smoke stays in the barrel. Nice swirl pattern on low or no compressed air. Flame on with 50 psi! -
From the album: New forge
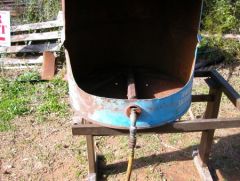
Barrel has now been cut and the edge folded over and hammered together. Hole for venturi cut and legs formed, holes drilled and bolted together. Ready for the clay. -
From the album: New forge
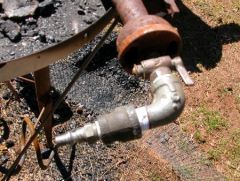
Air quick connect and valve assembly for air venturi for new forge. -
From the album: New forge
This is the burner assembly from a 5 radiant natural gas heater that I decided to try to use with compressed air in place of a blower for my new forge. -
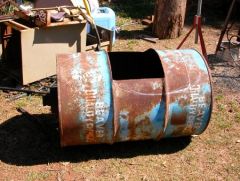 Old project of my fathers, about 20 years ago, that never got finished. Since it already had the hole cut in one side seemed ideal for the project.
 -
Hi all, Real name is David (Dave) Patty and I am from Weaver, AL. Been a tinker, electronics repair tech, and general handyman type as long as I care to remember. Got to know a fellow in the SCA who is into blacksmithing and it has renewed my interest. So I dug out my old (homemade) coal forge from the barn and am trying to get what few blacksmithing tools I have back together, repaired and new ones made. Just found this place last week and been going through the Blueprints section. Made it to the BP chat last night (2/27/07) and had a real good time. Thanks for a wonderful site! Dave