
Suboc
-
Posts
70 -
Joined
-
Last visited
Content Type
Profiles
Forums
Articles
Gallery
Downloads
Events
Posts posted by Suboc
-
-
This is how I did mine on my 100# ...I took cold rolled and cut just enough thread for the nuts and left the center section unthreaded so the adjuster bolts make contact with the unthreaded section.
Dan Lehman
-
Love hearing the history of these hammers. Very few machines made today (hammers or others) will live as long. Too much plastic and built in obsolencence.
Dan
-
My 50# hammer was shipped new in 1911 to the Kasmer and Mastell Mine in Garrison North Dakota. It made its way to Cotton Wood Arizona, then to Flagstaff Az. and then to Tucson.
My 100# hammer shipped new in 1975 to Phelps Dodge, Hildalgo smelter in Animas New Mexico, then ended up at the Chino mine in Santa Rita New Mexico. I saved it before it went to scrap. Unfortunatly I wasn't able to save anything else out of the "Boiler" shop, which included a beautiful steam hammer, platten tables, hundreds of tongs, spring tools etc. The hammer is now safe in Tucson.
Heck the history of the Chino mine is pretty darn interesting as well:
From Wikipedia"The huge open-pit mine was once the largest in the world, but has been surpassed by Chuquicamata, and is perhaps the oldest mining site still being used in the American southwest. Apaches, Spaniards, Mexicans, and Americans have all obtained native copper and copper ore from this site, once known as the Santa Rita mine, and in the 19th century, a tunnel mine. The present-day open-pit mining operation was begun in 1910. It is the third oldest open pit copper mine in the world after the Bingham Canyon Mine and Chuquicamata."
Dan
-
Mike,
Sounds good. I'll look for you at Harolds.I know what its like to sell a good hammer, not always easy. I sold my rebuilt 50# hammer to fund another which was a big mistake because the new hammer which I thought was a plug and play turned out to need quite a bit of work. I would have bought your hammer, but I'm trying to scale up. I'm currently on the hunt for something larger than my 100# L.G. and have been saving for it. I would love to find a complete running Nazel 2 or 3B that could use some work. I know I'll find one I just have to be patient.
Take care, and you are more than welcome to contact me if you are working on something and need to use a hammer.
Dan
-
Glad you finally found a home for it. Me and some of the local guys talked about how nice a hammer it was. Either we were too broke or already had too many hammers to buy it. You just can't beat a nice plug and play hammer. Its suprising how much can be spent in time and parts getting one to look and run like that hammer. Whoever bought it is going to be very happy.
Dan
-
Same here on my 100# hammer. No springs on the treadle, there are two heavy springs, one on each side of the clutch fork. You can also play with shimming out the clutch blocks, however I think the addition of springs up top sould resolve your problem. Once you get it releasing properly, make sure to eliminate as much slop out of the linkage/treadle rod as possible. The less slop in the linkage, the better controll you will have with the hammer. And like peacock said...before you do any of the above, you need to get a zirk fitting on the shaft and grease that thing.
Good luck,
Dan

-
Wow! That looks great, nice job!!
Thanks, I had fun with making it, and being a visual person I wanted it to look interesting as well as be functional.. I thought using 3/4" button head rivets to construct it seemed appropriate. -
Here is the stand I made for my 450# Nimba. The shelf on the right pivots or is removed easily.

-
I found one while staying on the small island of La Maddalena in Italy. It was a big one and in great condition. It was being used to fill a hole in the back yard wall of the house I was staying in! I think I could have found a better use for it.
Dan -
Suboc the one on the right is clearly marked as an Indian Chief. It has 6" jaws, they are very clean, and they close in perfect alignment. It will be my #2 vise replacing another one I have. The anvil/vise combo will be added to the shop and the others will be going to Quad State this week.
Probably a good choice, I always hate when the box/screw gets in the way of the work, and having that taller jaw profile should help avoid that problem. I have a large Wilton offset vise that eliminates that problem, the jaws being well offset beyond the box/screw, but being a cast vise, I avoid hammering on it. -
Good going. I like the one on the far right. Looks like there is a lot of room between the jaws and the top of the screw box.
Dan -
Picked this up a couple of weeks ago. The guy had a Harbor Freight bender for $100.00 and this #2 Di-Acro for $200.00 complete with boxes of dies, and other tools like hand held rivet sets, and several of these neat little bending jigs. The decision was easy.
Dan


-
Always amuses me to read 'experts' making guesses. No caustic soda, no bead blasting, no power washing, just a lot of hours with wire brushes by some young fellas making wages. He has a seperate room for the clean-up work, with good ventilation, and his guys wear the proper protective gear.
Anyone coming anywhere near SW Michigan should give him a call and stop by his shop. Stewart, you are correct, he is a pro, and most definitely a good guy.
No one claimed to be an expert here. Seems like most of the responses were just examples telling how they have done it. -
I was wondering if they are bead blasted?
-
The 3 to 1 rule comes to mind when talking about upsetting. This is a rule for both hand work and in heavy industry with all the tools you could imagine. If the length of hot stock you are upsetting is more than 3 times the diameter of the stock, you will have problems. Your stock will buckle, fold or upset unevenly. There are some work arounds that involve moving the heat, or progressive upsetting dies, but for all practical purposes the 3:1 rule is firm. There is a ton of published information on this, as well as complimentary anecdotal evidence.
Thats a good rule to remember, thanks for posting.
Dan -
Here is the die.


-
Suboc, both videos were great to see.
I'd like to ask a question, this just seems like the right place.
What are the limits on upsetting
When is it more advisable to add increase material through welding? I don't think a many people consider this when they see an extremely "upset" bar.
Not sure I understand your question about adding material through welding. I think for instance if you are wanting to have a 1/2" round bar flare out to a 3" diameter, you would be better off drawing down the 3" bar to 1/2" instead of trying to upset the 1/2" bar to 3"....I'm not sure what the limits are, it's a matter of controlling power, heat, and the correct amount of material to give you the desired amount of upset. Controlling how an upset develops is a matter of adjusting the length of heat, and the angle of strike, or press. A longer heat results in more bending and a gradual flaring. A shorter heat produces a more pronounced flaring at the end. I tend to try to upset with straight on flat hits to the end of a bar. Hammering around the edges will produce a thin lip and not a good upset. Non of this probably answers your question, but I tried.
Dan -
Sure it's quick but the whole planet's bucking for you. <grin> Well done.
Frosty The Lucky.
Very funny. Thats not my video by the way....here is one of me upsetting some big hex bar. Pretty low tech but it works. In this case I didnt mind the bending in fact tried to upset the end and develope a slight bend. It was for a sculpture I did, I wasnt making giant hex rivets.
Dan
http://www.youtube.com/watch?v=jWBtLQf5iA0 -
I know this does'nt answer your question, but this is the quick way to make rivets
-
Did those headers/upsetters come out of Bisbee originally? I may have one of the dies that goes with one of them. I bought it along with a lot of other tooling several years back when the A.A.B.A. members bought a bunch of stuff from a guy in Safford who originally liquidated the blacksmith shop in Bisbee (Lavender Pit).
Dan -
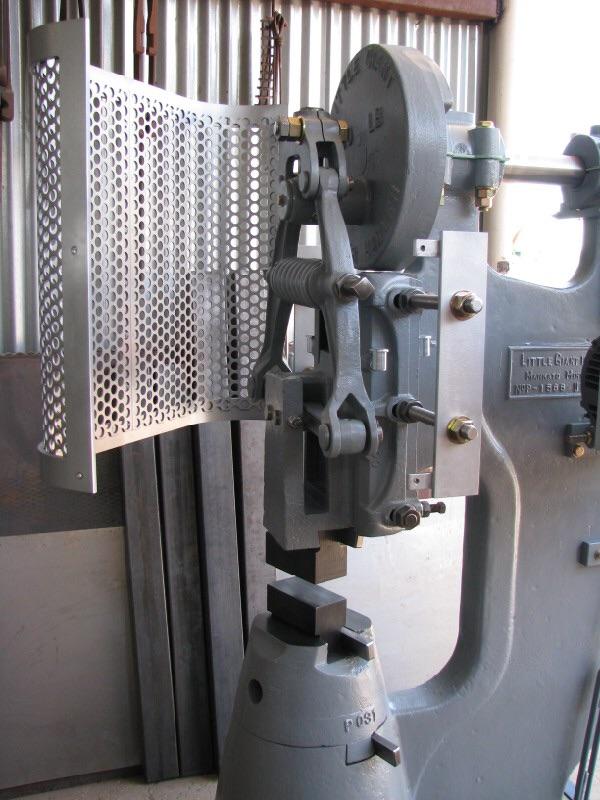
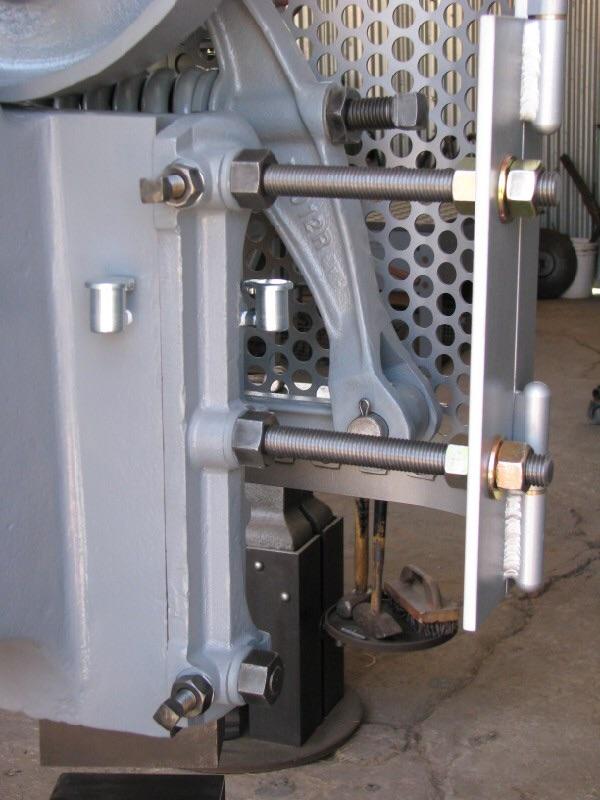
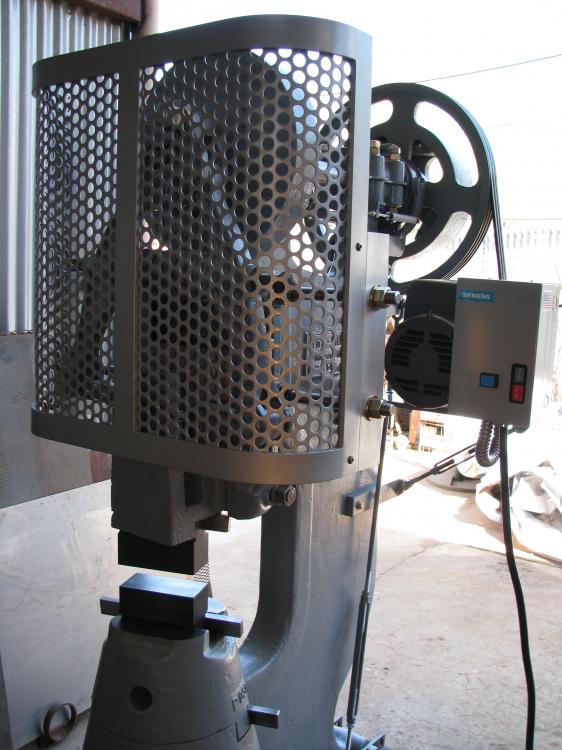
The more slop you can get out of a mechanical hammer the better. Worn pins and holes, sloppy clutch, loose flexing treadle and treadle rod, and improperly shimmed ram guide all add up. The more little fixes you make the better performance you will have. You will learn even more about your hammer once you get a motor on it. Good luck it's looking good.
Dan -
Looks like it was in the correct orientation with the old dies, and then flipped with the new dies.
Dan -
You might want to flip that cross head over, that will give you clearance between the dies and create the correct geometry for those toggle arms.
Looks good,
Dan -
This is how I have my 100# LG temporarily mounted on a slab. I used long lengths of all thread and epoxy to hold the whole thing down. I have mounted a 25# and a 50# the same way. Its not ideal and realy needs an isolation pad/foundation poured, but this will work to a point. This may result in cracking of the slab over time. The construction is 3/4" conveyor belt...timbers tied together with three lengths of all-thread and an angle iron frame around the edges to protect the wood from being torn up.
Dan


Replace Ram Guide Bolts with all thread rod?
in Power Hammers, Treadle Hammers, Olivers
Posted · Edited by Suboc
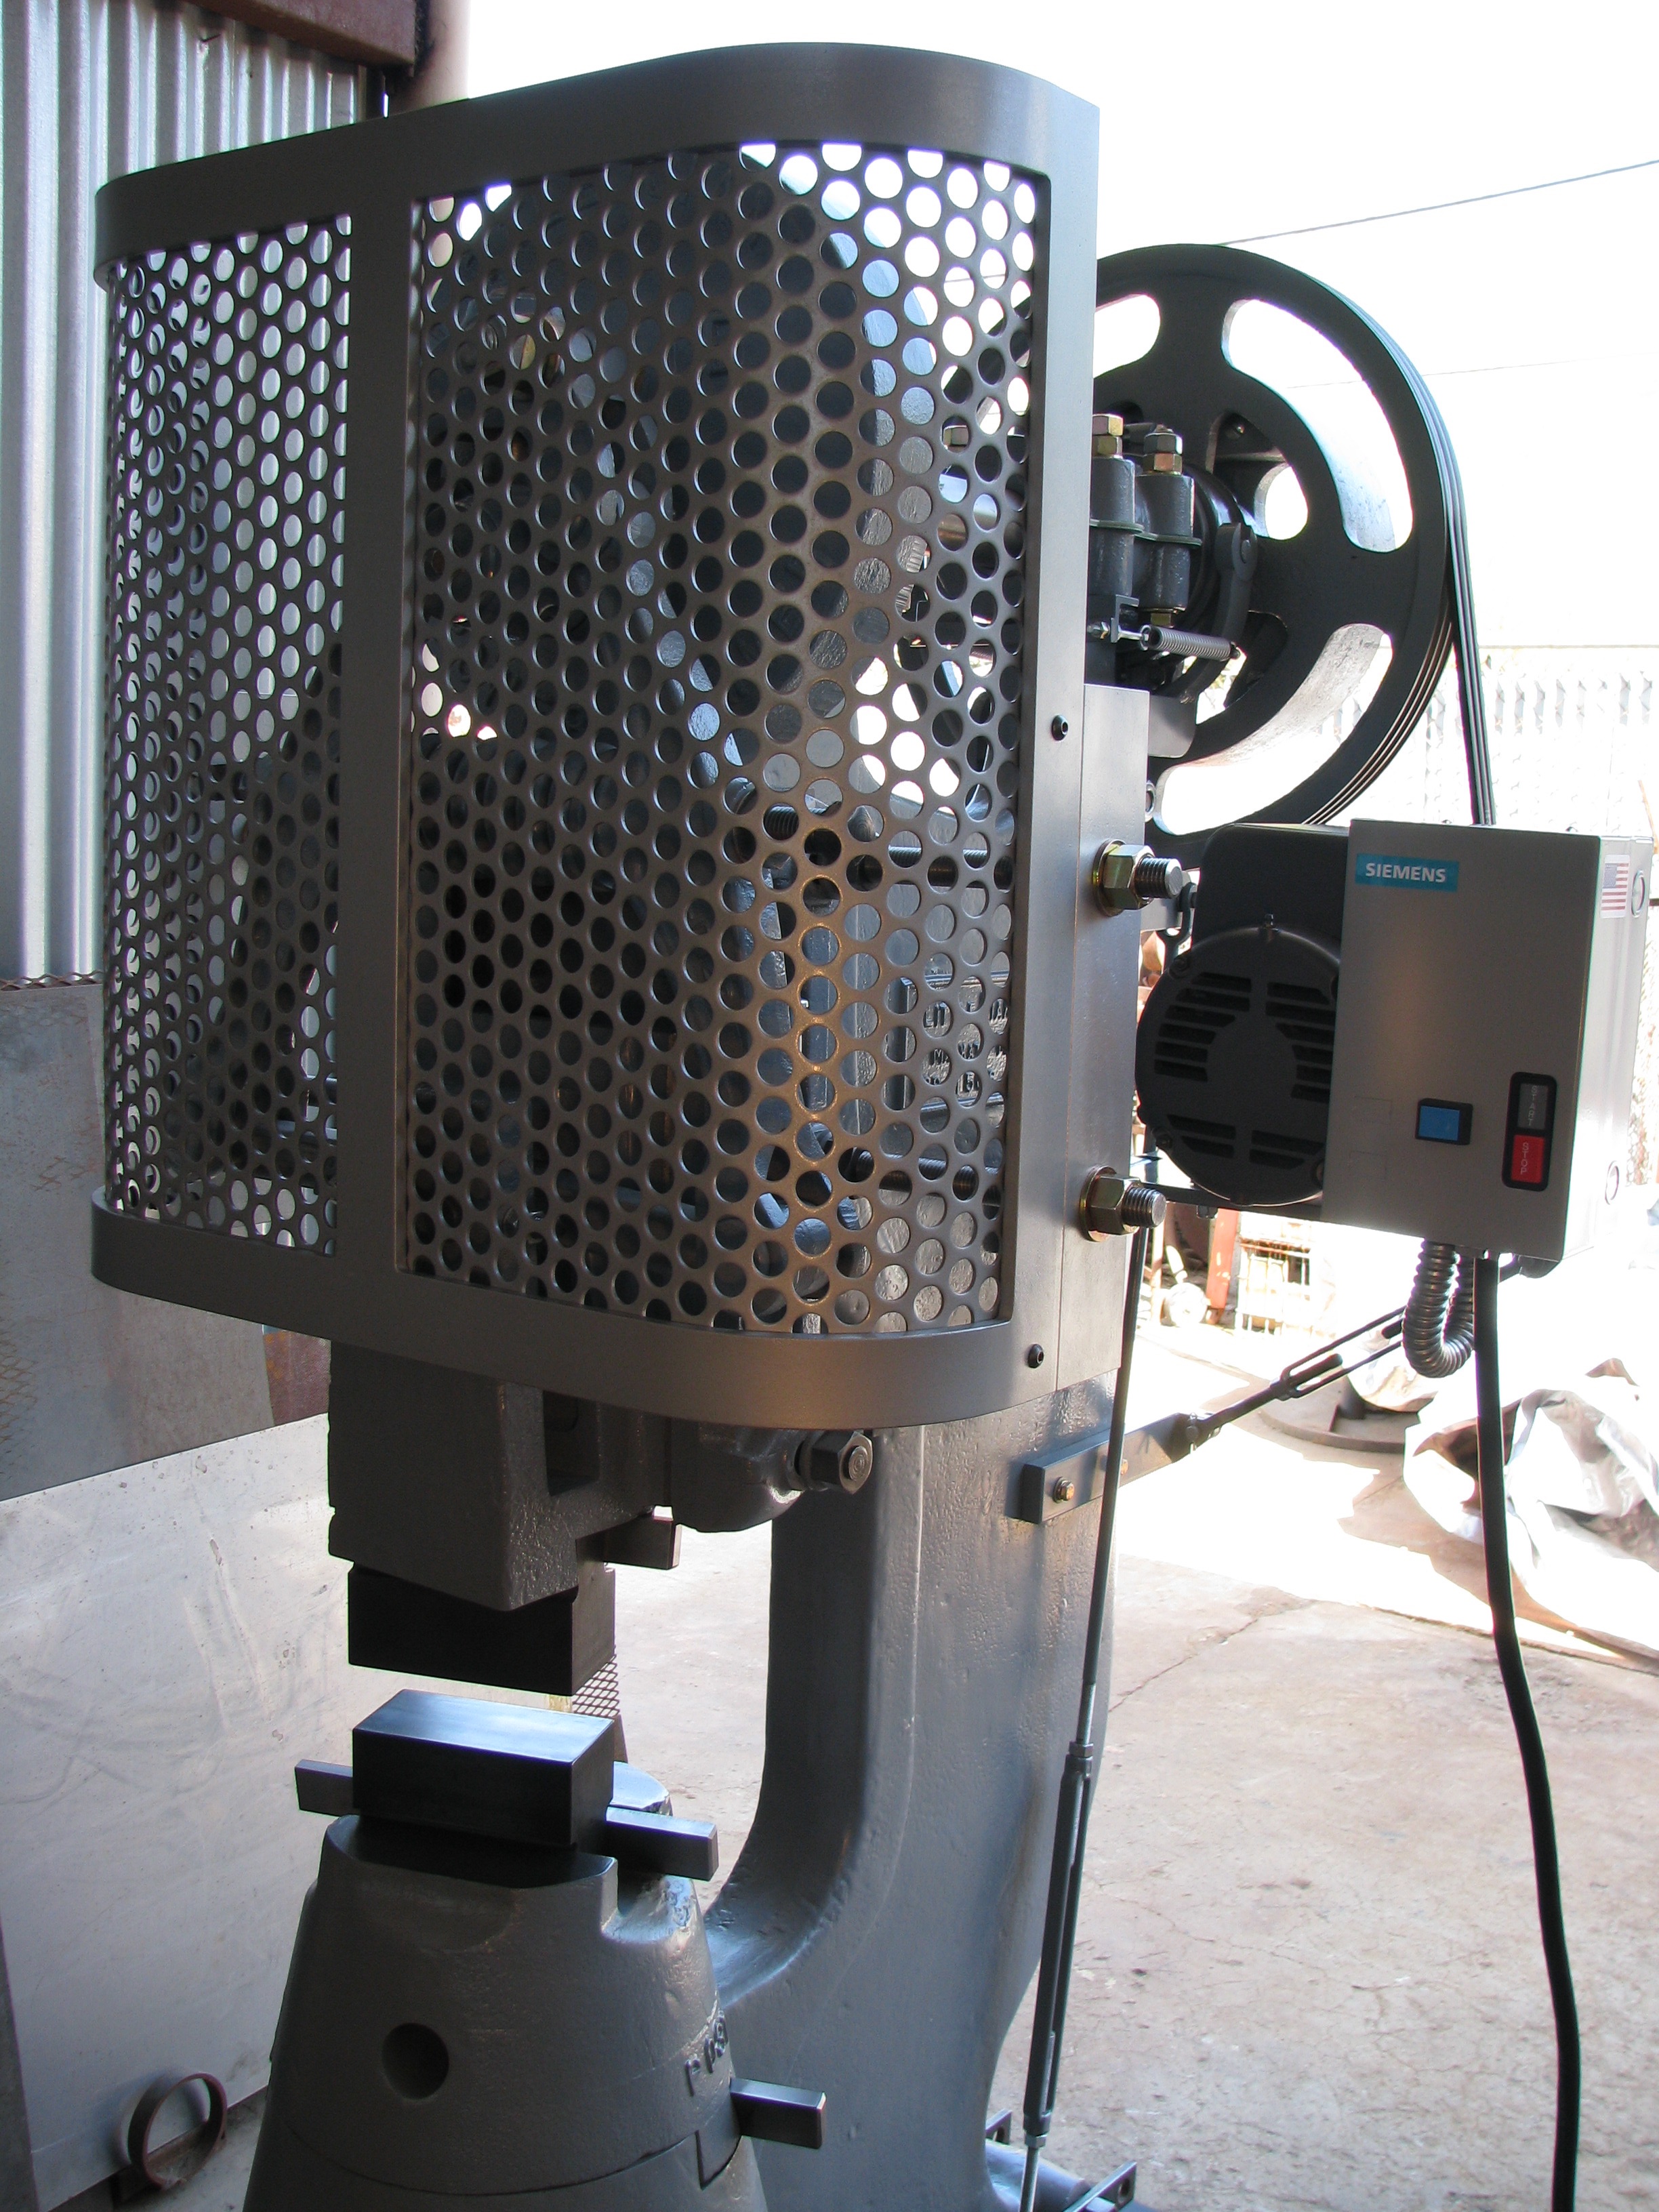
Thanks Chris. Those photos were taken several years ago just after I had rebuilt it. Believe me, it's not that clean anymore but has proven to be a great hammer.