
Jeff Seelye
-
Posts
236 -
Joined
-
Last visited
Content Type
Profiles
Forums
Articles
Gallery
Downloads
Events
Everything posted by Jeff Seelye
-
Very creative idea!
-
Hi AricV, If you are looking for some ideas or information here is a good start. Another good place is http://www.miblacksmith.org/ . I believe the January meeting is in SE MI. Welcome!
-
Beautiful Beth! Great job on the blends ( I hate grinding too) You have a good eye for the details. I also agree with Macbruce, your +/- is great. However, I wouldn't be able to resist the urge to paint just 1 leaf green :rolleyes:
-
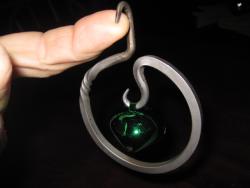
My very first piece - Tobbe Malm inspired bottle opener.
Jeff Seelye replied to CaptainSpaulding's topic in Member Projects
"Anyway, it does work, so there's that" Hey Captain, glad to see you're as thick skinned as the rest of us. Sounds like you did incredible work with the setup you have created! -
A better and safer bench grinder wire brush
Jeff Seelye replied to territorialmillworks's topic in Grinders, Sanders, etc
I did about 15 of the Christmas ornaments that you see in the Avatar. One of the first ones caught in the wire wheel, and took it out of my hand. I decided to soak the rest in white vinegar overnight. When I pulled them out, I ran them under water with a Scotch brite pad. NO carbon deposits. I reheated them in the gas forge and used the temper colors as finish, then put some wax on them. Got shades of blue and straw. This was SO much easier and safer for small parts. I love my wire wheel, Frosty has some great ideas, I decided to not use mine for small parts again before I do something stupid. -
I agree with the trip to the doctor. We are smiths not Doctors. I can tell you of my experience that is similar. Same situation as yours... newbie, head in smoke for too long.trying my hardest, not wanting to give up. Ended up with a massive sinus infection, kind of disoriented me, horrible headache, had all kinds of stuff coming out my eyes. Go see the Doc, get a hood on the forge, learn to glance at the forge, don't stare at it & don't get to close. If you're outside, see which way the wind blows before you light the forge.Be safe!
-
The breaking of an anvil
Jeff Seelye replied to C.D. Mitchell's topic in Anvils, Swage Blocks, and Mandrels
Seen videos of anvils 35' in the air...They gotta come down on something! -
Prayin for you & Patty.
-
Hi Dave, great place to learn, read and get started. MABA meets on your side of the state sometimes . More info at http://www.miblacksmith.org/ I used to go to White pine village, up by you, just to watch the smith work. Welcome!
-
Welcome Ken, Same here, wanted to make things out of metal since I was a kid. Became a welder and now (that the kids are grown) I'm back beating hot metal. Great site, I lurk as much as contribute. Jeff
-
Modern Marvels
Jeff Seelye replied to WayneCoeArtistBlacksmith's topic in Blacksmithing, General Discussion
]You're right John, how many of us put down "Blacksmith" on the Occupation line of our taxes. The reporter from Modern Marvels probably researched it very well. -
Welcome to the site, Daniel! great place to learn
-
Project Design: Striker for Flint and Steel
Jeff Seelye replied to wd&mlteach's topic in Member Projects
Nice project! That is a great way to go thru the steps. -
Balancing forging with life
Jeff Seelye replied to robert hanford's topic in Blacksmithing, General Discussion
One thing I do is keep my shop orderly. That way, when I do get time, I am ready to roll. Most tools are out on pegs and hooks, that way I don't have to get them out each time (lockable shop, really saves time). I pick up supplies on my way home, may not use them for a day or two, but, when I'm ready, so is the job. I just made a cutting table/grinding area, this keeps my shop cleaner and I spend less time cleaning. Time has value, Kids need dads, wife needs husband, house, lawn, car, job... Sometimes my wife shops... I forge at the same time. Frank sums it up! Great quote, applies to a lot of things! -
Striking anvil under way
Jeff Seelye replied to FieryFurnace's topic in Anvils, Swage Blocks, and Mandrels
Great work and a real sweet couple of videos! -
Is Green a blacksmith color?
Jeff Seelye replied to Agita's topic in Blacksmithing, General Discussion
The factory where I used to work had green paint on all the equipment including the blacksmith shop. I'm just suggesting that maybe It might not be a manufacturing paint but a shop paint. -
84 years without safety glasses has got to be a record!
-
How to attach rails to headboard and footboard
Jeff Seelye replied to dgause's topic in Problem Solving
I have made 2 headboards, but my side verticals were made of square tube. I bolted the bed frame to it so it could be transported. One of them had a bed frame and I just made holes in the headboard to accommodate the frame, the other one I made my own bed frame. -
Those are really cool. Nice work.
-
A New Member Join In This Discussion Board
Jeff Seelye replied to MatinJohn's topic in Introduce Yourself
Welcome! This is a great place to learn and share. Many times, when I have questions, I can google the key words and get old archive threads. This gets me info and saves me the time of starting a new thread. This is a great place to share new ideas and discussions. I like to click the "view new content" button, that saves me the time of looking thru all the different discussions. Again welcome! -
Thanks for the information. I couldn't figure out the square holes. The base also has more mass on one side than the other, even with the ears broke off, could this be so you could get "closer" to that side? I'm trying to get this mounted on a stump this afternoon. It was give a life far below it's dignity, I was literally scraping it this morning (it was in a chicken coop). I found out it belonged to a logging tool company until it went out of business.
-
I sold my anvil to a guy in my club to get this one. I'm not sure what it is but above the "Patent" I can see an HT on the right. I can see "wrought" above the weight. Am I correct in the weight of #159? (112+28+19). Is it possibly a Peter Wright? Big question is, what are all the holes for? It even has a square hole on the bottom! My last anvil had the holes in the face (hardie and pritchel) but no others, this even has holes to attach it to the base! The 2 lower tabs on the side appear to have been broken off, not sure why. Also their are several "D"s on different spots. I will try to post pictures. Any info on resizing would be great too!
-
If I was a young man courting a girl, I would have bought the slowest burning candles I could have got!
-
Nice Selection I Saw on Holiday!
Jeff Seelye replied to Gundog48's topic in Anvils, Swage Blocks, and Mandrels
I'm going to take a wild guess. If I had an anvil out in the middle of a room with a sharp end on it about thigh height where their might be people walking around, I might put something over the sharp end. Thanks for posting all those nice anvils! -
Common Beginner Mistakes
Jeff Seelye replied to Ridgewayforge's topic in Blacksmithing, General Discussion
As a beginner, take time to develop your craft. Many times we say we don't have the time... maybe next year. Most of us here have someone or some place we can go to learn from, even if it is a few hours. I get lots of ideas here, but I develop my skills doing and watching much easier than reading ( that's just me, not everyone). Even You Tube helps because you can see how they are doing it. Watch people carefully, watch where they hit on an anvil, watch how hard they hit, watch where their thumb is (had to say it), watch what way the metal moves, it will save you hours. One of my welding journeymen told me "You will either learn to be a good welder or a good grinder, it all depends on how you look at the details" this applies to our craft as well