Bob Ouellette
-
Posts
64 -
Joined
-
Last visited
Content Type
Profiles
Forums
Articles
Gallery
Downloads
Events
Everything posted by Bob Ouellette
-
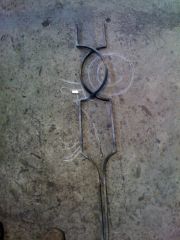
I second that you should use at least 1/2" stock and work hot. As for a bending fork, you can make a very simple fork by bending a piece of 1/2" or larger round in a U and clamping that in the vice. It's a lot less work and just as effective.
-
headed to DC areia
Bob Ouellette replied to Max Mulholland - Tetnum's topic in Blacksmithing, General Discussion
I recommend the Museum of Natural History. It's been a while since I've been there, but I used to go a lot as a kid. The best part is that it's free I also recommend visiting Great Falls, though I've never seen it from the VA side of the river, it's impressive. -
Swedish pattern hammers are nice, I like nice square faced hammers though.
-
I hardened the face first, so when I hardened the peen, there was enough heat transfer to temper the face. I tempered the peen only a bit as I wanted it to bee pretty hard still.
-
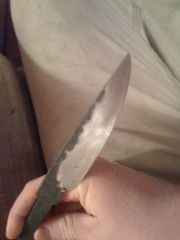
It was forged, then ground and finished off with a file. I guess leaving forged or filed for school kinda left its mark on me I did the face and peen one at a time in a coal forge. Heated up just about 5/8" back and quenched in water. Finnr, I can't say that it's a period handle, just what I prefer.
-
It's about 850 grams forged from an 18 wheeler axle or drive shaft. It was punched and drifted then hammered over the horn to get the shape how I wanted it. It's loosely based on the hammers from "The Masterm
-
I hope I'm not too late to jump in on the discussion. First I would like to say that you should probably use a lighter hammer. The biggest mistake some beginners make is to get too heavy of a hammer. About 2 pounds or so is a good weight. I recommend using a long handle, so that when you put the hammer head in the crook of your elbow, the handle extends to your finger tips. A longer handle will increase the velocity and the power of the swing. It will save your arm in the long run. The heavier weight of other hammers gets you twice. #1: You have to lift more weight, then #2: It doesn't rebound as much. Another advantage of a longer handle is that you can keep you hand father away from the hot metal. I guess some people like the short, Hofi hammer with a heavy head, but from my experience, the longer lighter hammer is really easier to use and hits just as hard with less effort. As far as head pattern goes, I like the old Viking/Medieval style. It's fairly similar to an American pattern, which is not too far from the German style. I think that it's all about the look you're going for. Of course, some hammer faces are a little further from the centerline of the handle than others, but each hammer takes a bit of getting used to before they all function the same.
-
Wow, that is terrible...
-
ACBA Gate - side panel
Bob Ouellette replied to Bob Ouellette's topic in Blacksmithing, General Discussion
I wish I had a picture of the die we made for it. If I could get to school, I'd get one. -
ACBA Gate - side panel
Bob Ouellette replied to Bob Ouellette's topic in Blacksmithing, General Discussion
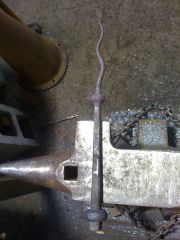
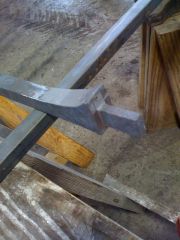
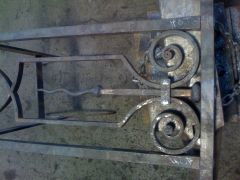
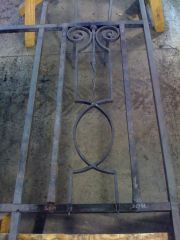
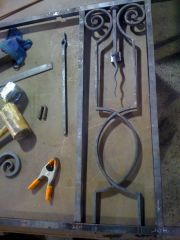
Thanks everyone. I really liked working on it (despite all the times when I thought my brain was going to explode). Mark, the beaded piece in the center (if that's what you're talking about) is made from 2 different sized collars welded onto the parent bar. The larger collar was 1/2" sq welded onto a 3/4" sq bar. The bar was then drawn down to 1/2" sq over 7 inches. A 3/8" sq collar was welded at 7" in a die. Heavy chamfers were forged onto the bar between the two collars. Then the flame was tapered, rounded and squiggled. Finally, the 1/2" round tenon was forged on it. Gerald, all of the joinery is mortice and tenon, half-lap, collars or forge welds. If you're interested in the school, call them up and talk to them. There may be scholarships available ;) -
ACBA Gate - side panel
Bob Ouellette replied to Bob Ouellette's topic in Blacksmithing, General Discussion
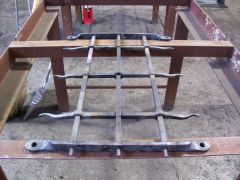
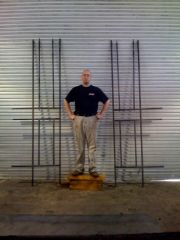
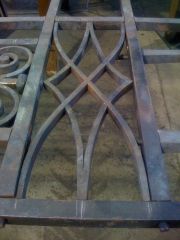
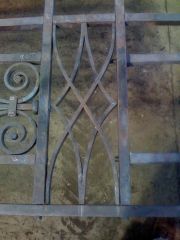
There's a picture of both of the side panel frames. The short, horizontal bars are half lapped into the extreme outer vertical bars and the tenons on the end of the horizontal bars fit into mortices in the extreme inner vertical bars. I hope that helps. -
ACBA Gate - side panel
Bob Ouellette replied to Bob Ouellette's topic in Blacksmithing, General Discussion
-
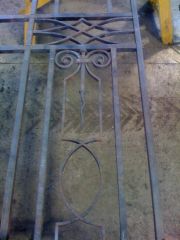
This is as far as I've gotten working one of the side panels for the gate we've designed during the BS 202 at the American College of the Building Arts. I've managed to get the bottom panel and lock plate of the side panel I was working on finished. The second year students next year will finish it.
-
-
-
From the album: ACBA Gate
-
From the album: ACBA Gate
-
From the album: ACBA Gate
-
From the album: ACBA Gate
-
From the album: ACBA Gate
-
From the album: ACBA Gate
-
From the album: ACBA Gate
-
From the album: ACBA Gate
-
From the album: ACBA Gate
-
From the album: ACBA Gate
-
From the album: ACBA Gate