

Paragon
-
Posts
166 -
Joined
-
Last visited
Content Type
Profiles
Forums
Articles
Gallery
Downloads
Events
Posts posted by Paragon
-
-
Well, it is cast and setting up. Hopefully I didn't add too much water to the Mizzou
 I started with the recommended ratio but ended up adding a bit more so it would actually tamp down around the crayons. A palm sander with no paper on the workbench helped tremendously. I guess we will see. If it doesn't work I have plenty more for a second attempt.
 ")
-
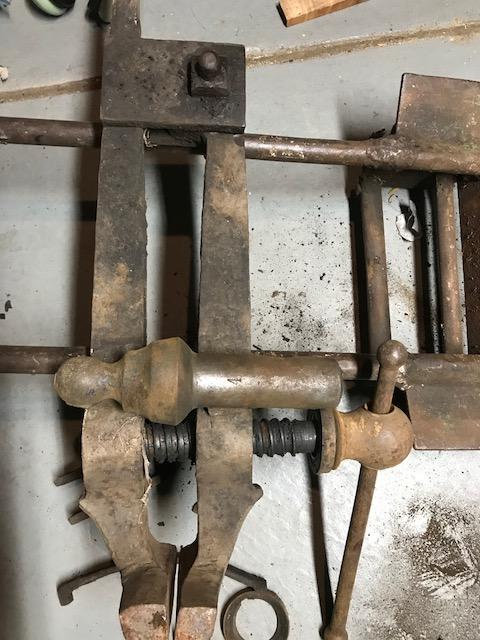
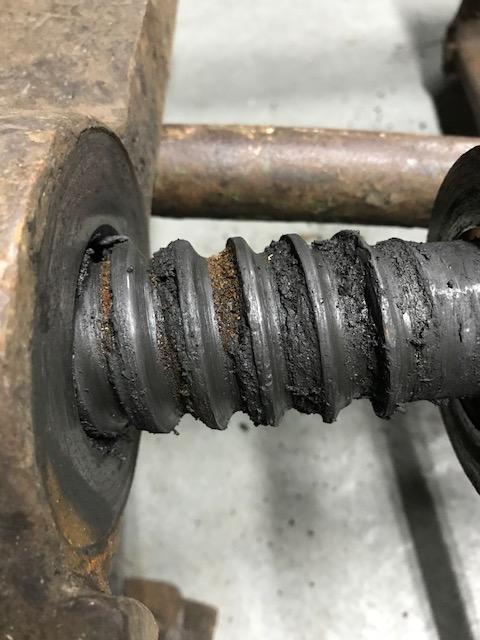
What is going on with the front thrust washer? Are those threads? looks like a makeshift one. make sure it has a cupped surface that mates with the one on the handle. it allows good force transfer at different open distances. From what I gather, legs with the corners knocked down to octagonal are older.
-
Just the foot there. Hard to make out. It should be the serial number iirc. Someone has a reference and could tell you when it was made. Others are much more knowledgeable than I.
-
That's what I thought but the diamond seems small for the letter size.
Is there any numbers on the foot under the horn? It would be on the flat just above the ground.
-
On 10/4/2018 at 10:39 PM, DWH said:
The pipe inside the Tee just threads into the backside of the same 1/4" threads that the inlet goes into? I know it is a tapered thread but there is enough to grab onto?
-
I'm building a burner as well. From the information that I have found, Pine ridge uses metering tubes so if there is a leak between the plenum and block, it could only occur where the metering tubes are. If there is a gap, it wouldn't matter as the air will carry the mid out the block to the forge. It can't backtrack and snake through between the block and baffle plate out the side. You have to remember that they are building these things for high out and large forges/kilns/etc and one less failure point is what they were going for. Their tubes do not extend to the end of the block so the castable still takes all the forge heat. I have a feeling the blocks are cast separately then attached to the plenum.
If you do use metering tubes, I wouldn't have them go through to the face. I was contemplating the idea before I understood why they do it and it just was more complicated with unknown gain. Pineridge has their tubes sized for their burners. Unknown what they use but it seems that the holes in the castable are 5/16 from what I found. The internal plenum baffle is also different than what you see as standard here.
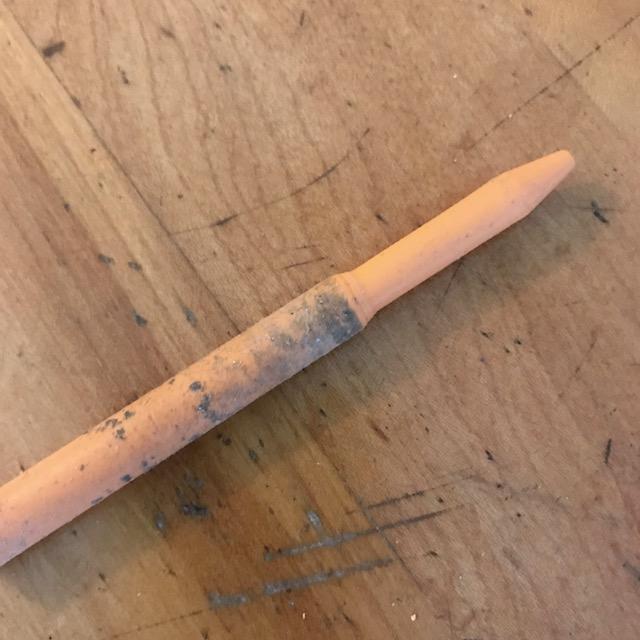
I was thinking of necking down the crayons and using those as an integrated metering tube nozzlette system but I am tending to lean toward just using regular. Below is a crayon necked down to 1/4". This will mean less flow and possible more needed fan pressure. I don't know if it is going to do anything positive other than possibly increase velocity right there and decrease chance of the flame propagating into the plenum which shouldn't be an issue if the blower is running ok.
-
Wouldn't taking too much material get into softer steel assuming the hammer is hardened or should this only be done on hammers with softer faces that a file can bite into?
-
You can get flow adjusters that go on the air ports of the cylinder and use those to restrict flow for a slower close and open. It would allow you to adjust close and open speed separately.
We use them at work when we use cylinders for cycling.
-
I have seen a vid of someone welding or brazing a turned down nut inside the box and put a new piece of acme rod on the handle.. It can be done.
-
I think it is just from use. Any twisting from tightening to the extremity should be handled by the washers.
The offset is possible it was put on by someone other than factory.
-
You can get custom air cylinders built by Bimba. All depends on what pressure you are running and what force you are looking for. That will determine the diameter of the bore and then you just have to figure out an approximate length. Small diameter cylinders are rather affordable. I don't know how larger ones are.
Foot operated directional air valve and you are good to go. I would put a ball valve in to shut off the air supply to the system so it is not always under pressure. McMaster has a few foot valves but they are not cheap. They also have different air cylinders and don't look too bad. I think they use Bimba iirc but don't quote me on that.
I'm not familiar with your vise. Searches seem to hit more hammers than vise of that style. It is just a matter of securing the cylinder to the non-moving jaw and then attaching the rod to the moving jaw.
-
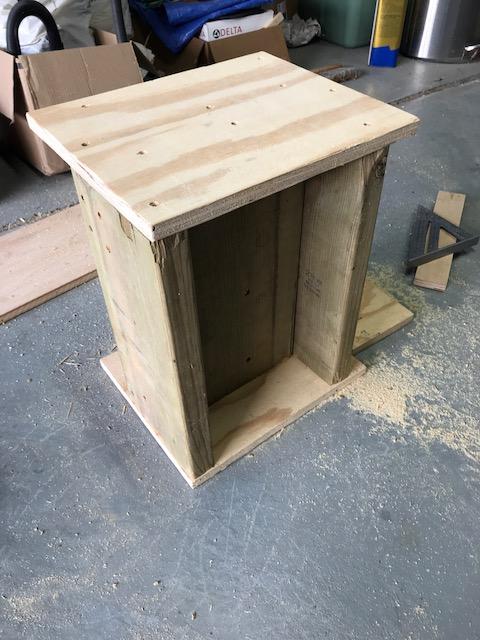
Interesting concept. It should work well for quite some time! I'm glad you put the plywood on top. Those mounting bolts could eventually split the boards they go through.
People have used worse stands and there is always a better stand to build.
I made a simple temporary stand all out of scrap wood I had. Basically an H-pattern out of 6 pieces of 2x8 and some ply just to test height. I only had a circular saw to cut so the lengths were not precise and the wood was a bit twisted so I used a power planer to level out the ends. Is it ideal? No but it didn't cost me anything.
Now go forth and forge!
-
Hello Thomas, I know it is worth more than scrap. I was just in a moment of disappointment and anger toward my stupidity. Good thought on that ABANA. There is one close by in January it may be worth contacting someone.
-
Hard firebrick will act as a heat sink. It is heat resistant but not a good insulator like the wool or soft firebrick (IFB = insulating fire brick). The hard brick will take a while to heat up form what I have read. Some use a thin brick for a floor (easily replaced) if you are doing welding but I wouldn't have that as the only layer. I would just do it right and wait for more wool. You will be more pleased with the end result.
go on Google and Bing maps and search for refractory in your area. You may have someone local that has wool in stock.. it may only be sold in the full pack quantity but they may have some pieces around if they also construct.
-
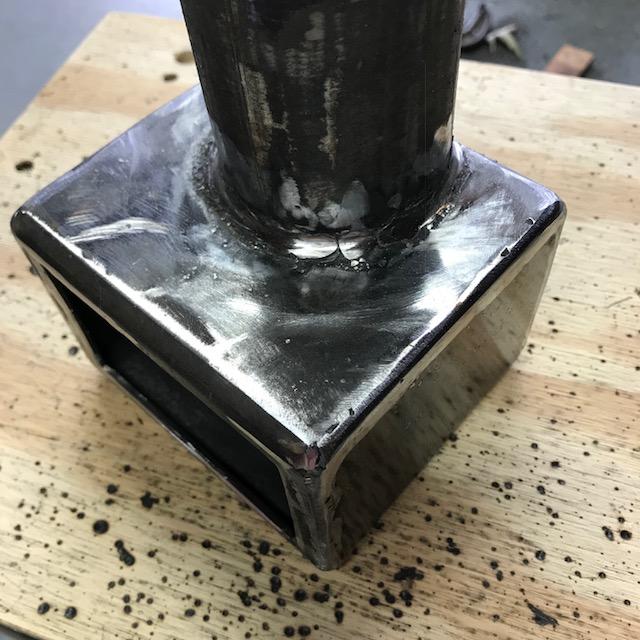
Plenum is welded. I may add some expanded metal to elp hold onto the casting. Mizzou came in yesterday.
-
Thanks. Looks like it is for a smaller vise. The screw on this one is 1 7/8 outer diameter of the threads. Just the threads are 9 or 10 length. Handle is 20.
I think I will just cut my losses. This vise is just going to be too big for the garage. I just wasn't thinking when I bought it.
-
Acquired this vise and apparently didn't inspect box and screw enough. Logic was not with me on that trip.
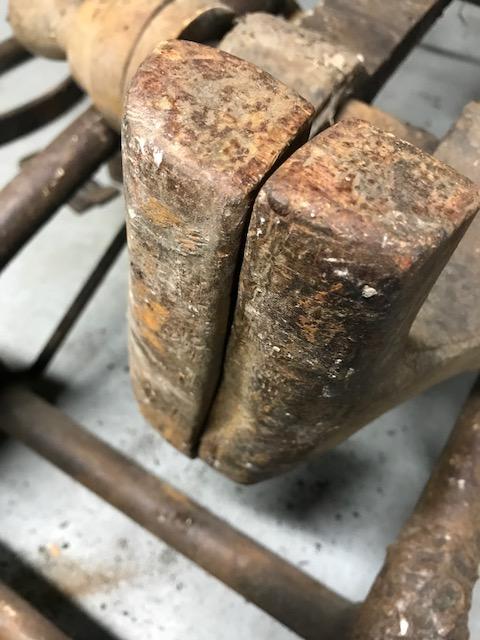
It is an interesting vise. 100 lbs (101.5 on my cheap scale). The jaws are offset. I believe closer to 7.5" length. Outside jaw is gouged pretty good. Seem to close well... and I forgot to take a good overall photo..
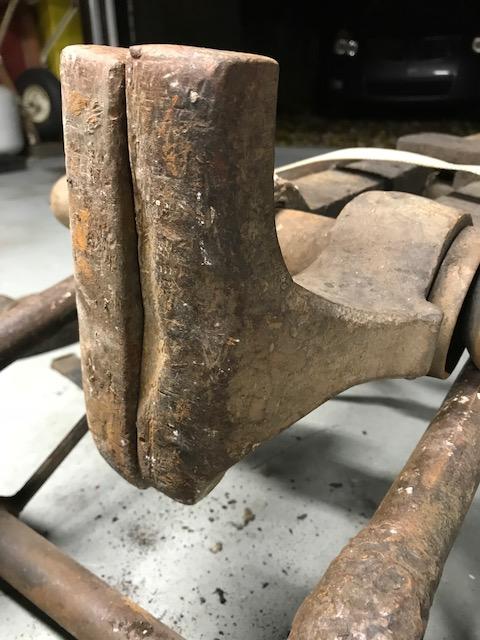
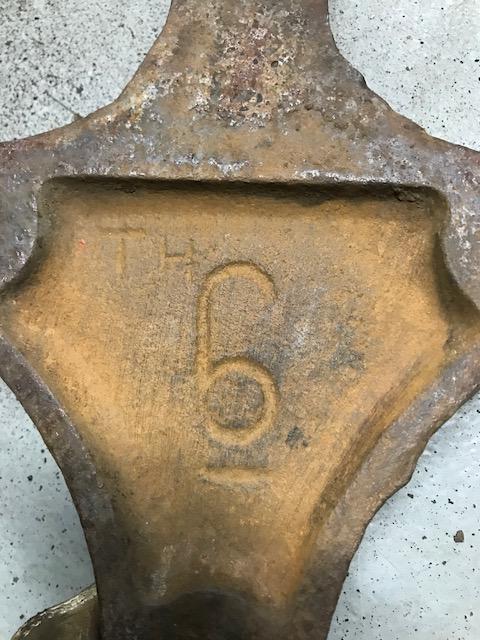
There is a 4 on the box and what looks like a TH and I assume an underlined 6 on the underside of the mounting plate (indicating 6" size?). Weight lines up with a 6" jaw iirc so it was either modified at the factory or in the field with the extended jaws. Cannot really see any indication of welding on the underside of the jaws.
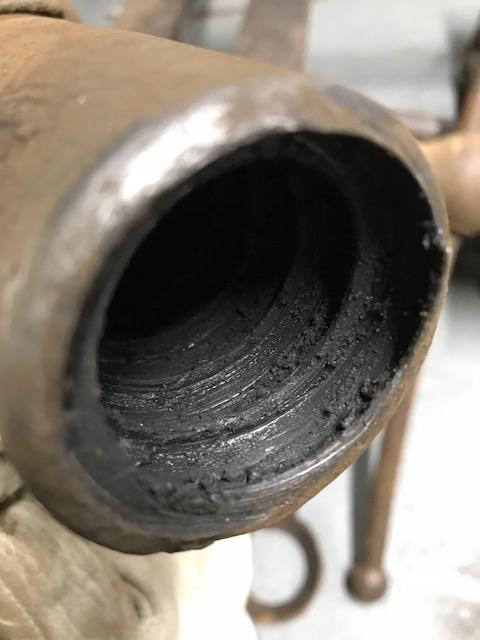
The box is only threaded for the first few inches .. well I should say it was threaded.. Would this have had threads the whole length of the box or is it common only a few inches of threads?
Apparently the vise was only used to hold narrow stock its whole life as the threads on the screw are worn most near full close. I unthreaded the box a bit when I was buying it and they looked better but I should have looked inside the box. The threads in the box are down to a thin wafer

Oh well. is it worth anything more than scrap? I know it can be fixed but I think it is too big for my small needs as a hobbyist so i will probably sell it somehow.

-
Hello Mikey. Not quite understanding . That's a 2" nipple in the photo for air/gas mix inlet. It will be a blown ribbon. Nipple is welded on already.. needs some cleanup
Was thinking of using PVC onto that nipple or is there heat issue that close to the forge/burner plenum?
I bought a box of 3" thick BNZ PA26 IFB ($3 a brick) and have a box of PA23 from years ago.. might slice the 26 thickness and back it up with the 23 or likely leave it whole for starters..
-
Hello all! First I want to say thanks for the forum and contributions other have done. Hopefully I will be able to add some useful information in the future.
I jumped into the deep end and started making the forge (mainly cause I want to hit put the anvil to use and so I can get some sleep and stop trying to plan all the time..)
Picked up some steel yesterday and cut out the burner pieces today. Still may go out and weld it up after I eat. Borrowed the HF flux core welder from work.. At least I can use it to tack everything together and may have to get the OA out if I can't get a decent bead with the welder.
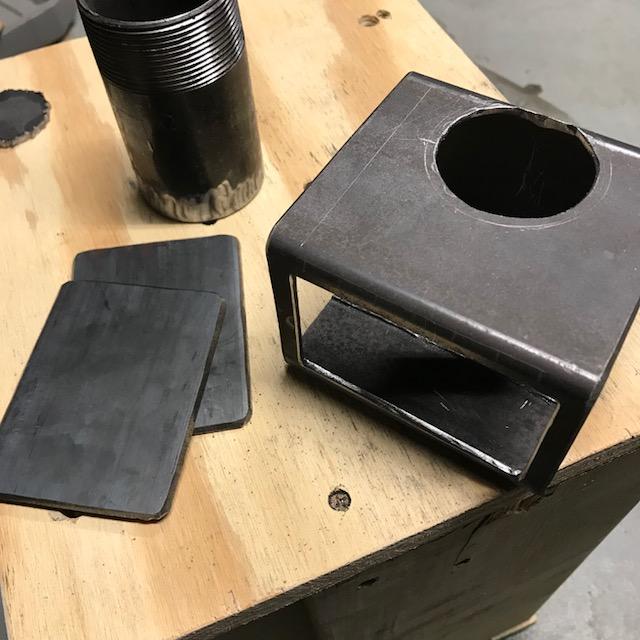
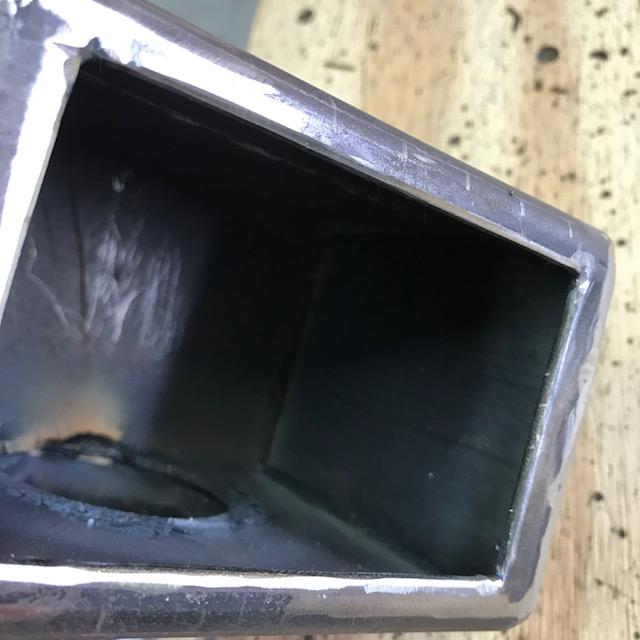
3x4 tube. 4.25 length. 1/8 end plates for finished 4.5" length (probably overkill and 3" would have been fine but I'll be able to extend the brick pile if I need). 3x4 tube so there is a larger air chamber behind the casting for flow and mixing (theory in my head.. probably pointless)
Inlet is right angle to the burner outlet for mixing and help with dispersion (I hope). No baffle or a small angled baffle (might do like a wedge plow to split the stream and angle it down).
There will be 3 rows of 3 holes for the burner. Need to get some crayons or small candles. I may try to shape the crayons and make an integral metering tube that is slightly smaller than the crayon diameter.. have a feeling that won't work well. Have some Mizzou for the casting. Will cast in the basement since it is rather cold out
Don't know why I feel I need to change a working design but I guess I'm just a thinking too much.
-
I think I read in one of the threads to coat each later of wool with stabilizer separately. Someone with more experience can chime in on that if it is actually necessary.
Flare should be inset like you are planning. You do not want it into the main interior area. Flare hole should be coated with the castable. Inset it helps hold the flame and protect the flare some. If the flare is inside the main area, it will get too hot.
Lastly, top right of page, click on your Name, Account Settings, Edit.. and put your location in. You never know who might be around you.
-
My guess is these fittings to NPT is what is in the regulator to hook up the hose (I looked at mine and the hose fitting is RH thread into the regulator)
Western #33 (WES33, WES #33) looks to be the same 1/4" NPT
McMaster 1/8" NPT 79215A712 https://www.mcmaster.com/79215a712
McMaster 1/4" NPT 79215A2 https://www.mcmaster.com/#79215A2
Zoellerforge has a Type I propane hose from the B fitting to 1/4" NPT http://zoellerforge.com/forgeparts.html
Hope this helps!
-
Looks like a B fitting 9/16-18 LH for the fuel line. Doesn't matter if it is a Acetylene regulator or a Propane one. Mine is listed for both Acetylene and LP (propane).
My Victor set has T hose for all fuels and I'm pretty sure the kit is good for Acetylene or propane with a switch of just the tips.
There has to be an easy way to convert.
..
B LH to 1/4" NPT
Radnor 64003910 (bulk part number)
Radnor 64003998 (2-pack number)
-
See above for one issue I didn't think of.. reverse thread on the fuel regulator

9/16" - 18 LH
-
Hop on Google maps (seems better than Bing for this in my area) and search for 'refractory' in your area.

Old anvil with anchor stamp
in Anvils, Swage Blocks, and Mandrels
Posted
That block is awesome. Dovetails for sure. The precision to get them closely packed and all interlocking..