
Quarry Dog
-
Posts
412 -
Joined
-
Last visited


-
Anvil molds, white cast vs gray cast
Quarry Dog replied to Quarry Dog's topic in Anvils, Swage Blocks, and Mandrels
I think this was just me overthinking what materials would be used by Fisher and Vulcan. I'm pretty sure it was just plain old gray cast and that all the durability of the face and horn was from the steel plates. Sorry for disappearing. I've been off on a few adventures since the last time I was in here. Forgot how much easier it is to focus on a specific topic in here versus Facebook groups. Glad to be back! -
Fullers are handy when drawing out, grooving, and forming something down into a swage.
-
Anvil molds, white cast vs gray cast
Quarry Dog replied to Quarry Dog's topic in Anvils, Swage Blocks, and Mandrels
Thanks for sorting me out Glenn. I had a feeling my question wasn't closely enough related to that beautiful anvil pattern. Also, now that I think on it some more, I'm not sure if I have all my facts straight enough to even ask these questions. It's been a couple of years since I read whatever book it was that differentiated (very generally I'm sure) between gray, white, and malleable cast iron, but I'm sure it didn't cover Brooks, Fisher, Vulcan or any other cast anvils and the particulars of their castings. Edit: I did find Fisher pat. 189892 again, which explains about the hornplate and faceplate. I'm asking about the method and material of the actual casting. -
my shop is in trouble
Quarry Dog replied to territorialmillworks's topic in Power Hammers, Treadle Hammers, Olivers
Gophers. No plant is safe. Even if it's something they can't eat, they'll pull it halfway into the ground before they figure it out. -
my shop is in trouble
Quarry Dog replied to territorialmillworks's topic in Power Hammers, Treadle Hammers, Olivers
Sounds like my varmint solution. Unlit oxy/acetylene torch with a rosebud stuffed in the hole for about 5 minutes, then light it off. I've never done it within 50 feet of the house, but I doubt it would be advisable, unless you wanna live in the caddyshack. -
Anvil molds, white cast vs gray cast
Quarry Dog posted a topic in Anvils, Swage Blocks, and Mandrels
I know this is me being lazy (also not even the slightest clue where to look for a good reference...patent number?) but was the cast iron used in anvils different than your typical casting? Would regular white cast (Do I have that right? White cast being a ceramic mold casting that makes it cool faster making it harder and tougher somehow? As compared to gray cast being a sand mold?) be tough enough to hold up to our brand of beating? The cooking to make it malleable cast would cook all the carbon out of the tool steel face wouldn't it? I guess what I'm trying to get at would be that I'm wondering if they somehow cooked all the carbon out before casting, effectively making it cast steel? -
Looking for anvil in SoCal; need advice
Quarry Dog replied to federalist's topic in Anvils, Swage Blocks, and Mandrels
Short version: Look everywhere, but don't waste time digging in the weeds unless you have good reason to (I've found good stuff in the weeds, when I had reason to look). Start with asking everybody you come across, and leave a number. Long version: Since you're just starting out, don't forget to check heavy equipment rental places and dealerships. Think Caterpillar or Komatsu. A worn out "pin" from a larger loader/excavator/etc would make an excellent anvil. Imagine +3" round by +8" long of hardened steel. I've also seen heavier forklift tines make a pretty nice looking anvil. Any of this stuff properly mounted and dressed would make a very good start. If you can't get one that way, try looking for any sizeable (40+ pounds) piece of steel at a scrap yard, if you can find one that will sell to the public. I also accidentally scored 2 three foot lengths of track (120 and 140, weight per yard) through a contact at a local welding supply that I deal with regularly, which I found surprising as I don't really think of California as a big railroad state, at least not like I've seen back east or in the south. Eventually you will probably get it in your head that you "need" (want) a "real" (london pattern) anvil. Do not buy one from harbor freight/northern tool/etc. They are cheap cast iron and won't hold up much better than your vice. My best advice is to contact a local blacksmithing organization, or the California Blacksmith Association, take whatever classes they offer, and after that if you still like it, hang around and show that you are serious. You will almost certainly see a few fair deals after a few months. You won't get the best deal this way (they know they have a good tool), but you shouldn't get gouged either(they won't charge antique dealer prices, unless it's pre-19th century or something that you'd be afraid to hit for fear of destroying history). The price will be fair (although probably higher than in other states, since it is California and this stuff ain't that common here. Expect $2 a pound, maybe less, probably more, unless you're lucky like me), and most likely they will have good insight into the condition of the anvil. If you want to go the "cheap" route to a real anvil, start small. Get leads at places that you'd be anyway. Ask your friends, bartender, mechanic, that one cute grocery clerk... If that doesn't work you could go spend your time (a lot of time) at swap meets, flea markets, yard sales, estate sales, or go into the rural areas and start asking around, but you'll probably spend more money in gas and time than you would on the anvil, and you probably wouldn't be as sure of the condition. I would save this until you have more experience, as these beasties seem to follow you around, bear more of their souls, and tell you more of their history after you've been around them for awhile, and read about them. I'm not saying to take all this as gospel, as I've only been doing this for a few years, but It's pretty much how I've seen it, and as I've heard it from more experienced craftsman than myself. It also seems to be the same way with any tools or oddities that you might be looking for. -
And for those that occasionally have call to wear a faceshield with a hard hat, there are aluminum frames that mount very nicely to wide brimmed hard hats. I also wear torch goggles at the same time, at least when doing demolition on rusted out, wet, or steel that I know will be otherwise uncooperative. Even with the shield and goggles I still have an occasional spark get hold of an eyebrow every now and then. There is also the occasional spark pop that somehow showers sparks off of my chest, inside the faceshield and off the back of my collar and straight down my back. Self control is a must when using an acetylene torch in a field environment, as well as a tolerance for the smell of burnt hair, bacon, and stupid. Seriously though, when I'm fully geared out for high chance of fire, I just need a couple of extra straps on my leather jacket to look like I crawled out of looney bin that just burst into flames (there's a couple char marks on my gear).
-
If you have one, chuck some mild round stock up in a vice and pein the end down with a ball-pein hammer. This cold riveting process takes a little while, but if you anneal your stock beforehand, and take your time, making sure to only pein down around the outside edge of your stock, you should come up with a handsome looking mushroom that doesn't split. When you're "factory" head starts looking pretty good, cut off the end with a hacksaw to a length that clears the pieces you're riveting together by 1.5 times the rivet thickness. Assemble the joint and buck the "shop" head on a flat piece of metal (anvil face), or if you have one, a "bucking bar" that fits your factory head pretty well. If you want, you can do the process in a simpler manner while hot, but you run the risk of upsetting the rivet down into your boss, seizing up the joint, and possibly shearing the rivet in half in an effort to free it. You shouldn't need any hints as to how I figured that one out.
-
"two" small? My magic tool has been knowledge of blacksmithing. I've made many very simple useful tools in the last 3 and a half years that I either would not have had and sorely been wishing I had something better than the junk available, or would have done without the good tool because it cost too much and I couldn't make it. As far as a physical tool, I would have to say chain comealongs. Often times at work I end up with something that looks like a spider web before all is said and done. The crew I used to be on had 5 of them and it was wonderful. Now I only have a little 1/2 ton and a couple of chains that are a half step away from scrap. It takes me three times as long, but still makes impossible jobs a lot more straight forward than nothing.
-
I've seen power hammer tools somewhat like you're describing. As a matter of fact I went digging in my folder of E-books that I downloaded for free from google books and have already read (still a lot more to read) and found a perfect example. It is a side fuller, pictured in Forge Work by William Lewis Ilgen, on Pg 130, Fig 8. If you read the description below the picture, you fill find that it is usually used to isolate mass prior to drawing out so that a portion of the bar remains relatively undisturbed. PS: pardon the font, but the Sans Serif was making it hard to read the author's last name.
-
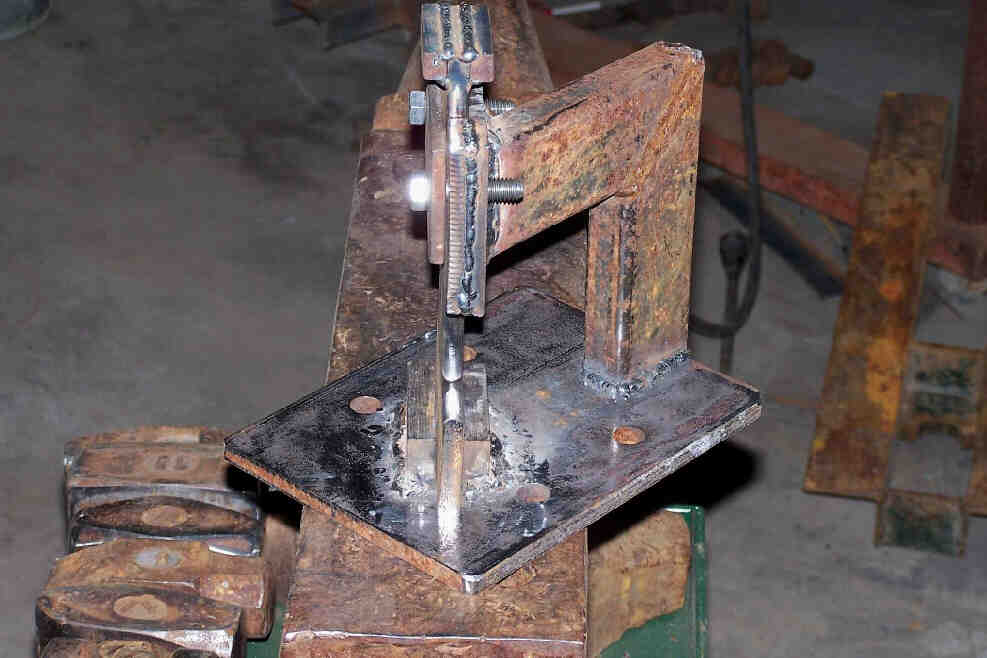
Here's a 45 degree one that I cached away into my tools to make folder. This thread might even be where I found it. Pardon the odd naming convention, it's how I keep the ideas organized.
-
Well, I haven't done any serious research on this, but I have read a few old books that go over the subject of tooling for PHs in pretty good detail. Let's see how good I was paying attention If I remember the reason for PH and press tooling being so low slung it is to reduce the likely hood of a missed strike and pressure being released in a possibly lethal vector or vectors, or at the very least the tool twisting and wrenching your wrist something fierce. This low slung tooling seems like it wouldn't play well with a wooden handle. I would have to say my favorite option listed so far is John's, with the wire rope. I've used wire rope punches to knock pins out of smaller equipment at work and it really does reduce the recoil of the held tool. I recommend using somewhere in the neighborhood of 3/4" to 1" wire rope so it's a good size for gripping, and some heatshrink or old rubber (not plastic) hose makes the grip even easier, as well as keeping the fraying down to a minimum. Speaking of wire rope, I need to talk to my boss about dumpster diving for a small sling I saw in the scrap, or the 30 feet we dug out of the ground the other day(no idea where it came from), as it's not good for much else. I would probably go with Charles option next. It is about time someone found a good use for those cheap little things. I'm a fan of Estwings for chipping hammers (even though they say the end is only for prying), although I often find myself using a centerpunch and hot chisel that I forged out of 3/4" coil spring. Edit: yay, it didn't disappear this time.
-
I might be being silly, but I could see that long one being very handy hanging off the edge of the anvil, used like a smaller heel, maybe with a pritchel hold-down to keep it from popping out if necessary. I know there have been times when I was making small hooks or tight multiple bends that I wanted the heel to be thinner and couldn't get quite what I wanted with a bick or a bridge tool. I ended up clamping some flatbar in a vise.
-
Speaking from past experience, I would add to check that the end that isn't glowing red is cool enough to handle as well. Also, if you do any welding, make sure that you don't have a hole in your glove where you might grab a piece to manipulate it real quick. There's an old blacksmith joke with a punchline "Nope, Just didn't take long to look at it!" that I lived about 2 weeks ago at work. We smell like bacon and stupid, just so you know.