LibrariaNPC
-
Posts
198 -
Joined
-
Last visited
Recent Profile Visitors
3,156 profile views


-
That is one lovely blade! I am rather jealous with how that looks, from the finish to the shape, and do not have any real criticism to offer. Excellent work!
-
 When I first started in 2014, I was in a small 1.5 bedroom apartment in NJ, but I had yard access. This meant I could forge outside, but didn't have electricity. That said, this is how I got started: Books: I was suggested to get Goddard's $50 Knife Shop, which is by far one of the most useful and frustrating books I've read on the topic. There are some good ideas for tools in there, though, so it's worth checking out. The others I grabbed were mostly grabbed due to suggestions, but they really are mixed in my opinion. Forge: Started with a modified version of Goddard's soft fire brick forge, then tried a home-made version of the Atlas forge (with burner). Got tired of the bricks falling apart (went through 6 firebricks due to experimenting and fragility), so caved and picked up a Diamondback within my first three months of smithing. Pricey (about $500 for what I got), but I love it. Anvil: Another given, but I had a bit of a misadventure here. A local smith suggested I start with one from Harbor Freight, claiming that, as a beginner, I'll "ding it up anyway." Let's just say I now have a $50 blue doorstop. There are tons of alternatives, so you'll need to pick something. I ended up with a nice Budden thanks to a local smith that was selling it, and I've found a ton of railroad track anvils for low prices locally (getting one for the shop later). General hand tools: I picked up my first hammer, files, and punches/chisels from Harbor Freight. Not great tools, but they are a good start at a low price. Tongs had to be ordered new (prices vary), but once I hit the local flea markets, my tool options opened up and I was finding many of the tools I needed for a few dollars each (my most expensive tool at a farmer's market was a $10 brass hammer; monkey wrenches, files, and the like were just a few dollars each). Power tools: While most people would suggest a belt grinder (great tool, don't get me wrong), they do have a hefty price tag for a good one and take up a good bit of space. Instead, I was suggested to get an angle grinder. Granted, my first one was a battery powered Rigid (good tool, but batteries make it almost worthless), but I've been using one from Harbor Freight since January without issue. With the right setup, it's a versatile tool that's well worth getting, and with various types of wheels (polishing, flap, grinding, saw, wire, etc), it's a nice go-to machine. It will take some time to get used to, and I don't think it's as precise as a belt, but you can get away with a cheap angle grinder for a while. I also went with a cheap HF drill, again battery powered. It's not the best thing in the world, but with a full charge and the right bits, it's gone through metal. I've also used it as a low-cost buffing/wire wheel; not powerful, but it helps get the job done. Heat Treat: Depending on what you are making, you can get away with anything that can hold your quenching solution and deal with heat, followed by an oven. My current setup uses a turkey fryer (snagged one for under $20) to heat up oil for quenching, and I use my oven for tempering. Not the best setup, but it's not high cost, either. That covers my first basic setup. Over time, I added more tools (other hammers and tongs, guillotine hardy tool, other cutting tools, peens, etc), but it is a slow process unless you have a chunk of money and space to work with.
 -
New Knife Comission: Fantasy-Inspired Cake Knife
LibrariaNPC replied to LibrariaNPC's topic in Knife Making
I can relate to that, Thomas. It's a bear to fix someone's mistakes all the time, but at the very least I have a couple of friends who are good at it and are fellow blacksmiths that are lending a hand (with the goal of turning my shop into a prime hammer-in location). Back to the topic at hand, though: any input or commentary on the blade? Just curious if anyone has any tips so I can make the next one better. -
W2 integral pig sticker with hamon, Impregg, and ebony
LibrariaNPC replied to TheoRockNazz's topic in Knife Making
Thanks! I'll have to look into it; trying to find alternatives to wood just to learn something new. -
W2 integral pig sticker with hamon, Impregg, and ebony
LibrariaNPC replied to TheoRockNazz's topic in Knife Making
I have to ask, if you are willing to share: did you already have the handle shaped via a mold, or did you shape it from a block? Just curious as it seems everyone has a different approach. -
New Knife Comission: Fantasy-Inspired Cake Knife
LibrariaNPC replied to LibrariaNPC's topic in Knife Making
I figured some of you have done the nightmare of house repairs. Our place is only about 50 years old, but the last person that owned it was a special snowflake with wiring (we found no less than 5 arcing wires, one of which was between a leaking pipe and the gas main), which is really delaying wiring the shop. -
New Knife Comission: Fantasy-Inspired Cake Knife
LibrariaNPC replied to LibrariaNPC's topic in Knife Making
Thanks! I'm trying to get the house fixed (wife pushed for a fixer-upper), then I can turn the old garage/carriage house into a shop. . .THEN the new projects begin :-D -
New Knife Comission: Fantasy-Inspired Cake Knife
LibrariaNPC replied to LibrariaNPC's topic in Knife Making
I used to say a phrase similar to that to my old students, and still use it to this date. One thing I forgot to add: I don't have any photos of the knife being used yet. I've asked, but the newlyweds have been busy with a number of things. Hopefully I'll be able to see things soon~ish. -
W2 integral pig sticker with hamon, Impregg, and ebony
LibrariaNPC replied to TheoRockNazz's topic in Knife Making
That is beautiful. The handle looks stellar, and I do love how you pulled off the integral guard with the handle design. -
New Knife Comission: Fantasy-Inspired Cake Knife
LibrariaNPC replied to LibrariaNPC's topic in Knife Making
Thanks! I feel as though I still have a long way to go, but I was just happy to be at the forge again and making some progress! -
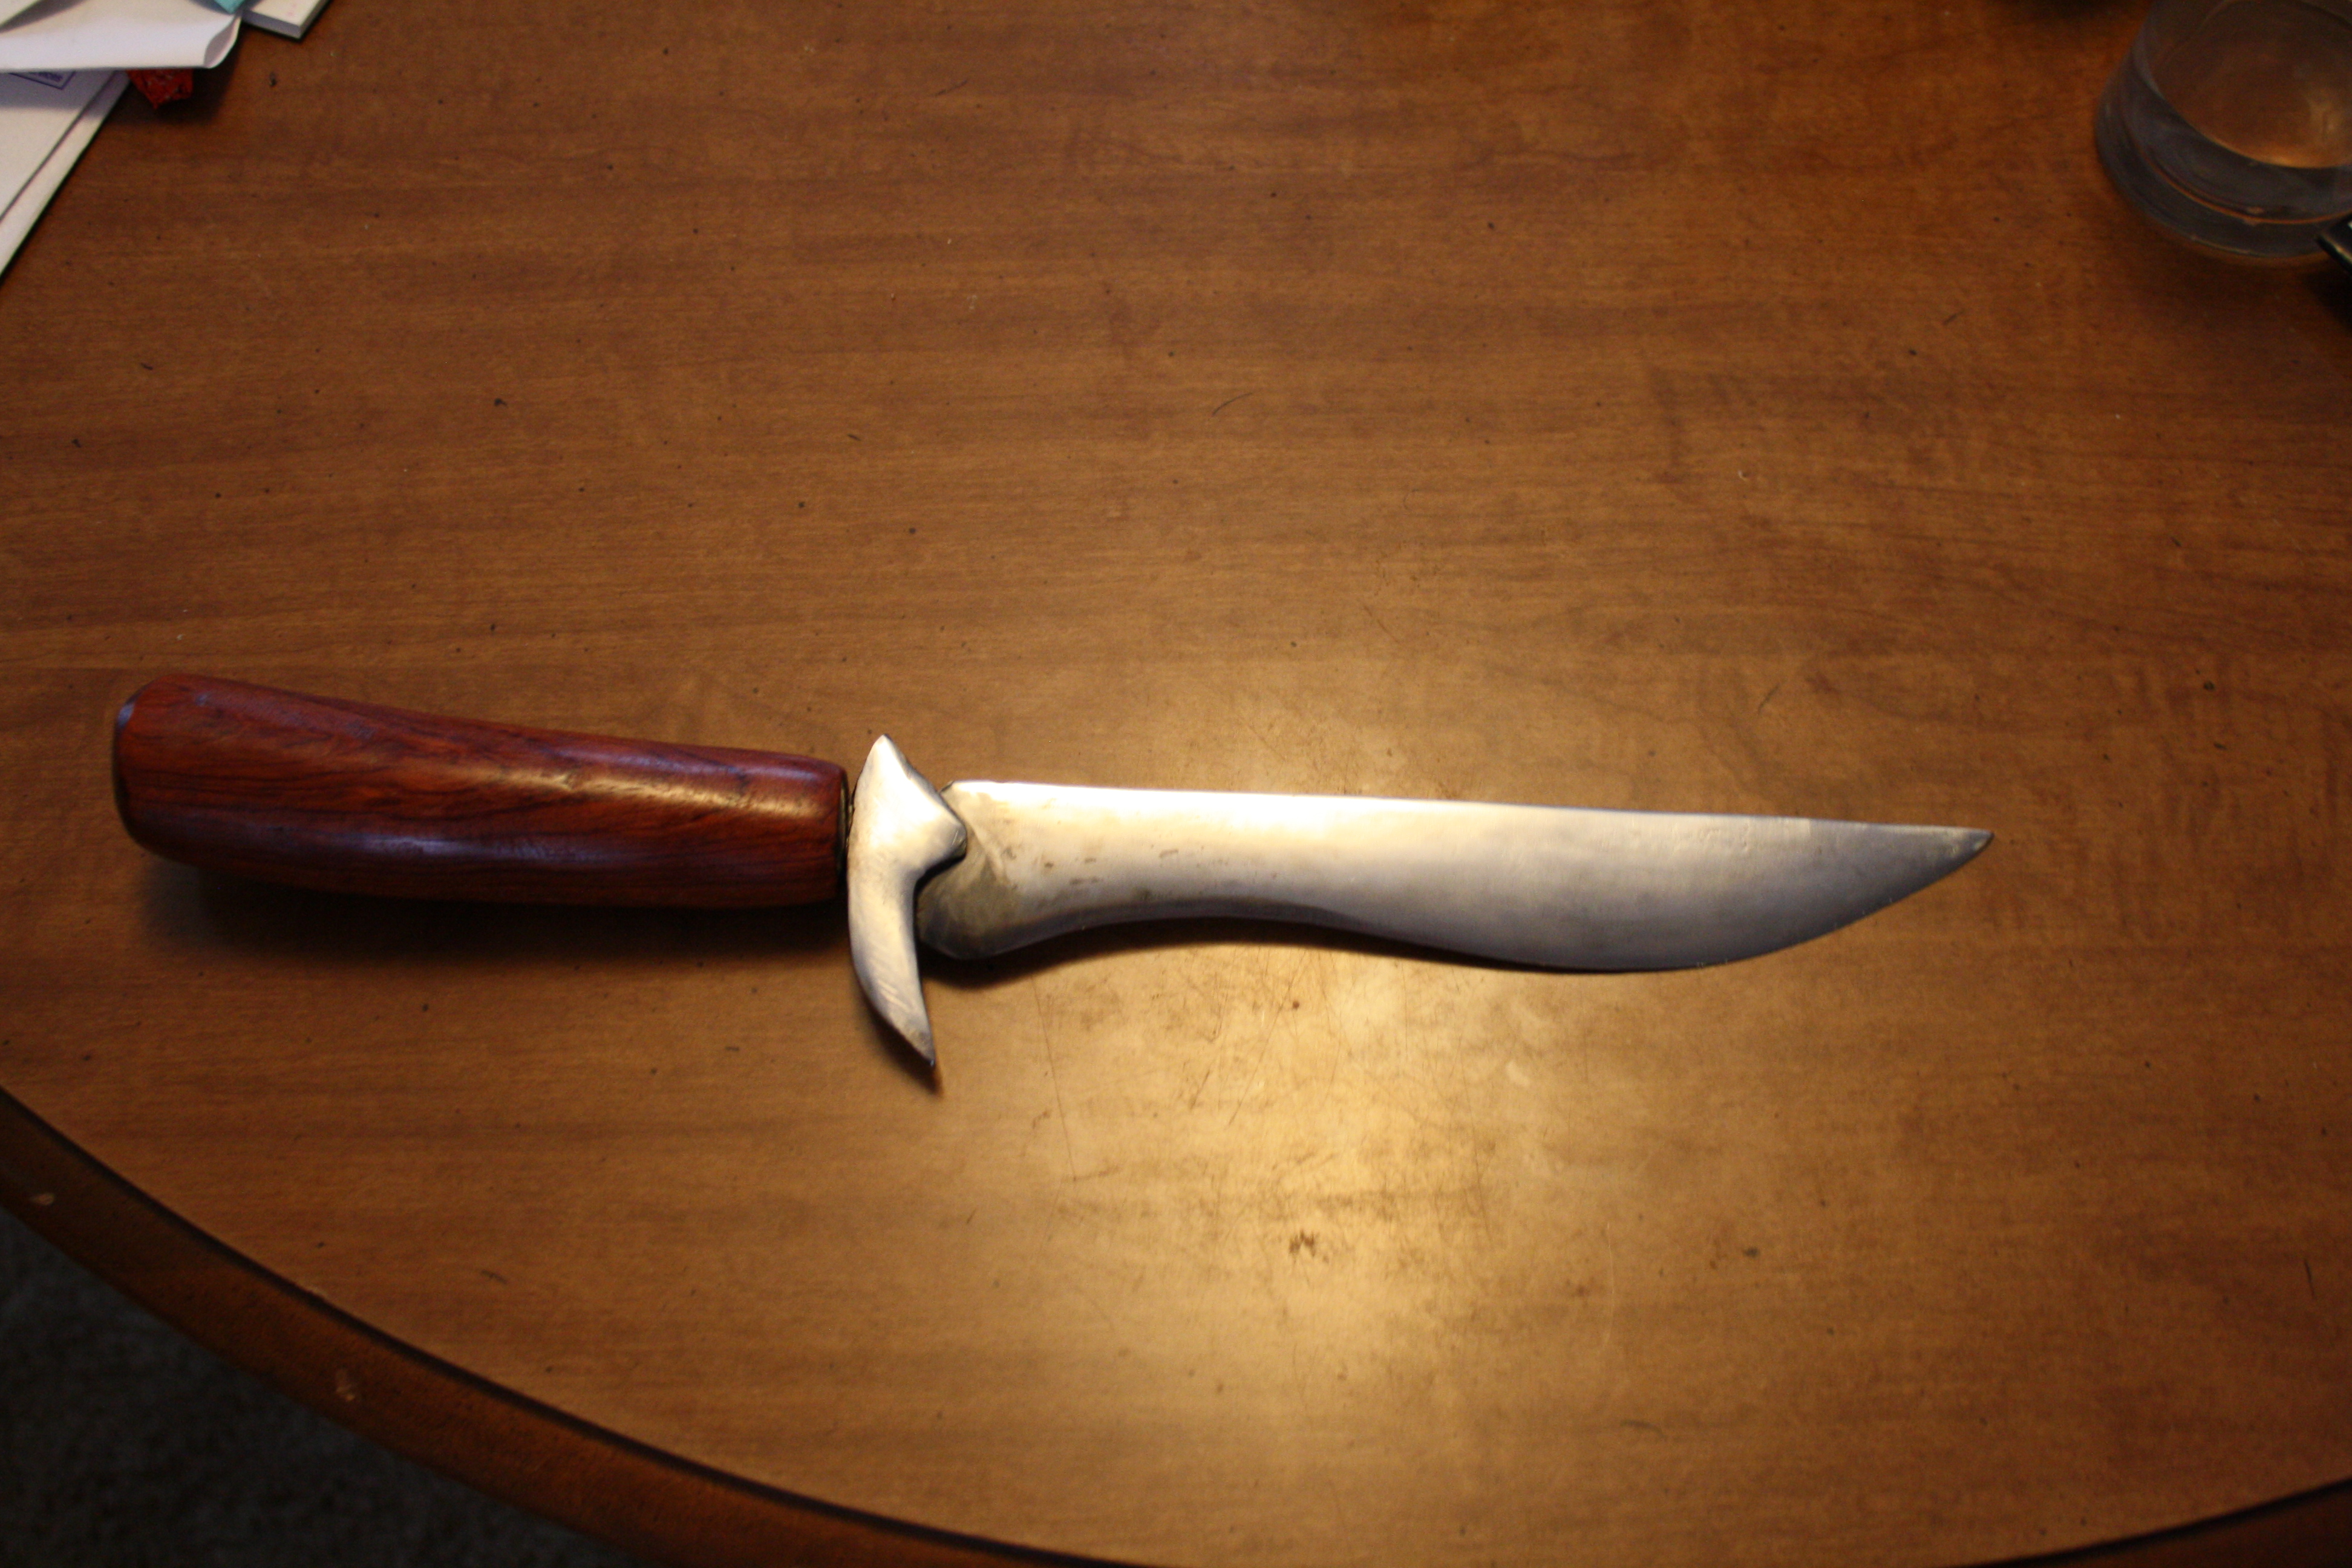
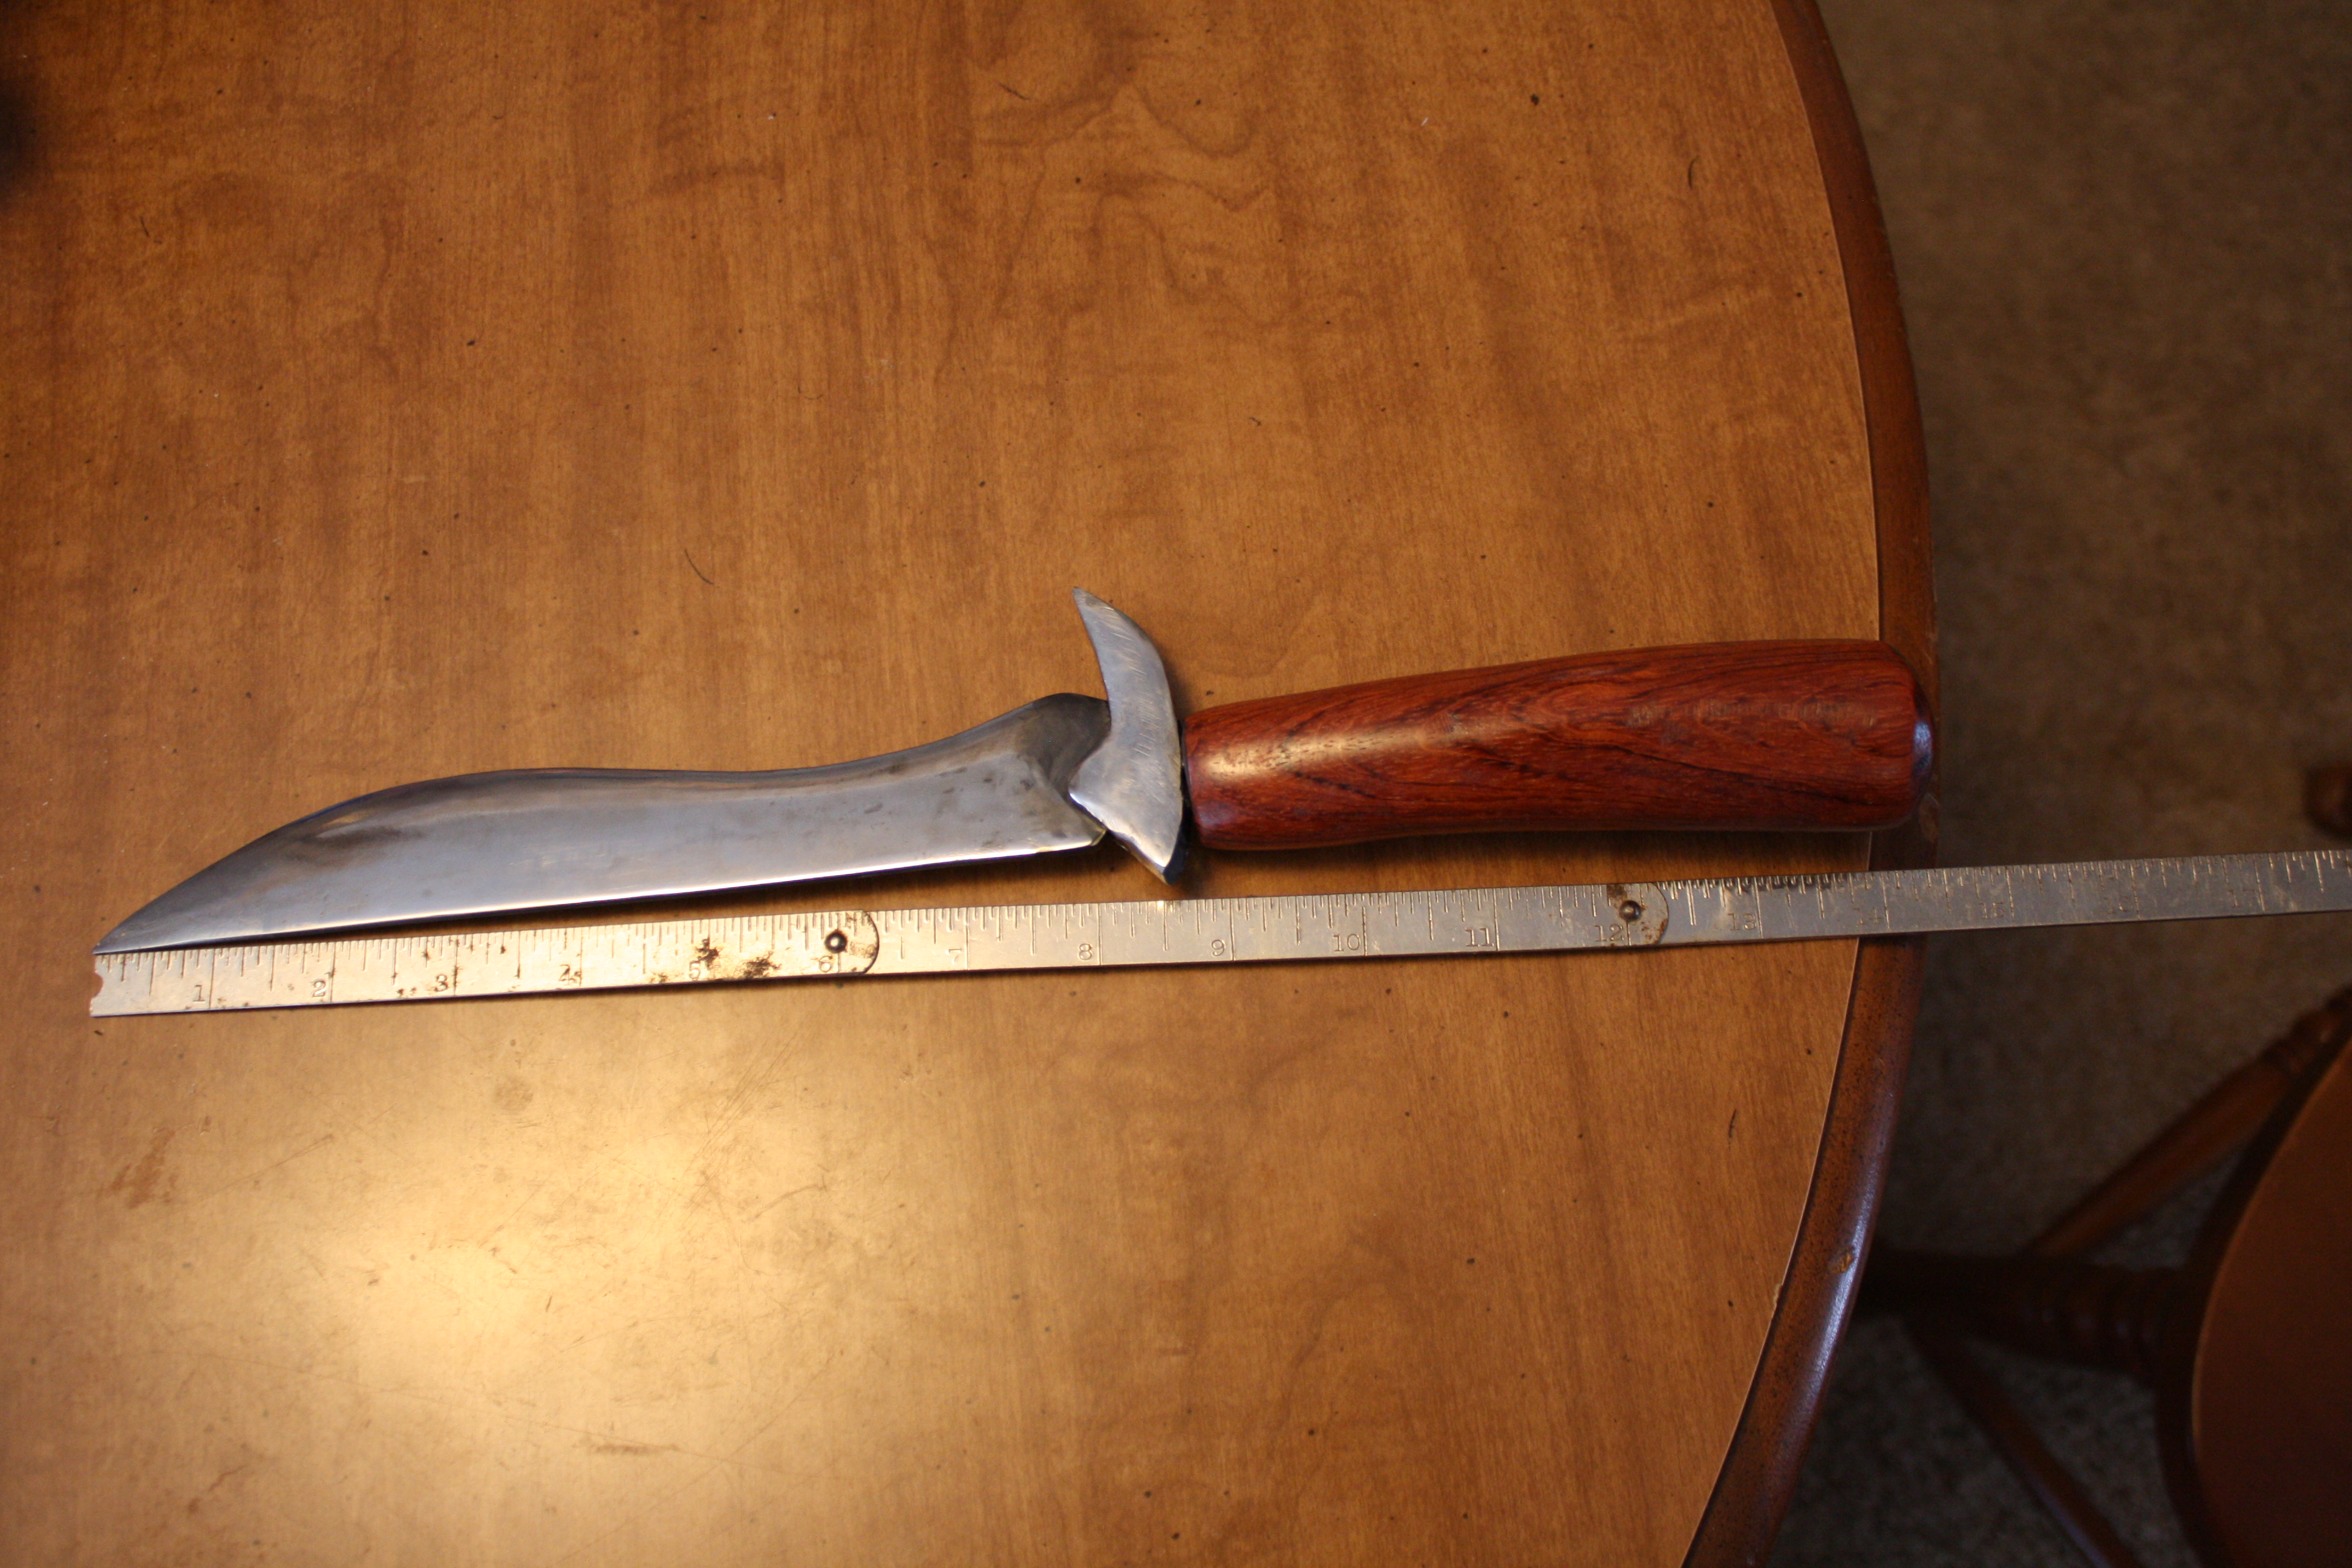
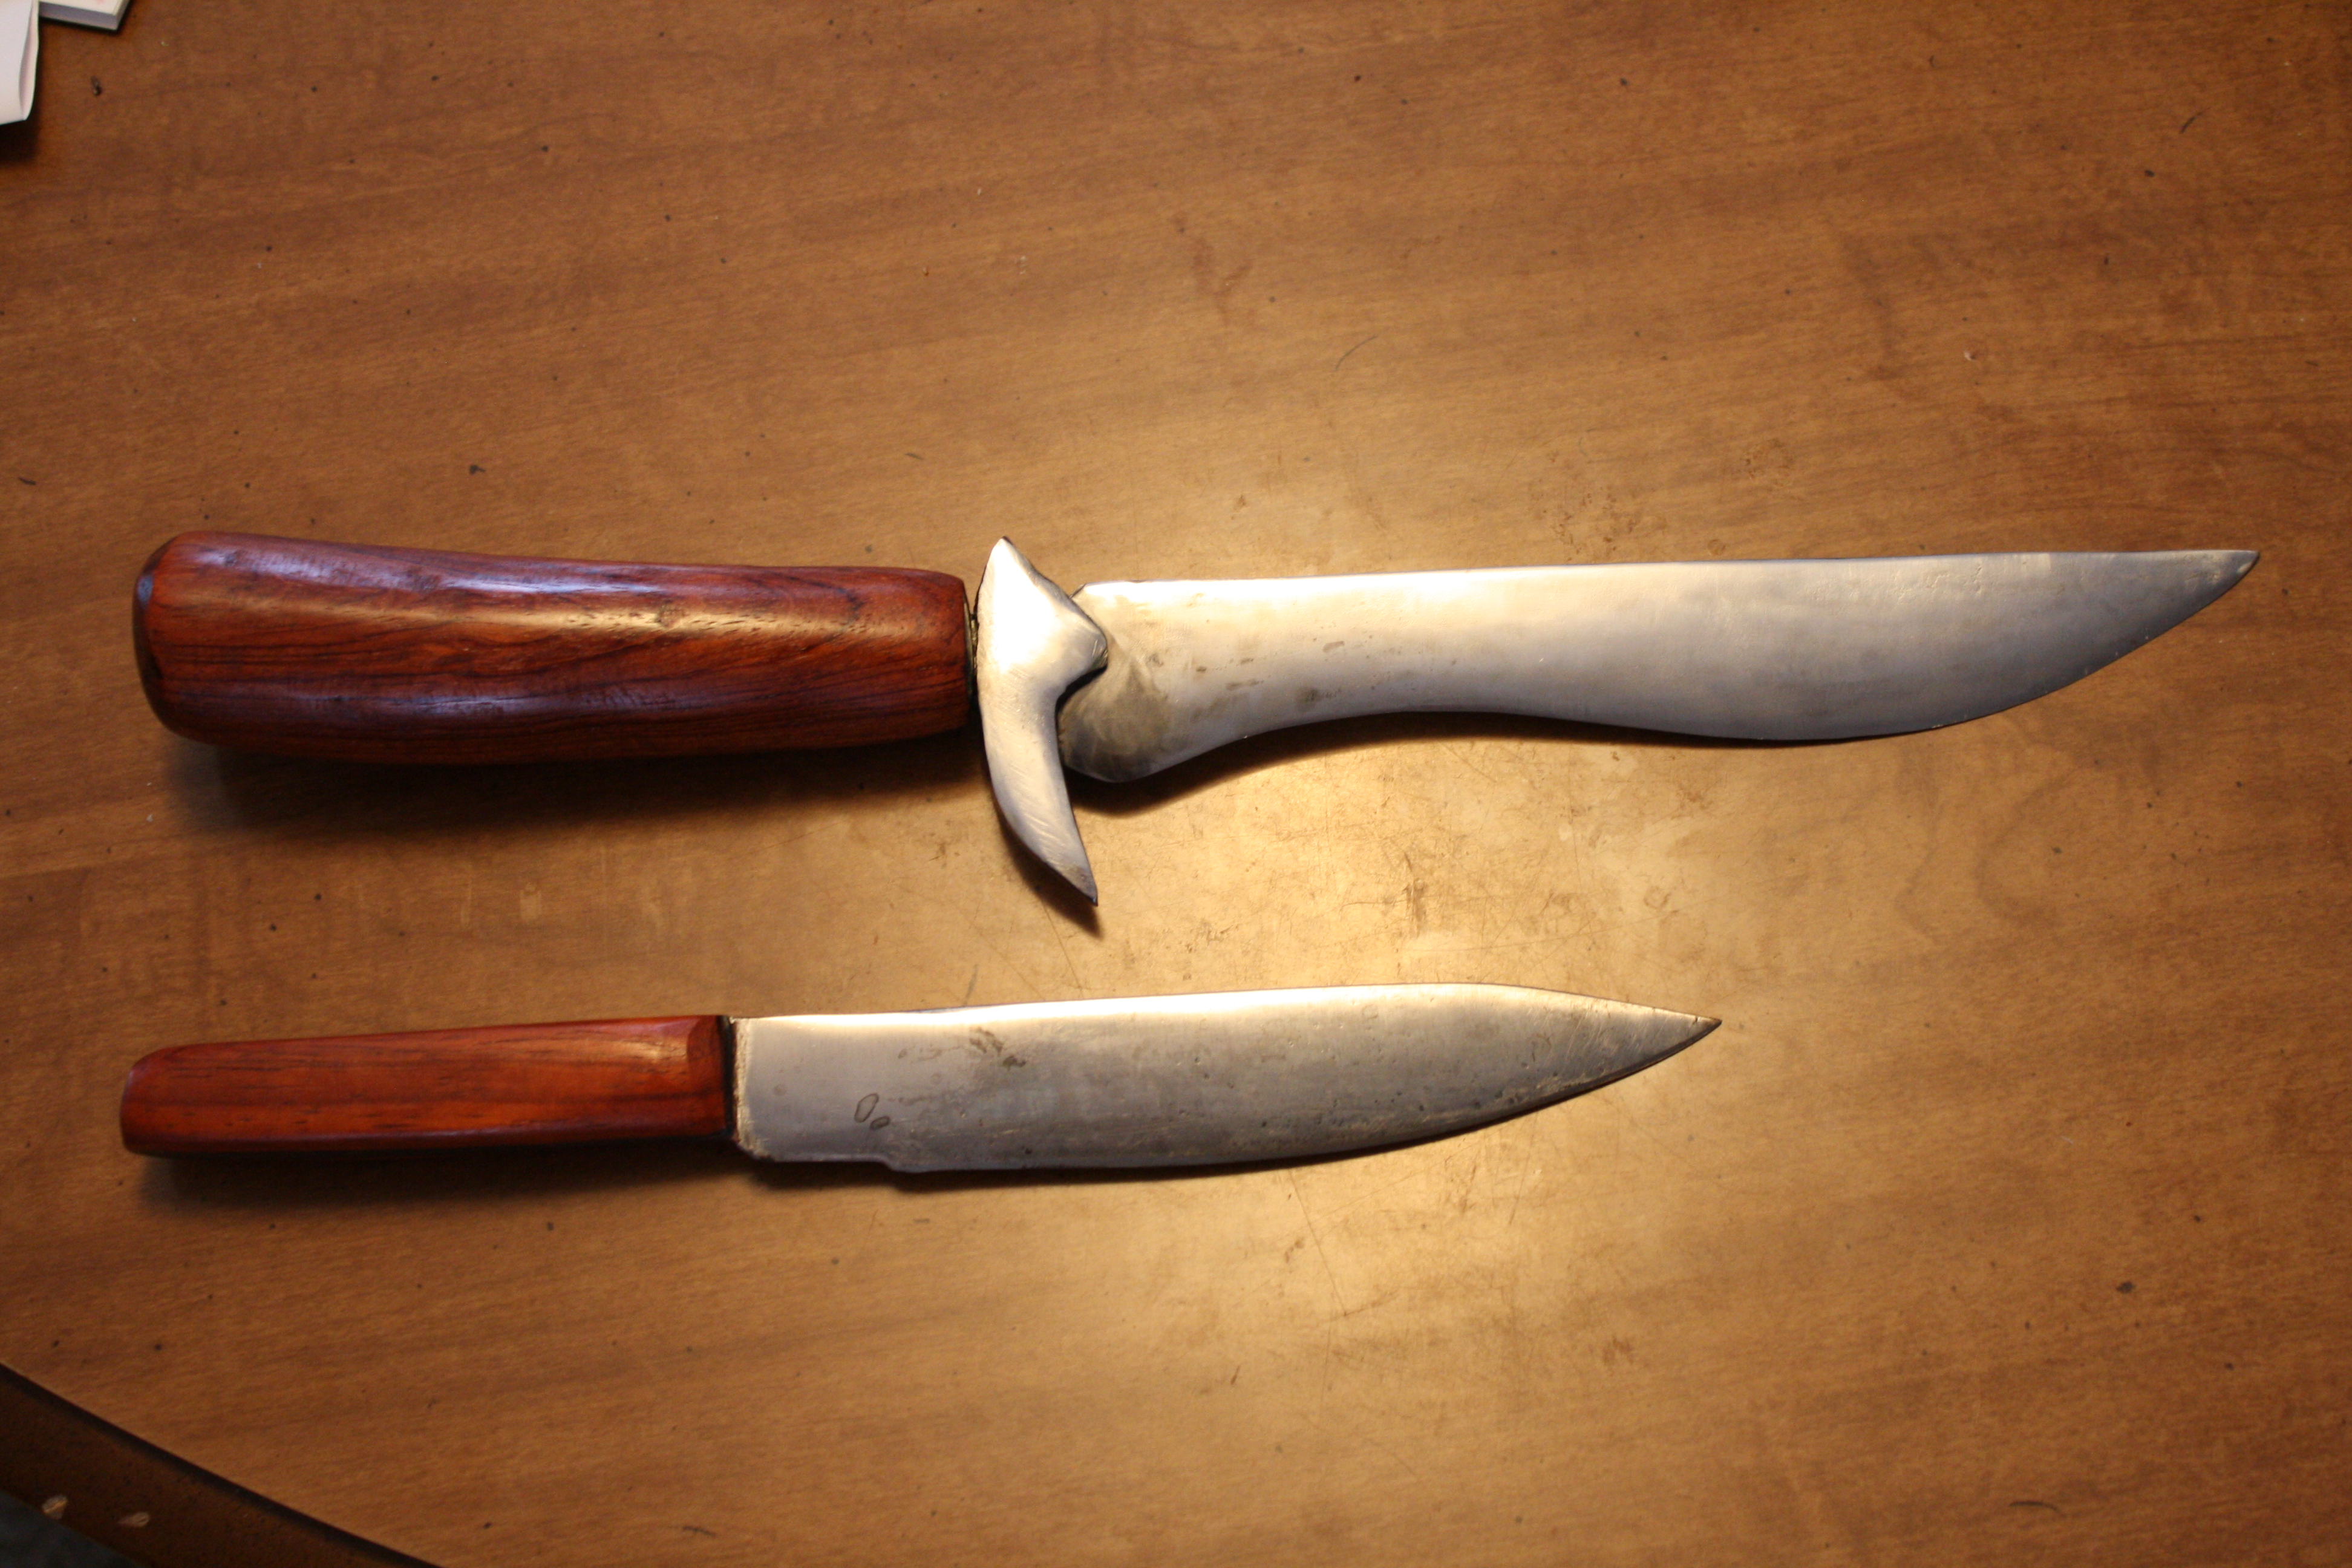
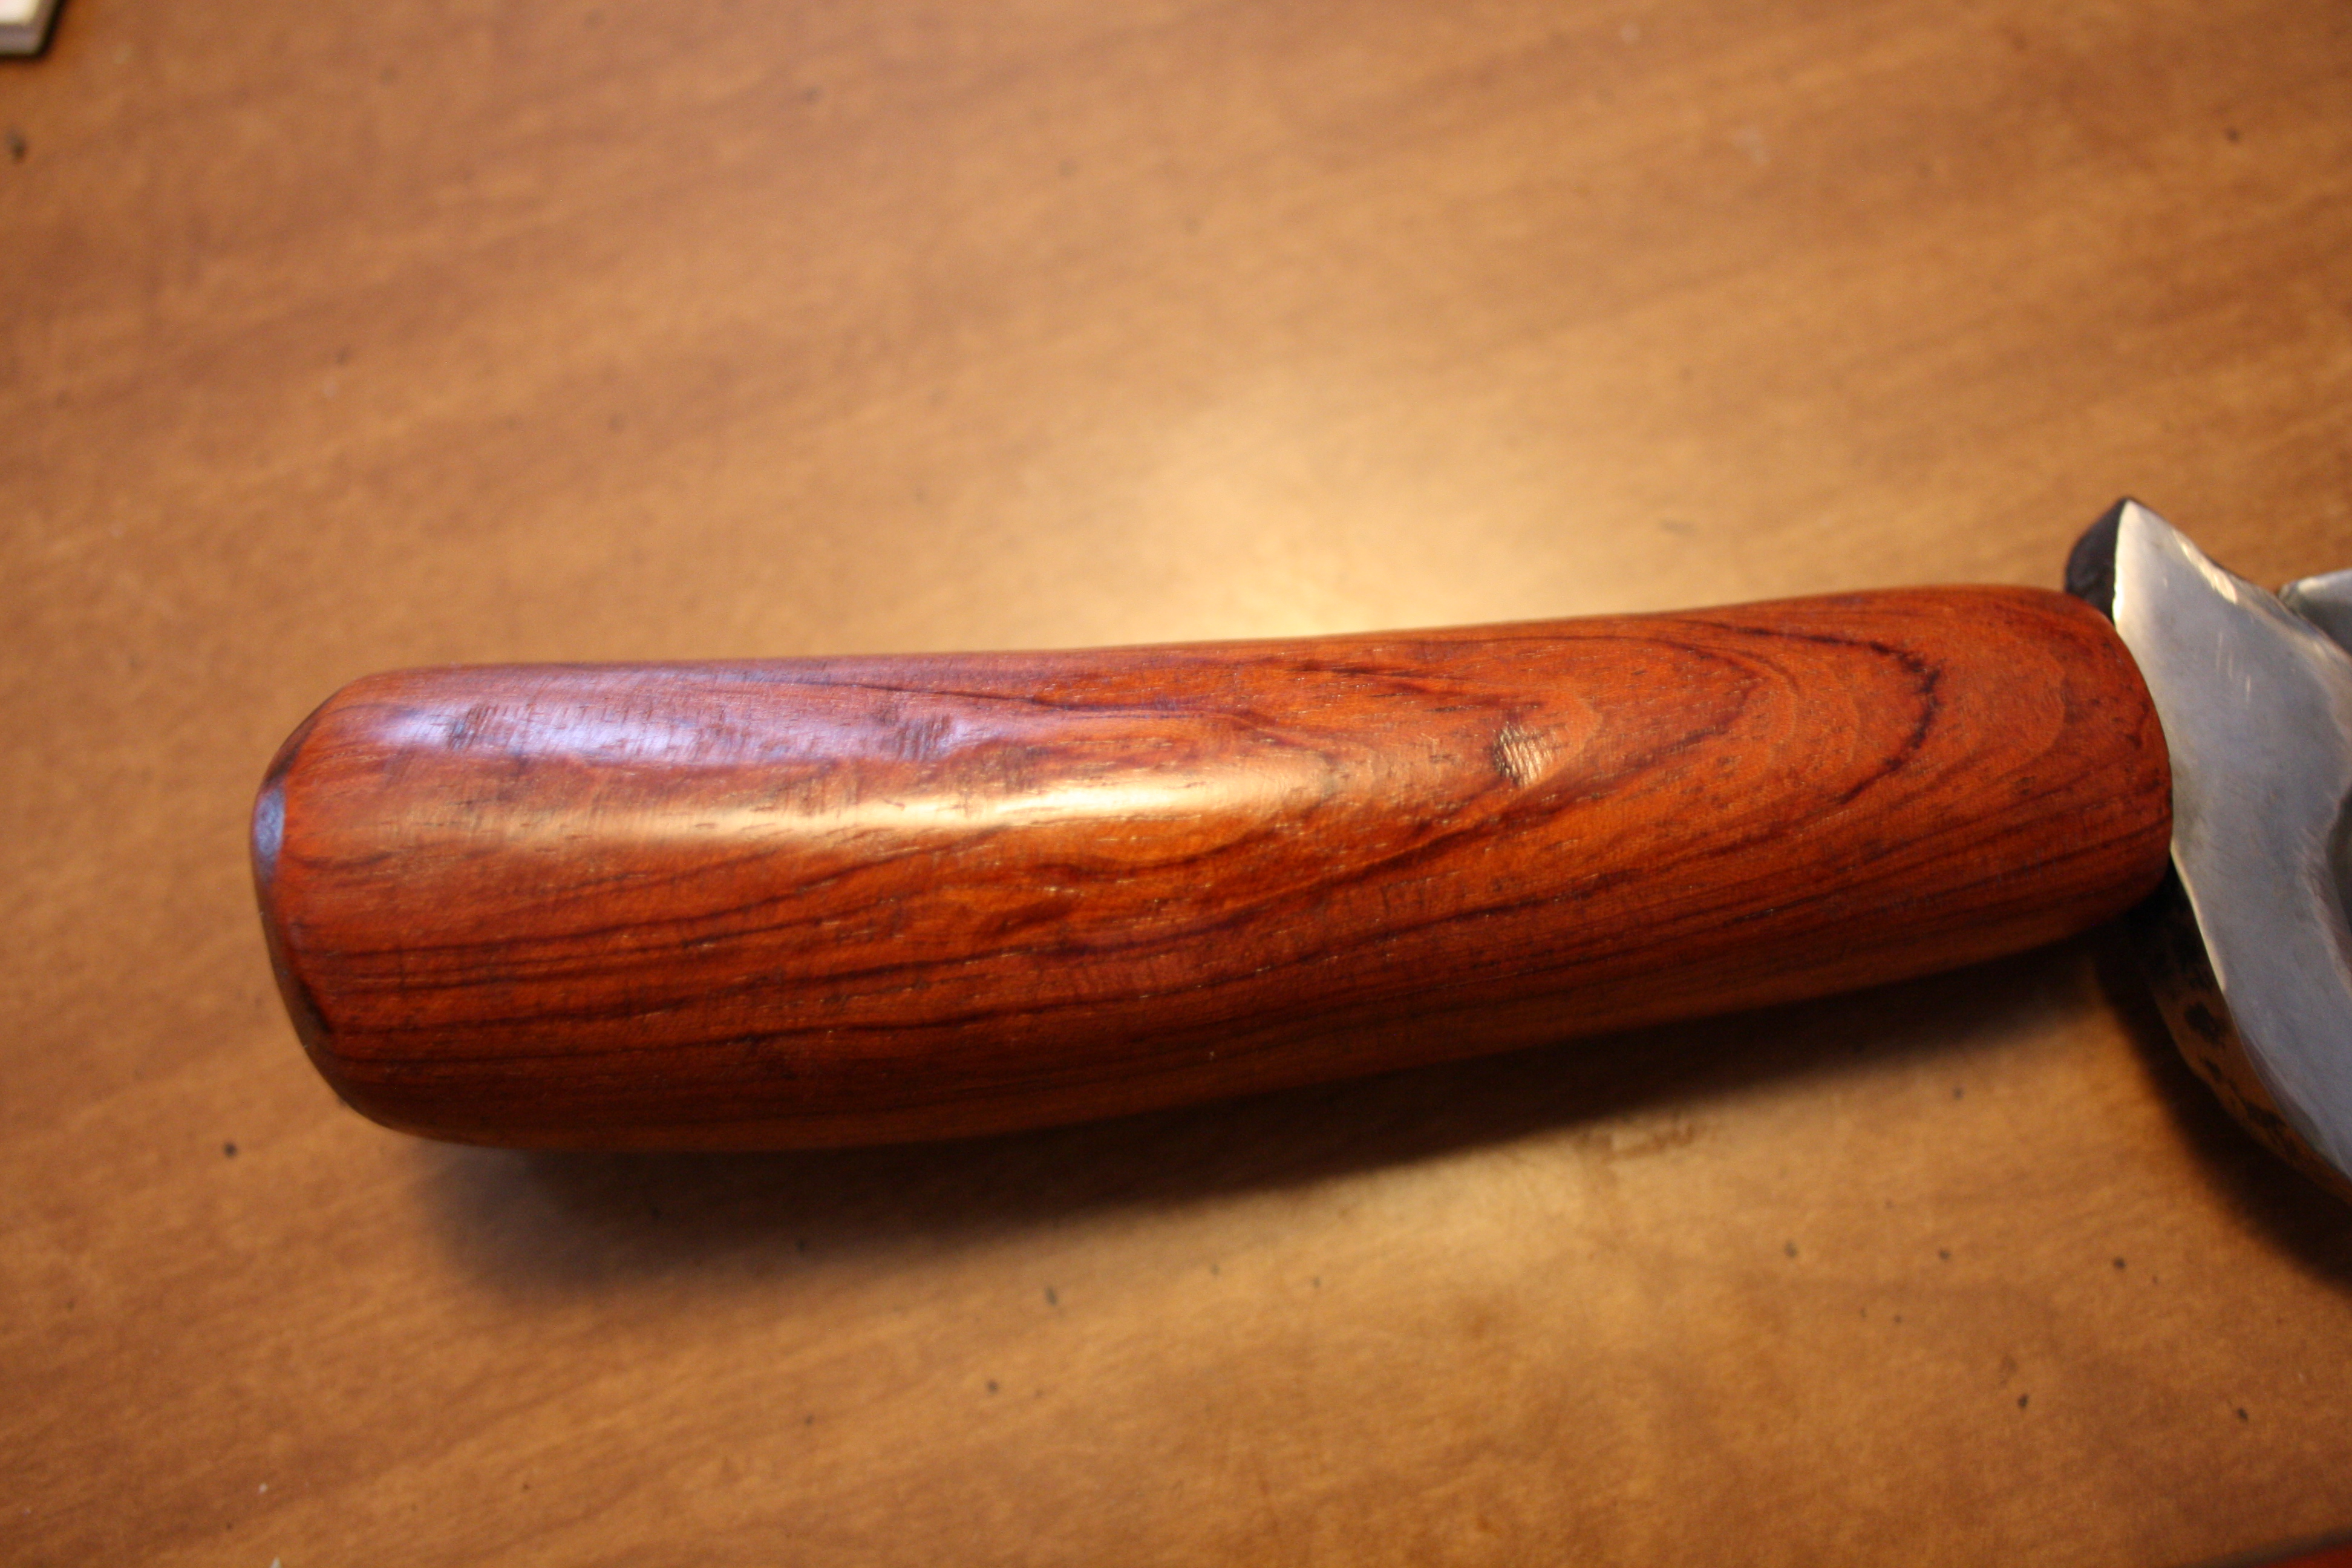
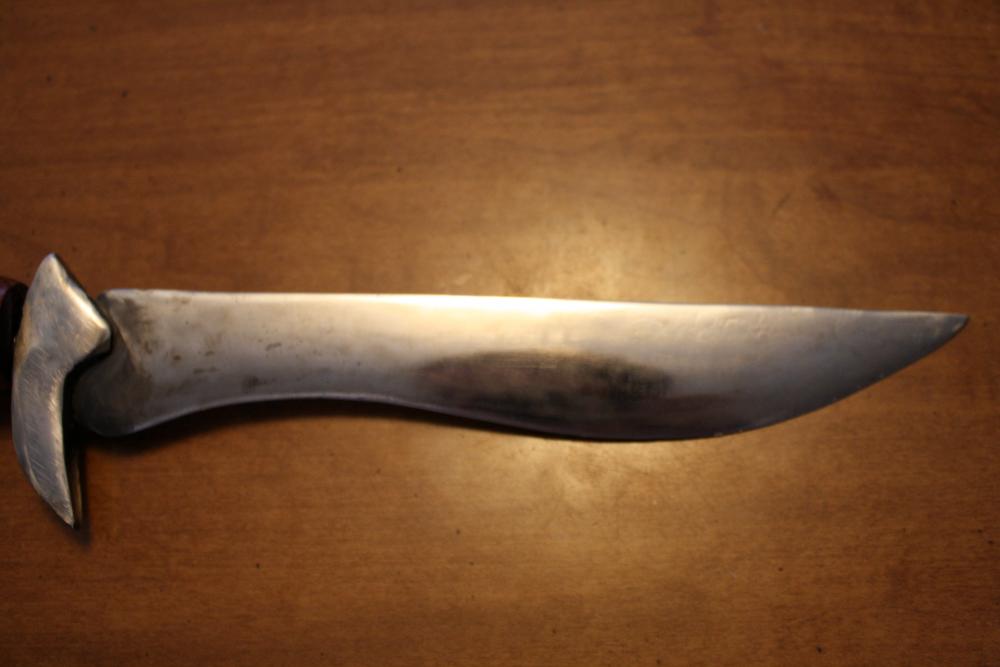
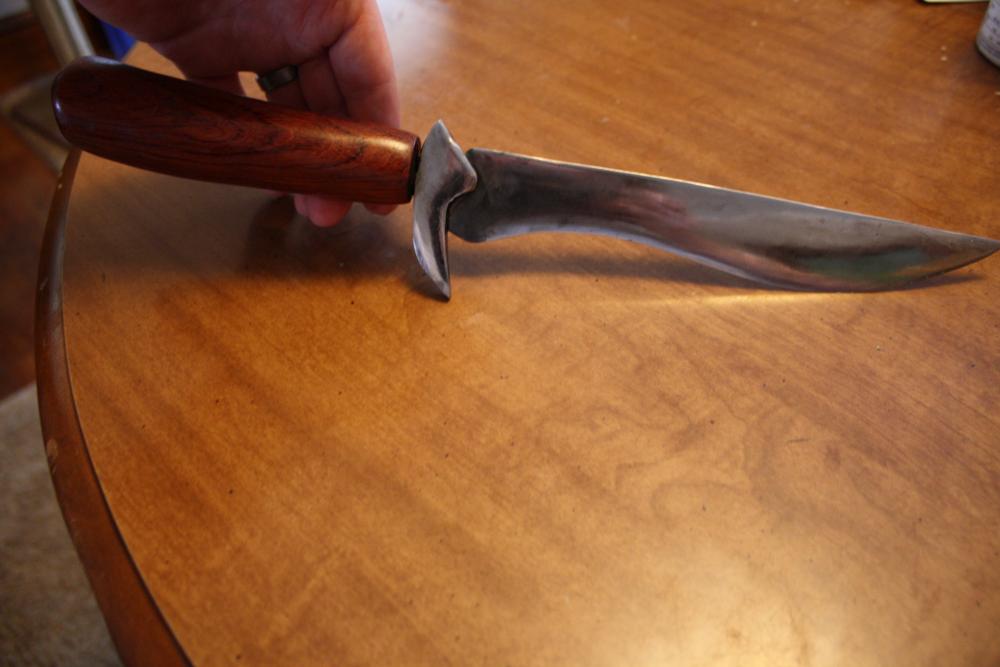
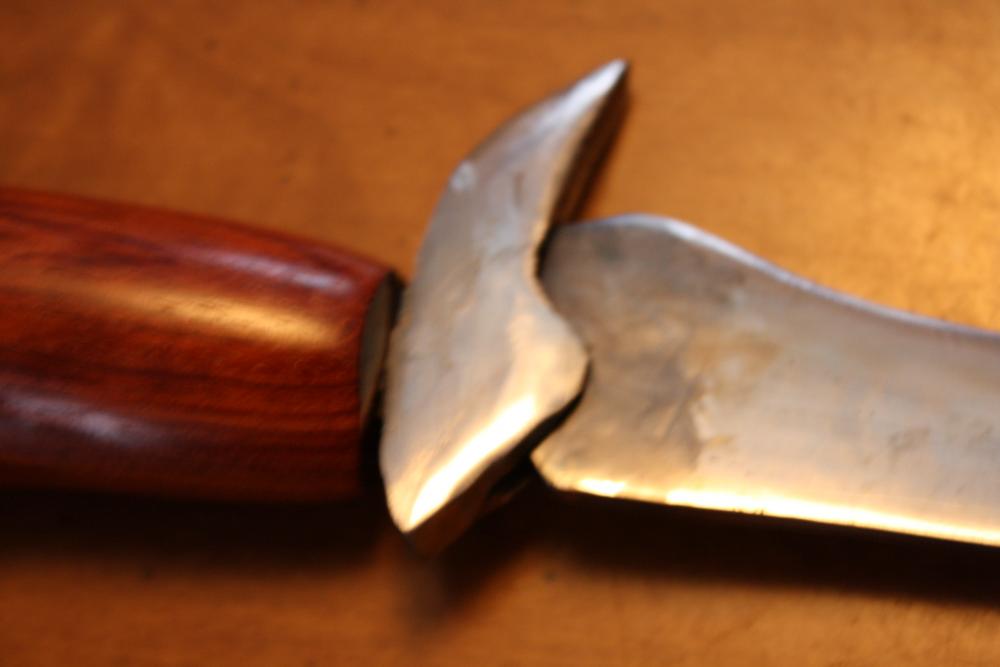
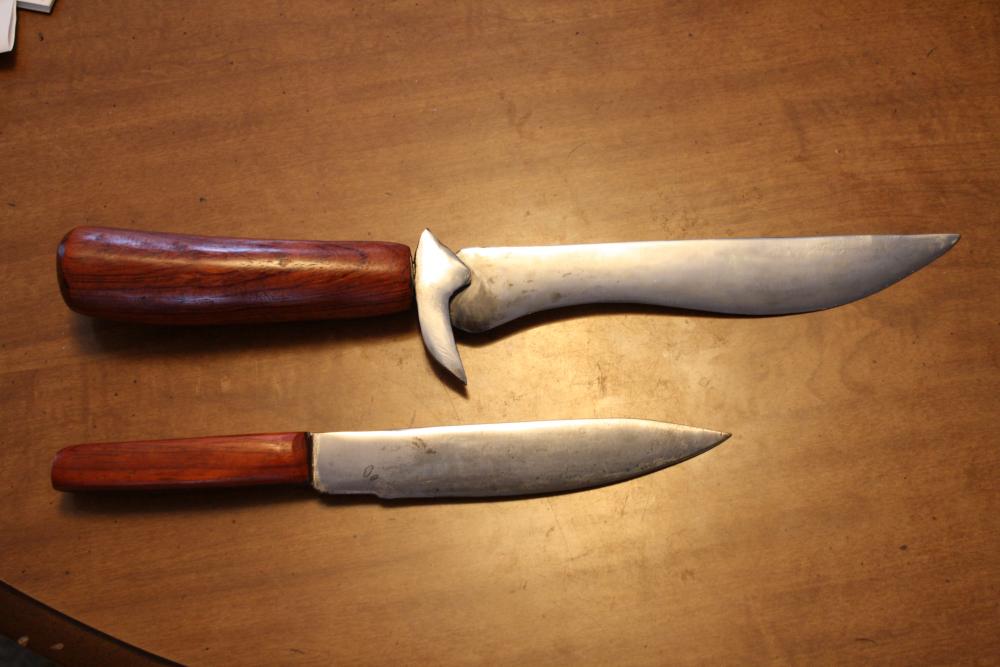
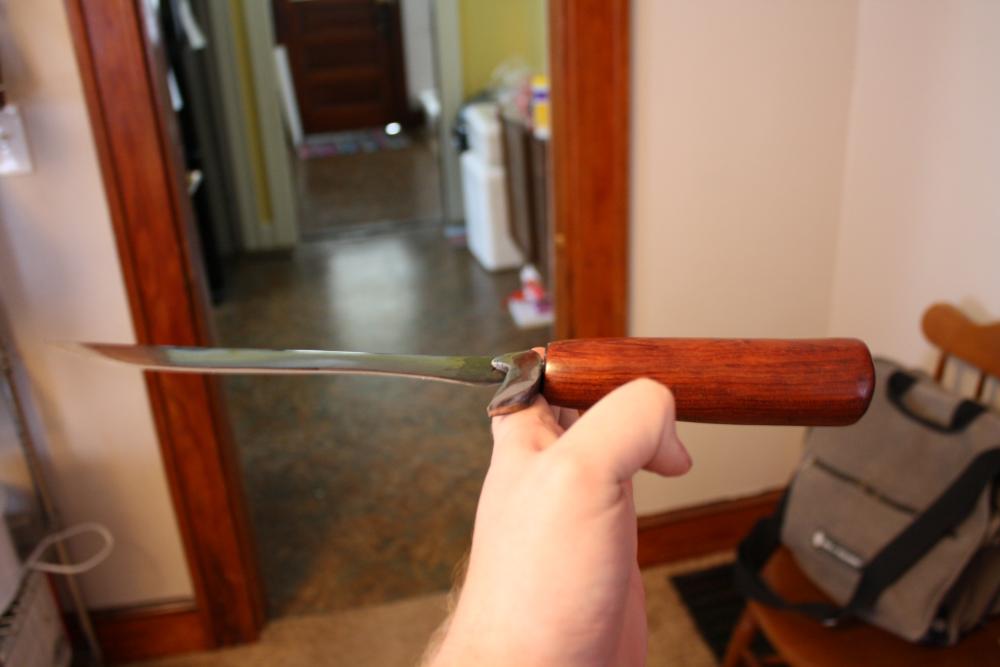
I've been silent for a while due to the moves (second move this year), but I'm easing my way back into things. Sorry for not being around, but glad to be (partially) back! Before my most recent move, an old student of mine announced she was getting married. As I knew I couldn't make it to the wedding due to conflicts (buying a house is time consuming), I offered to make her a knife that she could use as a cake knife as well as a decorative (but practical) piece afterward. Her immediate reaction was to send me this, an image of Orcrist from the Lord of the Rings movies. I haven't made anything like it before, so I decided to take the challenge. I started working on this in late May, and had it shipped out early July, with the blade arriving the day before her wedding. I won't bore you all with the step-by-step details, but here's the finished product and related details. Made from W-2 from Aldo, starting dimensions were about 6.5"x1.5"x0.18", the wood was about 6" of a 2" square chunk of bubinga, and the guard was made from a .5" square chunk of mild steel I had nearby. The finished product measured at 14.5" long, with the blade itself measuring about 8" of it. I forgot to get a full weight at the end, but it balanced almost perfectly on the guard. Not a good shot, but it shows something that I was trying to experiment with and learn from. I forged the guard a bit bigger than needed, and then used an angle grinder to get it to shape. I then borrowed a friend's belt grinder to flatten the bottom of it, drilled a hole into the guard, drifted the hole to be a bit larger, then did a hot fit (with a few taps on the sides) to ensure a snug fit. The guard design did call for the guard to encroach upon the blade a bit. I don't think I quite got it right, though. I think next time I'll cut a better slot for this. Doing so did heat up this part of the blade (I actually burned the wet cloth and wet leather glove I used to act as a heat sink), which did ruin the finish. I attempted to fix it with some sandpaper and a soft wheel and rouge, but as you can see, it didn't work out as well as I had hoped. I didn't quite get a mirror on this, but I think I made some progress. Due to constraints, I couldn't make this ideal. After forging, I used an angle grinder to make a small profile tweak (mostly to smooth the curve and straighten the back), take out a few minor pockmarks, and promote the shape of bevel/blade profile. I then filed it to ensure the blade bevel was there and to promote the curve of the blade, then sanded it to 1000 grit. After getting to the 1000 grit, I used a set of polishing wheels I picked up at HF, which really gave it a shine. I ended up catching a wheel on the edge at one point, so I couldn't get it back to a mirror when I was done. As I haven't gotten a mirror yet, I was pretty proud of this progress. Also, note that the blade hasn't been truly sharpened. It'll cut into things and is a great stabbing knife, but I purposely left it unsharpened for a few reasons. The first is shipping; I didn't want it to cut into any packaging. The second is a nod Japanese tradition: if you give a friend a knife, leave it unsharpened to represent that you are not cutting them from your life. As this was not a paid piece (not even a penny, as per German tradition), I didn't want to risk it (call me superstitious if you wish). Oh, and if anyone is curious for the heat treatment/tempering process: heated to orange, quenched in 200~ish degree canola oil, tempered in the oven at 450 degrees for three hours. Back to the handle. This is a hidden/stick tang knife. I did some minor drilling for the hole, then burned the tang in to ensure a snug fit, with just enough wiggle room for the epoxy to expand. Once the handle was properly shaped, I used epoxy to ensure it was in place before cleaning it up. Again, the wood is a chunk of bubinga. I did the entire process of making this with an angle grinder (stone wheel then flap wheel), then sandpaper to get it to shape. After it was finished, I cleaned it and gave it three coats of semi-gloss polyurethane, sanding and cleaning it between coats. This is the end result. Just another shot of the overall profile. This photo does mean quite a bit to me. The top photo is this knife, created this spring into summer (May-July 2016) in what free time I had after work; there's probably about 40 hours of work into it with my current tool setup revolving around small, portable tools. This is also my first time doing a blade with a hidden tang (made one for a sword, but that involved a pommel), as well as making my own guard (again, made one for the sword, but that also involved a milling machine and our instructor's help). The bottom blade is my first knife, forged during a weekend in a class I took in November 2013, made from 8"x1"x0.18" 1084, with a slab tang, no guard (really useful kitchen knife). I see it as an improvement from 2.5 years ago; not sure if anyone else would, but I'm seeing some progress with what little time I put at the forge. That sums up the newest knife. I have a few I was experimenting with, but didn't finish. My time is currently taken up with fixing the house so I can then fix the garage into a shop, so I'll be a bit quite for a while still.


-
Thanks for the follow up, templehound! Excellent work there!
-
Thanks for that input, Thomas and Bud! Dogsoldat, do you remember anything else about the video? Any random details to help narrow it down?
-
Not sure on the video either (there's tons of them), but isn't there a way to attach the knife without drilling by soaking/boiling the antler? Haven't tried it yet but I did read about it (and not sure if it's valid or not).
-
Thanks for that input, Thomas! I'll be keeping that in mind when I get around to working on projects again (rebuilding takes time).