

AidenCC
-
Posts
24 -
Joined
-
Last visited


-
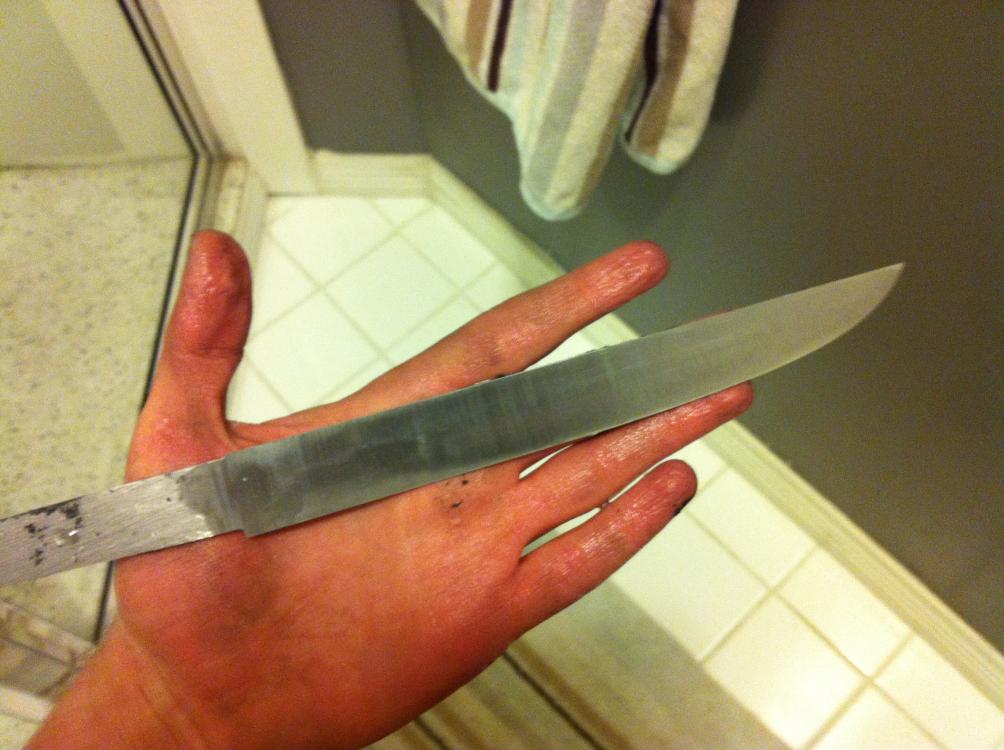
I've been working on a tanto made from 80crv2 (I plan to use 1080/1095 in the future) and have gotten already carved the tsuka and made the habaki and fuchi, so I did the final polish on the blade. Earlier, when I tried to sign the tang with a chisel, it would barely make a mark and dulled the chisel. I had a little more luck with a center punch, but it had to be resharpened along the way. At the time I thought it was just the difference between a high carbon steel and the mid steel I had practiced signing on, but when I went to drill the nakago ana, the cut about 1/16 of an inch in then wouldn't go any further (even with the drill press on the slowest speed, using a slow feed and with a cutting lubricant). Now my thought is that some of the clay covering the nakago chipped off enough for it to at least partially harden, and now I plan to do something to soften it. My idea is to submerge the blade in a bottle of baking soda solution and heat the nakago with a torch. I have a few questions though: has anyone done something similar and found that it doesn't hurt the finish/heat treat of the submerged blade? Will tempering it to a high temperature get rid of any work hardening from the drilling? Can steels like 80crv2 air harden with thin cross sections like this? Thank you for your time.
-
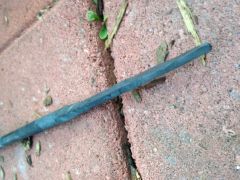
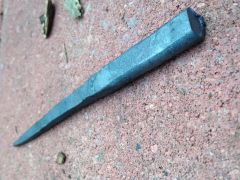
Not the best picture, but the only one I have pre-quench. The lack of any major curving was part of the reason I was wondering how well the differential hardening had worked. The blade is already tempered and because of a clearance problem the coarsest belt I can fit on my grinder is 80 grit (working on fixing that). If the belt is a little dull and 80 grit would I still be able to see a faint hamon?
-
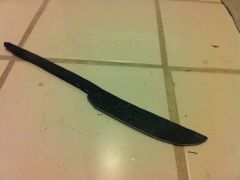
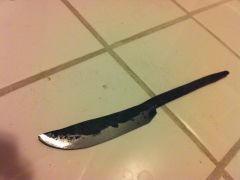
Last night I quenched my first tanto. It's made out of 80crv2, I coated it in rutland fireplace mortar, going all the way to the edge in thin strips in some places (the pattern kind of shows up in the oxidation) and quenched it in warm canola oil. After I scraped off the clay I ran a file down the spine and it bit in and it skated on the edge so I know that it differentially hardened to at least some extent. I have two questions: first, should I have quenched it in water? I didn't want to at first because I wasn't using a simple carbon steel. Second, I was wondering if there's any way to check if there is a hamon in a blade before the final polish. On pattern welded blades I usually do a few test etches after forging and hardening to get an idea of what the pattern is going to look like and to check fro any problems. Would the same work fro a hamon (as in being able to see it when etched at 80 or 120 grit)? (also I wasn't sure if this should go in the heat treating forum or here because it is a technique mostly used on knives).
.thumb.JPG.da2fcce6ec54dc5eceeb4191f00253c8.JPG)
-
Every knife I've made so far has involved the use of power tools of some kind, especially a drill and belt sander. For a bit of a change I decided to commit to only using hand tools, and so far I'm liking it! The design started out as a puukko but I added a bit of a curve in the blade and tang. The blade was forged from 1/2" O-1 round stock. http://www.iforgeiron.com/gallery/image/38460-tang-forged/ First I forged the tang http://www.iforgeiron.com/gallery/image/38457-blank-cut-off/ The material for the blade flattened and cut off from the main stock http://www.iforgeiron.com/gallery/image/38459-profile-filed/ The blade forged, annealed, and profiled http://www.iforgeiron.com/gallery/image/38458-one-bevel-filed/ The start of one bevel filed It's too late to do anymore tonight, so that's it for now.
-
-
-
-
-
Hard Time Removing Belt Sander Marks
AidenCC replied to AidenCC's topic in Finish and Polish for Knives
Thank you all for your input, I'm definitely going to look into getting some finer sanding belts. -
Whenever I grind a knife I remove the scale and profile it with an 80 grit belt (the guard/casing on my craftsman 2x42 is to tight to put on a 40 grit belt) then sand at alternating angles with 120 and 240 grit belts, getting rid of all the previous scratches etc. After that when I go to hand sand it I have always found that if I try to use 220 or 320 grit paper it a lot of time and paper seems to do little so I have been doing the first step of hand sanding with 100 or 150 grit paper. Even when I use a fairly coarse grit the first grit after machine sanding always takes as long or longer than all the other grits up to 600. I was wondering if that is just the way it is or if I'm doing something wrong (pushing to hard on the sander, reusing old belts, etc.) or even if it would be worth it to get some higher grit belts and do all the sanding with a machine. Advice/ideas would be greatly appreciated.
-
The blade is 100 layer 1095/15n20 ladder damascus, the bolsters brass, and the handle un-dyed curly maple. Because I made the unwise decision to learn how to make pattern welded steel at the same time as basic knife making this is my first successful pattern welded blade as well as my second full tang knife, and the first with bolsters. Comments and critiques are appreciated.
-
I'll make sure to add taking my time to the list of things to keep in mind while twisting. Is there any benefit to pre-heating the jaws of the vice like you would a die/anvil, or would it be a waste of time?
-
I'll try rounding the billet more instead of just breaking the corners and grinding it smooth after the twist next time. Thanks.
-
From what I can tell, the inclusion happened when I was flattening the twisted billet and several of the ridges got pushed together instead of straight down creating a seam filled with scale which didn't open again until I worked the billet more aggressively while forming the shape of the blade. If I try twists again in the future I'll check for bad welds from the folding before twisting as well to make sure that's not what's happening. I'll also etch and take a closer look at the blades to see if the it looks like any welds sheared while i was twisting.
-
I'll take a look at the knife making lessons and do some experiments to see what part of the process is causing the inclusions (whether they were there before the twist and I couldn't see them, or if the twist caused them). And I'll make sure to use plenty of flux and to grind all the surfaces between folds.

.JPG.20326b17604ff399264725476dd9e6dd.JPG)