

Adhamh
-
Posts
45 -
Joined
-
Last visited
Recent Profile Visitors
1,745 profile views


-
And what if I WANT to melt my refactory? :-) I based my large burner on these directions: http://azblacksmiths.org/plans/Forge%20build.pdf. Maybe I missed a section where the talk about cutting down the pipe. What does the pipe length effect? For now I will cut down the small burner pipe to 6" and move the jet to the right location. I really don't want to use the large burner, its just too xxxx hot!
-
Hi, I've been away for a while and now I'm back to utilize all the great knowledge here. A while back I built a new burner for my forge. I started using it again because my 3/4 burner was having trouble getting bigger pieces up to yellow heat in a timely manner. I think this bigger burner is too big for my forge. Here are the details: My forge chamber is about 300 cubic inches. My smaller burner is a 3/4" version. It uses a 1.25" x 1.25" x 1" T with an 8" long tube. I'm using a .035 mig tip for the jet. My big burner is a 1" version. It uses a 1.5" x 1.5" x 1" T with a 10" long 1" wide tube. The jet is also a .035 mig tip. When I run the smaller burner it will sputter a little but I can usually choke it or increase the gas to get it to stop. It seems like i have to turn the gas higher to get it to stop sputtering. On the big burner its more finicky than my wife's 13 year old cat. It sputters and sputters. I will crank up the gas and it will stop for a bit, but the hotter the forge gets the more I have to crank up the gas. Eventually the throttle is wide open and it seems to stabilize, but at this point I'm in danger of burning down my shed because flames are shooting out both ends. I just read a post that leads me to believe I need to make at least one adjustment. My jet has been aligned just above the throat. After reading the post I know now that the jet needs to be 3/4" or 1" behind the throat which puts it well inside the air intake. 33618-essential-gas-forge-formula. Besides that adjustments are there any others I should make? I'm still pretty happy with the size of my forge, the only change I would make at this point is to have it be an more of an ellipsoid than a cylinder. Thanks!
-
advice on a wall mounted coat rack
Adhamh replied to Adhamh's topic in Blacksmithing, General Discussion
Thanks all! The customer is me! :-) I do not have a rivet set or a welder. I think I'm going to go with the countersink method, so I'm not sure I need the rivet set. I do need a rivet header to make a nice looking head. Perhaps a rivet set can be used for making the round head and setting the rivet? I think I will try punching the holes from the back and using a tapered drift. This should make the back of the hole wider than the front so that I can countersink. I'm going to have to practice on that because its really an art to get the length of the rivet correct. -
Hi, I'm still very much a beginner. I'd like to try and make a simple wall mounted coat rack. However, I'm having trouble determining the best way to attach the hooks to the mounting plate ( could be round or rectangular ). I don't think rivets will work because the back of the rivet will push the mounting plate away from the wall. I can't forge weld to save my life and I'm not sure how well it would work if I could. Any suggestions on how to join the hooks to the plate? Perhaps rivets are the way to go? Thanks!
-
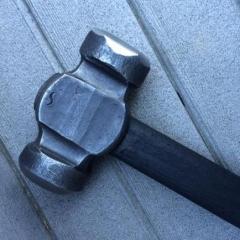
Any advice on how to properly size my hammer handle? I've recently giving myself tennis elbow because of the death grip I had on the handle. It seems the current handle is to small. I'm wondering if there is a method to determine the proper handle size for my hands other than trial and error... Thanks!
-
Okay, so my current mount isn't sturdy enough. I went out and got a 55 gallon metal drum after reading about other people using these for vise mounts. I'm a little stumped because I don't have a welder... I'm thinking I could cut the top of the off, so that its the right height. Then get steel tubing and use bolts to make a square that fits inside the barrel. At this point I could screw a small piece of metal plate to the steel tubing and then attach the leg vise to that plate. Here's a rough drawing of what I was thinking about. Is that too little? Too much?
-
I need help with this too. I found one adjustable regulator at tractorsupply.com. "Mr. Heater® High Pressure Regulator with P.O.L." for $20. It only goes to 20PSI and doesn't include hoses. tejassmokers.com has a COMRI-30, which includes a hosts, 0 to 30psi regulator, and gauge for $56. Its another $12 for the wrenchless connector. (add about $20 for a braided hose). amazon.com has an Bayou Classic 0-30 PSI adjustable regulator for $27. It doesn't have a gauge but it includes a braided hose. my local propane shop appears prepared to charge me $80 for the hose, gauge and regulator. Right now, I have an OLD regulator and hose from my beer brewing days. It goes up to 20PSI and seems to work fine. I'd like to get something with a pressure gauge so that I have a better idea about what I'm doing. I also think it will help me know if my burner's behaving correctly to know what PSI I'm at. I guess at this point I need a better idea about how much it should expect to spend on a hose, gauge and regulator. Pointers to a one stop shop would be nice too.... thx.
-
How would I fix the soft flame? Also, I'm seem to be getting a lot of scale build up. I'd also like to try some welding. How could I make the flame less oxidizing?
-
HA! I'm 5'10" and the top of the anvil is about 45" high. It actually seems a little low for me when I'm doing some types or work. I tend to bend over to get a close look. I might need it higher for that. Hum..... Maybe I need it on a jack so I can raise and lower it as needed.
-
Direct from Kohlswa! Hello Adhamh. We are happy that you like your Kohlswa Cast Steel Anvil. Unfortunately it is impossible to stipulate the manufacturing date. The manufacturing of anvils started around year 1900 and we are still manufacturing approx. 100 anvils per year. Kind Regards Kohlswa Gjuteri AB P.H. Thorerson President
-
Here's the anvil, safe at home and on its stump. Just need to clean up the dry rot on the pecan and try to keep it from splitting. Going to see if my Carpenter friend can help.
-
Where on the bottom? I don't see anything on the surface that it rests on.... I'm going to write them this week. I'll let you know if they are helpful! Bring your Kohlswa up to Austin and we have a party. :-)
-
thanks all. I understand that age is not an indication of quality in this case. Its more about determining the history of the anvil. My step father is in his 70's and thinks it belonged to his great grandfather, the age of the anvil would help determine that story.
-
I'm feeling pretty lucky today. I found a 122 lbs kohlswa anvil in my step father's barn, and he has pecan stumps for it to sit on! Anyone know how to determine the year it was made? It clearly saws Kohlswa Sweden on one side. This text appears to be from when the anvil was cast. On the other side it says 122 lbs and MADE IN SWEDEN this appears to be stamped. On one foot it says what might be B52. It's pretty light and it's hard to know what the middle number is because of the script. I'm curious to know if it's possible to determine what year it was manufactured in. Here are pictures. The green paint is just to make the text easier to read in the pictures.
-
The pipe itself is 1". One thing I like about not having a flare is that the burner won't ignite outside the forge. Should I just forget about this and get a working flare? I'm actually not using a mig tip. I'm using a part from piece from my old turkey frier. Here's what it looks like. The actual opening where the propane comes out is about 1/8". Before today it was screwed in as far as it would go. Today I moved out as far I it could safely go. I didn't have any chuffing at all, but I seemed to get more scale than I was getting before. Picts in this new configuration: Yes, I need to mount the burner better to improve safety.