Scobb Posted May 16, 2016 Share Posted May 16, 2016 hello, This past Sunday i purchased my first anvil, brought it home, and began building my stand. I decided to build the stand out of metal instead of wood for the simple fact that id rather cut, weld, and grind than start up my chainsaw. Anyway, my question is on mounting the anvil. Is it necessary to fasten down a light anvil (94# PW)? or can i just build up around the outside base? Ive been all over the forums looking for someone asking a similar question, if i missed it i wouldn't be surprised, because of the amazing amount of information on this site. My original idea was just to build up around the base, but i'm concerned the anvil isn't heavy enough and will bounce around too much. Just thought id get some opinions while i sit and have a cold brew. thanks! sam tried to upload some pictures, but for some reason this electronic thing isn't cooperating with me. Quote Link to comment Share on other sites More sharing options...
Glenn Posted May 16, 2016 Share Posted May 16, 2016 A couple of half moon shapes between the feet should be sufficient to keep it from walking off the stand, or angle iron at the feet but not above the feet. Usually the chain the anvil down comes when you want to deaden the ring but it helps to keep it in place also. You may want to consider a box for the top of the stand and then bed the anvil down in some sand to deaden the ring. This allows for some adjustment in anvil height without a lot of fuss. You purchased the WHOLE ANVIL so you may want to keep it loose on the top of the stand so you can flip it over on it's side and use the curve between the feet as a swage. The curve under the horn and under the heel is a different radius. There are many different inside and outside shapes on an anvil that can be used if the anvil is not chained or strapped to the anvil stand. Quote Link to comment Share on other sites More sharing options...
Scobb Posted May 16, 2016 Author Share Posted May 16, 2016 Thank you Glenn, I did decide to go with the half moon shapes. Only tacked onto place right now. I will use it for a bit, and see how I like it. Thanks for the insight. I never thought about using the "whole anvil" as you said. Great info! sam Quote Link to comment Share on other sites More sharing options...
Mark Ling Posted May 16, 2016 Share Posted May 16, 2016 nice feet! Littleblacksmith Quote Link to comment Share on other sites More sharing options...
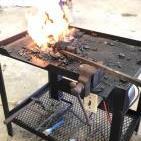
ThomasPowers Posted May 17, 2016 Share Posted May 17, 2016 Looks like a "Loud" system to me. Probably profit by some quieting methods used. Is the upright hollow? Filling with sand will help keeping it from being as loud. Some sort of pad under the anvil and a clamp to hold it in contact will help too. Quote Link to comment Share on other sites More sharing options...
Scobb Posted May 17, 2016 Author Share Posted May 17, 2016 1 hour ago, ThomasPowers said: Looks like a "Loud" system to me. Probably profit by some quieting methods used. Is the upright hollow? Filling with sand will help keeping it from being as loud. Some sort of pad under the anvil and a clamp to hold it in contact will help too. well, the upright is 5"x 1/2" wall and the feet are 2x3x1/4" I did fill them with about 45lbs of sand and capped them off. Its still somewhat loud. i have some baler belting here that ive been thinking of putting under the anvil. I still havent decided on how to clamp it down. (to busy bashing things with hammers haha). Quote Link to comment Share on other sites More sharing options...
Glenn Posted May 17, 2016 Share Posted May 17, 2016 Put it under the anvil as a test. Then raise the half moon shapes to match the anvil. Quote Link to comment Share on other sites More sharing options...
EricJergensen Posted May 17, 2016 Share Posted May 17, 2016 I prefer to have my 120# fastened. Stand to the floor and anvil to the stand. As an aside, I uploaded a video to YouTube prior to having the stand bolted to the floor. YouTube offered to stabilize the video even tho it was made with a tripod! No such offers since I bolted the stand down. Quote Link to comment Share on other sites More sharing options...
51 Papy Posted May 17, 2016 Share Posted May 17, 2016 Two layers of old truck innertube and bolting down sure helped my rr ASO. Quote Link to comment Share on other sites More sharing options...
Charles R. Stevens Posted May 17, 2016 Share Posted May 17, 2016 Pappy, are you calling a peice of rail road rail an A(nvil) S(aped) O(object)? Quote Link to comment Share on other sites More sharing options...
gote Posted May 18, 2016 Share Posted May 18, 2016 I think he means an object shaped Anvil Quote Link to comment Share on other sites More sharing options...
Frosty Posted May 18, 2016 Share Posted May 18, 2016 3 hours ago, Charles R. Stevens said: Pappy, are you calling a piece of rail road rail an A(nvil) S(aped) O(object)? I have to agree with Charles Papy, what you're describing is a RSA (Rail Shaped Anvil). It may not be your ideal but don't underestimate the amount or quality work a person can do on a piece of rail. Metallurgically RR rail is higher quality than most any anvil made until pretty recently. Stood on end and you have a tremendous depth of rebound which is a way to describe an anvil's effectiveness in returning energy to the work. Grinding a horn on a piece of rail is okay if you want a bic but not necessary and in my experience horns really aren't that useful. What I use a horn for most often is as a bottom fuller to help control the direction the steel draws. RR rail has a nicely crowned surface, grind off any mushrooming and you have a surface that has all the radii a good horn has and you don't have to run up and down the horn to access them just tip your work. I'm serious, I like RR rail anvil for an expedient anvil. Frosty The Lucky. Quote Link to comment Share on other sites More sharing options...
ThomasPowers Posted May 18, 2016 Share Posted May 18, 2016 New rail is crowned, old worn out rail can be dead flat; both have their uses. Quote Link to comment Share on other sites More sharing options...
Charles R. Stevens Posted May 18, 2016 Share Posted May 18, 2016 Then you do like Steve and cut a 1" rule in the side and grind a dish in it to straiten blades. Lol The disappearing post bug keeps hitting me when I try to add links back to other threads. Quote Link to comment Share on other sites More sharing options...
51 Papy Posted May 18, 2016 Share Posted May 18, 2016 Charles Another case of I should have read before jumping in and doing. Frosty I am hunting an anvil...but I like what I have and have passed on some $3 to $5 per lb anvils. I have employed Thomas's anvil theory and came up with two small cast anvils with less rebound then the one I'm using. Picture below but that "thing" got real quite after the innertube went under it and under the bolts holding it down. It works well for my experience level and ability. You guys can tell me what it is, but it will always be my first "anvil" Quote Link to comment Share on other sites More sharing options...
Charles R. Stevens Posted May 18, 2016 Share Posted May 18, 2016 Some one over thought it, lol. Unless they used full penitrating welds, they went backwards. You have a horn, hardy and pritchel hole, and that's good. Would have been better if they hadn't welded on the other plate. The plate normaly I would recomend going vertical with a rail, unless you have two. But if it's serviceable who am I to complain Quote Link to comment Share on other sites More sharing options...
ThomasPowers Posted May 18, 2016 Share Posted May 18, 2016 Looks like a good starter anvil; you want to see how to get fancy with a RRR anvil Weyger has an example in "The Complete Modern BLacksmith" that is way overkill in my opinion. Remember blacksmithing started with hammering things on rocks with rocks! Any step up from that is a good thing. Quote Link to comment Share on other sites More sharing options...
51 Papy Posted May 18, 2016 Share Posted May 18, 2016 Like I said... did and then read. In my defense that was done before I found IFI. Got the cart infront of the horse. One of these days I'll find my 150# anvil for what I want to give. Quote Link to comment Share on other sites More sharing options...
Scobb Posted May 18, 2016 Author Share Posted May 18, 2016 haha, well this got got interesting quick. speaking of the RR track i have a piece about 2 feet long, i figured it would make a good upsetting block? im sure its been done before. i wonder if a guy could take tubing and weld it to the rail and make a tool for different sized stock to help keep it straight while upsetting? anyone ever done anything like this? Quote Link to comment Share on other sites More sharing options...
ThomasPowers Posted May 18, 2016 Share Posted May 18, 2016 Again Weyger's book discusses making a tool to help upsetting. Quote Link to comment Share on other sites More sharing options...
Recommended Posts
Join the conversation
You can post now and register later. If you have an account, sign in now to post with your account.