Black Frog Posted September 11, 2014 Share Posted September 11, 2014 I have my 25# LG torn down, and cleaning it up real nice with degreaser and a lot of the original paint came off with it. So i took it a step further and just striped all the paint from the frame, and will do the same for the linkage parts soon. Now I'm wondering if I want it painted again or not. Anyone not have their LG painted? Link to comment Share on other sites More sharing options...
SoCal Dave Posted September 11, 2014 Share Posted September 11, 2014 I cleaned my 50#LG with degreaser and a wire wheel but left the painted and peeled paint areas as I found them. It is now painted with oil. Someone from this site once said that if a LG is maintained properly it should be dripping in oil. I agree. Link to comment Share on other sites More sharing options...
Black Frog Posted September 11, 2014 Author Share Posted September 11, 2014 As long as I have it apart, I'll machine some tighter/better fitting treadle and clutch linkage pivot pins that go through the frame casting. Although the machine is in great shape, those pivot points were always quite a sloppy fit.I sort of like the look of the hammer with no paint on it. Similar how I like cleaned anvils.I like the look of metal, not paint... so I'm leaning towards leaving it stripped and just wiped down with an oil rag now and then to keep it nice.You can see the first session of stripping the paint and got about 90% of it clean.As the paint was coming off, you can see the original factory hand grinder marks where they cleaned up the casting.....The ram guide has also been removed after this, everything is getting a full cleaning in every corner. :) Link to comment Share on other sites More sharing options...
njanvilman Posted September 11, 2014 Share Posted September 11, 2014 Where they originally painted? If so, what color? I would favor painting it in an original color, then let the oil (drips) do their thing. Link to comment Share on other sites More sharing options...
Black Frog Posted September 11, 2014 Author Share Posted September 11, 2014 I'm assuming mine was painted green originally, as it was when I bought it.When I got the hammer, it had been sitting idle for decades. It had never been converted over to electric motor use, only off a belt drive, and who knows how long ago that was. It had been stored indoors, and everything still turned freely. I was quite happy.This one is a transitional model, made in 1939. I see no evidence of repainting or repouring babbits. I'm guessing it hadn't been repainted, but I could be wrong. There was no primer under the green paint when it started coming off, so I was thinking it was more like a quick paint job at the factory rather than someone redoing the paint and would've put in the effort of priming then color coat.Here it is the day I got it home. Getting those die and sow block tapered shims out was not easy.... Link to comment Share on other sites More sharing options...
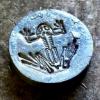
Black Frog Posted September 11, 2014 Author Share Posted September 11, 2014 Josh, here's another transitional style 25# LG I found a picture of, and looks like the same green paint that mine had.... I have no idea about early or later model LG's original color. Link to comment Share on other sites More sharing options...
kubiack Posted September 11, 2014 Share Posted September 11, 2014 The Old and Transitional style hammers were green from the factory and the New style hammers were gray. Link to comment Share on other sites More sharing options...
kubiack Posted September 11, 2014 Share Posted September 11, 2014 My hammer is a Transitional 50 and has most of the original green paint still on it. I'm also in the middle of rebuilding it and will be pouring the main bearing soon. Well see what the paint looks like once the bearings are done but I'm hoping to leave it as original as possible. Link to comment Share on other sites More sharing options...
Jim Coke Posted September 12, 2014 Share Posted September 12, 2014 Greetings Frog man, Mine is ....... Greenish gray background with 10 w 40 and iron oxide highlights... plus just a dusting of slag feck accents.. You can duplicate mine easy .. Just clean it up as best as you can and give her a shot of slippery... Forge on and make beautiful things Jim Link to comment Share on other sites More sharing options...
VaughnT Posted September 12, 2014 Share Posted September 12, 2014 I'd leave it bare metal, or shoot it with some clear coat to preserve the bare-metal look. That's just plain sexy! If you do have a hankering for painting, I would highly recommend that you do some copper/gold/brass pin-striping, with candy apple red accents here and there. I've seen a lot of early machinery that had OEM pin-striping and it looked beautiful. Link to comment Share on other sites More sharing options...
Frosty Posted September 12, 2014 Share Posted September 12, 2014 Leave it how you like it. Mine used to be LG green, now it's Frostworks hunter green and gold. Because I like it that color. No reason to keep LGs slobbering oil. Oil in your hair doesn't do the hammer a bit of good and I don't like it dripping from the ram onto the work and smoking. I lube mine with chainsaw bar oil, Stihl or Oregon, both are designed to stick in outlandish centrifugal force conditions so it'll say put. Add a couple few oz of Duralube to the gallon jug and it makes a superior lube. If you've run chainsaws much you know how you have to adjust the chain tension after a little while to take up the slack caused by heat expansion. Adding a bit of Duralube to the bar oil reduced the friction to the point I almost never needed to adjust the chain, snow wouldn't even melt o the bar. Anyway, a little bit, just a few drops in the main oilers keeps my LG free and smooth. Though I DO have to admit it still slings oil, no matter what I do. Oh well. <grin> Frosty The Lucky. Link to comment Share on other sites More sharing options...
Black Frog Posted September 15, 2014 Author Share Posted September 15, 2014 VT, nice idea, I hadn't thought about a clear coat.... hmmmmmm, that might do nicely. I kind of like the bare metal look.I was just at my favorite salvage yard this past weekend hunting for some plate steel for under the hammer. Found me some nice 1/2" plate that was the perfect width I was looking for, and then the owner cut it to length for me with a nice job with a torch. He also had 1" thick plate, but I opted for the 1/2". The 1" was too heavy for me to easily move around without some equipment, probably around 375#. For the base I was planning on bolting a bed of 6x6's together, and then putting the 1/2" plate on top of that. Link to comment Share on other sites More sharing options...
LastRonin Posted September 16, 2014 Share Posted September 16, 2014 Yes, mine is painted... with invisible paint. That's why I can't find it. I know it was in my shop last week... oh wait... that was a dream. :angry: Link to comment Share on other sites More sharing options...
Jim Coke Posted September 16, 2014 Share Posted September 16, 2014 Greetings Frogman, Ya don't need the large steel plate for a LG 25... Just mount it to a thick wood base... Check with others Forge on and make beautiful things Jim Link to comment Share on other sites More sharing options...
Black Frog Posted September 16, 2014 Author Share Posted September 16, 2014 Thanks Jim, someone else also mentioned that I probably didn't need a plate under a 25# LG with a bed of 6x6's....But since I already have the plate now cut to size, I figure can't hurt anything having at this point to have a bit more mass under the hammer.My garage floor is not the best quality or in the best shape, so I could use all the stability I can get.Now I'd like to find a chunk of conveyor belt rubber to put between the hammer and plate.Today's project is machining the new treadle pivot and clutch linkage pivot pins.Here's a question- I was thinking about drilling small oiler holes (or installing oiler cups?) in the topside of the frame bosses for the two pivot pins.That way you could drop in some oil now and then, rather than oiling the ends and hope it creeps its way to the center.Anyone else do this? Or is this a good idea? Link to comment Share on other sites More sharing options...
kubiack Posted September 16, 2014 Share Posted September 16, 2014 In Sid's Little Giant Hammer rebuilding video he shows adding a grease zerk to the lower pivot hole in the frame. If I remember correctly he said something to the effect that the new grease would push out any grit that worked its way in. I don't remember if he put one in the top pivot or not. He also add some washers on the pins next to the outside of the frame to act as a cover to help keep grit from getting in between the pin and the frame and wearing the hole. A couple of other thing he showed in rebuilding the treadle linkage was to replace the main rod with a thin wall tube to increase stiffness and also to build an adjustable tensioner for the return spring. Link to comment Share on other sites More sharing options...
Black Frog Posted September 18, 2014 Author Share Posted September 18, 2014 Thanks for the info, I'm compiling a list of parts I'll need to order like new spring, new dies, and a few other odds and ends. Everything is disassembled now, and I can see wear on some items that should be replaced or fixed. I'll be going through and redoing all the linkage pins, bushings, and holes for proper clearance in the machine shop. As long as it is all apart, might as well do it the right way.Reamed the holes in the frame to clean them up, and I did machine the new treadle and clutch linkage pivot pins yesterday.And VT, I have decided that this girl would look fantastic all cleaned up naked and clearcoated. :)No fancy colors, just a gorgeous metal machine from an age ago.After a thorough heavy wire brushing all over, this thing is gonna be cool all like this: Link to comment Share on other sites More sharing options...
kubiack Posted September 18, 2014 Share Posted September 18, 2014 Black Frog, Nice looking pins. Did you just use a hand reamer for the pivot holes? I'm planning on doing the same for mine but don't have a hand reamer the right size and they are a little pricy for a one time operation. I think I will just use a break cylinder hone I to clean up the holes. I just sent in a few parts of my hammer to Little Giant to have them rebuilt. The price for them to rebuild the arms and cross heads is less than what I would have in them by the time I bought the right sized reamers and put any value on my labor. If you are going to buy new dies you may want to look into the quick change die system they offer. It consists of a base with dovetails to mount in the frame/ram and with flat tops and bolt holes. Then there are interchangeable dies that bolt onto the bases. It is slightly more expensive than a set of standard dies but once you have the base the bolt one dies are about half the price of the ones with dovetails. I have talked to Sid and some others who are pretty knowledgeable about these specific hammers and have been told that one problem they have is that the frame casting is a bit thin at the back dovetail of the anvil and that hammering the key in can cause it to break. The problem happens when there is ware in the die, key, or dovetail and the die wont stay tight then the user tries hammering the key in progressively harder and it eventually breaks the dovetail. I think this was more of a problem with the old style hammers and does not apply quite as much to our transitional style and the new style hammers with sow blocks. One advantage of the quick change system is that you only set the base in once and then it is bolt on and off so the risk of breaking a dovetail is lessened. My hammer needs new dies and I have not deiced if I'm going to get the quick change or build some euro dies. How are the condition of the holes in your cross head, toggle arms, and toggle links? I talked to Sid recently and he said that a lot of issues he saw with these hammers is when the connections at these spots get worn and sloppy the hammers lose fine control and power. He was pretty adamant about these needing redone in order to have a really good hammer. Does your clutch flywheel have Babbitt bearings or bronze bushings. I lucked out in that my hammer has bronze busing and they are still in good shape. The are within spec for clearance and there is virtually no play when mounted on the spider and grease applied. I'm looking forward to seeing your hammer coming together so keep posting. Link to comment Share on other sites More sharing options...
Black Frog Posted September 18, 2014 Author Share Posted September 18, 2014 I drilled them 1/64" larger, then hand reamed them the last few thousandths from there. I'm lucky to have a lot of tooling available to me from work, and my machine shop at work. :) I don't think I wanted the pivot pins too tight fitting, I want to leave enough room for grease to flow around and out to the ends of the pin after I install a centered zerk fitting. If you only have one or two thou of space around that pivot pin, it'll be tough for grease make the trip. I even added a center trough to the above pictured pins, that way the grease has an easier path to flow to the backside of the pin. Probably overkill, but its fun putting in the tiny details. I was measuring the holes in the toggle arms and links. I talked to Roger Rice from LG yesterday, and was asking how much clearance there should be between the pins and holes. He said around .003" - .005". A few of my holes have a bit of oblong wear to them as well as overall enlargement. Most are averaging .025"-.035" oversize range. I'll take them all up a bit (whatever the closest reamer size is), and then I'll machine new pins .004" under that. Once the bronze bushings pressed into place in the toggle links, I'll have to ream them up as well. I want a nice fit on the link pins (closer than the pivot pins using grease), oil will flow nicely in there. My LG had babbit bearings, and they aren't too bad so I don't think I'm going to redo those. I still need to pull apart the clutch pulley, spider, etc. But the frame babbits still had two shims left in them and not a whole lot of shaft play, so I think I'll be ok there and leave the repour for another decade down the line. I was leaning towards the interchageable die system myself. I plan on making several dies as I do more with the hammer. Link to comment Share on other sites More sharing options...
kubiack Posted September 18, 2014 Share Posted September 18, 2014 I was thinking of the exact same thing with the trough in the center of the pin for grease flow. I have a lathe, mill, and shaper so I will be making some of the easier parts from my hammer. What I don't have is enough tooling and especially the time so I sent some parts got sent into LG and I will be buying some new parts from them as well. When I'm done it will have all new connections through the toggle linkage. I was hoping to just bore the holes oversize and turn new pins but the previous owner had used bolts instead of pins in several location and the threads chewed pretty deeply in several spots. The holes were already over sizes when they put the bolts in so I was not comfortable with the amount that would renaming after boring out the chewed up areas. My hammer has the old style ram with the T-toggle links instead of the bronze bushings and pins. My main bearing only have one thin shim left so I think I am going to go a head and re-pour them while I have the hammer apart. Link to comment Share on other sites More sharing options...
Black Frog Posted September 18, 2014 Author Share Posted September 18, 2014 I know LG recommends bar oil for lubricant, I'll be adding some tungsten disulfide powder to my bar oil. I use that with anything that has moving parts. I'm a big believer in it, been using it for years now. Link to comment Share on other sites More sharing options...
Frosty Posted September 19, 2014 Share Posted September 19, 2014 I know LG recommends bar oil for lubricant, I'll be adding some tungsten disulfide powder to my bar oil. I use that with anything that has moving parts. I'm a big believer in it, been using it for years now. I'm not familiar with tungsten disulfide. What's it's mojo? Just the thought of adding tungsten powder to wear surfaces makes me think grinding compound sorts of thoughts. That can't be what this stuff does so if you'd enlighten me please? Frosty The Lucky. Link to comment Share on other sites More sharing options...
Black Frog Posted September 19, 2014 Author Share Posted September 19, 2014 I'm sure you've heard of Molybdenum or Moly grease or oil? Tungsten Disulfide powder (WS2) is the next generation of super slippery particles.It was used by NASA for lubricating the Mars rover, and quite a few other lubricating applications in space. For years it was way too expensive for everyday people to buy. But around 10 years ago the price and particle size of the WS2 started coming down a lot. Some really sharp engineering guys on my motorcycle forum had been using Moly powder in lots of things, but switched over to WS2 powder when the particle size got down small enough to where it would flow through the oil filters. They were using it mixed in with the engine oil as well as anywhere lubing was required. Some of these guys have over 100k miles on their motorcycles. I have the 0.4 micron particle size (or 400 nanometers), and since then they have shrunk the particle size even more. Until the particle size got down that small, it would tend to settle out to the bottom when mixed with oil. People are using it to burnish dry into sliding surfaces (like semi-auto gun slides). Now they make grease and oil with the WS2 in it, but I still have quite a bit of powder so I mix up my own. It has been very nice in manual transmission or gearboxes. Don't use it in auto trans because it makes things too slippery. I haven't used it in the engine oil itself (I wasn't quite as brave as the other guys), but I add it to anything that has gears or sliding surfaces.My old Ford Ranger manual transmission had over 500,000 miles on it before the engine died. I used the WS2 powder mixed in with my rear end drive fluid on my motorcycle from when I got it new. At 7000 miles the service manual recommended checking the wear on the final drive. When I opened it up for inspection, I was surprised that the factory machining marks were still there on all the gearing! Everything looked like brand new, like the gearing had just been machined yesterday.I put WS2 in the lower unit fluid of my outboard motor. Last year I got another used Ford Ranger with manual trans. I immediately changed the manual trans fluid with new fluid with WS2 added.So, once my LG25 is complete, I'll be using bar oil with WS2 mixed in. I don't know if the WS2 powder will settle to the bottom of bar oil, but I'll just keep a small container handy and give it a thorough shake before application. However, here is my cautionary note, I do not know how WS2 in bar oil will react if it drips off the hammer onto some red hot metal. I will be making a phone call to find out more info on that, but all I read is that WS2 is inert and nontoxic. I still wear gloves when handling the stuff, I don't know if that small of a particle size can get absorbed through the skin. Probably not necessary, just playing it super-safe. You can read more: http://www.ws2oil.com/ Link to comment Share on other sites More sharing options...
Black Frog Posted September 19, 2014 Author Share Posted September 19, 2014 More progress on cleanup and determining how much wear is present in all the linkage holes.I'm liking how this is going to look as bare metal clearcoat. :) Link to comment Share on other sites More sharing options...
kubiack Posted September 19, 2014 Share Posted September 19, 2014 Looking good. It looks like you pitman is steel, mine is bronze. It is interesting to see the differences in our hammers. Both are Transitional models and of course different sizes but there are a lot of differences. What are the tabs on the toggle arms for. I got a call this morning from Little Giant and they have started work on my parts! Link to comment Share on other sites More sharing options...
Recommended Posts
Please sign in to comment
You will be able to leave a comment after signing in
Sign In Now