Hoenirson
-
Posts
39 -
Joined
-
Last visited
-
1st-Timer Forge Build Fun ( or 'Hey look, still not blowed up')
Hoenirson replied to Hoenirson's topic in Gas Forges
You think so? Excellent. I do notice it leaking out the left edges of the front door a bit, same with the back. I wonder if a baffle might help? -
1st-Timer Forge Build Fun ( or 'Hey look, still not blowed up')
Hoenirson replied to Hoenirson's topic in Gas Forges
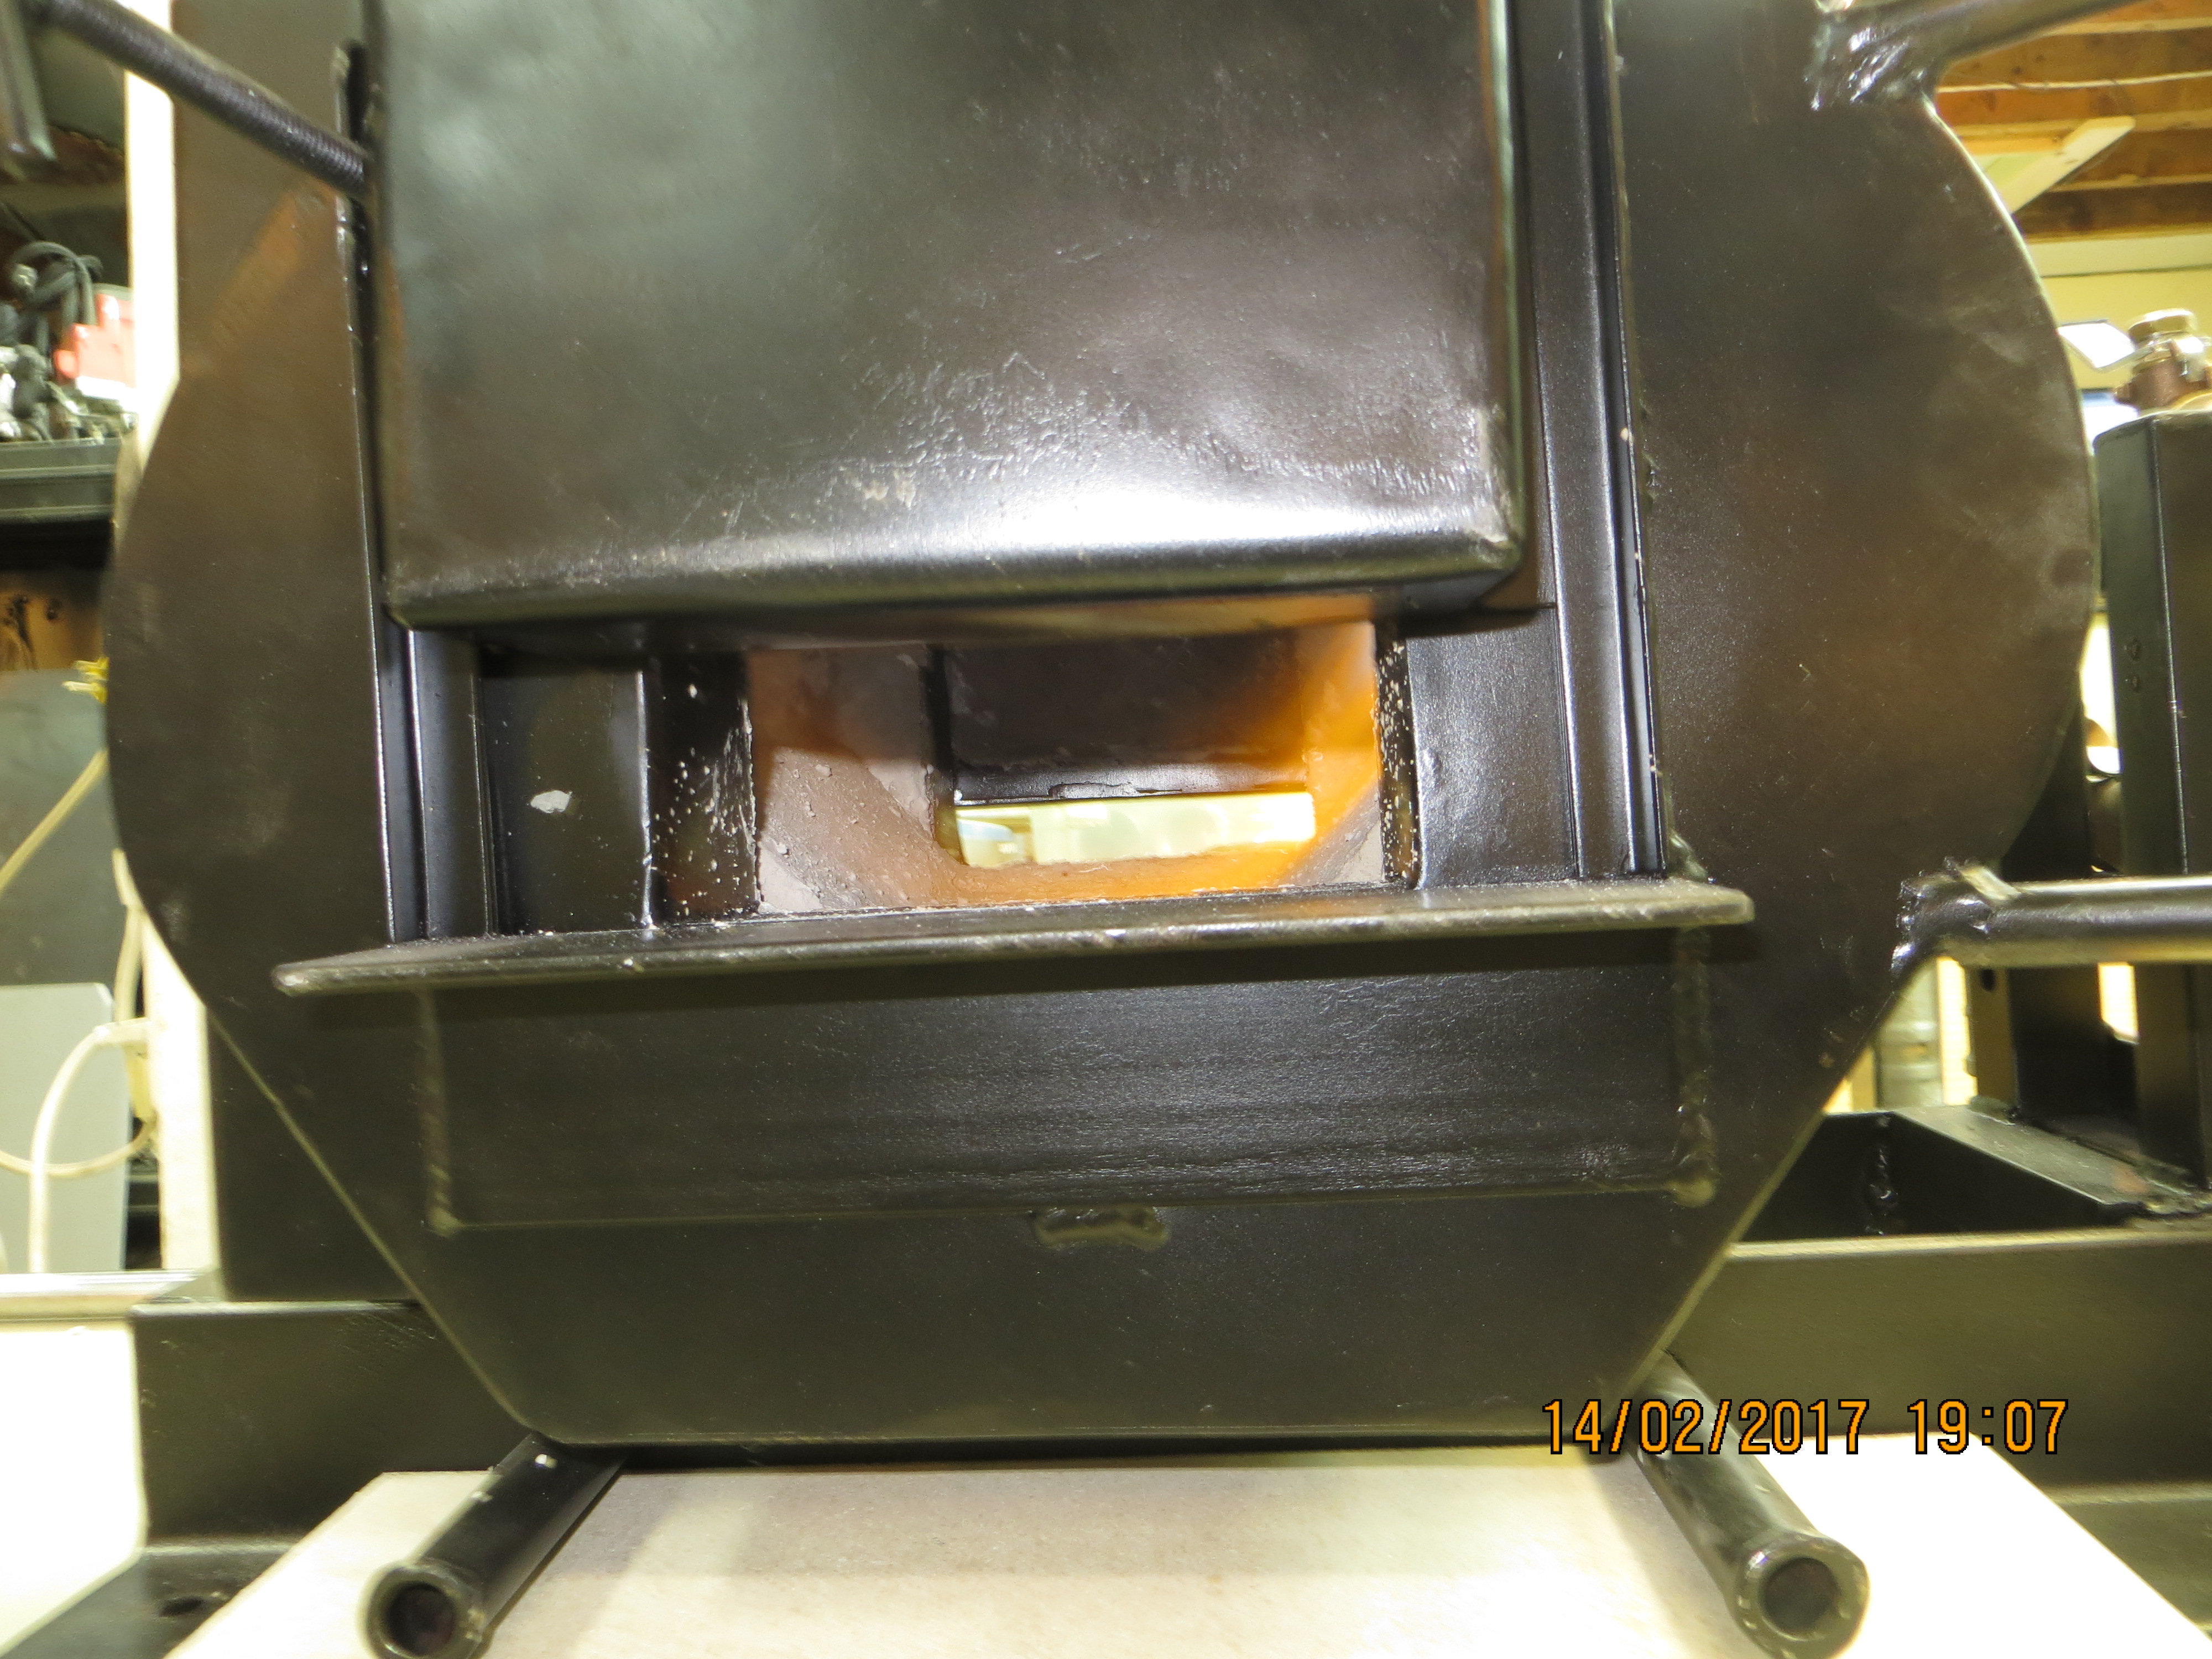
After adjusting the burner OUT of the forge as per Mikes instructions, AND discovering the outlet sleeve had loosened up and could travel over an inch, I think I am getting some good heat.I am letting it cool off, then may do one final (fifth) full heat burn. I attempt to heat some metal again, then. Still getting some snap, crack, pop. Very little dust so far (progress!) I will leave these 2 pics full size, as the flame is a little hard to pick out. I THINK the spread looks good, and it is visible curling up the far wall before disappearing. The burner tip is maybe an 1/2" in from the interior. Does this look about right? This is running at about 8psi. Here is a short video, as the flame is not showing up great above.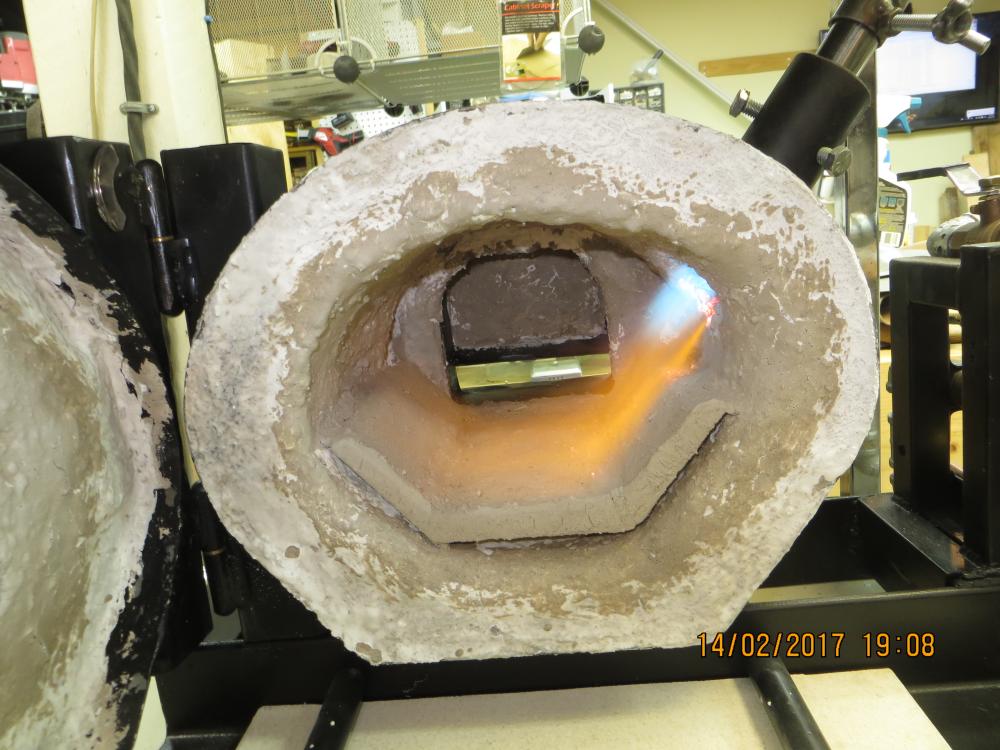

-
1st-Timer Forge Build Fun ( or 'Hey look, still not blowed up')
Hoenirson replied to Hoenirson's topic in Gas Forges
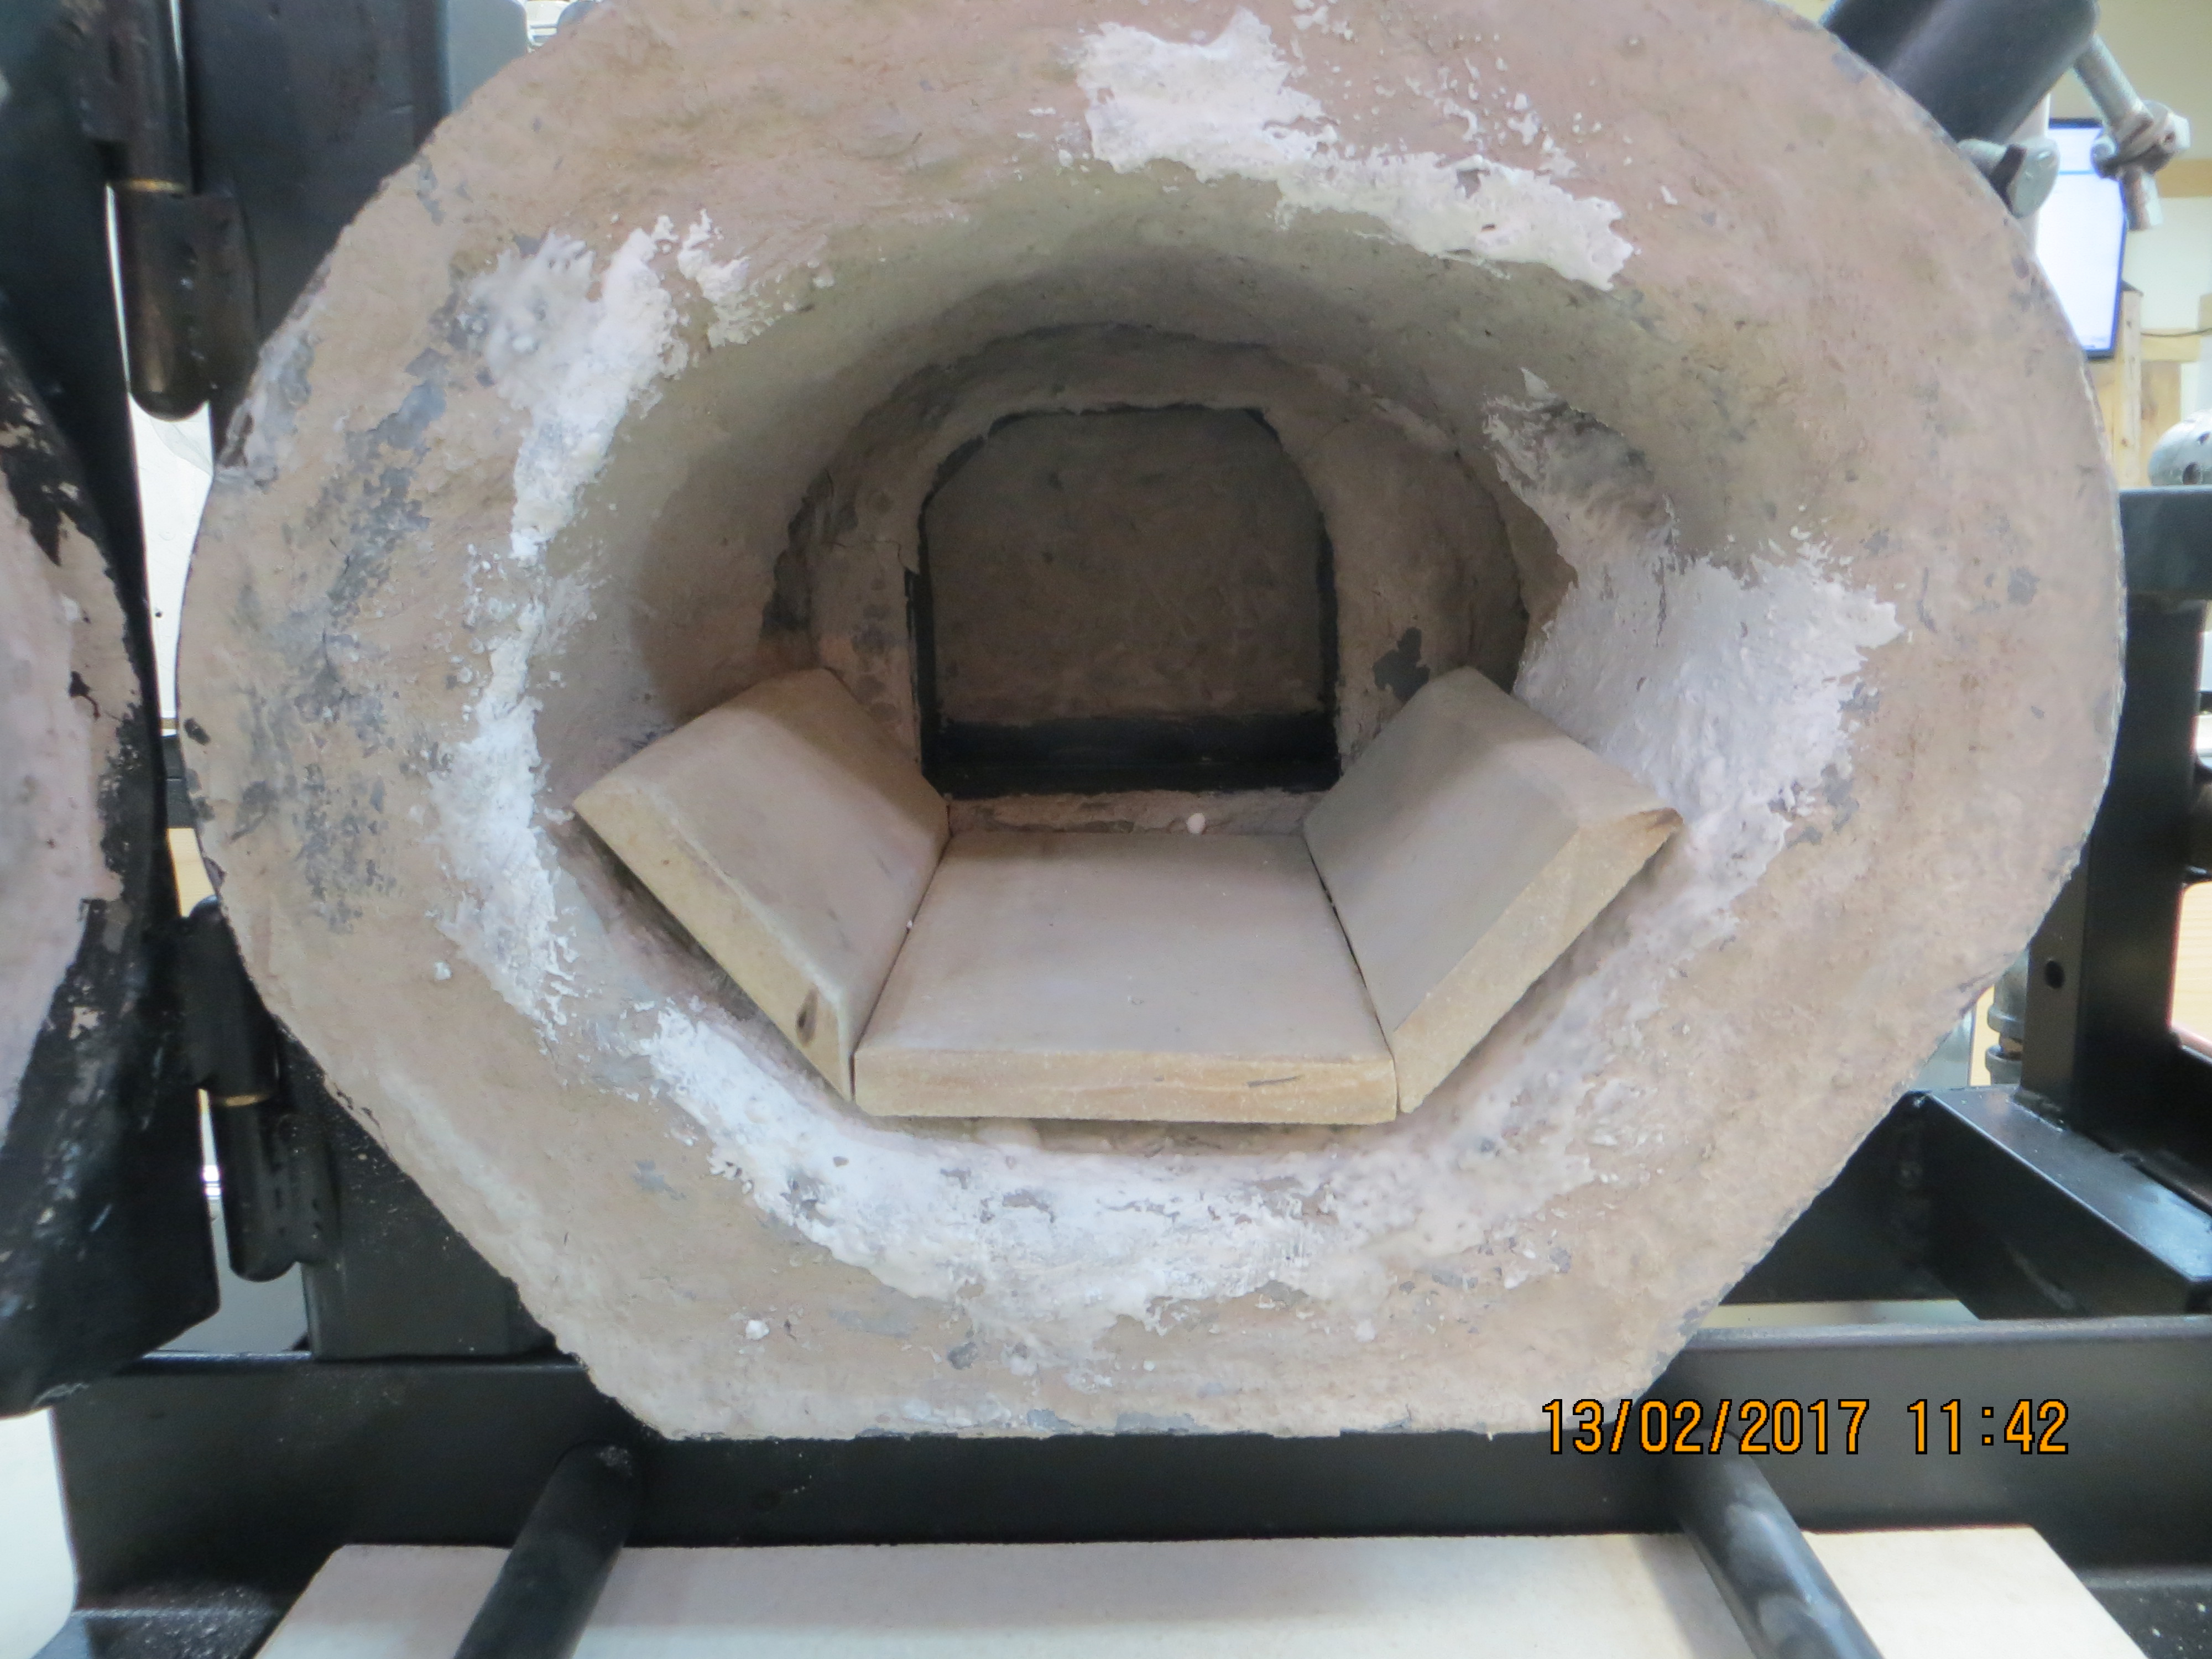
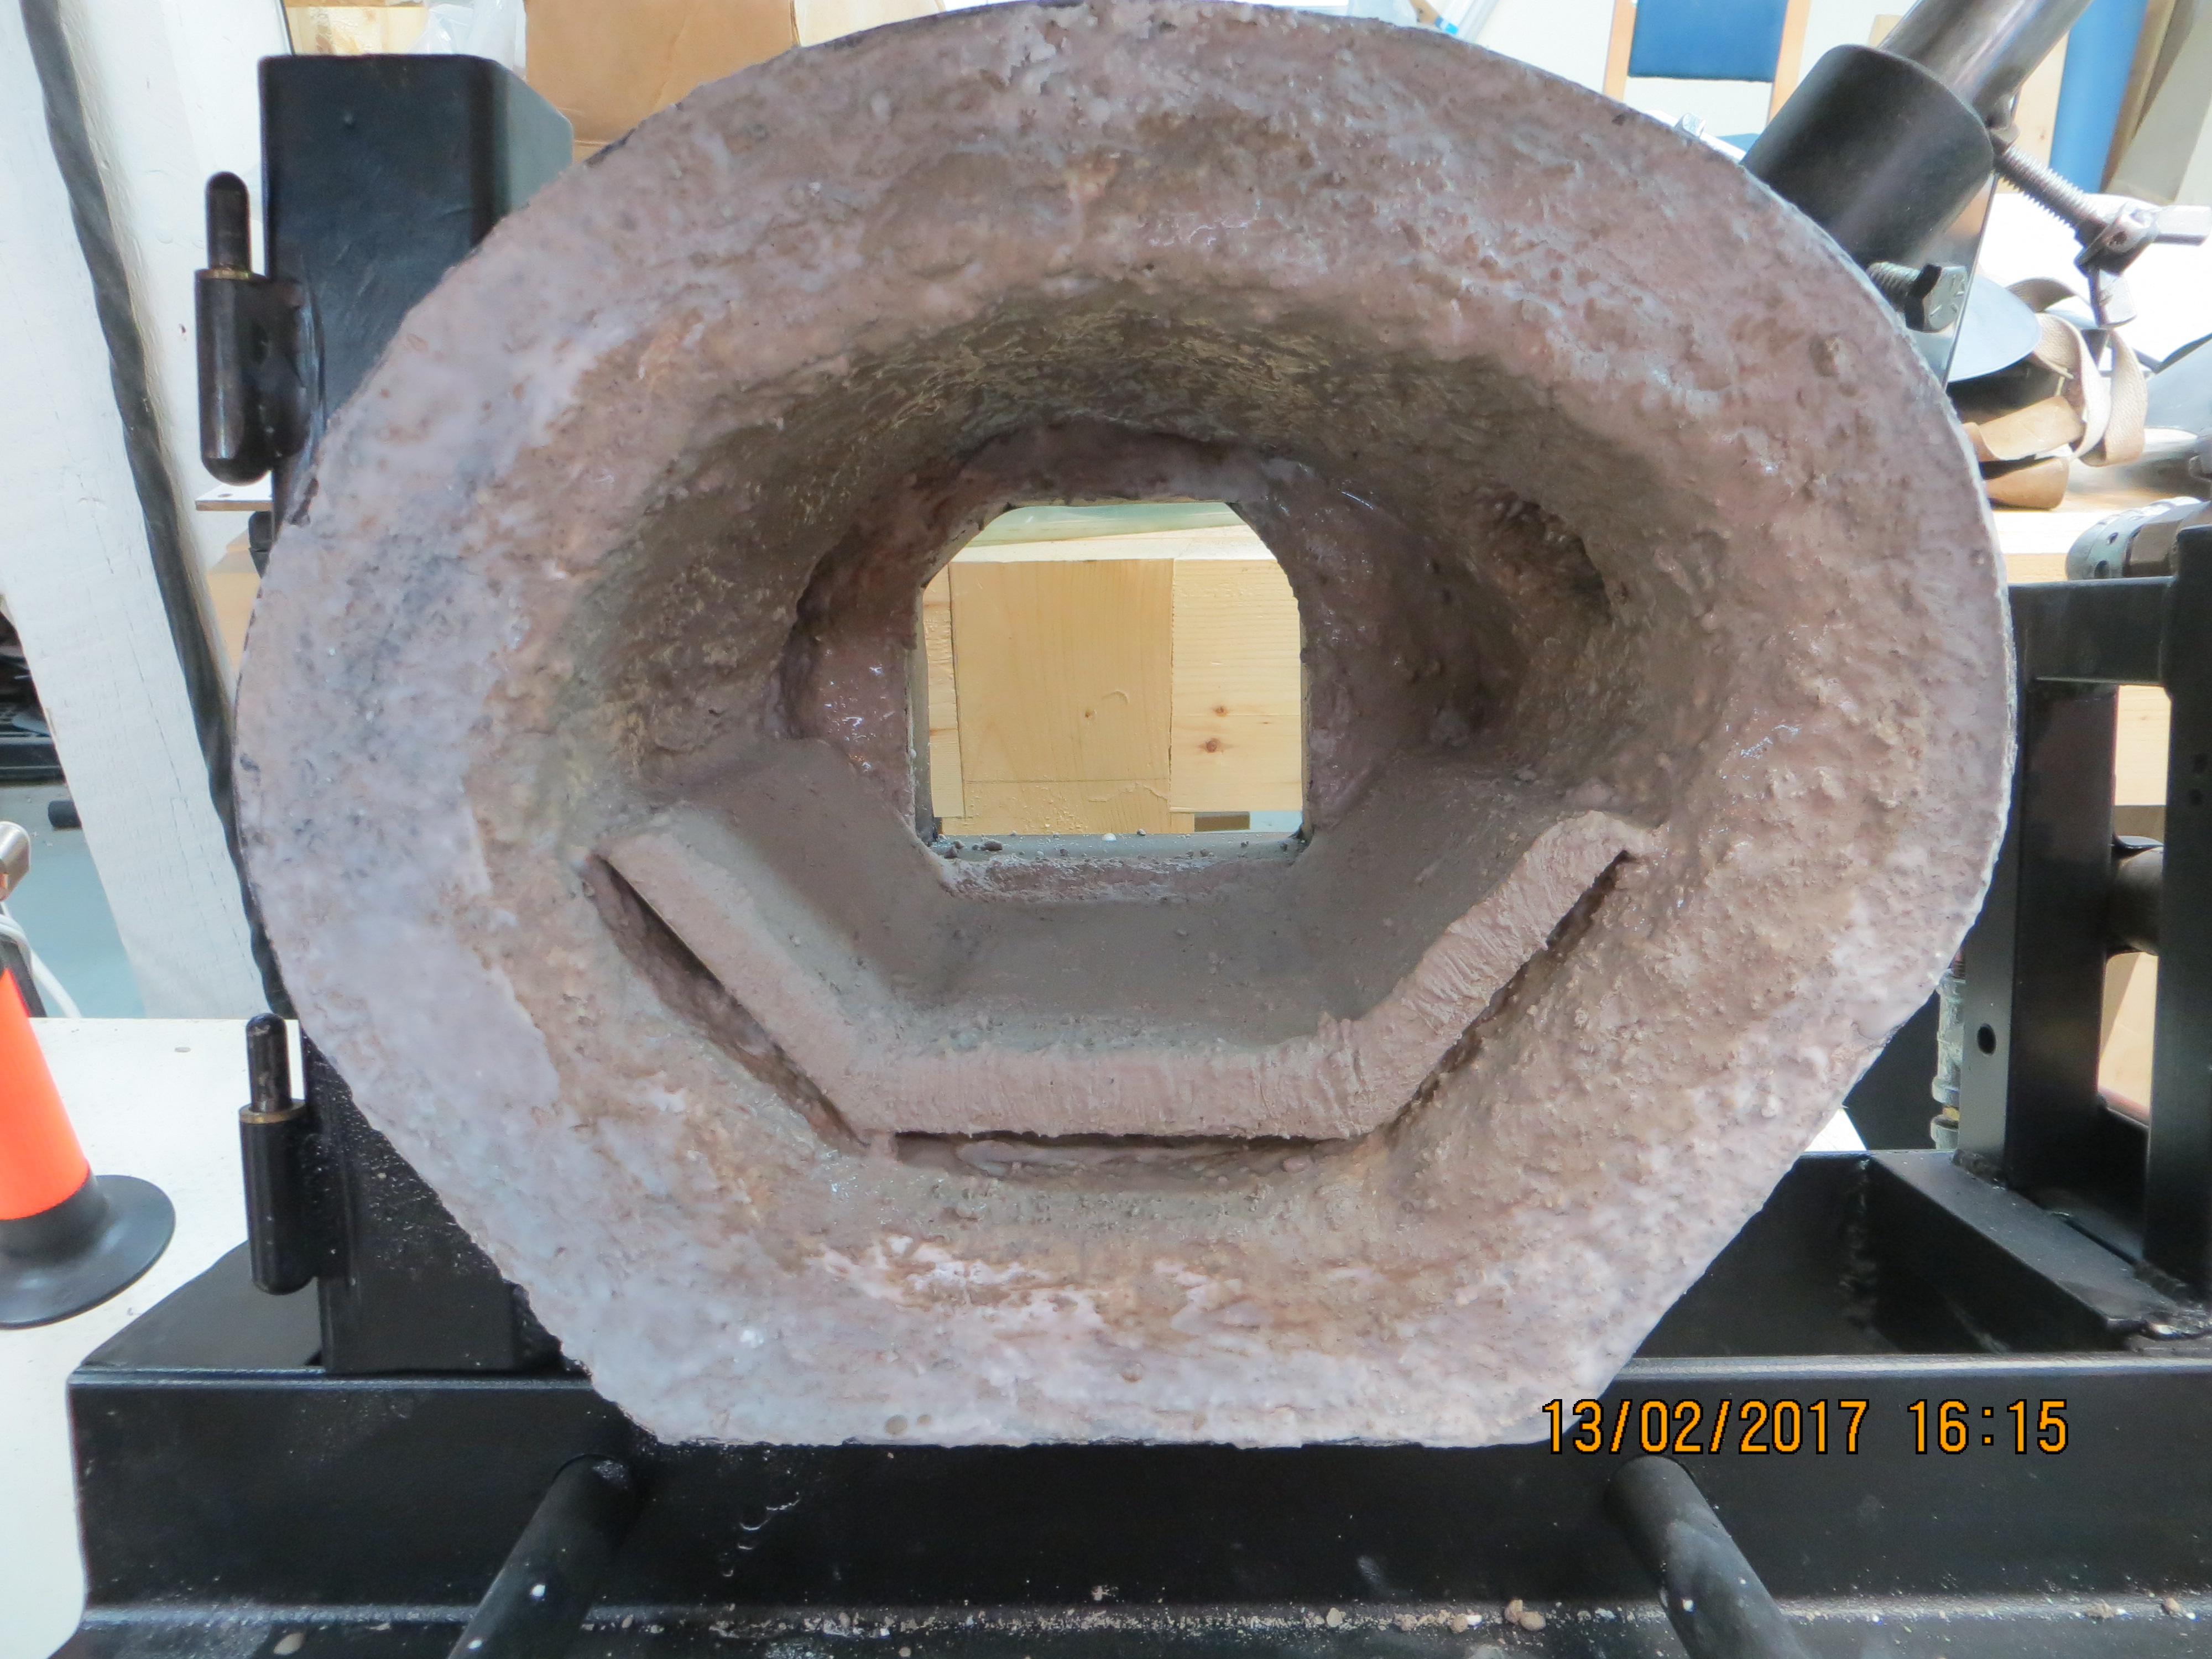
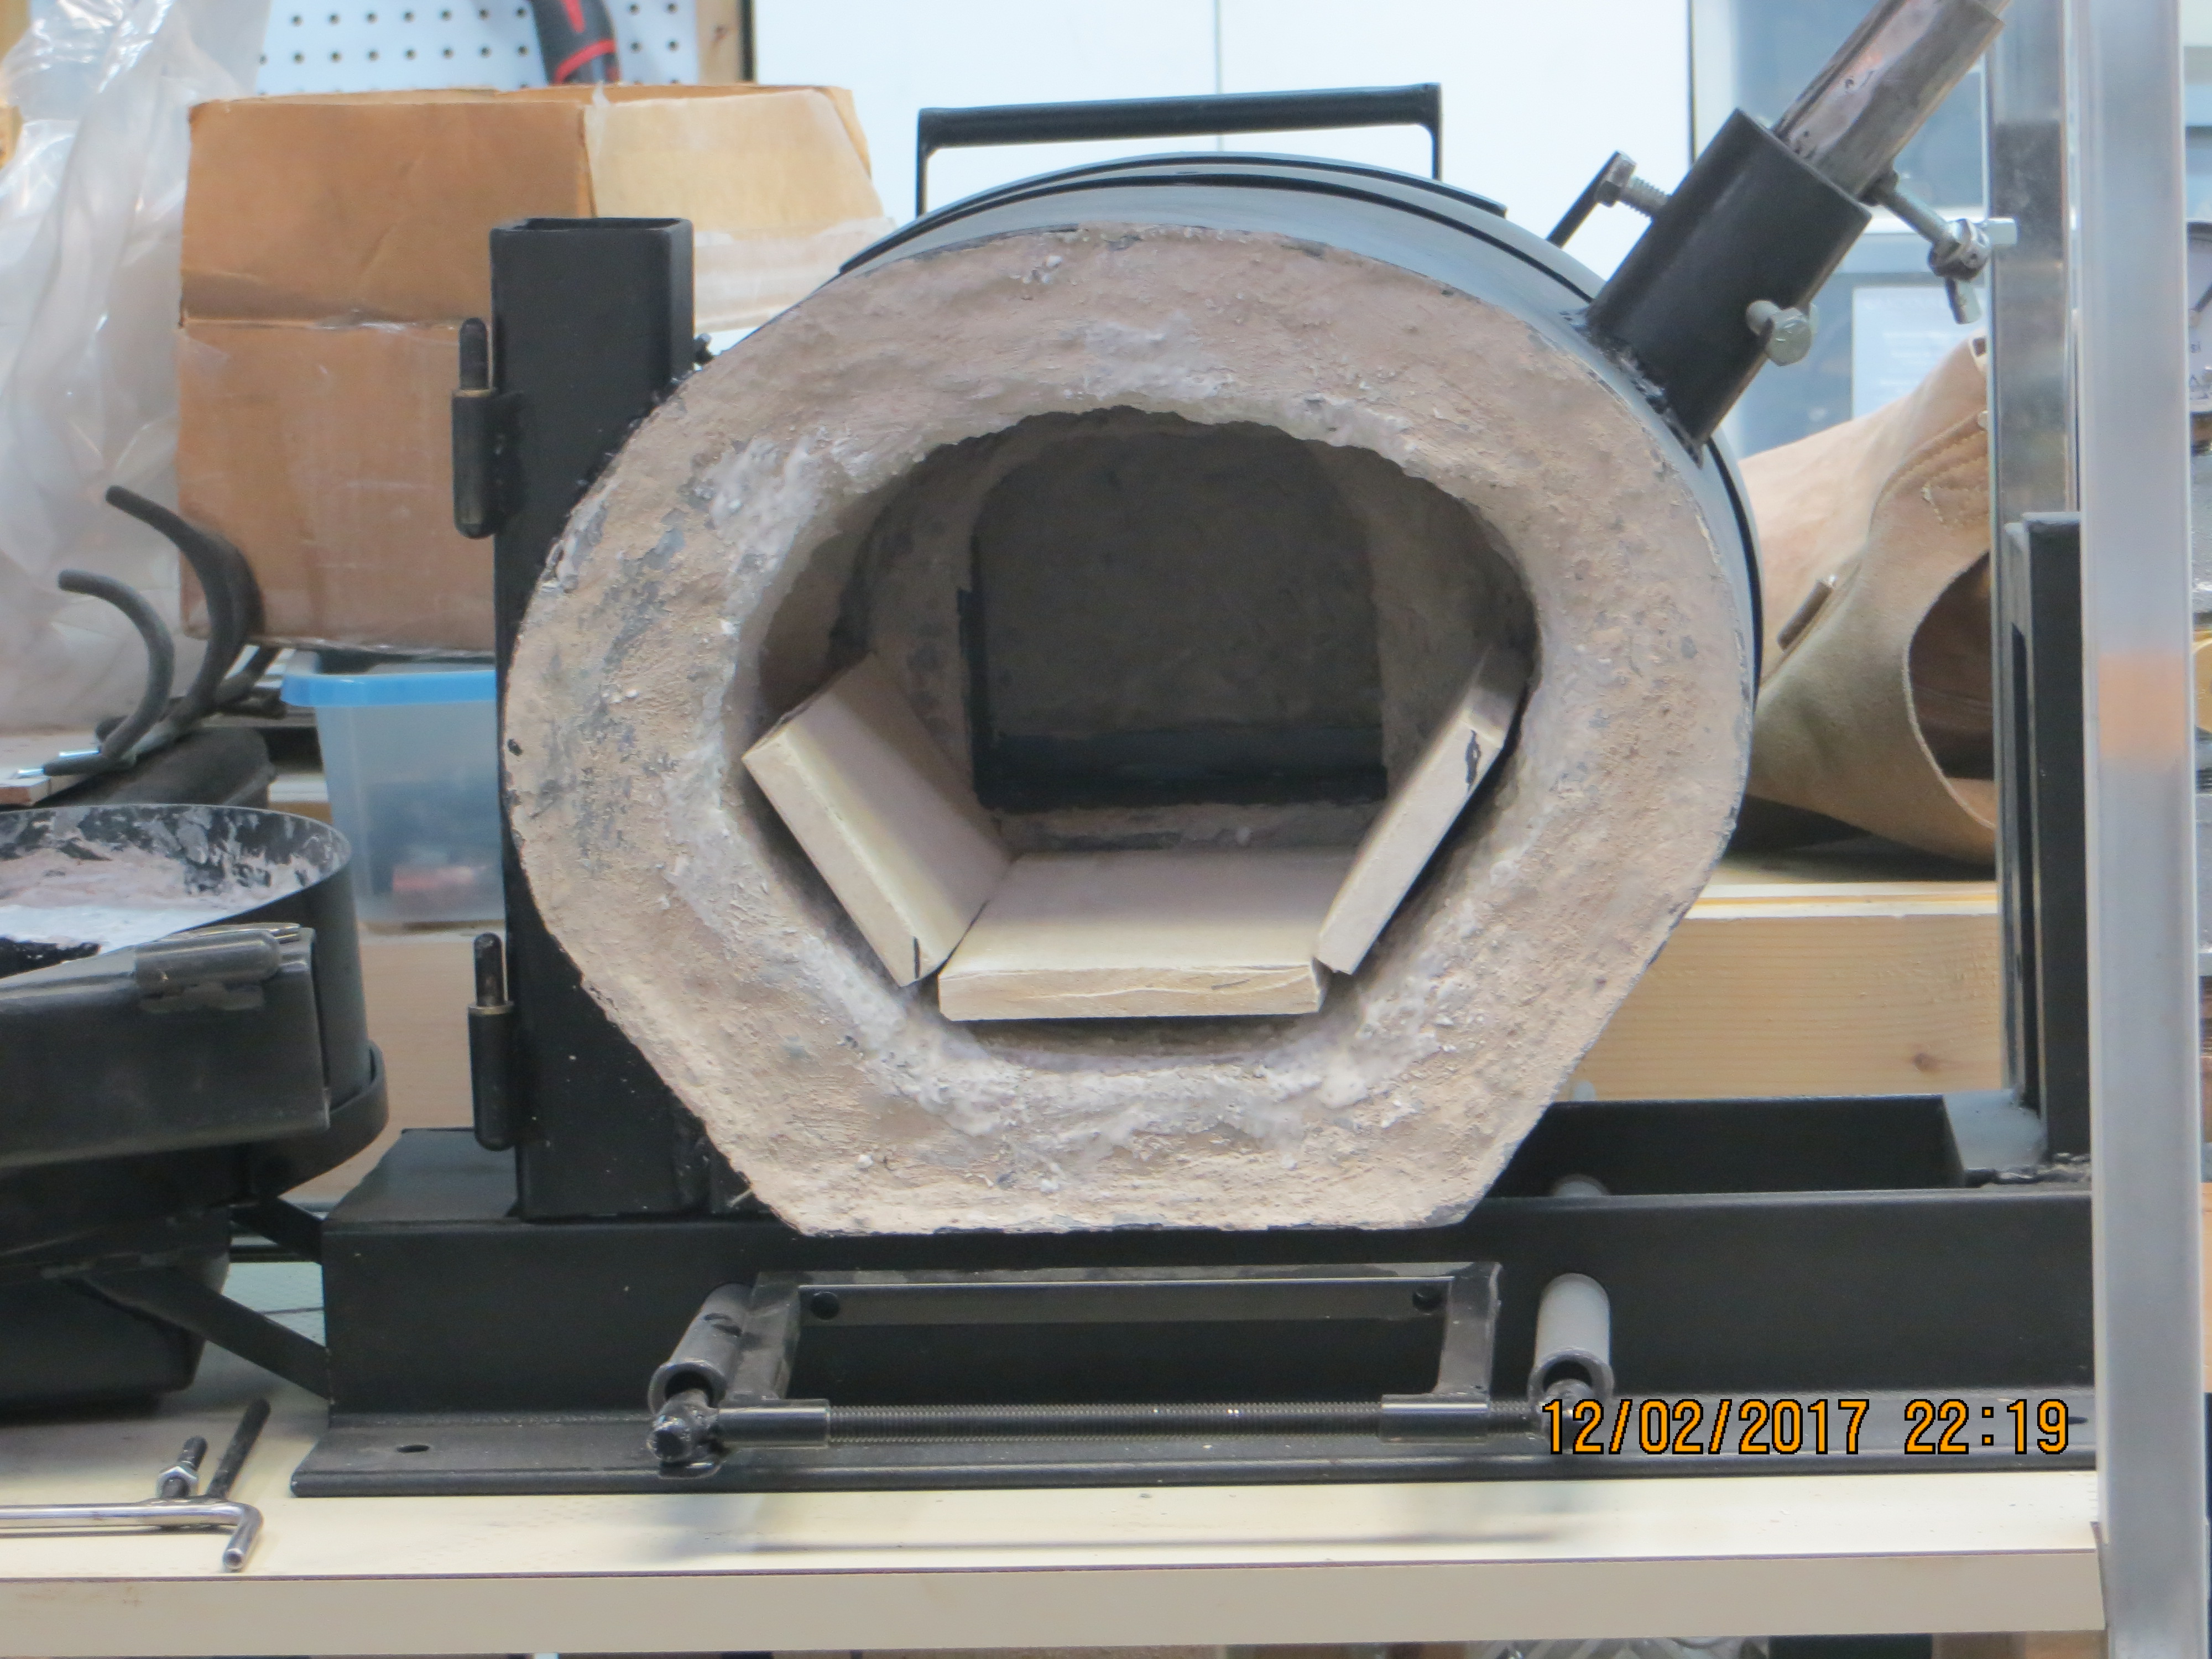
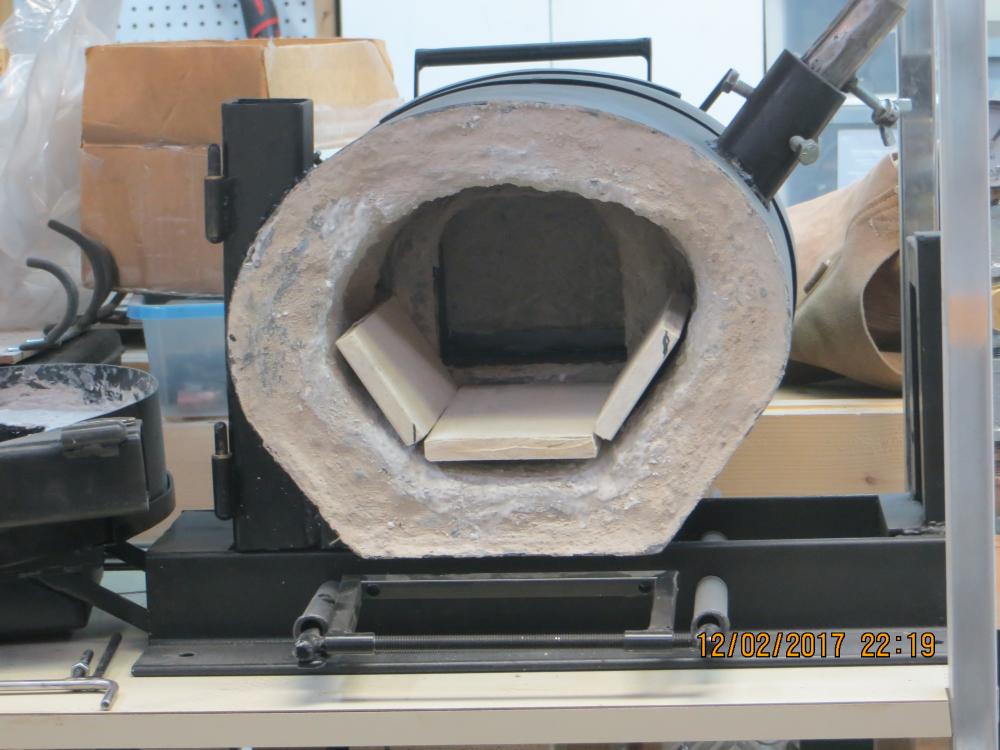
A low heat 5 minute firing turned all the new coating solid white where exposed, and a slightly creamy white underneath the kiln plates. Texture is mostly smooth, except where put on lumpy or dripped. Kiln shelves join up fairly well, still lower than the door opening. Flame curls around the edge well enough. Same mix applied to all surfaces that might shed dust. It goes on fairly translucent, which is surprising considering the amount of alumina involved. After it dried, a second coat of ITC-100 over all reflective interior surfaces. It was cut with liquid glass as well. Sealed kiln shelves down. I am hoping that it can capture flux drips. Time will tell. I attempted to get a lip formed on the front floor edge and a seal on the back edge. Area underneath kiln shelves is left empty cause I tired of xxxxxxx WITH THIS!!!! GAAA! I WANT MY xxxx FORGE WORKING. Ahem. Sorry. Nearly there. Sigh.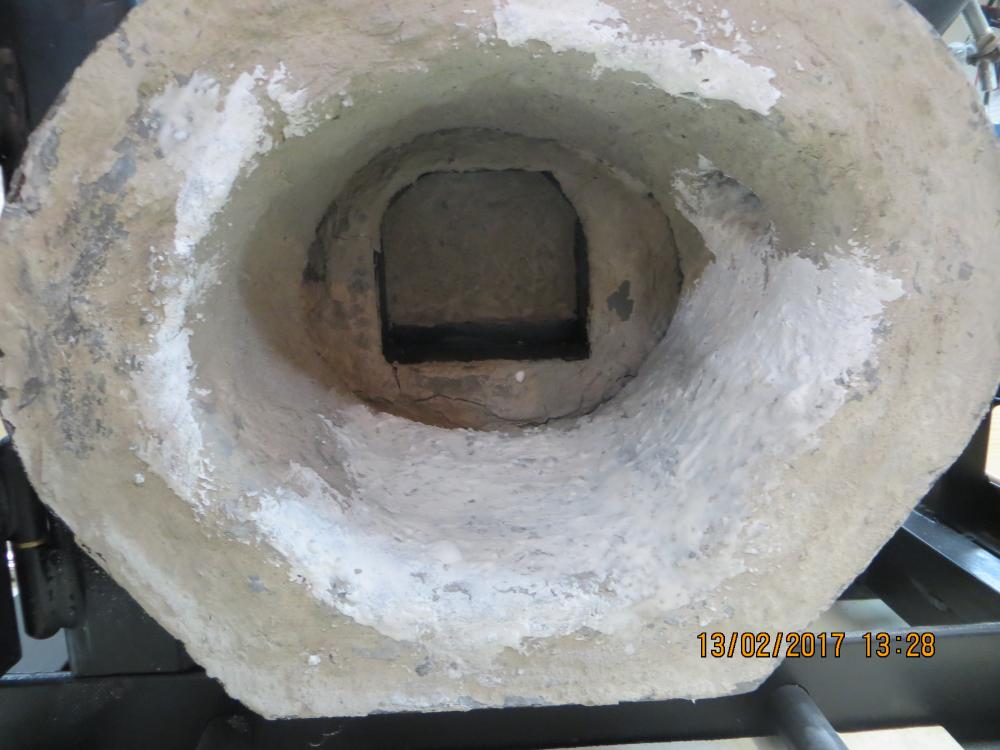


-
1st-Timer Forge Build Fun ( or 'Hey look, still not blowed up')
Hoenirson replied to Hoenirson's topic in Gas Forges
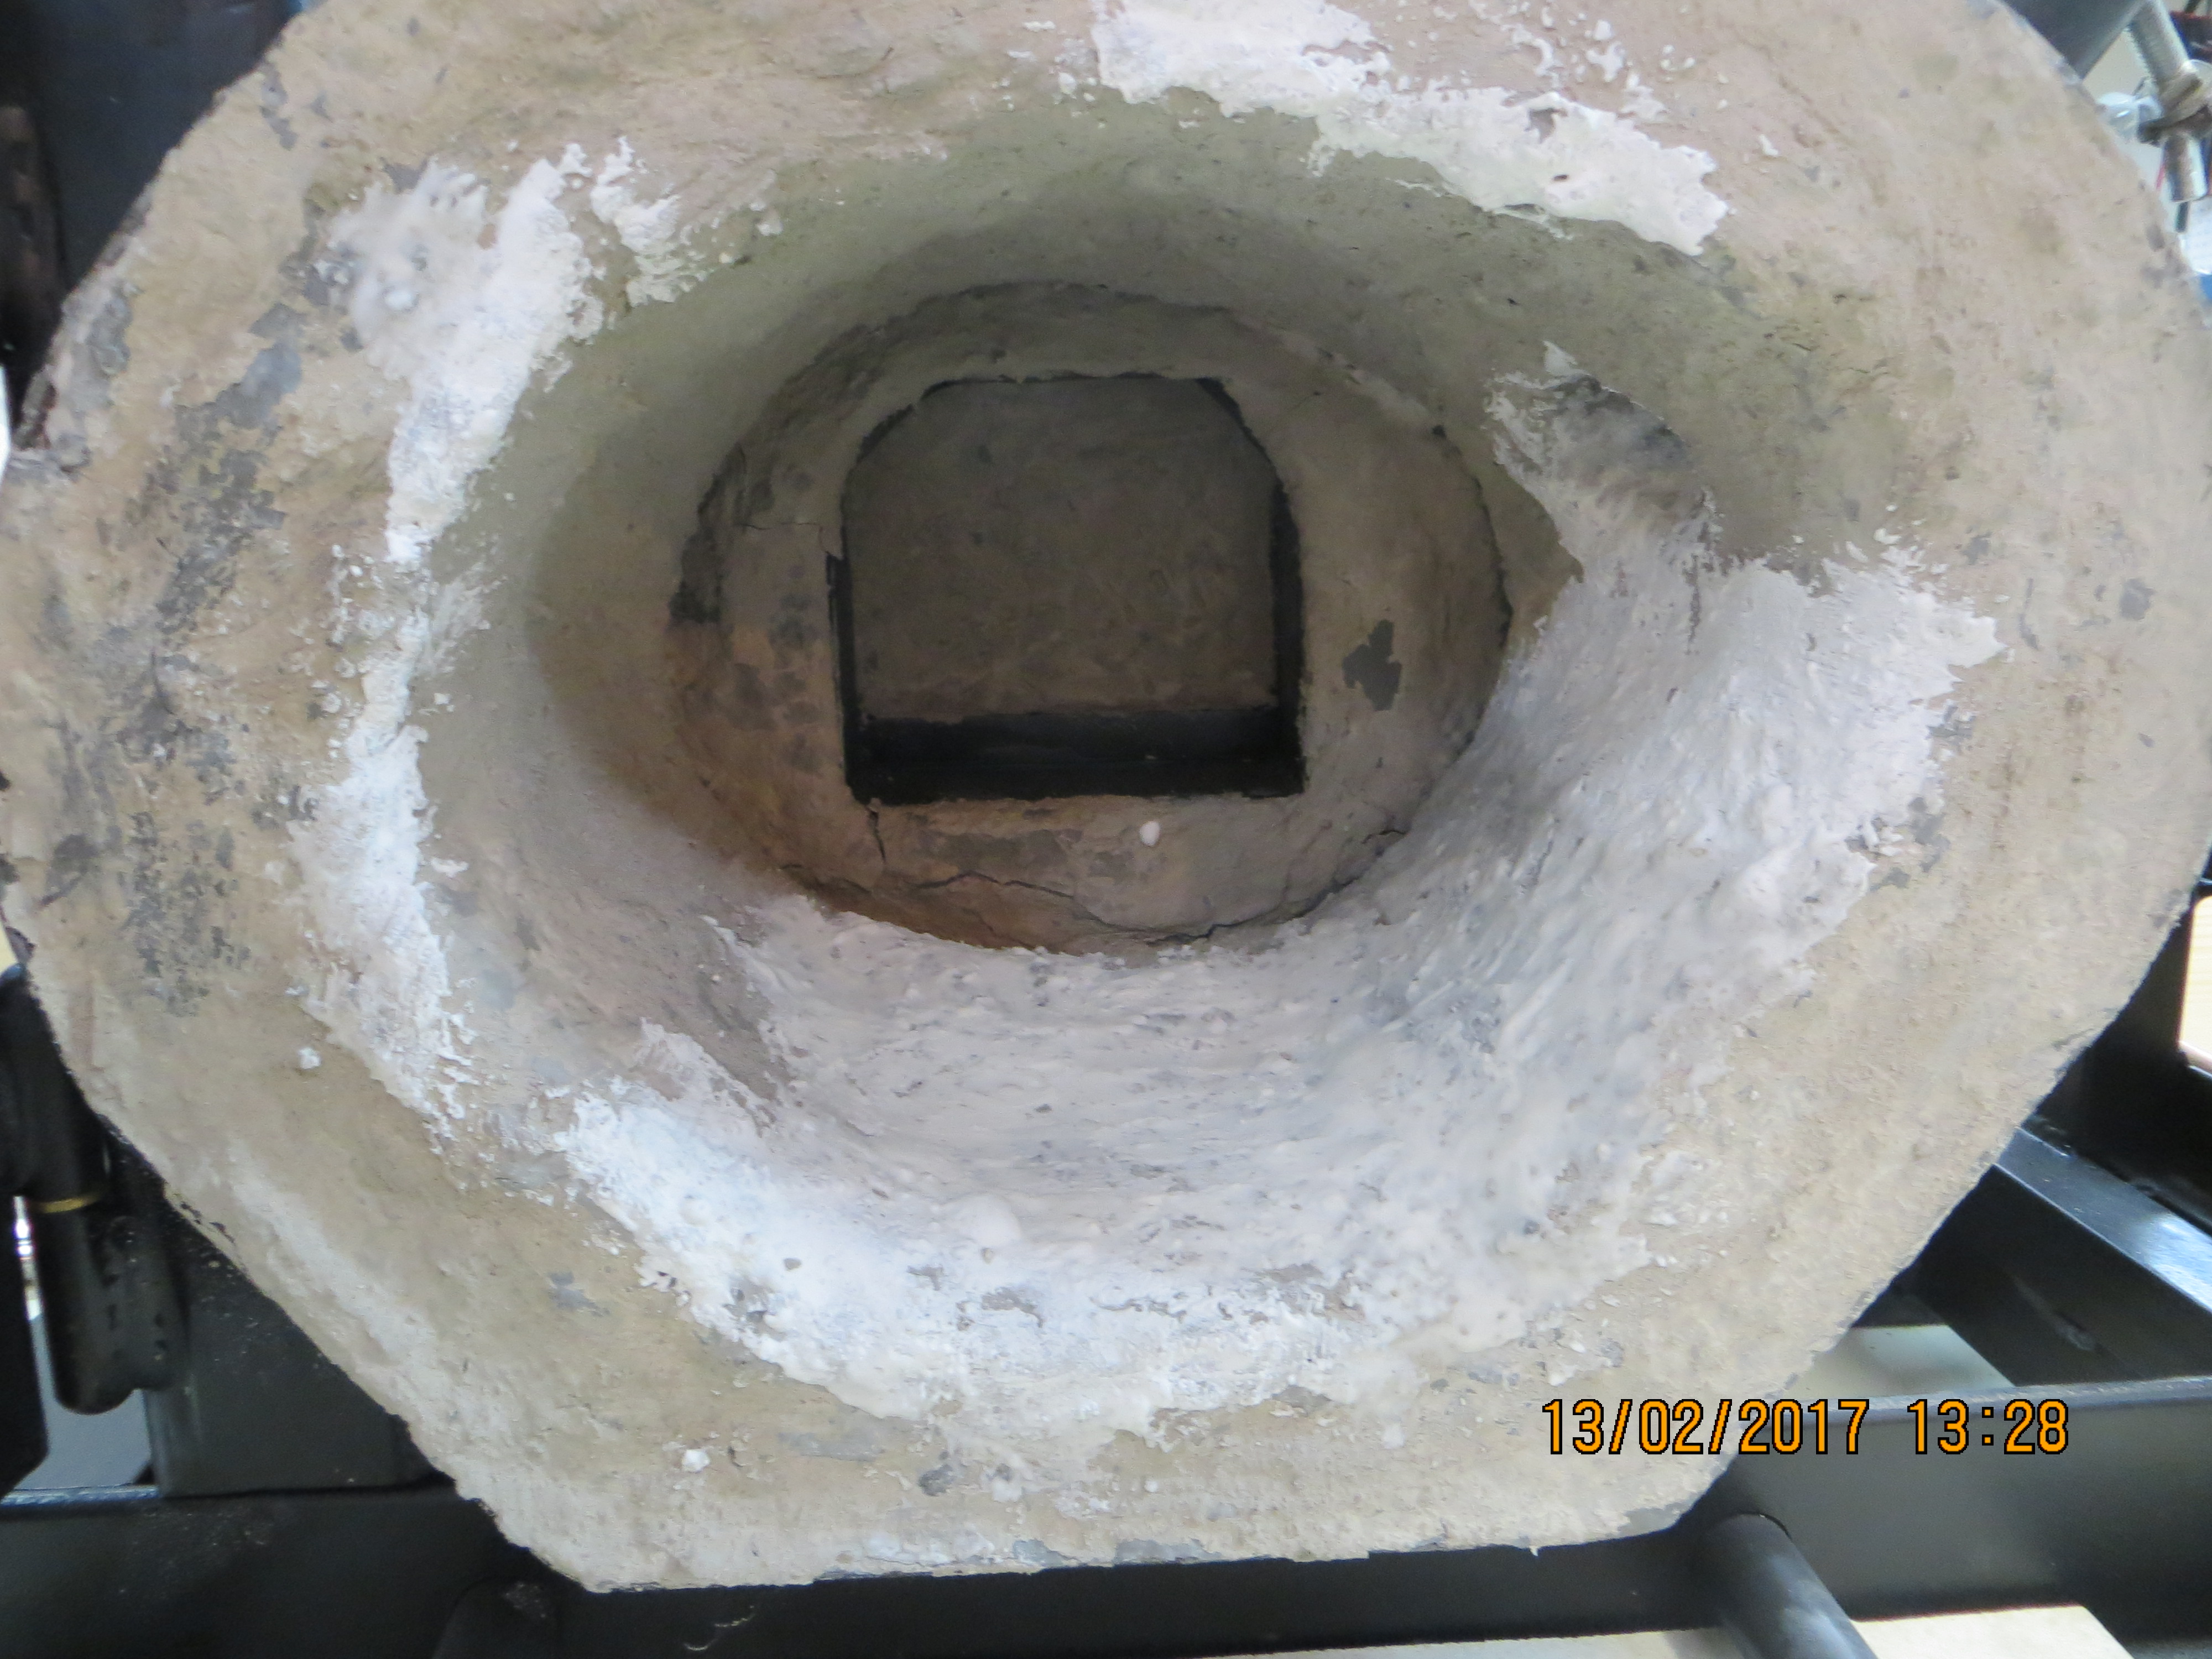
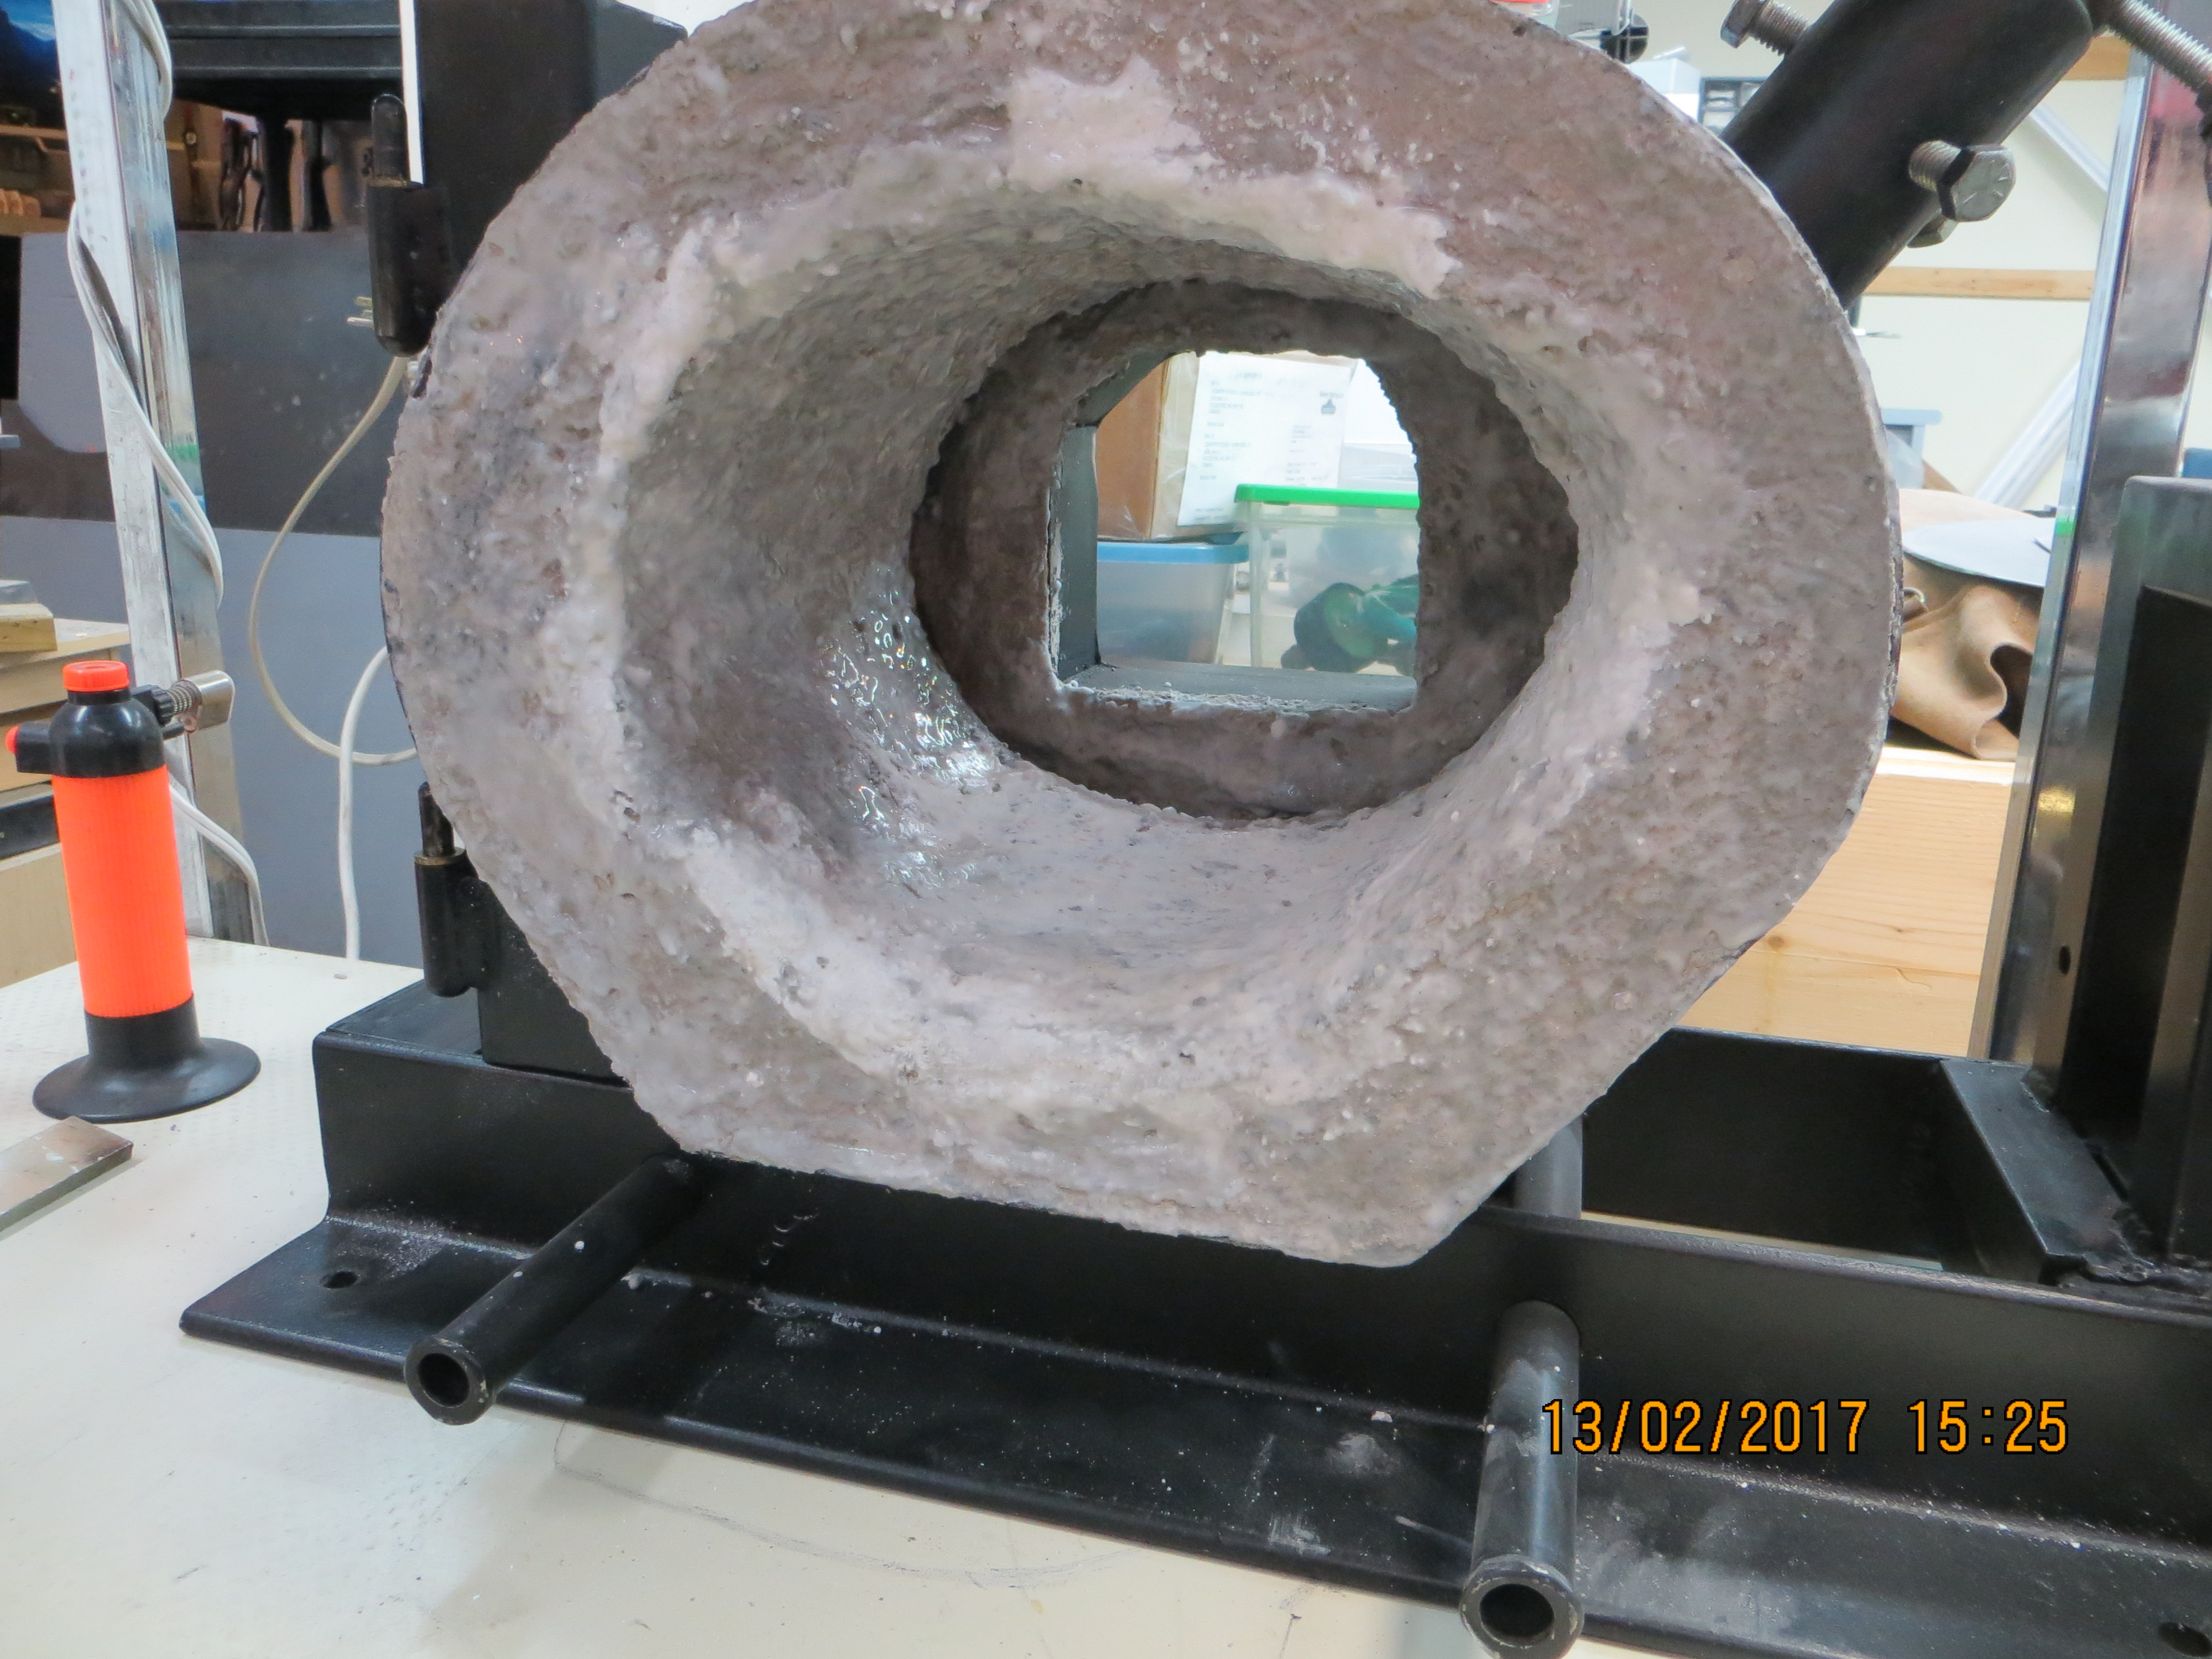
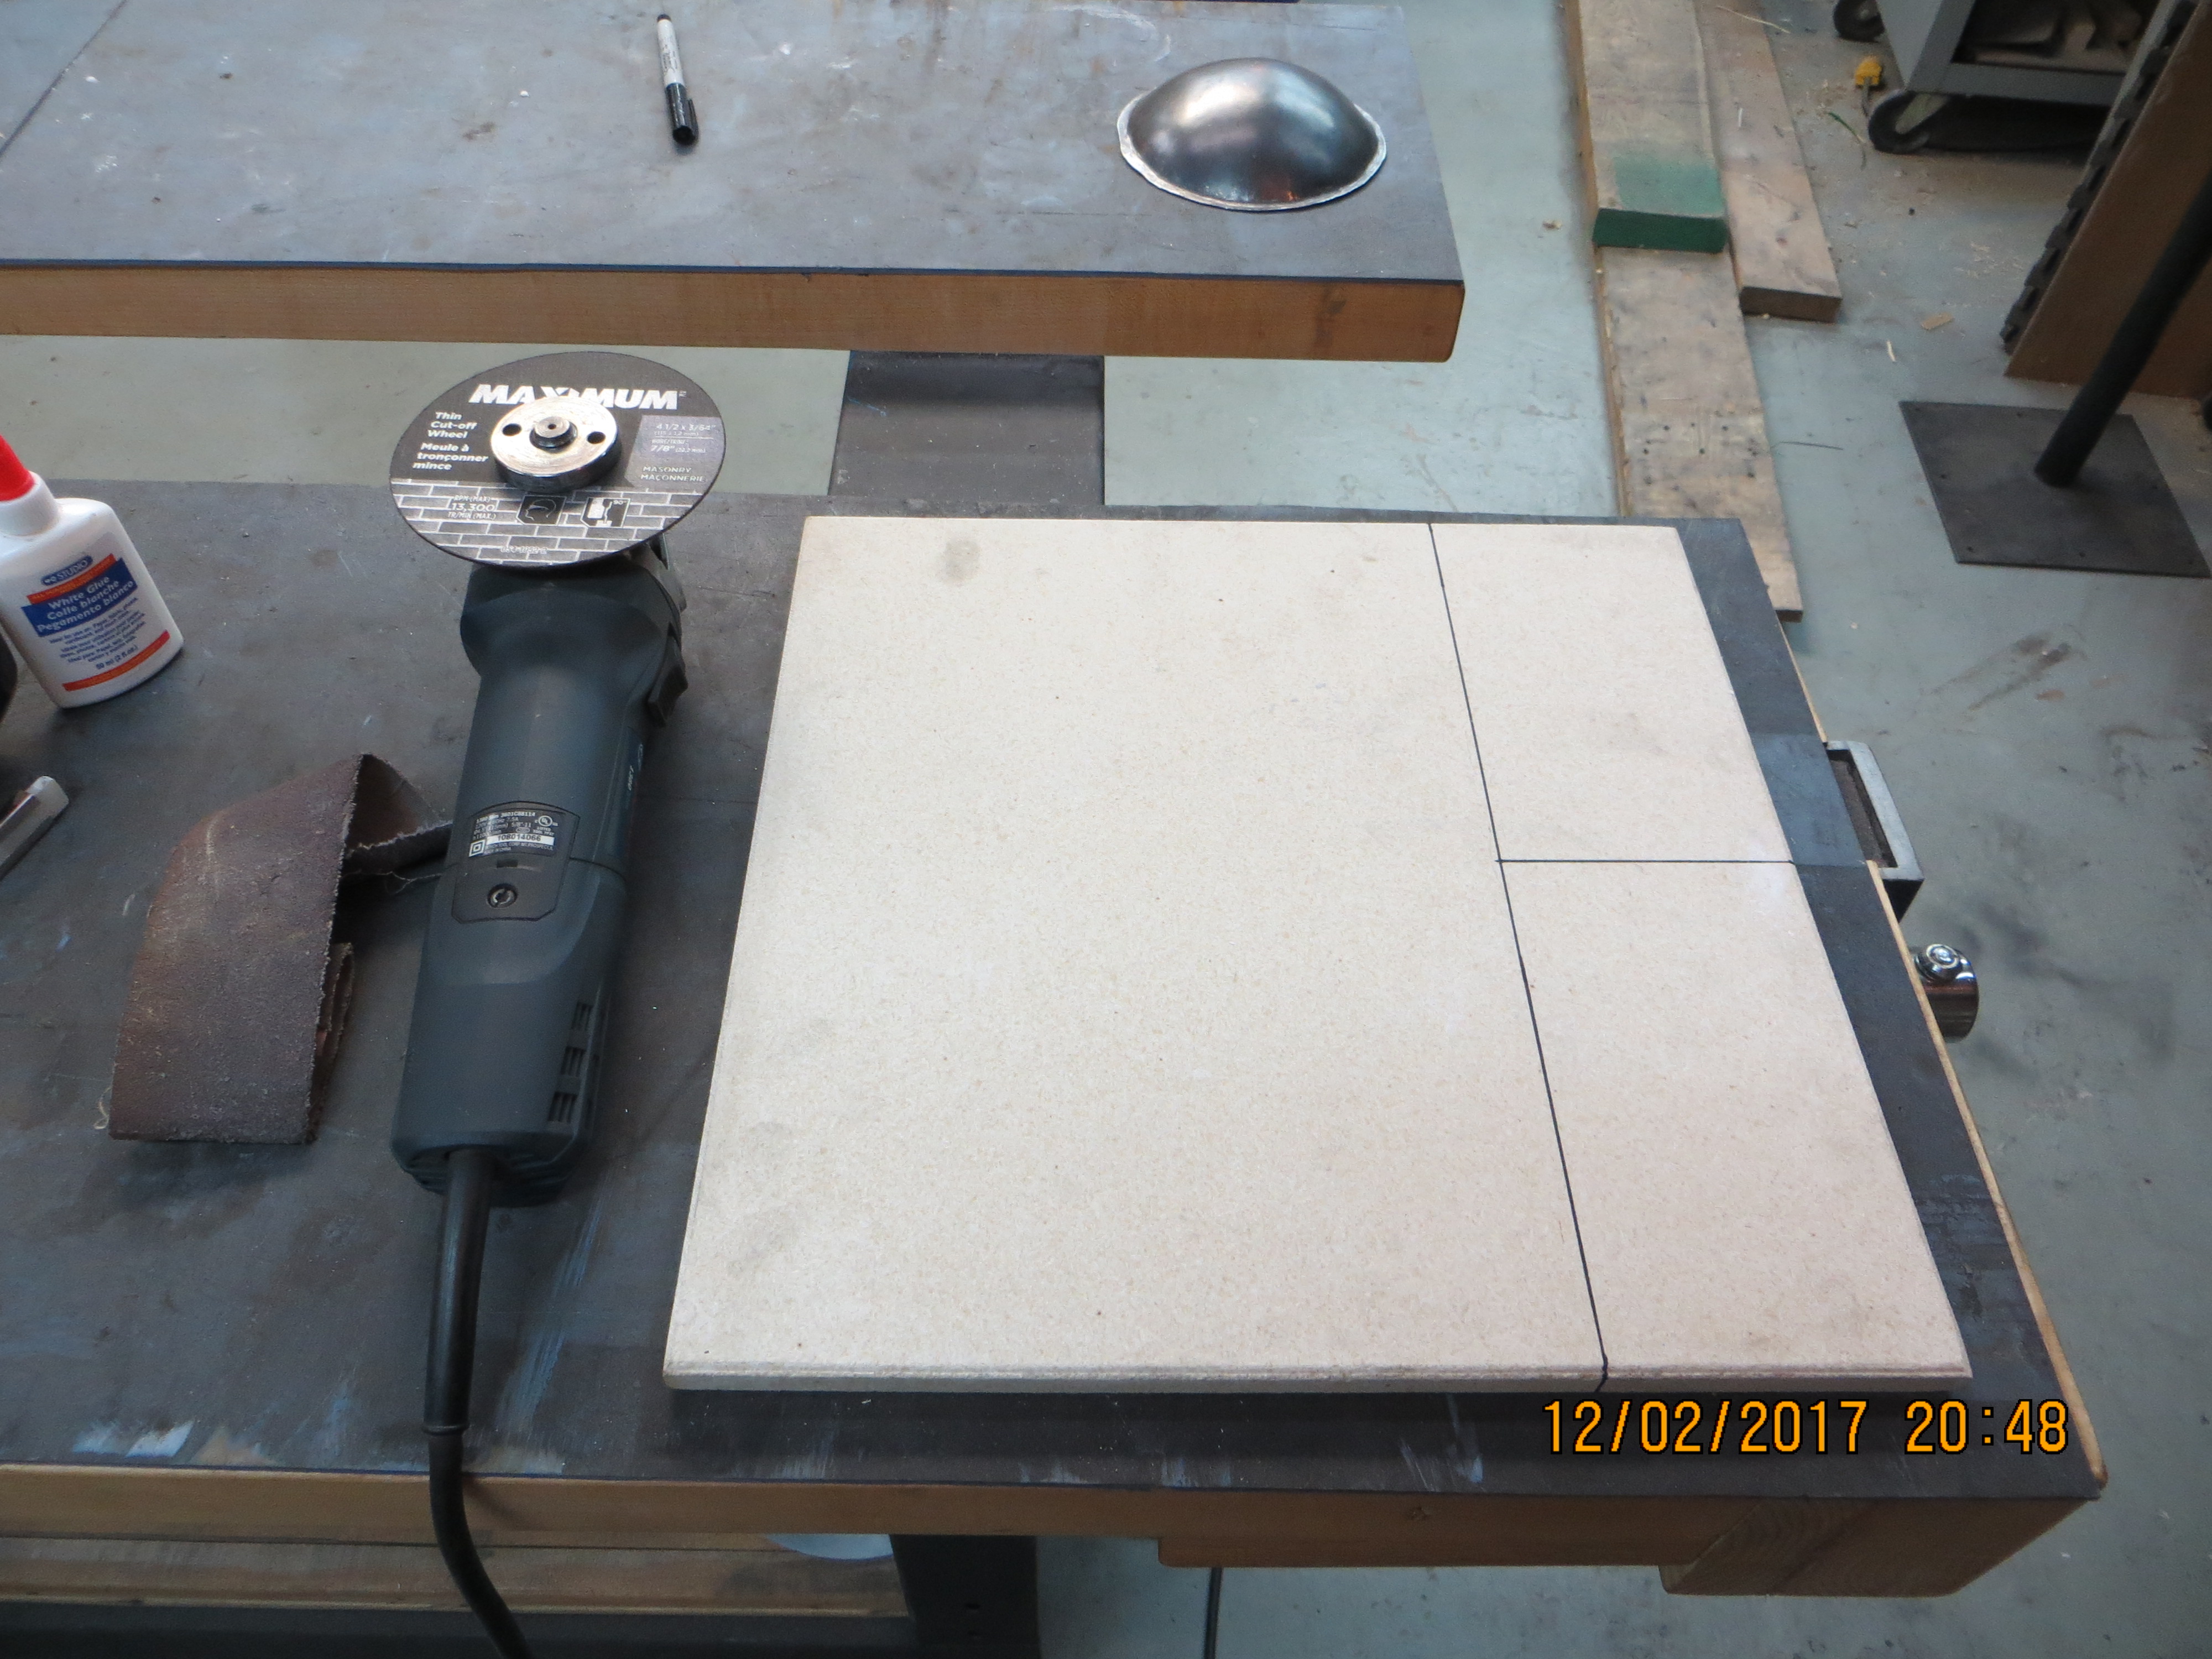
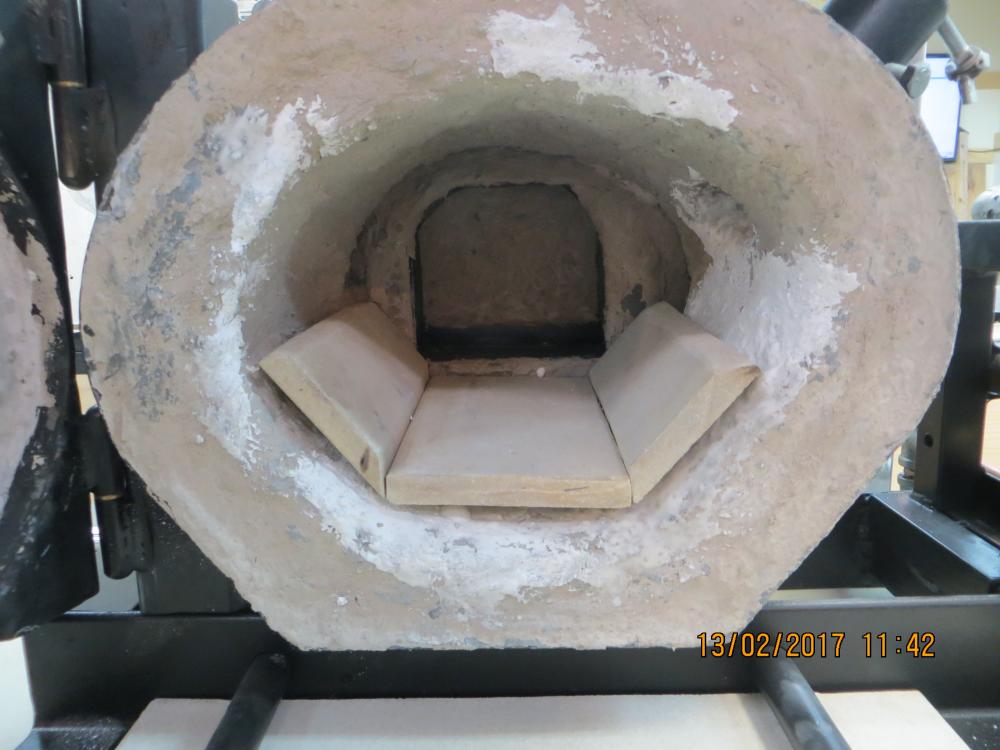
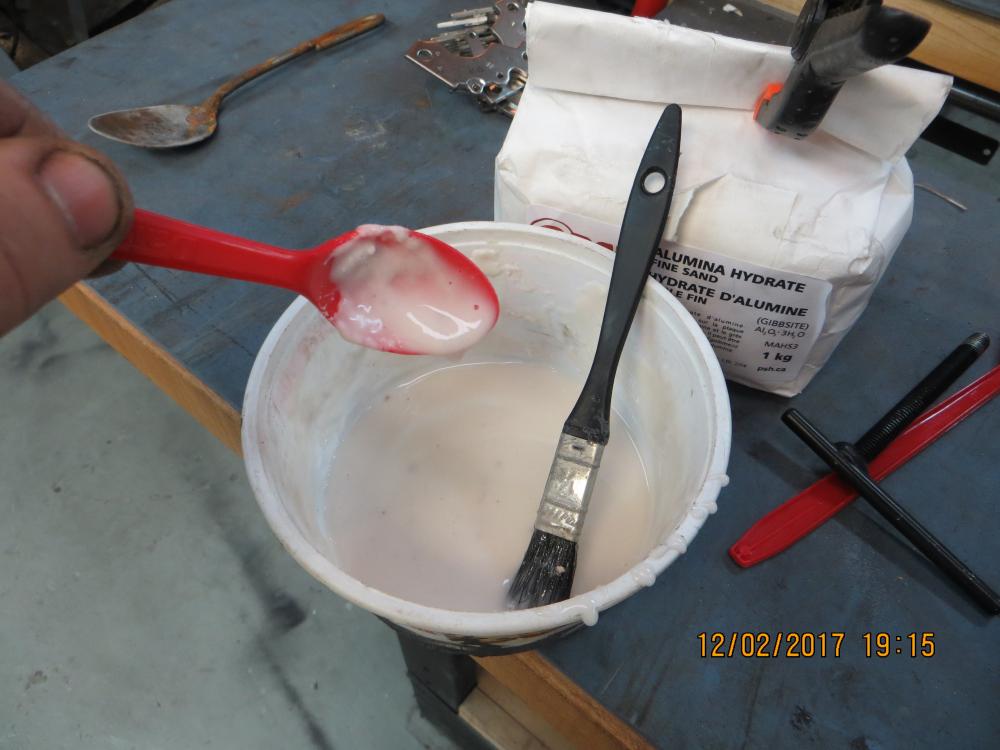
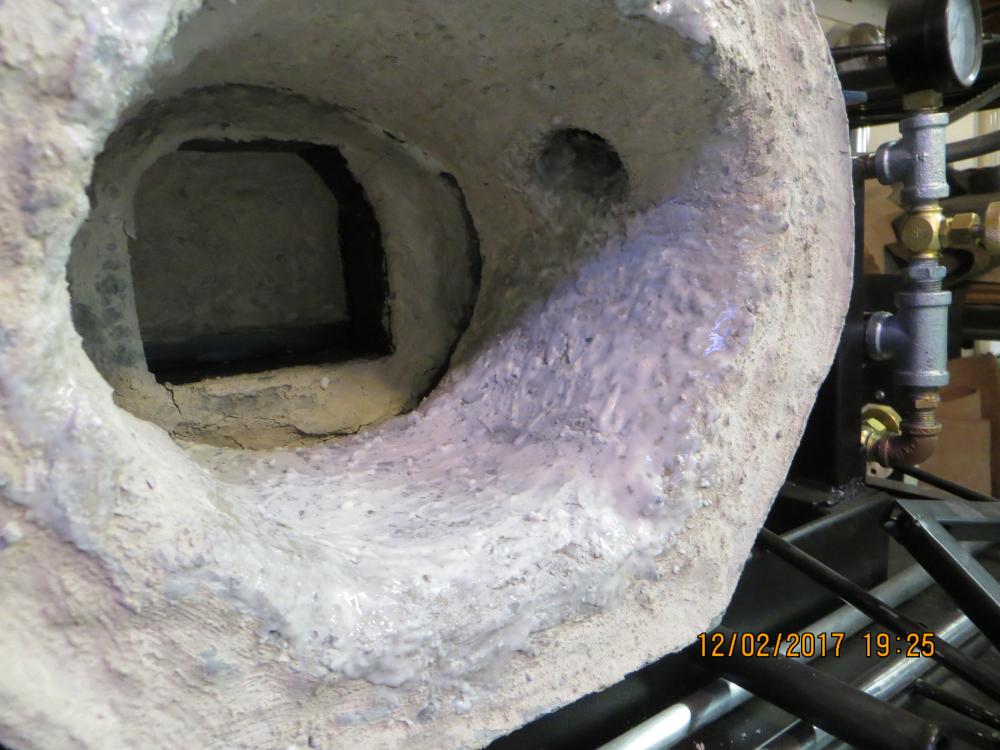
Mixed up a runny batch. Here is the test area where flame was impacting the most, and chowdering up the hi temp cement. I will give it a test firing tomorrow and set the burner for max O2 to produce some CO2 which apparently Water Glass is hardened by. This will be under the kiln shelves afterwards, but I still want to try and seal up the powdering refractory, even underneath the Alumina shelves. And here is our patient prepped for surgery, masonry cutting blade at hand. It cut thru like butter. Crunchy butter... 4 x 7" floor, and 2 3 x7" sides. I will chamfer the mating corners and the leading and trailing edges of the shelves.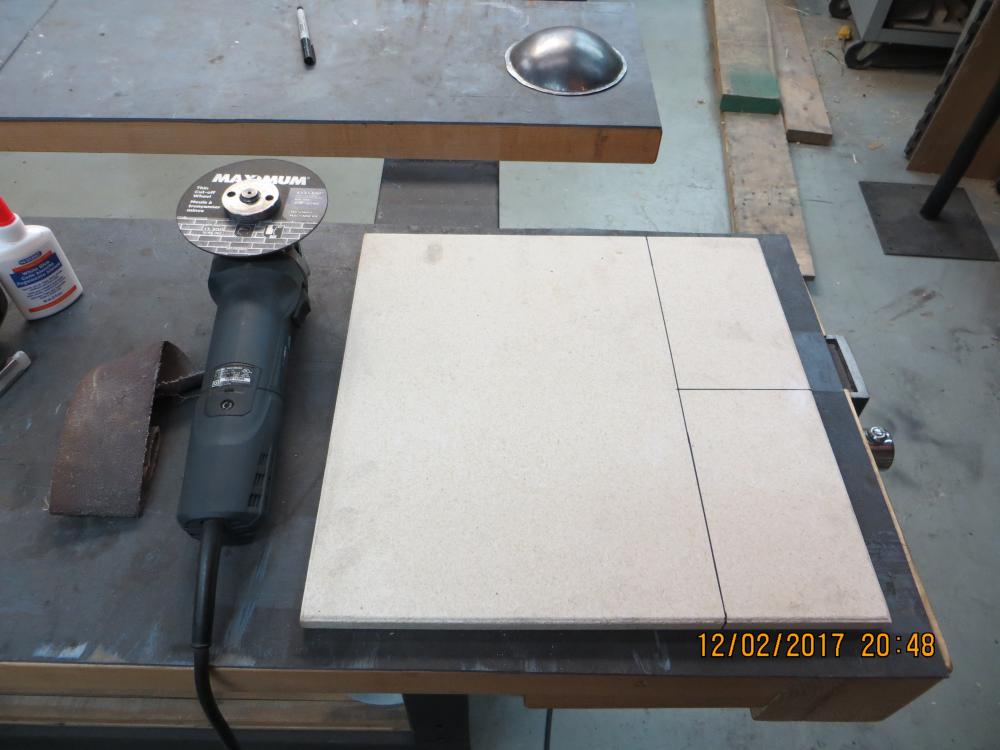
-
1st-Timer Forge Build Fun ( or 'Hey look, still not blowed up')
Hoenirson replied to Hoenirson's topic in Gas Forges
I will Ede, thanks for the encouragement. It really feels like I am out in left field here. Found this recipe for Satanite: Silica (SiO2) 34.8% Alumina (Al2O3) 59.4% Titania (TiO2) 2.6% Iron Oxide (Fe2O3) 1.5% Lime (CaO) 0.3% Magnesia (MgO) 0.4% Alkalies (Na2O+K2O) 1.1% Then this site shows an alternative called Kerathin showing a breakdown using Silica and Alumina again: I think i will mix up something close to 85/15 as I can do. Wish me luck.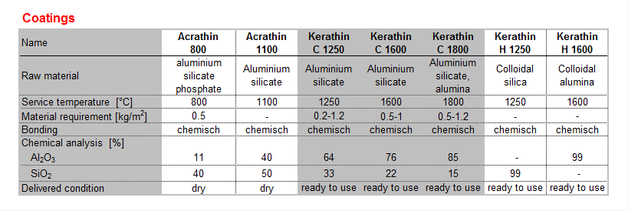
-
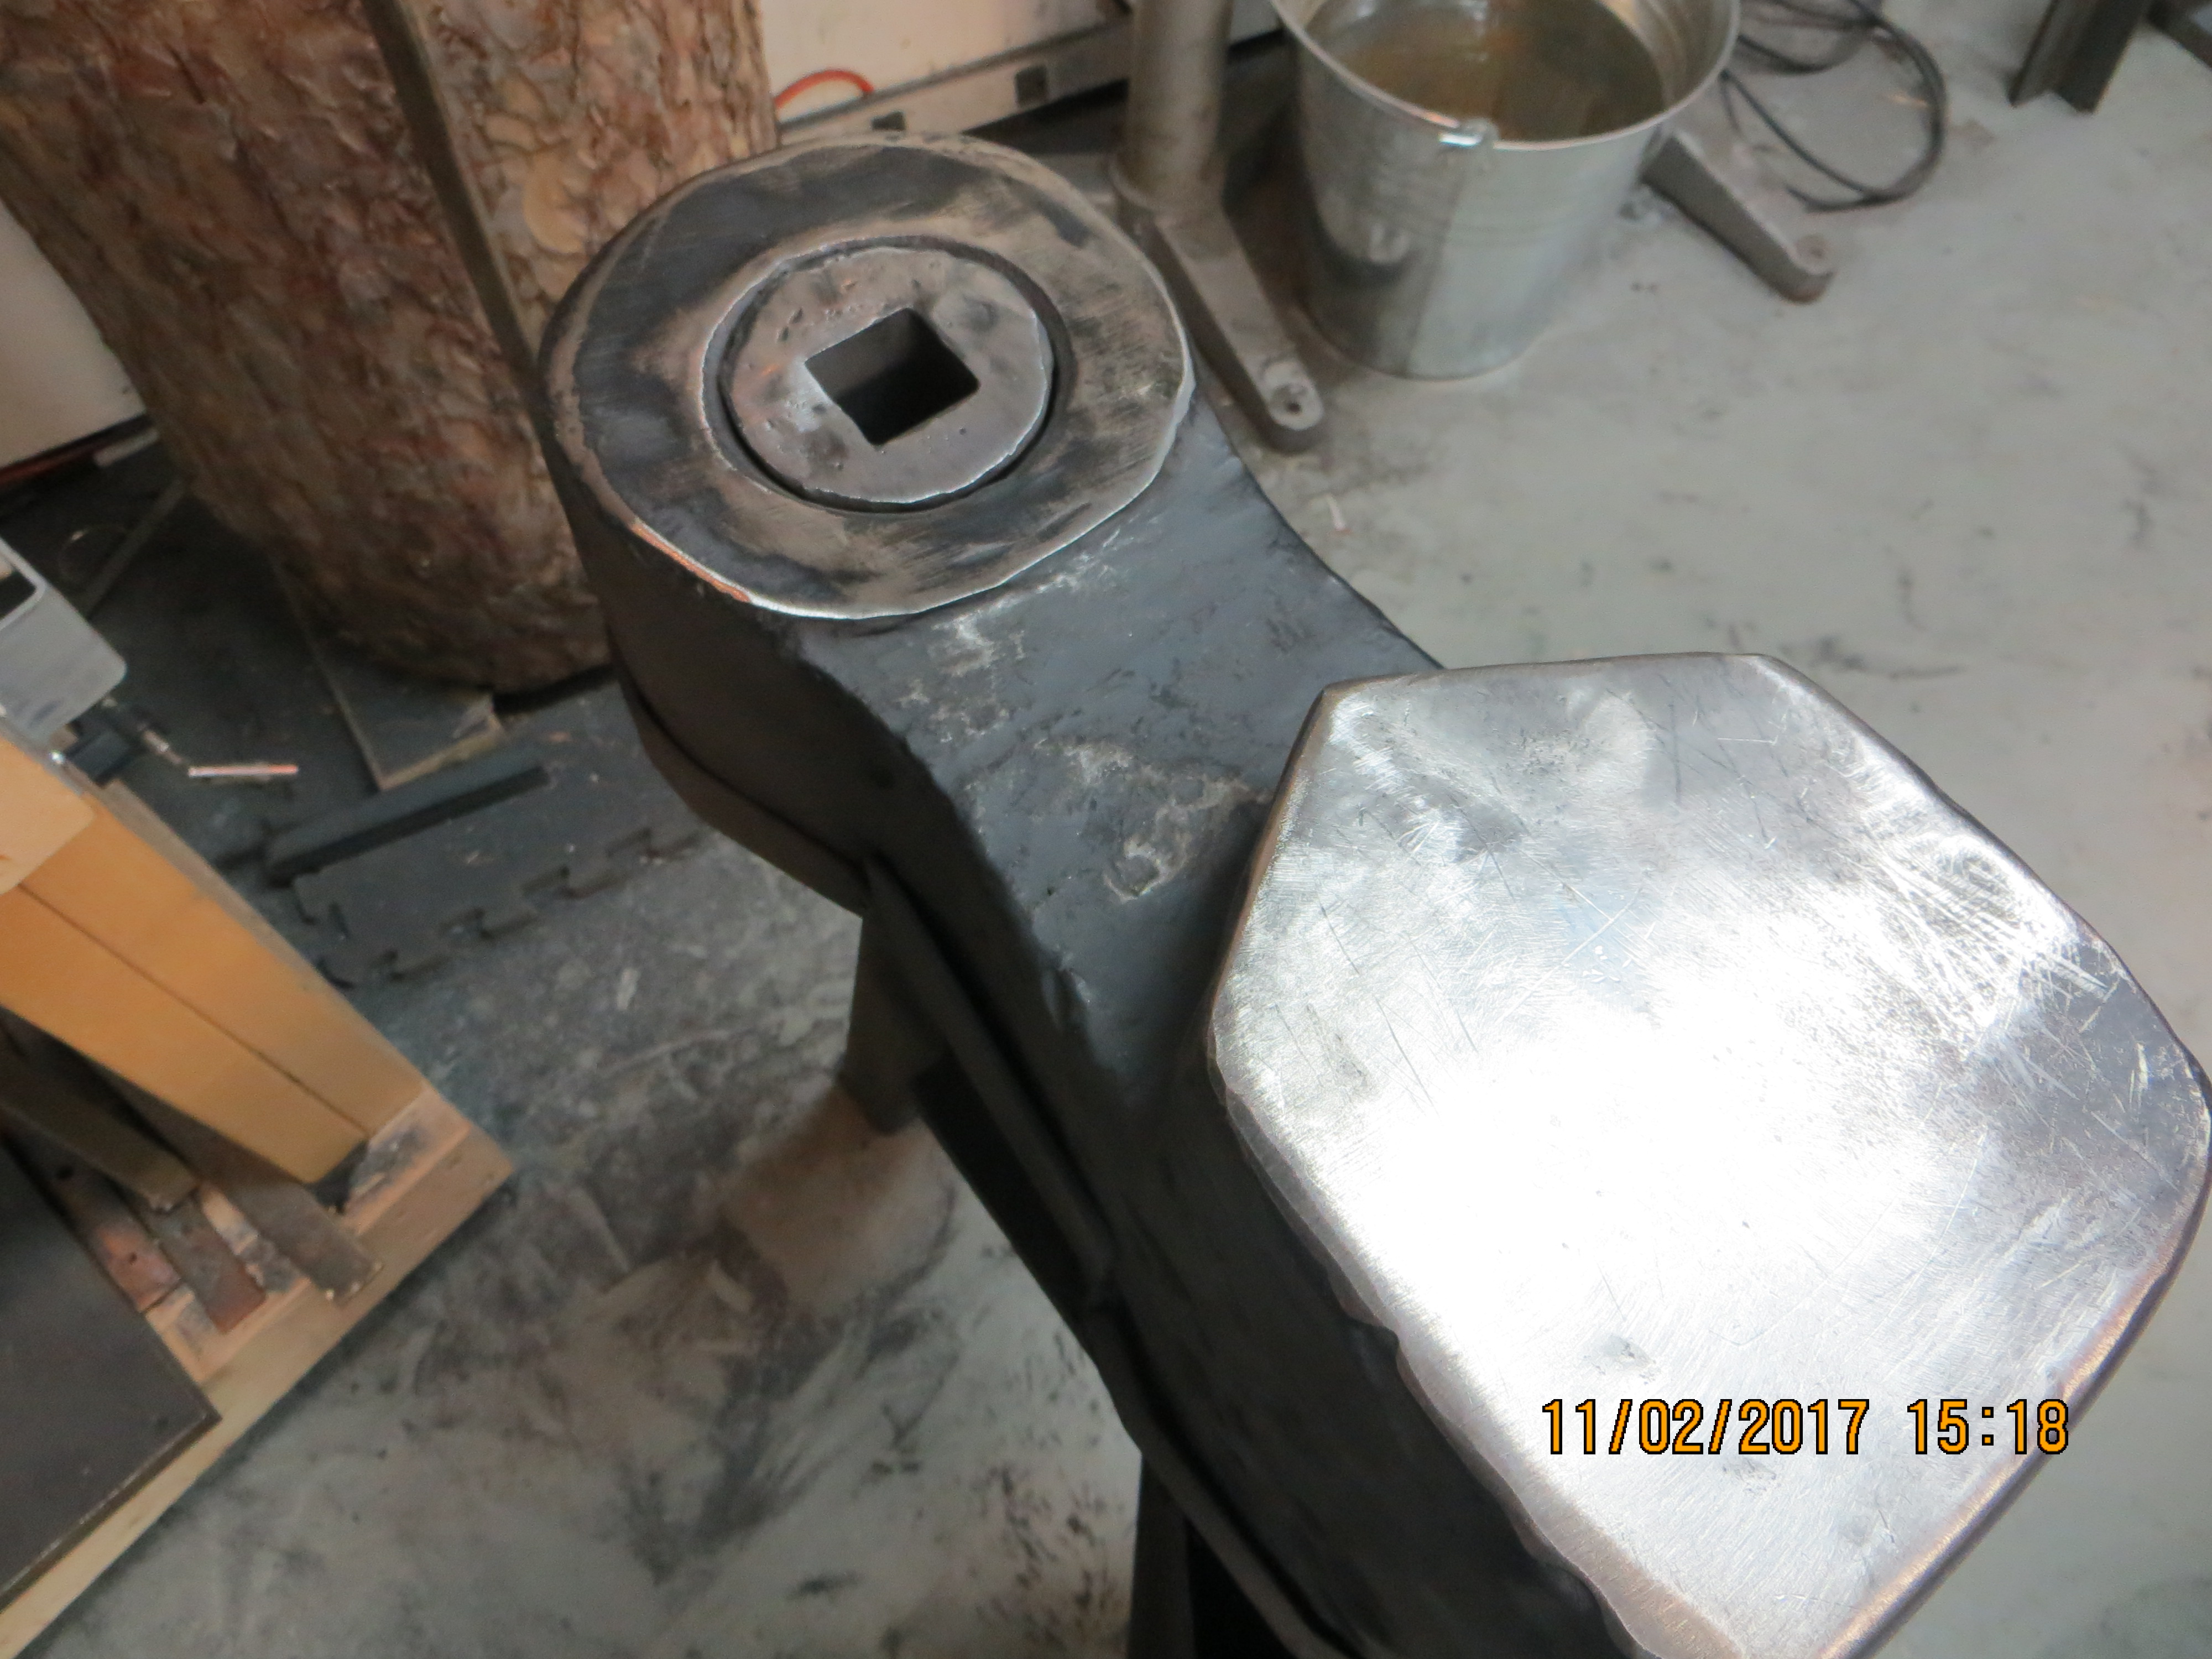
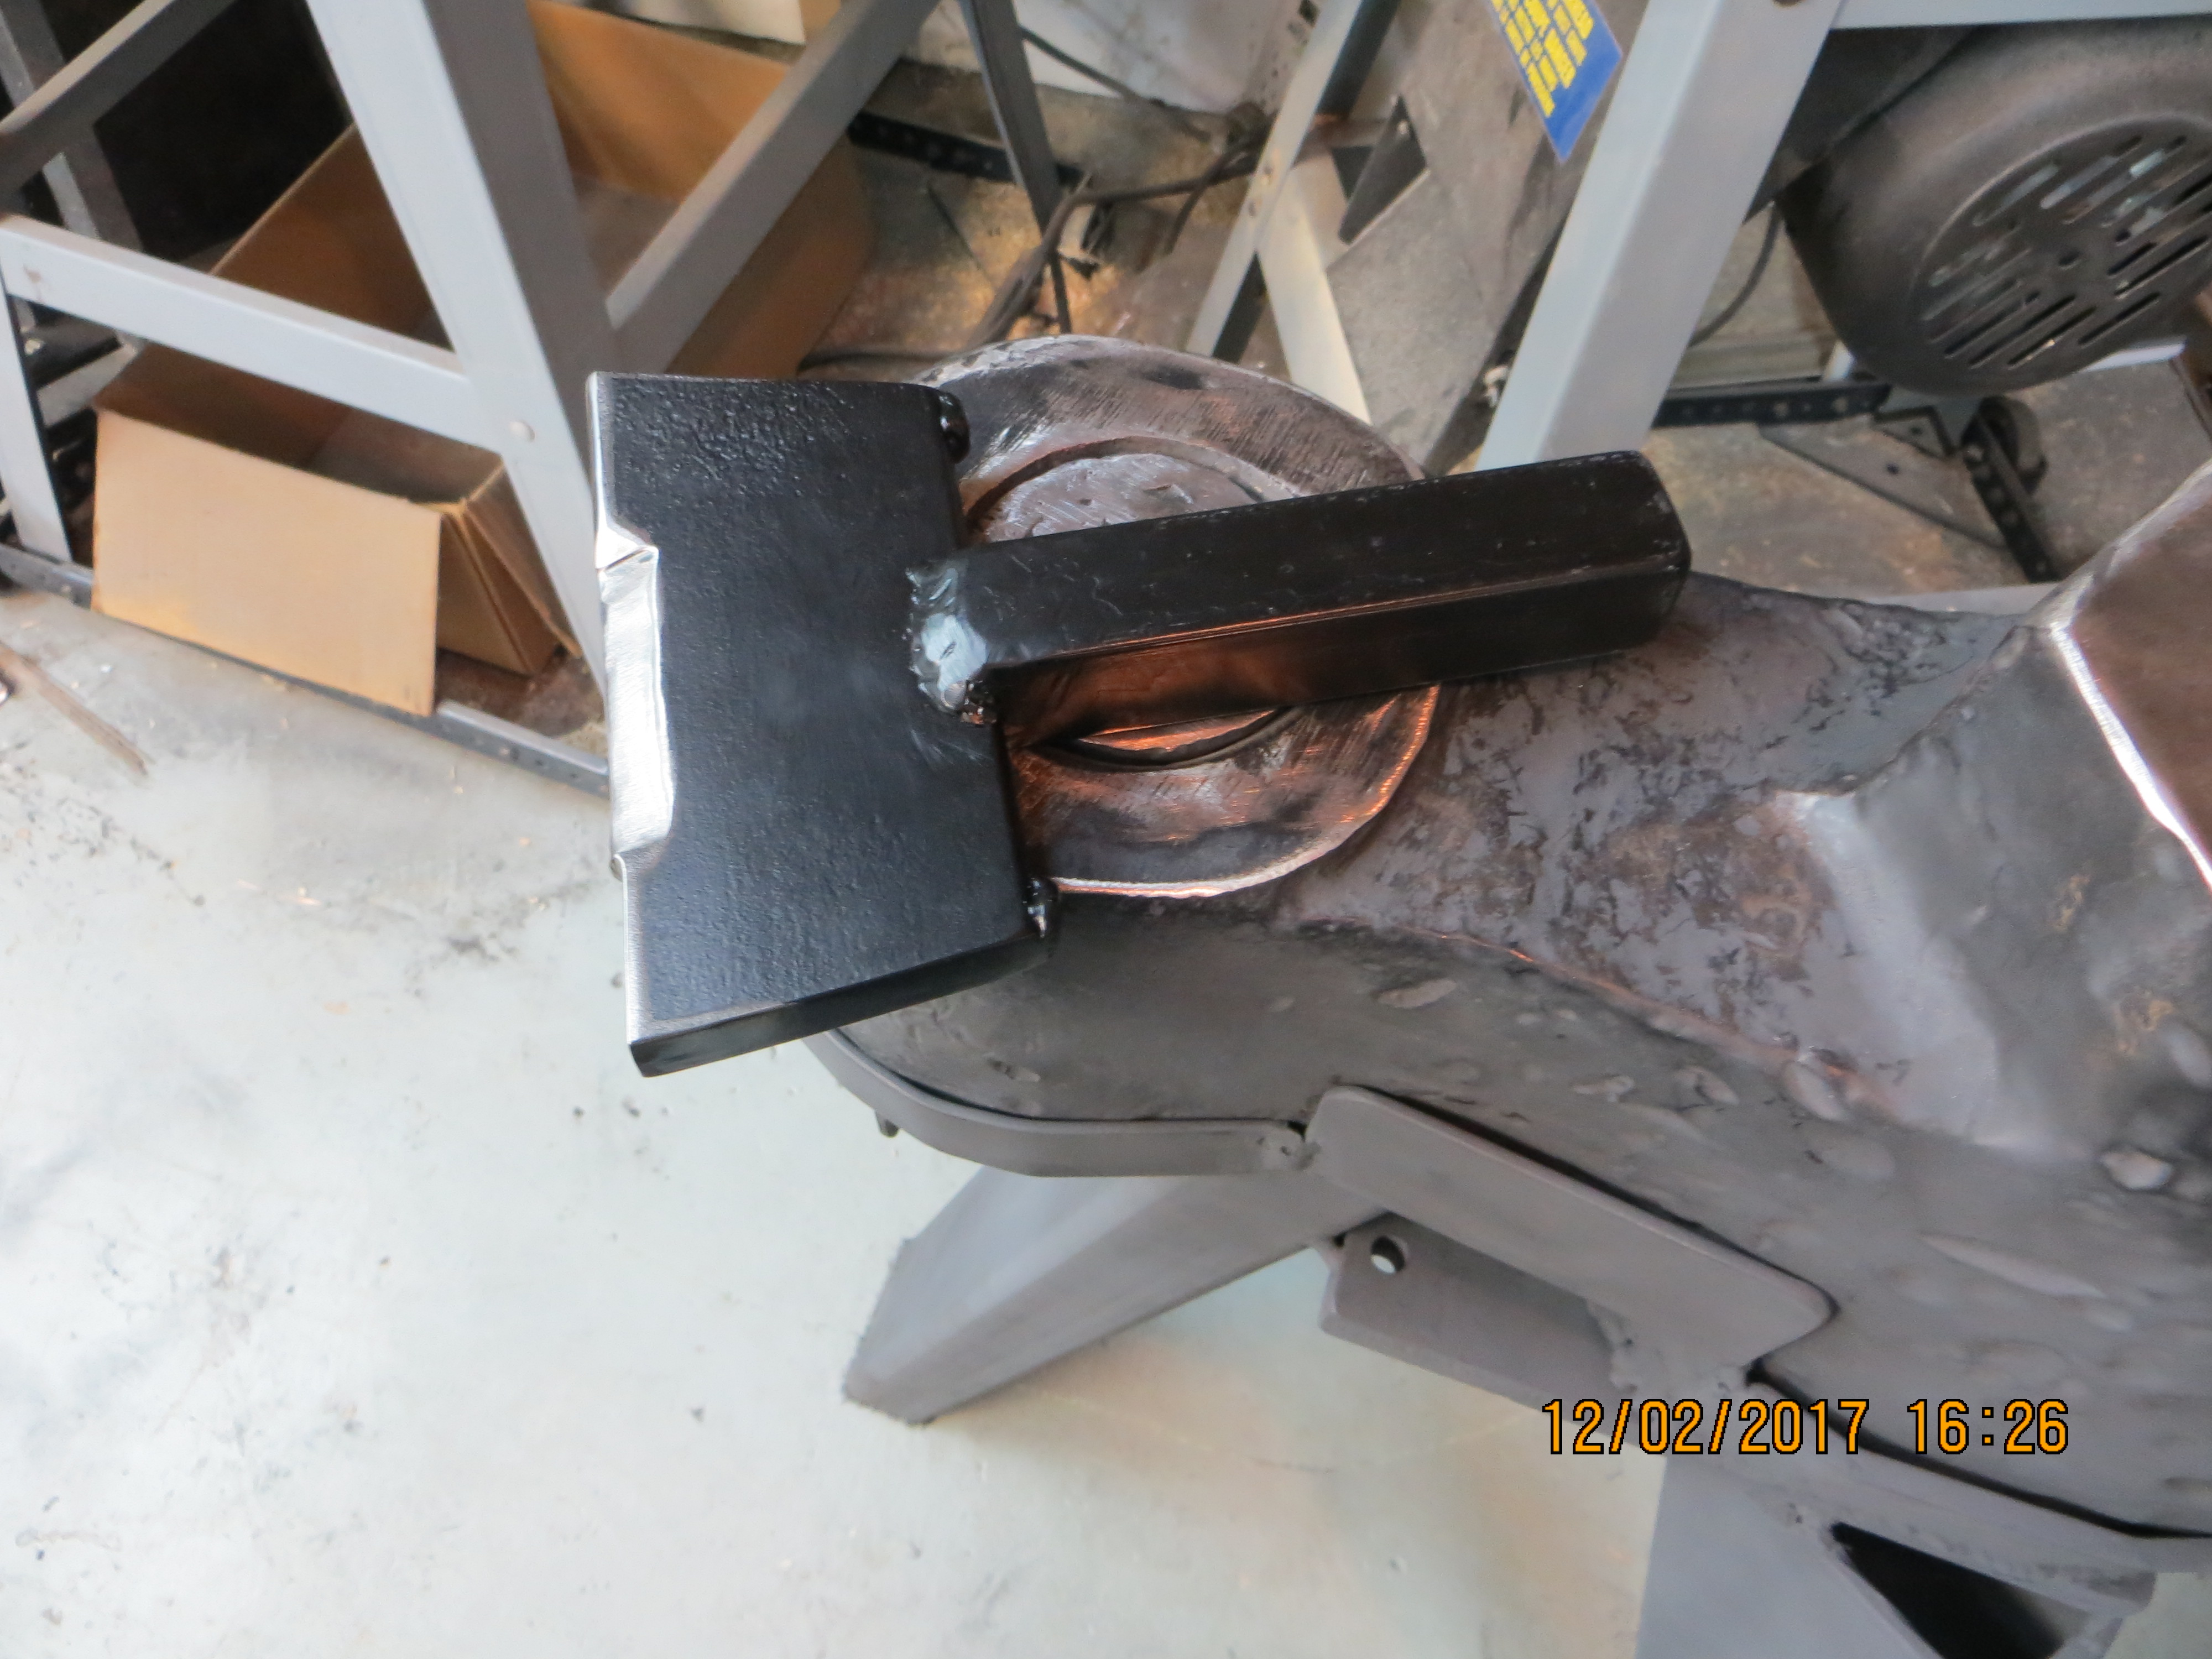
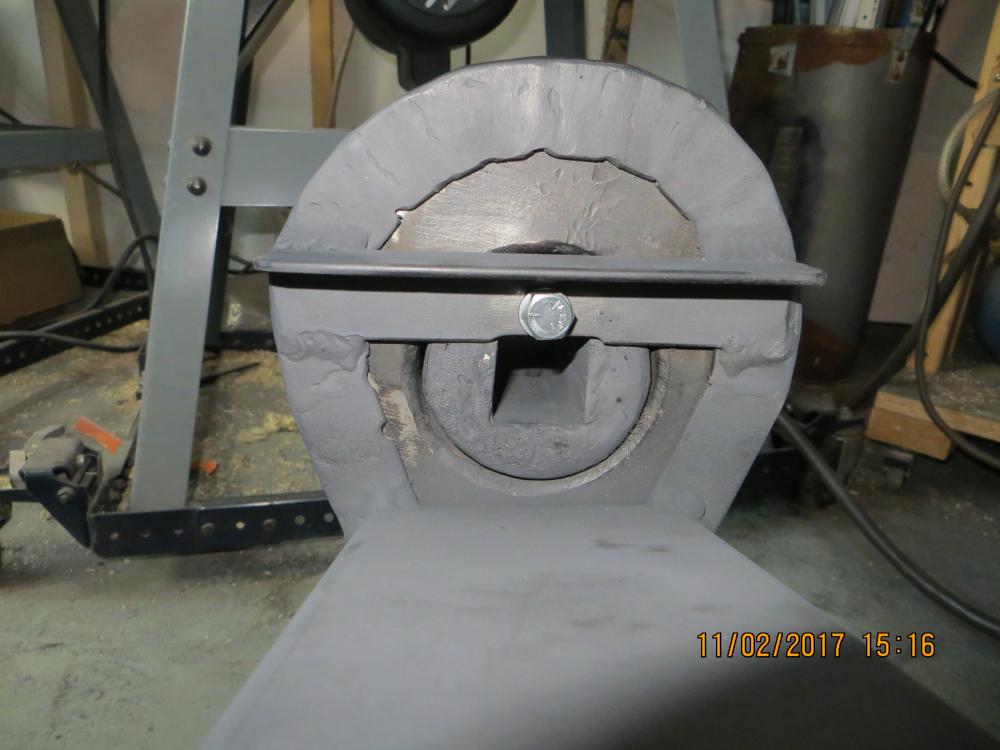
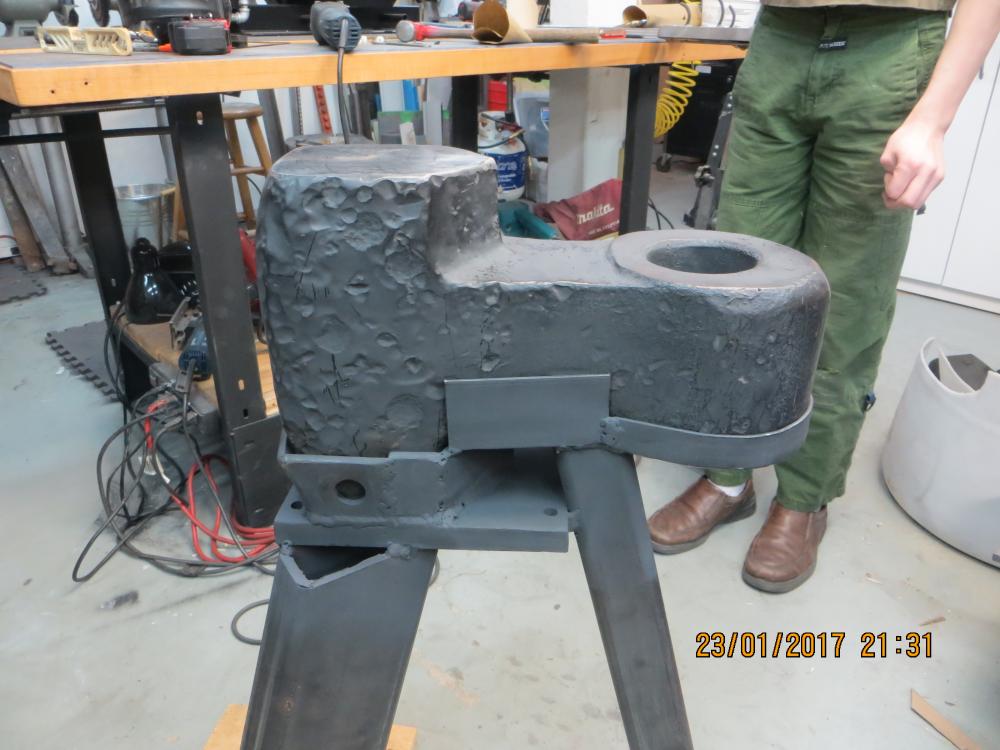
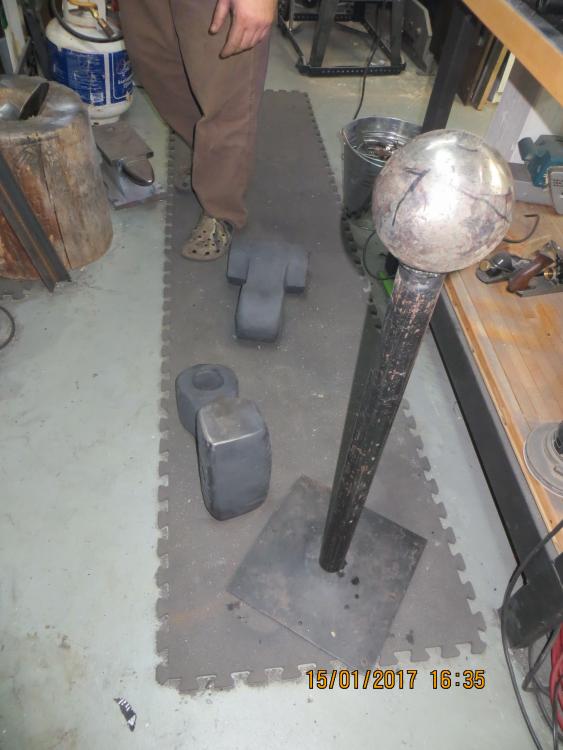
Based on all the great suggestions, I have built a shouldered removable insert that bolts itself and the anvil down to the supporting frame of the stand. This way I keep my options open without modifying the anvil shape. This had the happy result as well, of deadening the piercing ring of the anvil. It was like a fresh sharpened golden spike (with just a hint of lime) being driven into my head with every blow. (Yes I was a bit hung over at the time.) Taking the lazy way out and still waffling a bit on finishing my forge floor, I welded a 5" piece of truck spring to some 1" solid stock to form a hot cutoff tool. I made it long to support the blade directly to the anvil, instead of via the inserts welded shoulder (yep, I am a big chicken). I don't think I would need a 5" wide cutoff, so I shaped just the middle to a thick edge, and left the top corners to be used for shaping surfaces. One is flattened, and the other is rounded. If ever DO need more edge for cutting, the material is easy enough to remove to extend the cutting edge. Here is a quick video of hardy tool.


-
1st-Timer Forge Build Fun ( or 'Hey look, still not blowed up')
Hoenirson replied to Hoenirson's topic in Gas Forges
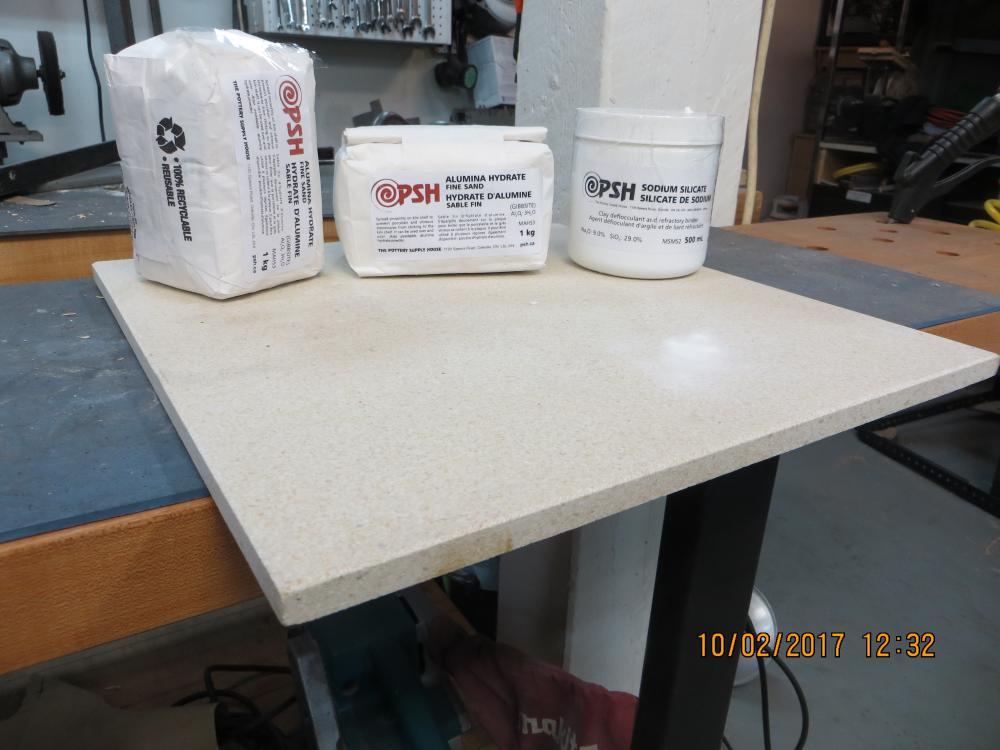
Supplies have arrived! I received a large Alumina 5/8" kiln shelf sufficient to line a goodly portion of the forge floor, seal off the door ends, and have a wee bit left over. It was more economical to order a large shelf and cut down, then to order thinner smaller pieces. Also received was some Alumina Hydrate and some Sodium Silicate. I hope to use this for a couple of things. -1: stick the floor bits in place - 2: mix a refractory that doesn't continue to shed ceramic dust. Alternatively a wash that seals the ceramics down better. With the ITC100 coating applied, the dust is still pretty heavy, which makes me think my zirconia coating is at risk as well. I am thinking, that with these 2 ingredients and perhaps something to minimize shrinking, I can build a better refractory coating than what I have now. Reviewing iforge refractory discussions again, and keeping in mind that I have restricted refractory purchasing options here in Nova Scotia, here is what I am wondering about. For point one I found a reference to something potters call 'wadding' and 'kiln wash'. Wadding = Alumina Hydrate (3 parts) + EDK / Kaolin ( 2 parts) Kaolin = 46% alumina, 54% silica Kiln wash = Kaolin + water The above reference then discusses methods to raise the melting temperature of the wadding I found what I believe is the source graph mentioned: This sure seems like a fine argument to mix up the thickest Alumina Hydrate recipe possible. Melting temperatures do seem high though, based on anecdotal evidence. Thoughts?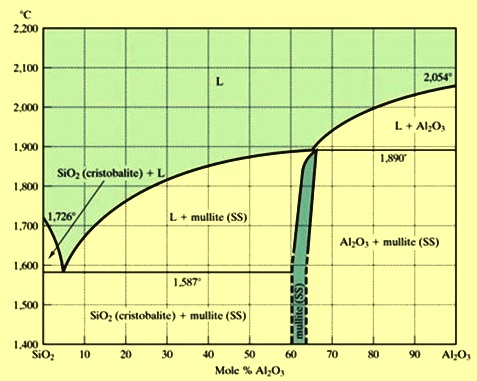
-
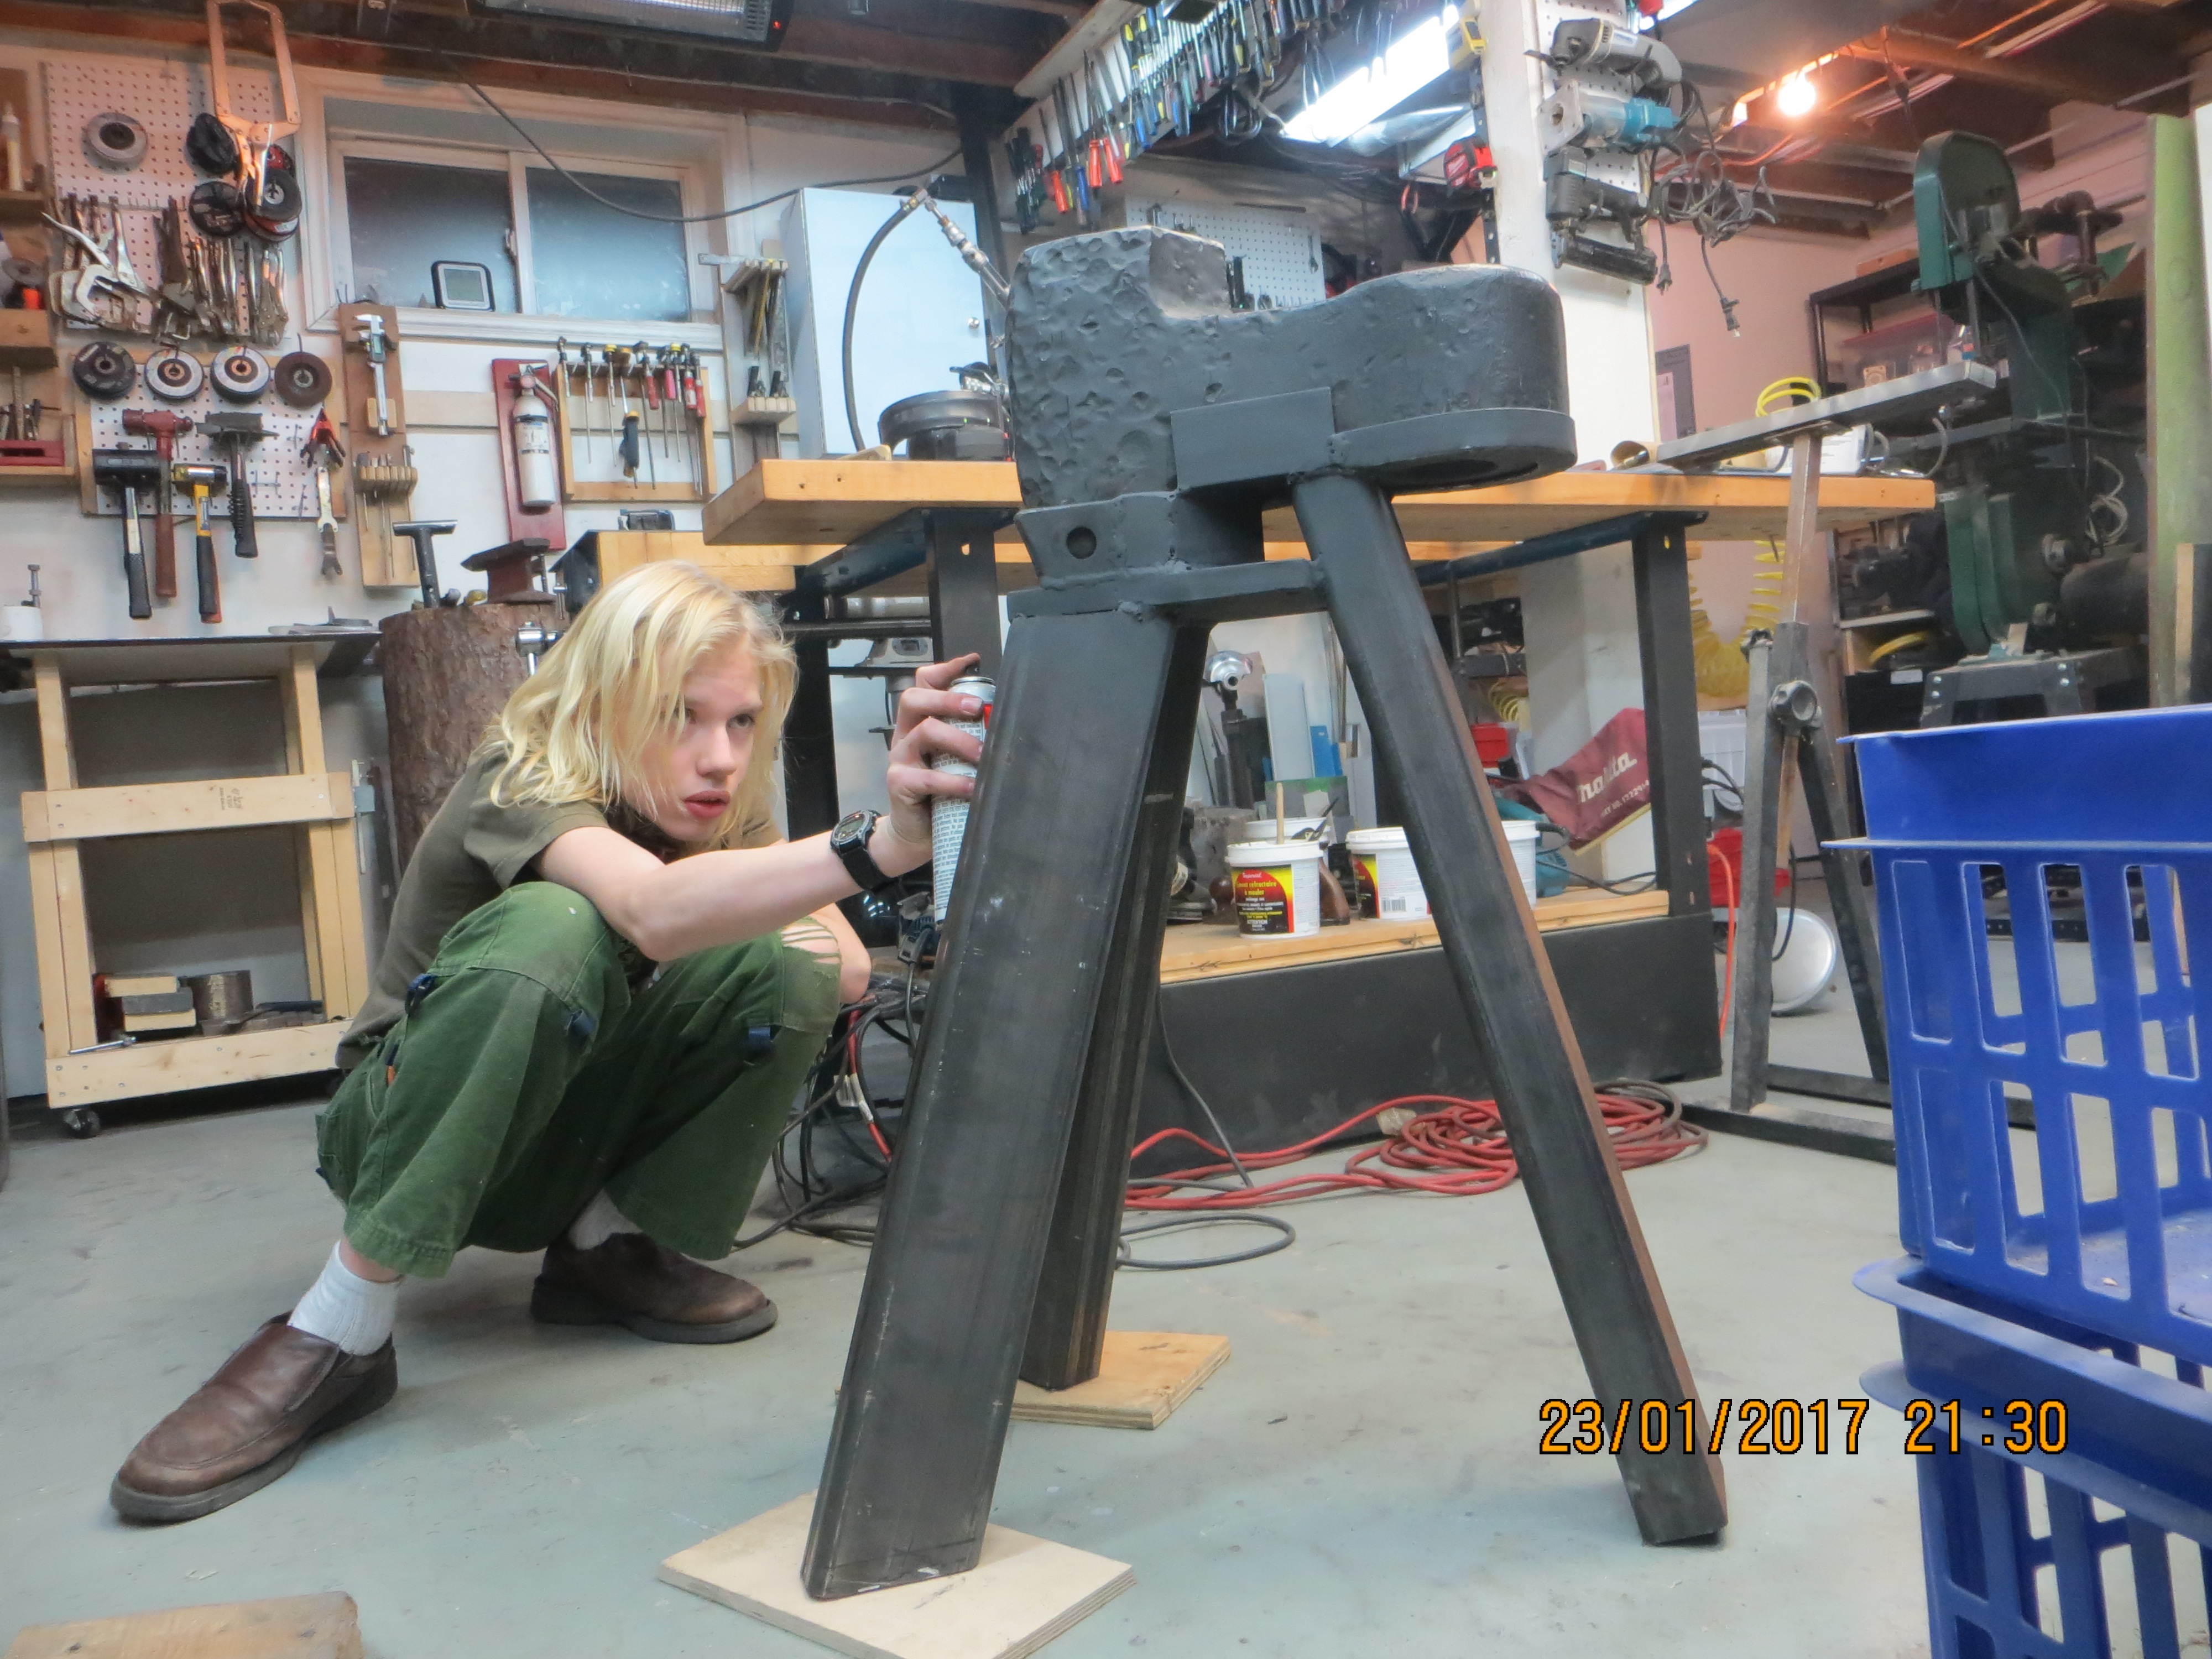
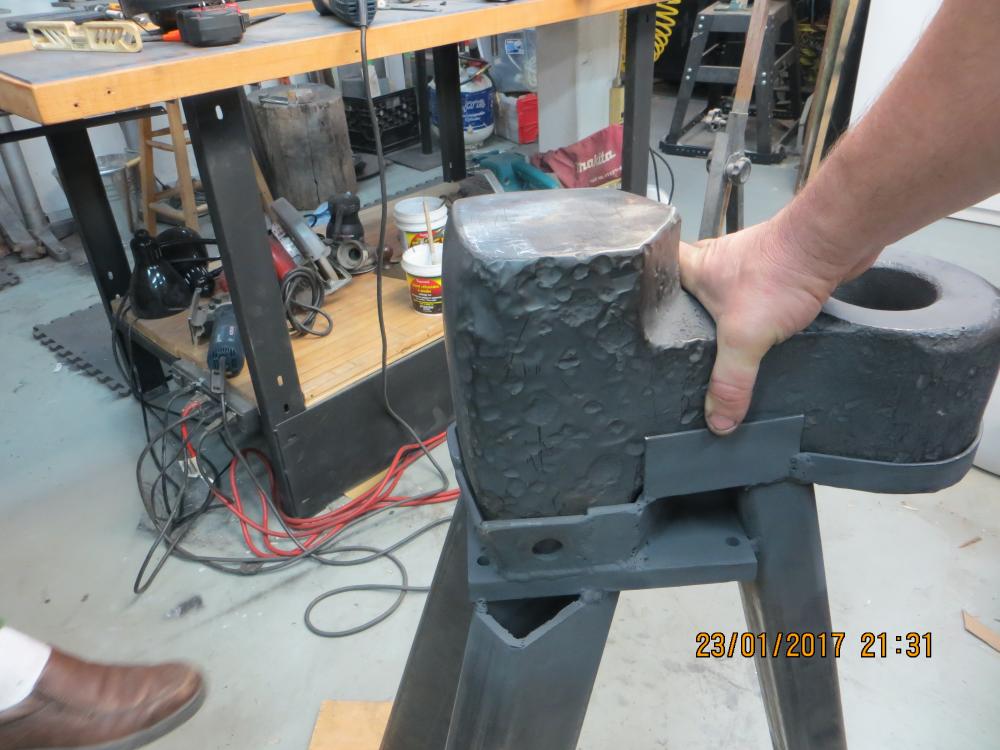
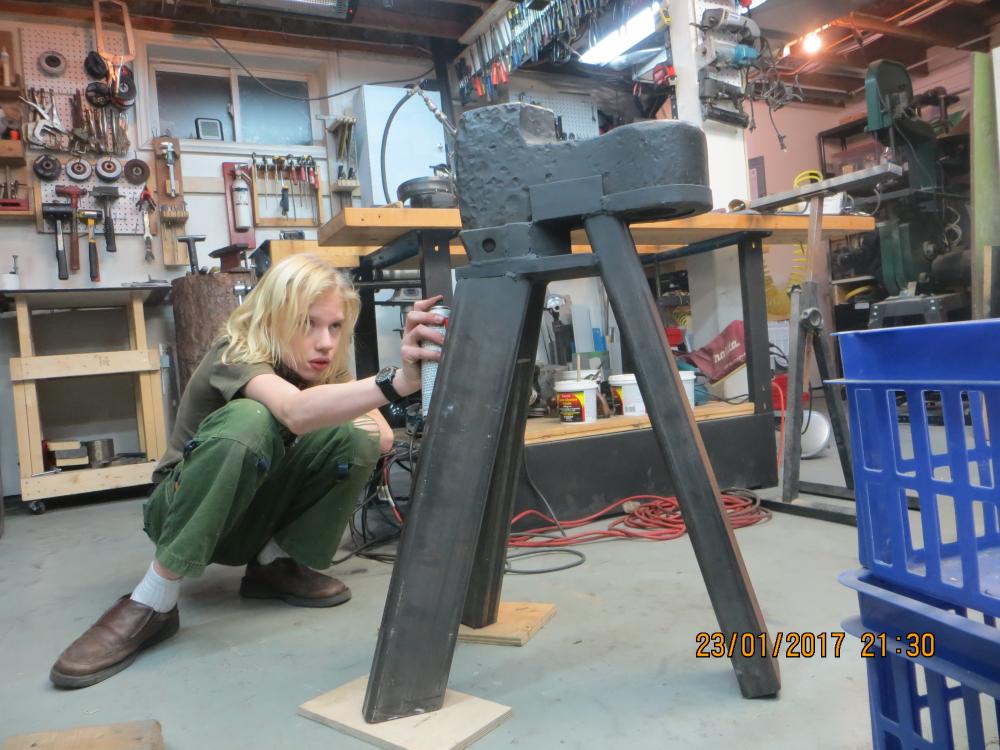
Welds are holding up for a quick fit of the ... anvil. I WILL be adding a triangular leg shelf to tie the legs together. Stand #1: Not a chance of getting my mitt around it, but this gives some perspective. The height of the anvil faces is 9". The ring is pretty loud right now. I will get some rubber under the anvil and see if that helps. The anvil is very fitted to the stand and is held in place by its weight and shape. The bottom face of the anvil sits firmly on the 3/4" plate that the legs are welded to. We needed three of us to get it on the stand while its tipped over. The boy to foot the legs, me holding it up by the ring, the wife pushing it into the fitted collar. Then we tip it up, them footing the legs, me lifting the whole mass of stand and anvil til it stands up. Stand is 66 lbs as is. I know the legs are overkill (2.5" x 4", 3/16" thick) but this is what I had in the shop. I assume more weight equals better, so I will cap the bottoms with some feet and fill the legs with sand. I have lots of cleanup to do on the stand. Also planned (after a shelf) is a way to hang a couple hammers and some tongs. Yay progress! (Last pic showing all of stand and the boy who is helping with the painting.)
-
Ah, yes. Suspicion confirmed. Thank you. Better for my use anyways.
-
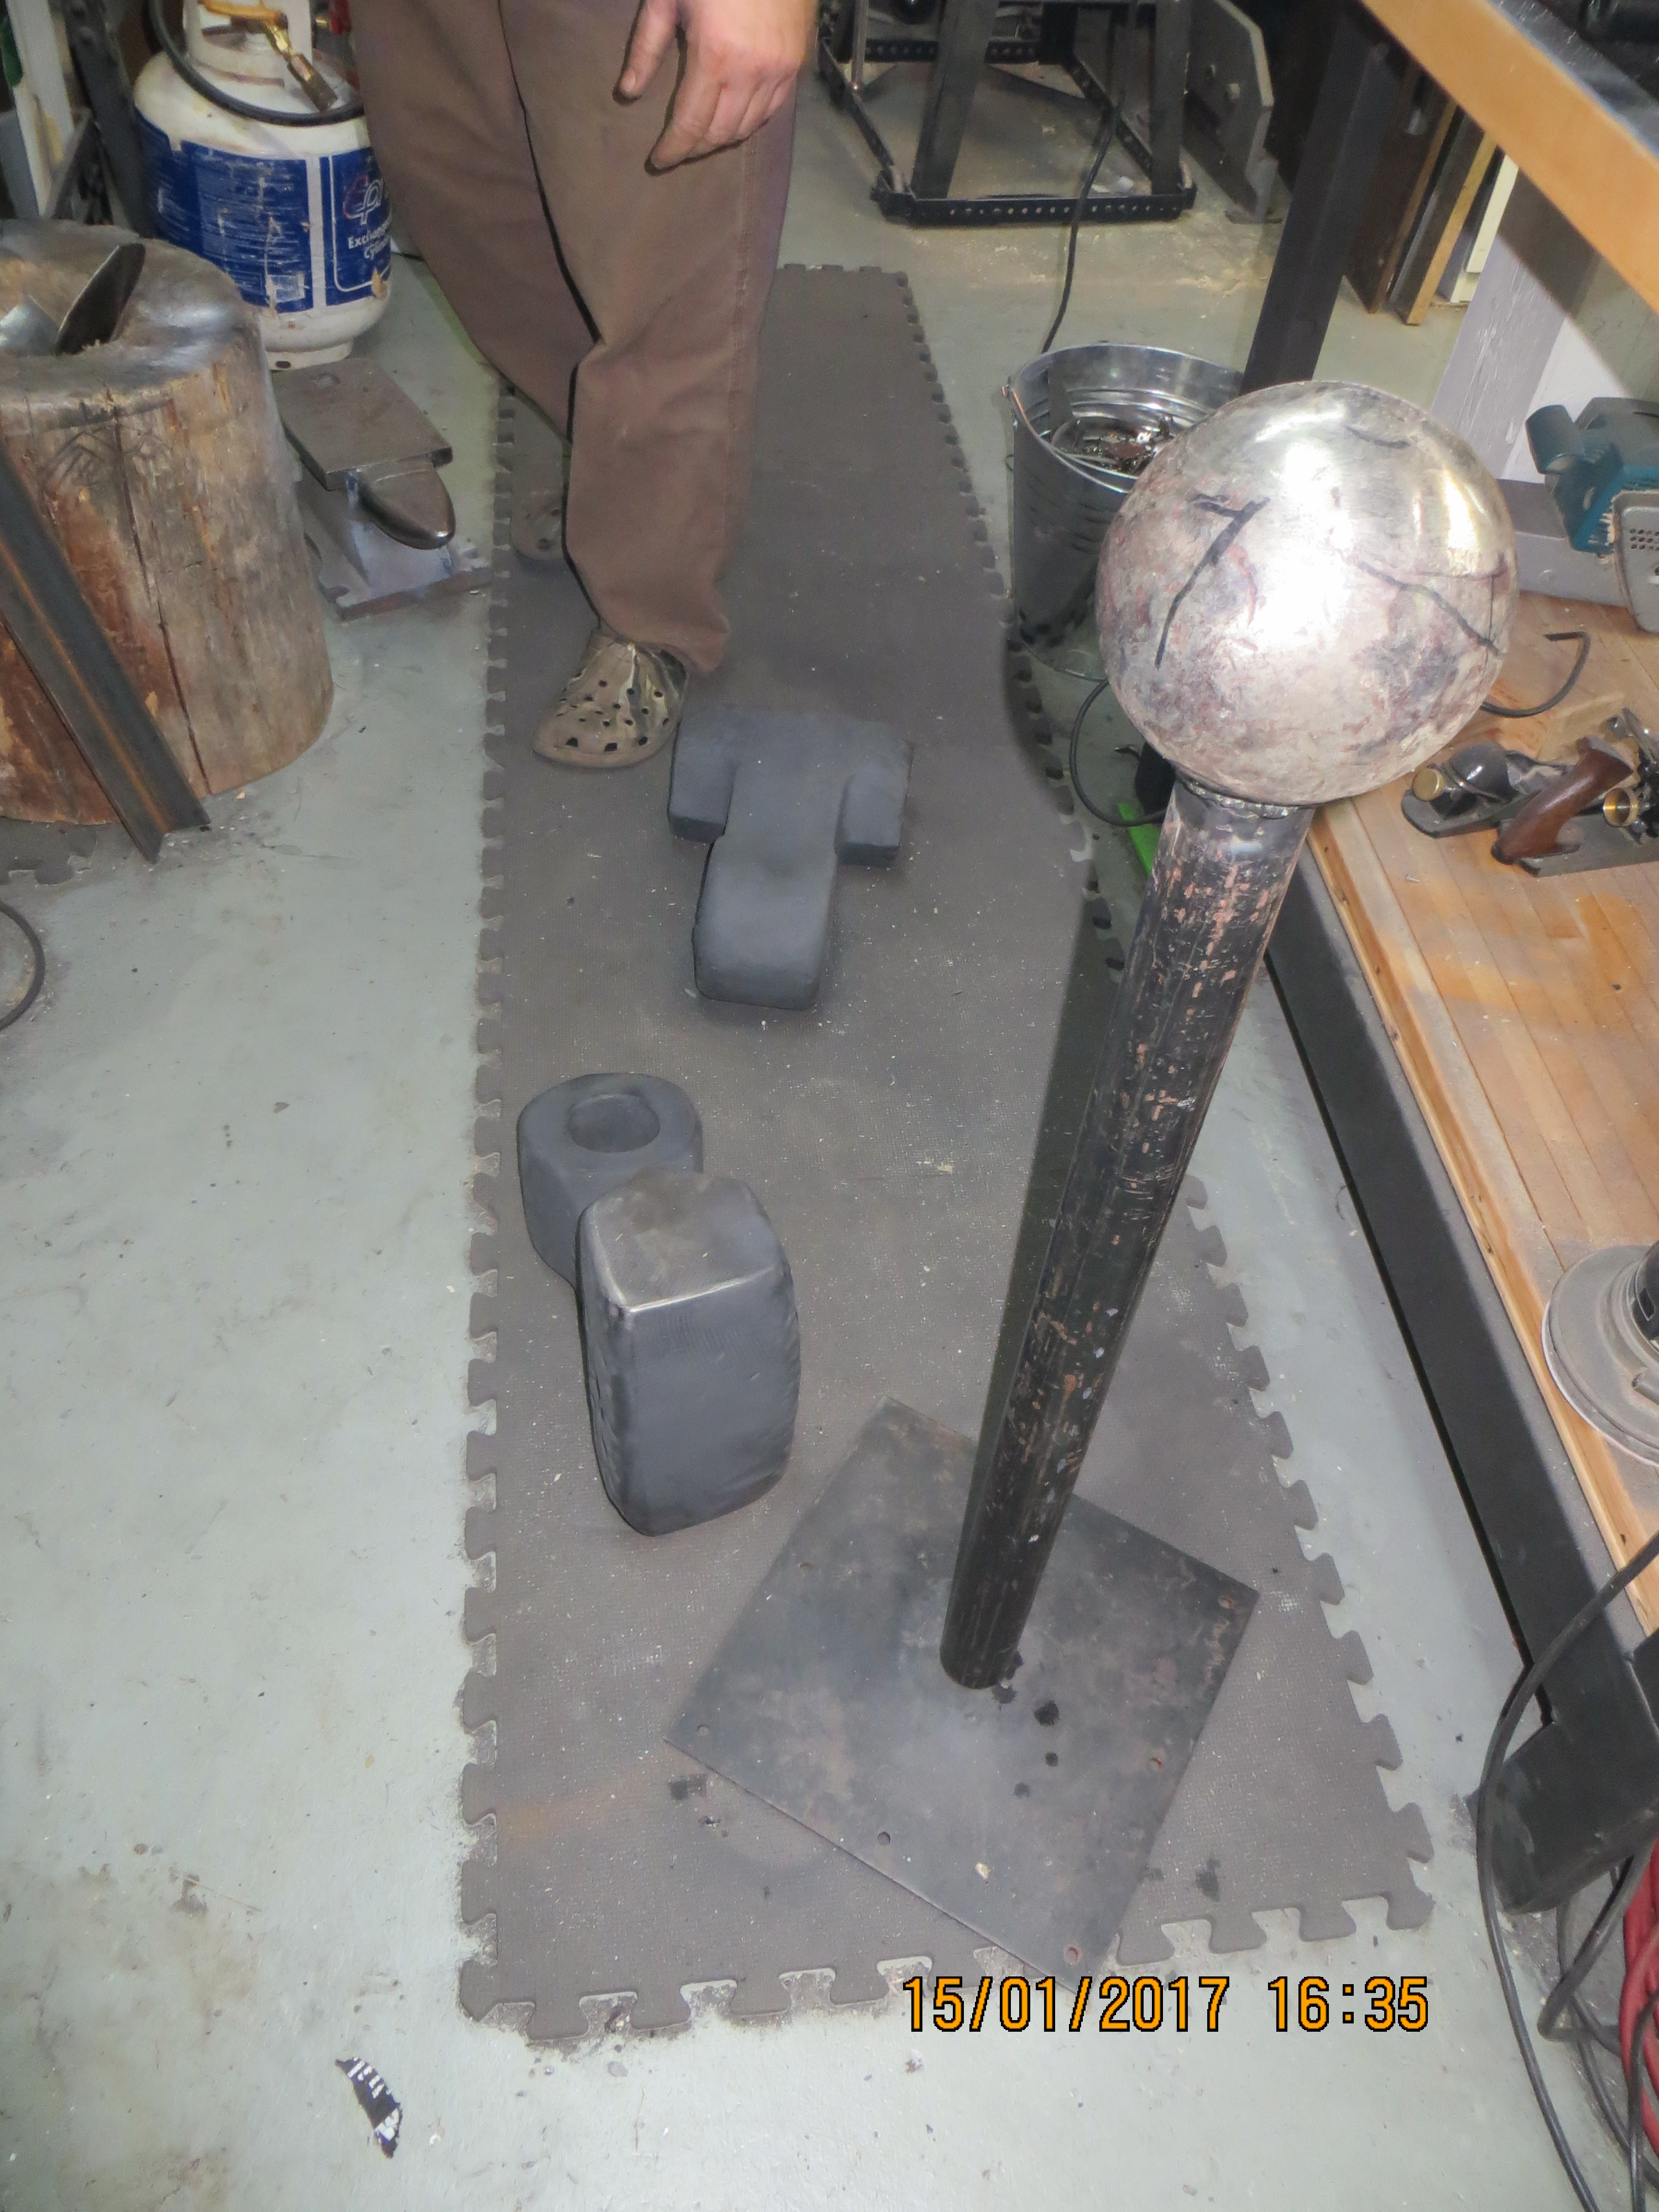
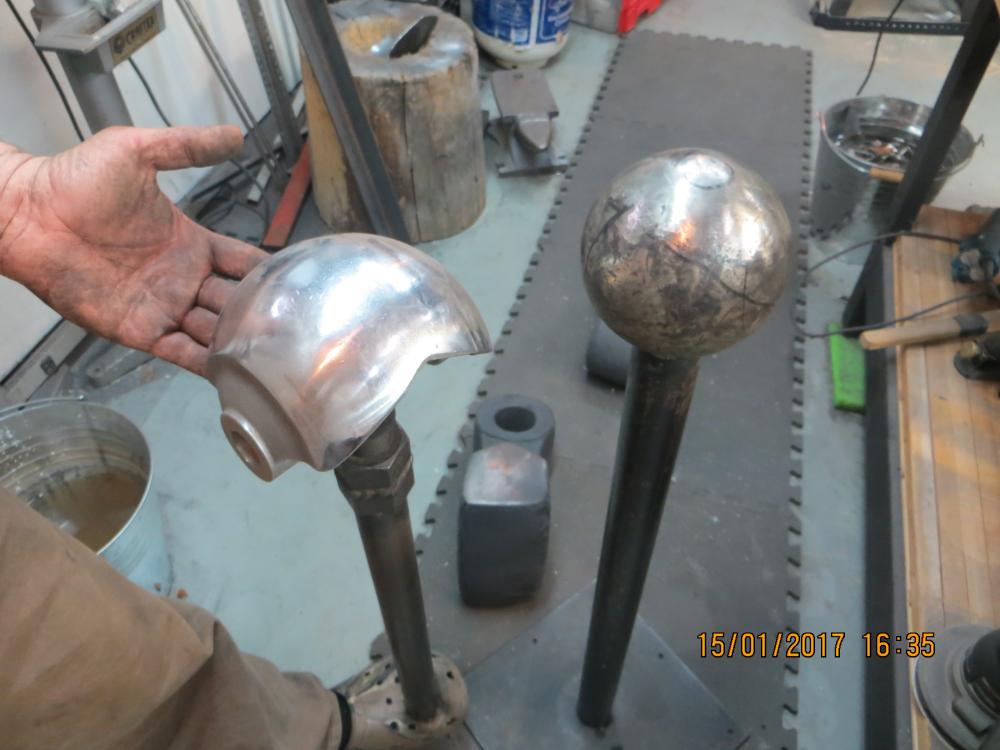
Ball topped stake is what I JUST put together with this steel ball. The ball sits at 34" high on the stand for planishing and forming, and when used as hammer leaves lots of pipe as a handle when used on low dishing stump. This one is a 5" diameter ball. It acts like a mild steel in welding, not like a cast ball at all. Seller claimed it was a very old cannon ball. Total weight was 24lbs which is excellent, as I have a lighter 9" diameter factory knuckle (17lbs) for larger dished pieces like helmet tops. I find the heavier the weight the less work I have to do. Heavy dishing ball does all the work.
-
Sounds like a stand to support both is in order. I have to admit, I did not think of using them as is...makes sense. Thanks folks.
-
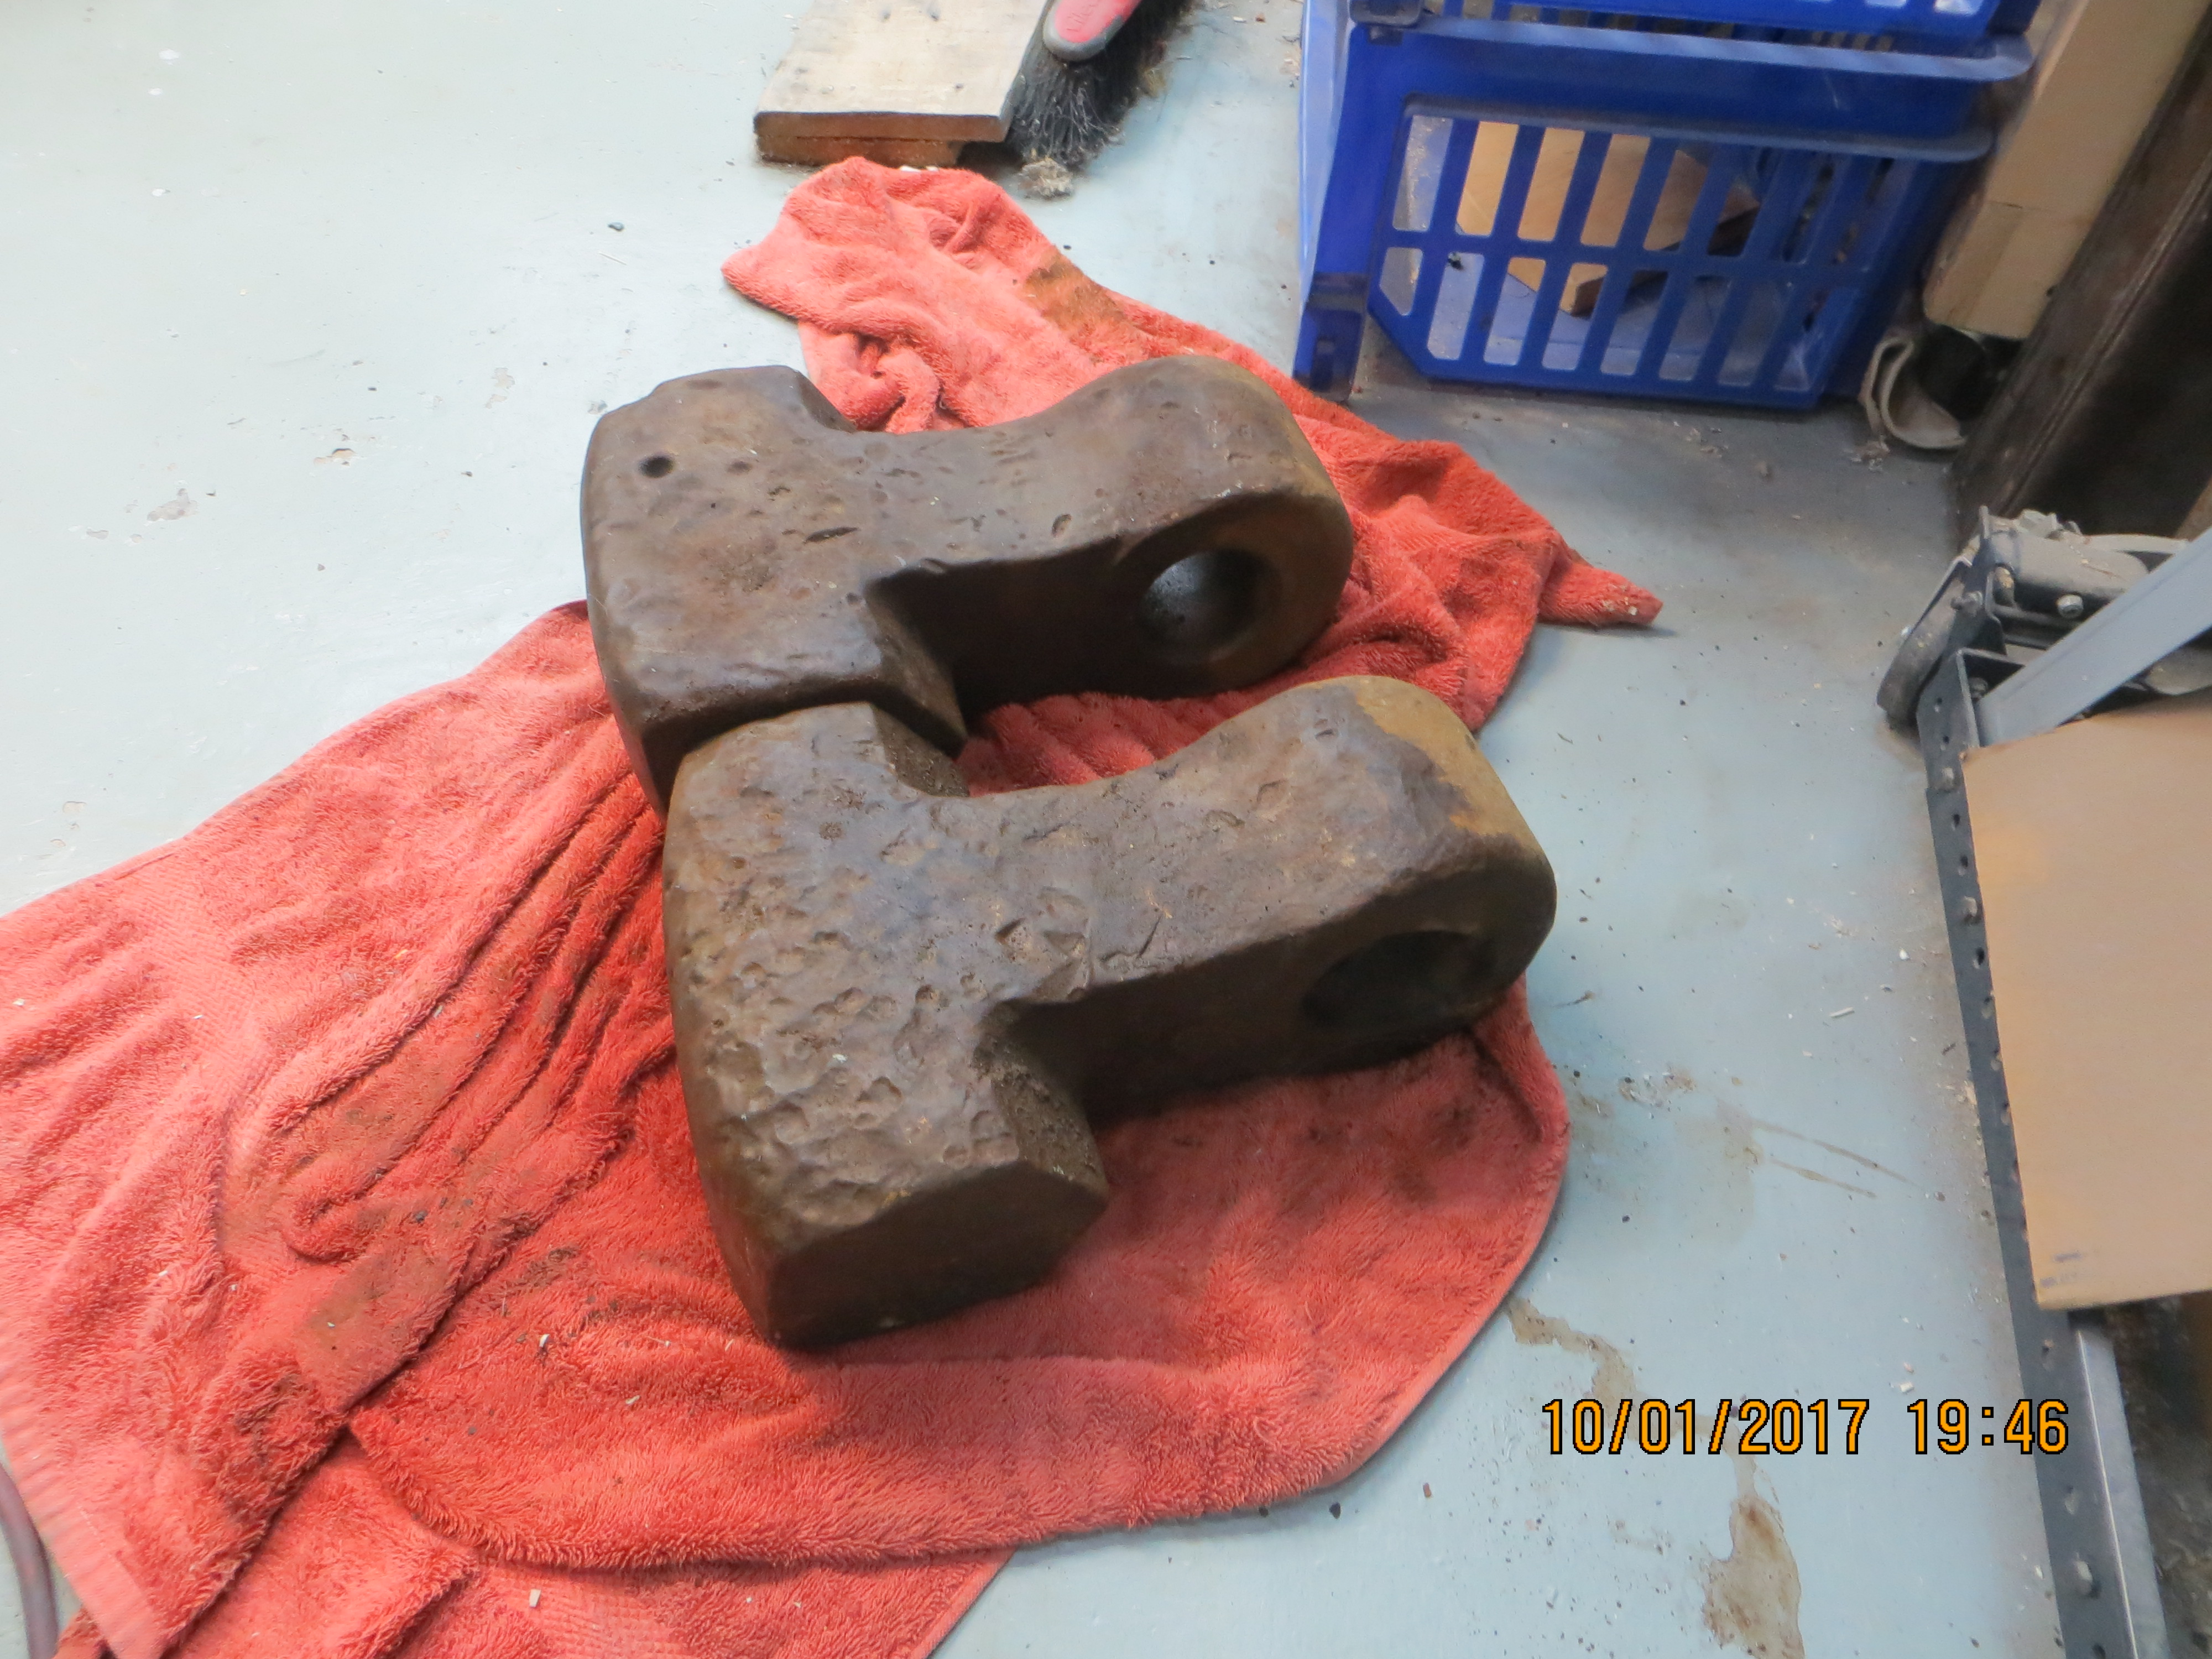
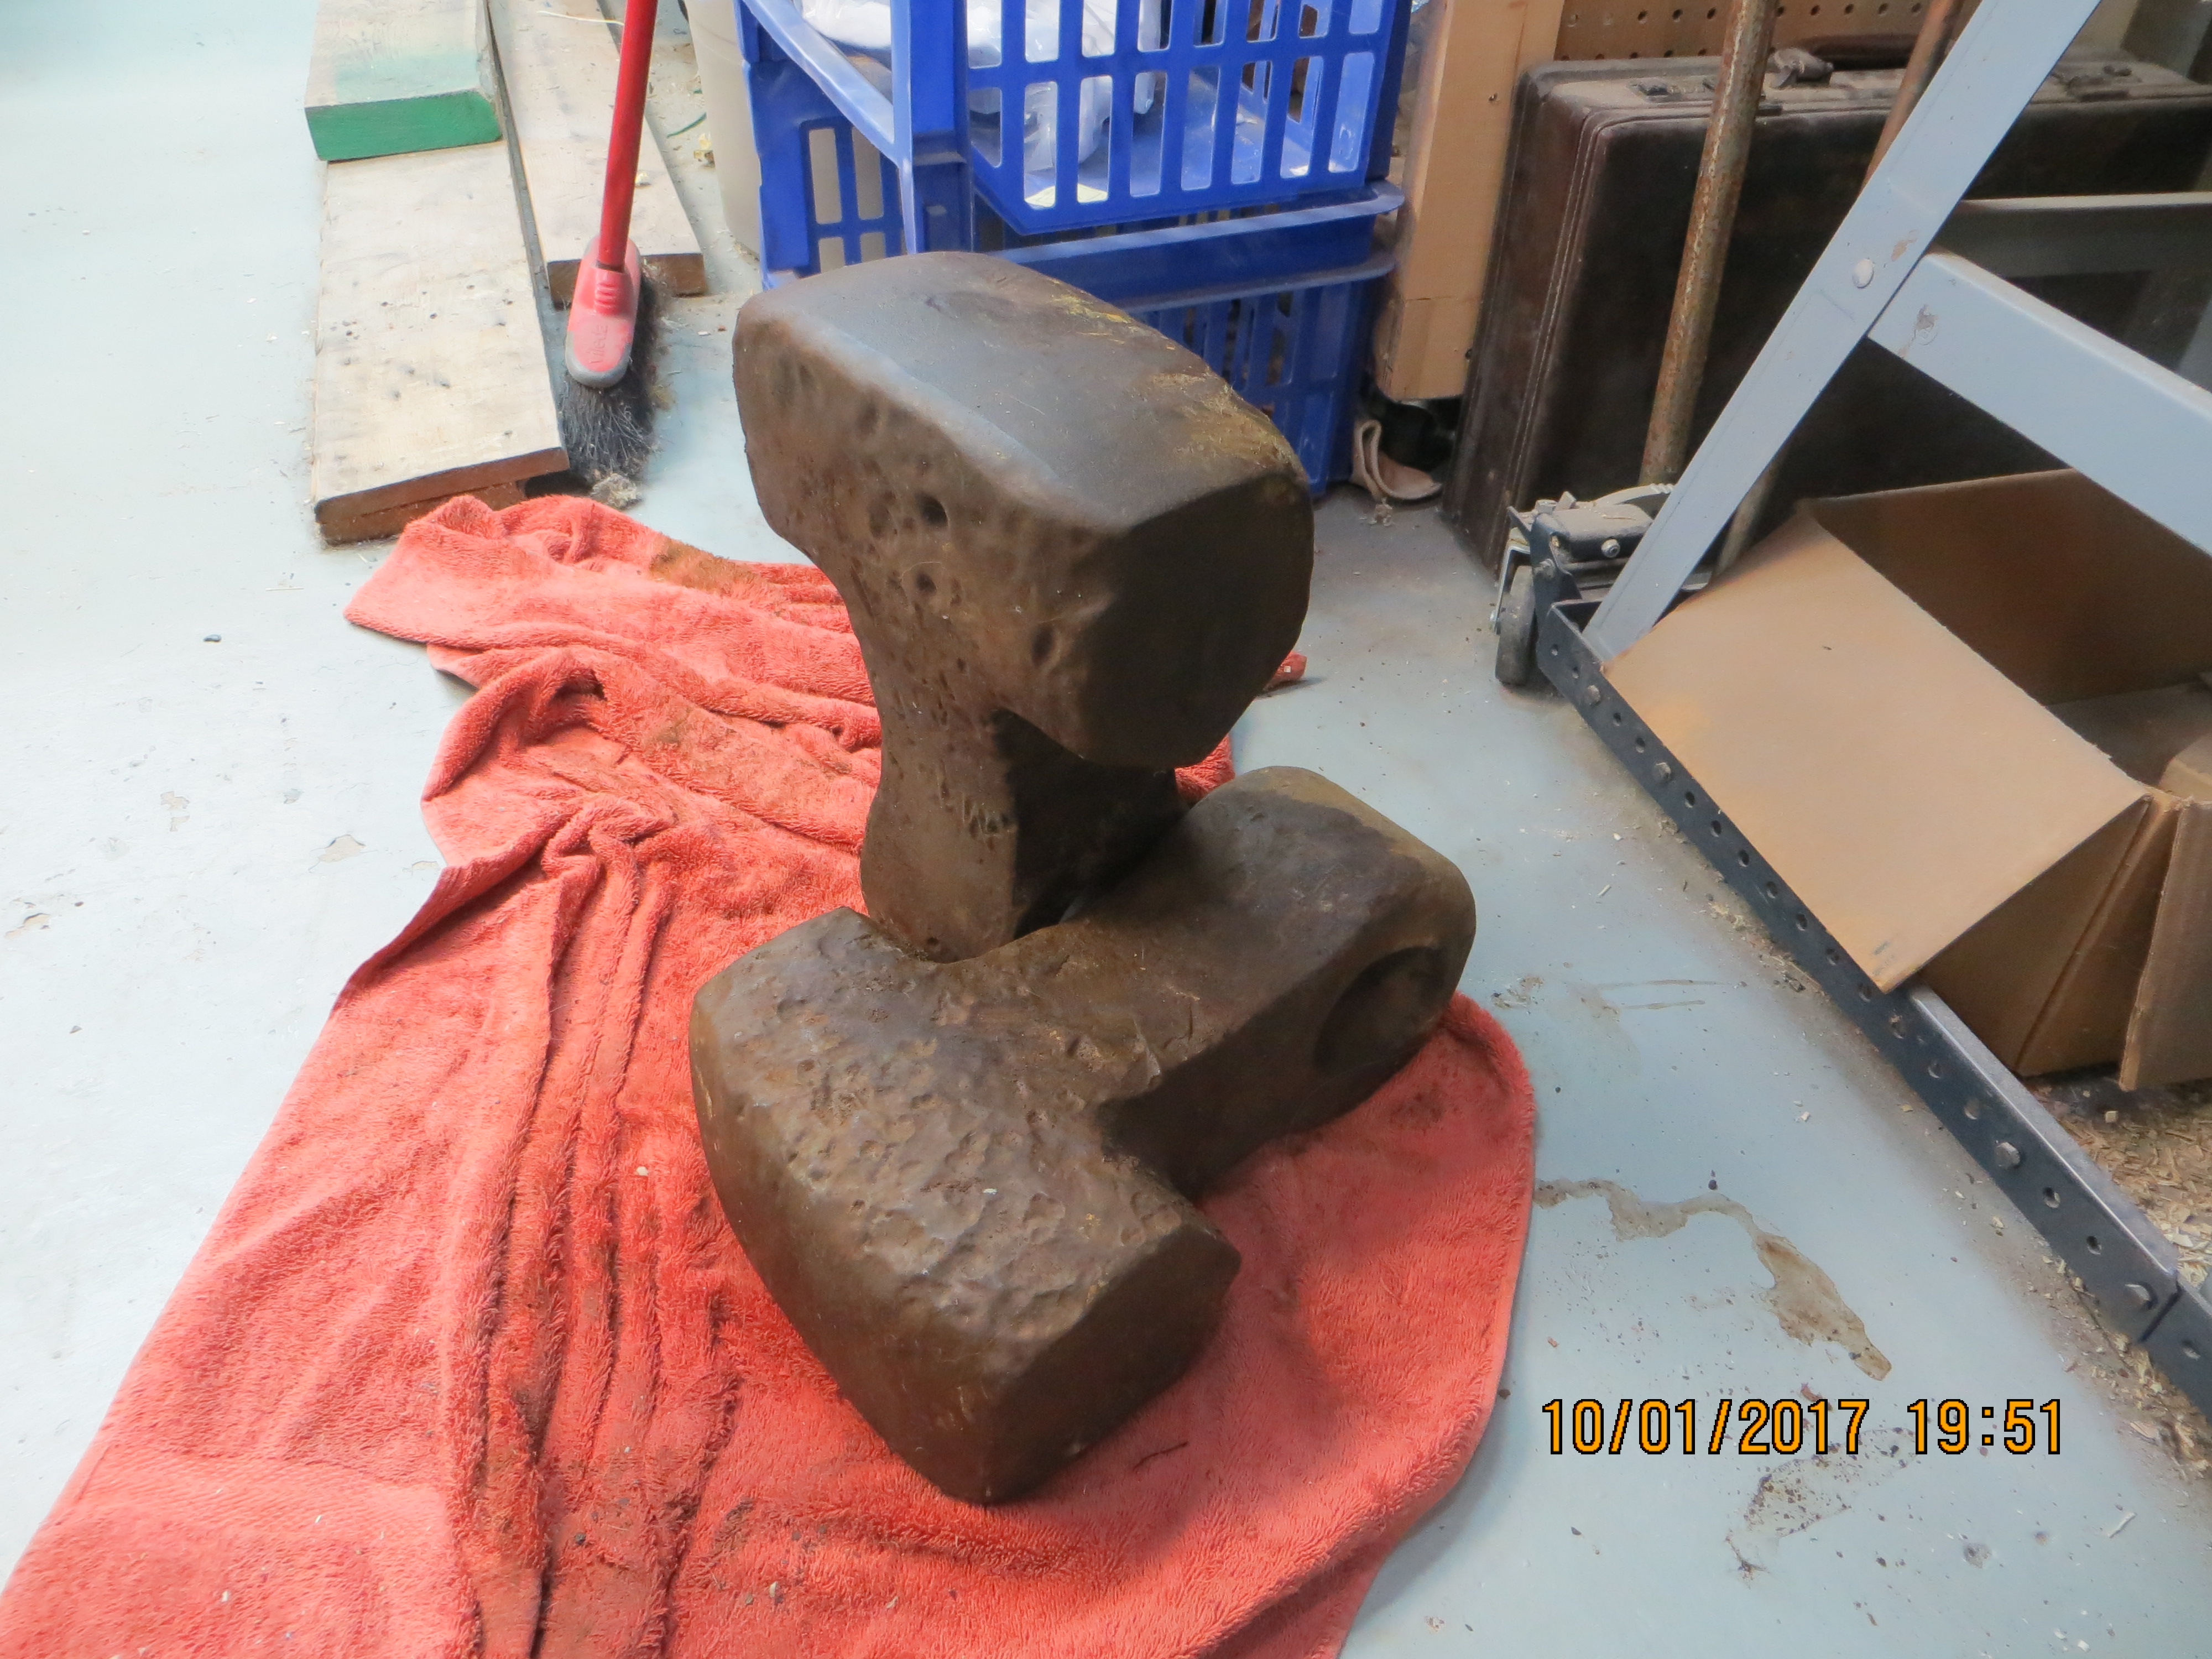
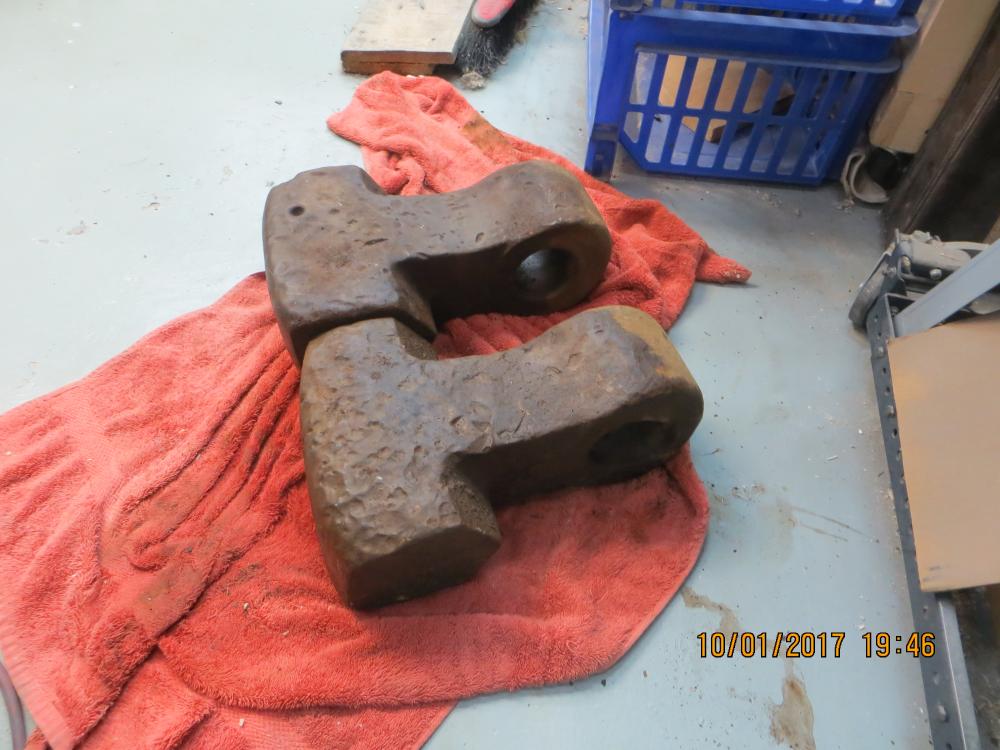
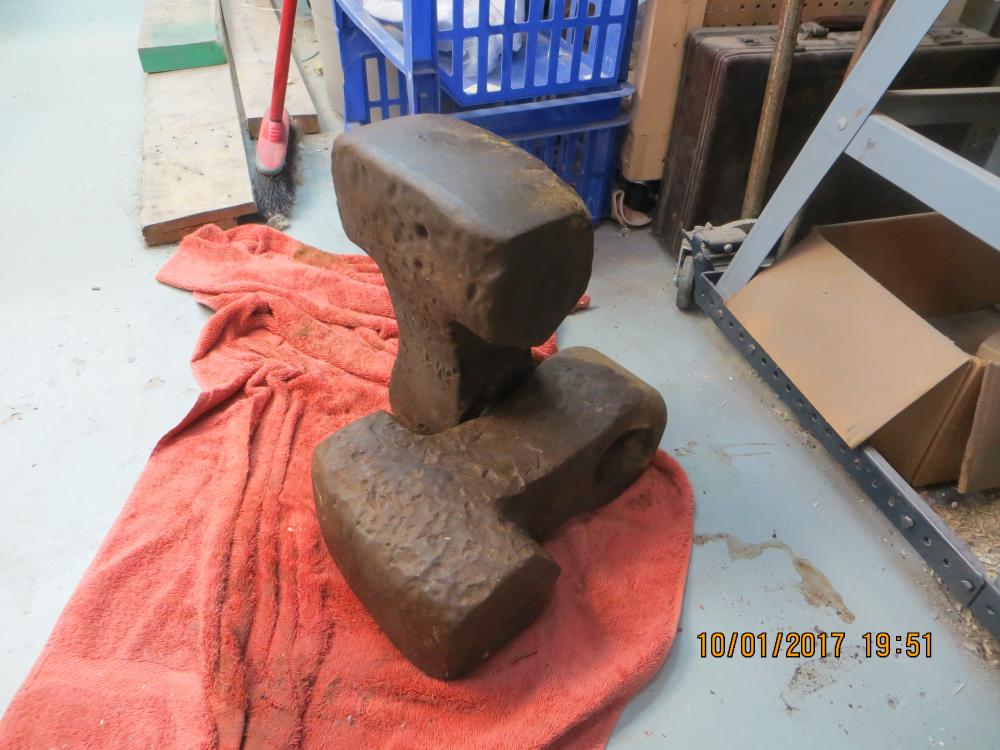
This followed me home from local scrapyard today. These are hammers from an industrial rock crusher. $20 each and weighing about 110 lbs per. I am trying to decide best way to turn one or both into an anvil for myself, a beginner smith. Both On End, welded together: Or I can level the top for a larger work area. I have some heavy metal stock I could weld a stand up with, or I can slab together a stand from 2x10 lumber. I would appreciate any thoughts and suggestions. Thank you.

-
1st-Timer Forge Build Fun ( or 'Hey look, still not blowed up')
Hoenirson replied to Hoenirson's topic in Gas Forges
As I am still waiting for refractory to air dry, I got bored and built this long stock support. -
An armourer who taught me, used to use those and larger ones for dishing. His method was to weld them to posts, sometimes offset for plenishing in odd locations. 2 of them welded near each other allowed a valley for dishing into for heavy fluting, for things like the later period knee fans that protect the sides and tendon of the joint. He would also weld them to hammers for added momentum. That also helped with inside odd spot where a heavy short arc of swing was the only way to dish. I still use a large partial 8" ball welded to a post for plenishing and heavy dishing over wooden stump. So ya....I would use them for forms for doing customized sheet metal work.
-
1st-Timer Forge Build Fun ( or 'Hey look, still not blowed up')
Hoenirson replied to Hoenirson's topic in Gas Forges
Good point. Thankfully I found a propane parts supplier in Halifax, that can provide gas rated stuff. I am also hoping to replace the rubber hose with a stainless one. I have one propane rated one still on the rig for the feed from the tank, and the one that got removed LOOKED the same (doesn't fit any other male connector in my air parts pile) but was not.