OllieTheRed
-
Posts
9 -
Joined
-
Last visited
Recent Profile Visitors
4,648 profile views


-
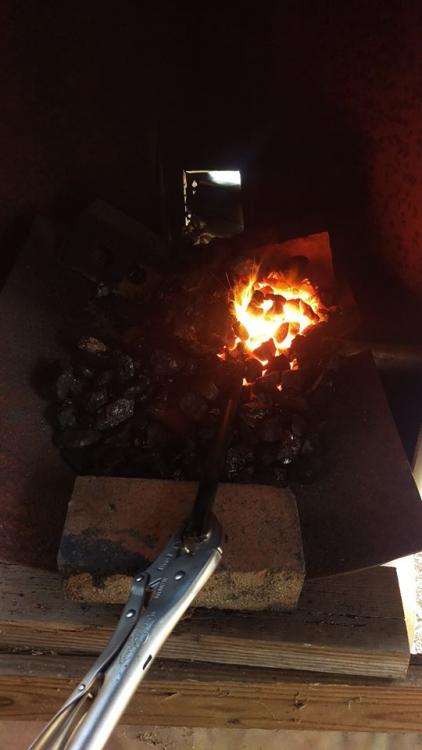
Just to give an idea of what I'm working with now, it's simple and literally the first fire I laid into it I was getting half inch up to a buttery yellow color and was able to draw out and do a decent fire rake, when I was eventually able to get a fire going. It really was quite impressive and I really thought I'd gotten it right straight off the bat. Just to give you an idea, the air inlet is 2" diameter. Unfortunately, ever since then I've begun having issues keeping the coal burning, and starting to think it's due to lack of a firepot to keep the pocket of heat centralized. The fire pictured is one instance where we were just chasing the heat for a solid hour, and I've been banging my head on the wall because I also feel the air coming from the side instead of bottom isn't helping or is just too much. Should also I be breaking my bituminous coal down much smaller, say 1/2" pieces or less? Using nut coal and breaking it down, but usually the majority of it is about 1"-1.5" pieces. Using a hair dryer as the air flow, at even it's lowest setting would you consider that to be too much air flow? Obviously a difficult question as not all dryers are standard speeds... but I'm getting great air flow, just wondering if it's too much... For sure, all criticism is welcome. Fire away, it's a learning process, and thank you.
-

Nut coal
OllieTheRed replied to Small town Smith's topic in Solid Fuels: Coal, Coke, Charcoal, Wood, etc
I bought 10 bags of the anthracite nut coal from tractor supply yesterday as well, $5.99 a bag. Read quite a few different places recommending it so guess we'll see. -
That's why I asked about understanding the cut he's talking about. I didn't know if he was saying keep the air from the side and put a hole out the back to allow the piece to be placed further in or just widen the opening so I could put things in sideways. I will be back out there tomorrow to work on it all day after I attend a funeral, I will just have to think more about exactly what it is I'll be putting into the fire, really, and then modify from there. I appreciate the replies though, gents. Unfortunately I've never done this before so kind of flying blind. Hopefully you'll excuse the noobishness.
-
Apologies if I'm not grasping the cut you're describing, but what do you mean as far as laying long stock side to side, do you mean multiple pieces of metal next to one another in the fire or laying a piece left to right so the entire piece is perpendicular to the front opening and in line with the air flow. If I'm better served running the air flow from the back as opposed to from the sides then I can do that for sure. It's not a problem running the air from the back to allow fuller use of that tray lengthwise, now that I look at it, it does seem a much better layout. I haven't been able to proceed much at all since posting this due to other obligations, but I will be ramping it up in the next week or two and aim to be burning before next weekend.
-
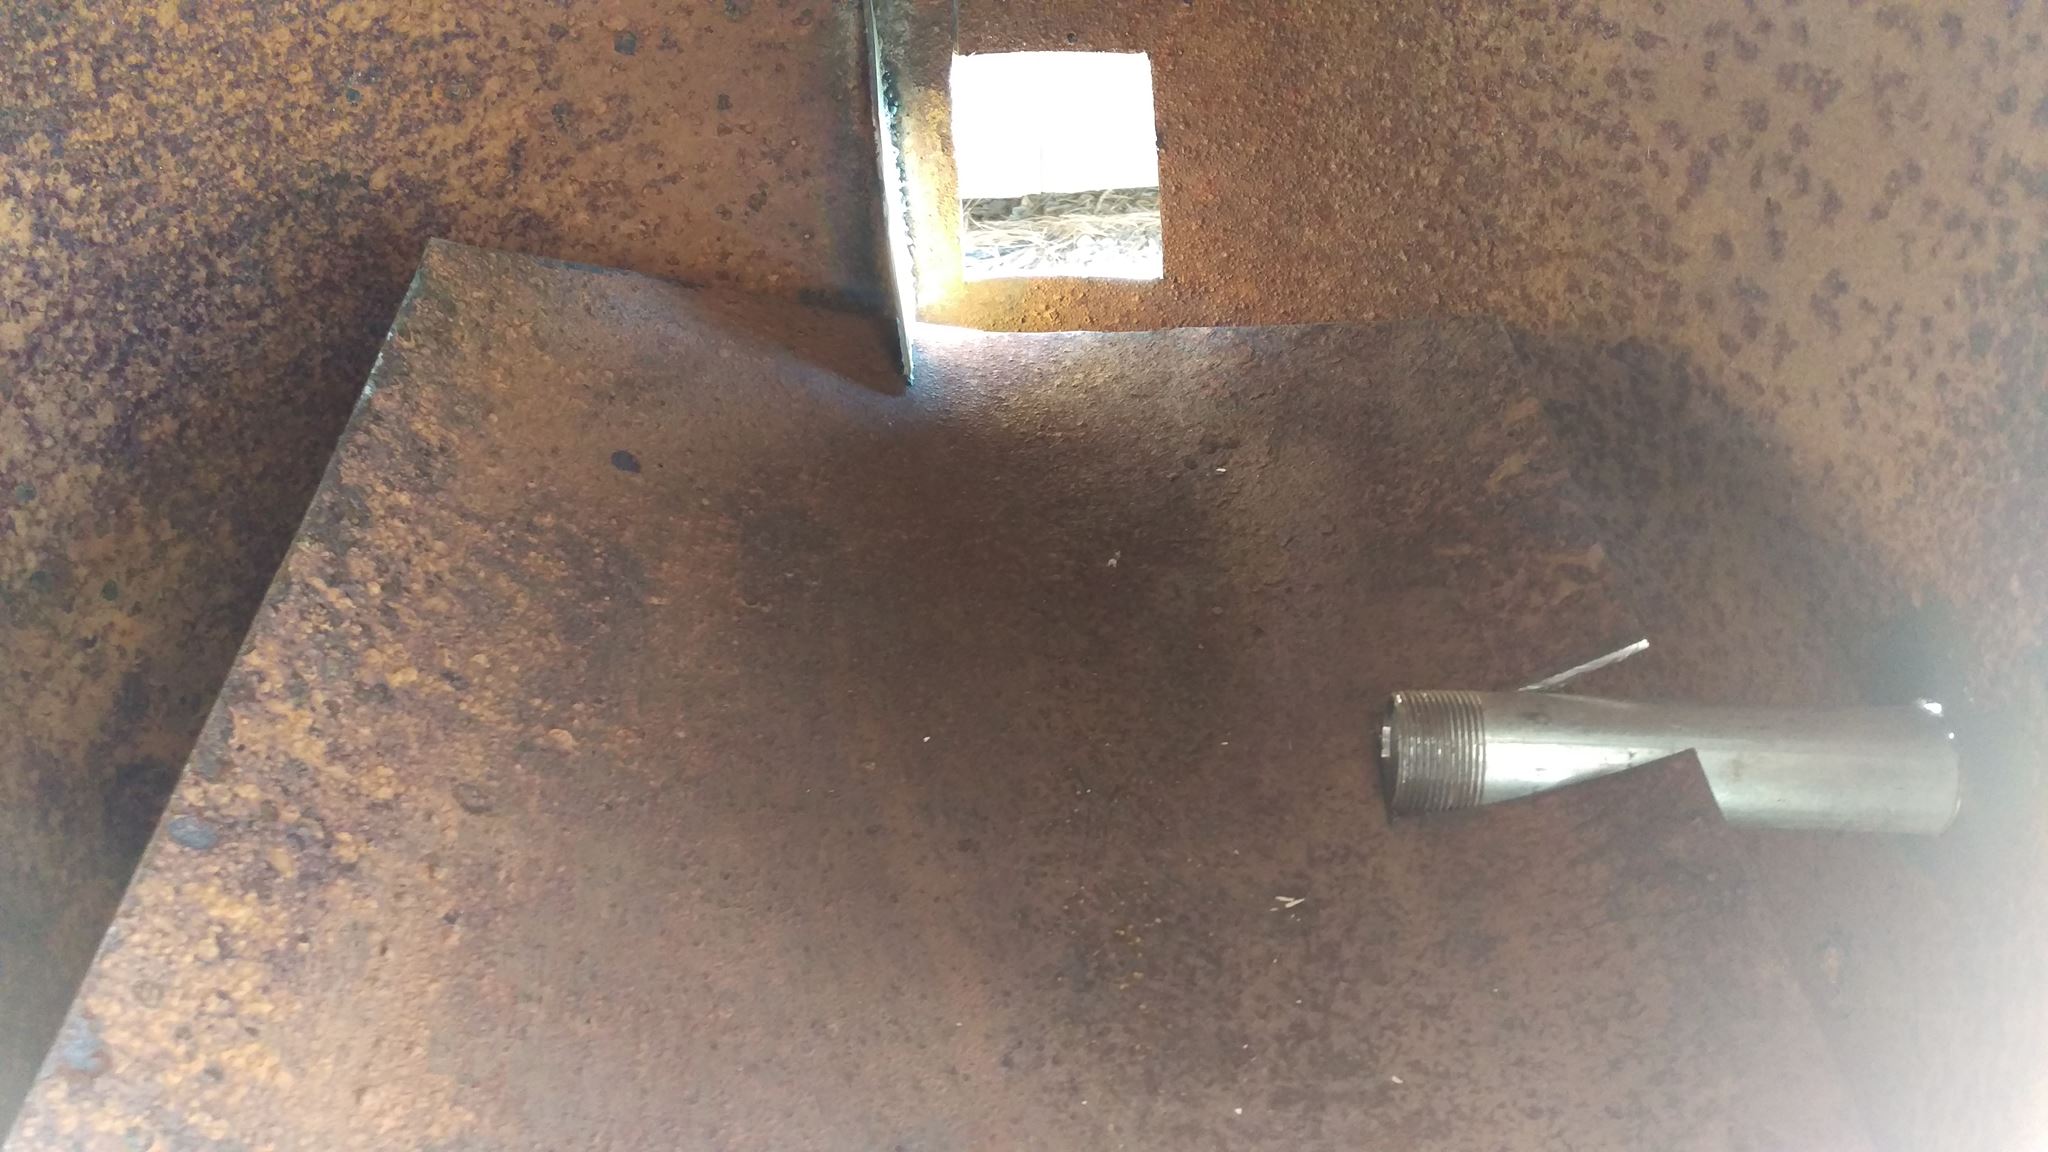
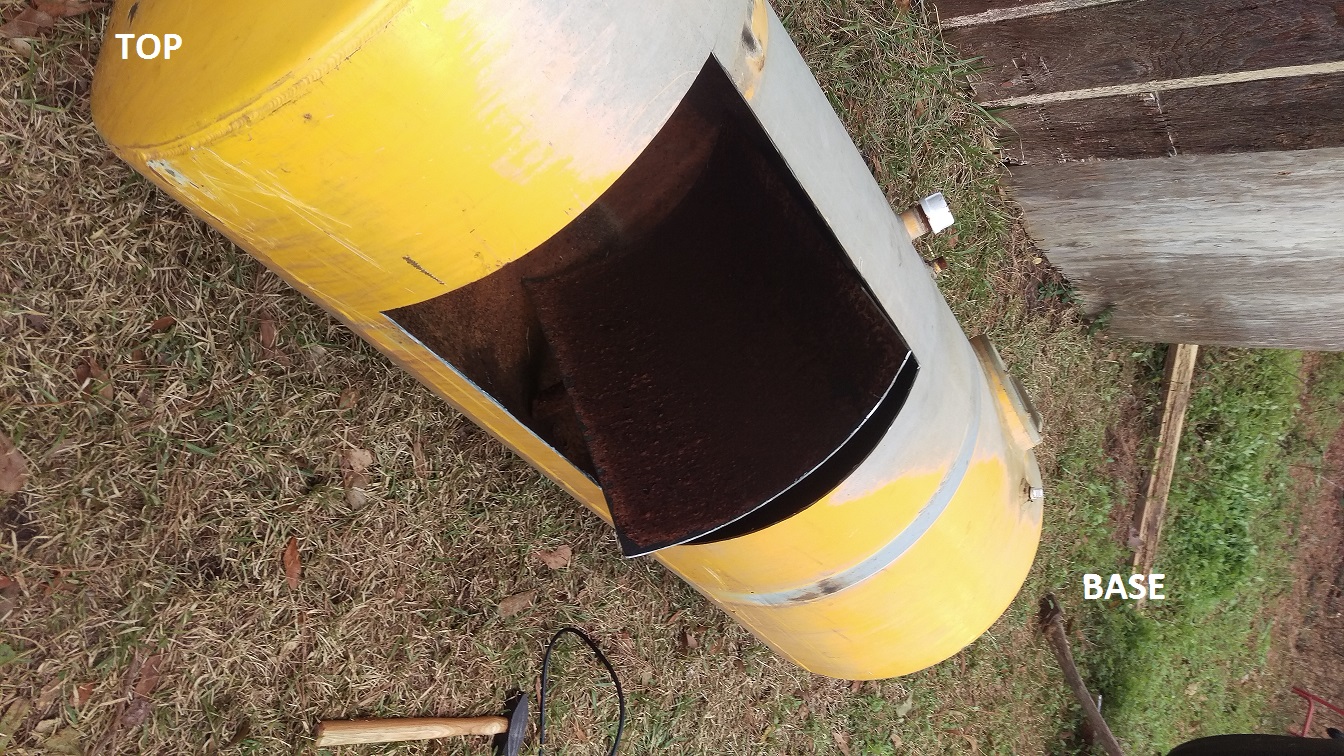
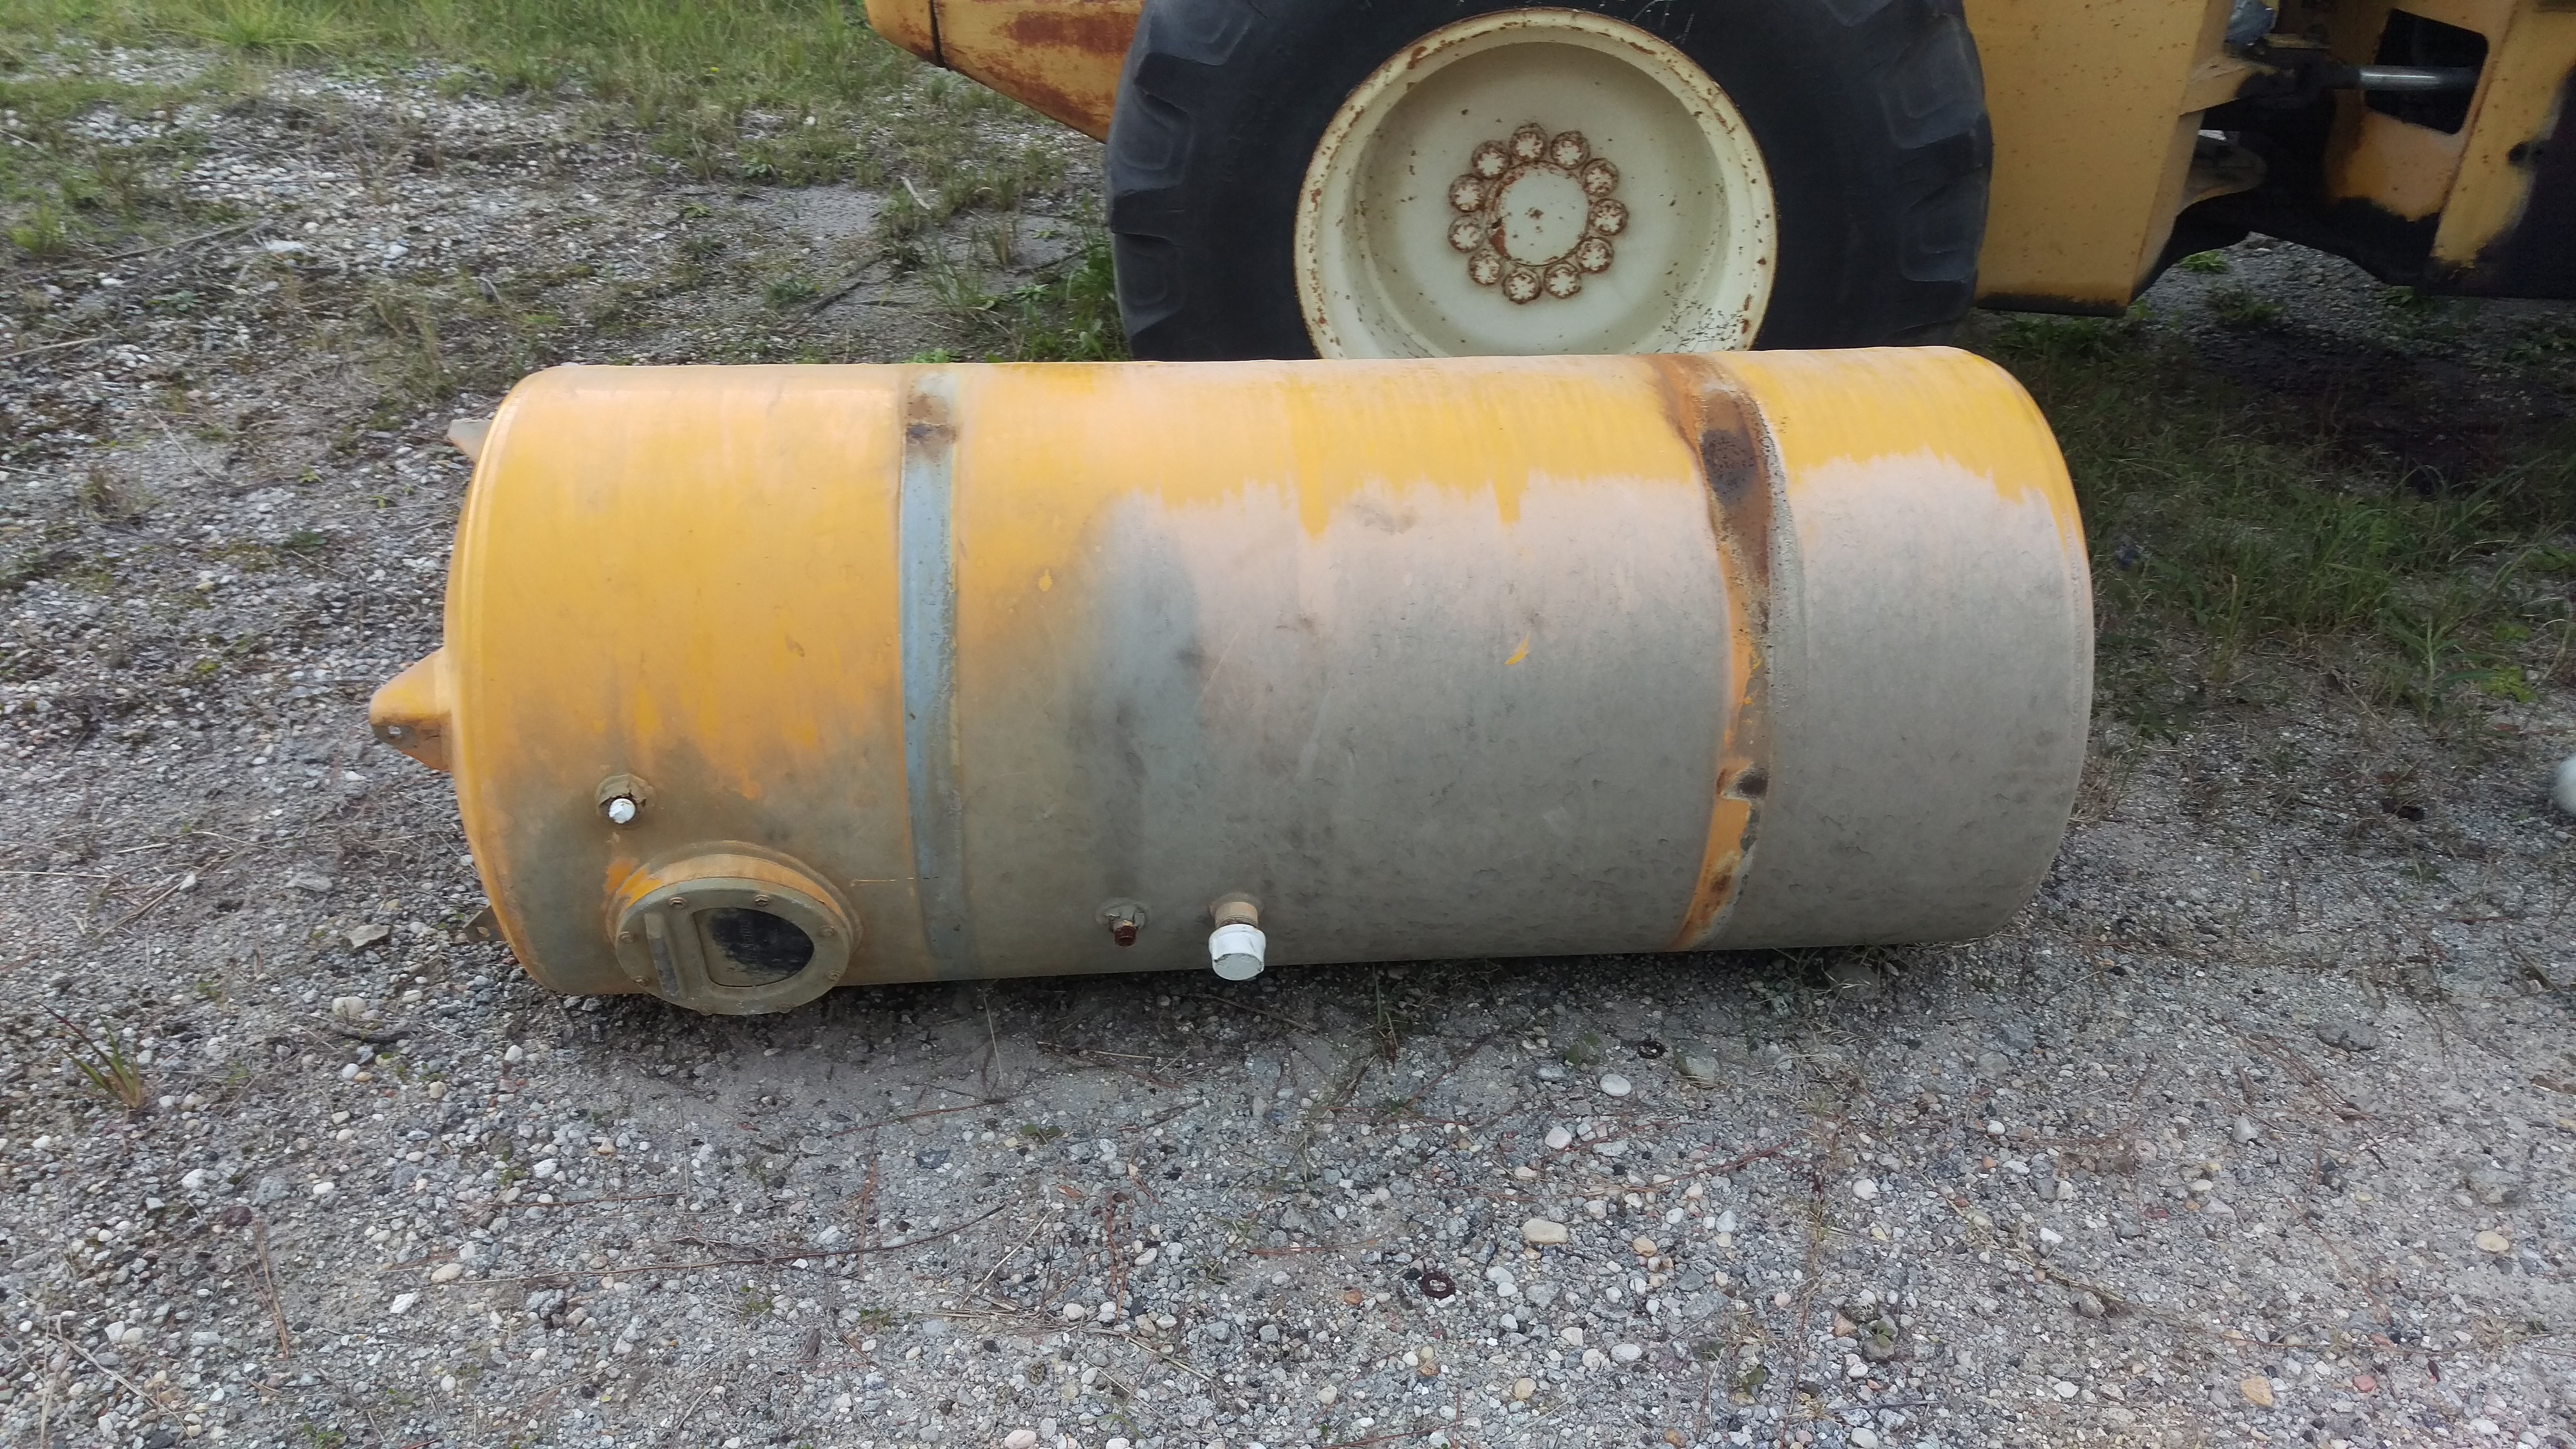
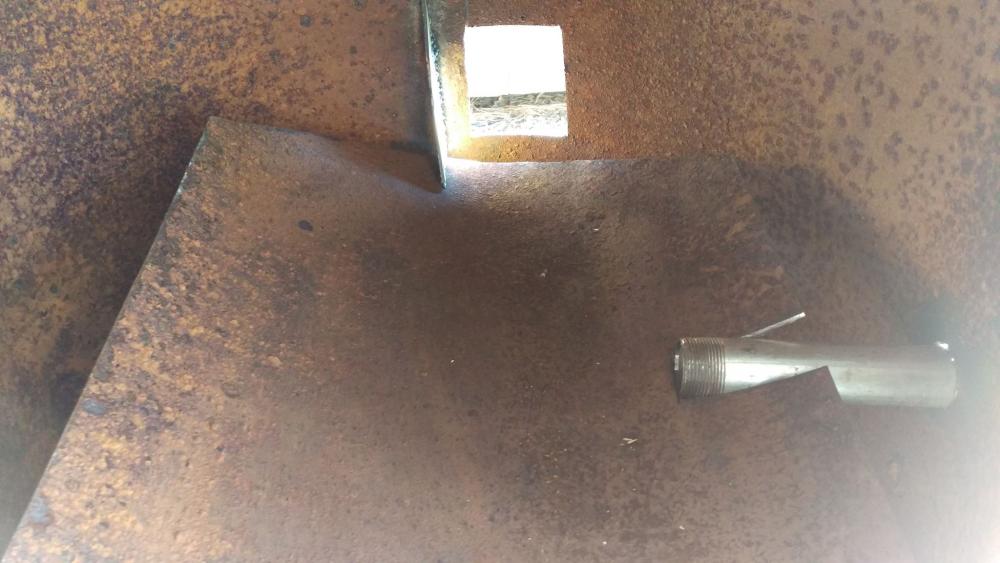
Alright, so I live about 45 minutes away from my cousin's house where the forge will be located and I haven't had much opportunity to go and do any work on the tank I procured for making the forge, until today. I have a plan on what to do but I just wanted some final thoughts before I go any further with the cutting and welding... Apologies on the photo, I'm on a newer laptop and haven't gotten around to installing any decent photo editing software. Just so you have an idea of the work space setup, the forge will be physically outside, hence keeping the opening down to about 2 feet in width and a more pronounced hood. However, the opening will be lined up with a 36" square hole in the wall of a 3 sided shed, basically a tin roofed ATV garage without doors. We (anvil, me, vises, everything else) will be in the shed, but we'll be reaching through the 36" square opening to use the forge. Air flow control and blower will be inside, pipe running from inside. The tank stands a little over 5 feet tall, out of view on the base it has 4 feet. The plan was to bend that cut piece in the picture a bit more so the sides are slightly steeper, cut the rear corners of it to fit the inner radius of the tank and weld it in flush at the rear, weld it for support near the front, then use brick/clay to level with the edges to close in the rear and front making the pot. Tuyere would be in from the right where that white cap is, flue out the top, bob's your uncle. Going solely on the limited description and horrible photo, will the pot/hearth design be ok in your opinion? The diameter of the tank is about 28" at the inside. The steel is 3/16" and I don't mind cutting and welding that piece to make a more permanently shaped pot but it doesn't need to be huge yet as to begin with we'll only be doing smaller things such as knives, tongs, hatchets, etc... maaaaaybe a machete or two but that's a few months down the line. I apologize for the novel, I get a bit long winded... also the tank was used as a water tank on the back of a concrete mixer, that's what the white/gray is on the side. Please, if you have any advice or criticism, feel free and thank you.

-
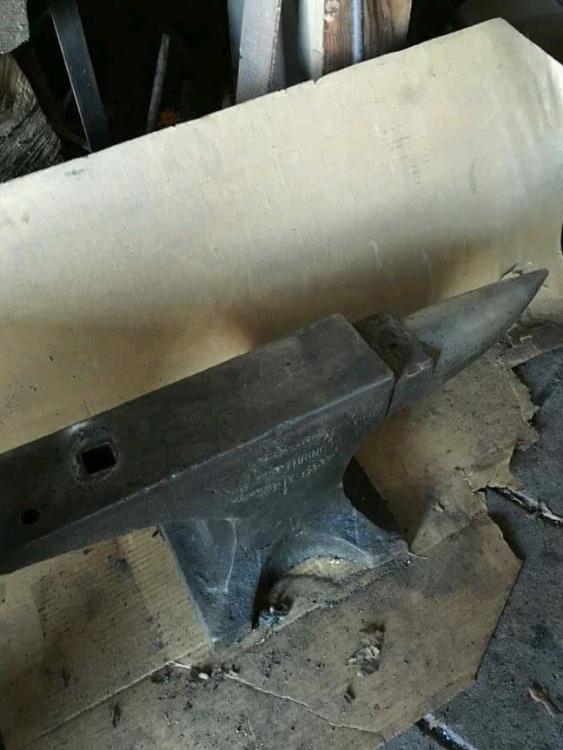
It's fantastic, hammer springs right off the face all around nicely, don't have a ball bearing to gauge it but it's fine and exactly what I expected from one in such good condition. Can't wait to put it to good use
-
Been reading reading reading and to be honest, a lot of what I have read here has changed my mind about what I expected to do right off the bat, and how. Like most, stars in the eyes and all that, I had plans to throw together this great gas forge and go to town on making the best knives (or whatever) anybody had ever seen. Have definitely now decided to start from the ground up and build a solid fuel forge though, as well as make a retort and learn how to make my own fuel. Will be frustrating, but I have tons of time and people to help, so learning properly is more important to me. I am lucky enough to have figured out at a relatively young age that enjoying what you do with your time and profession is just as, or more, rewarding as the money you make in said profession so here I am, taking the steps to a better reward. Hopefully. Already decided on a 2lb crosspein and once I get the forge sorted the first project is a set of tongs... easy enough, eh??? Friend has sorted me with a pair of 150 gallon water tanks from cement mixers to cut up for the forge construction, as well as a 50 and 30 gallon drum for the retort construction, all for free. Will definitely need to think of the best way to make something out of a pair of these, they have legs so can be stood up and are very stable. Both right at 5 feet high and 2 feet across at the widest... I see a lot of cutting and welding in my future. Just hope they aren't galv... Haven't had a chance to look them over yet. Thanks for the reply and words by the way, much appreciated. I have already read a ton of your posts for info, I am sure we will talk again.

-
New to the life. Just scored my first anvil, 158# Hay Budden, this past weekend. Haven't even built the forge or gotten my first hammer yet. Soon.
-
Howdy everybody, name is Oliver. Not much to say, really. Just back from living in England the last 5 years or so, nothing to do until I start courses for welding in the fall, so I bought a Budden and am gradually getting the bits together to start this journey. Always wanted to get into it, never actually took the time or had the cash. Things are different now, and I am making the time. Here's hoping I'm in it for a long while, and I look forward to picking your brains.