AKHunter
-
Posts
22 -
Joined
-
Last visited
-
I have been asked by a friend to make a holster for a scoped Ruger Redhawk in .44 mag. I'd like to use a retention spring (instead of the more common strap) to secure the gun. I'm loosely copying the idea off of another holster that uses a spring. The spring will be 1/8-3/16" thick, 5/16-3/8" wide, and 17" long and bent in a "U" shape with each leg just over 8" each. It will be enclosed in leather and grip the gun with the upper third of the sides of the "U". Do you all have any recommendation for the steel type and HT regimen? I've never tackled a lightweight spring that will see so many cycles over its life, so I'm a little unsure of how best to approach it, and I don't want it to fail him on a hunt. Have any of you tried something like this before? Any suggestions are appreciated! AKHunter
-
Tomahawk Design and Materials
AKHunter replied to AKHunter's topic in Axes, Hatchets, Hawks, Choppers, etc
I just looked up the Gransfors axe. It seems like I good idea, but I think I'll pass on the flay pole. Please don't take offense, I'm not disregarding your idea due to preconceived ideas- at least I don't think I am. Here is why I think a spike is a better option for me. I haven't caped, or assisted in caping since my highschool days when I worked for a guide, and I don't plan on doing it ever again. I hunt to put meat on the table, not for sport, and my hunting is in a National Park with subsistence privileges. I know, unthinkable anywhere else, but when you live in a 4 million+ acre park, that's the only place to hunt. Since I'm in the park, I end up with fairly stringent rules on when, where, and how I travel to the hunt. Basically its boat, foot, and if we get enough snow, snowmachine. Weight is at a premium because it usually involves a lot of hiking, and packing it out with 800 pounds of meat. The early winter hunt usually involves early ice that is usually barely thick enough to walk on, but too thick to push a boat through. To make a long story short, I've got a good hunting knife for skinning, and I don't want to use the bit of the hawk for safety checking ice before I step onto it. Falling through the ice in Alaska can be a death sentence for someone who swims well- and I swim like the average rock. I'm intrigued by your suggestion of 4140. How does it hold an edge? If I go that route, do I follow industry standard HT, or a different regimen for a good edge? I'd love to try 80crv2 or Cru-forge V, but I can't stomach the price for a block of that size. Any recommendations for total head weight on this project? I'm thinking around 1.5 pounds finished. -
I'd like to try making a specialized tomahawk- you could say design driven by intended use. Hunting and trapping are the intended use, so that means that the bit needs to handle chopping brush, limbs, and cutting firewood- traditionally the role of an axe or hatchet. But I'd like it to be able to handle bone, meat, and hide- hunting tasks like splitting a moose's ribcage, chopping through the spine, and chopping off his hock at the knee. Additionally, I plan to put a 2.5-3" spike on the back for checking ice thickness and to ease the job of landing a canoe or kayak on springtime shelf ice. I'm not sure if I can design that much versatility into a hawk without serious compromises, but I'd like to try. My planned construction method is a slit and drifted eye, and a welded bit. For the body of the hawk, I have the options of garage door rod (1" diameter, likely mild steel or the horrid A36-everything-melted-together steel), 1" grade 8 bolt (my research suggests some mystery medium carbon steel), or Honda 4-wheeler axle (3/4" diameter of some sort of very tough rust resistant- but not stainless- metal). I really don't like the idea of forging it out of the wheeler axle- forging the stuff is like petting a porcupine- slow and painful, but I imagine that it would be very tough if I managed to pull it off. The bit would be a piece of 1084 scrap left over from my knife stock or a piece of leaf spring (possibly 5160). The handle will be from seasoned birch, alder, or possibly oak- if I have a piece big enough left. How large should the eye be- 1.5x.75" ovaled? What temp should I temper it at? If I use the grade 8 bolt, should I attempt to harden the spike at all? Or should I scrap the whole idea and buy a block of steel to forge it from? Any and all suggestions would be appreciated, I've never tried to make an axe, hatchet, or tomahawk before.
-
I have started removing my wedding ring at the forge, not because I'm worried about it getting caught or crushed, but because I'm a lefty. Because I swing my hammer with my left hand, I end up with some seriously deep bruising on my middle finger from the ring. Any other leftys deal with that, or am I just an oddball? It wouldn't be the first time if I am.
-
Guided Helve Design Questions
AKHunter replied to AKHunter's topic in Power Hammers, Treadle Hammers, Olivers
Ok, that's quite a bit more than I had anticipated. Thanks for the info! I've collected most of the needed parts, and will be starting the build in a couple of weeks. -
Guided Helve Design Questions
AKHunter replied to AKHunter's topic in Power Hammers, Treadle Hammers, Olivers
Since my motor is a 3,500 RPM, faster speeds will be easier to design. 300+ BPM seems incredibly fast, I guess this just reinforces the need for good guards. Any recommendation for the depth of stroke? I'm thinking 4-5", does that sound about right? -
Can I get a few more details on the recommended silver solder? After a quick search for silver solder, I find silver bearing plumbers solder, silver and silver bearing electrical solder (both flux core and un-fluxed) and 3 grades of jeweler's silver solder- available in wire, flake, and pre-fluxed syringe. What do I want for this application? If I should be using a un-fluxed type, what kind of flux should I get? Also, will slightly under sizing my hole in the cup and driving it on with a hollow punch give me the fit I want, or will that be too tight?
-
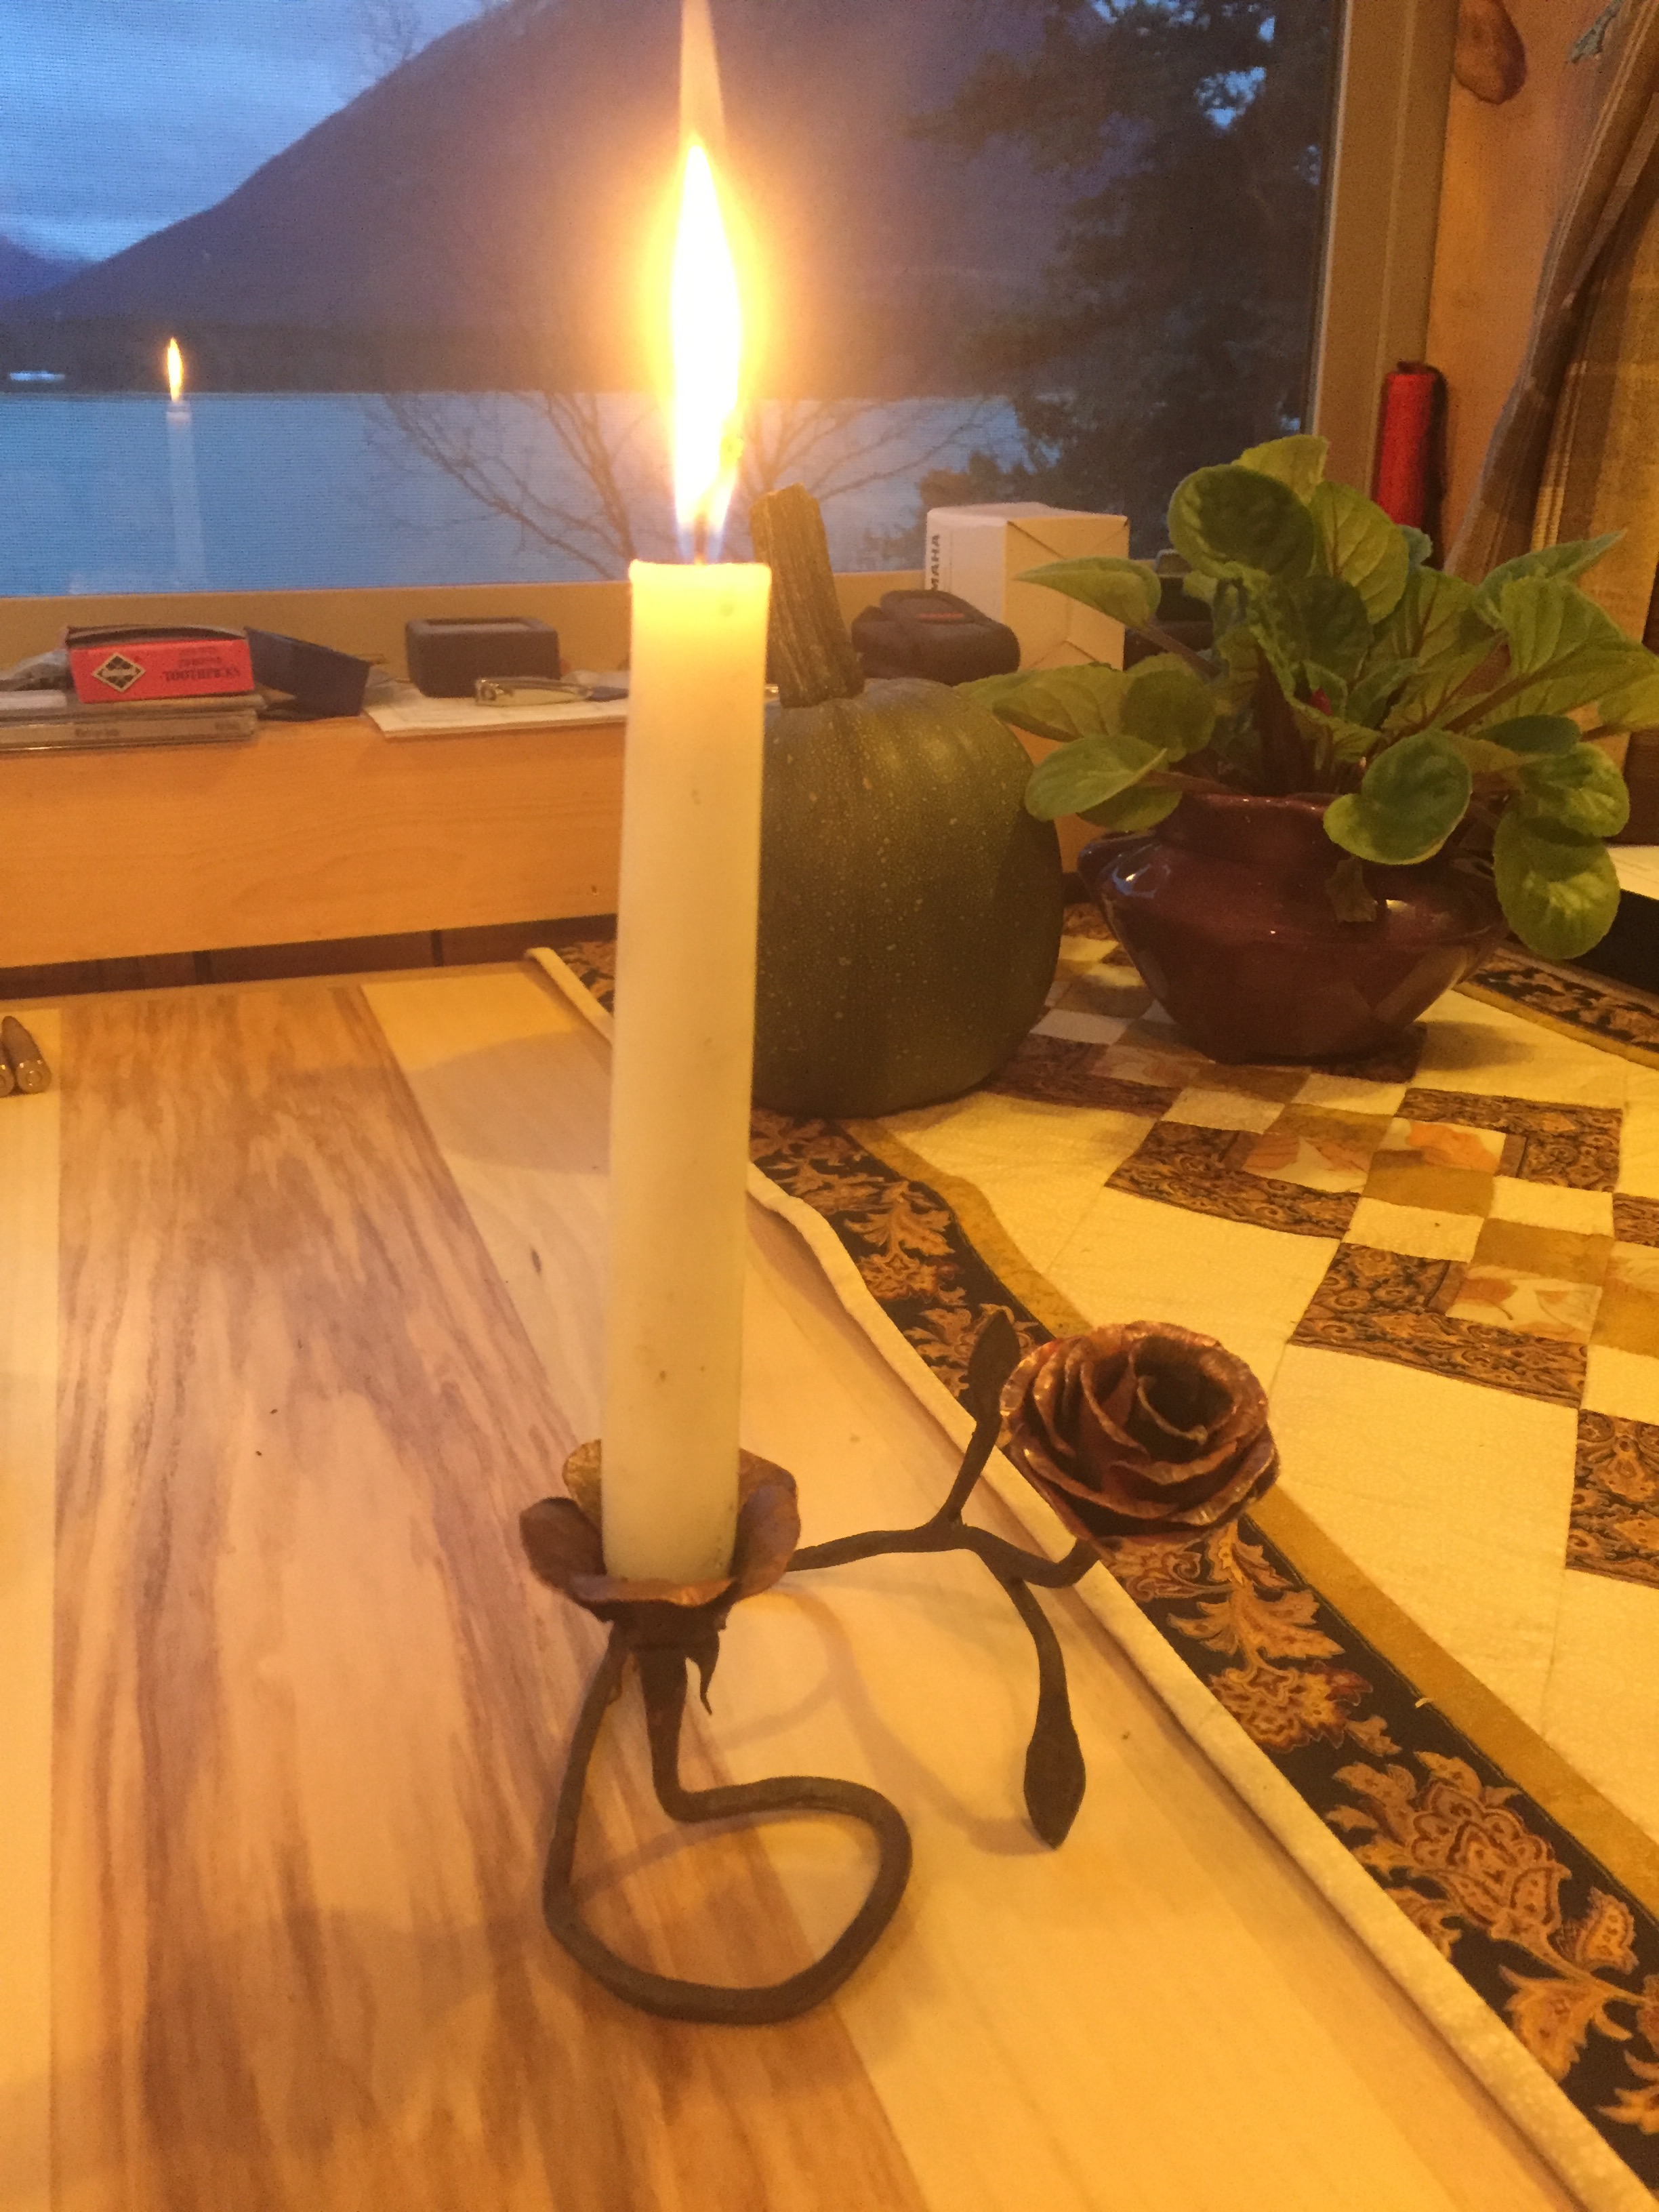
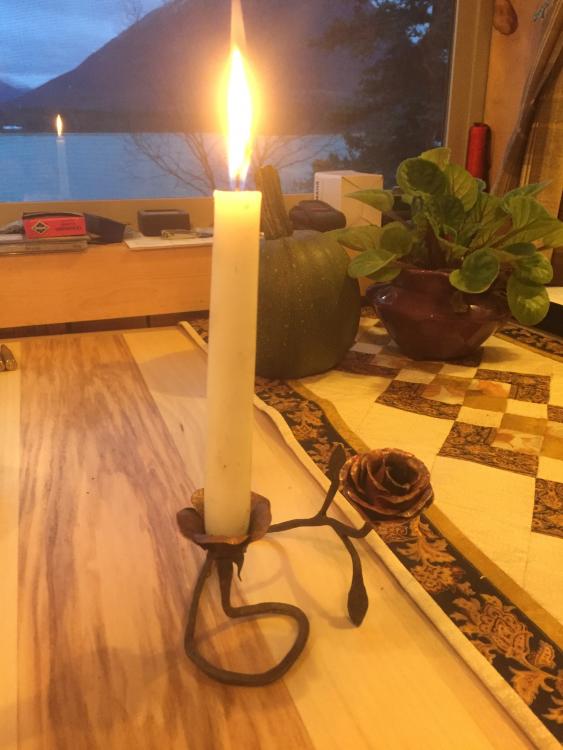
Mods: this project/ problem involves both copper and steel, so if this is the wrong spot, please move accordingly. Thanks. I'm working on a candlestick and I'm stumped on attaching the cup. Here's the candlestick in question: My current design has a small spike in the bottom of the cup to help stabilize the candle. The stem is forged round stock (garage door spring) and the cup is copper. The problem is that I need to attach the cup to the spike. The stem has a upset bulb just under the cup that it sits on, with the spike protruding through the cup. "Riveting" it with a hollow (depth and diameter of the spike) punch doesn't seem to work, nor does 95/5 plumbers solder (tin/copper, not tin/silver) work. I'm not set up to braze, but if that's my only option I might just buy the stuff for it. Any ideas? If my cup fits the candles tight enough do I even need a spike? How deep should my cup be? If I can ditch the spike, I can attach via a simple peened rivet head like my rose. Thanks, AKHunter
-
Frosty Making it to the meeting would be a long shot, but not impossible. It's a $250 ticket to fly in, so it'll only happen if it coincides with a pre-planned trip. I'll keep you posted if it looks like I'll make it. I'm making a candle holder with a copper flower 'cup' to hold a standard tall taper candle and a copper rose coiling around the base. It has a forged steel stem/base and leaves. I'm trying to raise ( I think that's the right term) the cup that the candle sits in, but my copper is too thin (or I'm doing something wrong) for how deep I'm trying to go. Any recommendations for how thick of metal to start with? My copper is .025 when I start, and I'm trying to raise to 3/4". Am I raising too much for a candle holder?
-
Thanks guys! To anneal I was heating to cherry and quenching. Not sure what to make of the annealing not working. @ThomasPowers, I think you hit the nail on the head about too long of a heat causing it! I had my forge turned way down low, and stuck 2 or 3 in to heat. come to think of it, it always was the last piece out of the forge that cracked, and the cracks had large visible grains in them.
-
I'm having problems with my copper cracking quite badly when I work it with any heat. I made a copper rose out of 3/4" type M copper pipe. I wanted to make another, but all I had left was 3/4" type L soft copper. It is supposed to be the same stuff as type M (C12200) but thicker. It wasn't soft at all, so I tried annealing it, but no luck. I tried heating and cooling slowly- still no luck. Then I tried heating it to dull red and it works very well. But 1/4th of my pieces are cracking badly. I tried at a lower temp and at higher temps but it still does the same. I'm not trying anything extreme, just flattening it into a sheet of copper. What am I doing wrong?
-
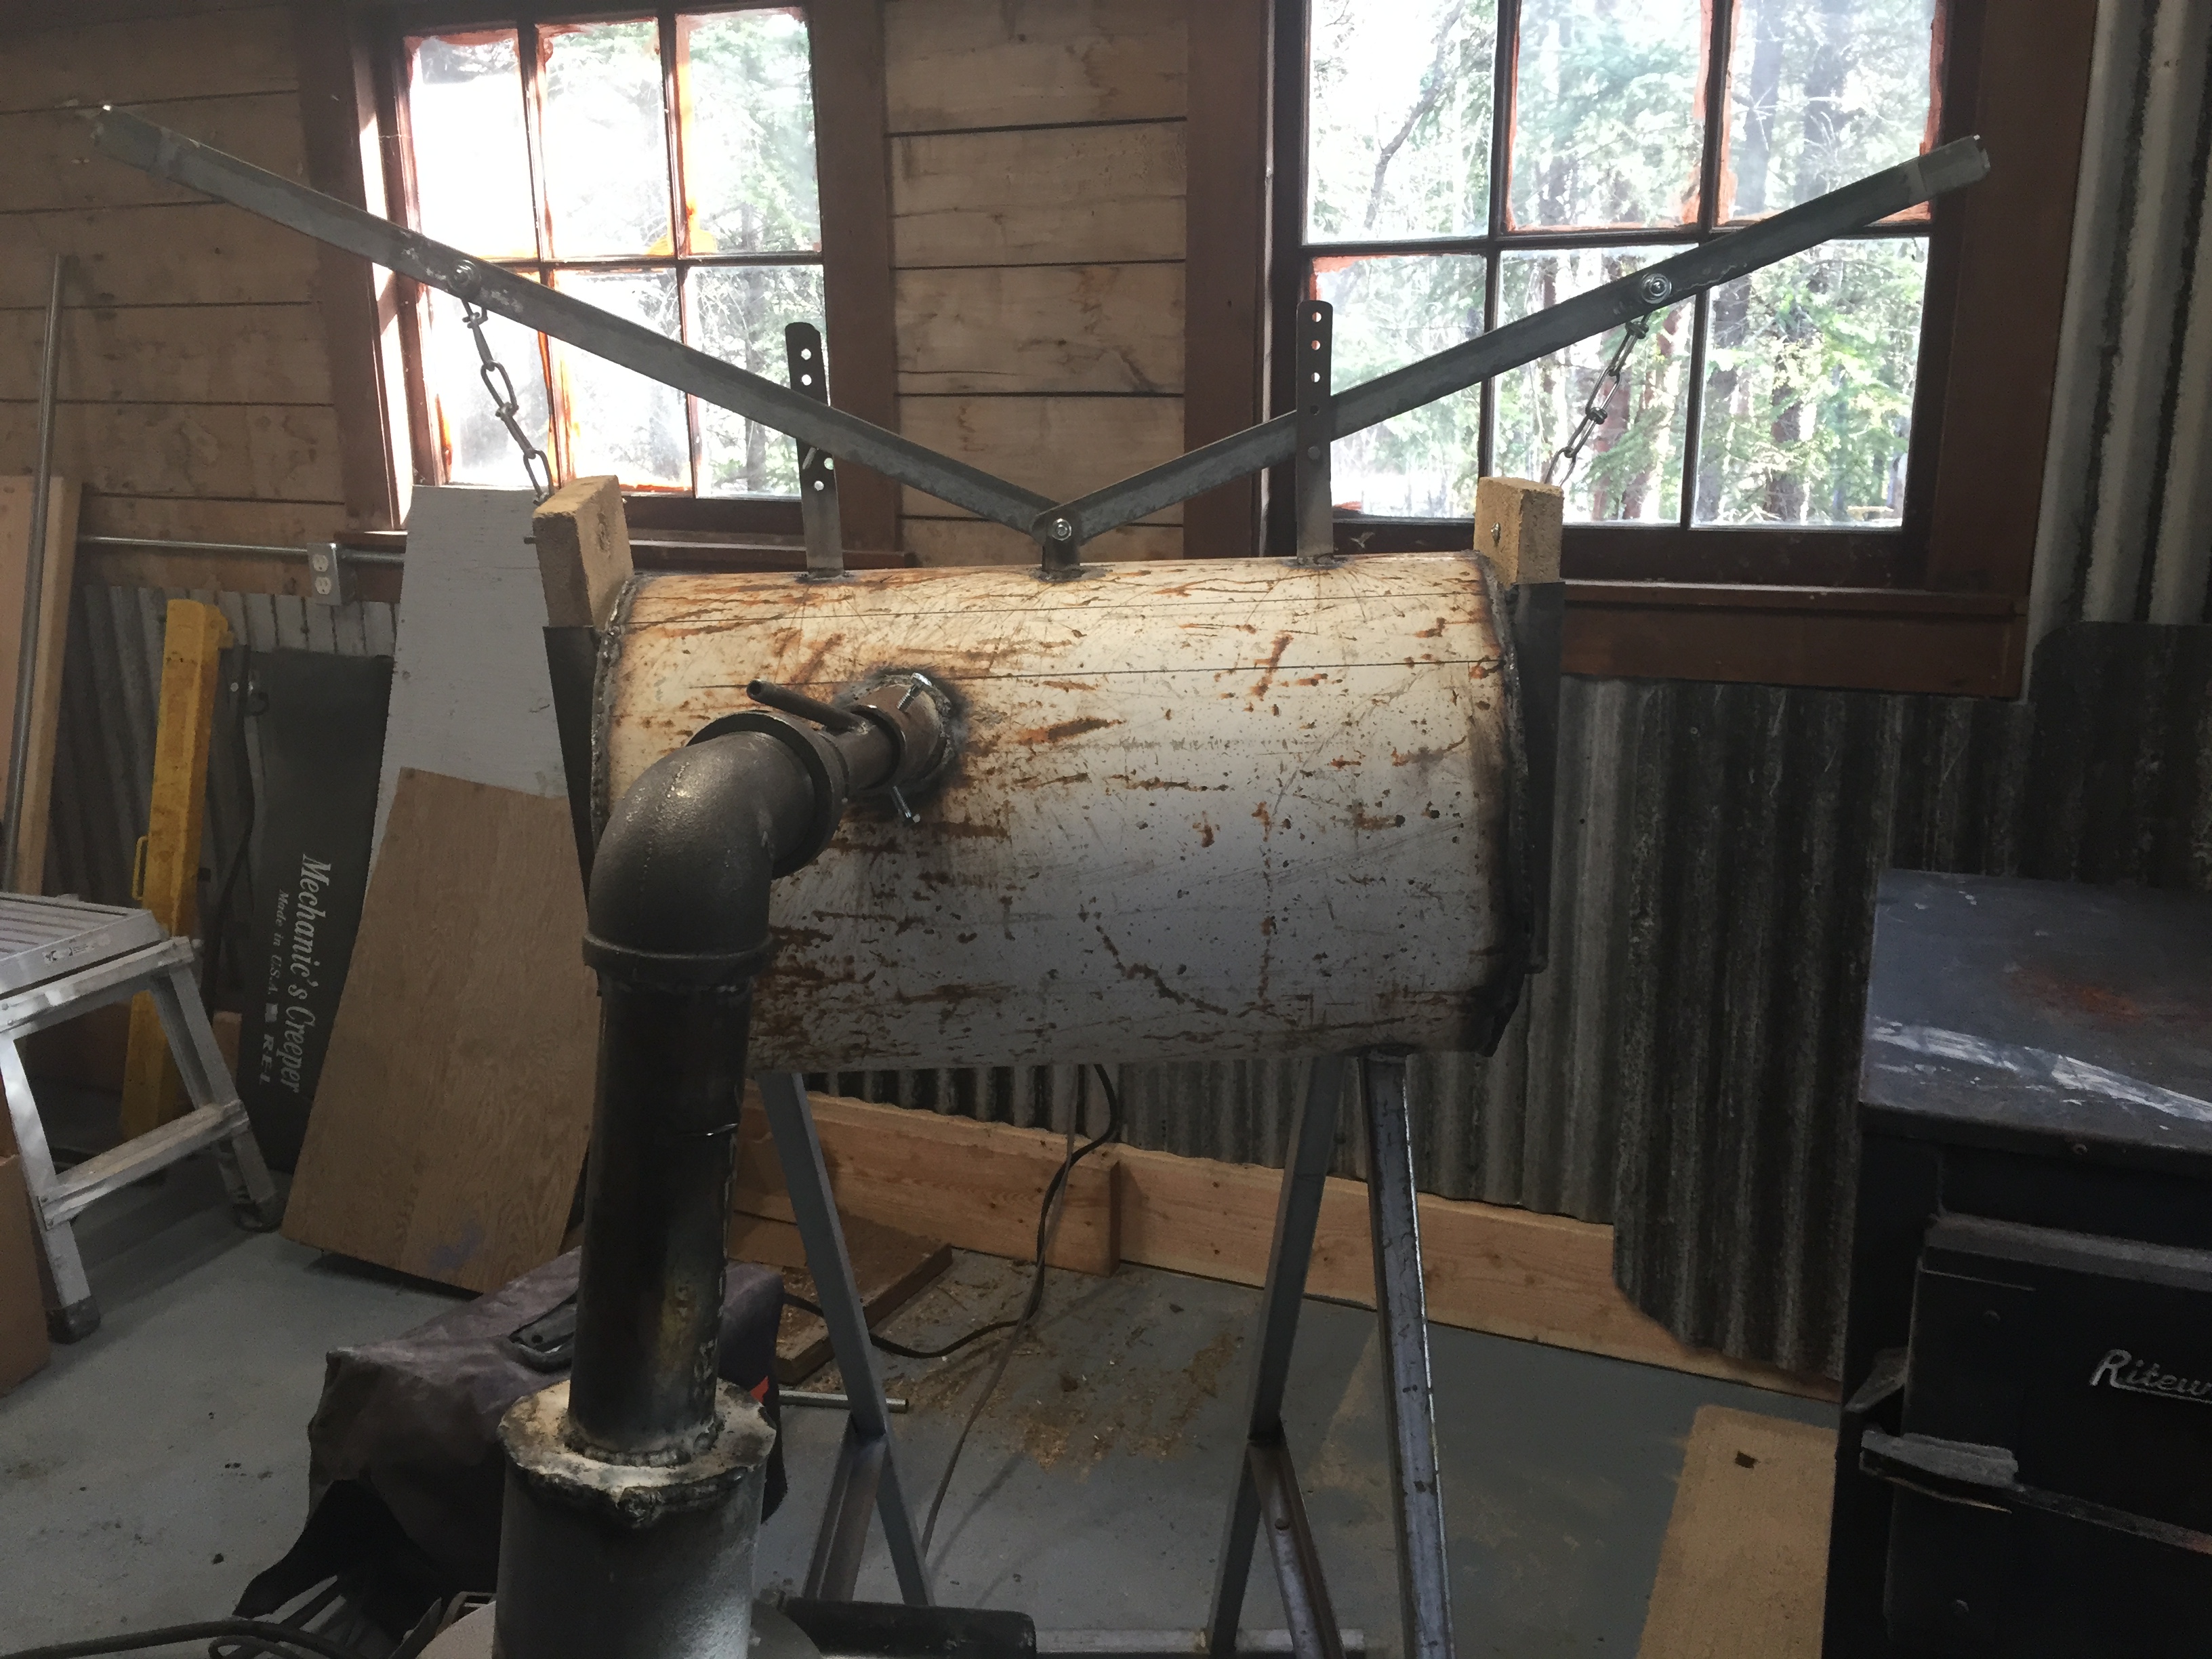
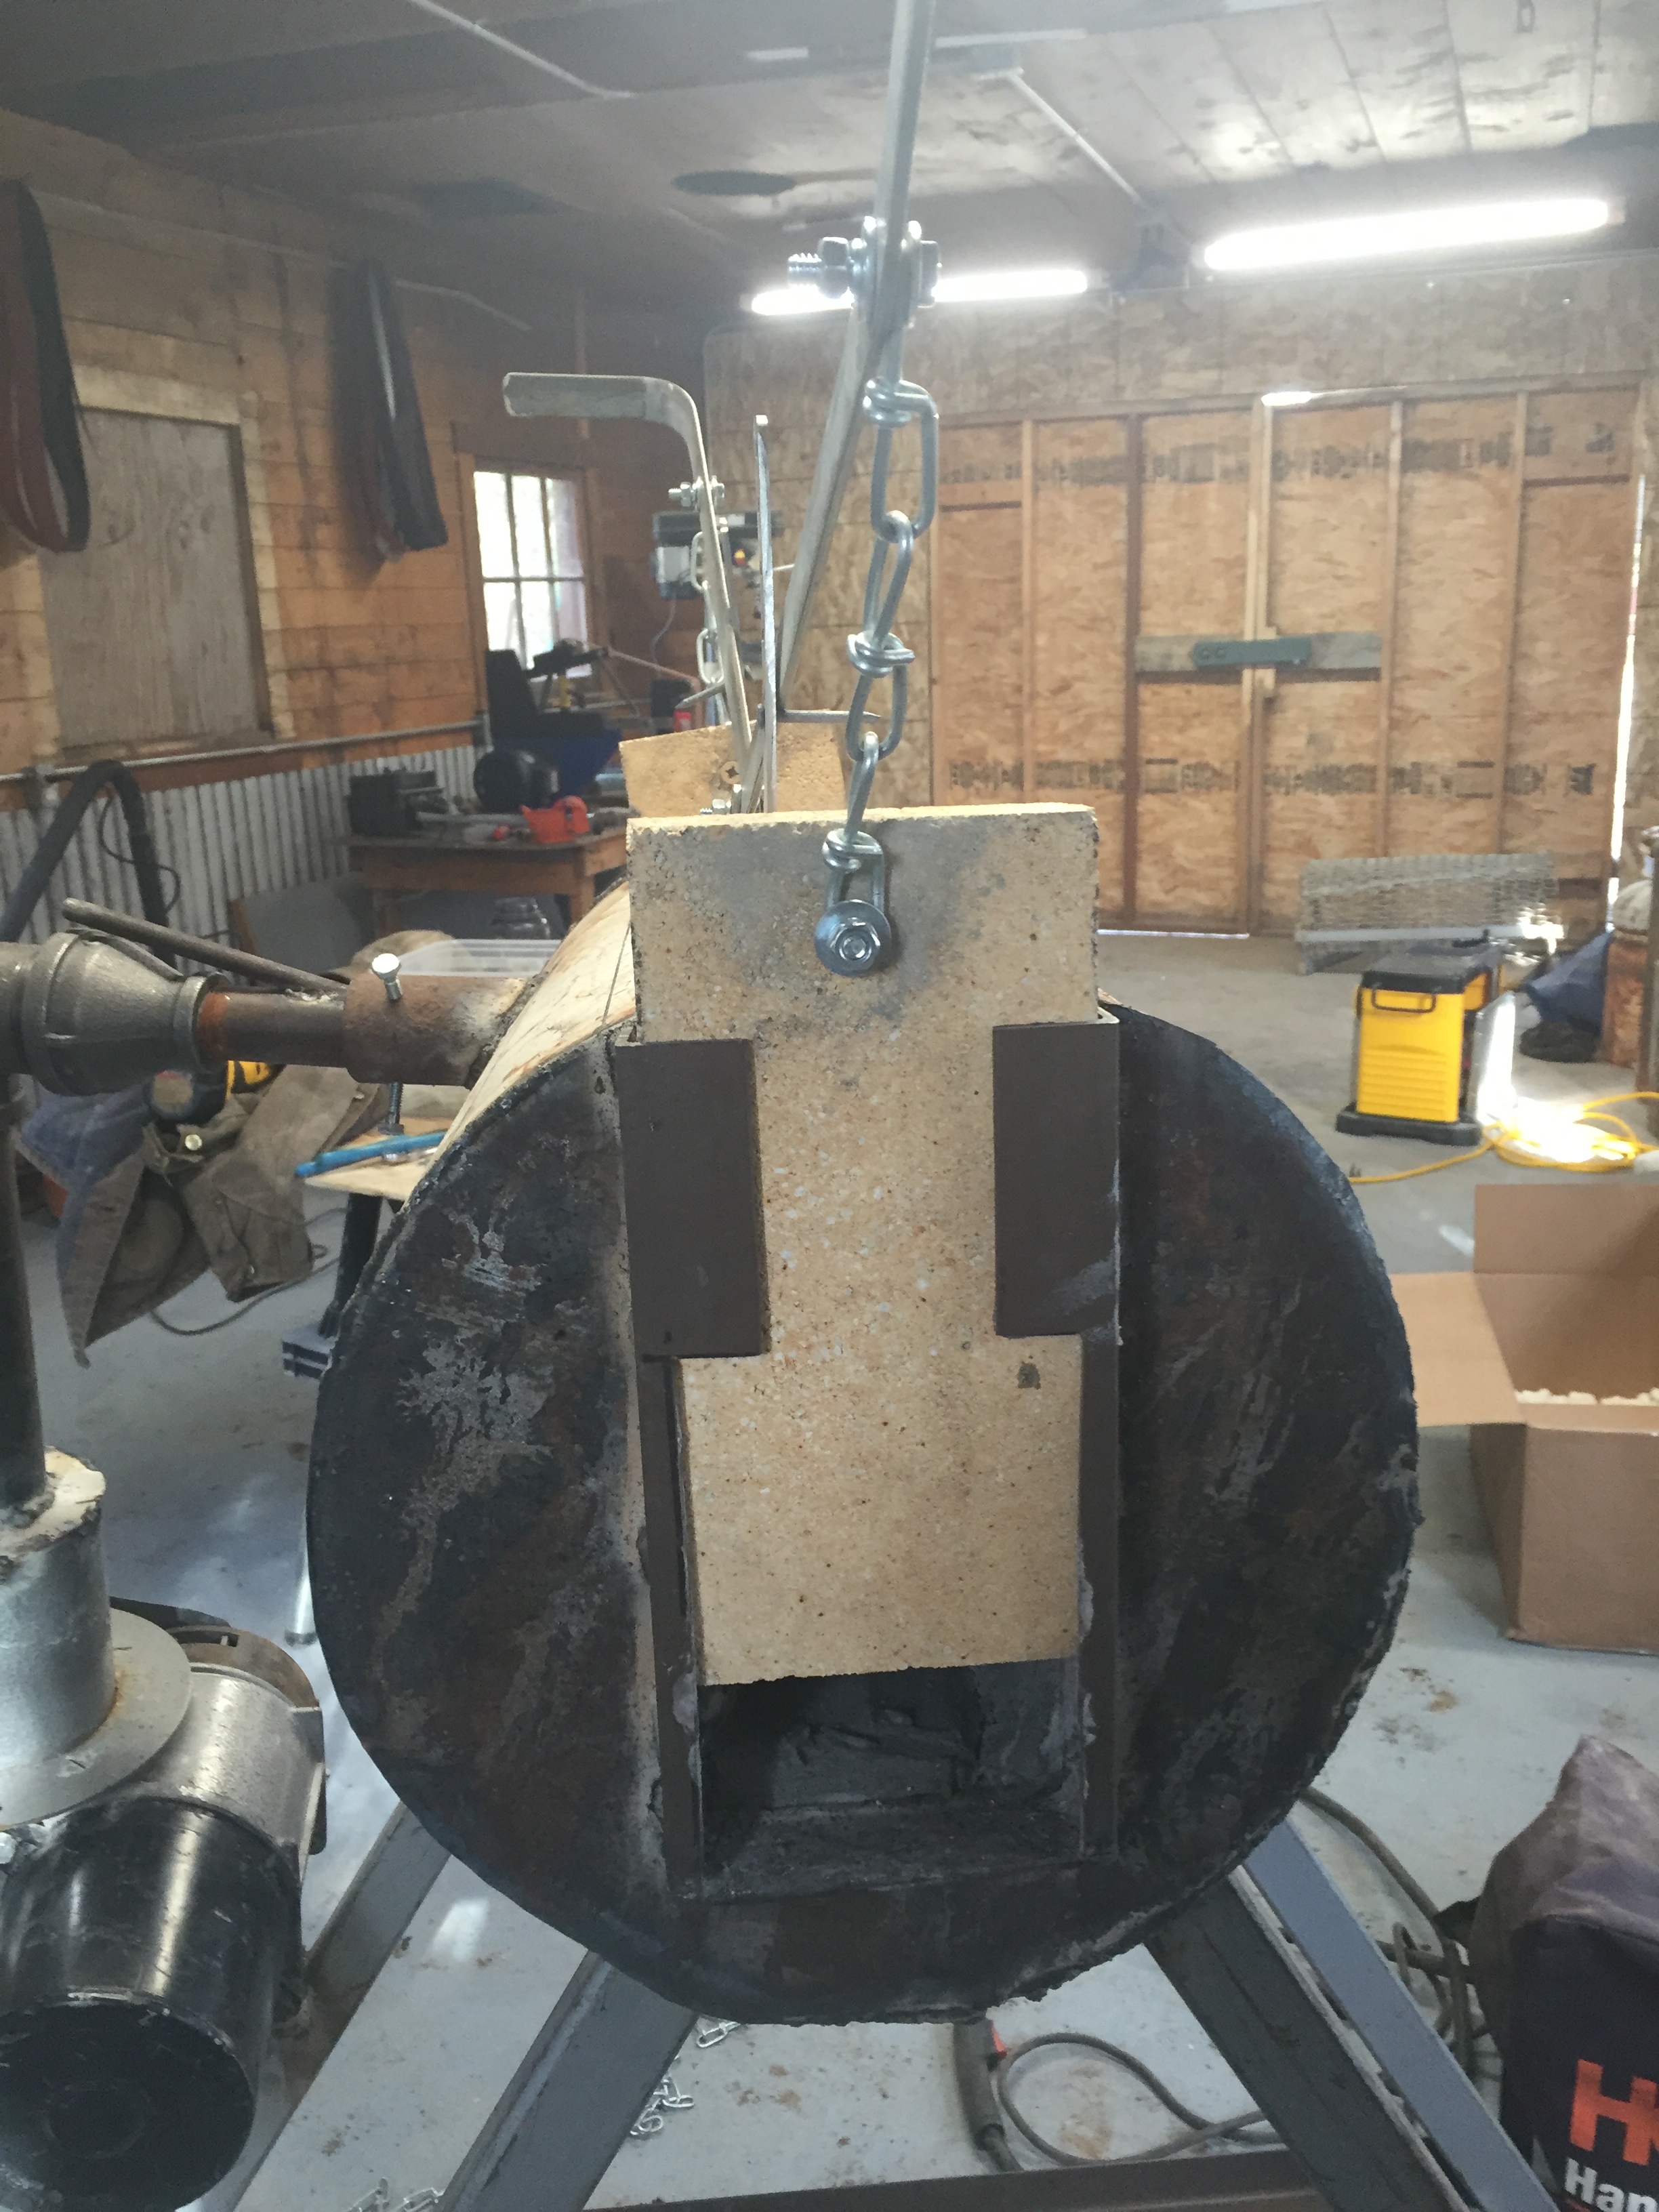
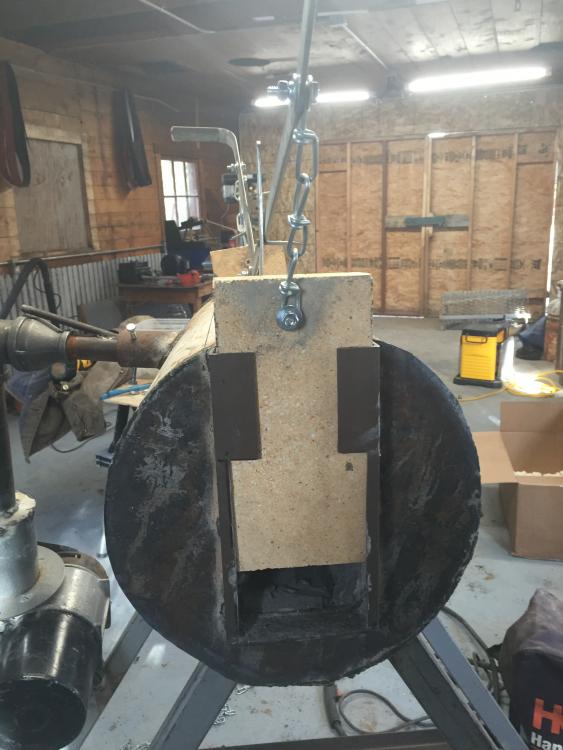
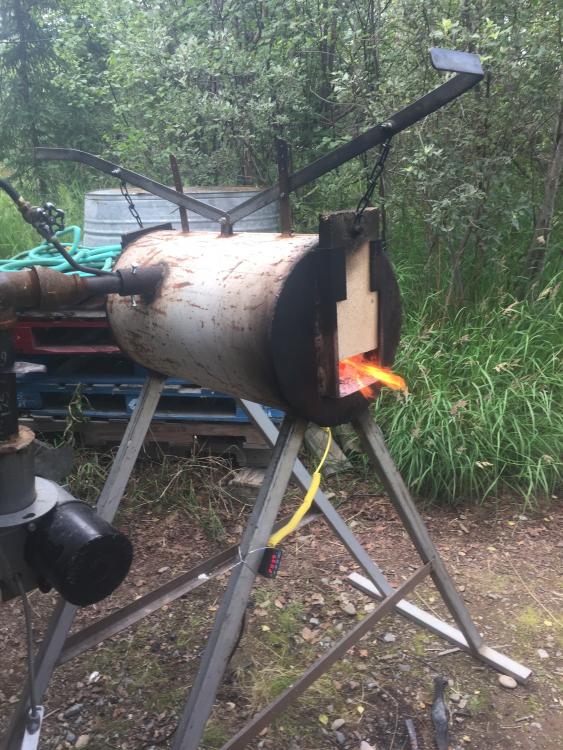
I built one. It runs on any liquid fuel that's equal or less volatile than gasoline. It burns plenty hot, but the varying viscosity of fuels are a pain to deal with. I have to "cut" the fuel with diesel or gasoline to thin it enough to meter through the valve. Filtering is also a nuisance to deal with, especially when using bacon grease (but it burns better than anything else). If you have reasonable access to propane or coal, use it instead! Much safer and simpler. If propane is ridiculously priced ($10.00 per gallon here!!) and coal not available, it's a viable heat source, but give it a LOT of respect. I got most of my burner info from backyardmetalcasting and alloyavenue. I built the forge based on this Bladeforums sticky thread. Everything about a propane forge applies to a waste fuel forge except the burner assembly. When calculating burner size, double (or more) the airflow you think you need and add some more. Liquid fuel, especially waste oil requires a lot of air to burn clean. You can always choke off airflow (remember to install a "valve" or choke of some sort to control forge atmosphere), but it's kinda hard to shove more in after you build the burner. Oh, and another thing, use a real needle valve for fuel control- don't cheap out and use an old gate valve- they don't work well. Don't bother with a pre-heater for the oil. They are the most dangerous part of the system, and usually are quite temperamental- vapor lock is a pain! No, I don't have plans for it. You'll have to reverse engineer it, but if you know enough to build and run it safely, that should be no problem. If you have any questions, feel free to ask.

-
I'd like to build a guided helve hammer- a.k.a. "Appalachian" hammer, and I have a few design questions. This will (if I actually build it) be "junkyard" construction. Weather or not I build it will depend on if my available materials will work. First off is the anvil. I can get materials for a 150# anvil, with almost all of it situated directly under my bottom die. If I understand powerhammer theory correctly, this restricts me to a 15# hammer? Next is the spring. How thick/stiff do I want the spring, assuming I use a 15# hammer? How long? In keeping with "junkyard" construction methods, it will be powered by a 1.5 HP Rockwell motor. I'm pretty sure its way overkill, but its the only one that the price was right on - free. The big kicker is that its a 3500 RPM motor. I think that's too fast? How many BPM do I want out of a small powerhammer? If I use a 1.5" drive wheel on the motor, and a small truck tire for the clutch (aprox. 26" diameter) that should put max speed around 200 BPM- if I did my math right. Does that sound right (both the math and the end speed)? What HP and speed would be ideal for a hammer this size? Final and biggest question- How useful would a 15# hammer be? I want to try more damascus patterns and forge down some 2" stock, but with hand hammers its going to take a looong time. Drawing down from large stock, or drawing out a 1.5" billet for re-folding is taking too much time and energy. Thanks for your time Gents! Keenan
-
Chance to Connect with AK Smiths?
AKHunter replied to AKHunter's topic in Alaska Blacksmith Association
Ok gents, my wife and I plan on being at the state fair on the 29th, 30th, and possibly the 31st. This will be our first time ever to the state fair. I had never really considered the possibility of security there until Metalmangeler mentioned it in my knife critique thread. So... normally I carry a leatherman and a fixed blade every day. I'm guessing that I should/need to leave them behind when I'm there? I had also planned on bringing 2 or 3 completed knives and 1 or 2 rough forged blades for critique and showing where my skills are at. Should I not bring them at all, or keep them outside the fairgrounds for show-and-tell at the truck (outside the "secure" area)? If it's advisable to bring them on in, what's the best way to package them for a smooth trip through security? - An ignorant young bush rat. P.S. I may have the afternoon of the 23rd free. I'll be in Palmer that day. -
Frosty, my hope is to bring several examples of my work- both finished and rough forged so you guys can see where my skills are at and what I can improve. If you'd like, I can bring pics of my equipment too. Anything else I should bring or do before coming in order to make the most of this learning opportunity?