Seek
-
Posts
67 -
Joined
-
Last visited
-
I am now more or less determined to make a table, wide enough for an oven on one side and a forge on the other side. I allready meassured in the garden and it should fit perfectly well. Thanks for the advice everybody!
-
Yes, that is most probably the best solution. A forge to the side of a nice pizza oven. Cover the forge when not in use so it can be used as a table for the pizza prepping business.
-
You are probably right, but... How about making a sink, or pit, in the middle of the floor. This pit has a tuyere on the side. Cover it with a flat stone when using the oven for baking pizza or bread.
-
My wife gave the green light to build a wood burning pizza oven in the garden. Hurray! But my garden is rather small so it would be efficient if I could combine it with a small forge. - Is this feasable at all? Or should I forget it immediately? - I forge small items, occasionally, and I use charcoal. - Side tuyere? - Size? Many thanks allready for ideas.
-
Looks like cast iron.
-
Making some hinges, material choice
Seek replied to Seek's topic in Blacksmithing, General Discussion
Lots of filing makes everything look good ! But for a rank beginner I am pretty happy wit the result. -
Making some hinges, material choice
Seek replied to Seek's topic in Blacksmithing, General Discussion
It took some time, but I have hinges ready for my little cupboard. I started all over again with thinner material this time, just 1.5 mm thick (about 1/16"). The welds ain't perfect, but it isn't a load bearing application, so I don't worry about that. This weekend I shaped them with hacksaw and files. I only need to drill or punch some holes, never done any punching so I think I'll give that a try.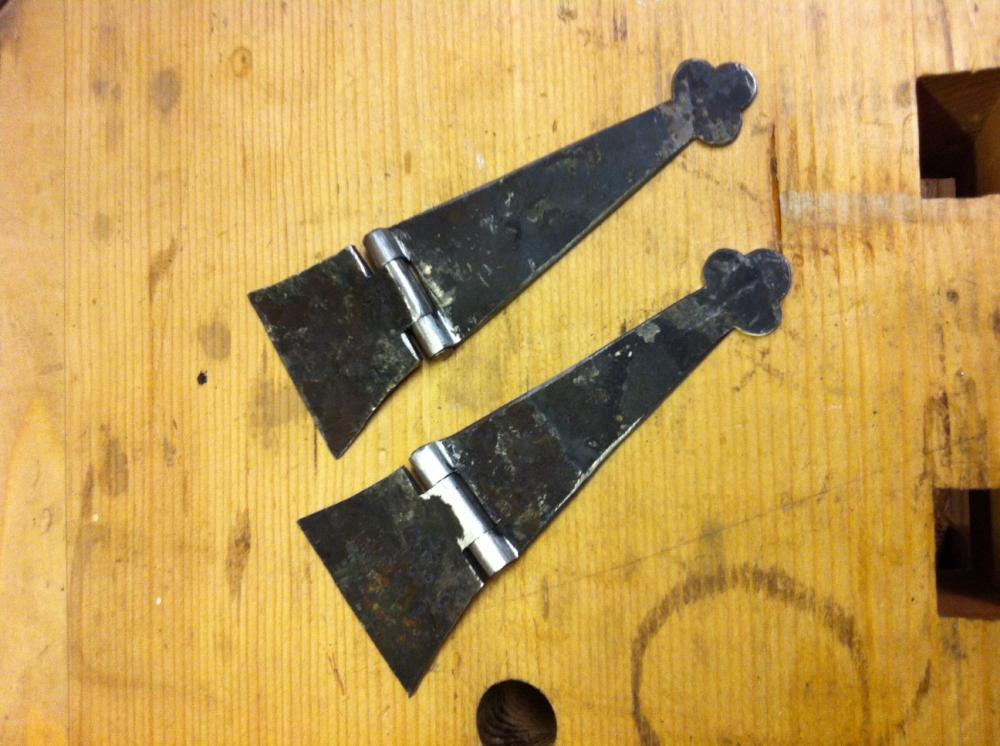

-
Frying pan! That's a good fine sieve too. I think I still have some cloth sacks around. So now I have plenty of things to try. But first I go to Rome for a long weekend, ain't too bad either Oh wait, I am mixing up English words agian, a frying pan is something else then what I had in mind. But I understand now.
-
Anyone want to apprentice? You can sleep in the shed and share the meals with the dogs....
-
Great! Thanks for all the tips. One more question. What is a fast way to chop down charcoal? One by one with a hatchet on a chop block? A big hammer, and putting the charcoal in a bag? I find that just burning makes them a lot smaller too. Lower down in the fire the pieces are smaller then higher up.
-
My forge isn't really designed! I think I made quite a mess of the design, but right now it is what it is. The blower is one of these bouncy castle things. I run it on half power at the moment, with an old fashioned big rheostat. The blower is blowing from a little distance into a piece of tubing, which is afixed to the bottom blast tuyere. So, I did everything to reduce the pressure of the blast. The idea of my forge is here. In the meantime I have made the fire area smaller, set the bricks closer together. https://www.youtube.com/channel/UCZ3RNXESpIKrm1d5u5p2xbA Good idea about heating up slowly. that is something I didn't think about. I think my next forge will be a sideblast. i must still figure out how and where.
-
Hi all, When I was at the blacksmith shop lastmonth, he demonstrated how he made a forge weld. He uses normal coal. He build a large mound of coal, let it burn through, created a cavity and inserted the iron pieces. You could see very well how the surface of the steel got fluid. He also used very little air, but it was like an oven, very hotin that cavity. Now I am back in my own little corner in the back of the garden. I use charcoal (don't want to pester the neighbours). I have a couple of firebricks around my brake disc. Air comes from the botto. The firebricks make the fire about 7-8" deep. I pile it up and then have to crank up the air to get it really hot. Then I push the steel bars in the pile of charcoal, hopefully in the middle of the heat. But I can';t see anything in there. So from time to time I pull it out to have a look. It is a short stretch from hot enough to sparklers, so I feel a bit uneasy with this procedure. Another point is that I must blow a lot of air into the fire to get it hot enough. Much more then the blacksmith was using with his coal fire. This blows around a lot of ash, which also settles on the steel parts. Any problem in that? I am still trying to make some hinges, quite a few trials and errors until now. The welds aren't great, but it isn't very critical in this aplication, so I don't worry too much about it. But I would like to get better at this forge welding. Any tips how to treat a charcoal fire for good forge welding?
-
Making some hinges, material choice
Seek replied to Seek's topic in Blacksmithing, General Discussion
Yes I made a jig too. Just a 5mm pin welded onto a thick plate of steel. That helps enourmously. But still, it ain't easy! The parts are small and cool very quickly, so I must work quickly. Everything has to be handled with tongs. I have one where the pin is solidly embedded in the hinge with no way to get it out again (apart from drilling). I just need more practice. -
Making some hinges, material choice
Seek replied to Seek's topic in Blacksmithing, General Discussion
Of course I ment to say: The WELD was the easy part. Forging of the rest was difficult. -
Making some hinges, material choice
Seek replied to Seek's topic in Blacksmithing, General Discussion
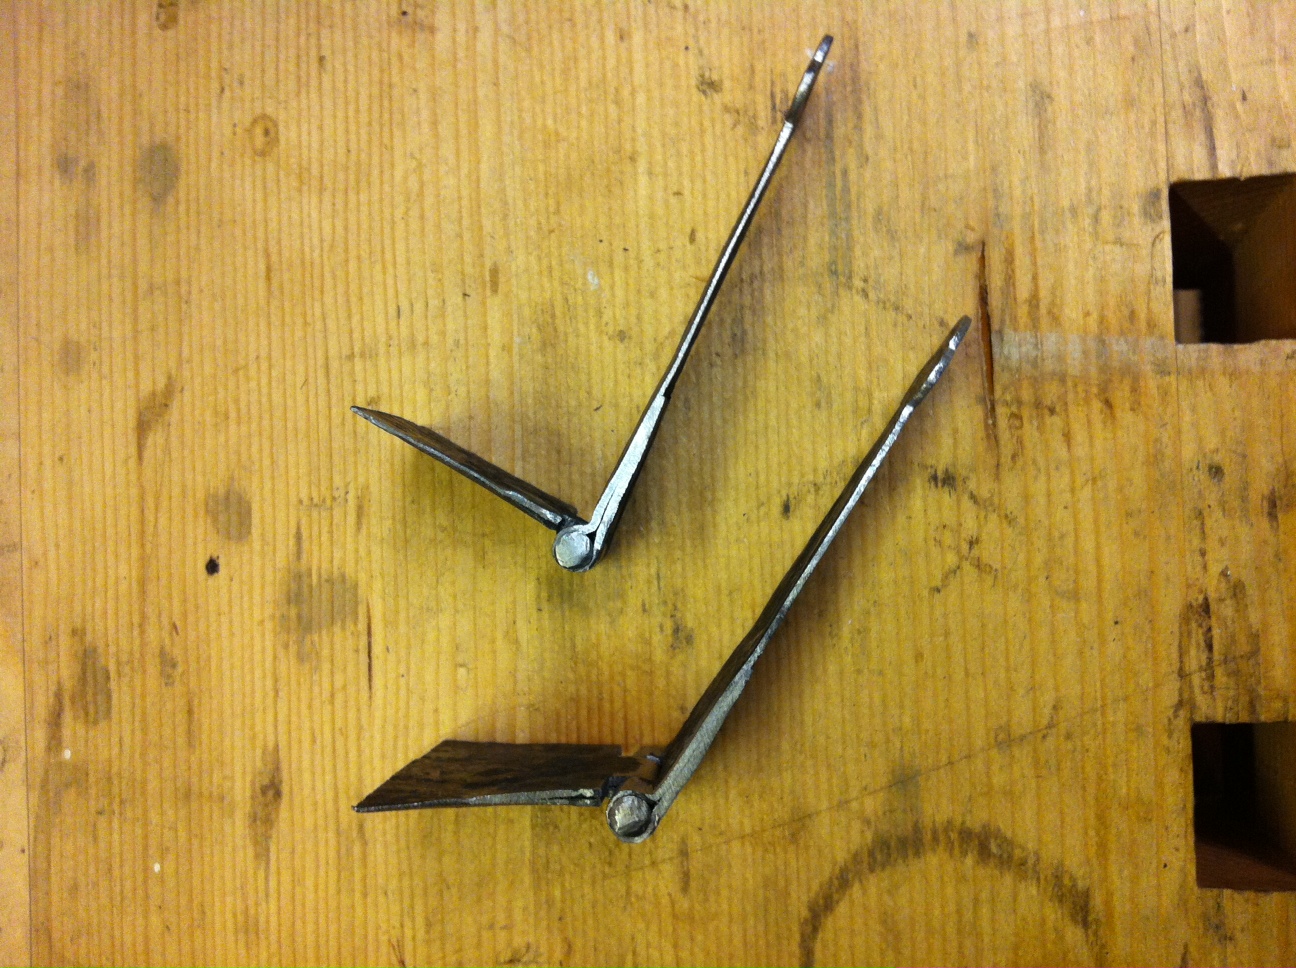
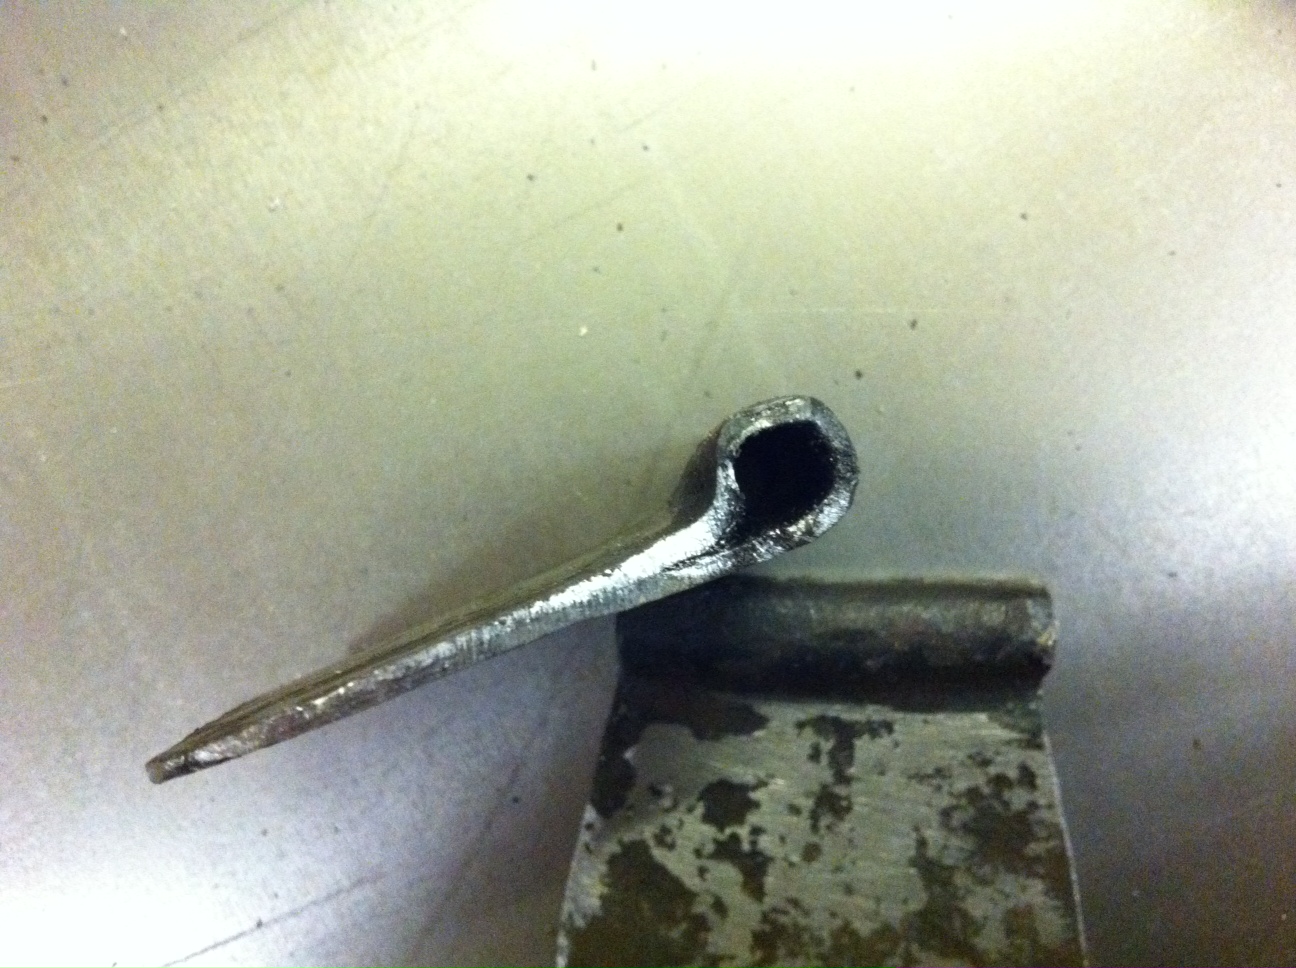
A little bit of succes. A took a bit longer to find some forge time, but yesterday I got a nice sunny day (the forge is outside) combined with a day of from work. It all went a little different from what I expected. The forging proved to be the easy part! Forming the metal around the hinge pin and ending up with a nicely round and tight tube was a lot harder! In the end I had to resort to the drill press to drill out some too tight spots. Here ist the result of a hard days work. I really need to get better and quicker at this forging business. I used 2mm thick material. Next time I will try 1.5 mm, just as in the Peter Ross video.