madwing
-
Posts
93 -
Joined
-
Last visited


-
gotcha. i mostly use coke, though i'll be using more coal as soon as i get this up to learn how to use it well. any thoughts on single vs. double-wall? going through a corrugated steel roof, any worries about pipe heat with single wall?
-
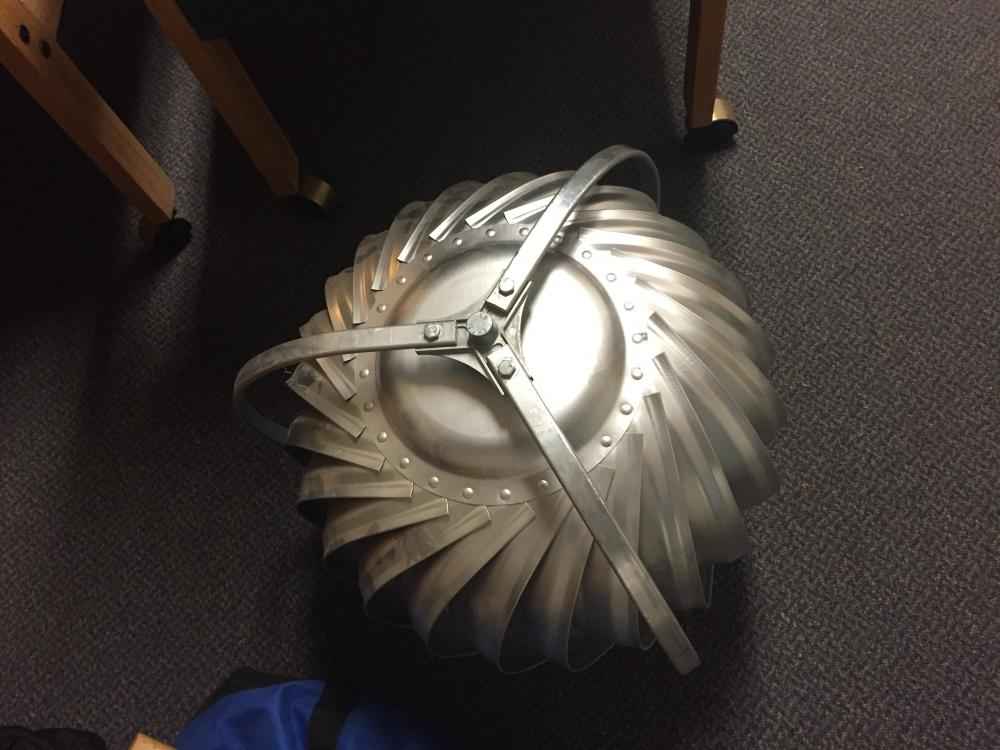
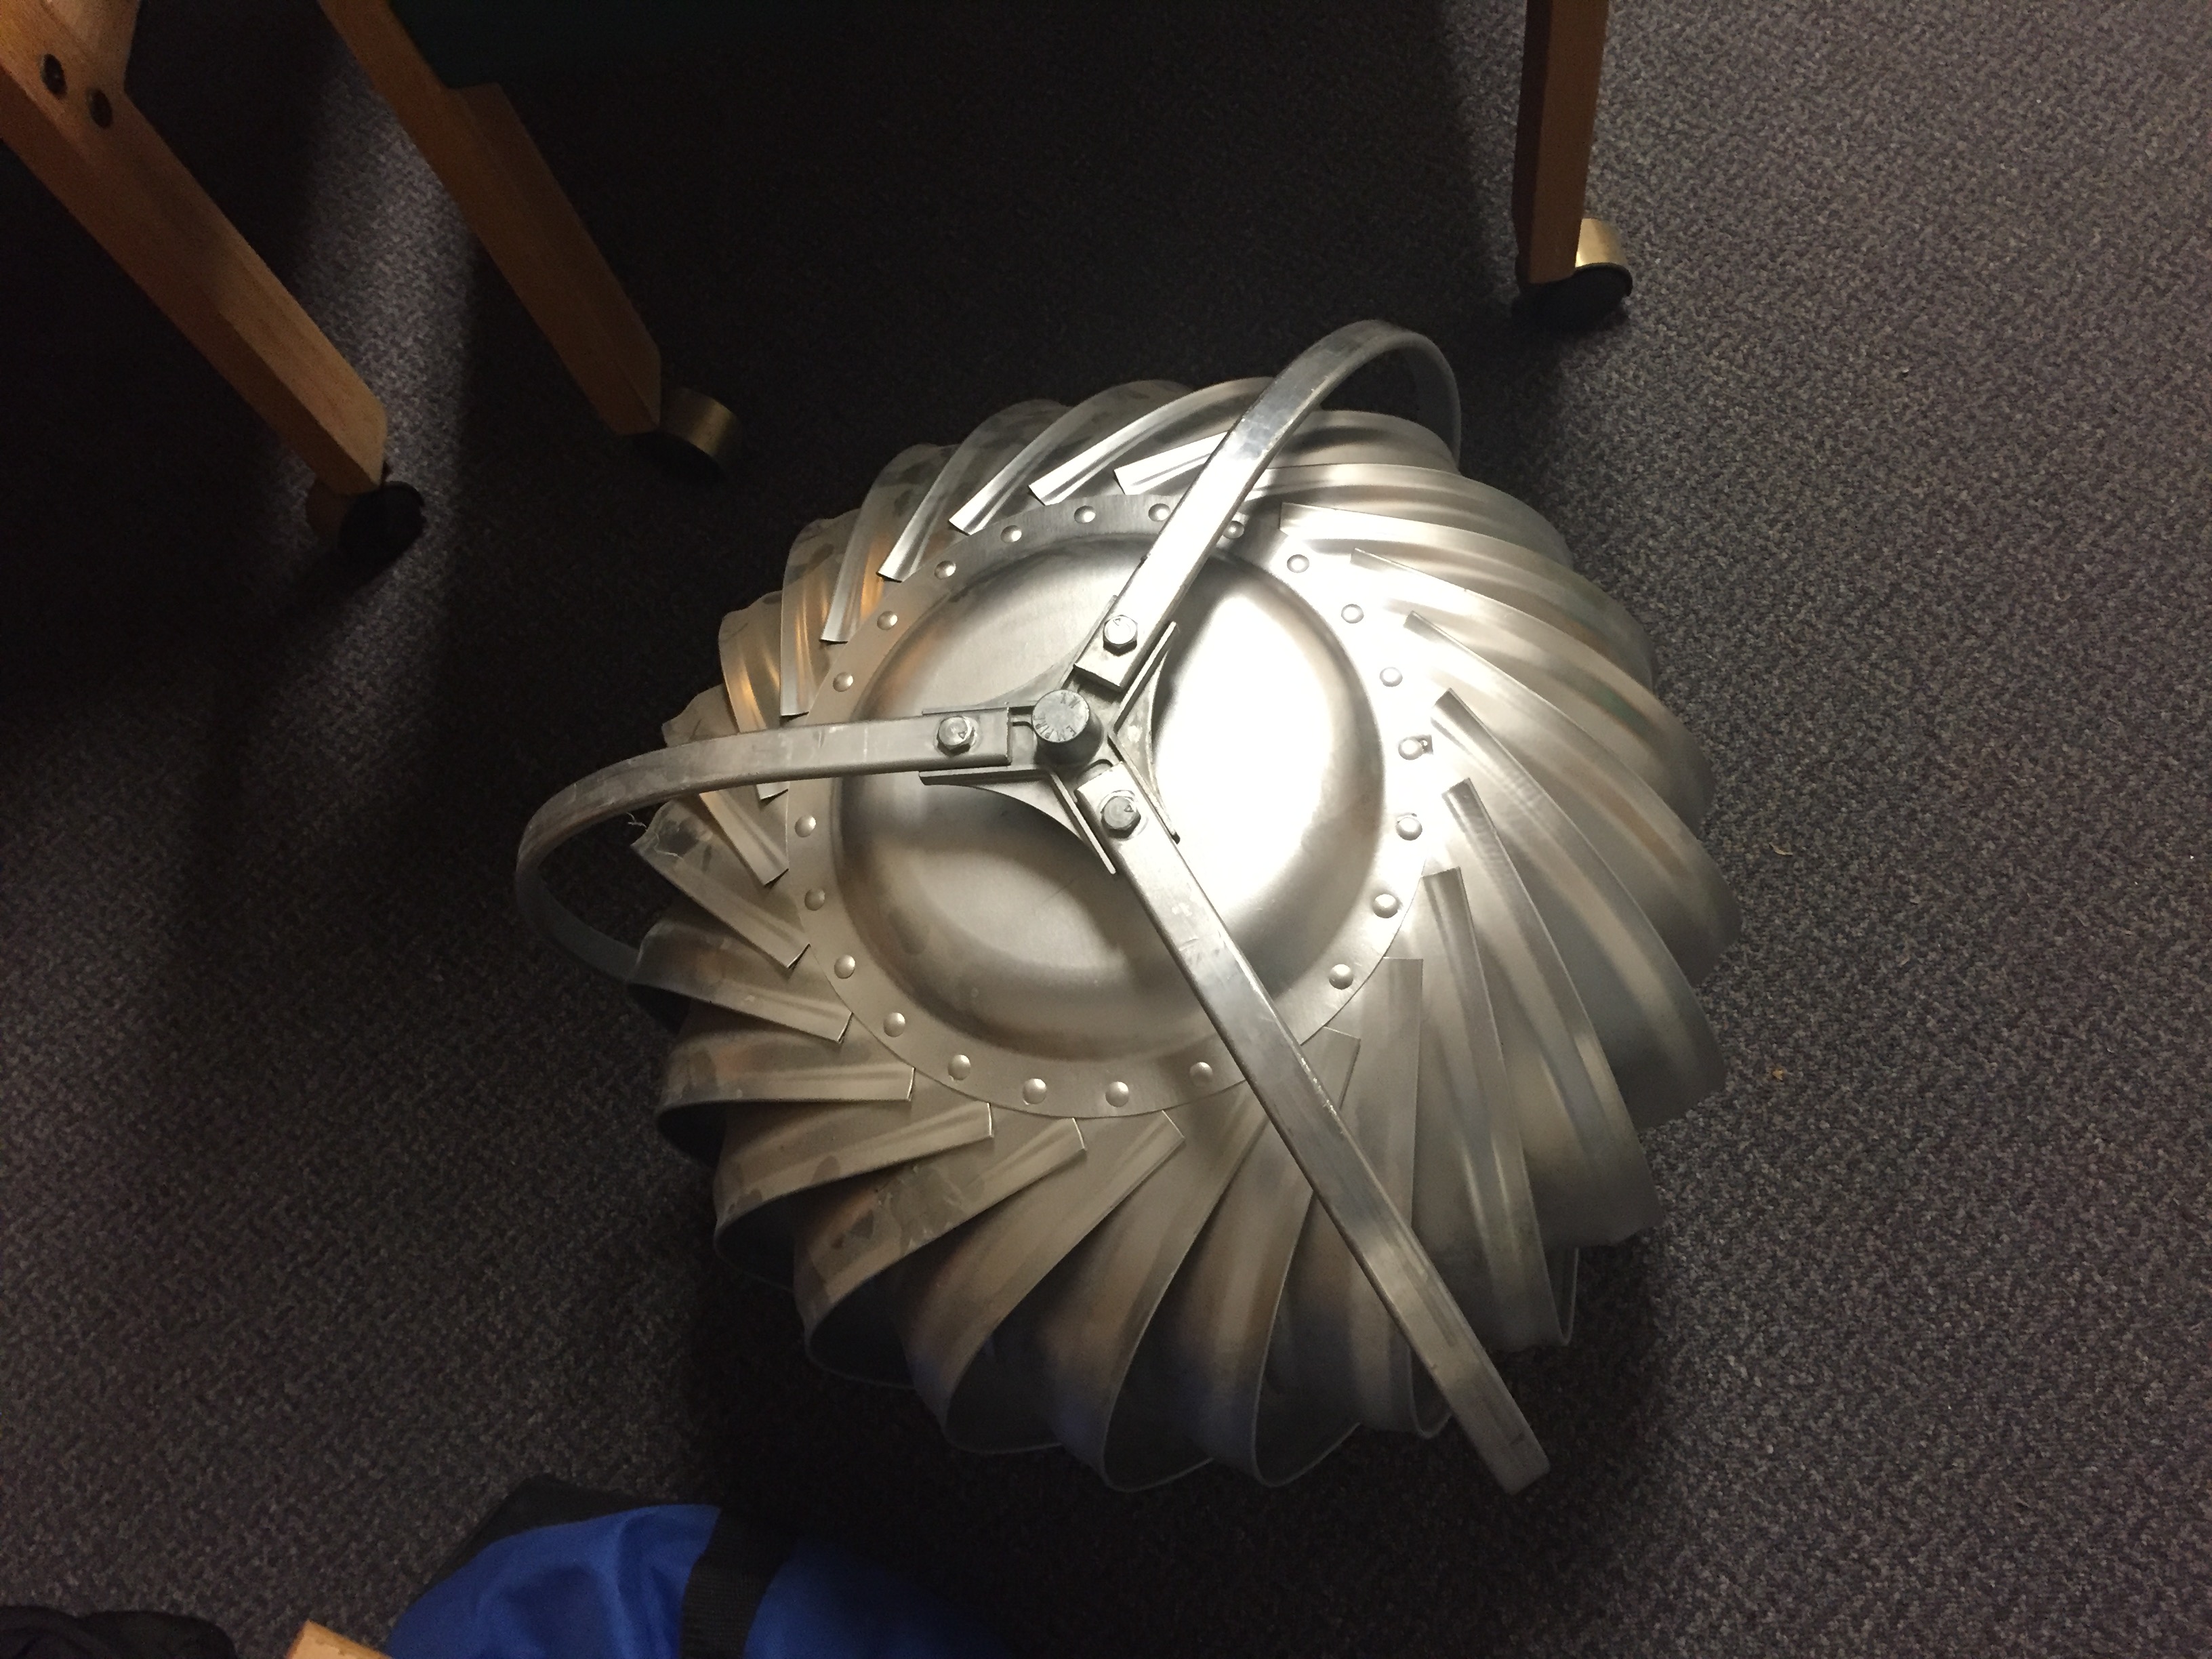
following in friend michael's footsteps, I found this turbine sitting undamaged on the metal recycling bin at work. i had been planning on using 10" pipe for a flue, but will now use 12" . I will hang this 2' above the roofline (my forge is in a space between the house and the garage, covered with corrugated plastic roofing; the area above my forge is corrugated galvanized). do most people use single wall or double wall pipe for flue stacks?
-
shelf brackets for a friend...
madwing replied to madwing's topic in Blacksmithing, General Discussion
thanks, frosty. exactly as he wanted... -
shelf brackets for a friend...
madwing replied to madwing's topic in Blacksmithing, General Discussion
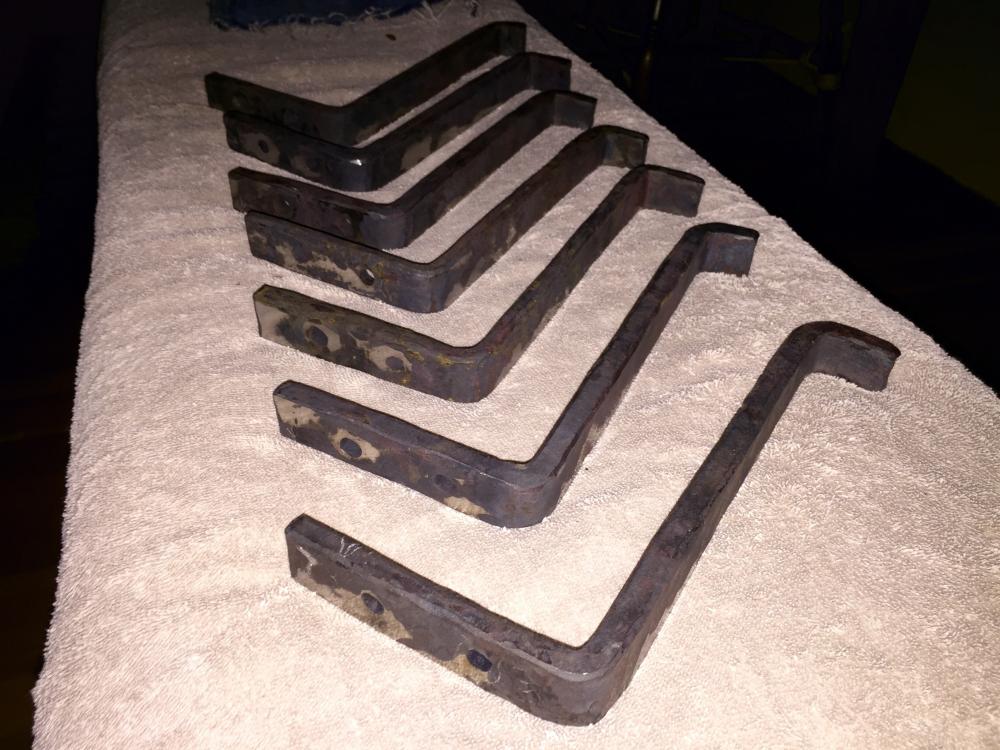
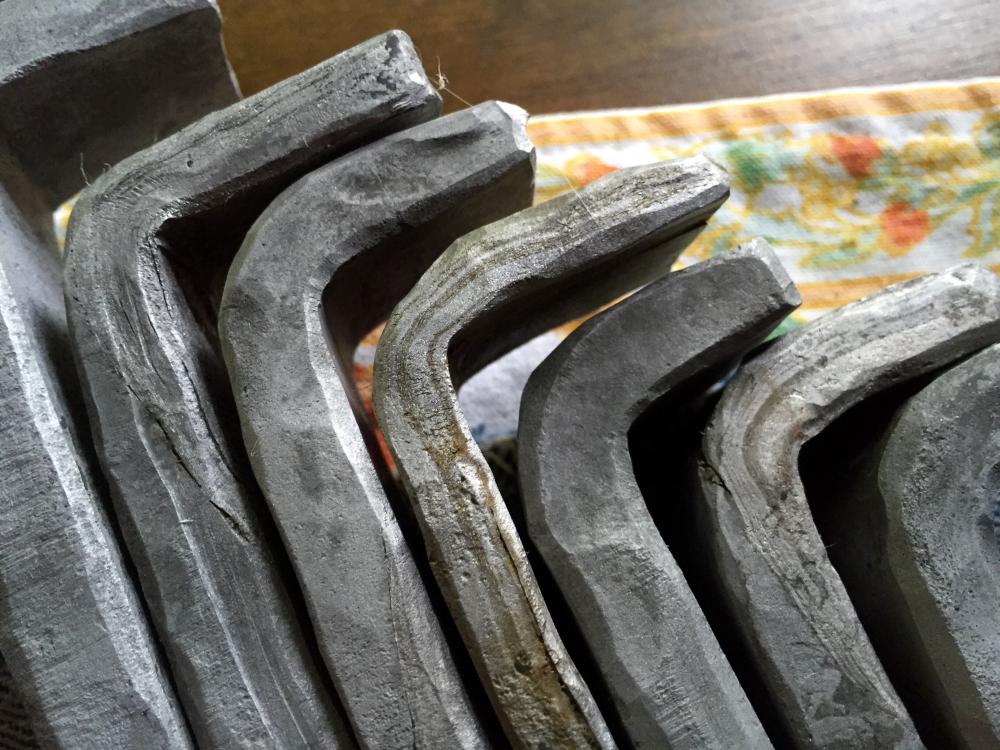
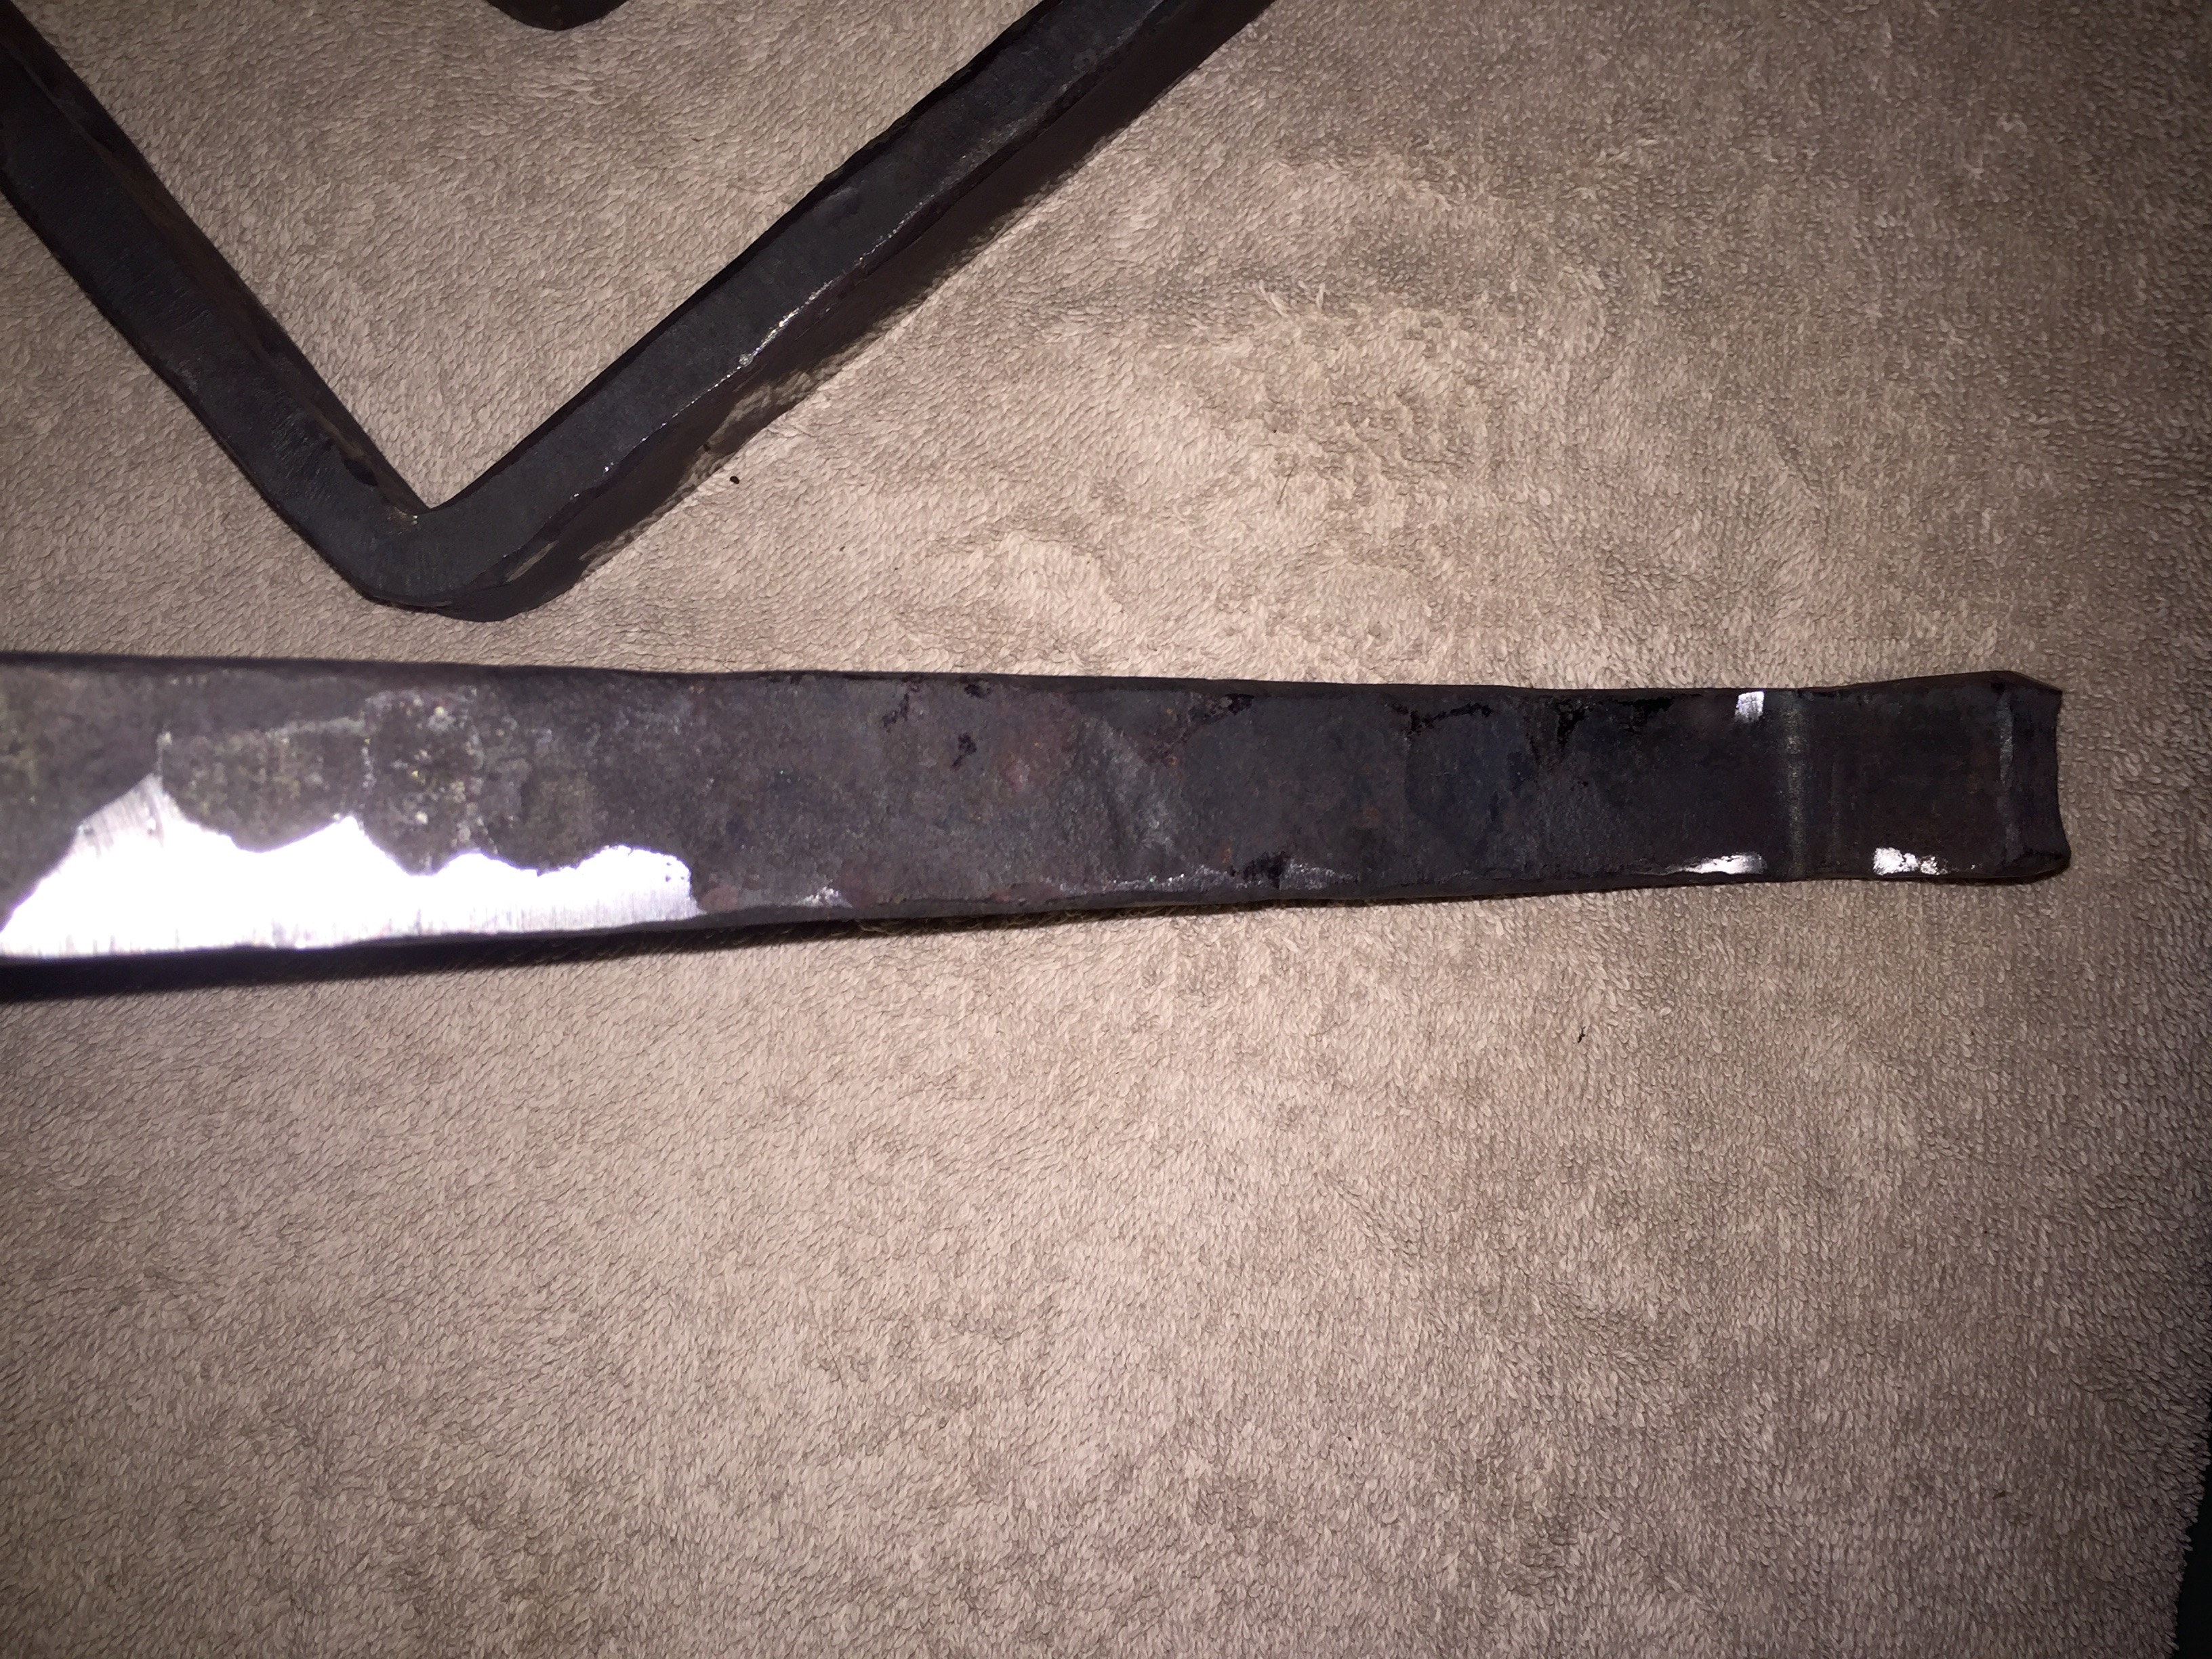
so the brackets are done, or nearly so. two bends, the holes sized, soaked in muriatic acid for 1 hour. I am taking them raw; if my friend wants wax only, or lacquer then wax, we can do that in Germany. the short bend was the hardest to do, trying for a consistent 20 cm length from where it will mount. hopefully they hey will work for him!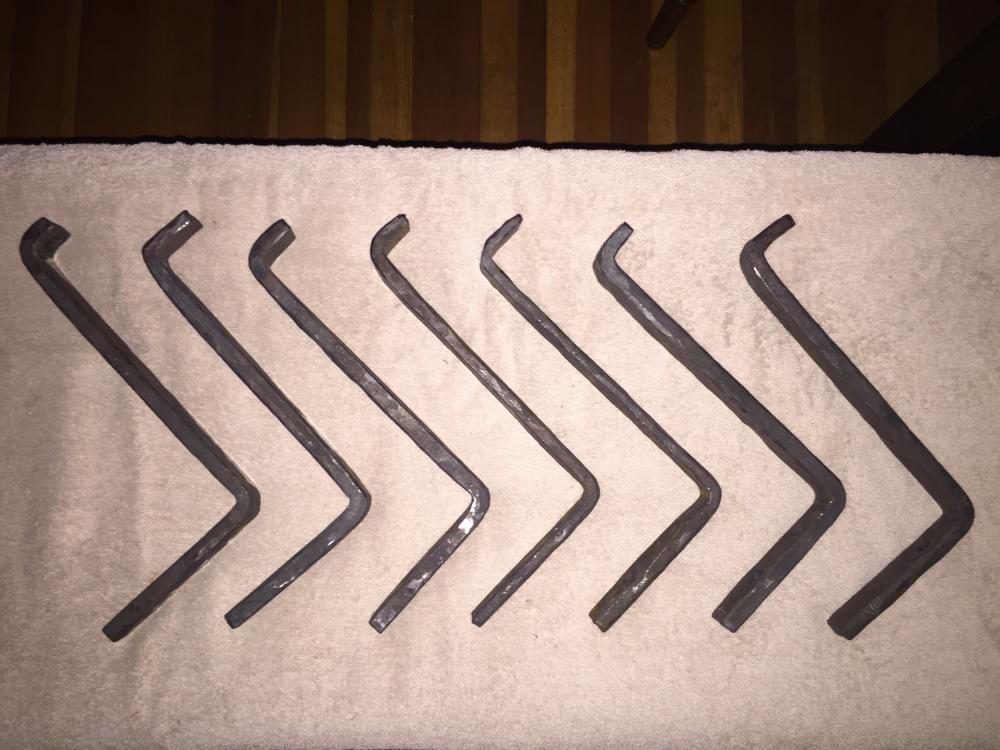
-
i was going to say, "backwards?". i work with the horn on my hammer hand side (the right side, for me).
-
nice hooks, michael. and the dragon! do you turn the hinges on the jig in the vise, or on the anvil?
-
shelf brackets for a friend...
madwing replied to madwing's topic in Blacksmithing, General Discussion
yeah, thieves suck. kirk's knife is a case in point. beautiful thing, needed handling, but he brought it to the gallery to share how it was made for people to figure out. someone just up and took it on the last day, when everyone was loading up...nothing one needed to live, just something shiny they didn't have, i guess. i was glad the paint was on there. in a group setting like that, small things like hot cut hardies can easily slip in a bag, or a pocket, even by mistake...though you'd have to try xxxx hard to make a mistake like that. put paint on it, and it's pretty obvious for those who might make such a mistake that it belonged to someone else. -
shelf brackets for a friend...
madwing replied to madwing's topic in Blacksmithing, General Discussion
ausfire, it's pink *and* green. painted by kirk prior to the cba spring conference; the entire hot cut is pink, too. it was to keep them from "walking off" on their own, or with assistance. not a joke, really, as someone took a whole forge that wasn't theirs, and from the gallery a damascus saxe knife kirk'd made with tool steel and meteoritic iron. michael, i'm going to bend them on the anvil. upset where the bend is going to be, then bend over a nice radius'd edge, and square up the outside of the bend to get the platform for the shelf as nice as possible. on the tip bend i'll use a very small radius edge (if not square) and leave it rounded (no upset, no squaring)...i don't want anyone hurting themselves bumping into them (at least not more than necessary, eh?). -
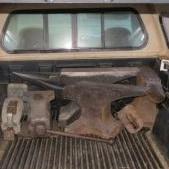
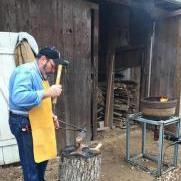
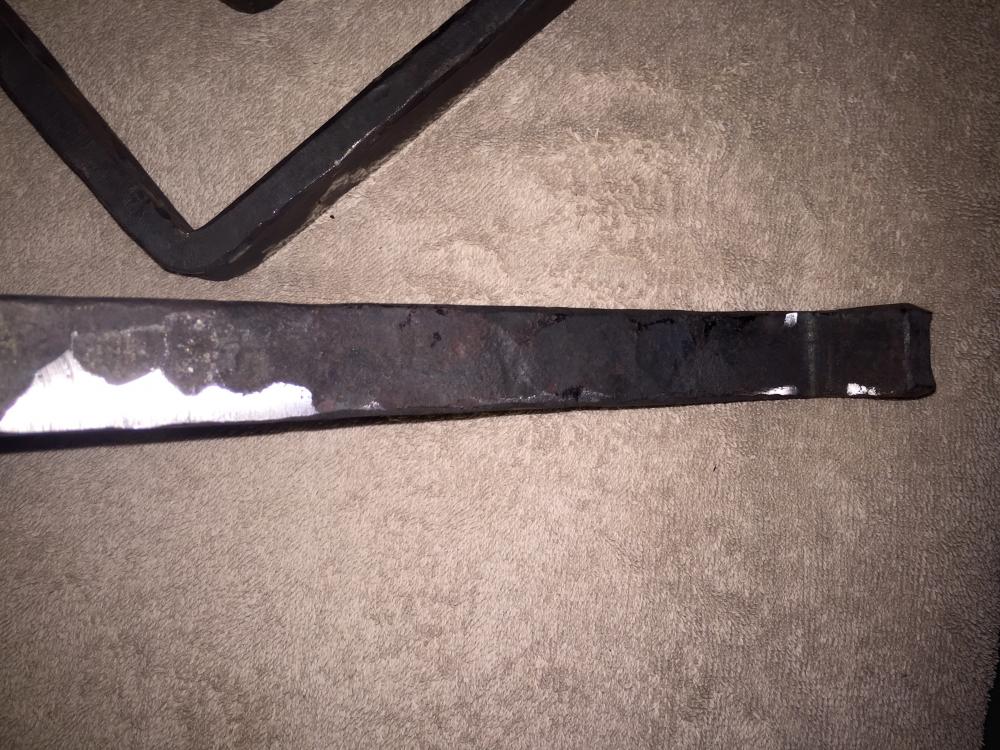
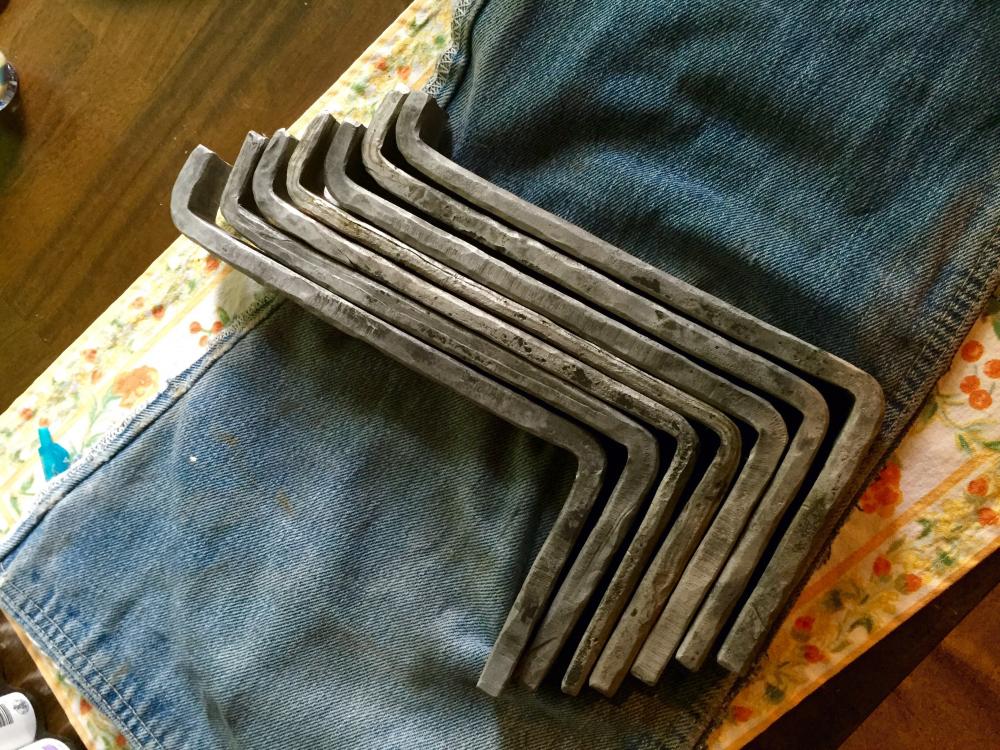
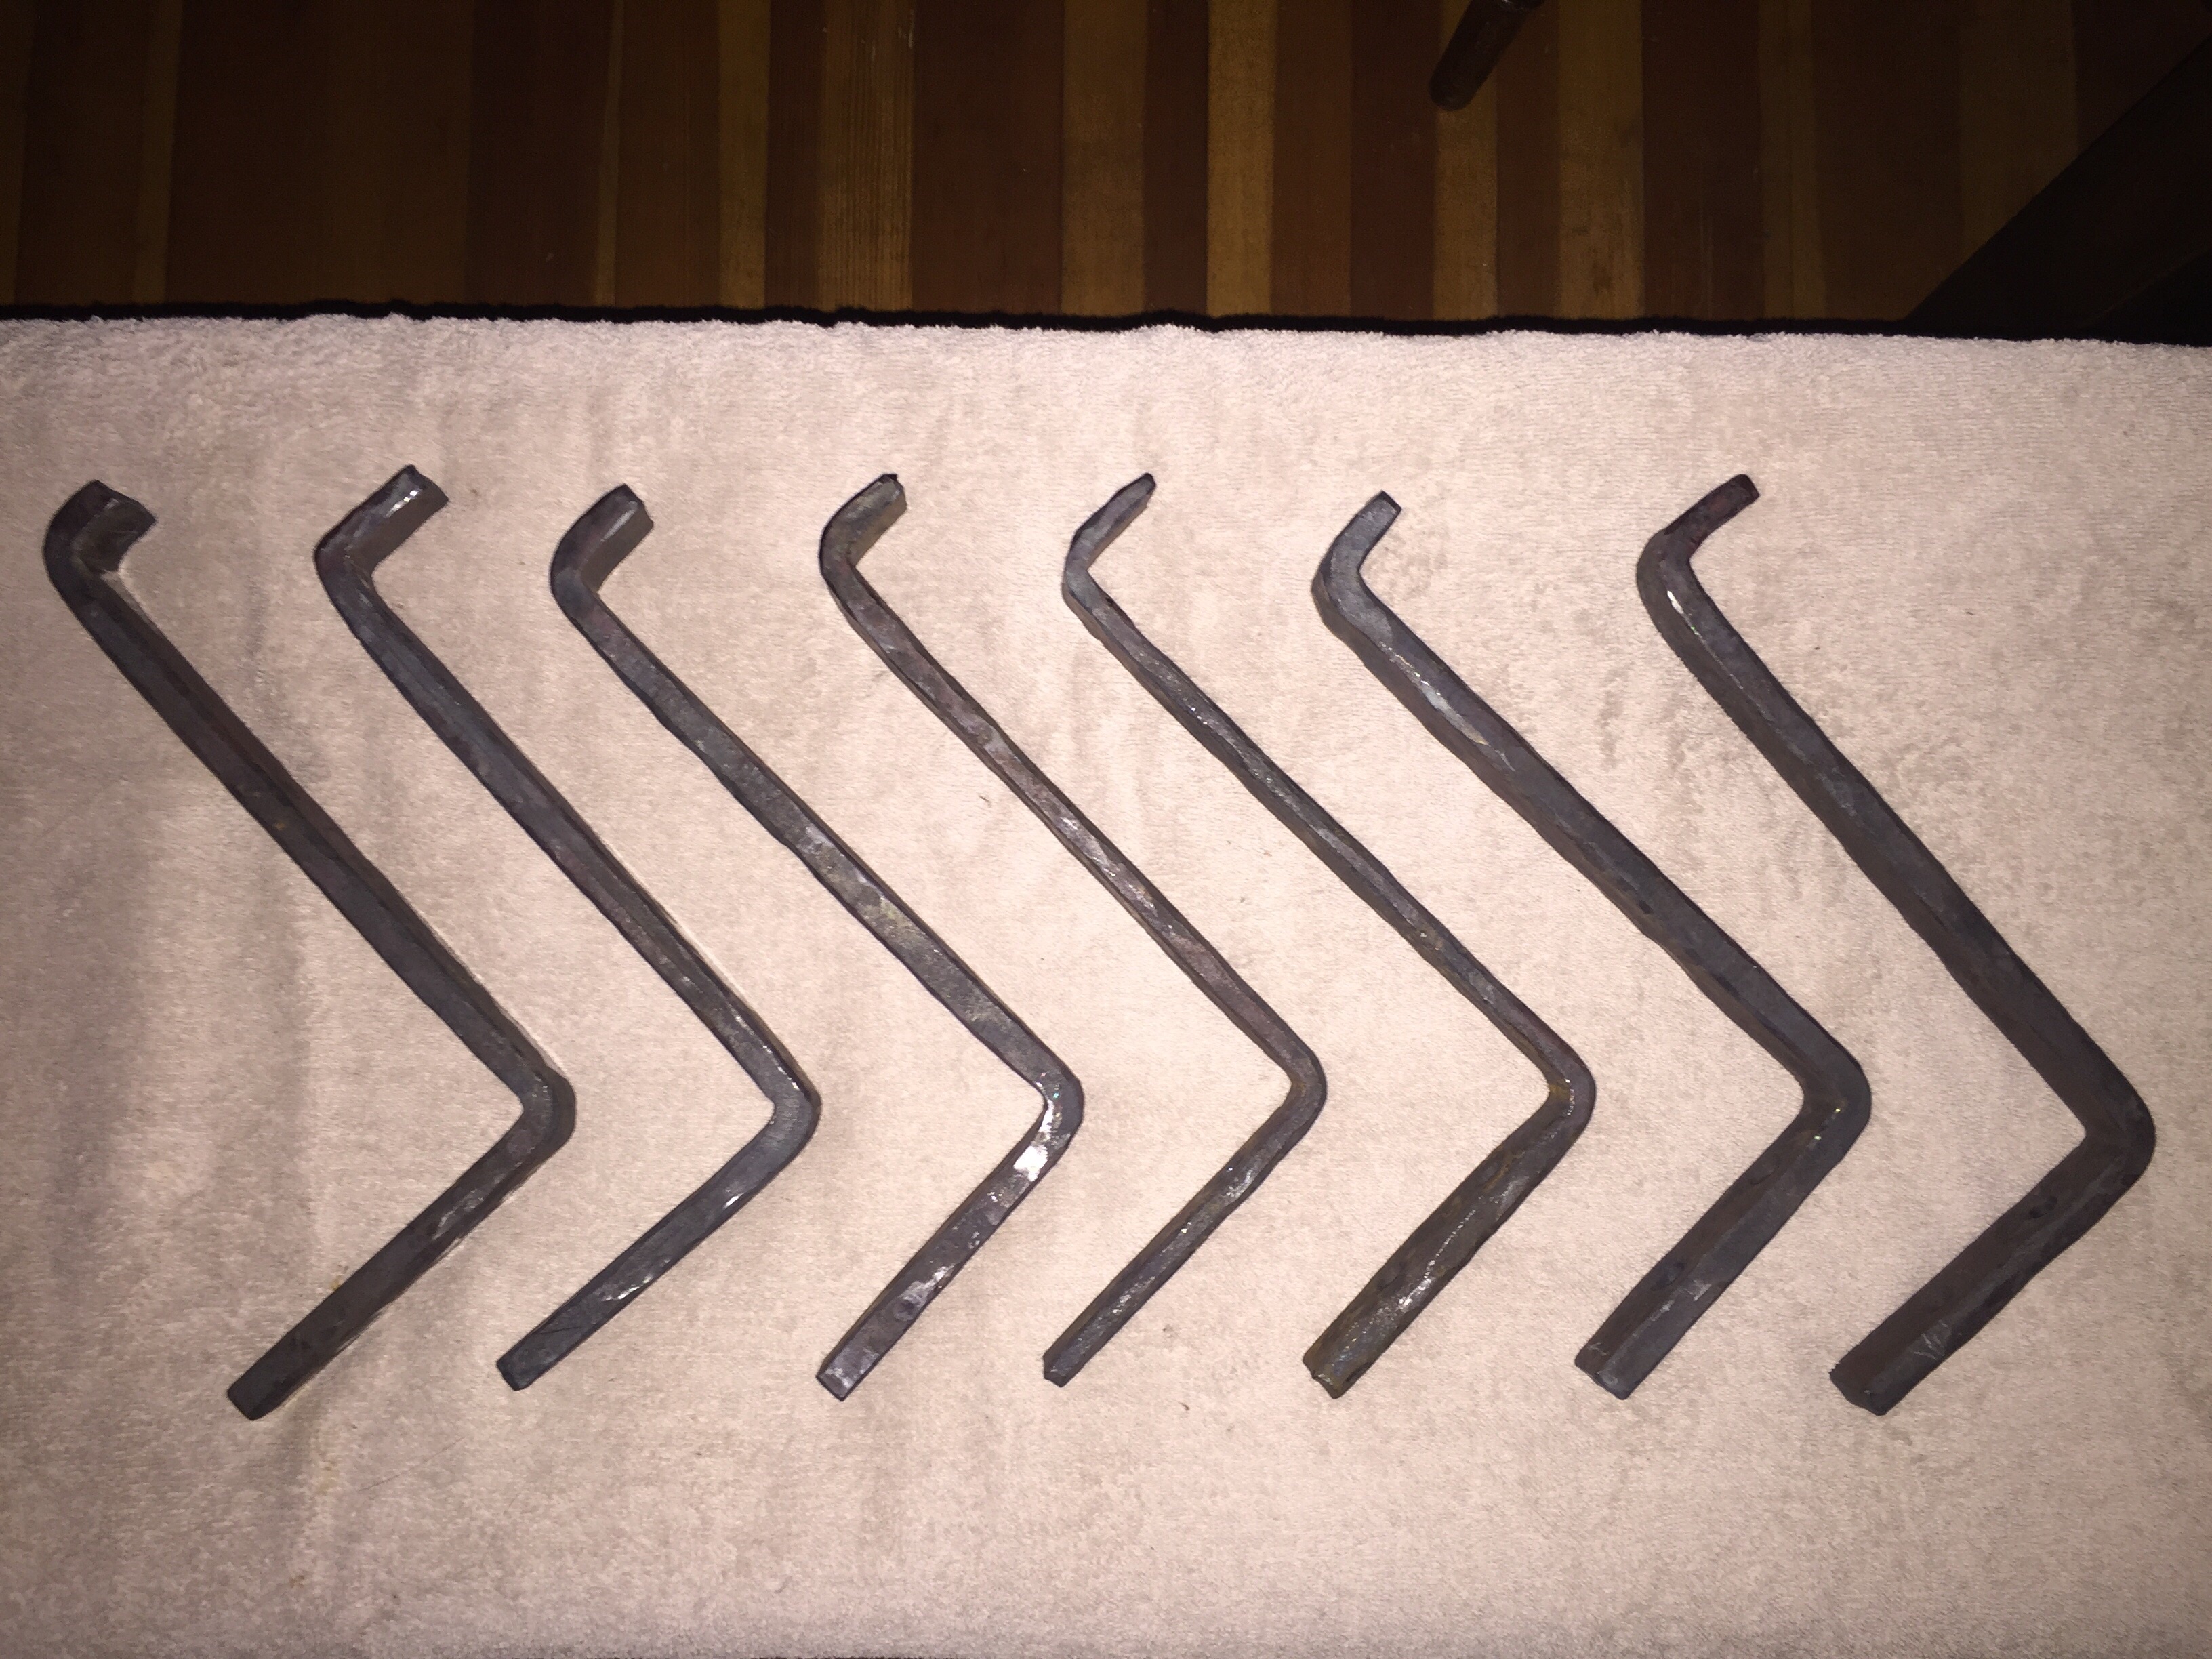
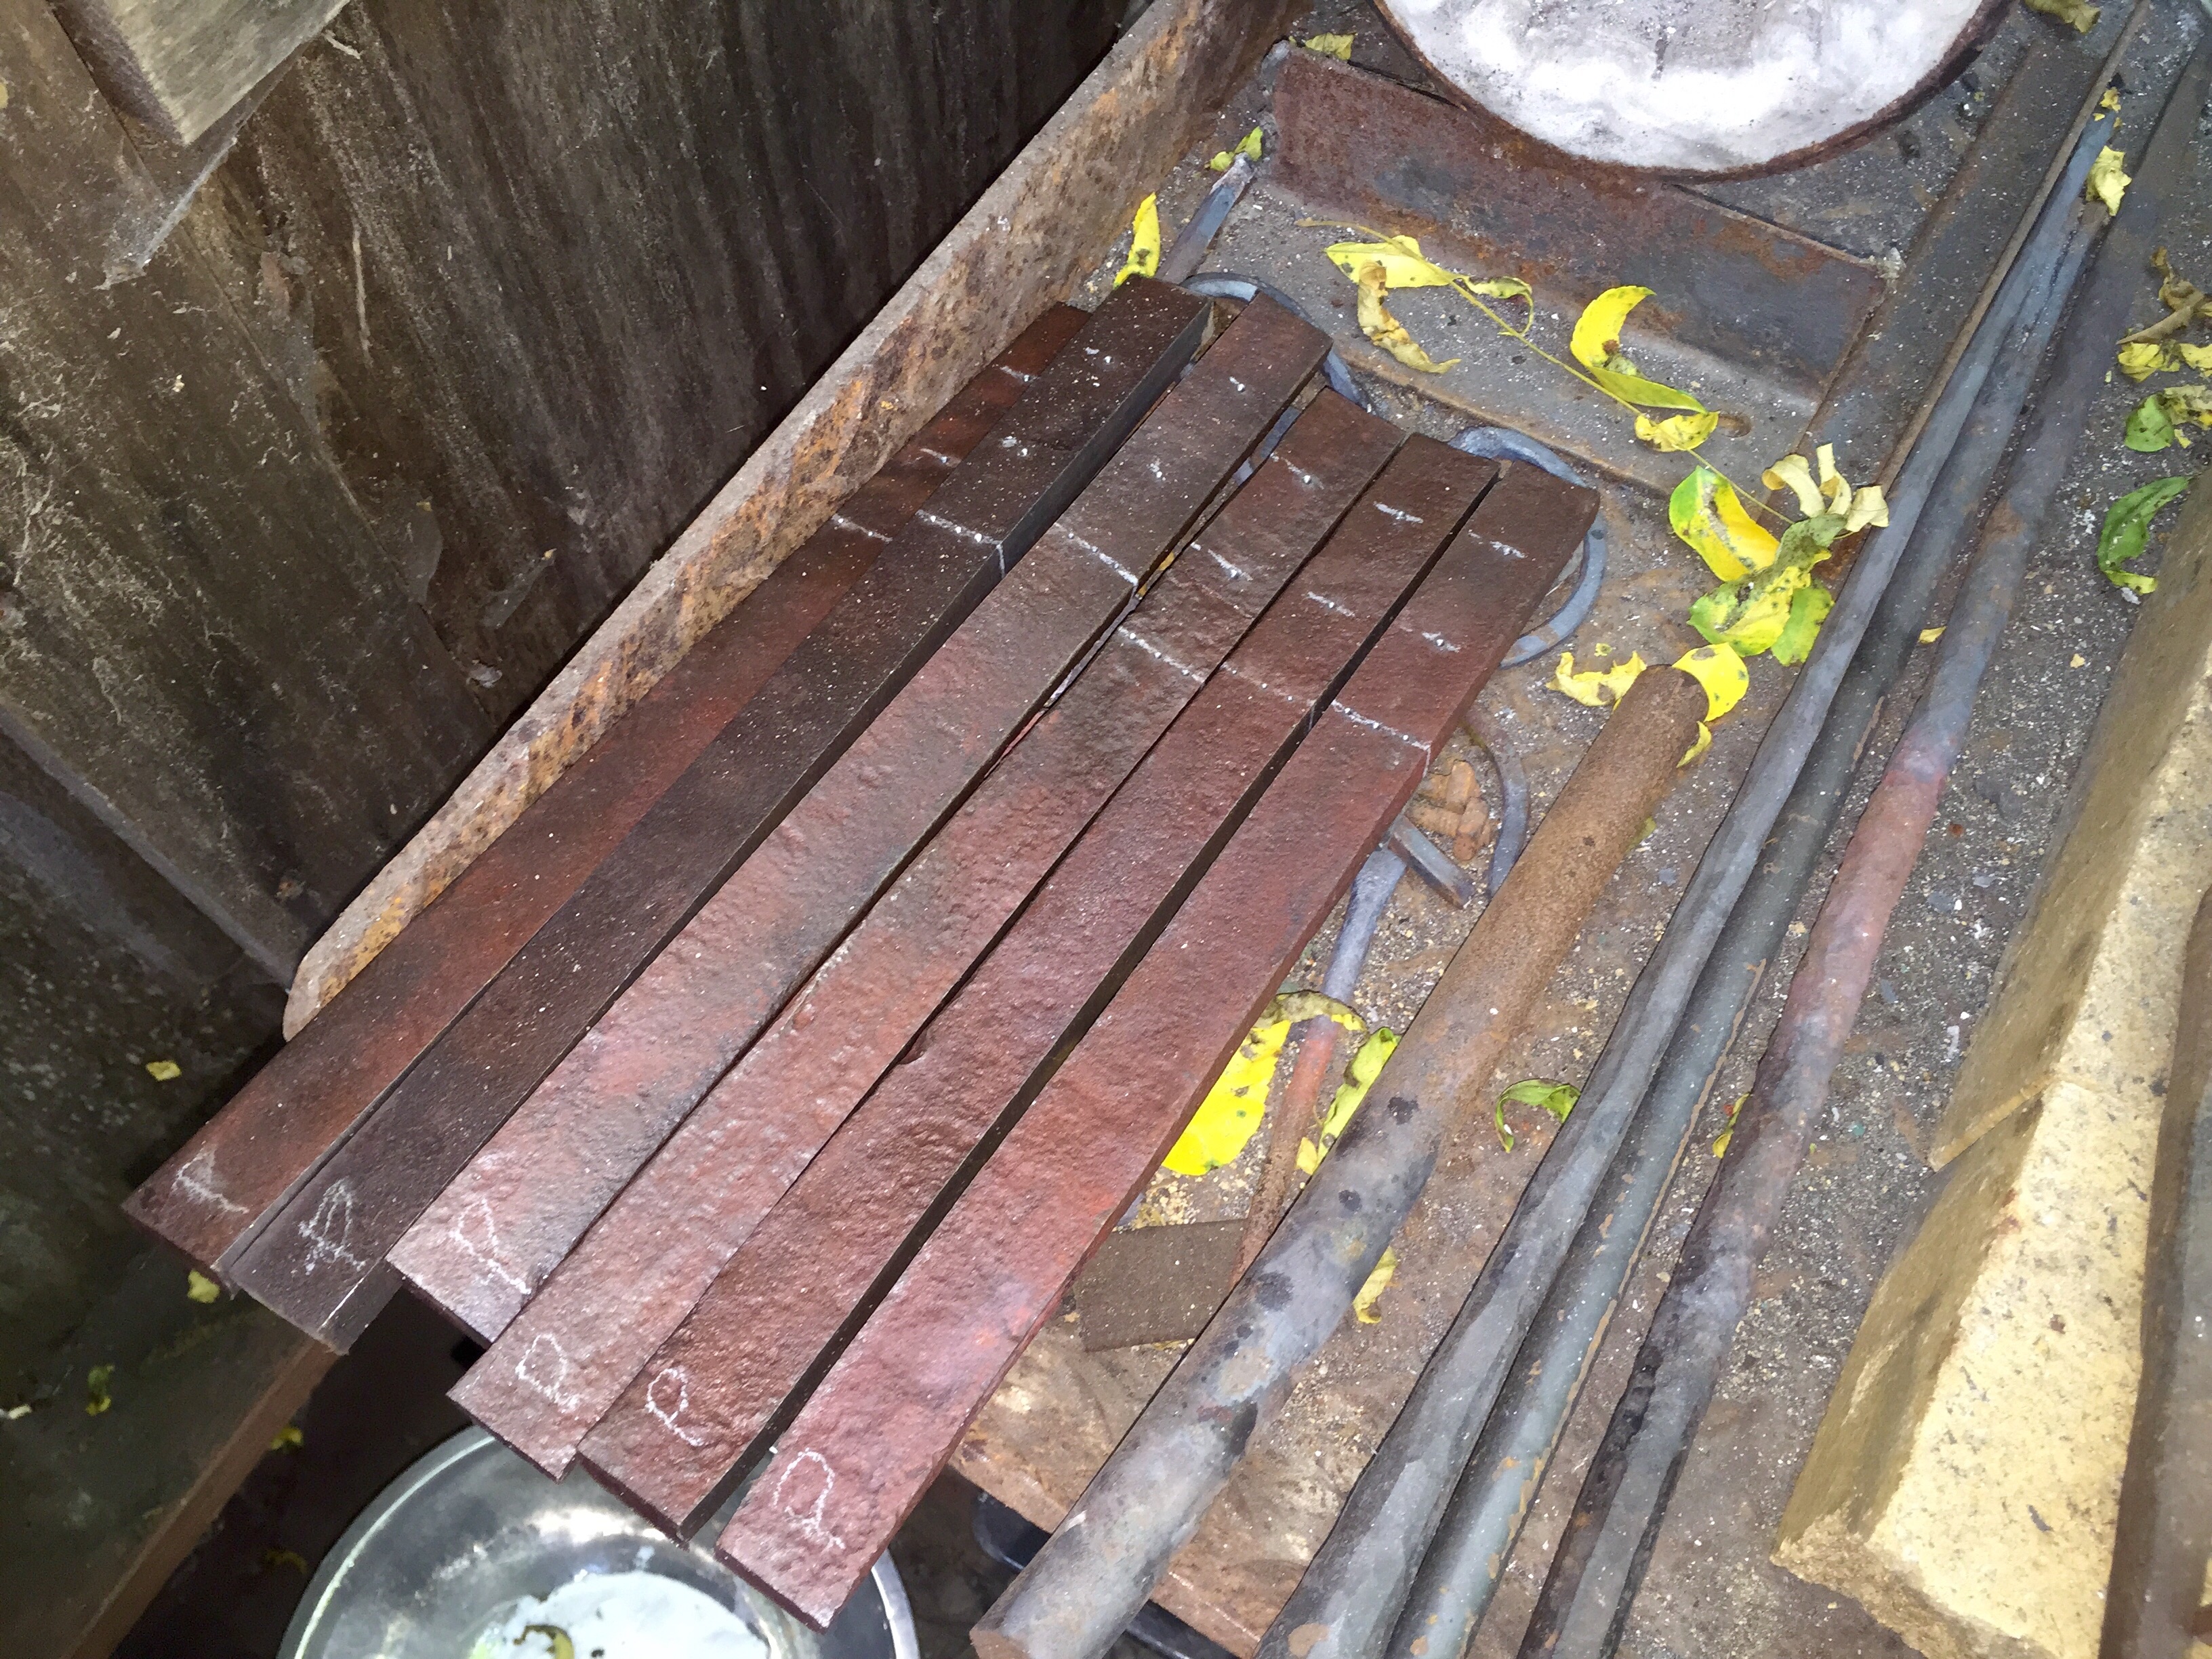
we're off to europe in two weeks, and are going to be visiting great friends in northern germany. olaf and sabine used to live near to us in santa cruz, and we happened to see them this past fall here. olaf and i forged together for a couple hours, and he then wrote to me once back in germany that he'd really like me to forge him some shelf brackets for shelves made of old train bridge timbers he got from a site near their house. simple things: 10 cm on the wall, 20 cm shelf width straight out, and a 1.25 cm lip in front; two 8mm bolt holes to mount into the wall. i had picked up two wrought iron wagon wheels last year, and have been slowly giving them away, trying things with them, and using them for projects. well, given olaf wanted something that would remind him of the old days in felton (our little town), i cut 33 cm strips 2.5 cm wide from some flattened wheel pieces, which are roughly 10 mm thick. he needs 7 of the brackets, so saturday afternoon was spent punching holes for the bolts, and drifting them to size. they're not perfect, and meet his criteria of "rough" between now and saturday i'll fire up the forge and put the two bends in the brackets, make sure they're all basically the same, and etch them with muriatic acid. then a coat of spray lacquer, and a huge dollop of blo/wax/turps on each one, hoping they won't rust before we get them there! some in-progress pics follow. i'll add more as they get done. note that the finished pieces rest on my new 196 lb. peter wright anvil i got from my teacher, kirk mcneill. it's the one i loved in class last fall. frosty, sad to say, i had to sell my soderfors to get this one...

.thumb.jpg.92c5a653c4b8e221c019ebb17e547e29.jpg)
.thumb.jpg.9bf2c938885b043edcebf7481c113e59.jpg)
-
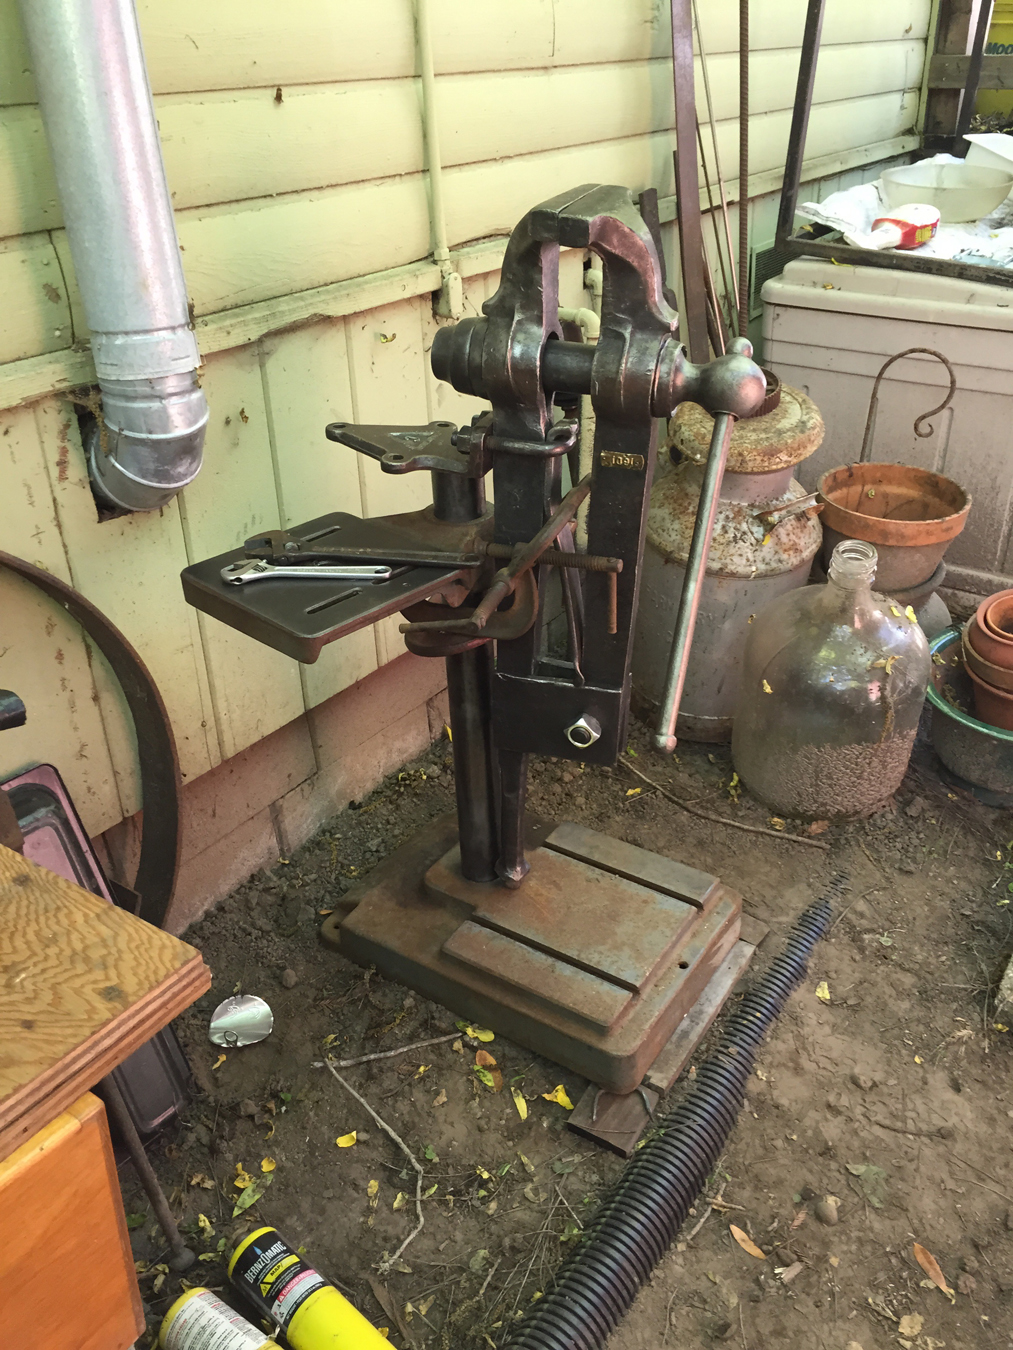
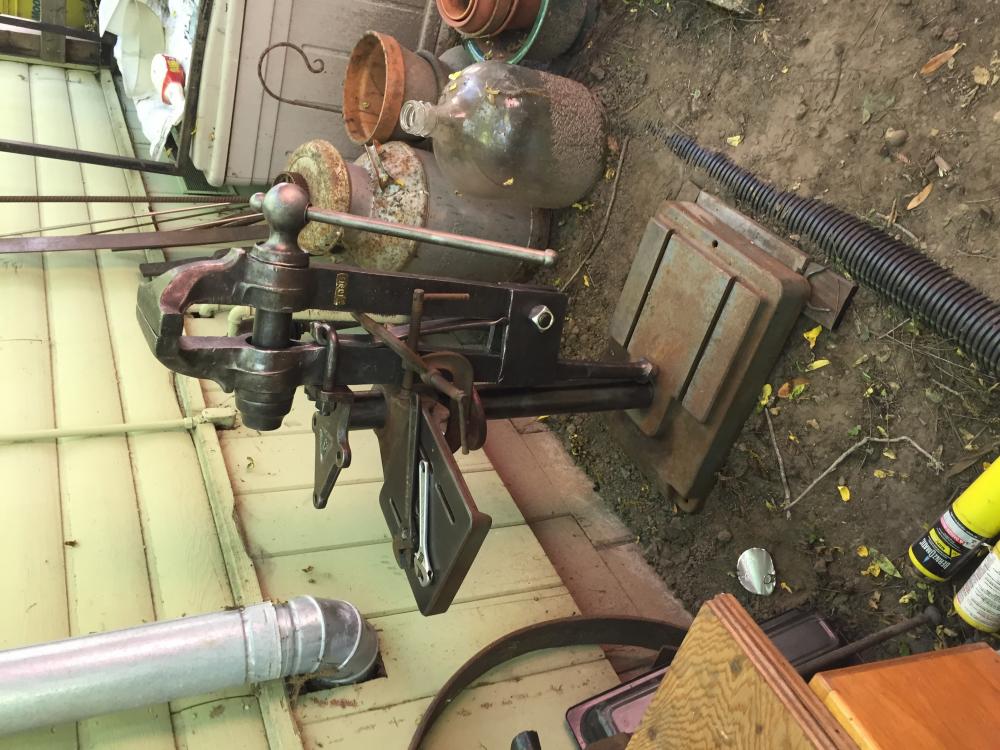
i've had my wonders about the cast iron base. i have also wondered about putting a hole in it, and putting a rod vertically underneath onto a piece of steel cross-bolted to the base. i'd just think that would transfer the stress from the surface of the thing to the points where the strap was bolted in (leg/vertical rod/cross-bolted steel is how it'd transfer), and rather than being a pounding it would involve shear at the boltholes, on the bolts. i'm thinking a 1/4" thick plate for it to rest on now covering the entire flat part of the base, with sorbothane between that and the base, held on by 4 t-slot screws with the leg coming down somewhere in the the middle. the plate would flex, or take the stress, and there wouldn't be any drill holes in the base to weaken it. here's a rotated picture.

-
cheers, frosty. i am thinking the foot will be about 3" in front of the post when it is all said and done, allowing good clearance to pivot the table. I might center the mounting plate over the post, which would push it out another inch, too. in either case I am planning on running a piece of 1/2" strap bolted between the t-slots in the base. I will drill a seat for the post, and put a layer of sorbothane between the steel and the base, to absorb shock. hopefully I can wail on it, then unfortunately the the jaws want to close offset a half inch. this is down to the pivot box bolt and the base of the spring, I think. gonna tweak that once I get it all mounted properly, though.
-
after getting the screwbox unstuck, and the vise all cleaned and waxed, I prepared the drill press base and mounted it temporarily. i have to weld the plate on top of the vertical tube, and gusset it, and mount it permanently.
-
tap tap tap tap tap tap hammer on a piece of scrap wood. dropped right out. it's soaking in krudkutter as I write.
-
on cleaning and refurbing my new columbian vice, I had assumed the screwbox was slip fit, if indexed, and that it would slide out when I pulled the screw out the other way. but no dice. it is loose in the socket of the leg, and is indexed, but I can't find the right way to turn it to get it out. is there a trick to this? could clumps of old grease and scale be jamming it up? i sprayed a whole lot of degreaser in and around the screwbox...but shouldn't it just slide out? tonight i'll try again, and maybe use a wood block with the socket supported closely and try to hammer tap it out.
-
I ran into a bit of a snag tonight. I had assumed the screwbox was slip fit, if indexed, and that it would slide out when I pulled the screw. no dice. it is loose in the socket of the leg, and is indexed, but I can't find the right way to turn it to get it out. is there a trick to this? could clumps of old grease and scale be jamming it up? i sprayed a whole lot of degreaser in and around the screwbox...but shouldn't it just slide out?


.jpg.3aa00543ef91369956ece93ff208e008.jpg)
.jpg.9e043eba4eb70c79e4ea728940feda5e.jpg)